How to Merge or Join Multiple Outlook PST Files on Mac Machine
- Software Working Process
- Activation Guide
- Installation & Uninstallation
- Software Working Video
- User Interface
Table of Content
Software Working Process
Software Working Process
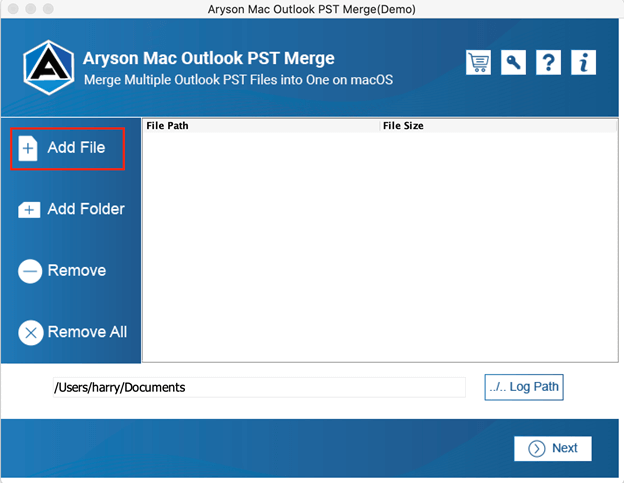
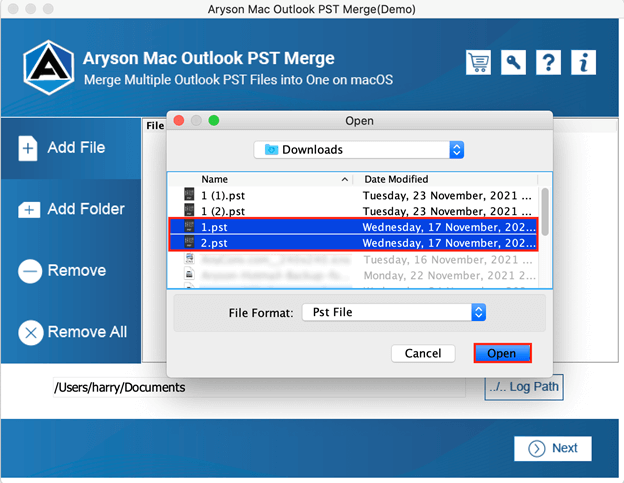
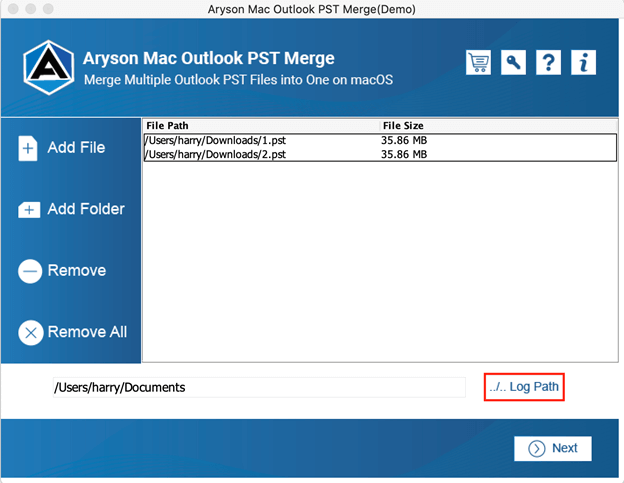
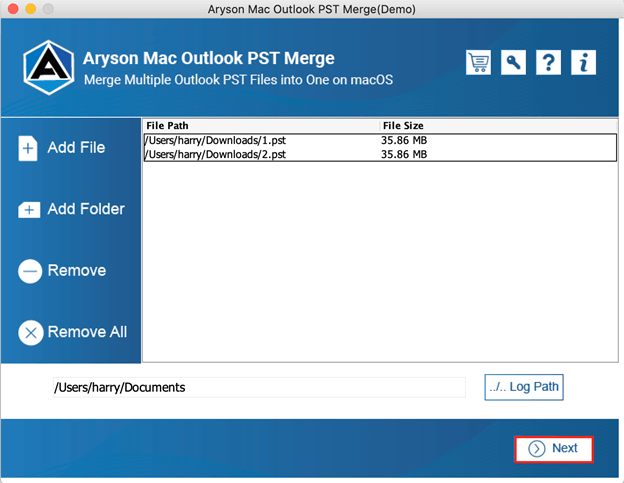
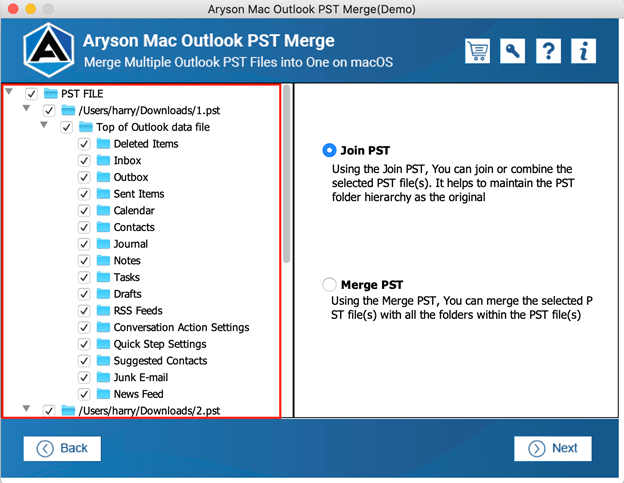
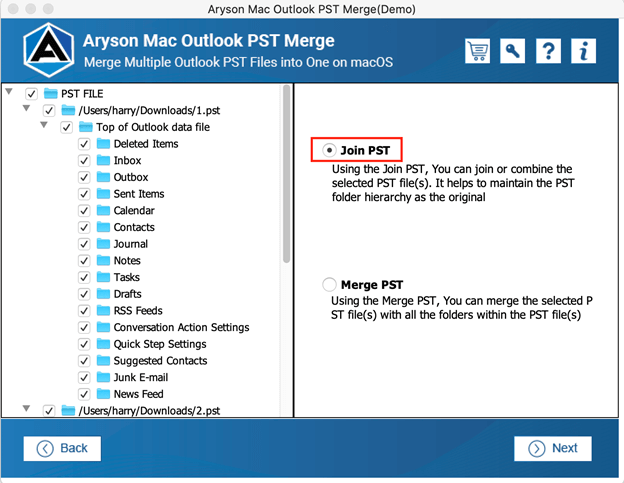
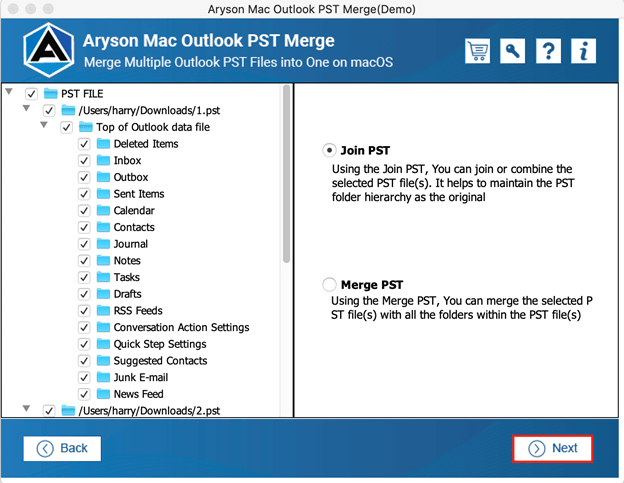
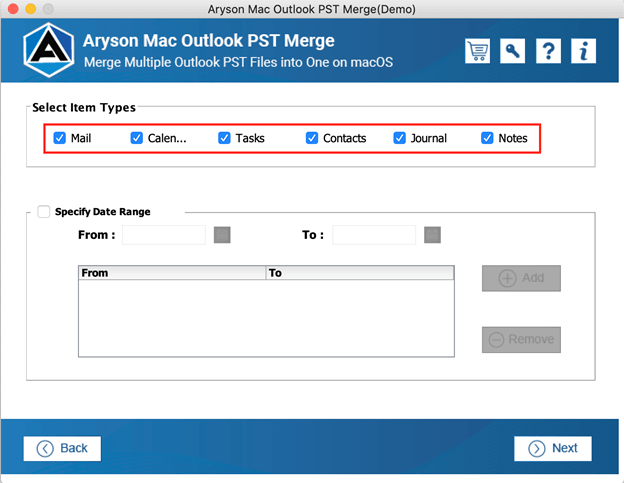
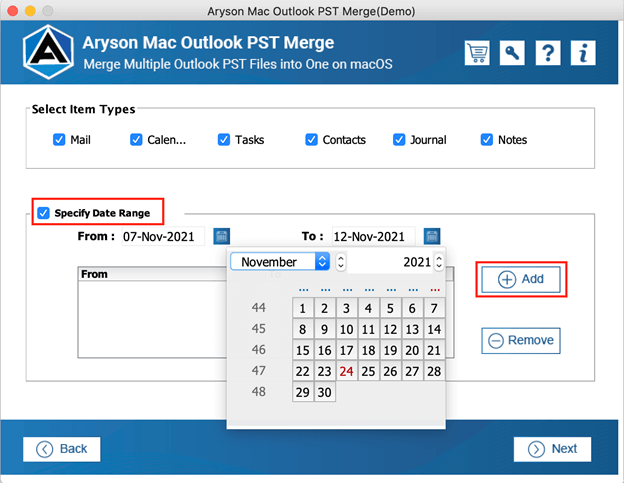
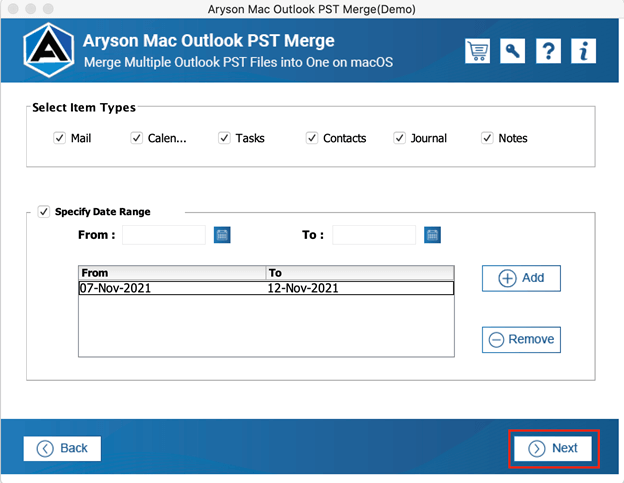
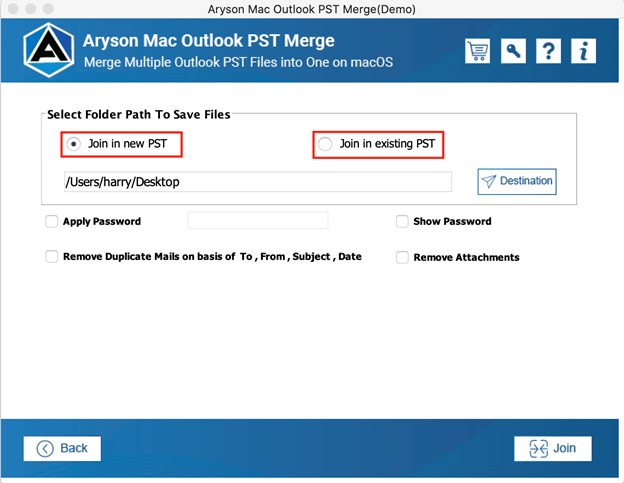
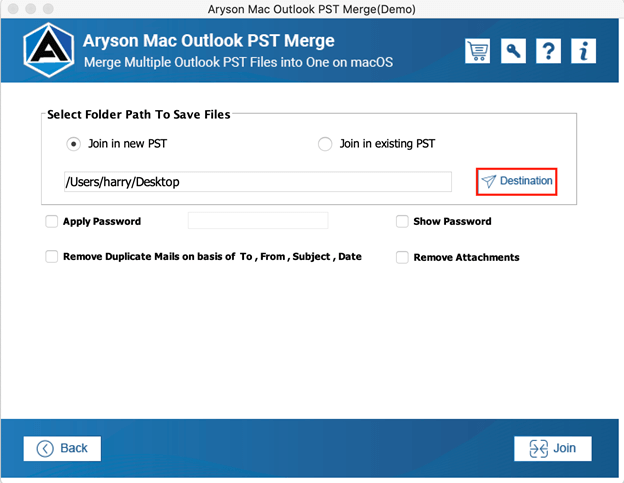
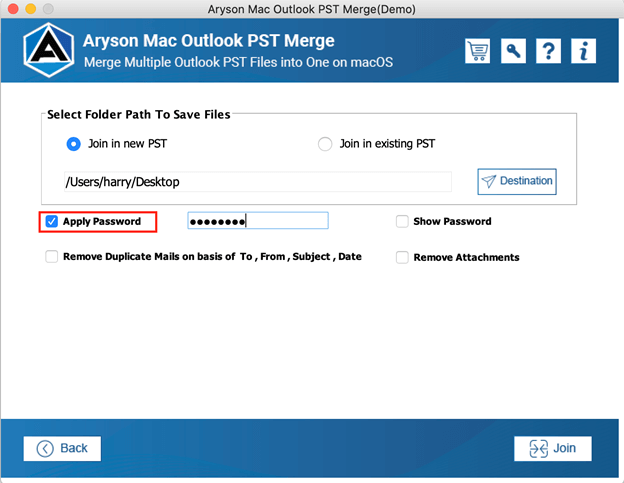
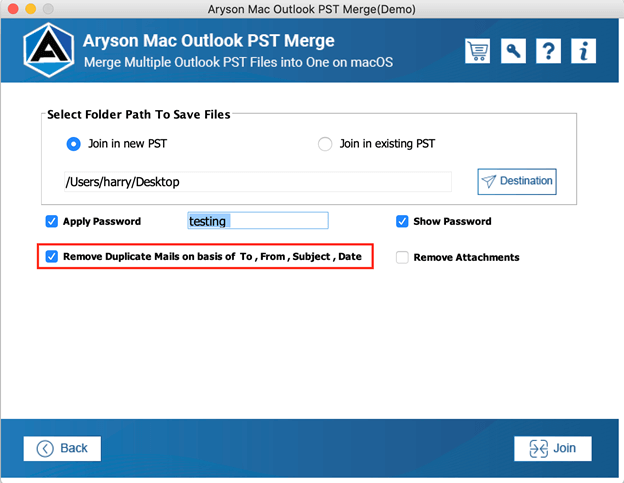
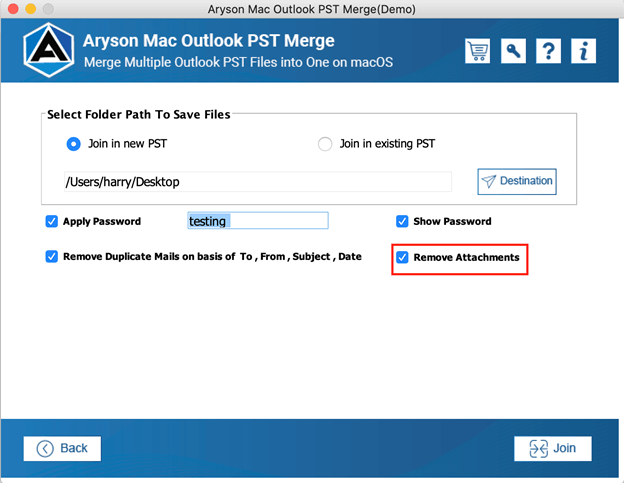
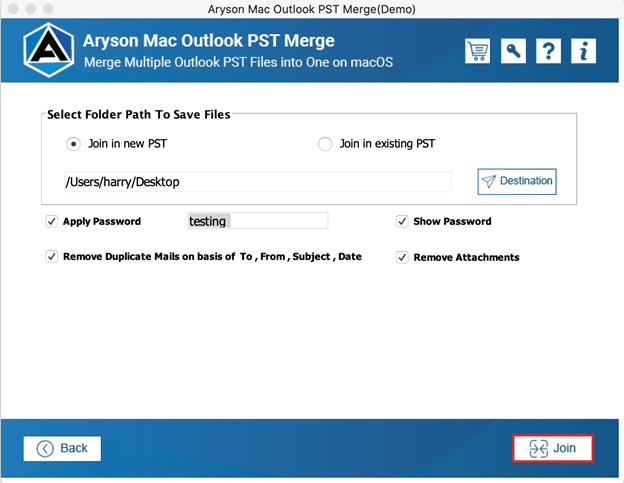
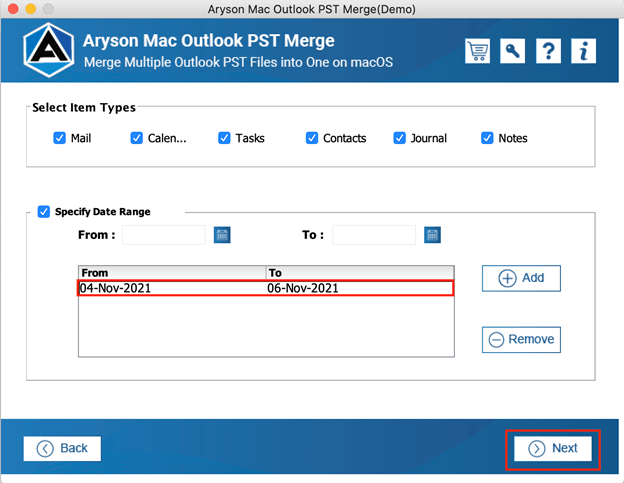
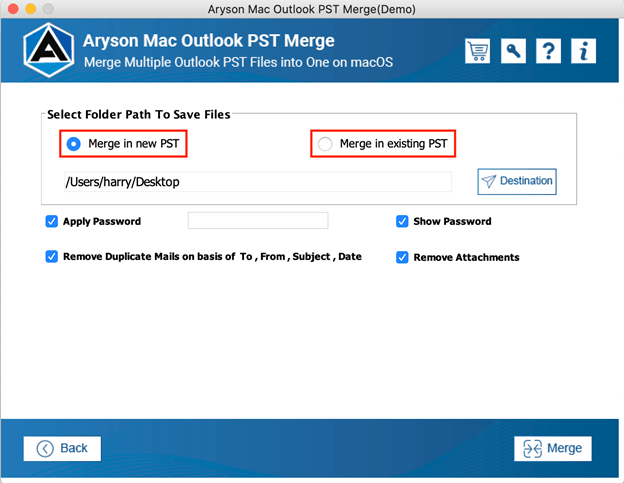
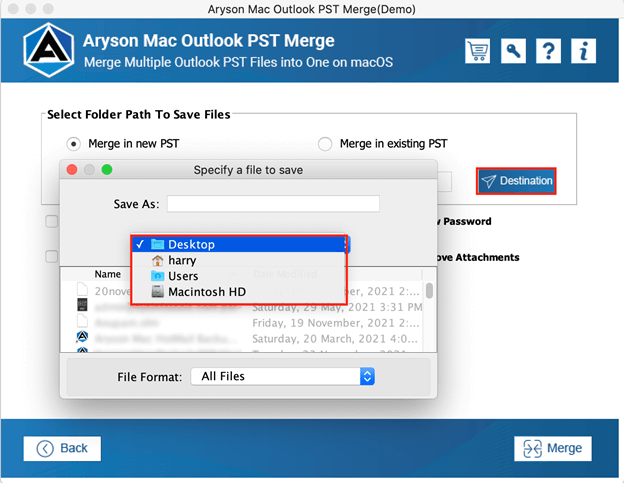
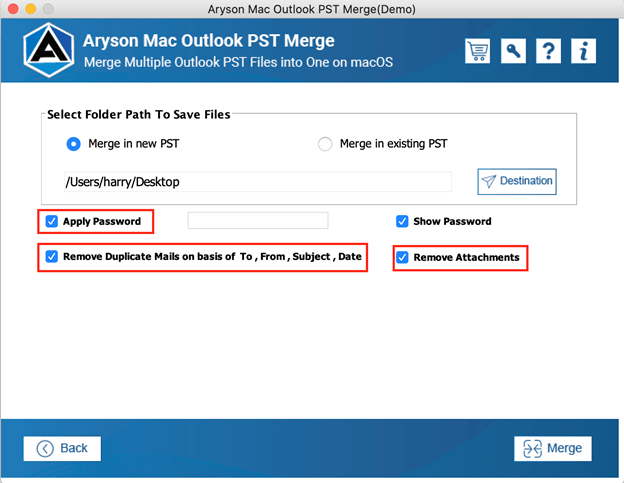
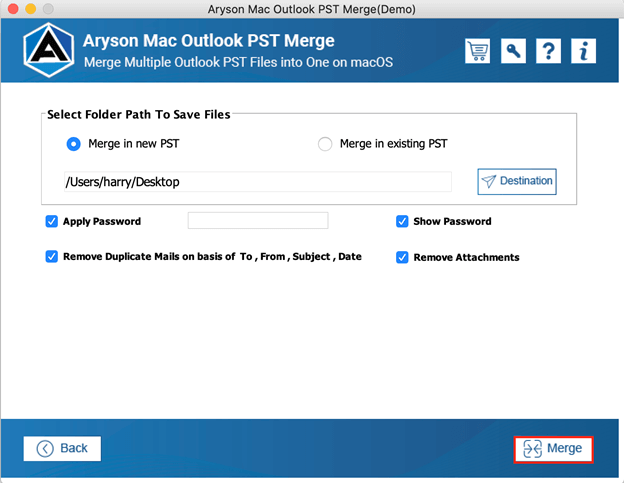
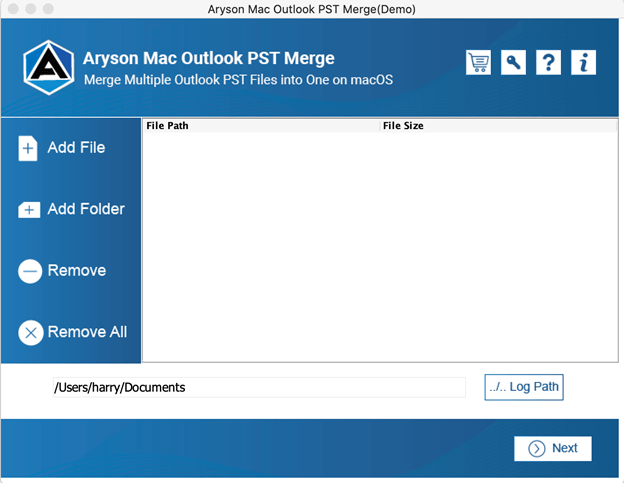
Practice the below-working procedures to merge or join Outlook PST files on macOS.
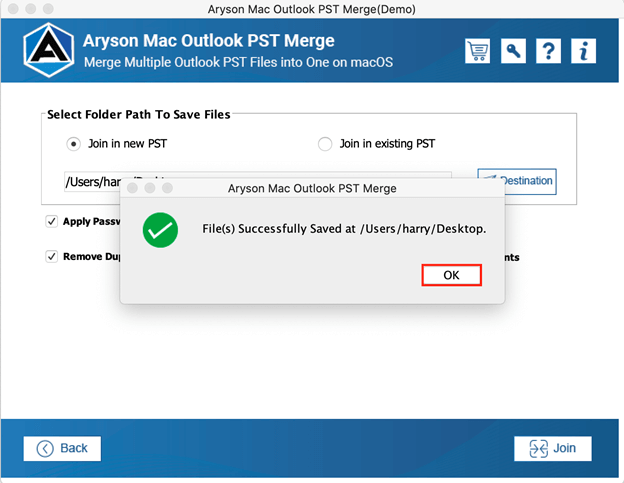
How to Join PST Files?
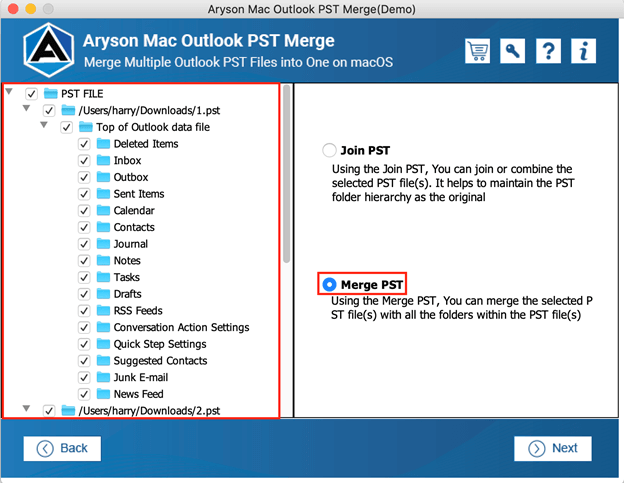
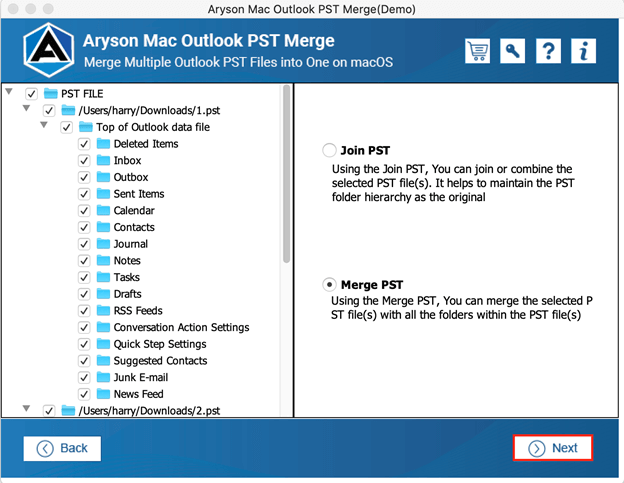
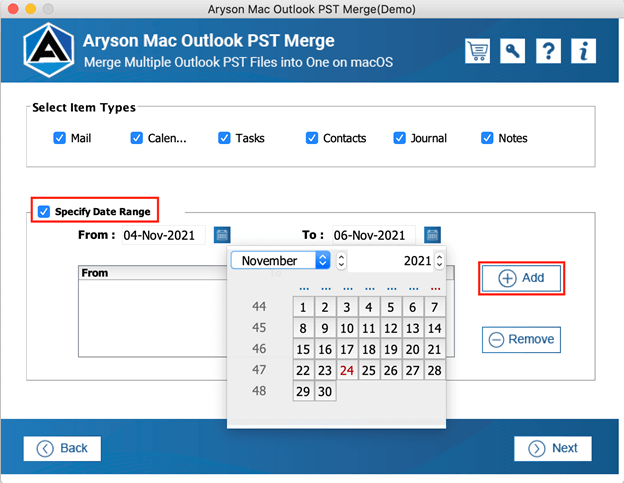
How to Merge PST files?


Activate the Software
Activate the Software
Installation & Uninstallation of Software
User Interface
Software Interface
![]()

2880 Zanker Road, Suite 203, San Jose, CA - 95134, USA

A-58 , 2nd Floor A Block Sector 57, Noida, Uttar Pradesh 201301, India
Useful Link
Find Us on
Subscribe to our newsletter to get the latest News & Update
© Copyrights 2014 by Aryson Technologies Private Limited - All Rights Reserved
![]()