How to Create App Password & Disable Multi-Factor Authentication for Office 365 / Enable Multi-Factor Authentication in Office 365
Note: To create the third-party app password, you must check whether the multi-factor authentication is enabled or Not. If not, then make sure to enable multi-factor authentication and enforced it.
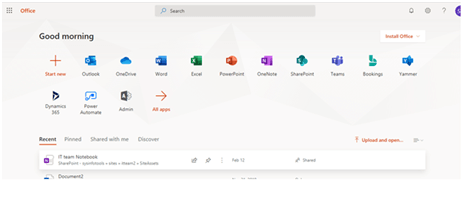
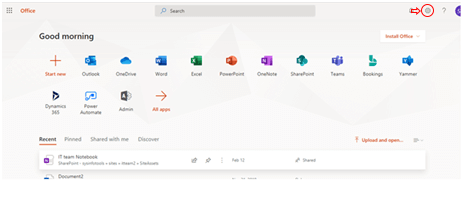
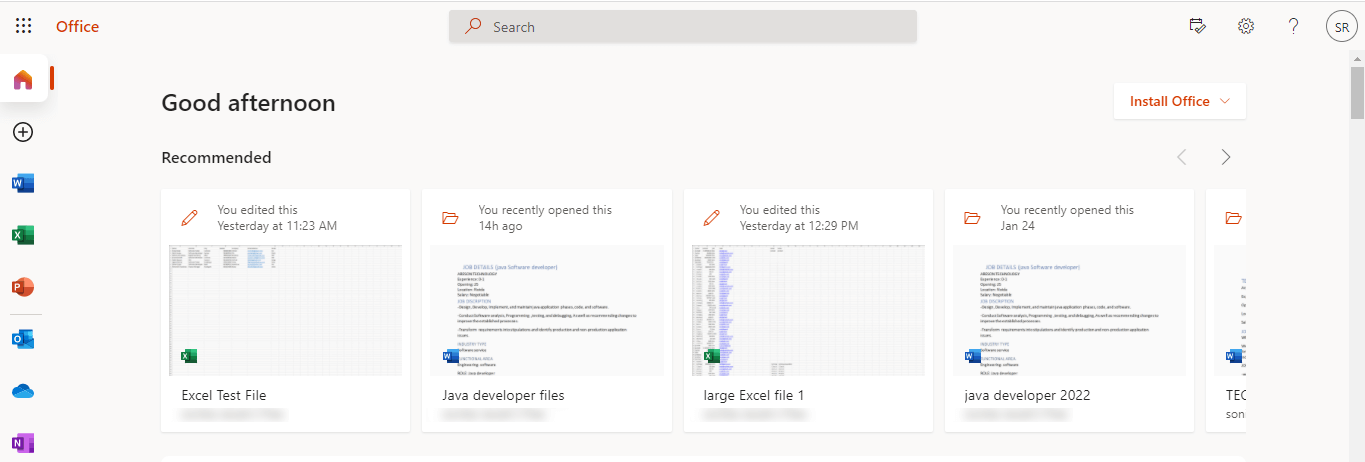
Sign in to your Office 365 A/C, and click on the Setting/Gear icon.
Click on Update contact preferences from dropdown list menu.

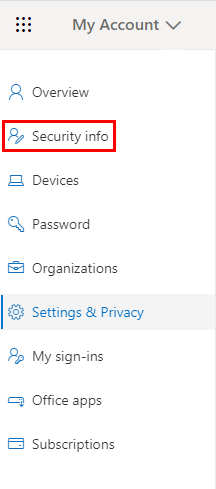
Here, click on the Security info option from the left side of the Office 365 interface.
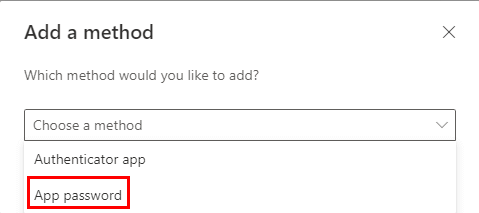
Tap on the Add method option to continue the process.
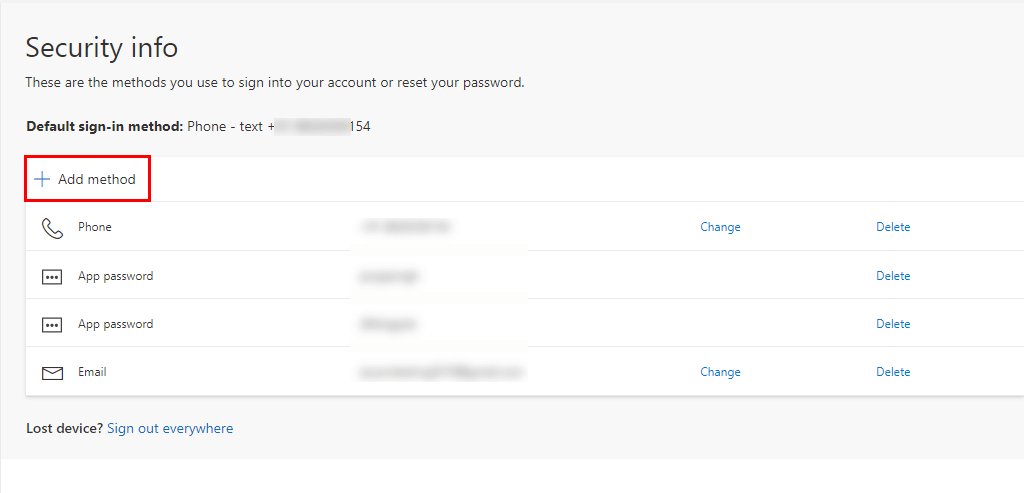
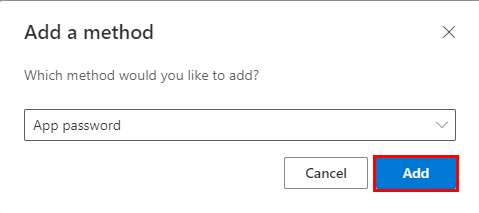
Now, you will get a dropdown. Choose App password from the displayed drop-down.
After choosing the App password, click on the Add button.
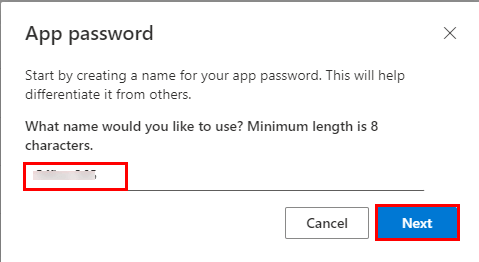
Here, type the name for which you need to create the app password. Click on the Next button. (You can enter any name by your choice)
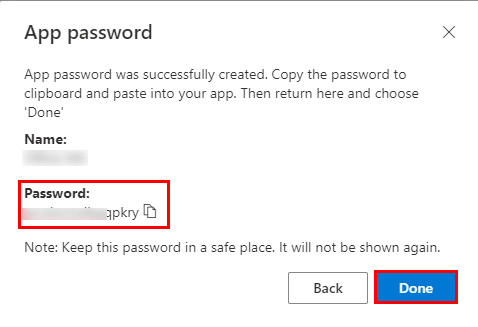
You have successfully created the app password in Office 365.
Disabling multi-factor authentication is to make Office 365 more functional and adding new authentication features. By disabling the multi-factor authentication, users can log in with the usual password of Office 365.
Firstly, log in to your Office 365 account.
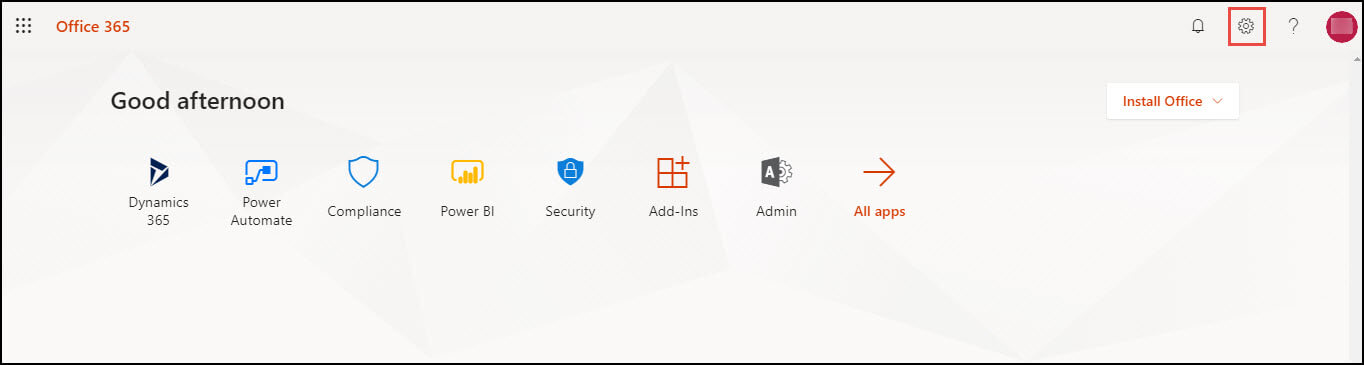
Now, click on the Setting button from the Office 365 interface.
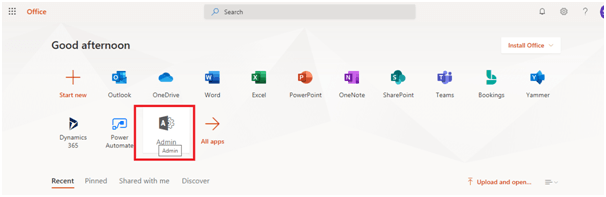
Now, click on the Admin icon.
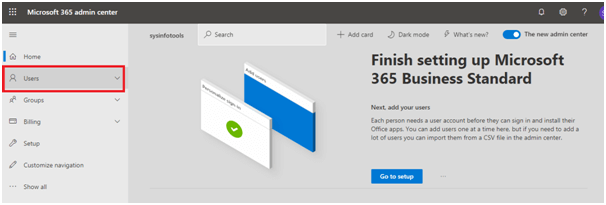
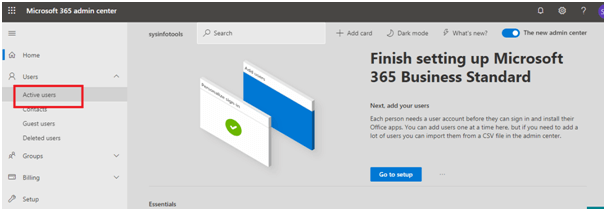
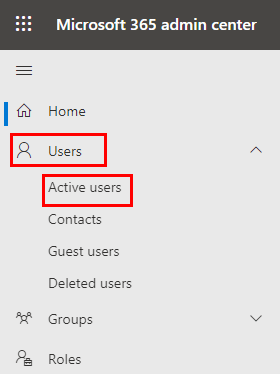
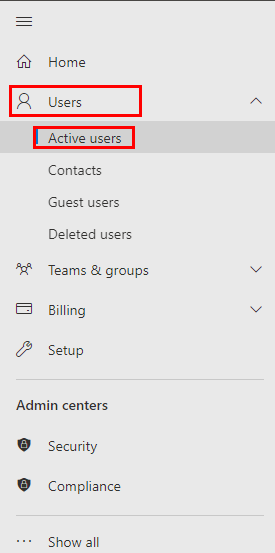
Go to Users tab and expand it.
After expanding, press the Active User option.
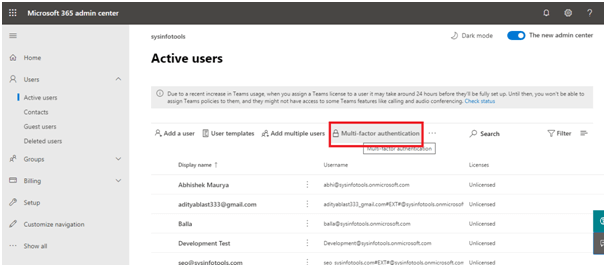
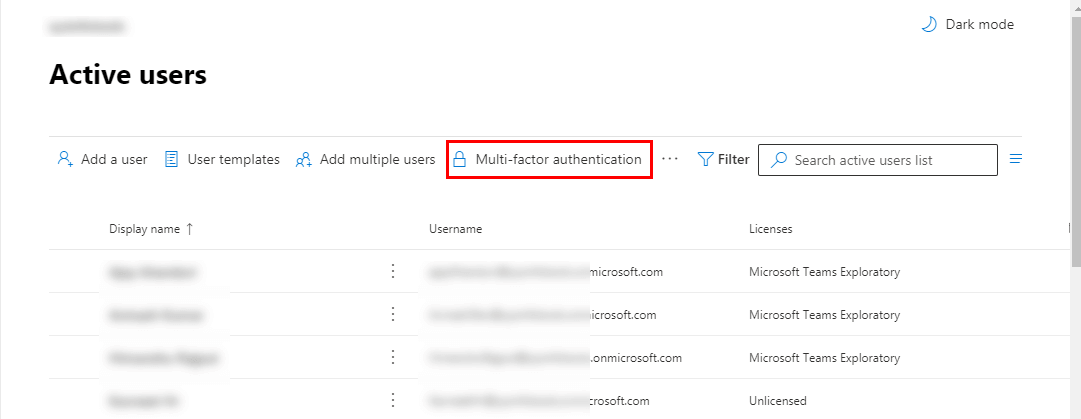
In the active users, click on the Multi-factor Authentication button.
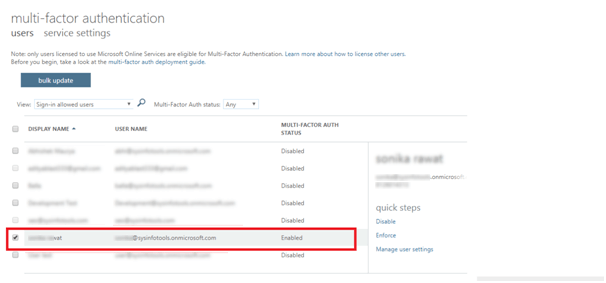
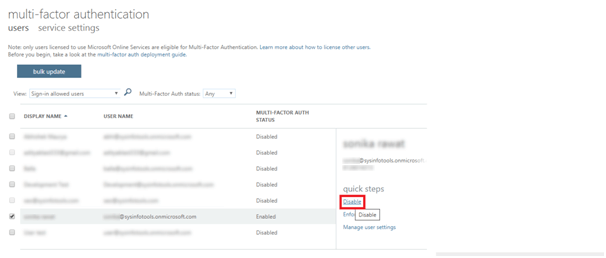
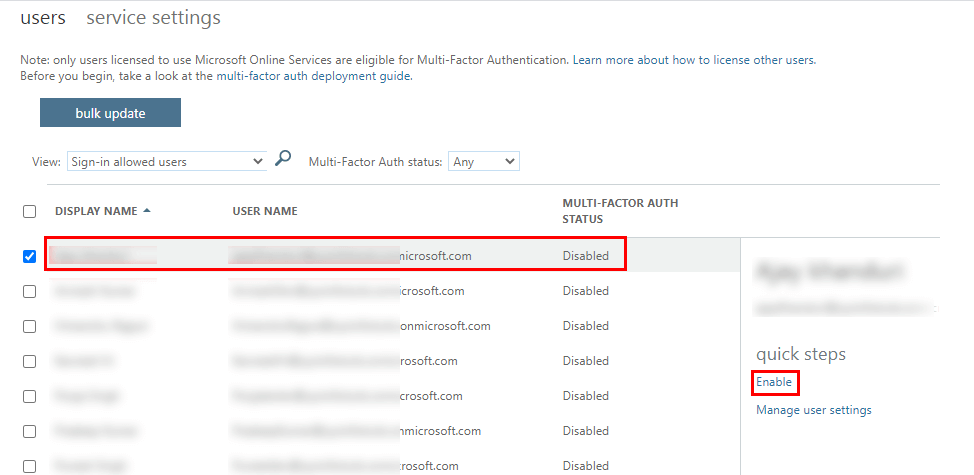
Choose a user from the list whom you want to disable Multi-factor authentication.
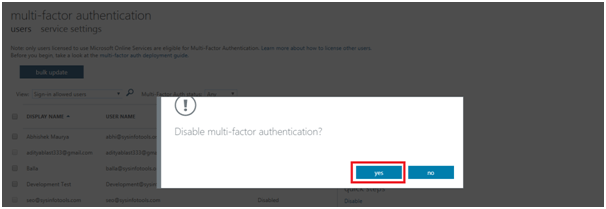
Press the Disable Button after selecting the user.
Hit the Yes option on the appeared dialogue box.
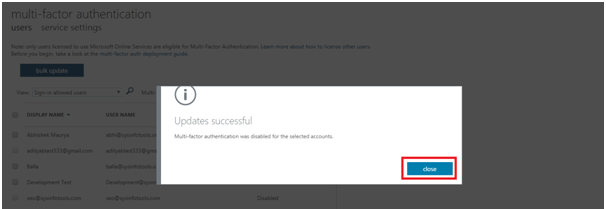
In the end, click the close button.
Enable multi-factor authentication is required for generating/creating app passwords for logging the Office 365 id in any third-party program or software. It also helps to secure the account by cross-verification.
STEP 1
Log in to the Office 365 account.
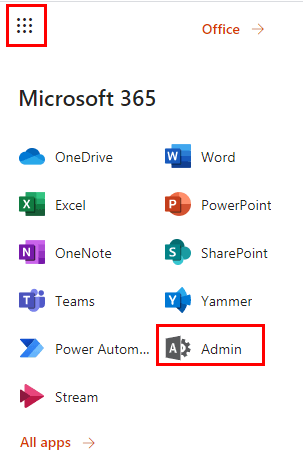
Now, click on the App launcher and tap on the Admin section.
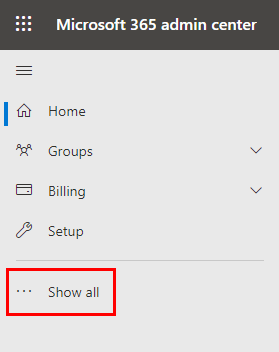
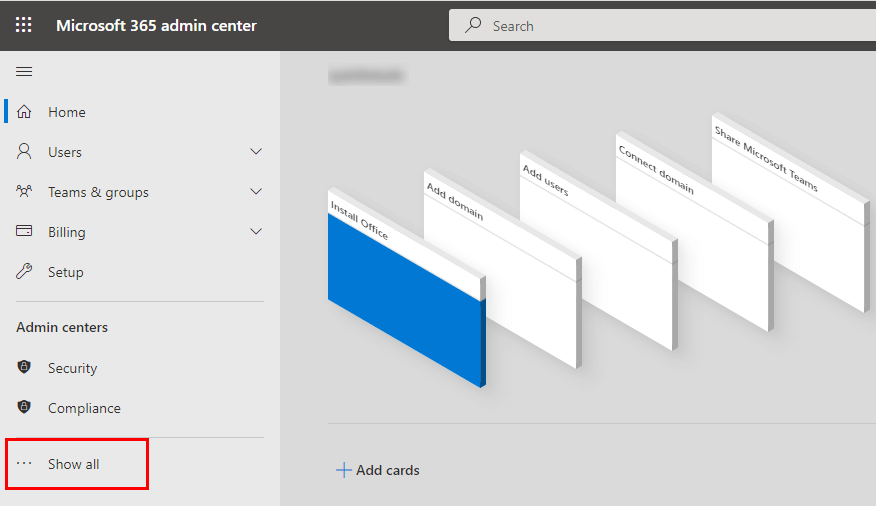
Here, find the Show all option and tap on it.
After that, Tap on the User option and select the Active users.
Now, hit on the Multi-factor authentication section.
Choose the account to enable the Multi-factor authentication, and click on the Enable option.
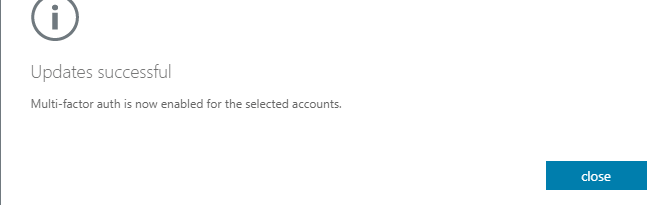
Here, click on the enable multi-factor auth button.
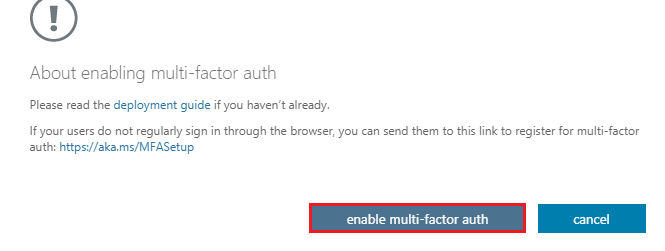
You have successfully enabled Multi-factor authentication in your Office 365 account.
To Enforce the Multi-Factor Authentication
Select the enabled account and tap on the Enforce option after selecting the user.
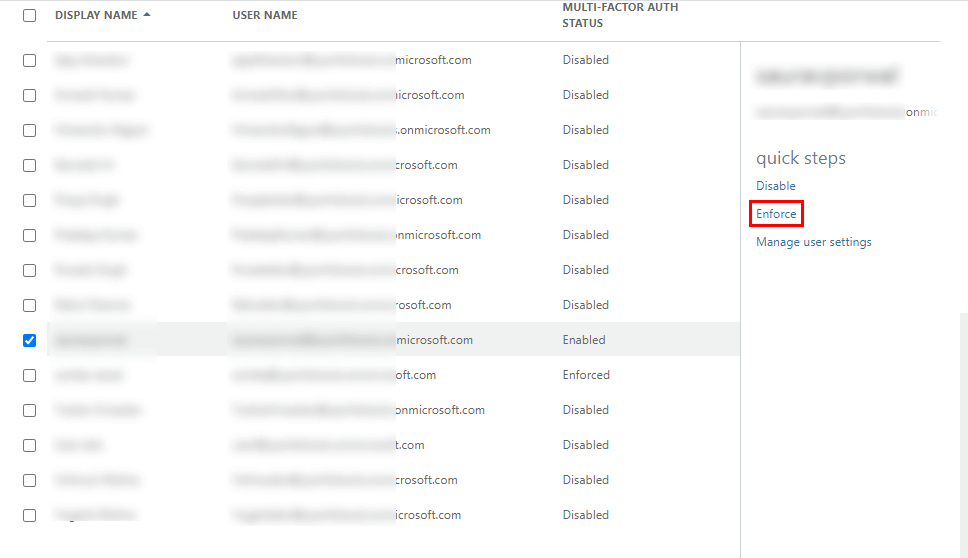
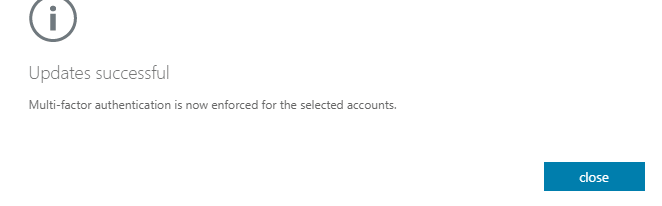
Now, tap on the enforce multi-factor auth option.

Here, you have successfully enforced the account.
If unable to Sign In to your Office 365 email account in Aryson Office 365 Backup & Restore Tool. Then, it is advised you to Turn-Off Enable Security Defaults option.
Open any browser and Login to your Office 365 account.
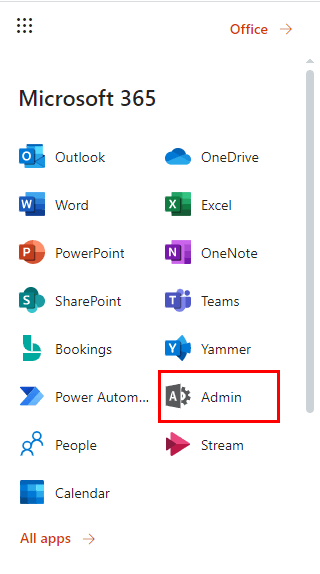
From the Office 365 homepage, click on the App Launcher Icon.
Click on the Admin option under app launcher.
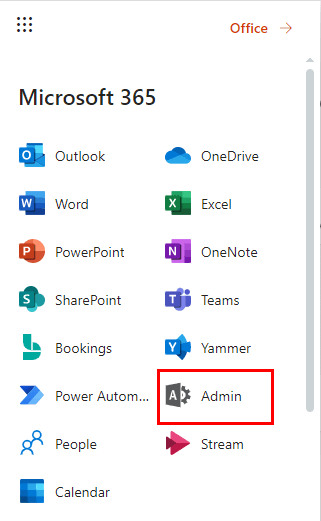
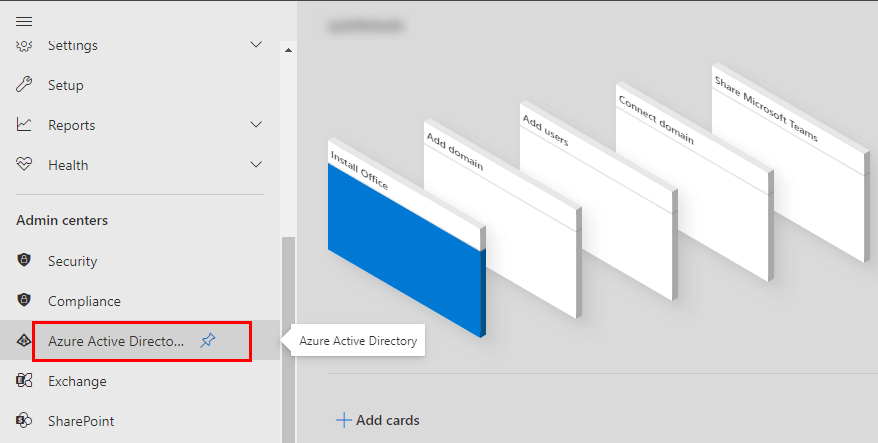
From the Admin account page, tap the option Show all to expand.
Now, from the expanded list click on the Azure Active Directory under Admin centers.
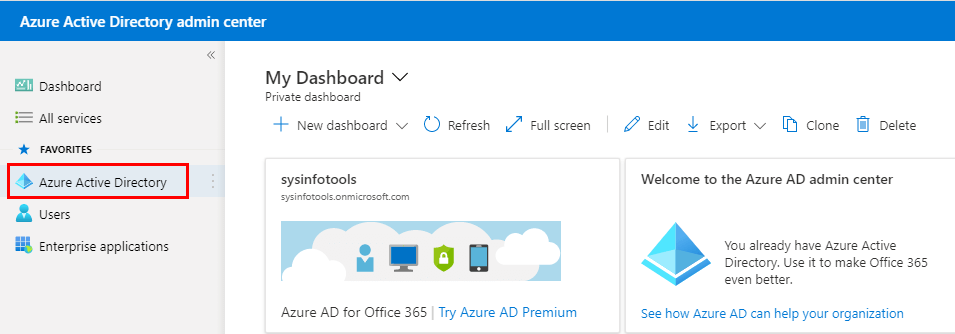
After that, you will find a azure portal. Tap the Azure active directory.
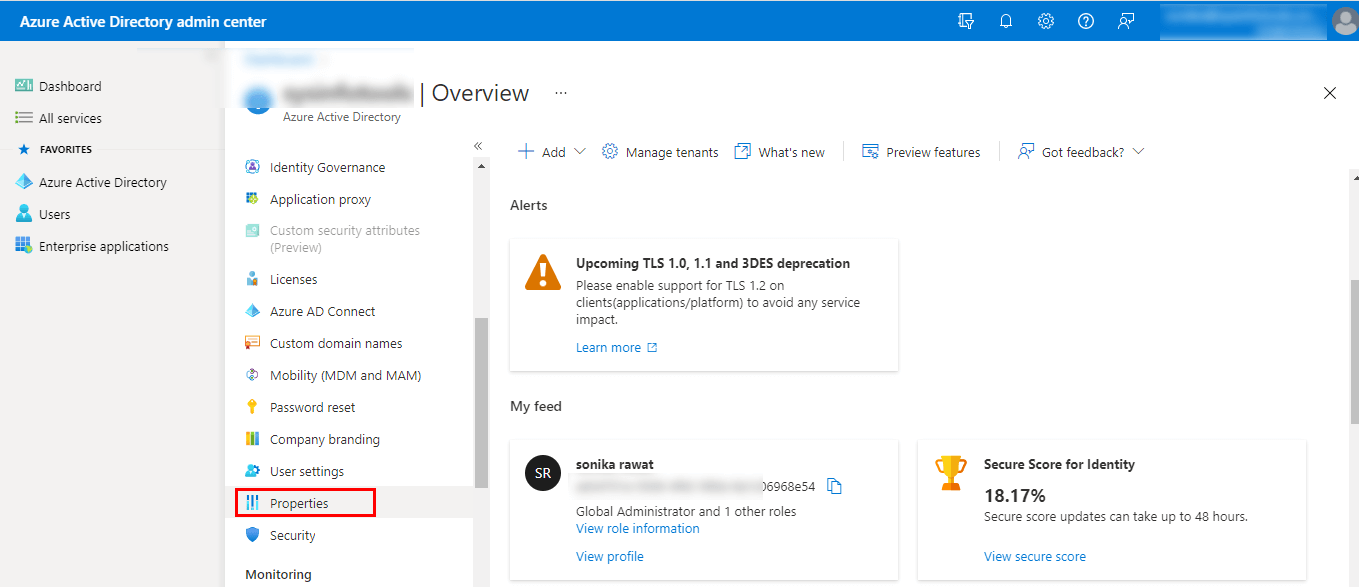
Here, scroll the active directory option and click the Properties under manage option.
Within the Properties option, scroll the page and click Manage Security Defaults.
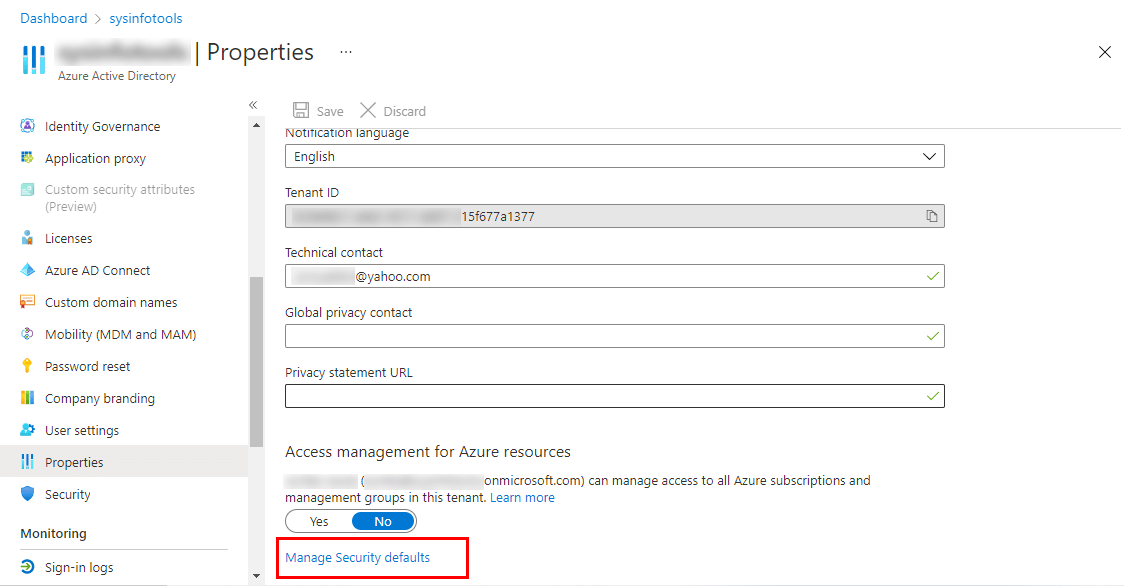
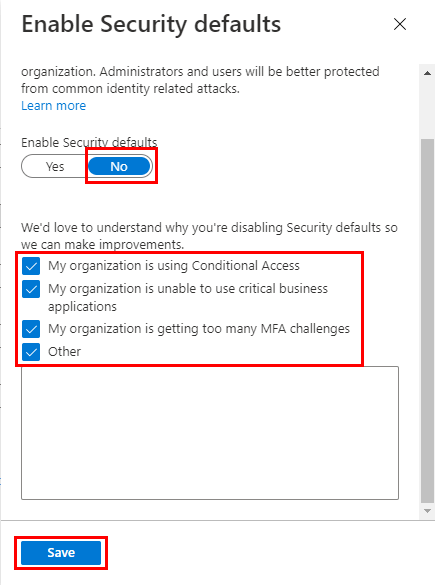
After that, you will find a Enable Security Defaults option. Mark the No option and check all the below checkbox and then click the Save button.
Login Office 365 and click on the App Launcher>>Admin.
Here, click on Users and select Active users.
Click the Admin account by which you want to login into our Office 365 Backup & Restore Tool. Additionally choose the Mail option of selected Admin/User account.
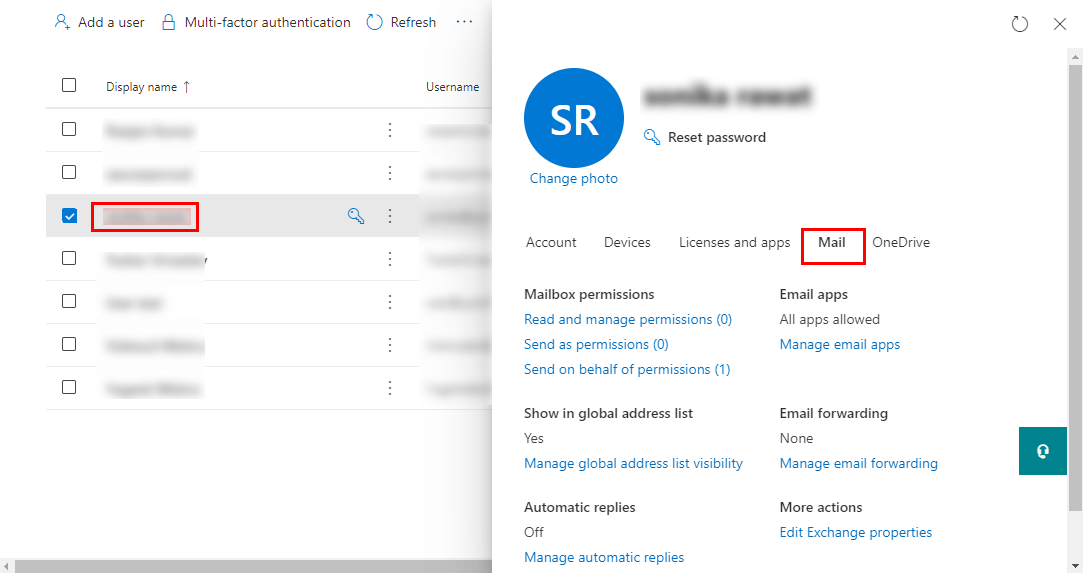
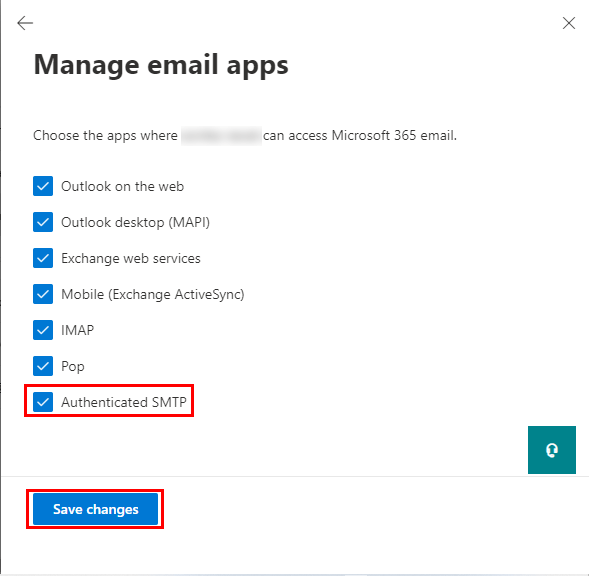
Under Email Apps, click on the Manage email apps.
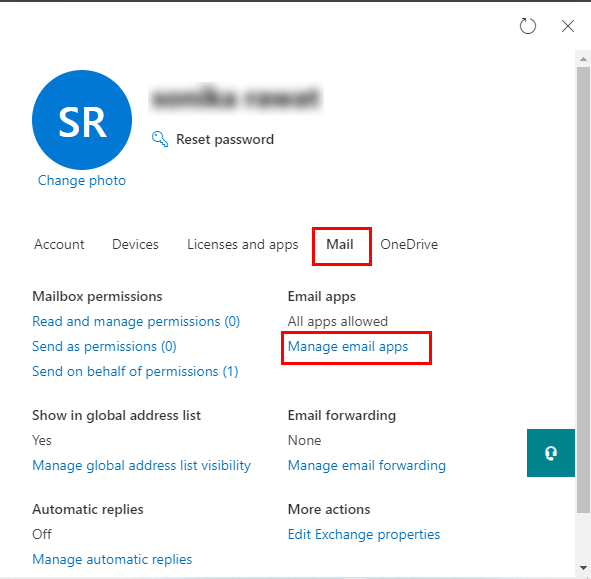
Check the Authenticated SMTP and tap the Save changes button.