Create a Project in Google Cloud Platform Console
If your source platform is G Suite, you must set up the Google Cloud Console project before proceeding with the backup or migration process. The following are the simple steps to create a Google Cloud Console project:
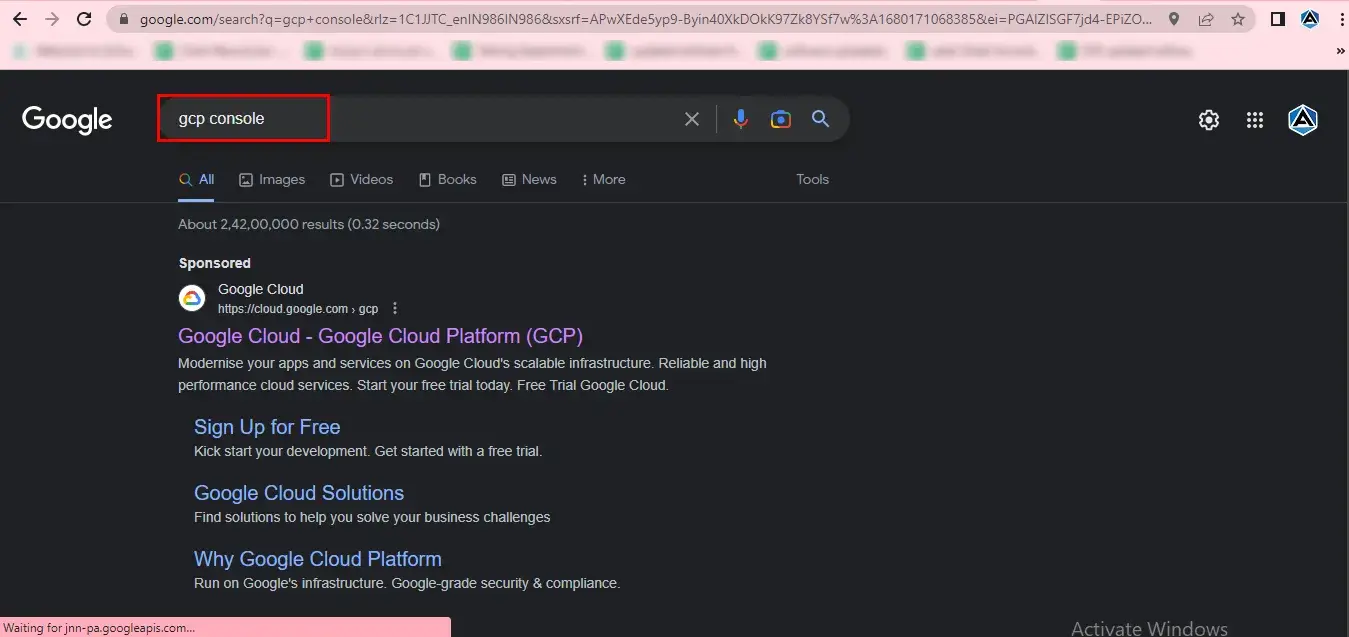
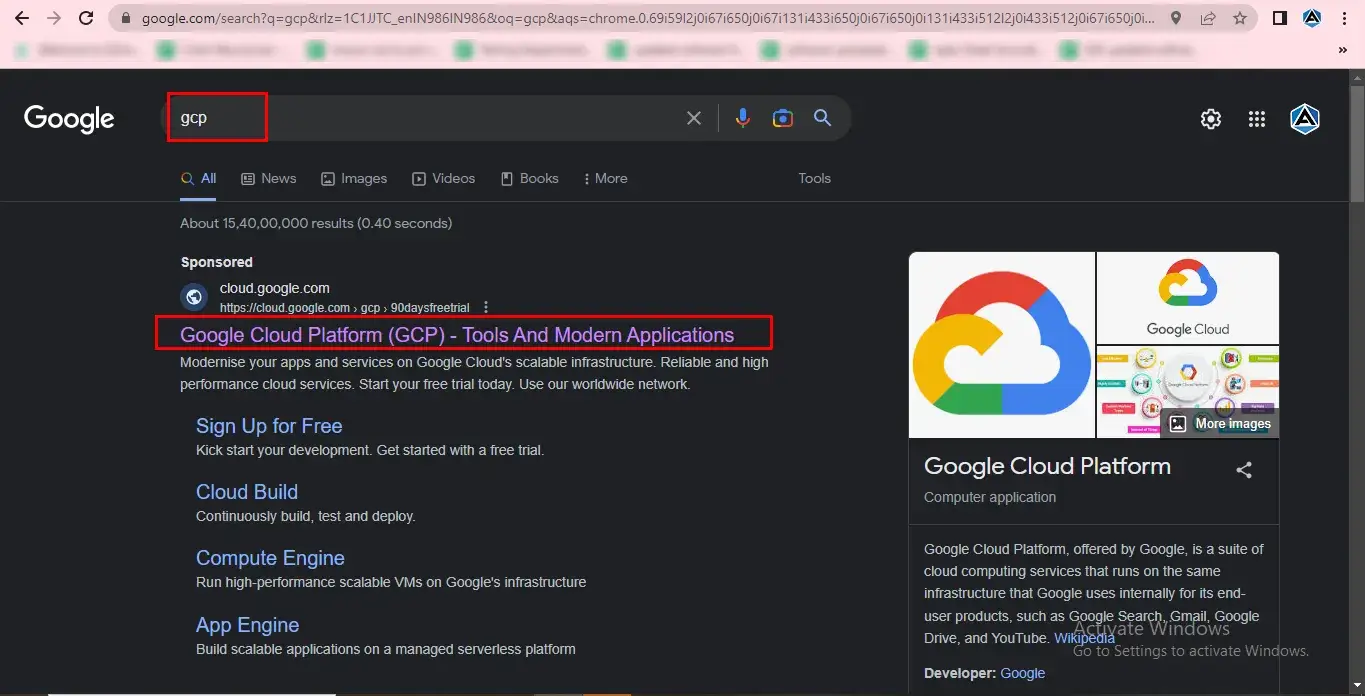
First of all, search gcp console on Google search and click on the first one(containing the message Google Cloud - Google Cloud Platform(GCP))
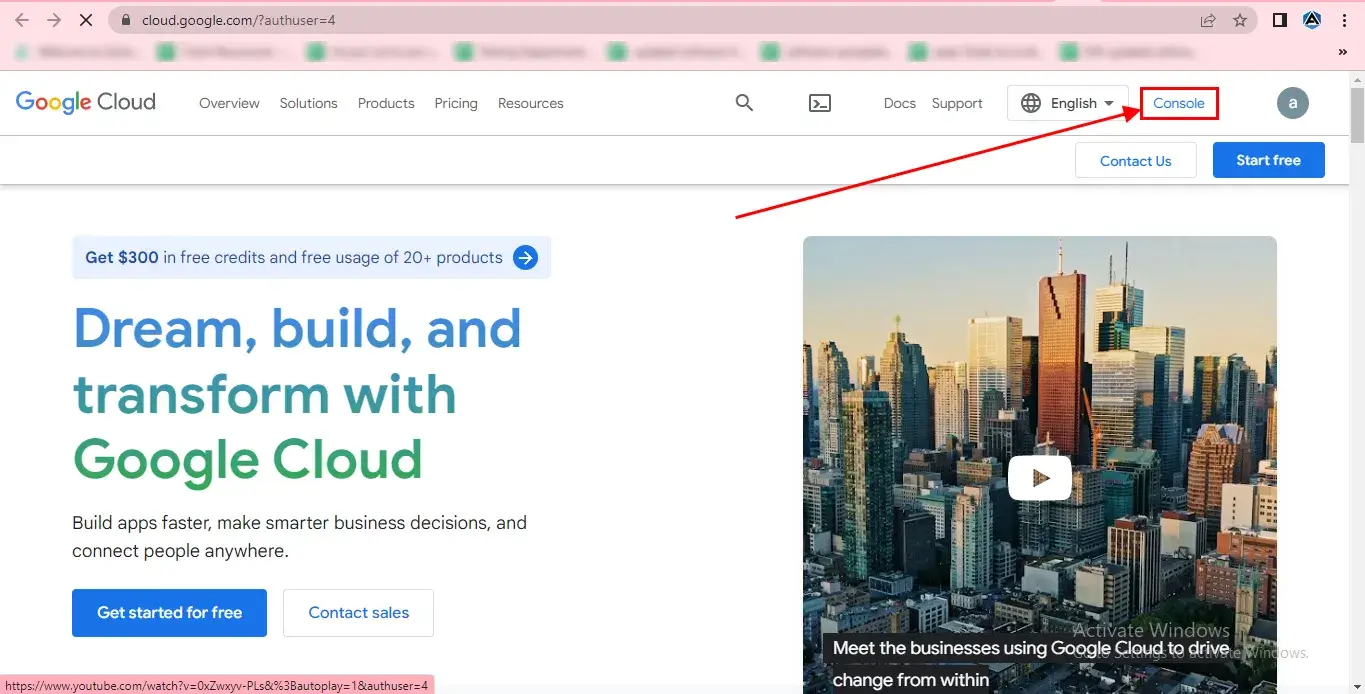
Here, click on the Console button at the top-left corner.

STEP 3
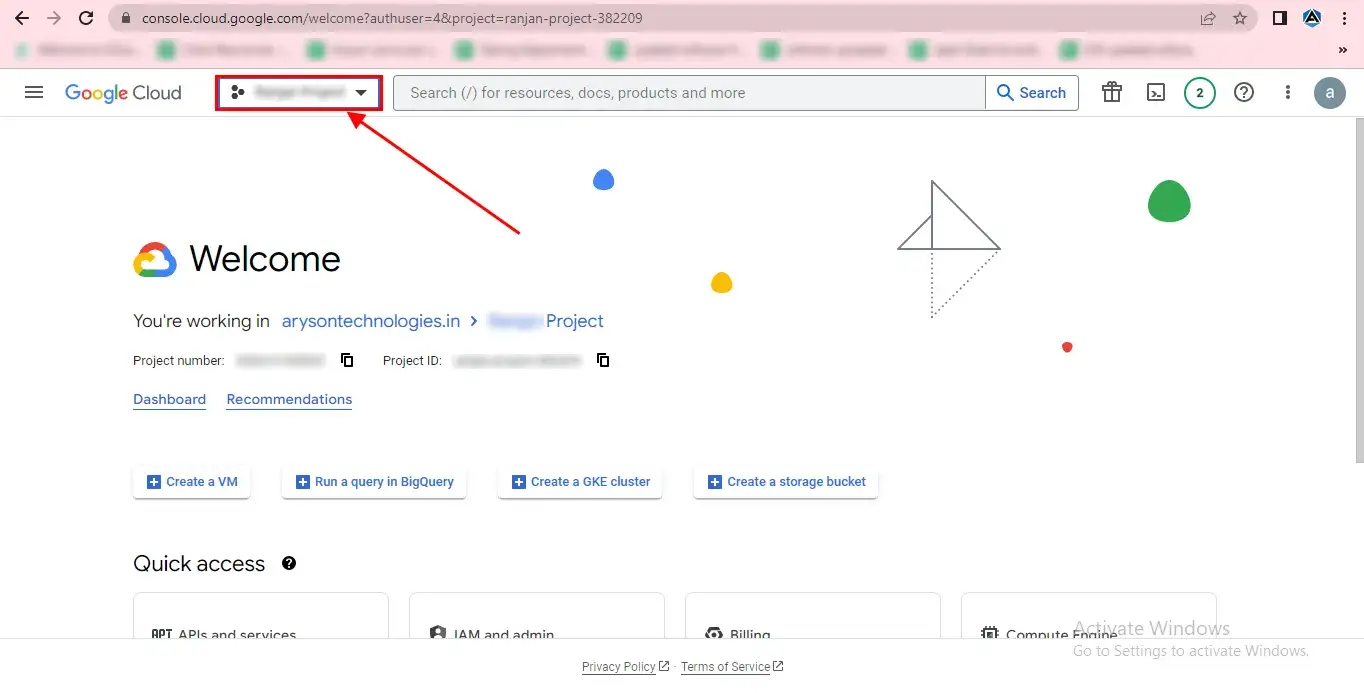
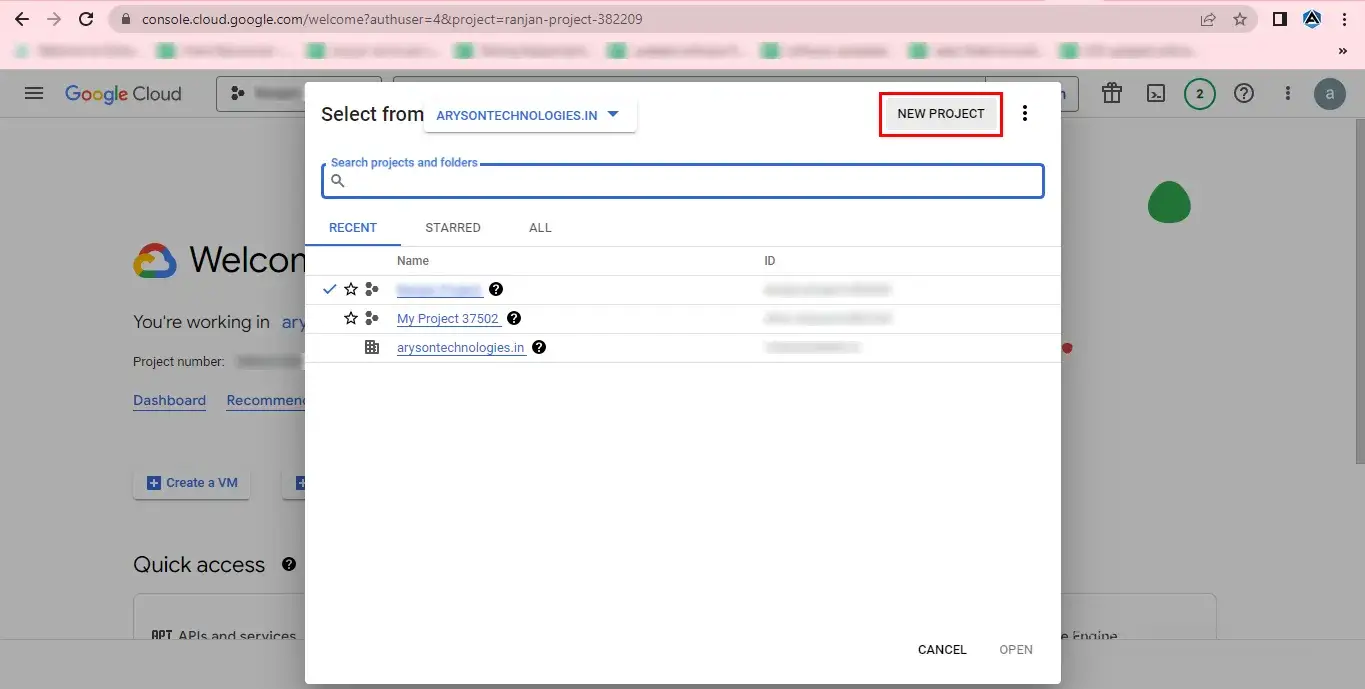
Now, you must open the existing project to create a new one.
STEP 4
In the pop-up Window, you will find all the created projects here. Click the New Project button.
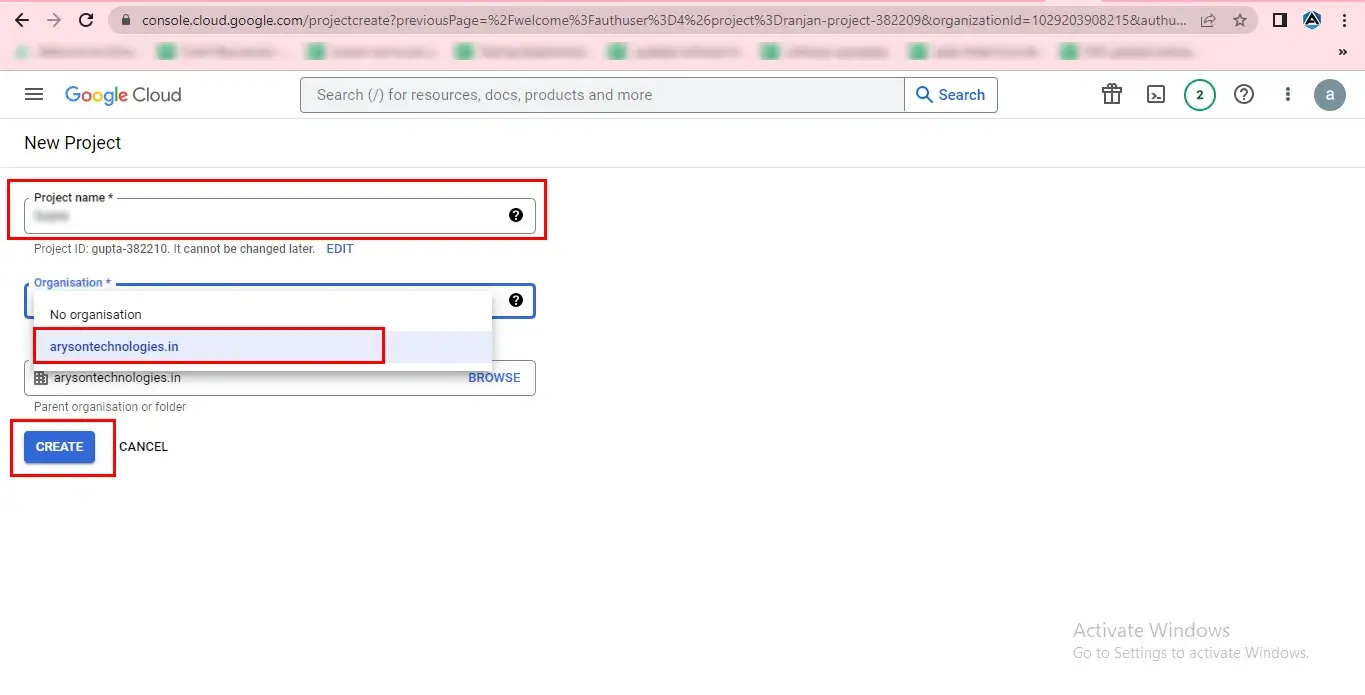
STEP 5
Enter the New Project Name, Organizations and click the Create button to complete the project creating process.
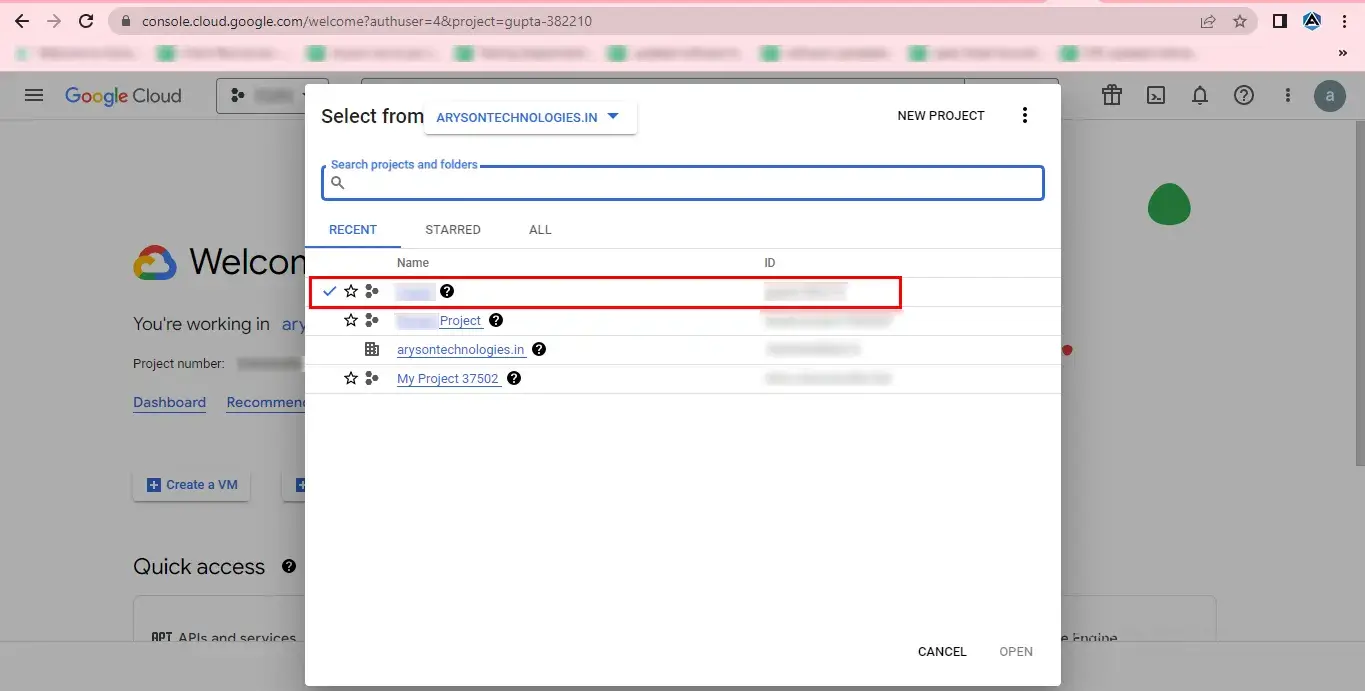
STEP 6
Here, you will see that the new Project has been created successfully.

STEP 7
Tap on the newly created Project, and you will find that the new Project has a checked mark. Click Cancel.
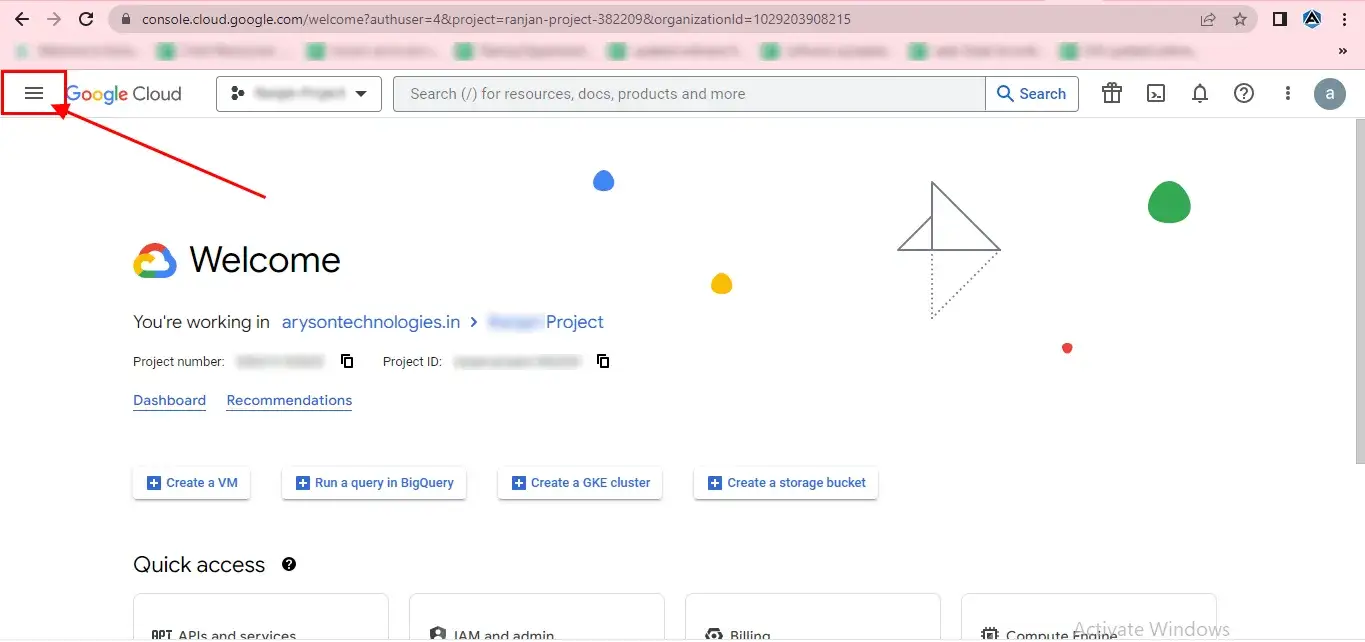
STEP 8
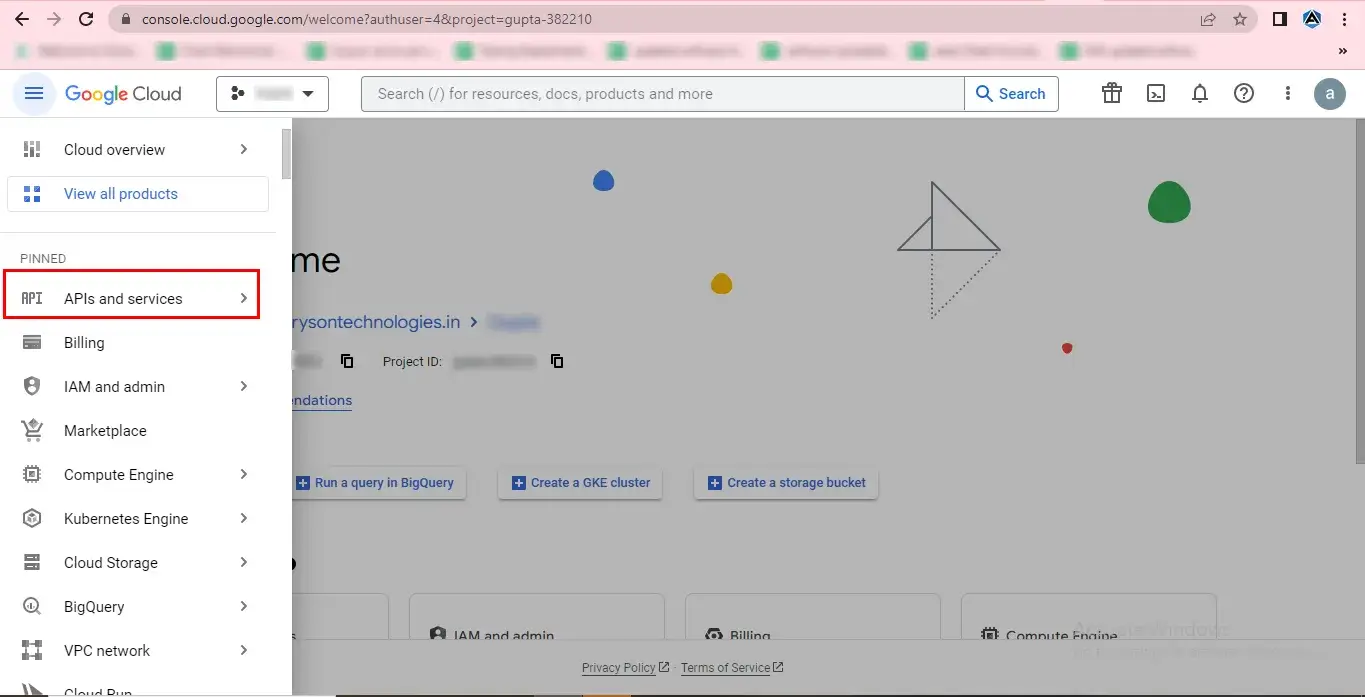
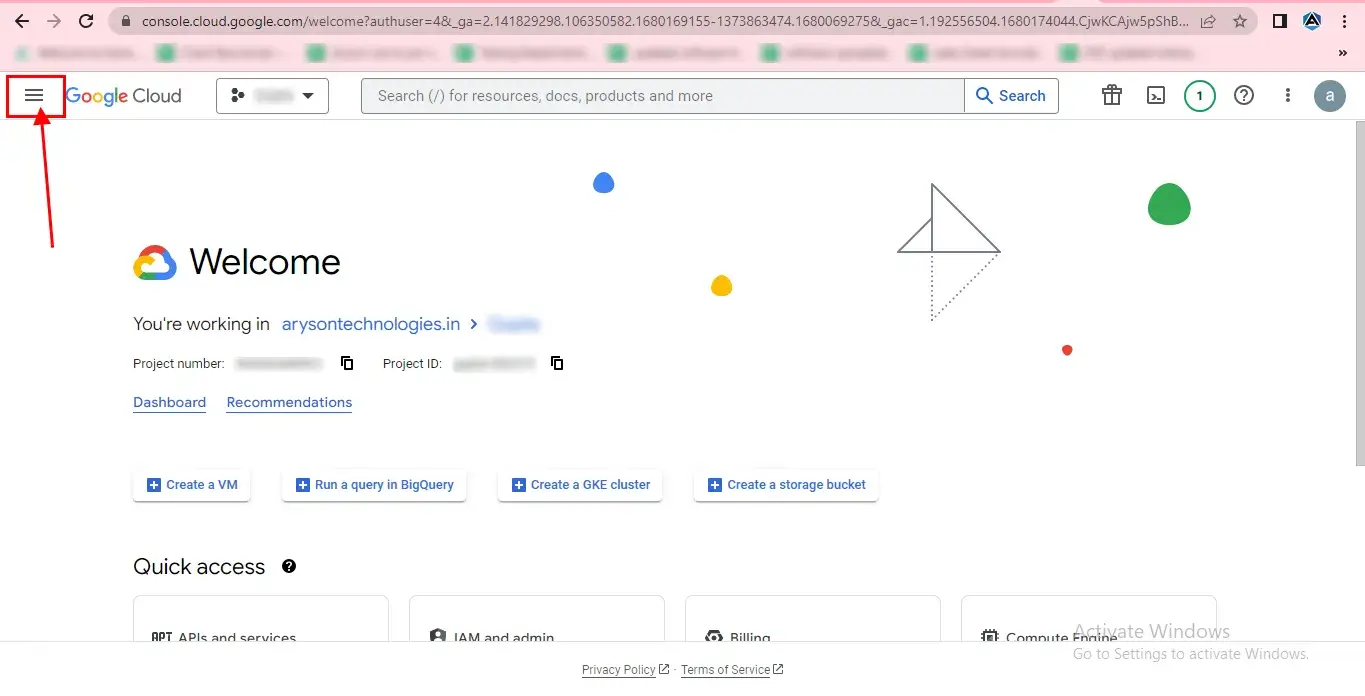
Go to the Menu(having three Horizontal lines).
STEP 9
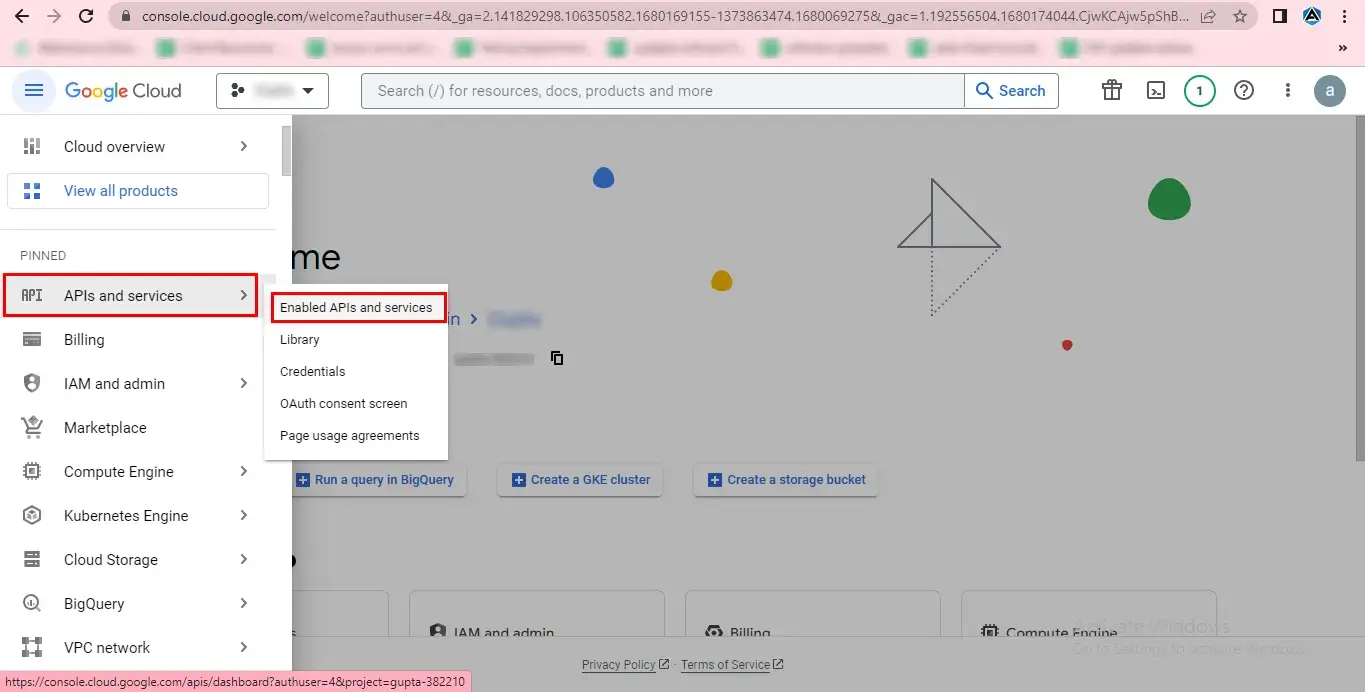
Select the APIs and services option from the drop-down menu.
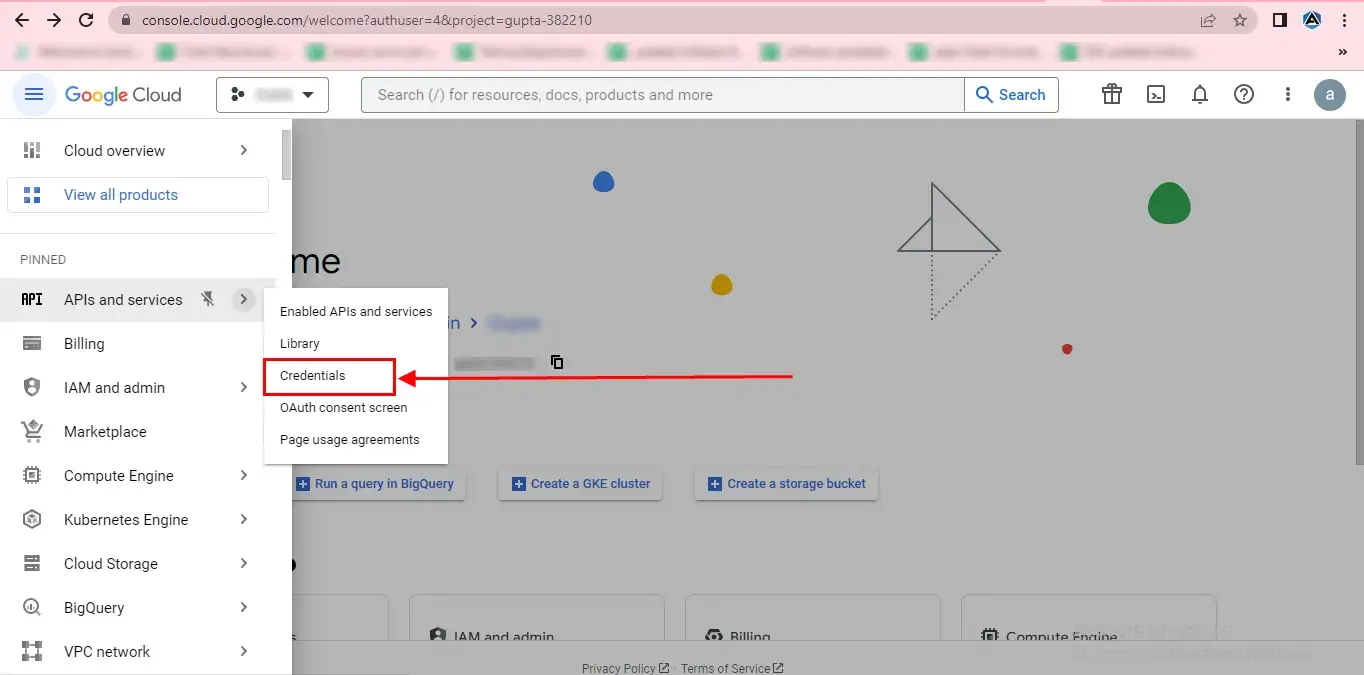
STEP 10
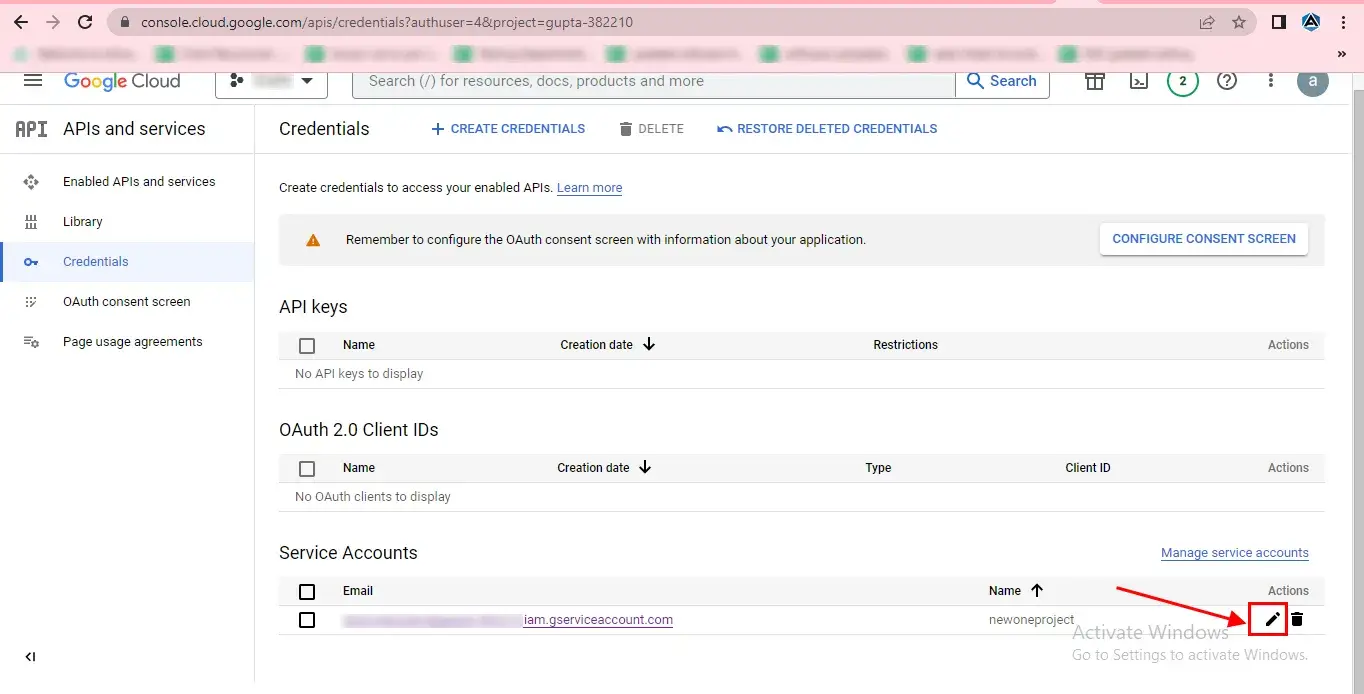
Choose Credentials from the list.
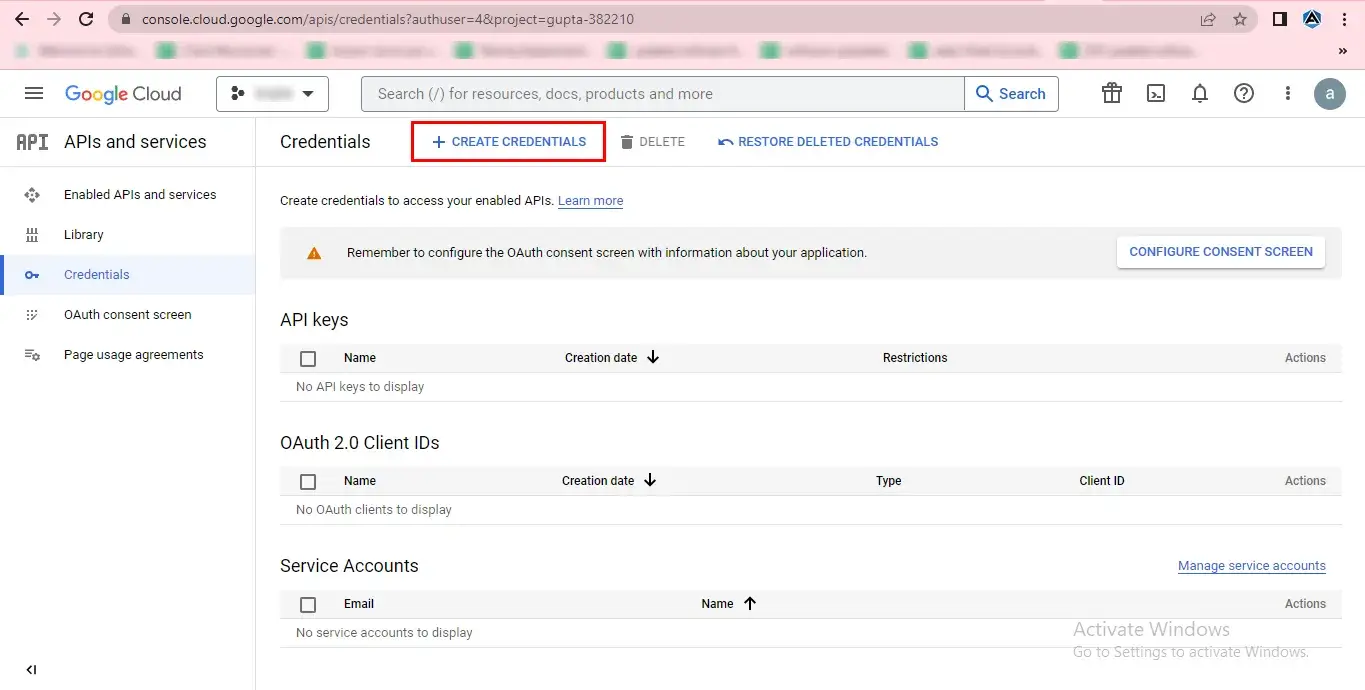
STEP 11
In the new wizard, click on Create Credentials.
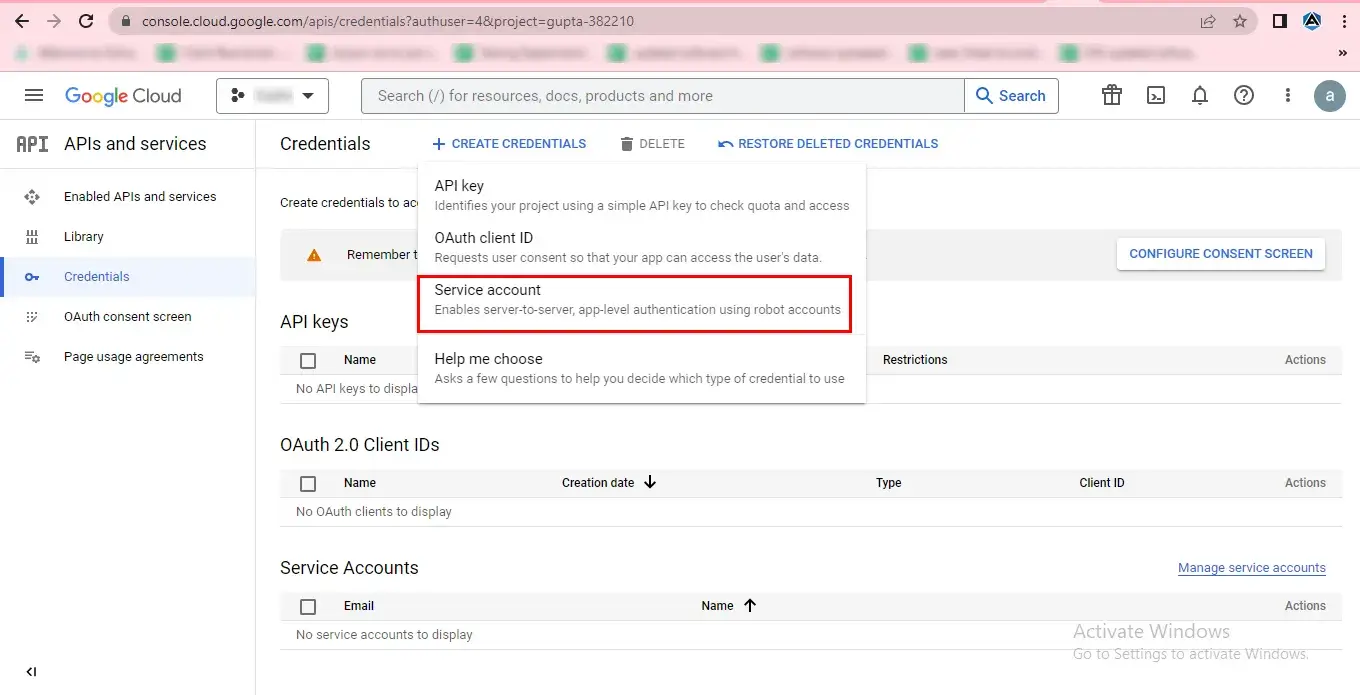
STEP 12
In the drop-down list, select Service account.
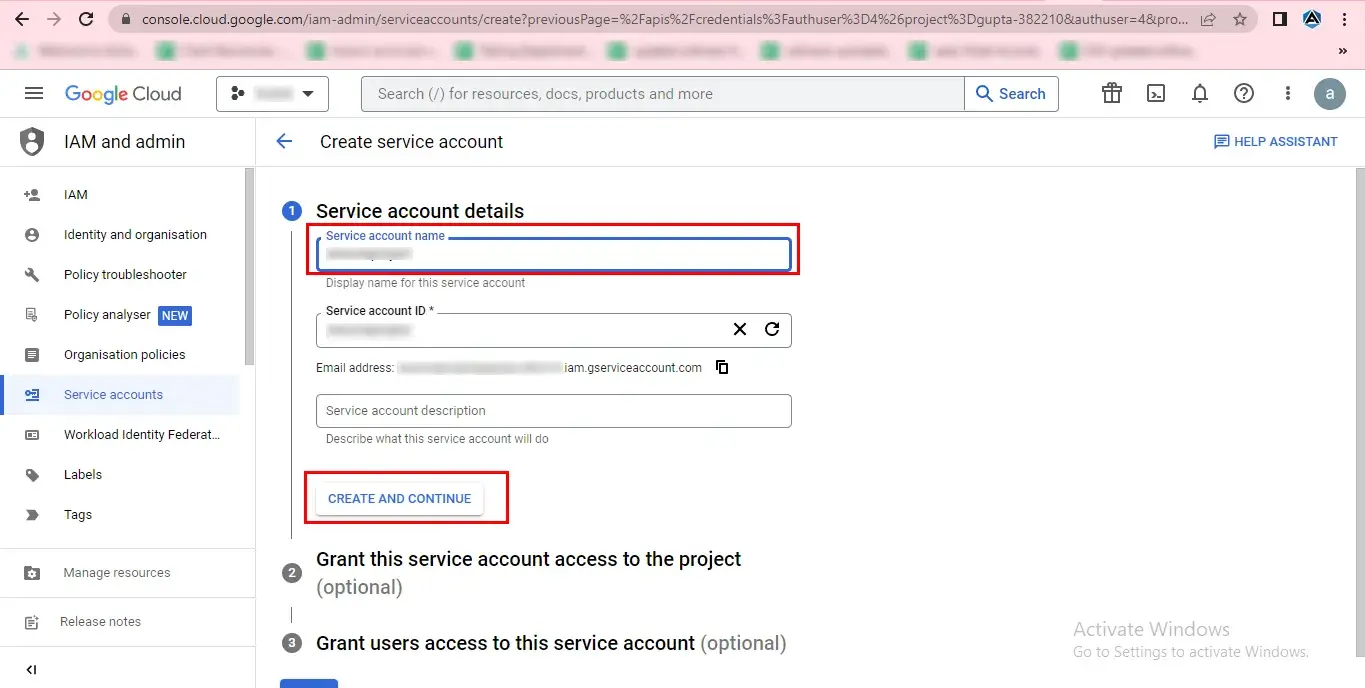
STEP 13
Now, enter the service account details:
- Service account name: Type the service account name.
- Service account ID: The Service account ID will automatically be created per the assigned name.
- Service account description: Describe what this service account will do.
STEP 14
After that, click on the CREATE AND CONTINUE button.
STEP 15
Now, it's time to assign a role to the Service account.
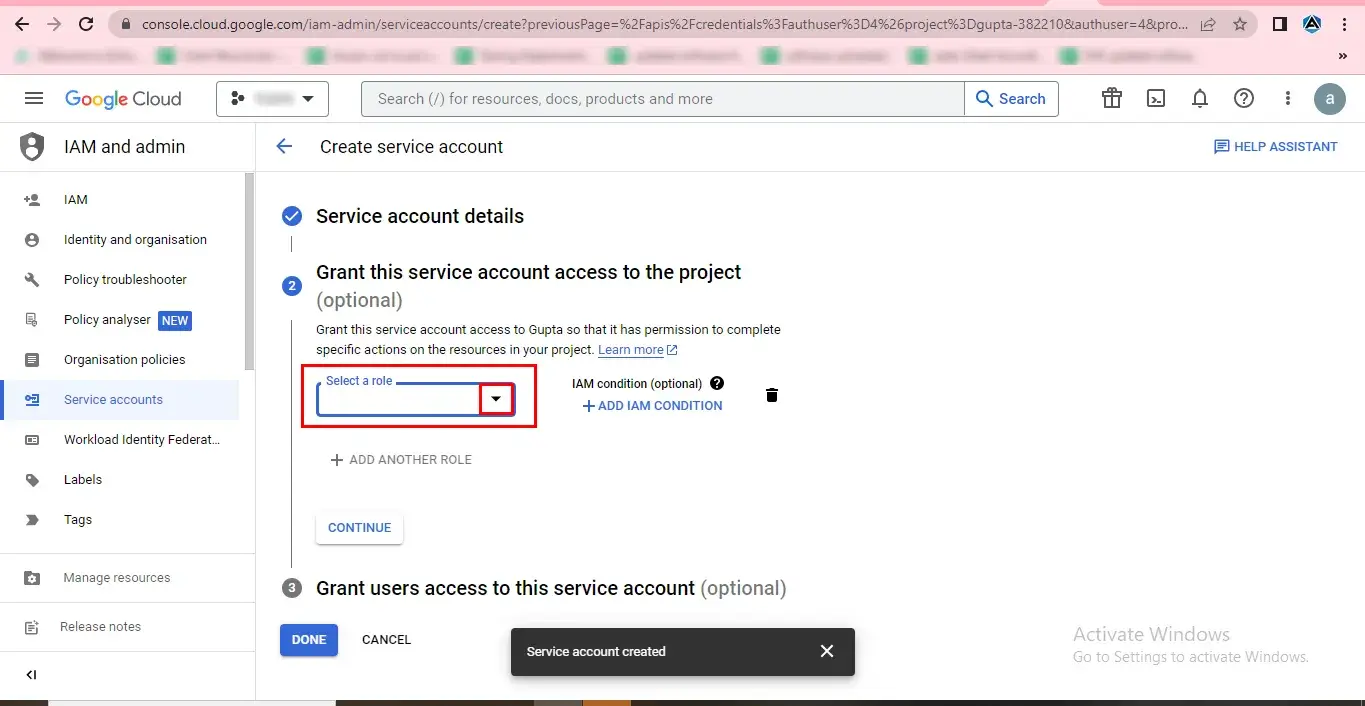
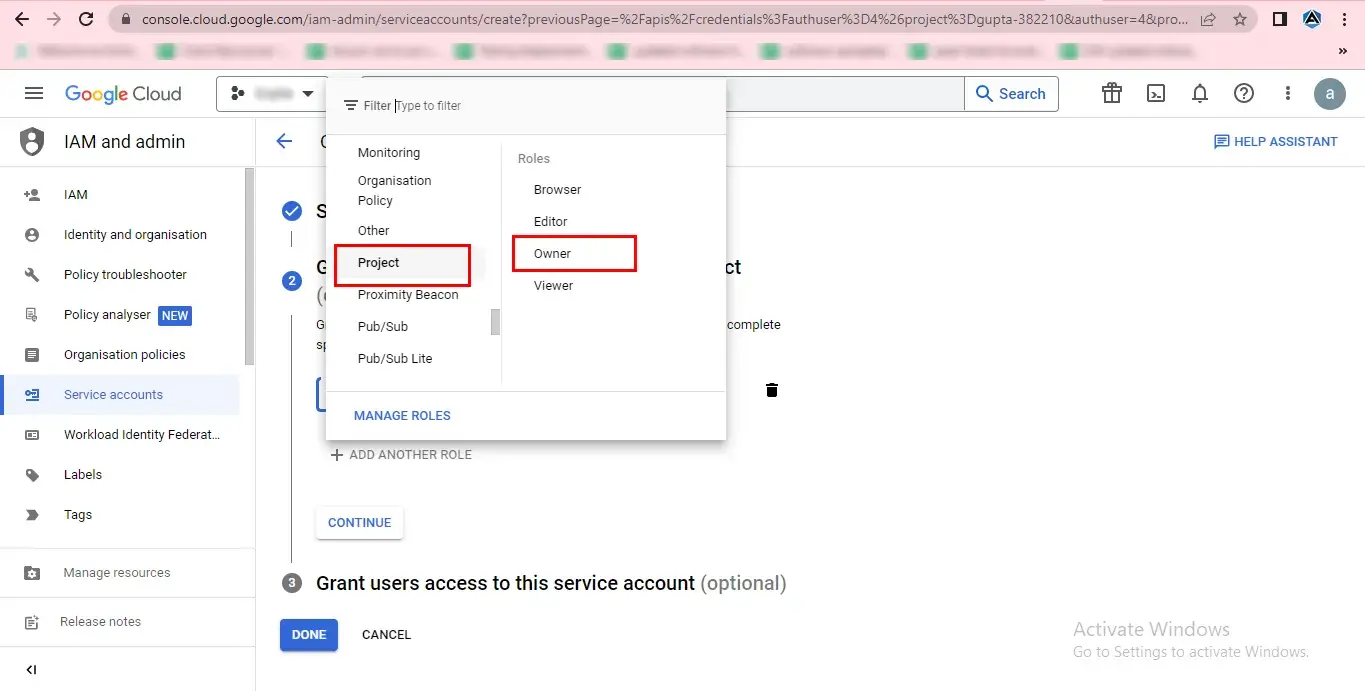
STEP 16
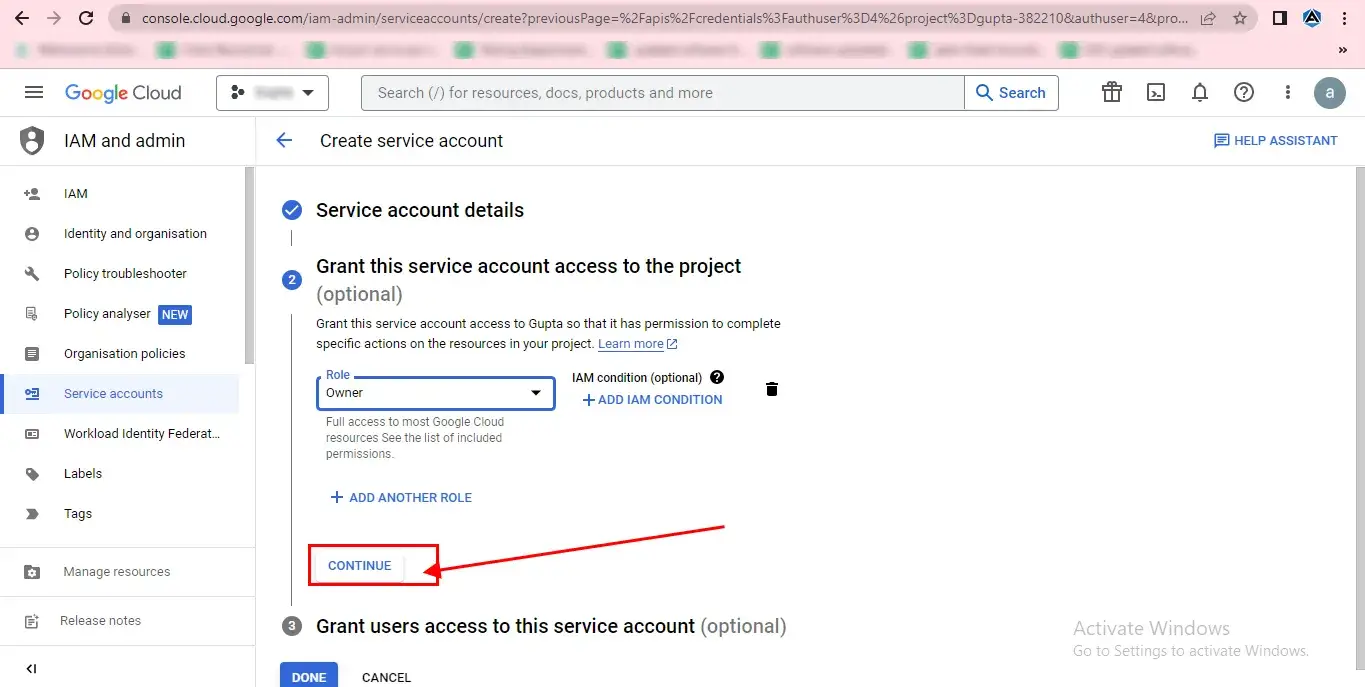
You can select Project and opt for a specific role, for example, Owner.
STEP 17
Click on the Continue button.
STEP 18
Here, you can also grant users access to this service account (optional). Click Done.
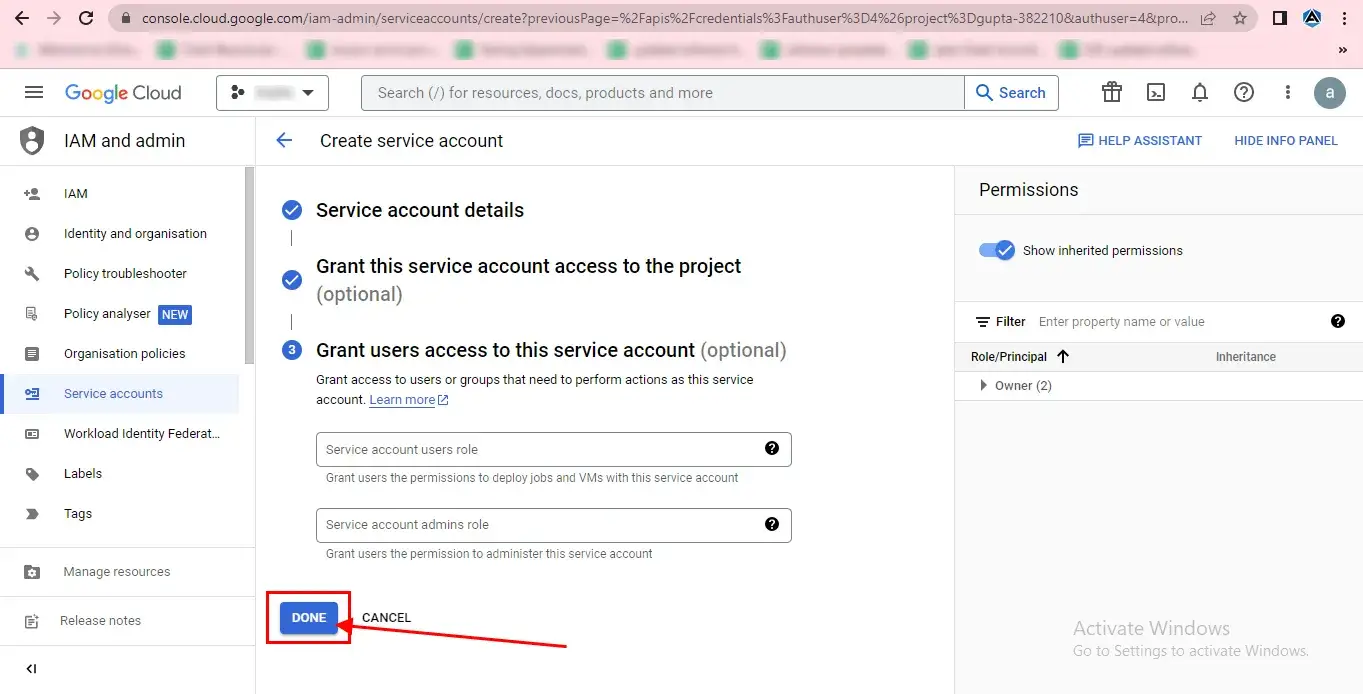
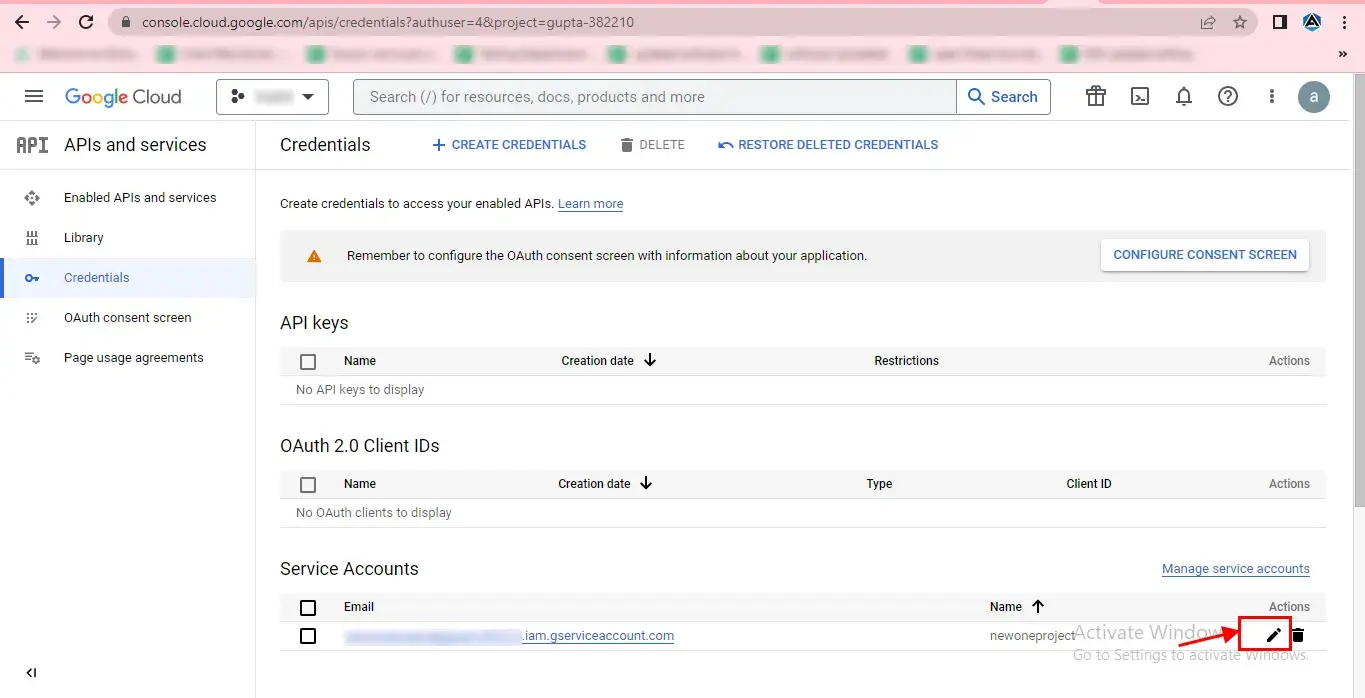
STEP 19
Now, click the edit icon to appear on the newly created project.
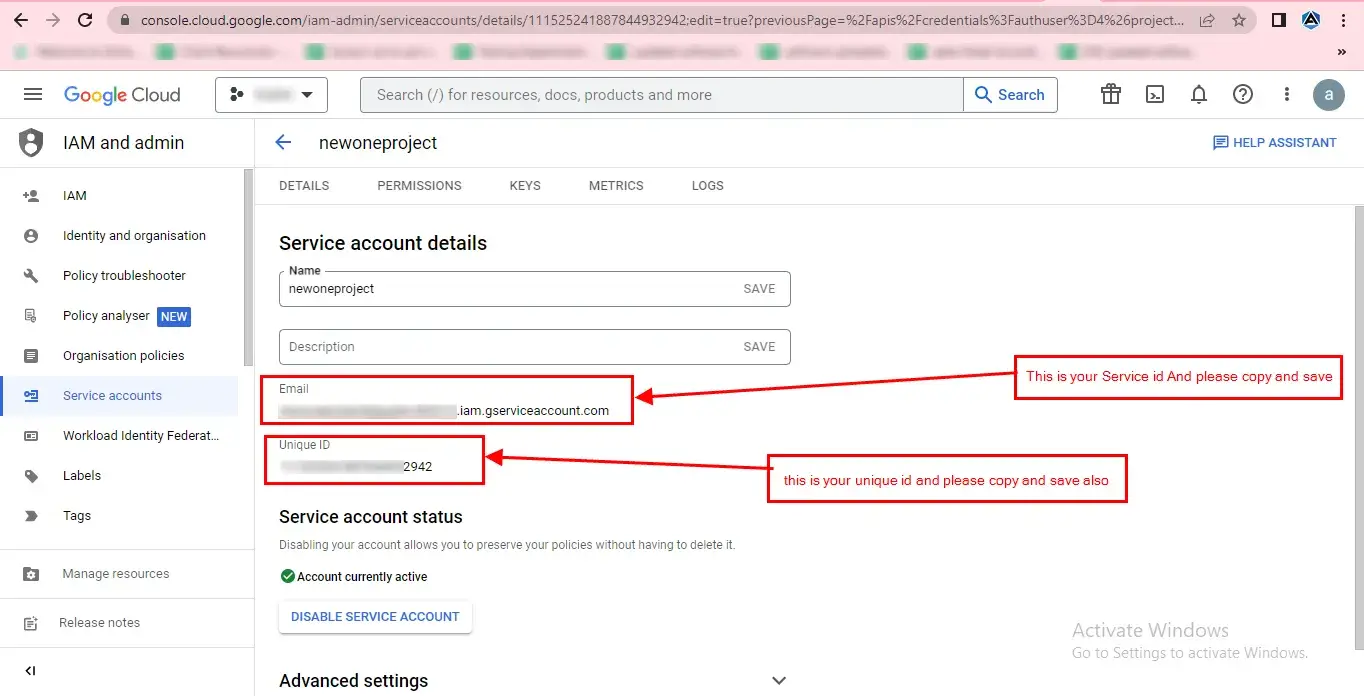
STEP 20
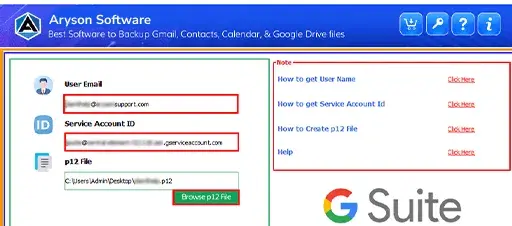
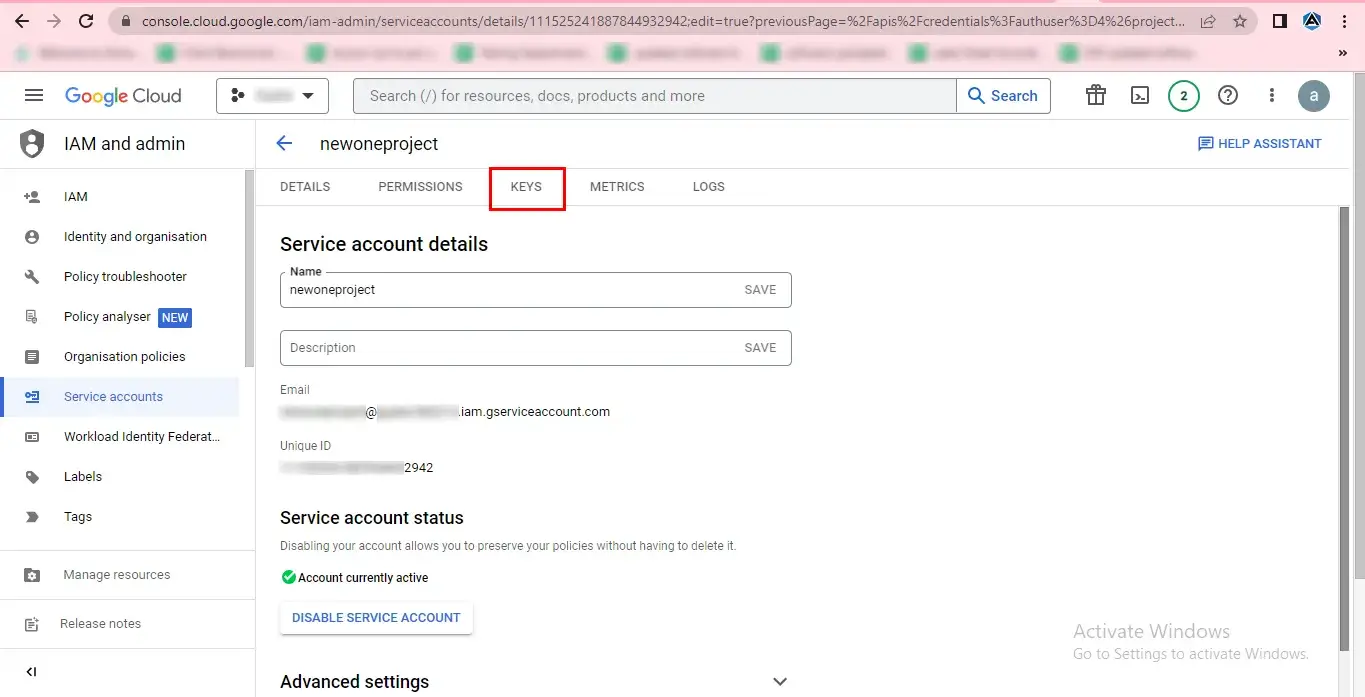
Here, you will find your service account ID(Email) and Unique ID. Please copy and save it at any desired location for future use.
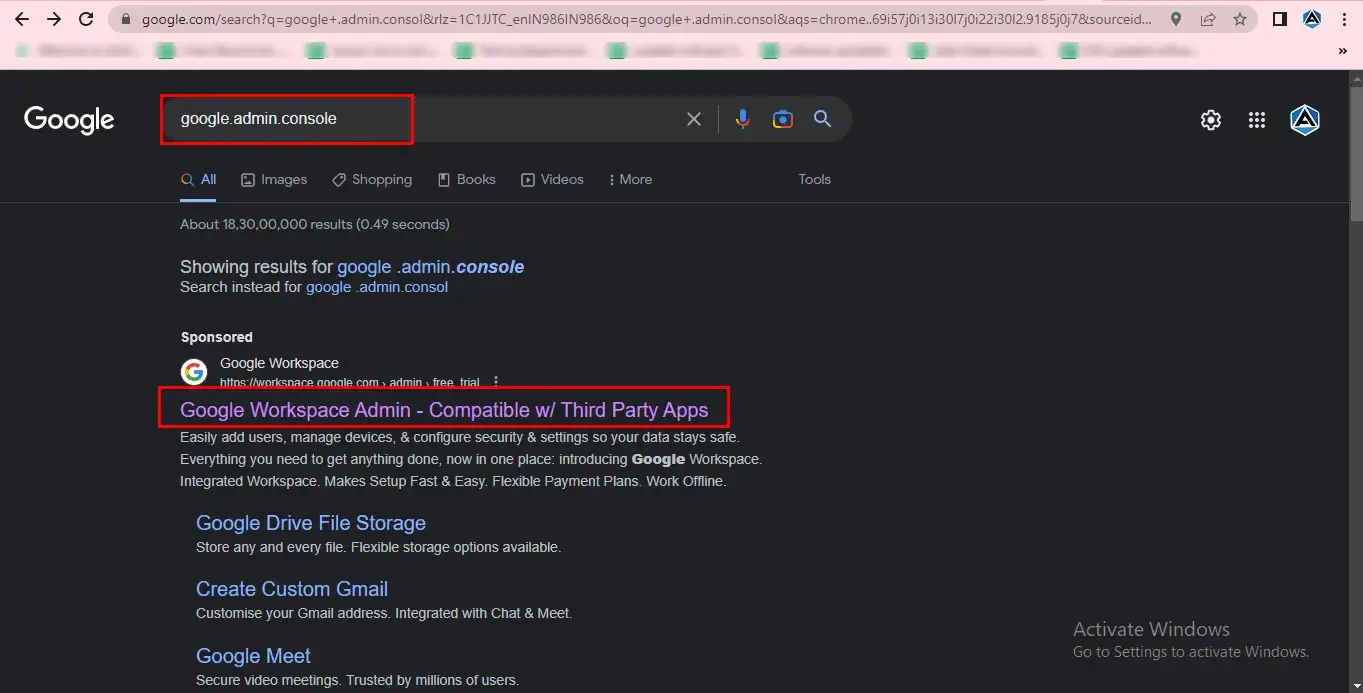
Add Scopes at Domain Level
STEP 21
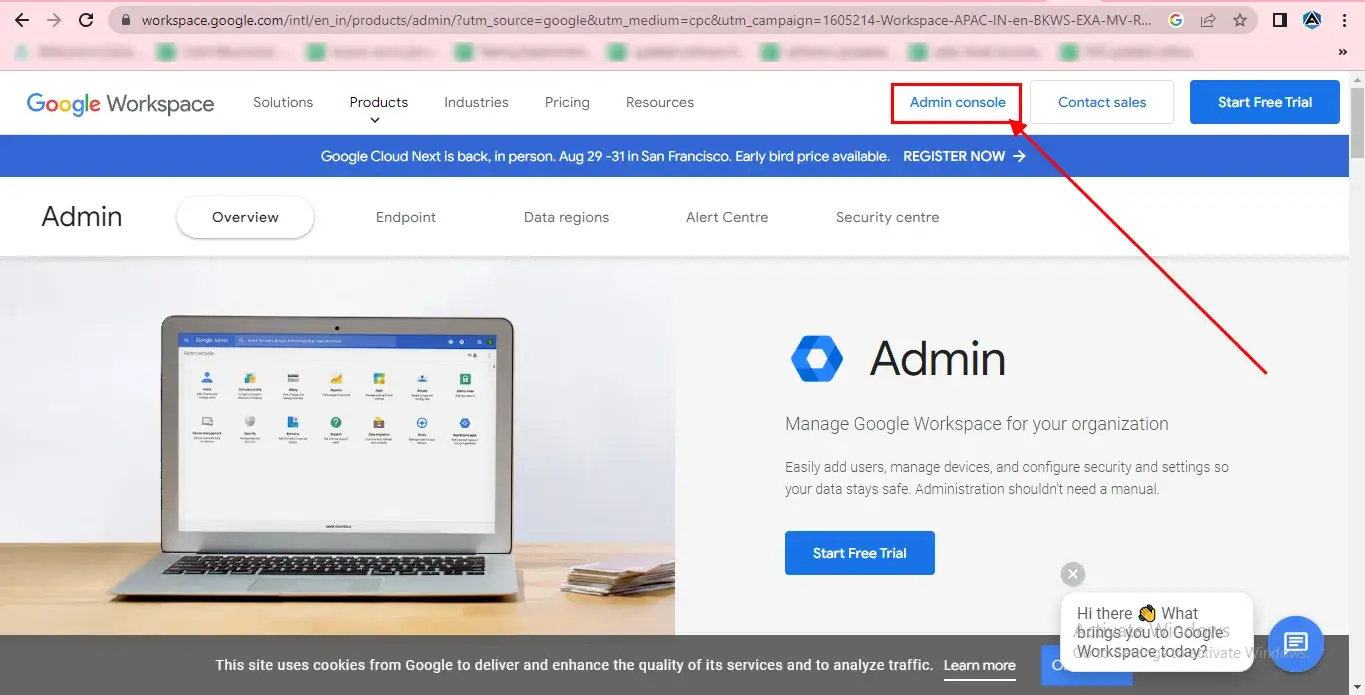
First, search google.admin.console on Google search and click on the first one(containing the message Google Workspace Admin).
STEP 22
Here, click on the Admin console button.
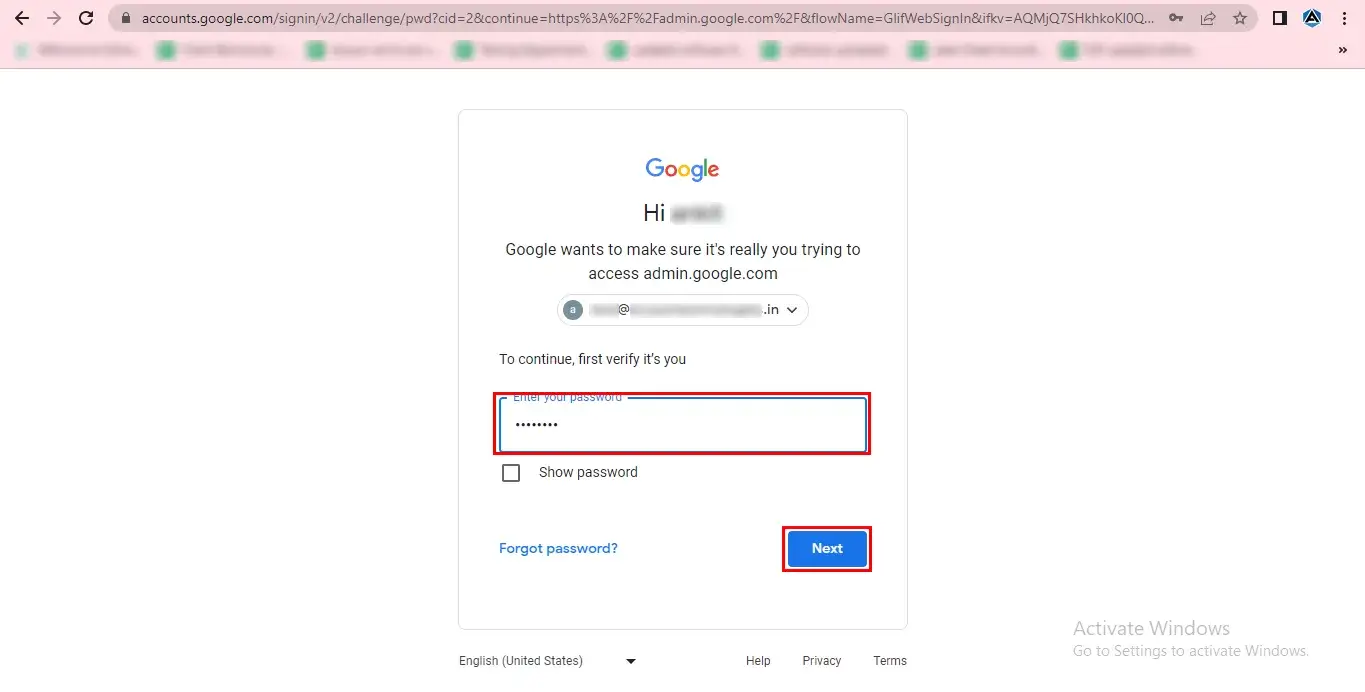
STEP 23
Now you need to login to your admin account here, so enter your account password and click Next.
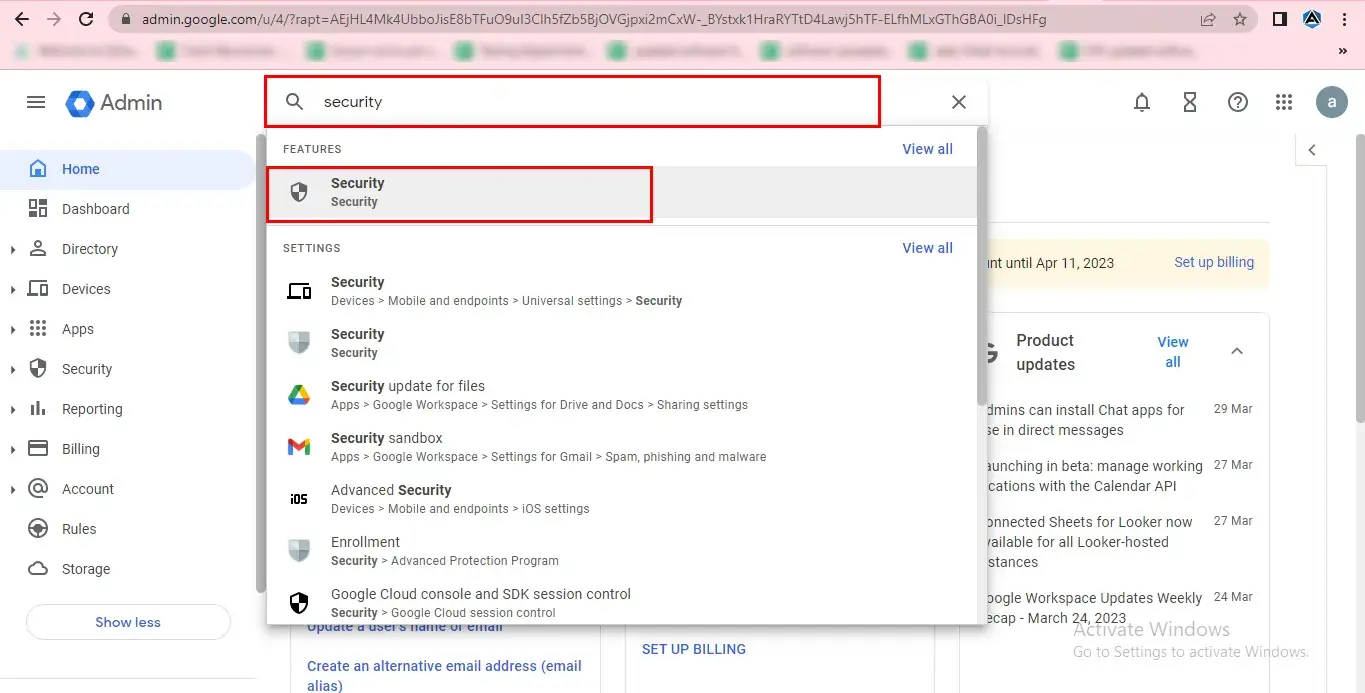
STEP 24
Here, search Security and click on it.
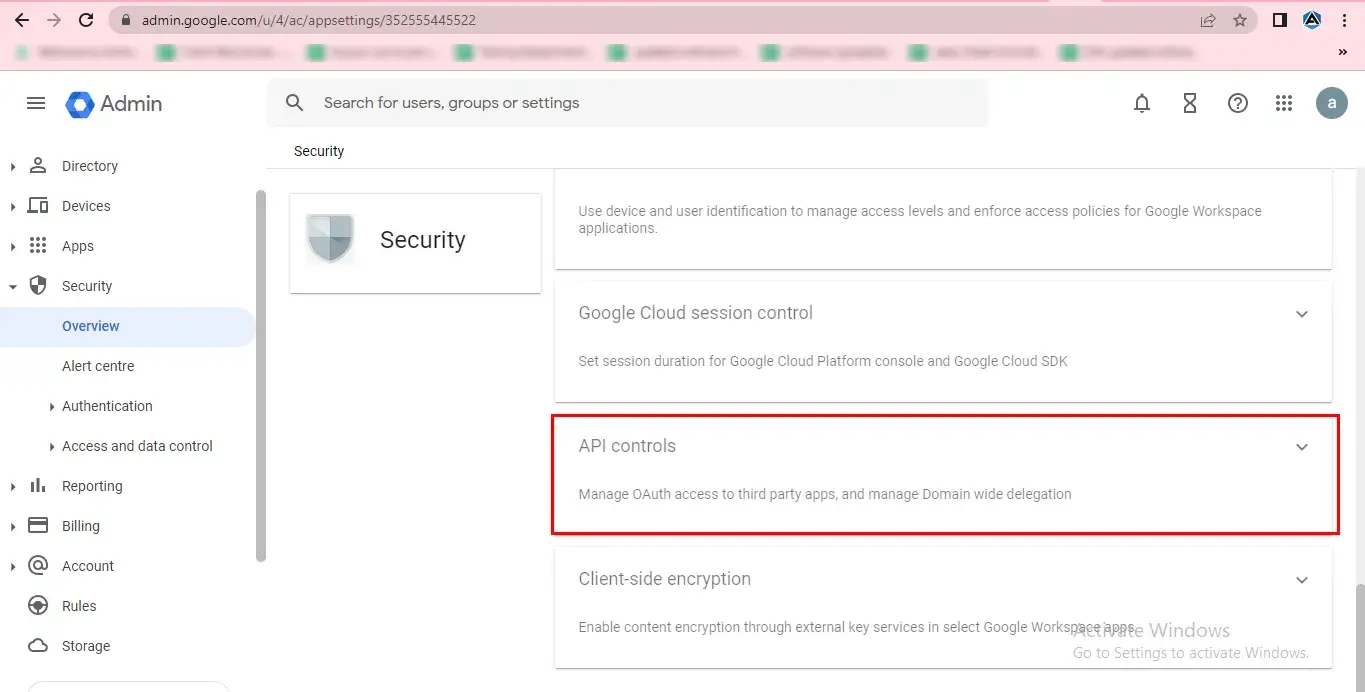
STEP 25
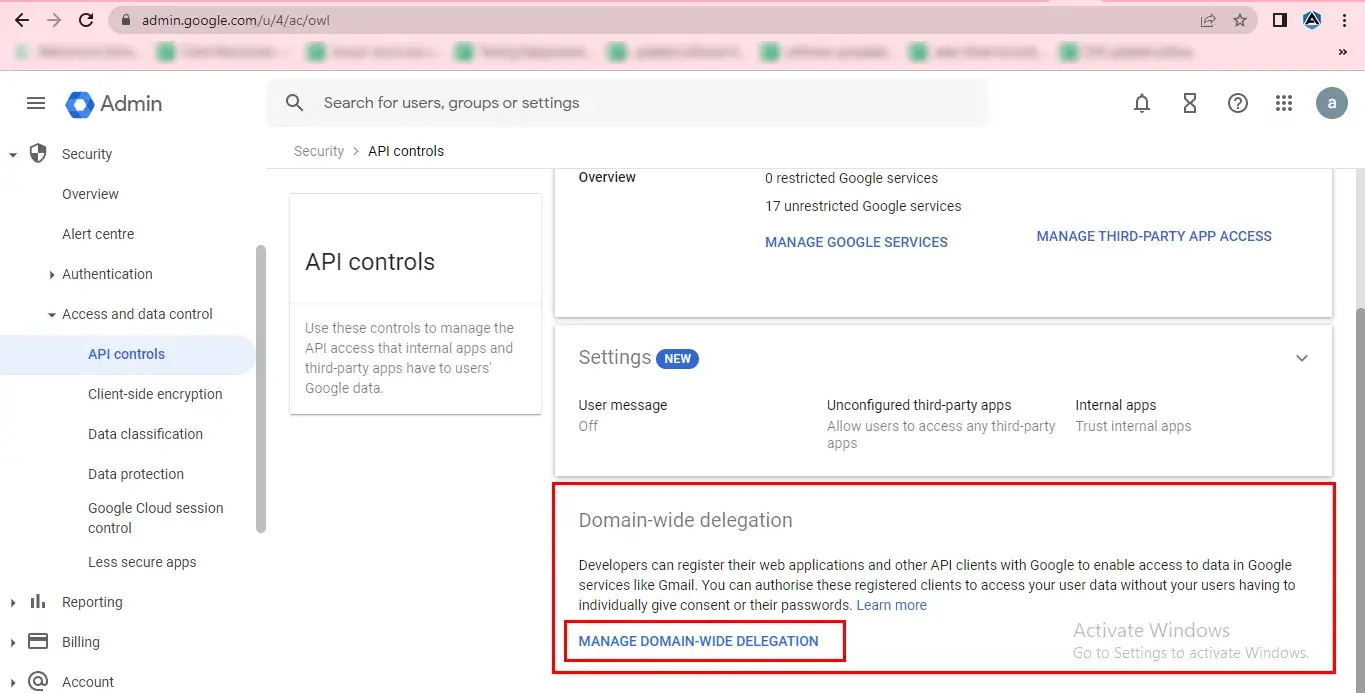
In the Security section, click on the API controls option.
STEP 26
Go to the Domain-wide delegation section and click the MANAGE DOMAIN-WIDE DELEGATION option.
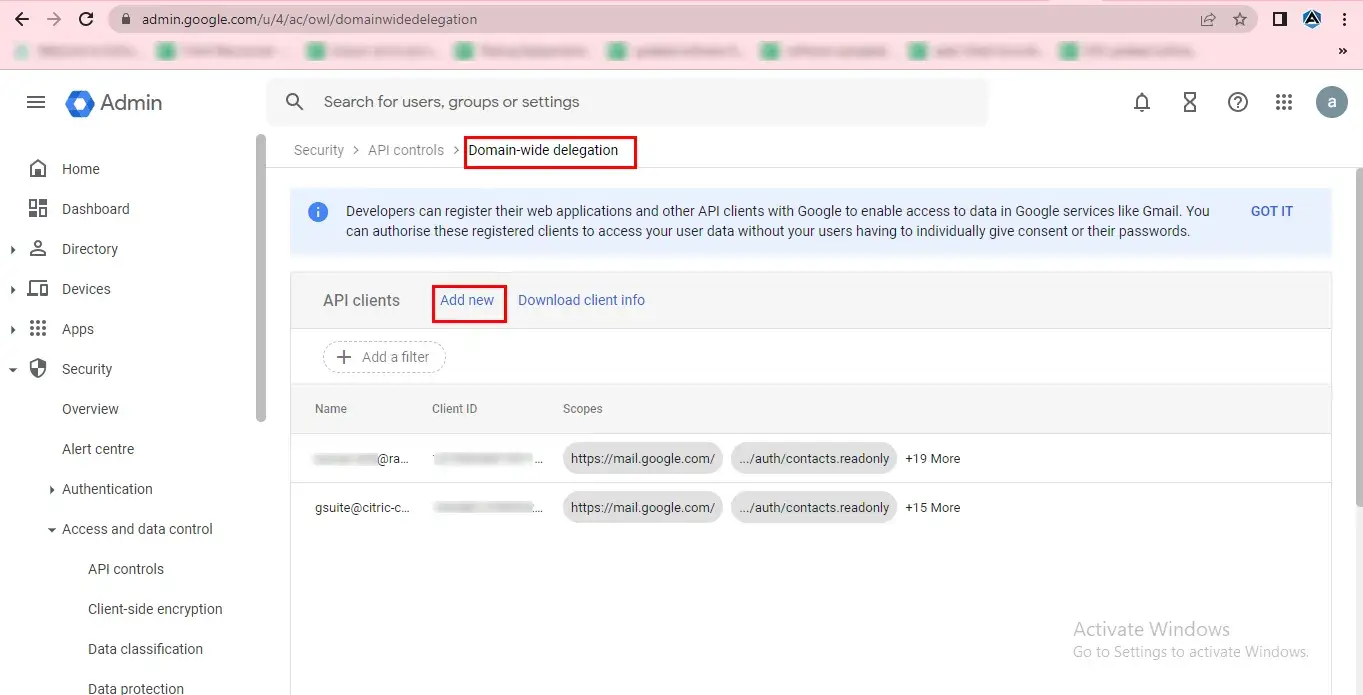
STEP 27
Here, you need to click on the Add New option.
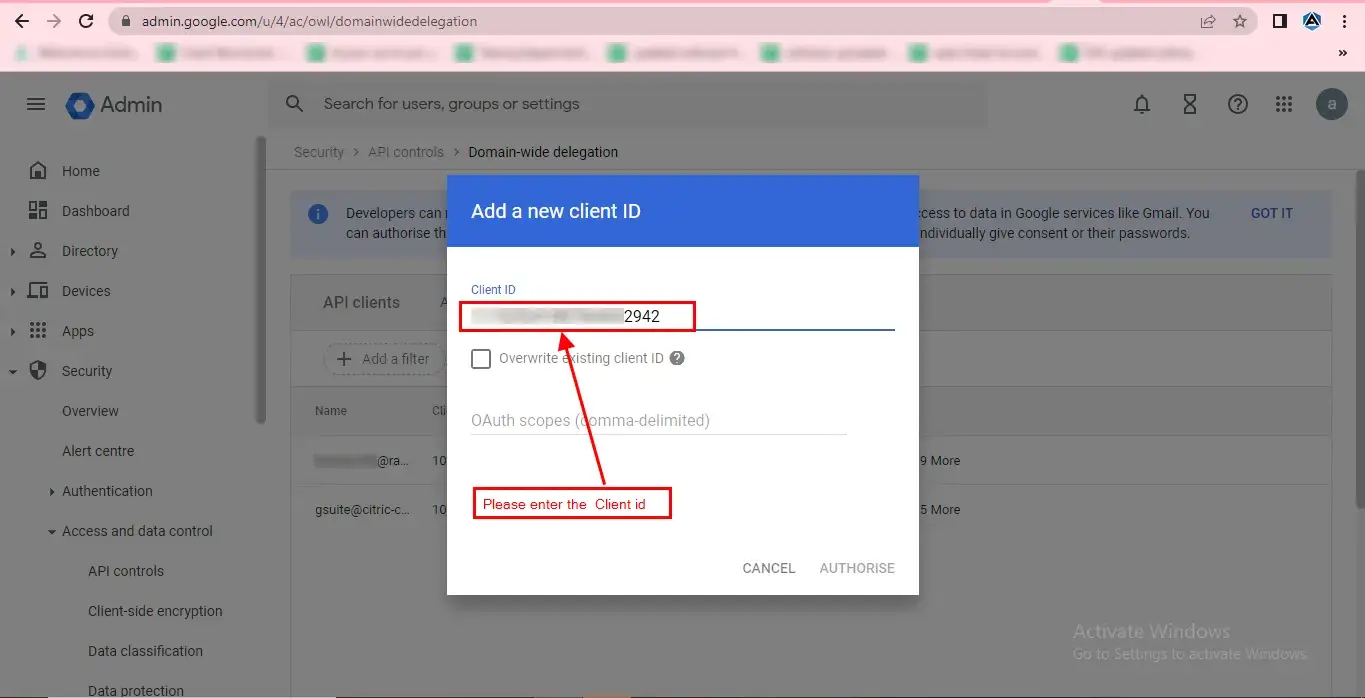
STEP 28
In the pop-up tab, enter the Client ID saved earlier.
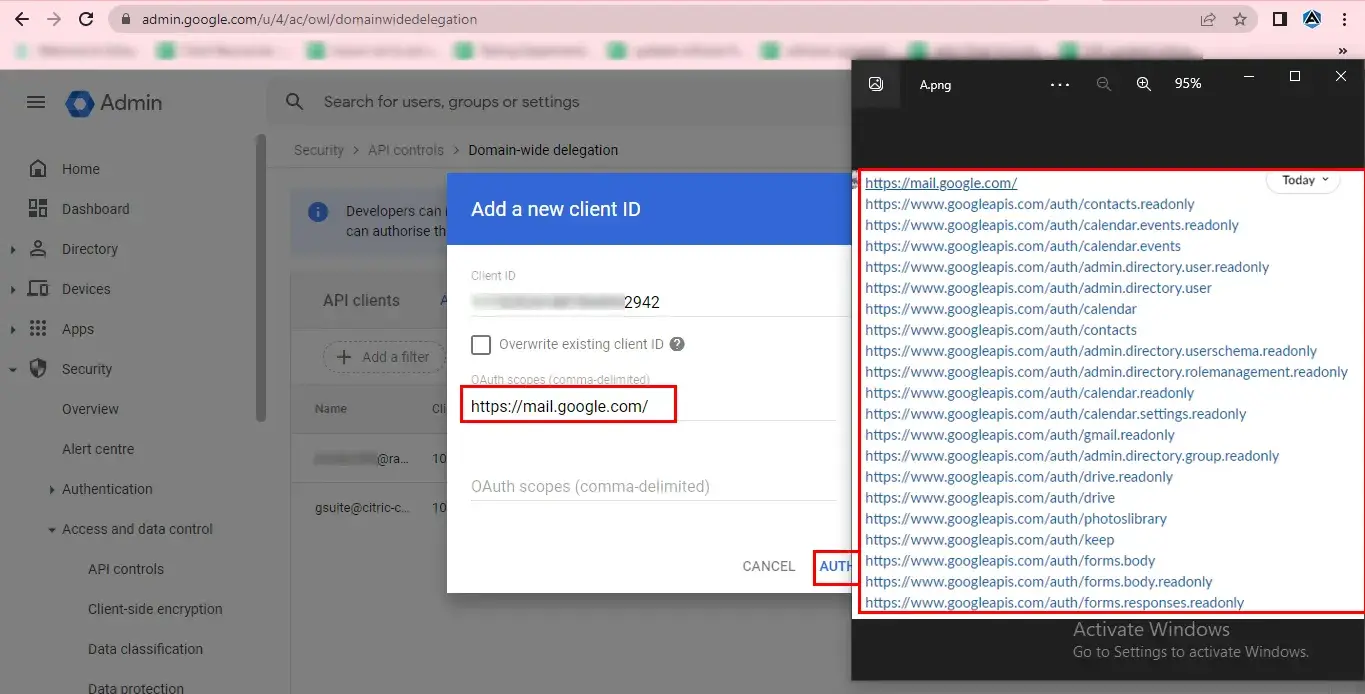
STEP 29
After that, you must add different scopes here and click the AUTHORIZE button.
Copy all the OAuth scopes listed below and paste them into the OAuth Scopes (Comma-delimited) section. Then, click the AUTHORIZE button.
- https://mail.google.com/
- https://www.googleapis.com/auth/contacts.readonly
- https://www.googleapis.com/auth/calendar.events.readonly
- https://www.googleapis.com/auth/calendar.events
- https://www.googleapis.com/auth/admin.directory.user.readonly
- https://www.googleapis.com/auth/admin.directory.user
- https://www.googleapis.com/auth/calendar
- https://www.googleapis.com/auth/contacts
- https://www.googleapis.com/auth/admin.directory.userschema.readonly
- https://www.googleapis.com/auth/admin.directory.rolemanagement.readonly
- https://www.googleapis.com/auth/calendar.readonly
- https://www.googleapis.com/auth/calendar.settings.readonly
- https://www.googleapis.com/auth/gmail.readonly
- https://www.googleapis.com/auth/admin.directory.group.readonly
- https://www.googleapis.com/auth/drive.readonly
- https://apps-apis.google.com/a/feeds/groups/
- https://www.googleapis.com/auth/admin.directory.group
- https://www.googleapis.com/auth/directory.readonly
- https://www.googleapis.com/auth/profile.agerange.read
- https://www.googleapis.com/auth/profile.emails.read
- https://www.googleapis.com/auth/profile.language.read
- https://www.googleapis.com/auth/user.emails.read
- https://www.googleapis.com/auth/user.gender.read
- https://www.googleapis.com/auth/user.organization.read
- https://www.googleapis.com/auth/user.phonenumbers.read
- https://www.googleapis.com/auth/userinfo.email
- https://www.googleapis.com/auth/userinfo.profile
- https://www.googleapis.com/auth/drive
- https://www.googleapis.com/auth/photoslibrary
- https://www.googleapis.com/auth/keep
- https://www.googleapis.com/auth/forms.body
- https://www.googleapis.com/auth/forms.body.readonly
- https://www.googleapis.com/auth/forms.responses.readonly
- https://www.googleapis.com/auth/chat.messages
- https://www.googleapis.com/auth/chat.messages.reactions
- https://www.googleapis.com/auth/chat.messages.reactions.create
- https://www.googleapis.com/auth/chat.messages.reactions.readonly
- https://www.googleapis.com/auth/chat.messages.readonly
- https://www.googleapis.com/auth/chat.spaces.readonly
- https://www.googleapis.com/auth/chat.spaces.create
- https://www.googleapis.com/auth/chat.spaces
- https://www.googleapis.com/auth/chat.memberships
- https://www.googleapis.com/auth/chat.memberships.app
- https://www.googleapis.com/auth/chat.delete
- https://www.googleapis.com/auth/chat.messages.create
Enable APIs in Google Cloud Console
STEP 30
Here, search gcp on Google search and click on the first one(containing the message Google Cloud Platform(GCP)- Tools And Modern Applications)
STEP 31
In the opening dashboard, click on the Console option.
STEP 32
Go to the Menu(three horizontal lines).
STEP 33
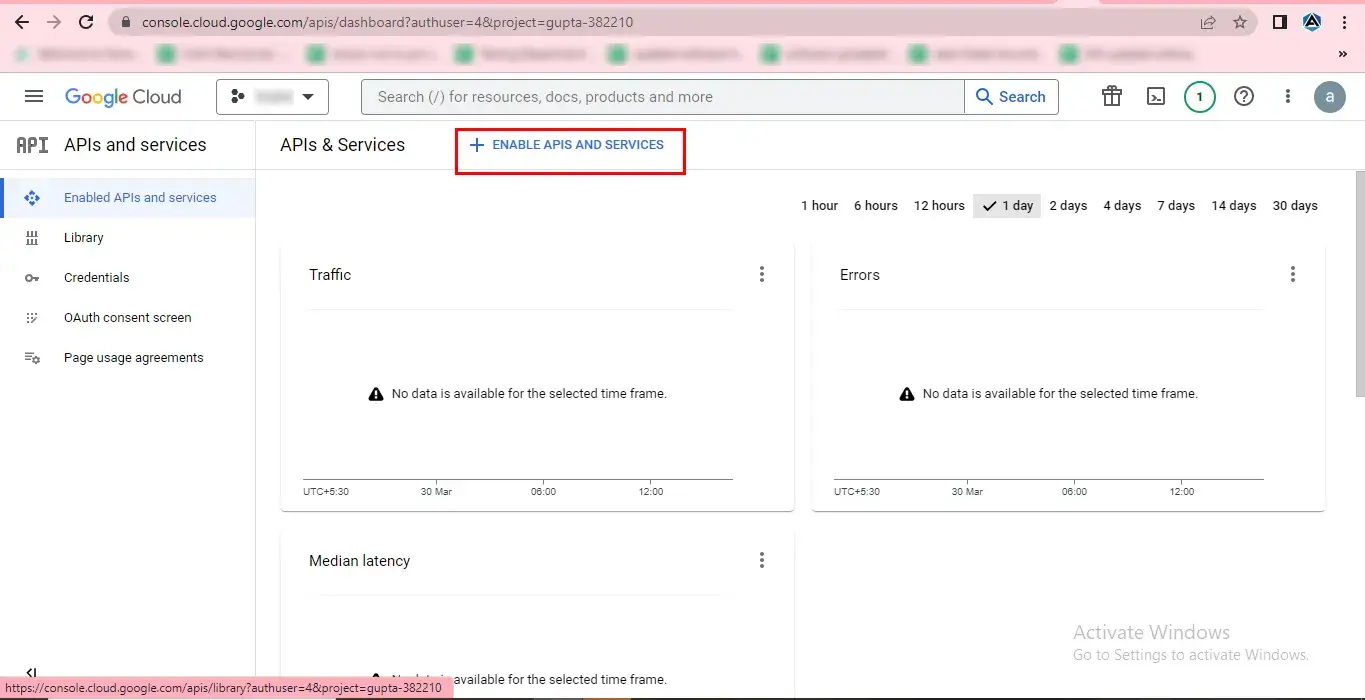
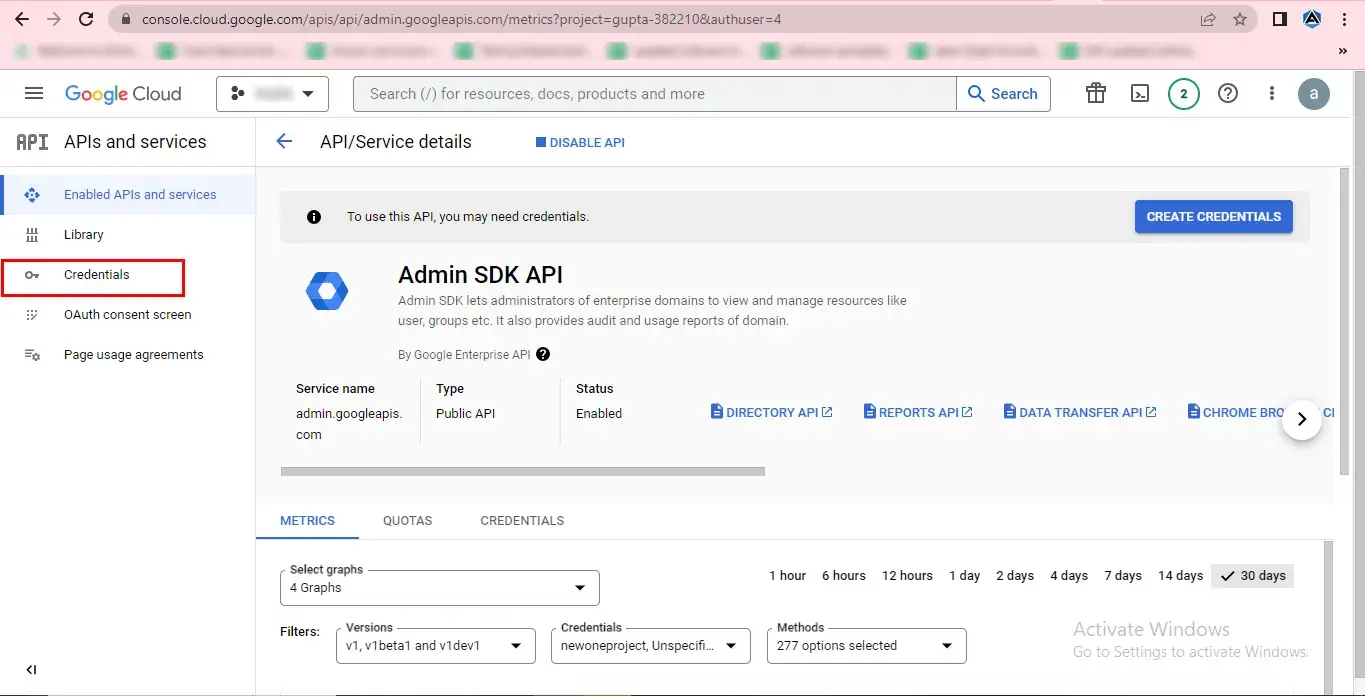
Opt for the APIs and service>>Enabled APIs and services.
STEP 34
Here, click on the ENABLE APIS AND SERVICES option.
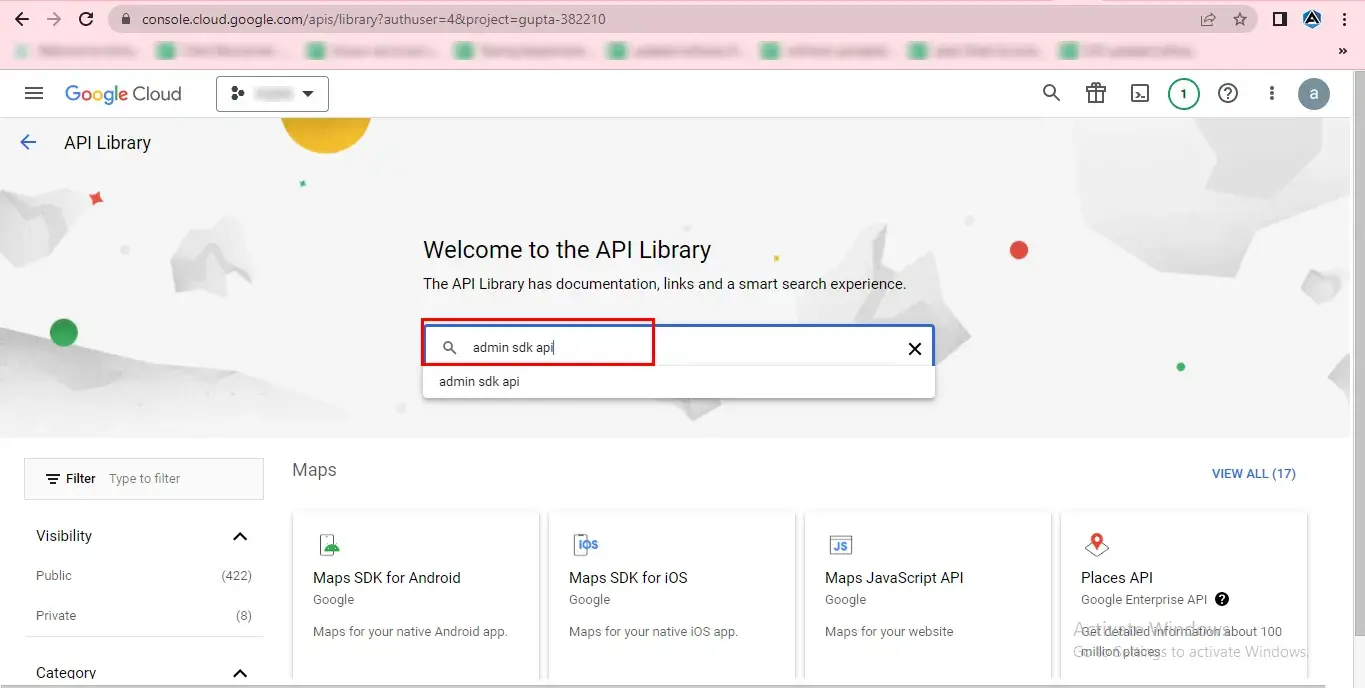
STEP 35
In the search box, open and Enable each library as given below:-
- Admin SDK API
- Google Drive API
- Gmail API
- Google Calendar API
- Google People API
- Contacts API
- Google Slides API
- Google Sheets API
- Google Docs API
- Google Forms API
- Google Keep API
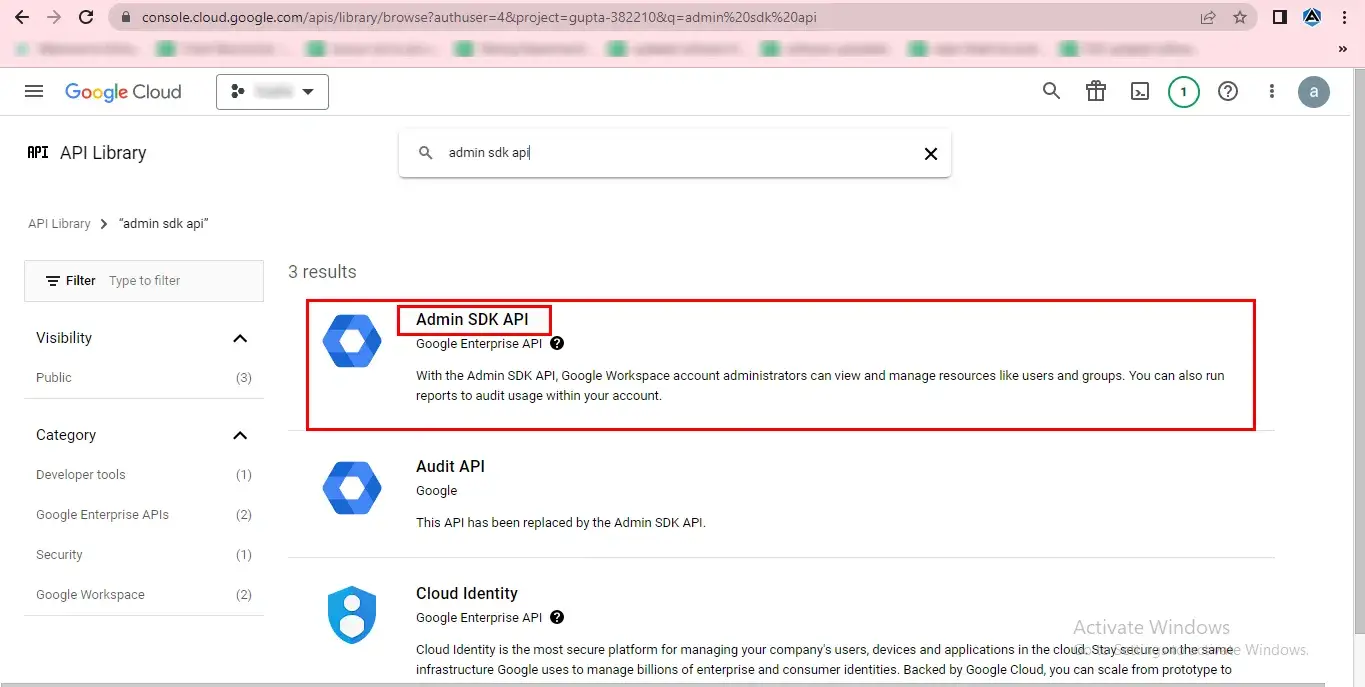
Steps to Open and Enable Admin SDK API
STEP 36
Once you find the Admin SDK API, click on it.
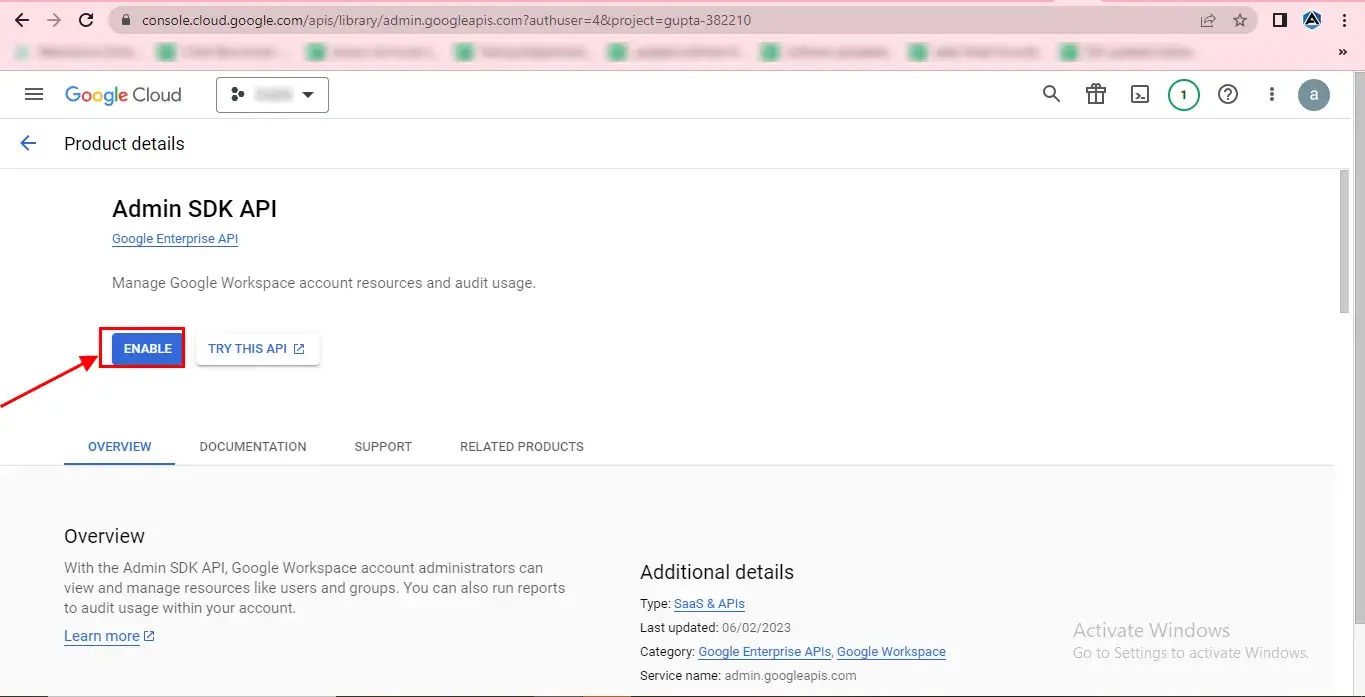
STEP 37
Now, you have to click on the ENABLE option.
STEP 38
Make sure to repeat the same steps again & again to enable all other APIs.
STEP 39
Go to the Menu(three horizontal lines) and click on the Credentials.
STEP 40
Click the edit icon.
STEP 41
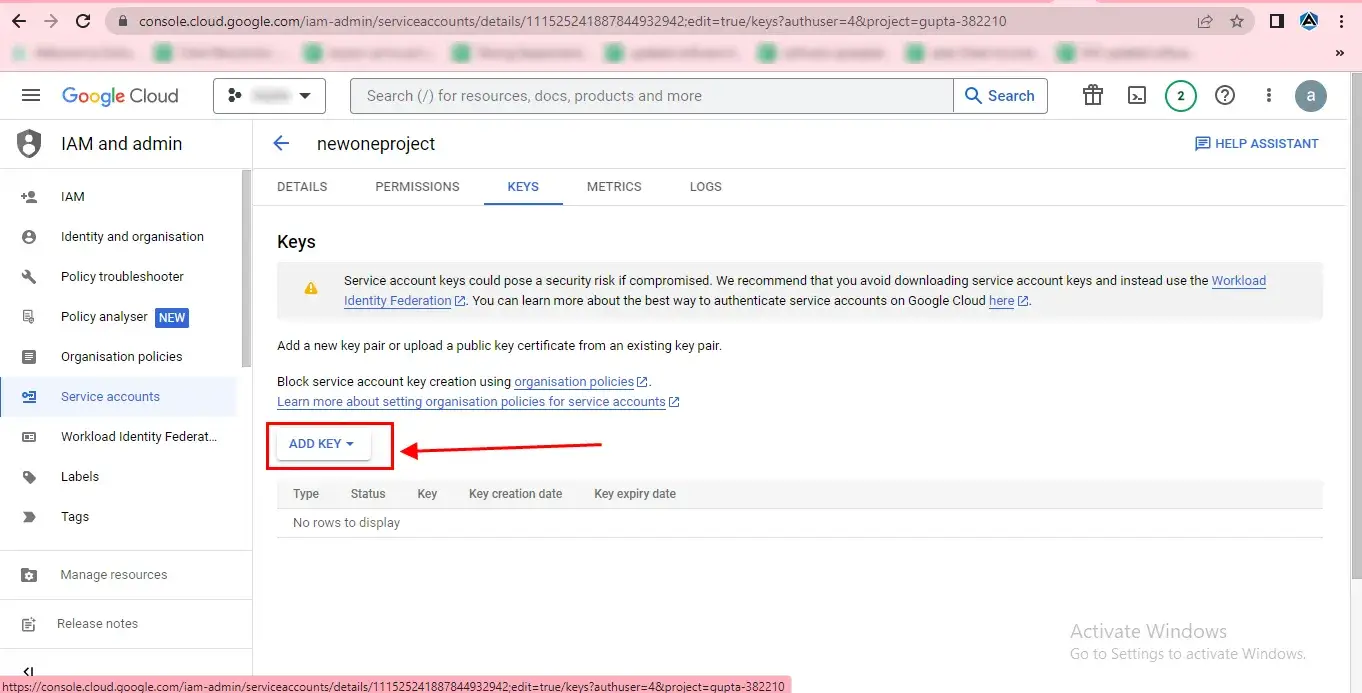
Go to the KEYS section.
STEP 42
Here, click the ADD KEY button.
STEP 43
Select the Create new key option.

STEP 44
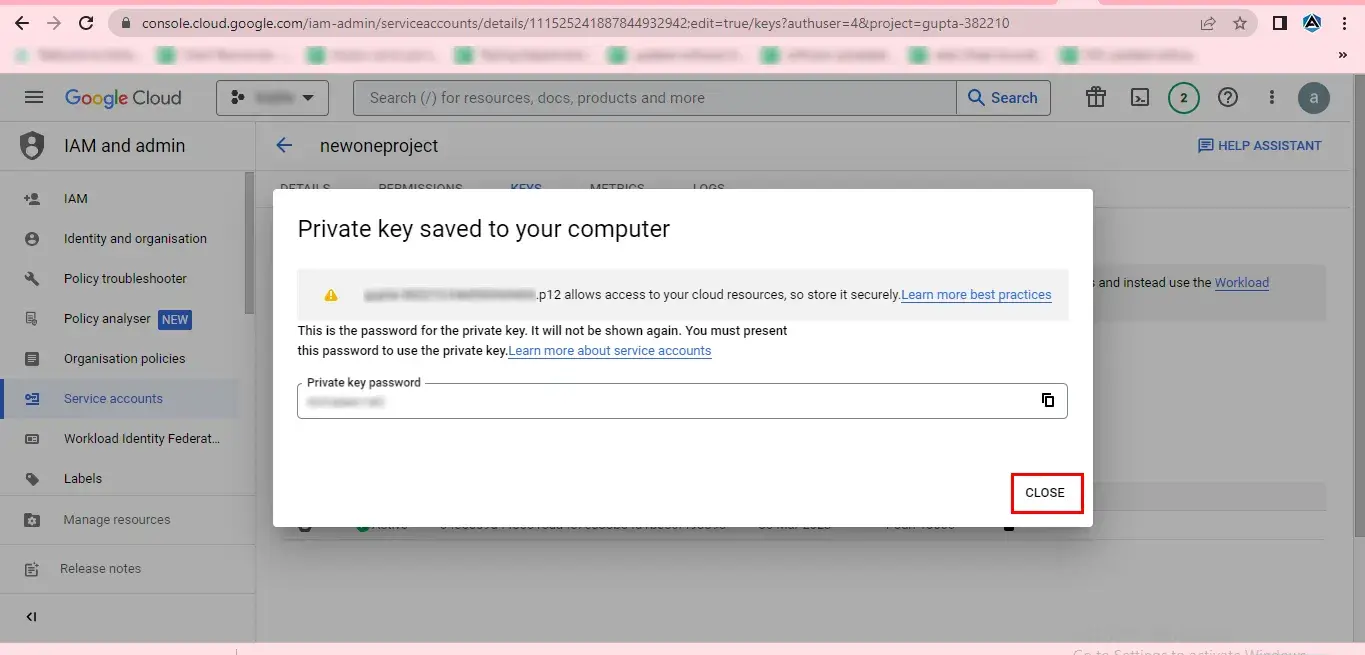
In the pop-up tab, choose the P12 as a key type and click the CREATE button.

STEP 45
Click CLOSE.
How to Generate a JSON File? Step-by-Step Guides
STEP 46
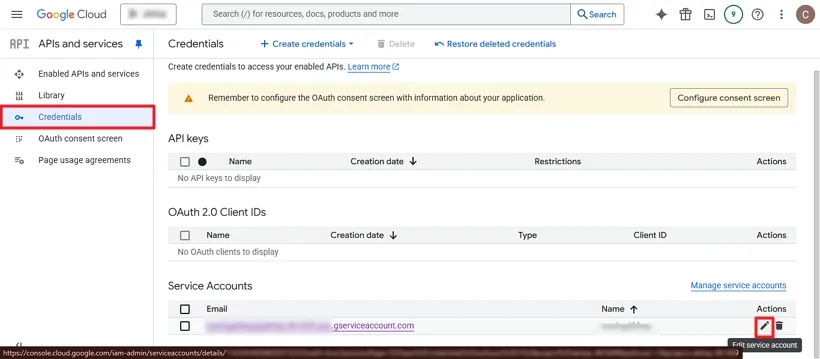
Click on the Credentials option, then select the Edit icon located on the left side
STEP 47
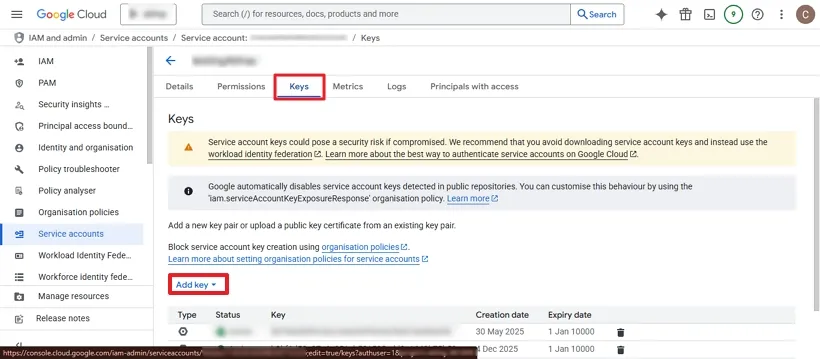
Now, go to the Keys tab at the top and choose Add Key.
STEP 48
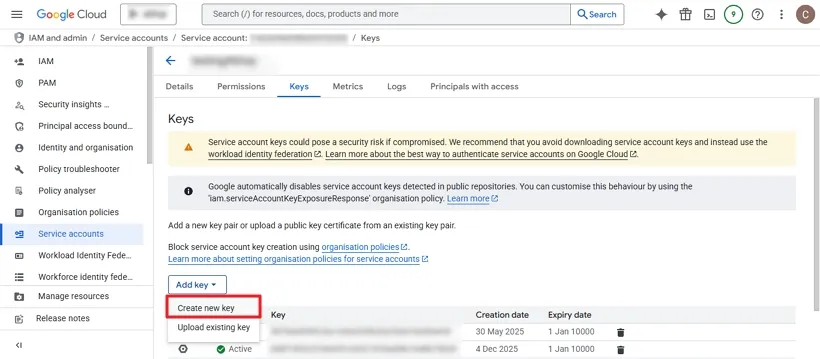
Click on Create a New Key.
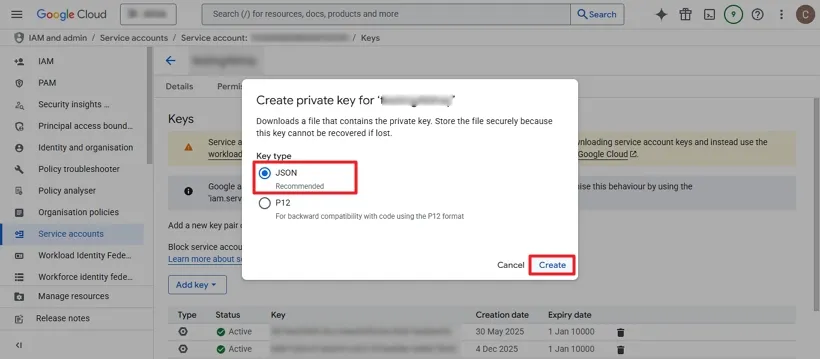
STEP 49
A dialog box will appear. Select JSON as the key type and click Create
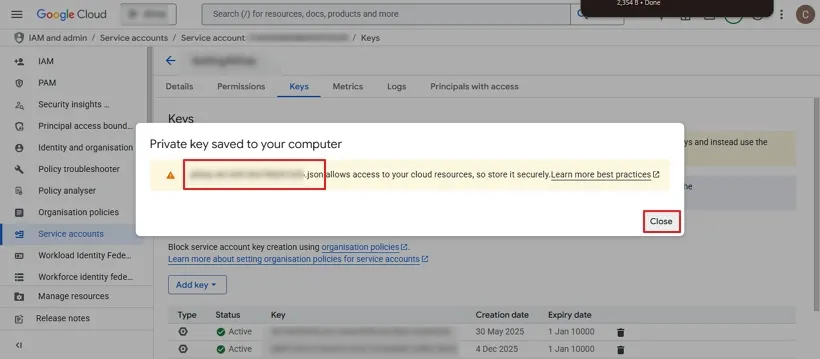
STEP 50
Your JSON key will now be generated successfully. Click Close to finish
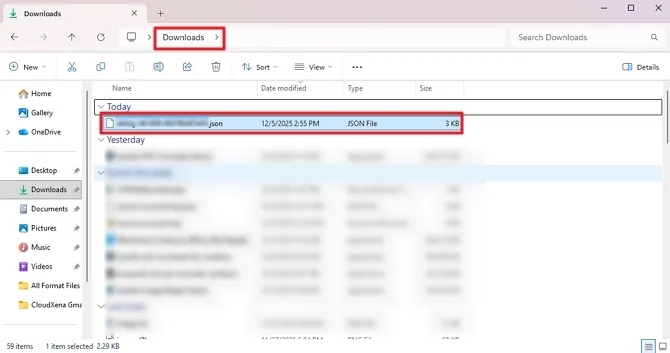
STEP 51
The JSON file will be downloaded automatically and saved to your system’s Downloads folder.