Aryson Google Workspace to Office 365 Migration Tool
-
Table of Content
- Software Working Process
- Activation Guide
- Installation & Uninstallation
- User Interface
Software Working Process
Software Working Process
Step 1: Download and install the Aryson Google Workspace to Office 365 Migration Tool.
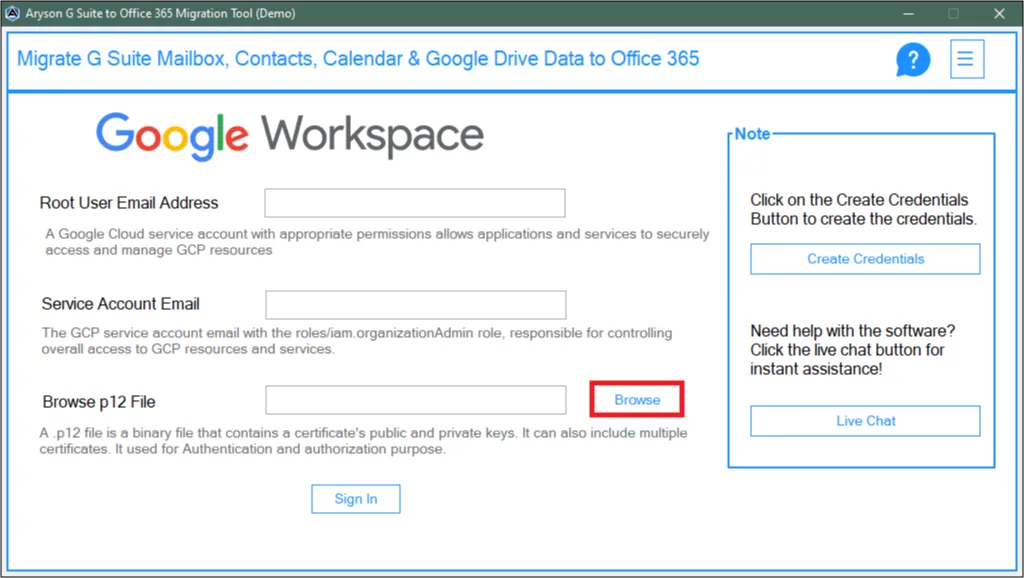
Step 2: Select the Mailbox Migration card under the Choose Migration Mode.
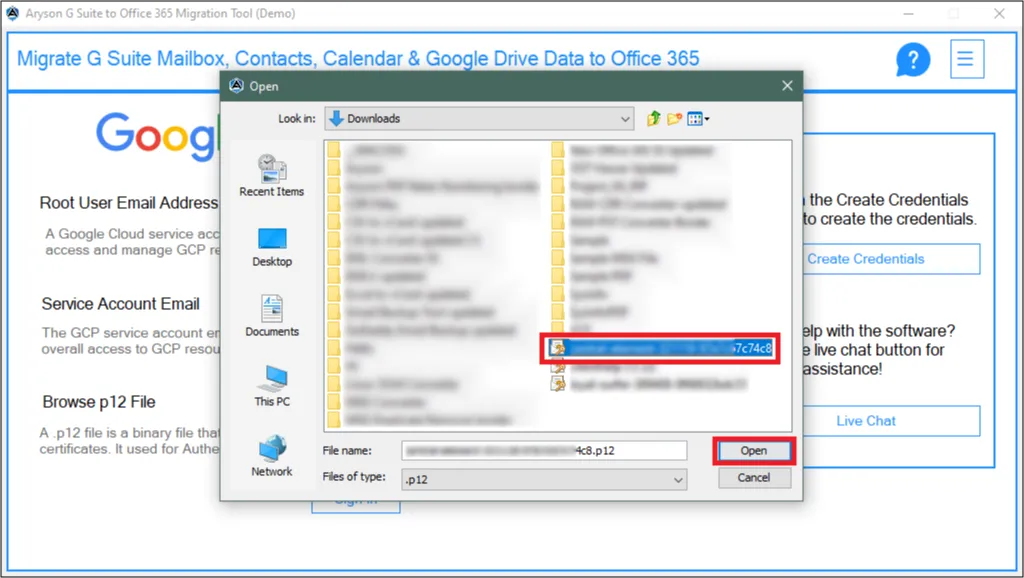
Step 3: Connect Your Gmail Account
The software provides three authentication methods to connect to your Gmail or Google Workspace account. Choose among the A, B, and C migration methods.
Step 3(A): Log in via OAuth 2.0 / Modern Authentication
- Select OAuth 2.0 / Modern Auth.
- Enter the Gmail email address.
- Provide the Client ID and Client Secret generated from the Google Cloud Console (optional).
- If you do not have your own OAuth credentials, enable "I don't have a Client ID & Client Secret".
- (Optional) Enable Remember this account for future logins.
- Click Continue with Google.
- Sign in to your Google account and grant the required permissions.
- The mailbox will be authenticated and added to the software.
Step 3(B): Login via IMAP + App Password
- Select IMAP + App Password.
- Enter the Gmail email address.
- Enter the 16-character Google App Password.
- (Optional) Enable Remember this account for future logins.
- Click Continue with IMAP.
- The software verifies the credentials and connects to the mailbox.
- You can also use Batch Mode to authenticate multiple Gmail accounts using a CSV file.
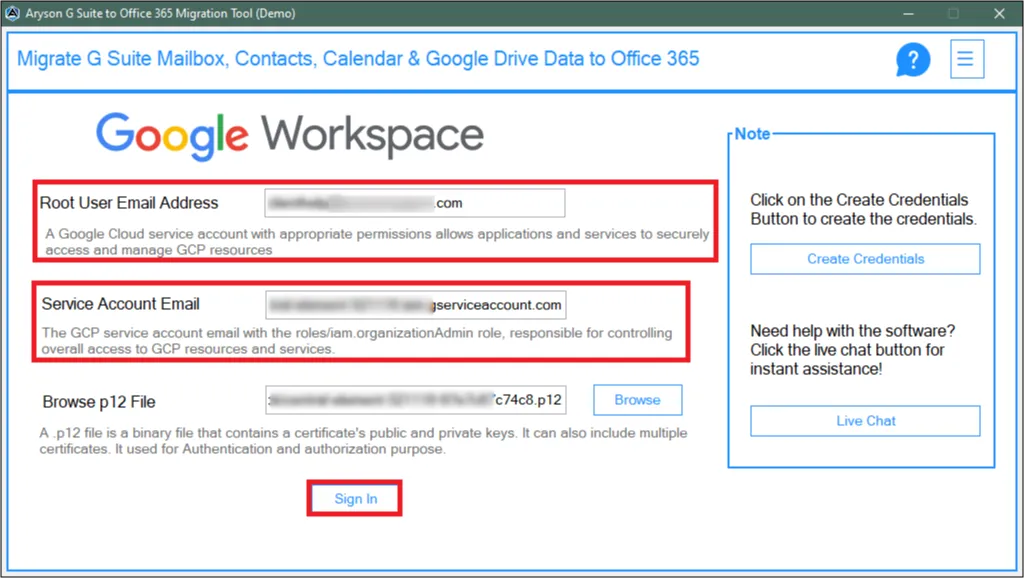
Step 3(C): Log in via Google Workspace Admin (DWD)
- Select Workspace Admin (DWD).
- Enter the Google Workspace Admin email address.
- Choose the credential type:
- JSON Key File
- P12 Key File
- Click Browse and upload the JSON key file.
- (Optional) Enable Remember this account for future logins.
- Click Connect Workspace.
- The software authenticates the Google Workspace domain and loads available user mailboxes.
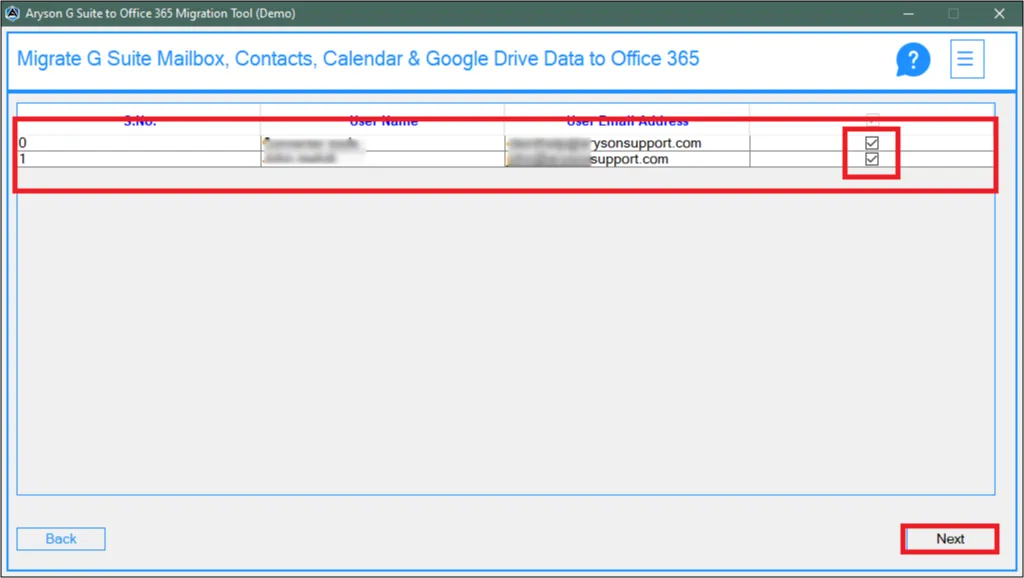
Step 4: Select Gmail Mailbox for Backup
The software displays all available Gmail mailboxes retrieved from the connected account.
- Select the required mailbox using the checkbox.
- Use Search by Email to quickly find a specific mailbox.
- Review selected mailboxes in the Selected Mailboxes panel.
- Click the Remove (X) icon to remove any mailbox from the selection.
- Verify the license status of the selected mailbox.
- Check the total number of selected mailboxes at the bottom-right corner.
- Click Continue to proceed to the Folder Hierarchy section.
Step 5:Select Gmail Folders for Backup
The software displays all available Gmail folders and labels from the selected mailbox.
- Select the required folders using the checkbox beside each folder.
- Choose All Mails to back up the entire mailbox.
- Use the Search Folders box to quickly locate a specific folder or label.
- Click Show Count to view the number of emails available in a folder.
- Select default Gmail folders such as Inbox, Sent, Drafts, Spam, Trash, and custom labels and others as needed.
- Use the navigation controls(Prev and Next) to browse additional folders and labels.
- Click Continue to proceed to the Export Format and Filters section.
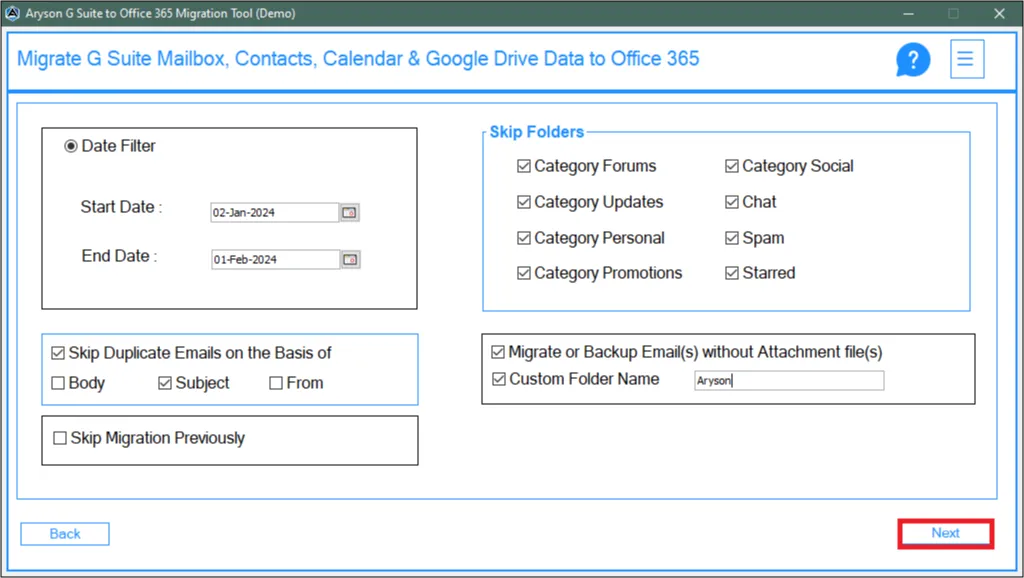
Step 6: Select Microsoft 365 as the destination
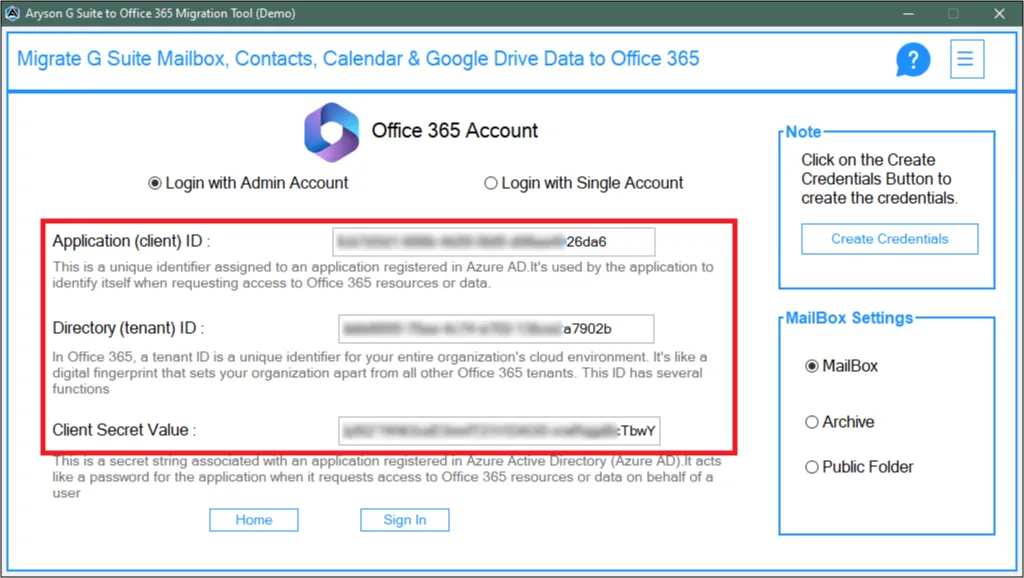
- Go to the Email Client section and select Microsoft 365 as the destination platform.
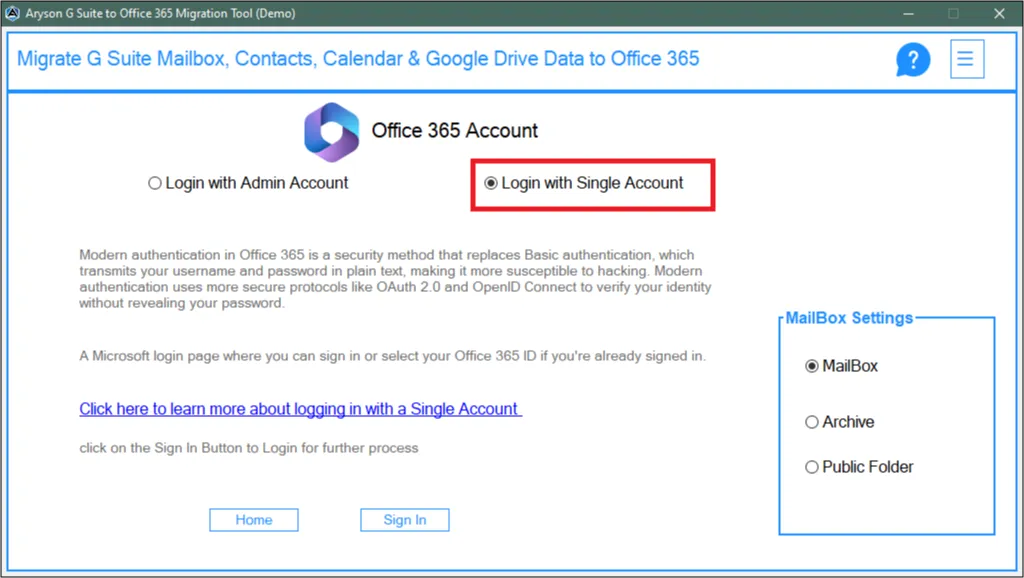
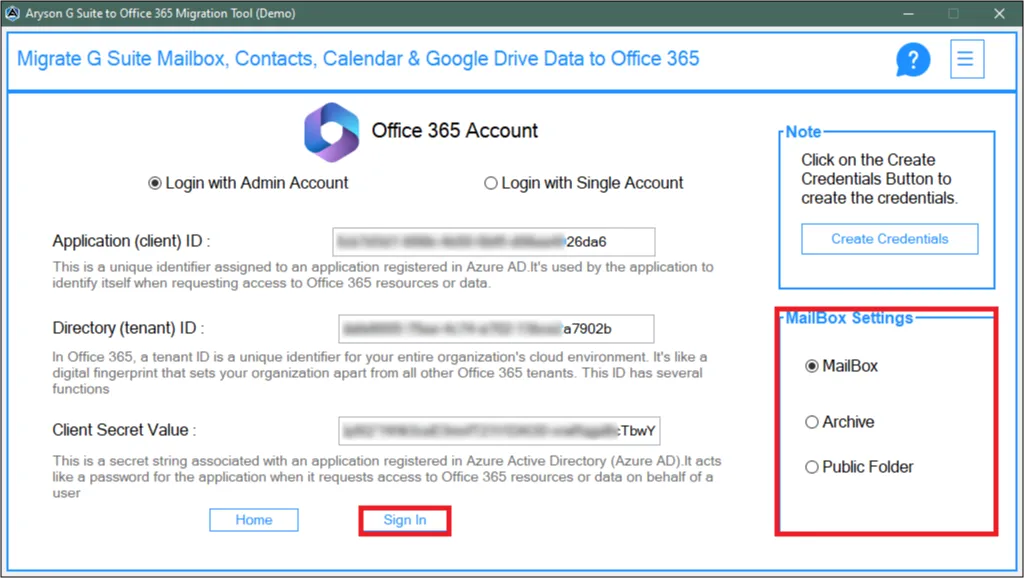
- You can choose the single-user or admin-user login method.
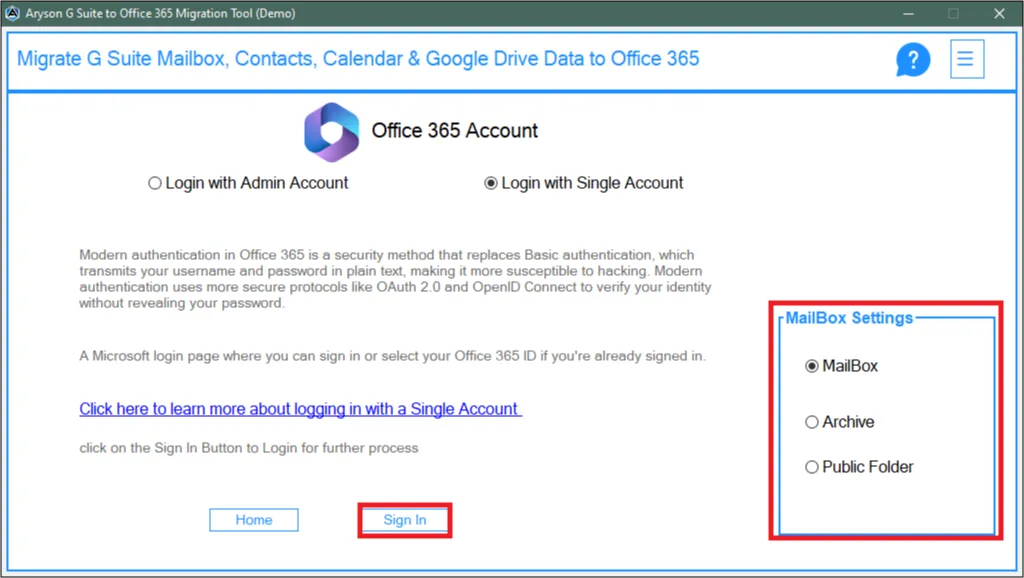
Step 7: Connect the Microsoft 365 Account
Select the Add connection option, enter the Microsoft 365 account credentials, and complete the authentication process. After successful login, the software validates and connects to the destination mailbox.
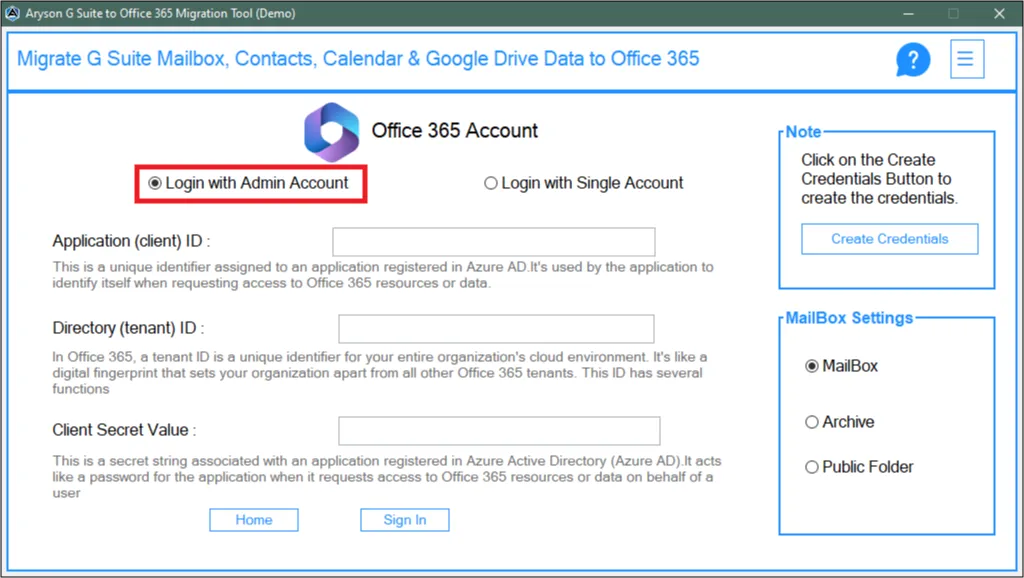
Step 8: Configure Migration Filters – Microsoft 365 Destination
Before starting the Gmail to Microsoft 365 migration, configure the required filters and settings as needed.
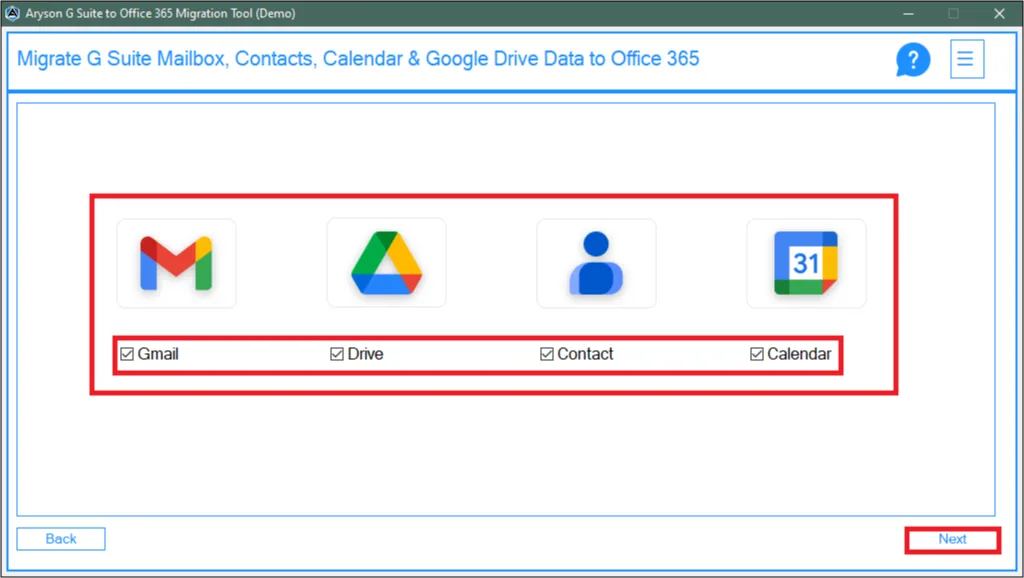
- Item Types: Select the mailbox items to migrate, including Emails, Contacts, Calendars, and Tasks.
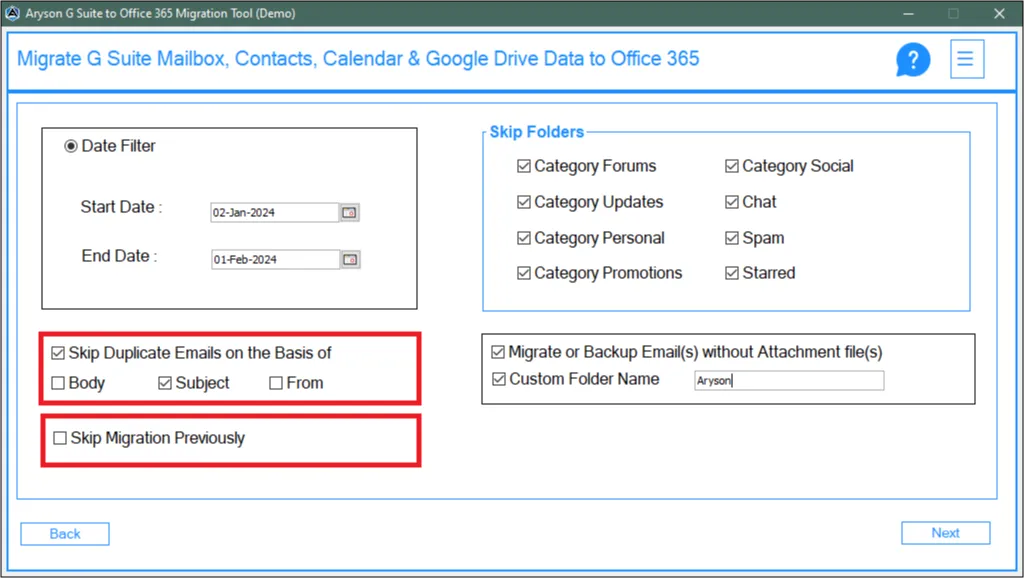
- Resume Migration: Enable Skip Previously Migrated Items to avoid re-migrating data that has already been transferred.
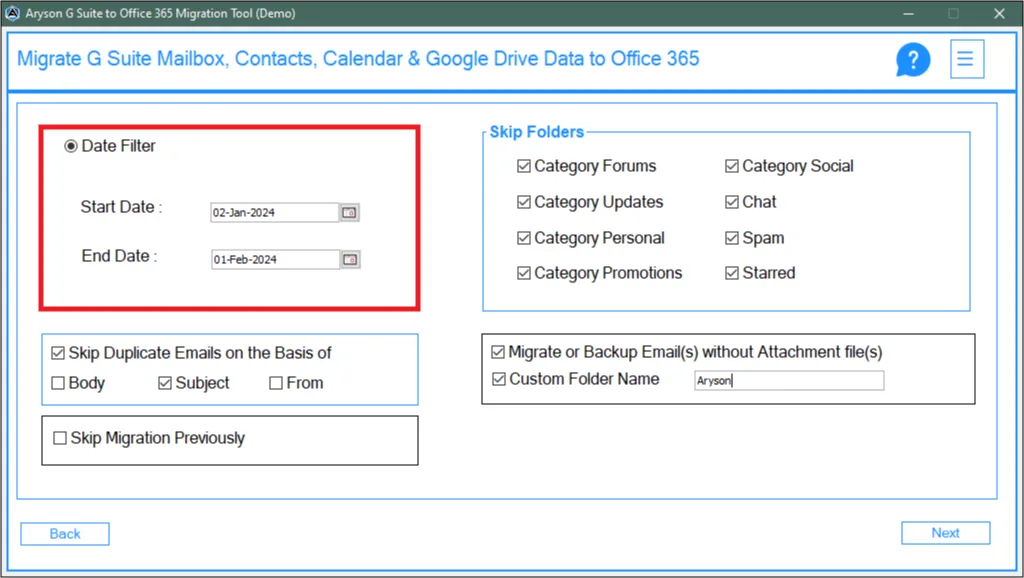
- Date Range Filter: Migrate only emails within a specific date range by selecting the Start Date and End Date.
- Advanced Gmail Filter: Migrate specific emails based on criteria such as From, To, Subject, CC, BCC, or Message Content.
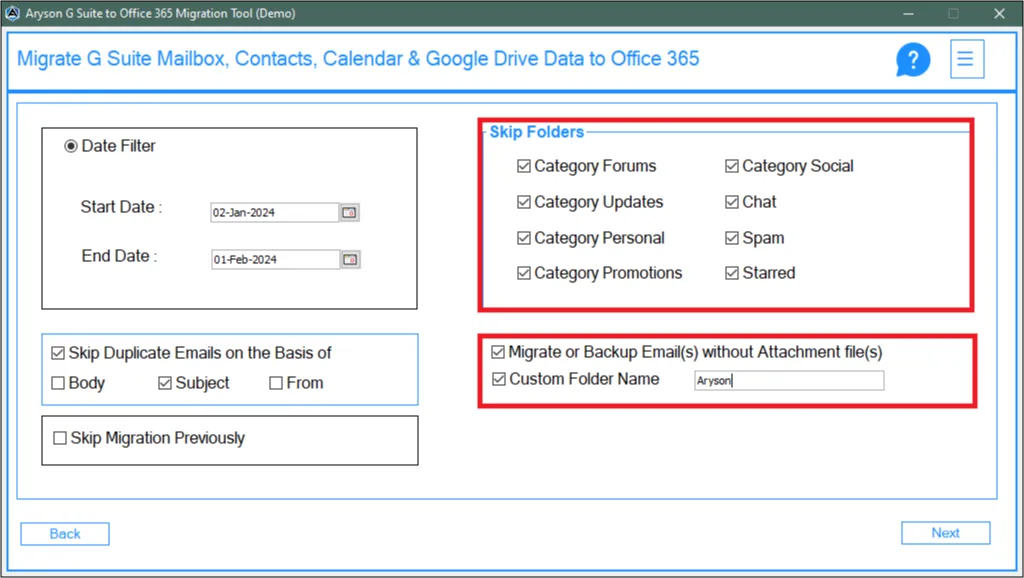
- Skip Folders: Exclude Gmail categories such as Promotions, Social, Forums, Updates, Personal, and Unread from the migration.
- Duplicate Handling: Remove duplicate emails based on selected fields such as Subject, From, To, CC, and Body.
- Preserve Folder Hierarchy: Maintain the original folder structure of emails and mailboxes throughout the migration to Microsoft 365.
- Attachment Options: Choose whether to migrate emails with attachments, skip attachments, or save attachments separately.
- Custom Folder Name: Define a custom name for the destination folder in the target Microsoft 365 mailbox.
- Exclude Empty Folders: Skip folders that do not contain any mailbox items.
- Exclude Deleted/Spam Folders: Prevent deleted or junk email folders from being included in the migration.
- Free Up Server Space: Move or permanently delete emails from the source mailbox after successful migration (optional) — choose Move to Bin or Delete Permanently.
- Save Contacts As VCF: Export contacts separately in VCF format.
- Save Calendar As ICS: Export calendar items separately in ICS format.
Step 9: Start the Gmail to Microsoft 365 migration
After reviewing all settings, click Start Migration to begin transferring Gmail data to Microsoft 365. The software starts migrating the selected mailbox data immediately.
Step 10: Monitor the Migration Progress
Track the real-time migration status, including migrated emails, contacts, calendars, tasks, skipped items, and failed items. The progress bar provides a live overview of the migration process.
Step 1: Download and install the Aryson Google Workspace to Office 365 Migration Tool.
Step 2: Select the Google Drive Migration card under the Choose Migration Mode.
Step 3: Connect Your Google Workspace Account
The software provides two authentication methods to connect to your Google Drive account. Choose between the A and B migration methods.
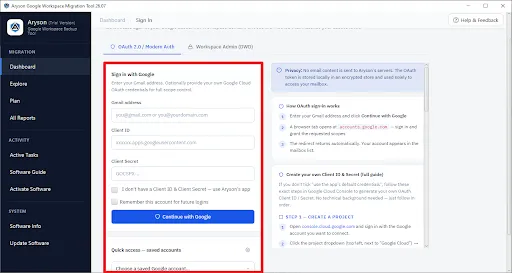
Step 3(A): Log in via OAuth 2.0 / Modern Authentication
- Select OAuth 2.0 / Modern Auth.
- Enter the Gmail email address.
- Provide the Client ID and Client Secret generated from the Google Cloud Console (optional).
- If you do not have your own OAuth credentials, enable "I don't have a Client ID & Client Secret."
- (Optional) Enable Remember this account for future logins.
- Click Continue with Google.
- Sign in to your Google account and grant the required permissions.
- The account will be authenticated and added to the software.
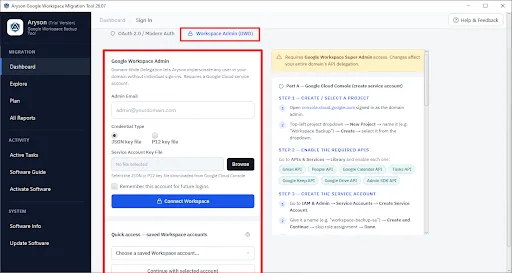
Step 3(B): Log in via Google Workspace Admin (DWD)
- Select Workspace Admin (DWD).
- Enter the Google Workspace Admin email address.
- Choose the credential type:
- JSON Key File
- P12 Key File
- Click Browse and upload the JSON key.
- (Optional) Enable Remember this account for future logins.
- Click Connect Workspace.
- The software authenticates the Google Workspace domain and loads available user accounts.
- This method is recommended for bulk Google Drive backup and migration.
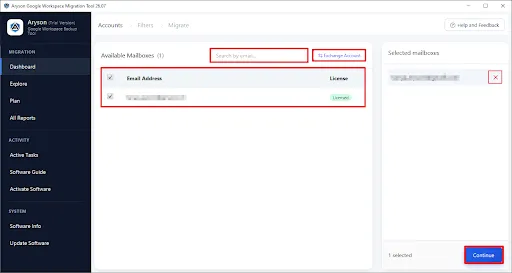
Step 4: Select Users for Google Drive Migration
- The software displays all available users retrieved from the connected account.
- Select the required user(s) using the checkbox.
- Use Search by Email to quickly find a specific user.
- Review selected users in the Selected Users panel.
- Click the Remove (X) icon to remove any user from the selection
- Verify the license status of the selected user.
- Check the total number of selected users in the bottom-right corner.
- Click Continue to proceed to the Filters section.
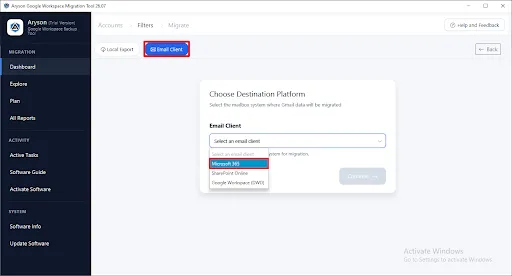
Step 5: Select Microsoft 365 (OneDrive) as the Destination
- Go to the Email Client section and select Microsoft 365 as the destination platform.
- You can choose the single-user or admin-user login method.
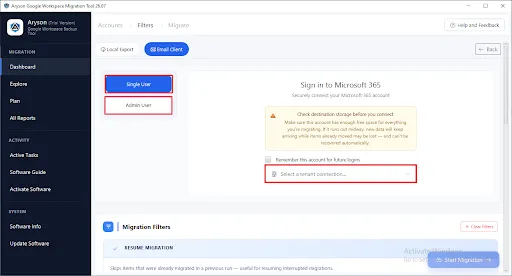
Step 6: Connect the Microsoft 365 Account
Select the Add Connection option, enter the Microsoft 365 account credentials, and complete the authentication process. After successful login, the software validates and connects to the destination account.
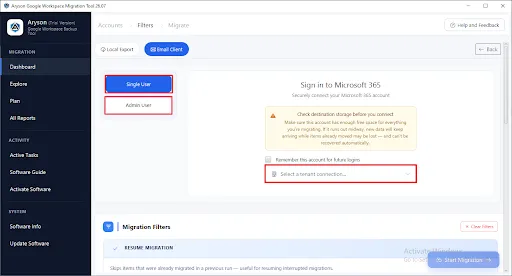
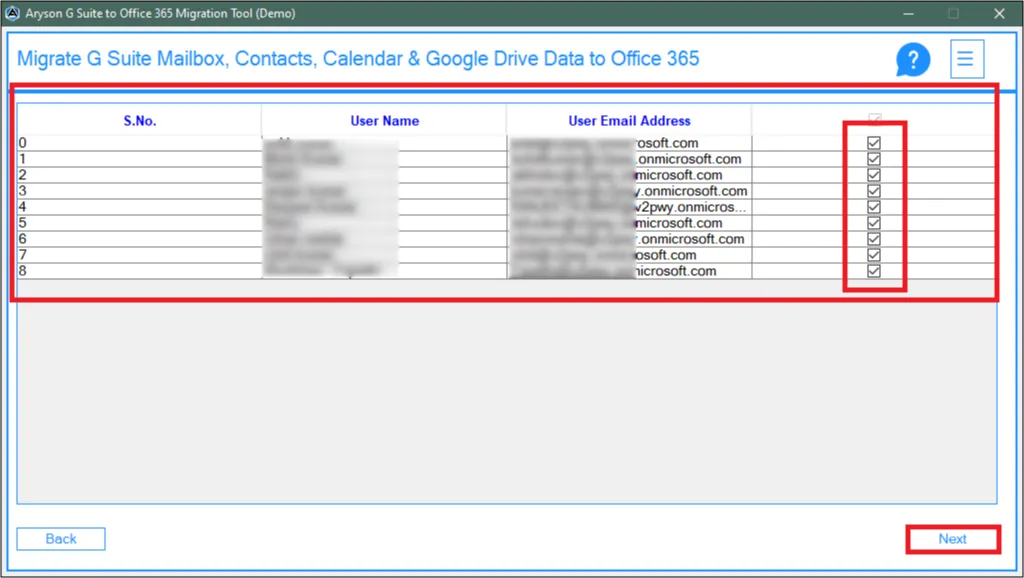
- If selected Admin Login:
- Click on the “Add connection” button to connect to a Microsoft 365 account.
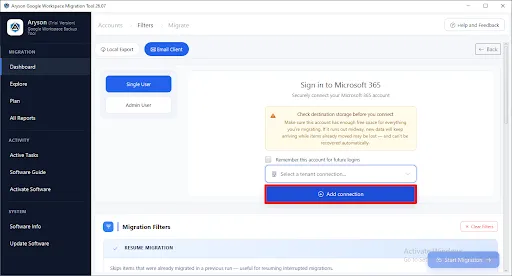
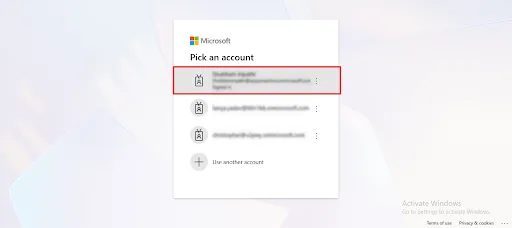
- Enter the required email address and password to log in or select the desired account to log in in the browser window.
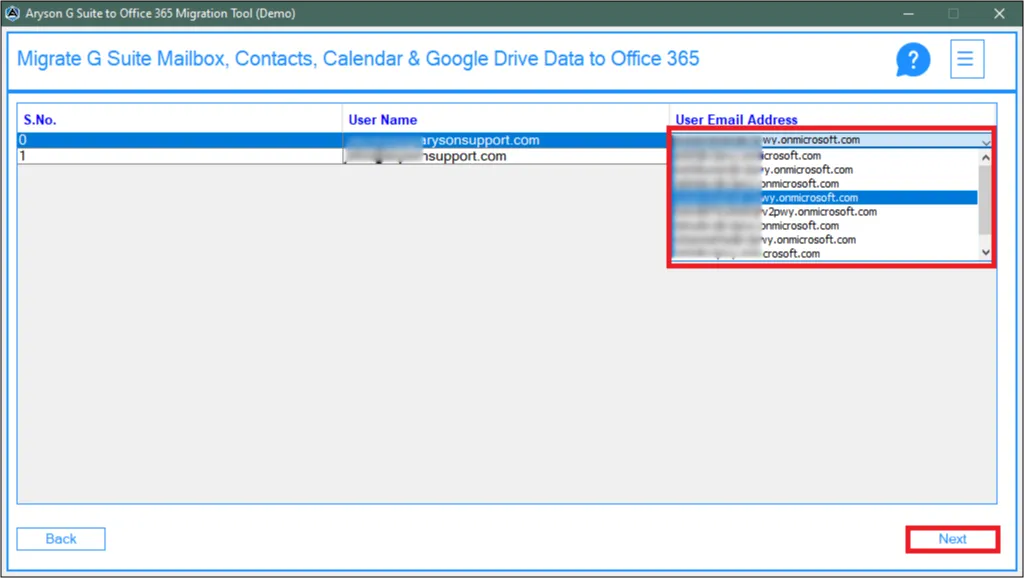
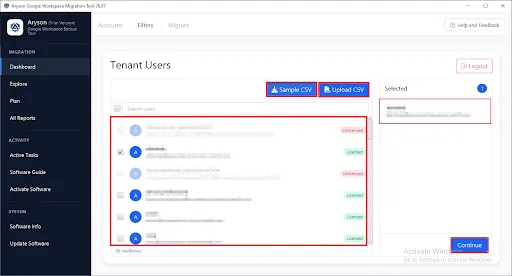
- After authentication, select the required mailboxes or use the CSV import option to import mailboxes.
- Select the source and destination mailboxes to map and click Map selected.
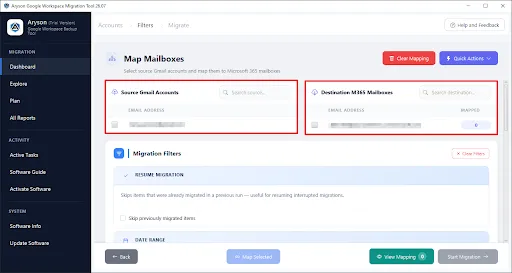
- Click View Mapping to review all configured mappings before proceeding.
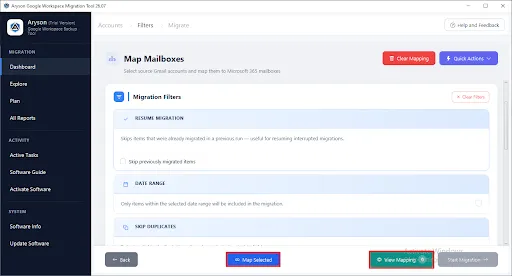
- Click on the “Add connection” button to connect to a Microsoft 365 account.
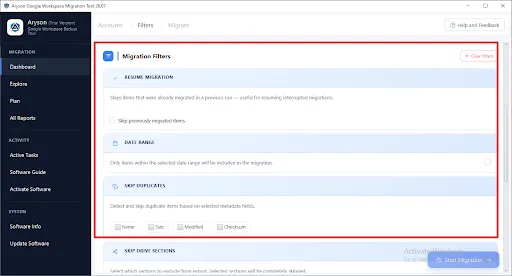
Step 7: Configure Migration Filters (Optional) – Microsoft 365 Destination
Before starting the Google Drive to Microsoft 365 migration, configure the required filters and settings as needed.
- Resume Migration: Enable Resume Migration to skip previously migrated items and continue an interrupted migration.
- Date Range Filter: Migrate only the items that fall within a specific date range by selecting the Start Date and End Date.
- Skip Duplicates: Select the required duplicate-check criteria, such as Name, Size, Modified, or Checksum, to detect and skip duplicate files during migration.
- Skip Drive Sections: Choose the Google Drive sections you want to exclude from the migration, such as My Drive, Shared With Me, Trash, or Shared Drives.
- File Type Filter: Enable the File Type Filter option, then select specific Google Workspace file types such as Docs, Sheets, Slides, and Forms, or enter custom file extensions to migrate only the selected file types.
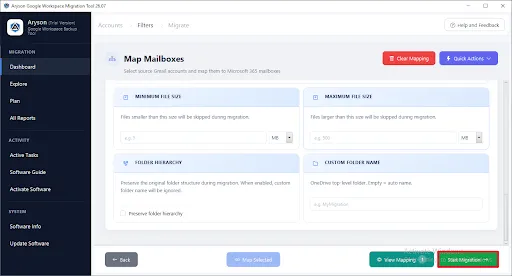
- Set Minimum File Size: Specify a minimum file size value (in MB or GB) to skip files smaller than the defined size during migration.
- Set Maximum File Size: Specify a maximum file size value (in MB or GB) to exclude files larger than the defined size from migration.
- Custom Folder Name: Specify a custom name for the folder where migrated data will be saved.
Step 8: Start the Google Drive to Microsoft 365 Migration
After reviewing all settings, click Start Migration to begin transferring Google Drive data to the Microsoft 365 destination. The software starts migrating the selected Drive data immediately.
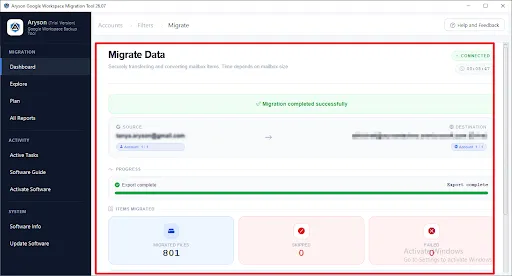
Step 9: Monitor the Migration Progress
Track the real-time migration status, including migrated files, skipped items, and failed items. The progress bar provides a live overview of the migration process.
Activation Guide
Activate the Software
Installation & Uninstallation
Installation & Uninstallation of Software
User Interface
User Interface
After downloading the Aryson Google Workspace to Office 365 Migration Tool, you will find the welcome screen as played below.