Software Guide - Aryson Webmail Backup Tool
-
Table of Content
- Software Working Process
- Activation Guide
- Installation & Uninstallation
- User Interface
Software Working Process
Software Working Process
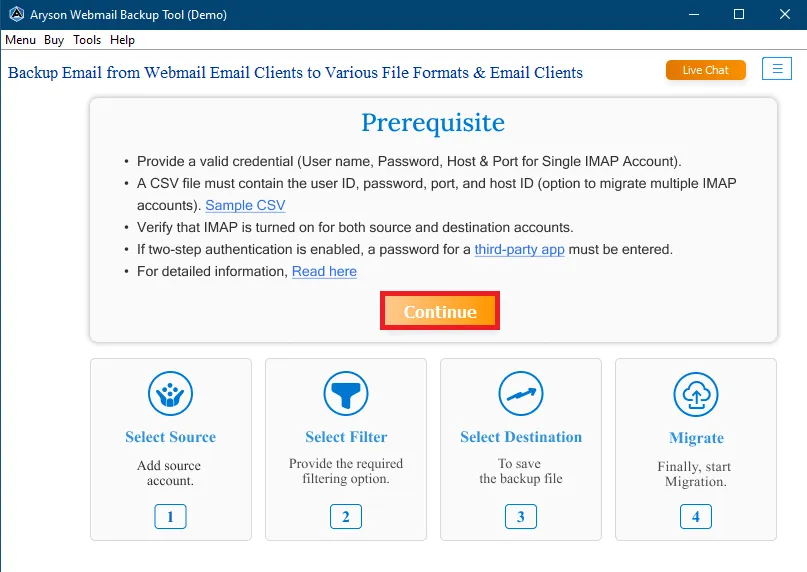
Step 1: Download, Install, and Run the Aryson Webmail Backup Tool on your local machine and click Continue.
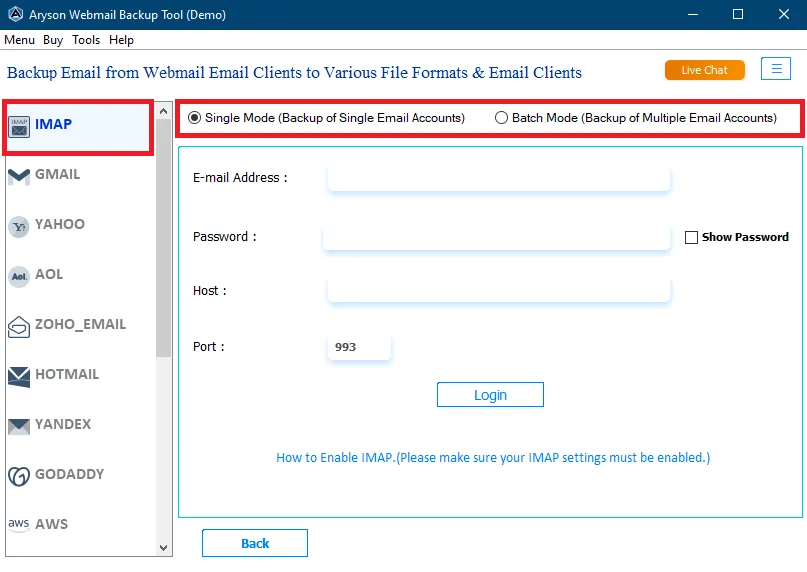
Step 2: Select the Webmail Account here we are moving with IMAP, and then choose Single Mode or Batch Mode.
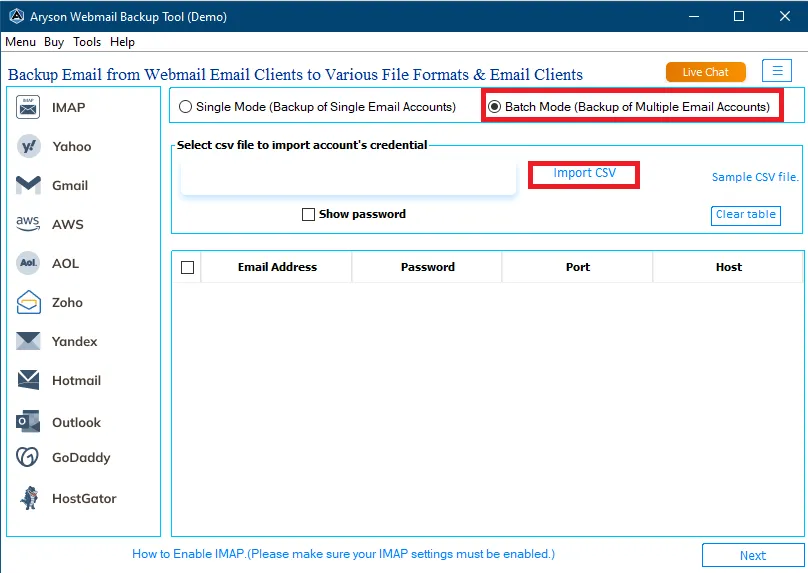
Step 3: Here we are choosing the Batch Mode, to add the User IDs click on the Import CSV button.
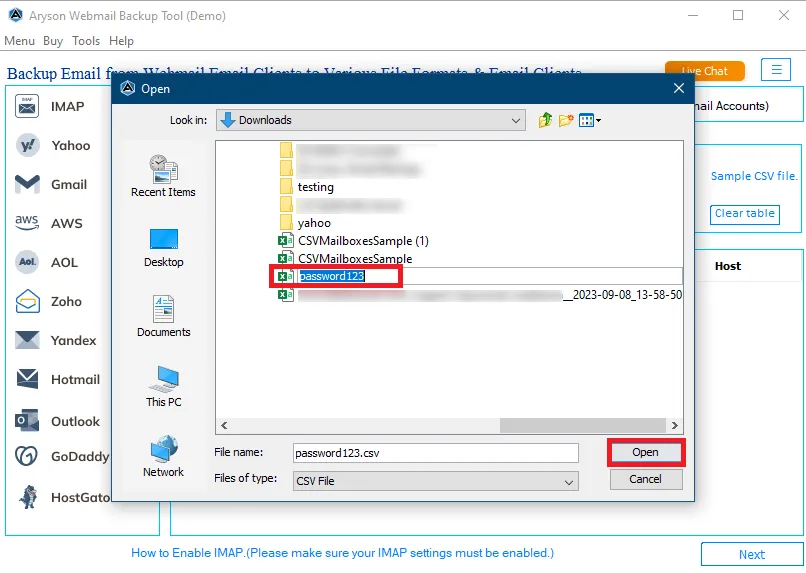
Step 4: Select the CSV file from your system and click Open.
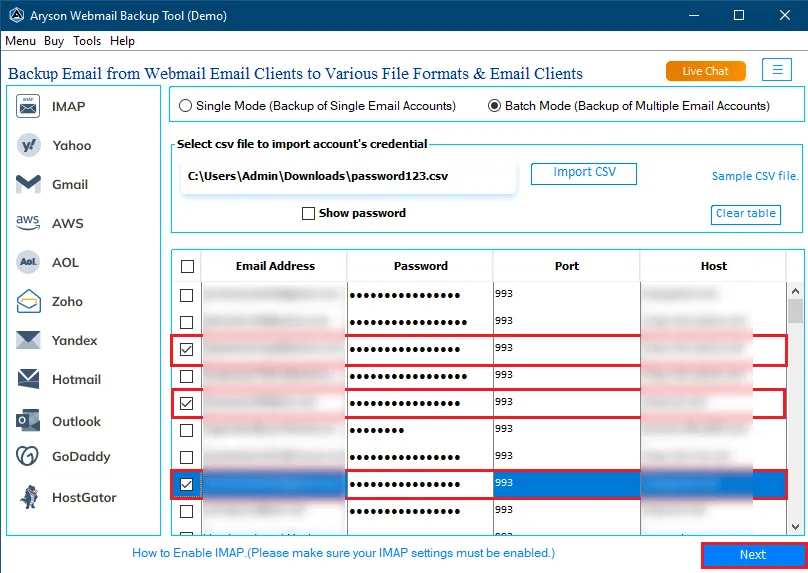
Step 5: After adding the IDs, the software will show all your webmail accounts in the table below.
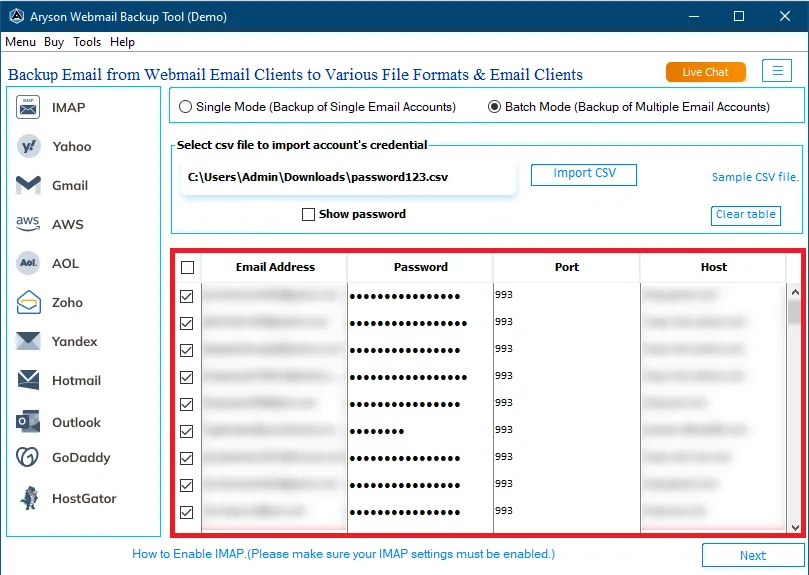
Step 6: Check the email accounts you require and click on the Next button.
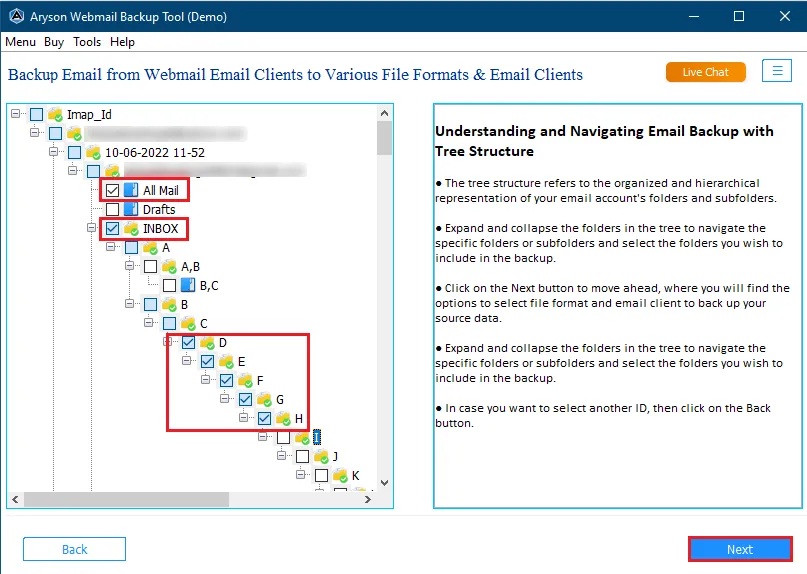
Step 7: Here, you can select the folder as per the requirement of backup and leave others if don’t need them, and then click Next.
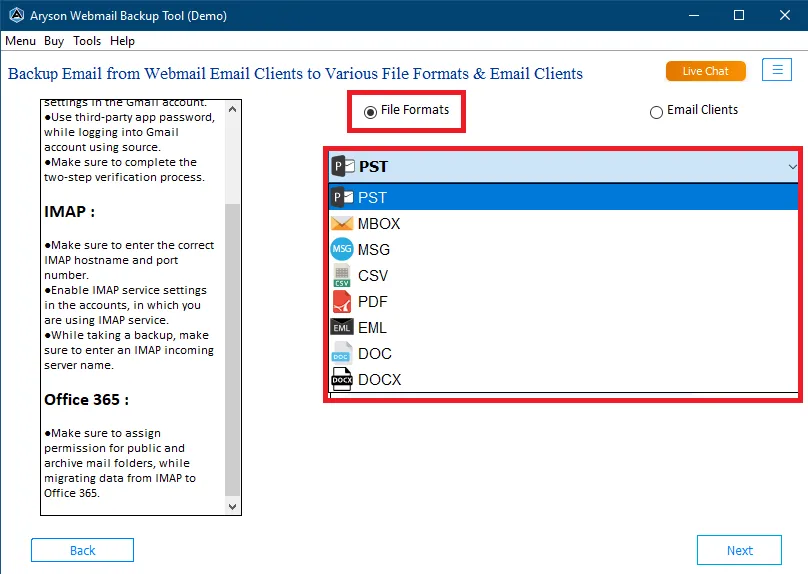
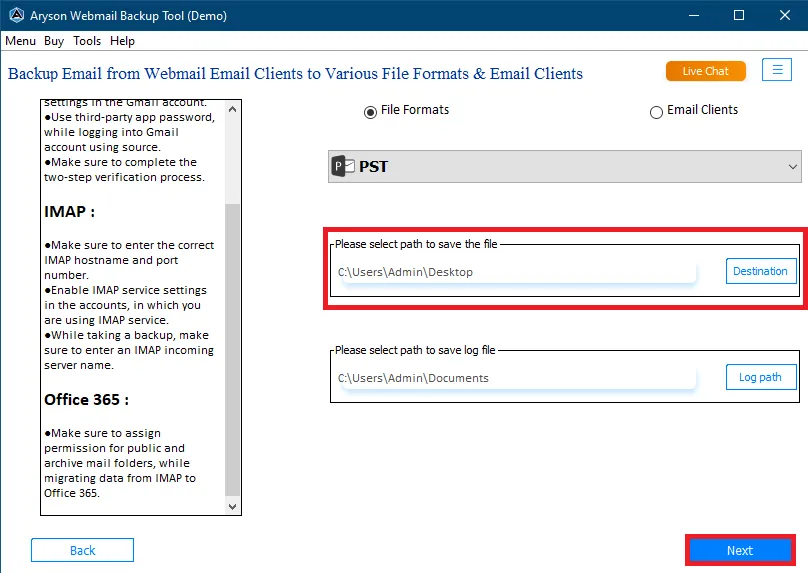
Step 8: From the drop-down menu choose the saving format, we are going with the PST file format.
Step 9: Click on the Destination button to assign a location to save the resultant file and click Next.
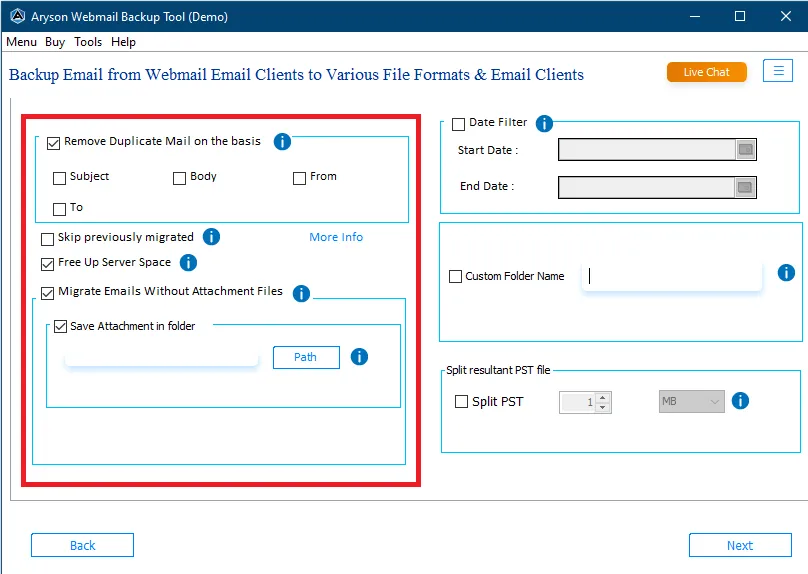
Step 10: Choose the features such as:
- Remove Duplicate Mail on the basis: By choosing this option you can skip the identical email on the basis of Subject, Body, From, and To.
- Skip Previously Migrated: This feature allows you to migrate emails that were not transferred before which helps to prevent duplicates.
- Free Up Server Space: It helps users to free up space on their webmail server.
- Migrated Emails Without Attachments Files: If you want to migrate emails without their attachments then select this option.
- Save Attachment in Folder: This feature helps you save attachment files into a different folder.
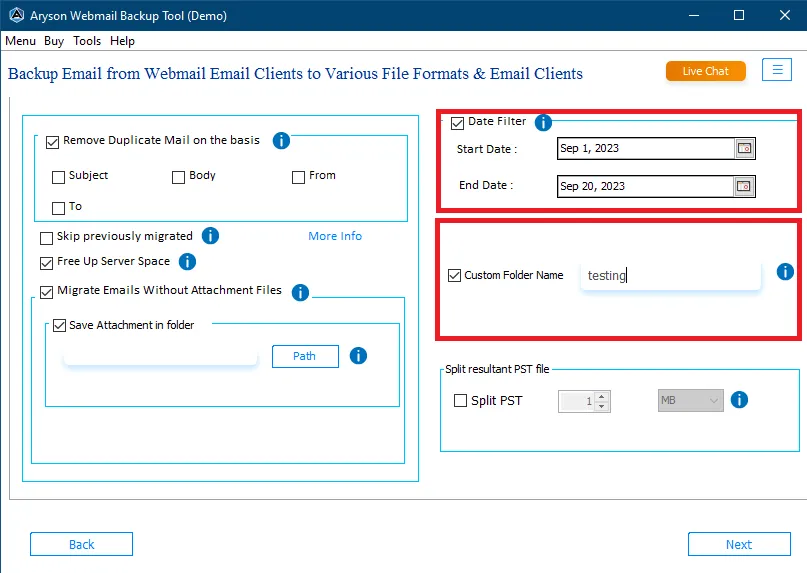
Step 11: If you want to backup specific emails according to date range then select Date Filter opinion. Also, you can assign a desired name for your file by using the Custom Folder Name feature.
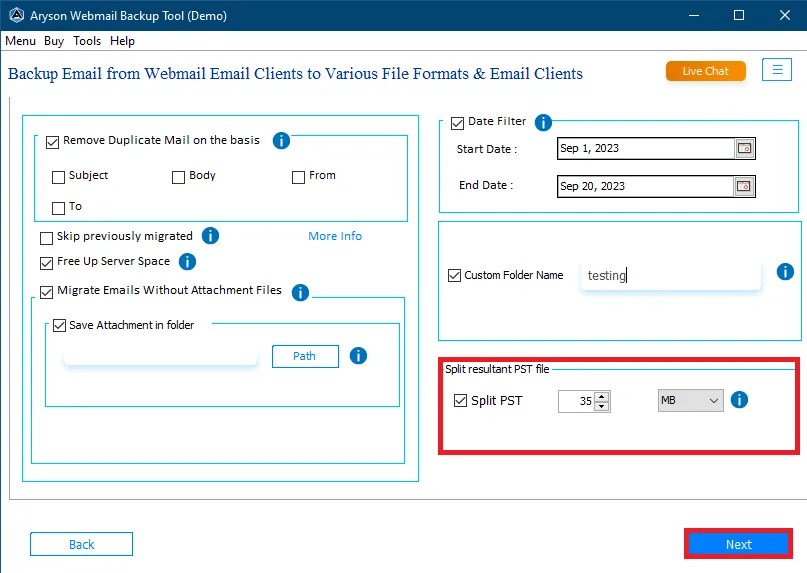
Step 12: In case you have a large PST file and you need to divide it into smaller PST files, select Split resultant PST file and click Next.
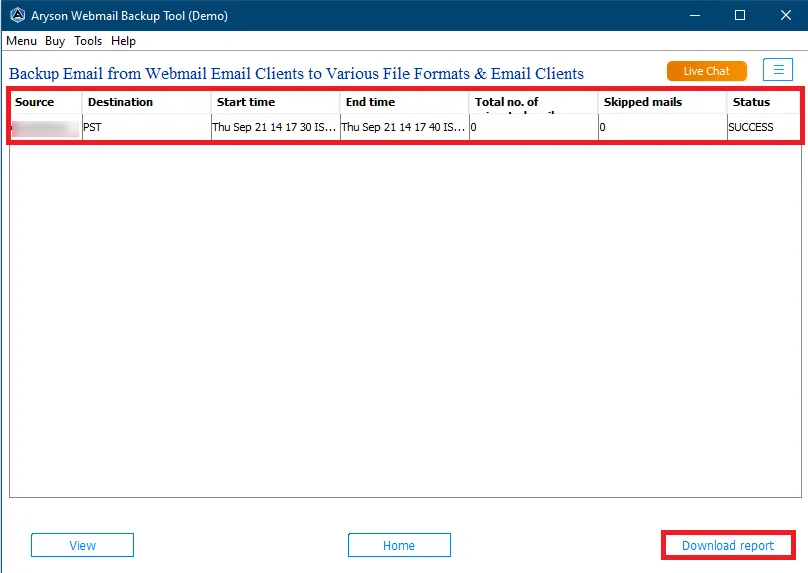
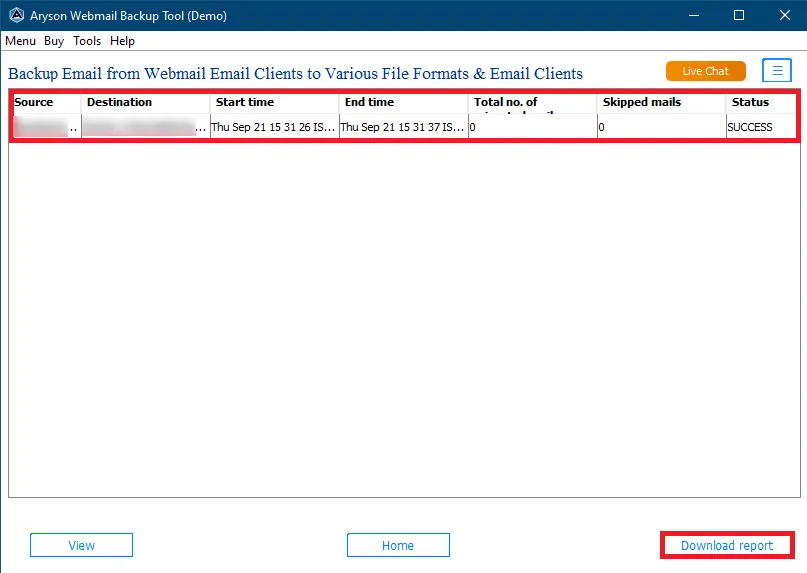
Step 13: After clicking the Next button the software will backup all your selected data in a PST file. Click on the Download Report button to analyse the backup process.
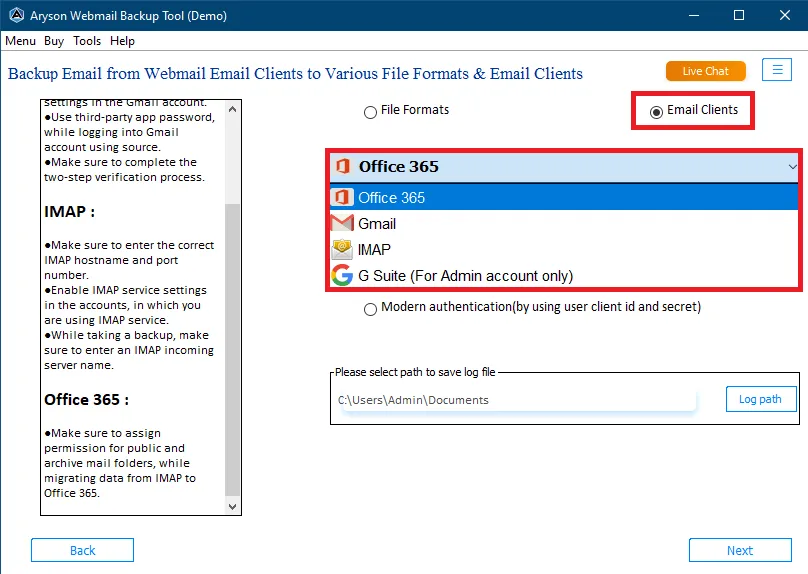
Step 8: Select Office 365 from the drop-down menu of Email Clients.
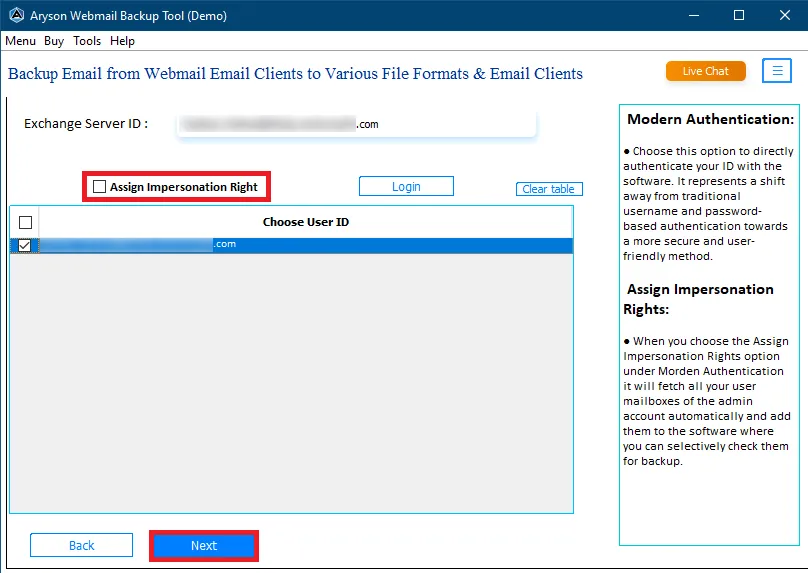
Step 9(a): There are two ways to log in to the Office 365 account first one is to select Use Modern Authentication and click Next to proceed ahead.

Step 9(b): Now, click on the Login button and the software will redirect you to authenticate your Office 365 account.
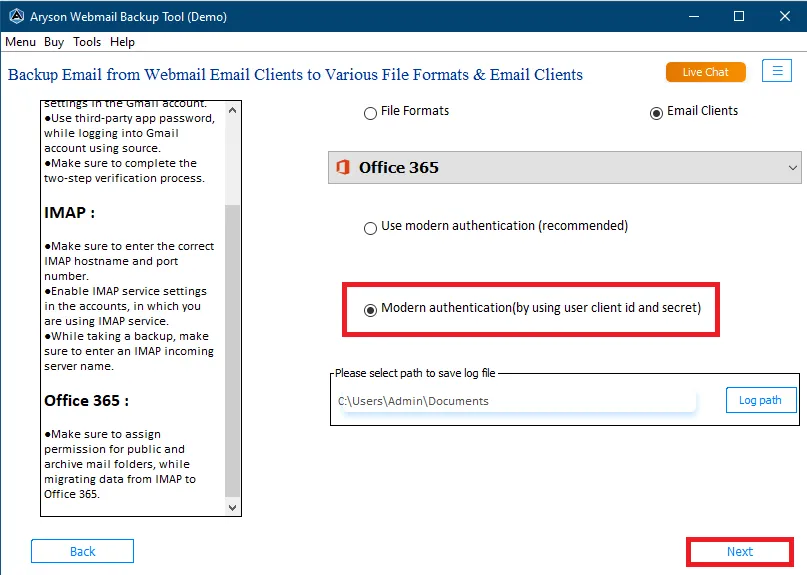
Step 10(a): The second way to log in to Office 365 is through Azure AD then select Modern Authentication by using the user client ID and secret.
Step 10(b): Here, enter the Application ID, Secret value, Directory ID, and Microsoft Azure Admin ID with the help of Microsoft Azure AD
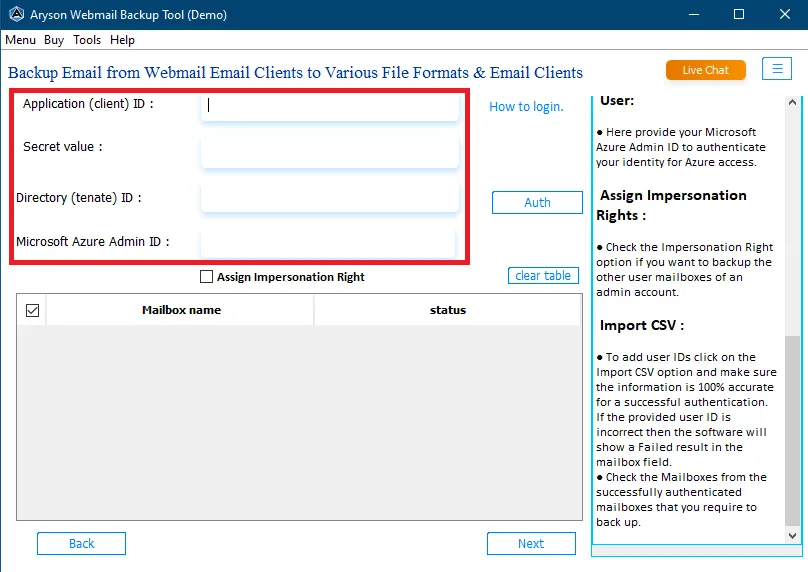
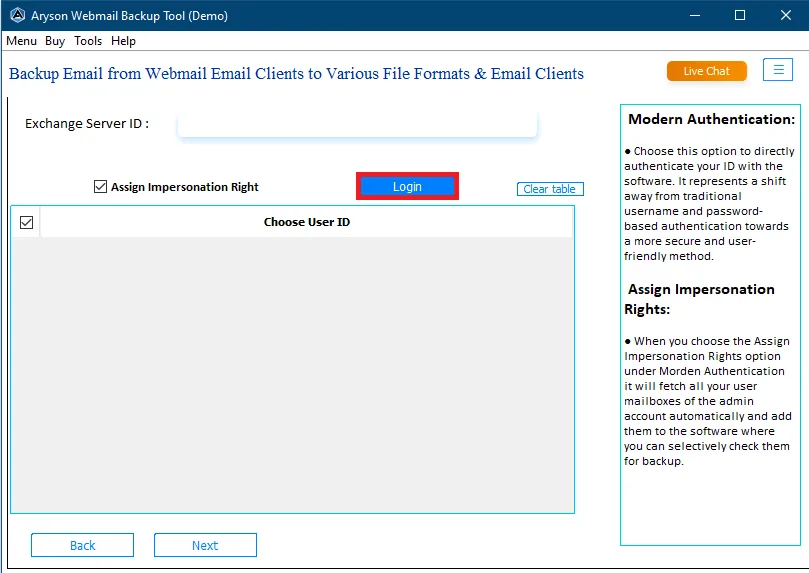
Step 11: After that, you can see that your ID will show on the tool’s interface, if you want to add the sub-users then click on the Assign Impersonation Right and click Next.
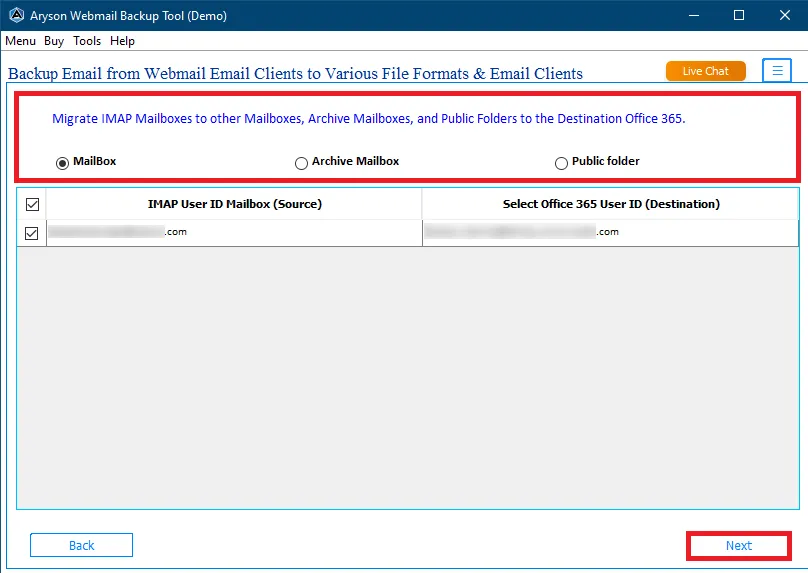
Step 12: Check the mailboxes and then choose from Mailbox, Archived Mailbox, and Public Folder to save your migrated data. Click Next.
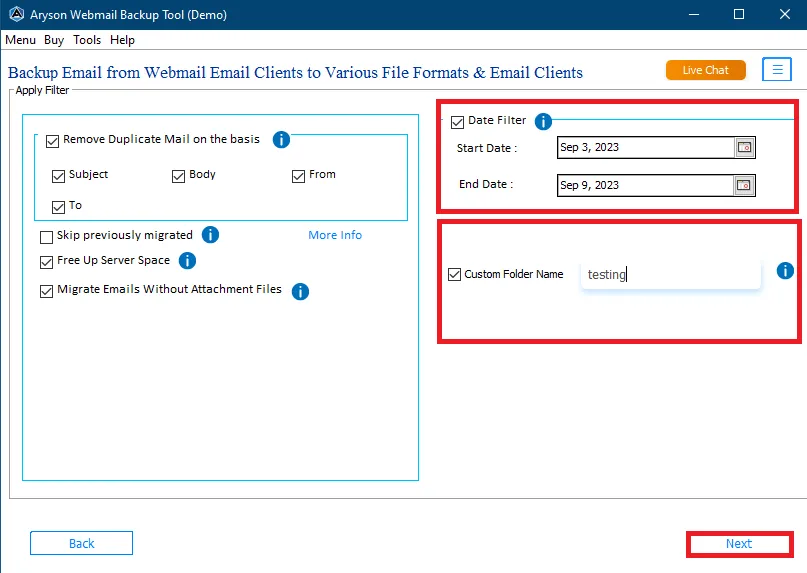
Step 13: Choose the additional features such as:
- Remove Duplicate Mail on the basis: By choosing this option you can skip the identical email on the basis of Subject, Body, From, and To.
- Skip Previously Migrated: This feature allows you to migrate emails that were not transferred before which helps to prevent duplicates.
- Free Up Server Space: It helps users to free up space on their webmail server.
- Migrated Emails Without Attachments Files: If you want to migrate emails without their attachments then select this option.

Step 14: If you want to backup specific emails according to date range then select Date Filter opinion. Also, you can assign a desired name for your file by using the Custom Folder Name feature. Click on the Next button to start the migration process.
Step 15: After clicking the Next button the software will migrate all your selected data to Office 365 file. Click on the Download Report button to analyse the backup process.
Activation Guide
Activate the Software
Installation & Uninstallation
Installation & Uninstallation of Software
User Interface
User Interface
After downloading the Aryson Webmail Backup Tool, you will find the welcome screen as played below.