Software Guide - Aryson Exchange Server Backup & Restore Tool
-
Table of Content
- Software Working Process
- Activation Guide
- Installation & Uninstallation
- User Interface
Software Working Process
Application Pre-Requisites
- Internet Connection
- Turn on the required Modern Authentication permissions.
- In case you are Login into Exchange Server through Azure-AD then you need to have an Azure Active Directory Application & Enable API Permissions.
Software Working Process
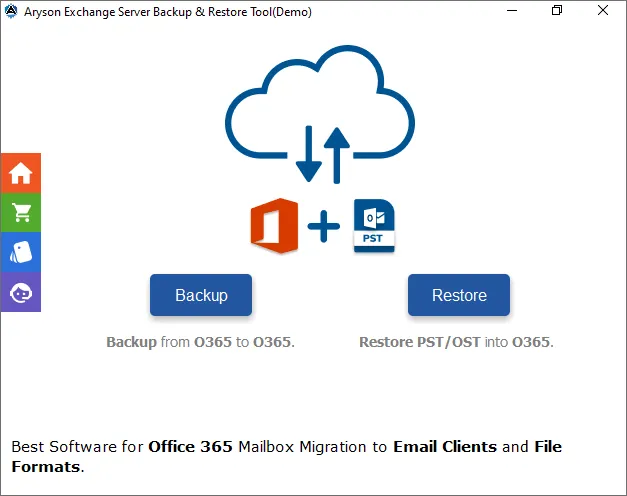
Step 1: Download, Install Aryson Exchange Server Backup & Restore Tool.
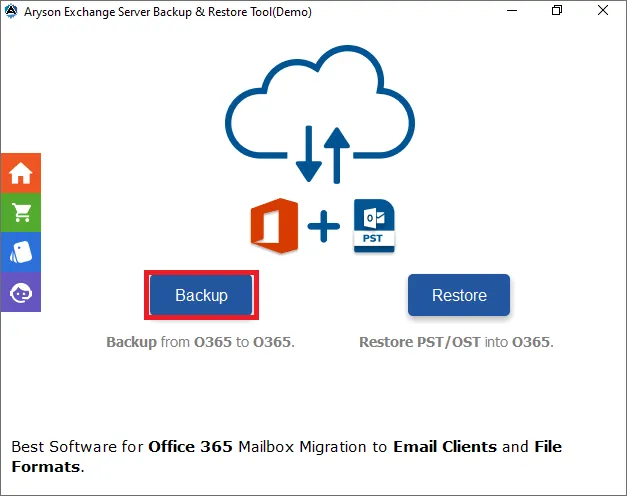
Step 2: Now, choose the Backup option from the displayed software interface.
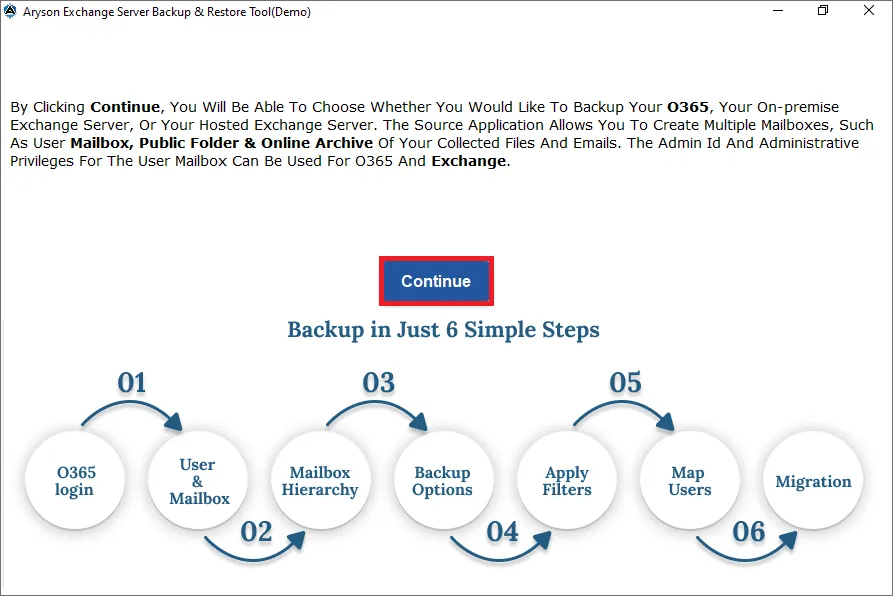
Step 3: Here, the software shows you the 6 steps you need to follow, click Continue to move forward.
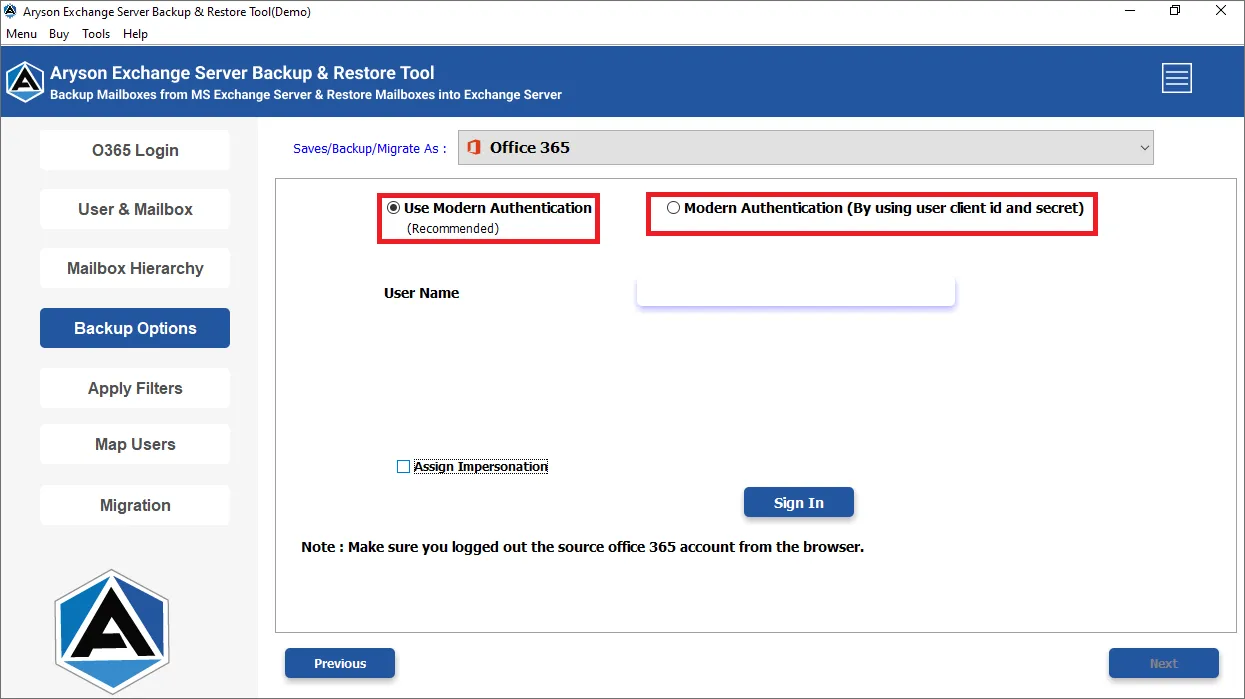
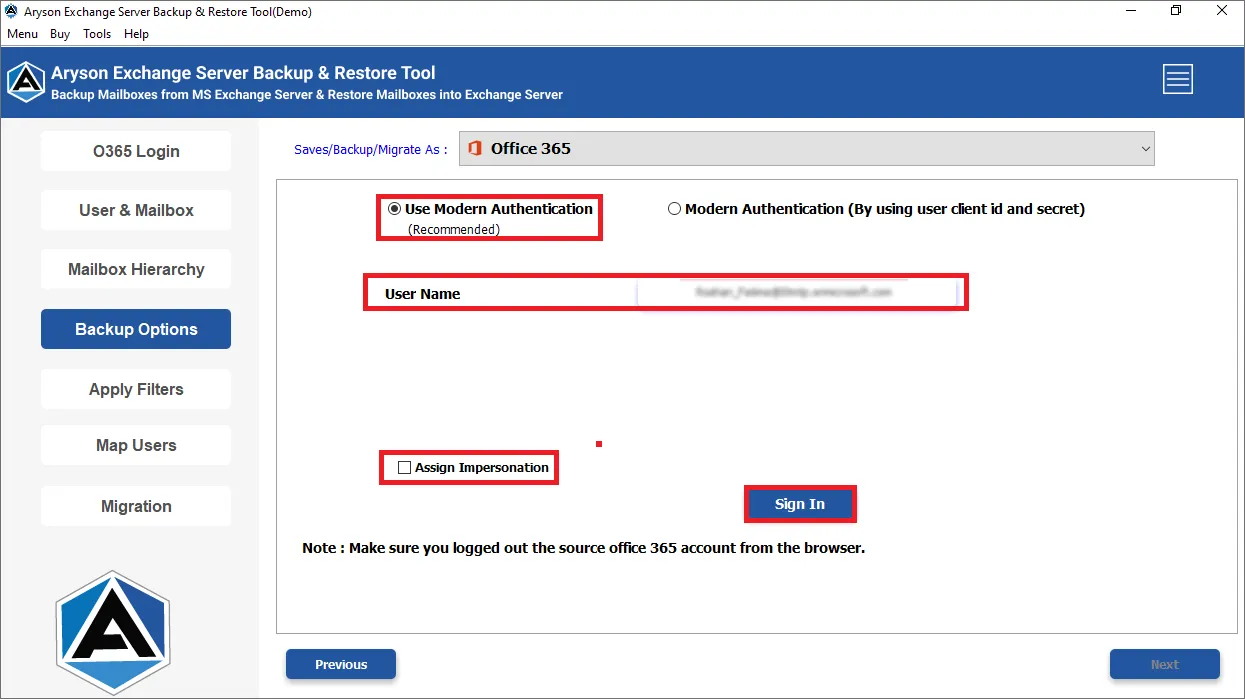
Step 4: There are two options to log in to your Exchange Server account.
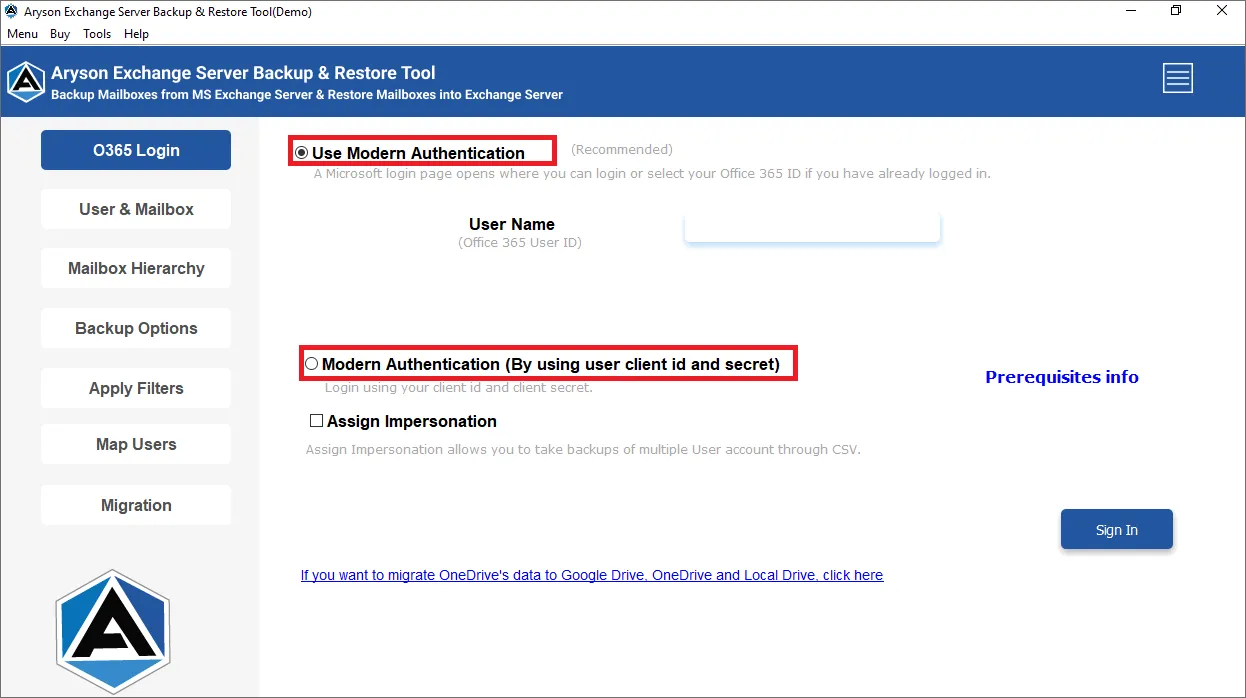
- Choose Use Modern Authentication (Recommended), enter your Exchange Server ID, and click the Sign in button. If you want to backup multiple mailboxes then check the Assign Impersonation option.
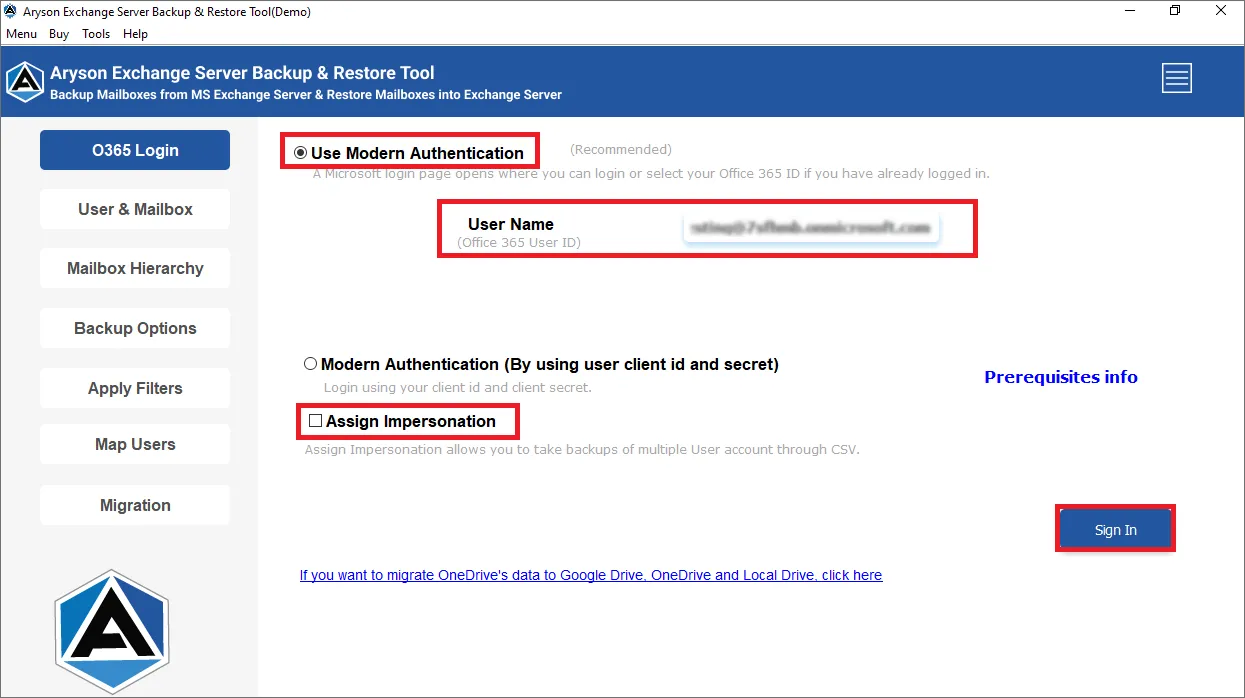
- Now the software will authenticate your given Exchange Server ID. After Successful Authentication please go back to the tool’s interface.

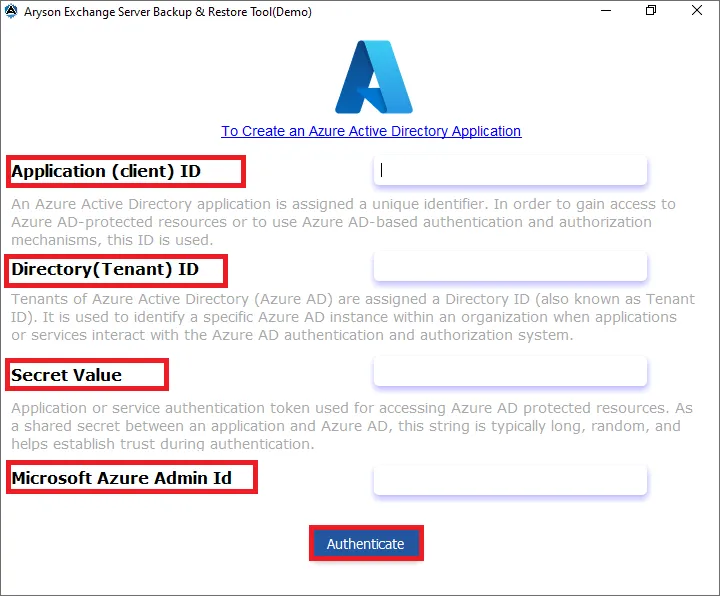
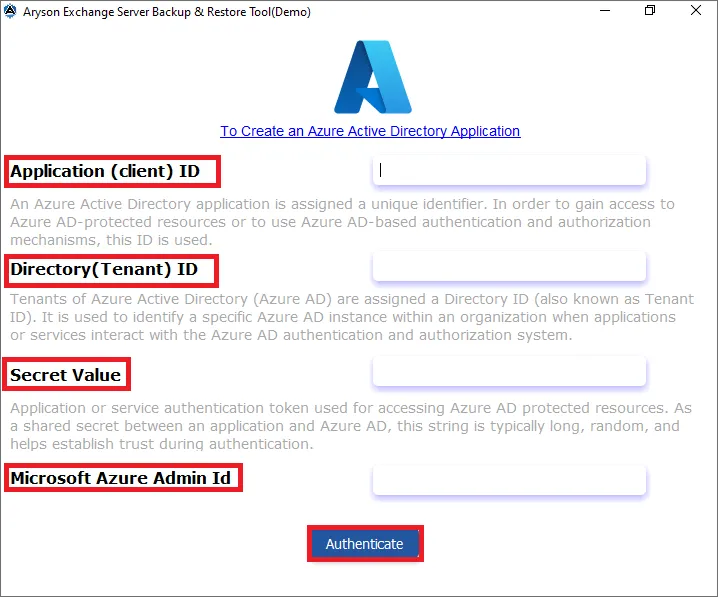
- Choose Modern Authentication (By using user client ID and Secret). Enter your Application ID, Secret value, Directory ID, and Microsoft Azure Admin ID, then click Authenticate.
- Now the software will authenticate your given Exchange Server ID. After Successful Authentication please go back to the tool’s interface.

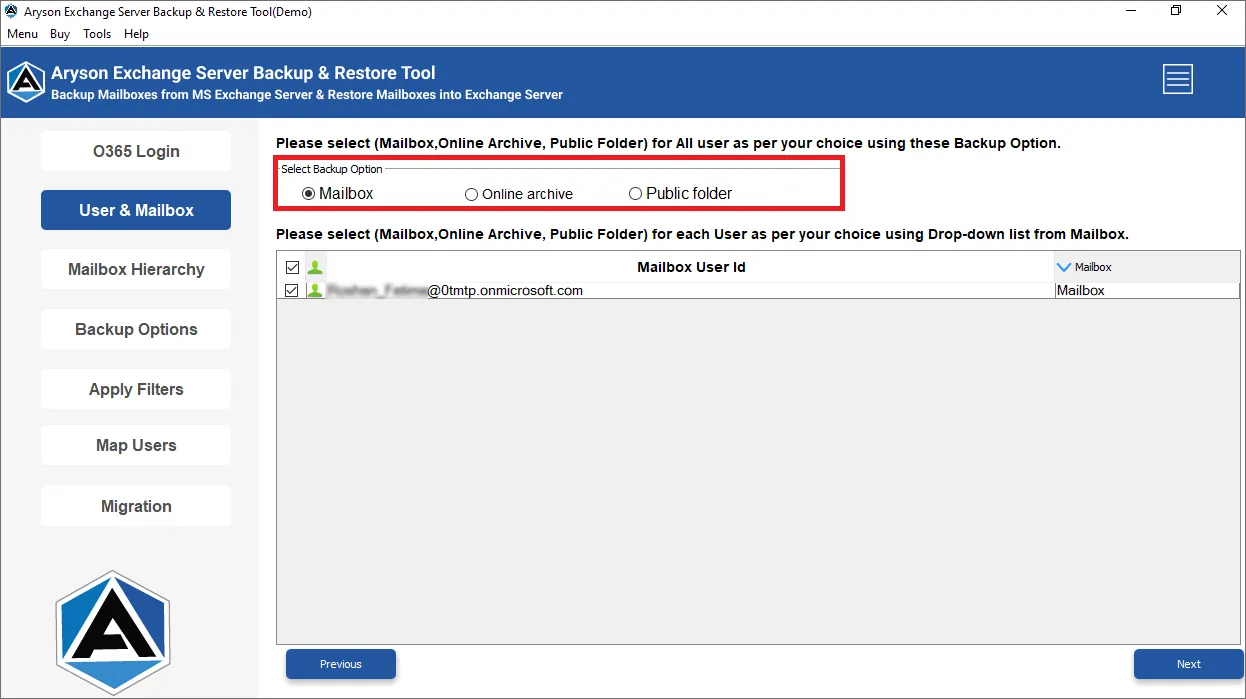
Step 5: After successful authentication, choose the types from which you need to back up. (Mailbox, Online Archive, Public folder)
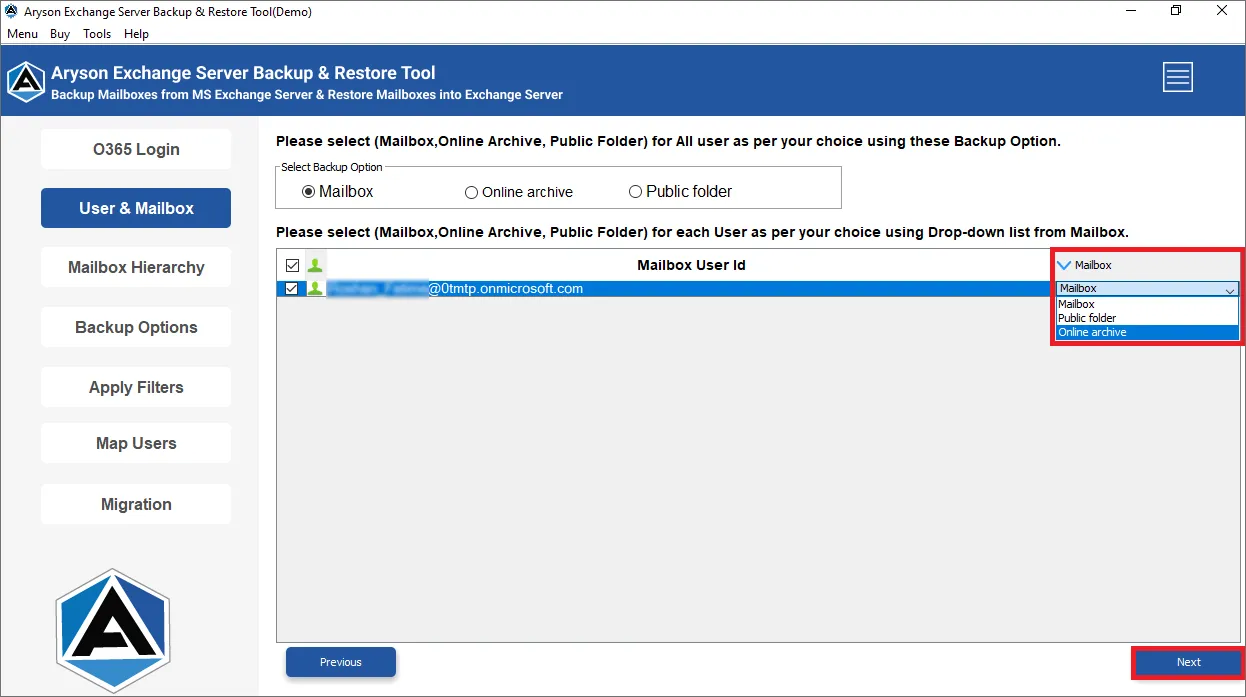
Step 6: Please select (Mailbox, Online Archive, Public Folder) for each user as per your choice using drop-down list from Mailbox. Click on the Next button.
Step 7: After successful authentication, choose the types from which you need to back up. Check the folders from the interface that you need to back up and click on the Next button.

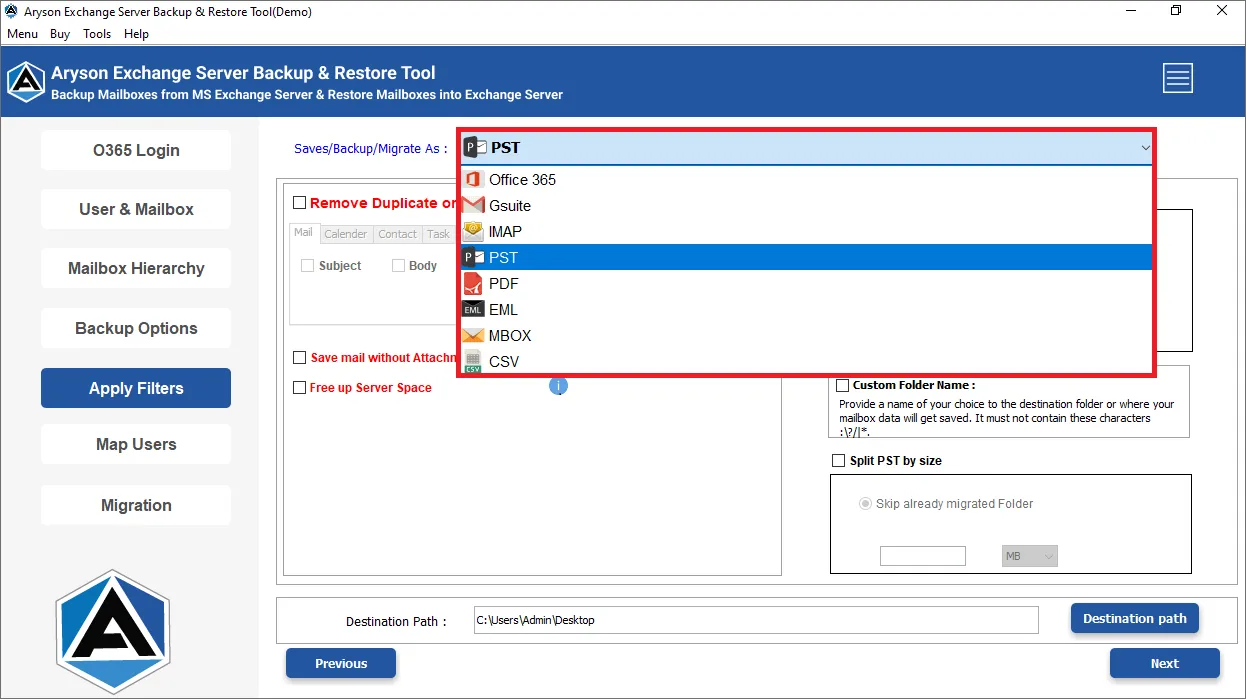
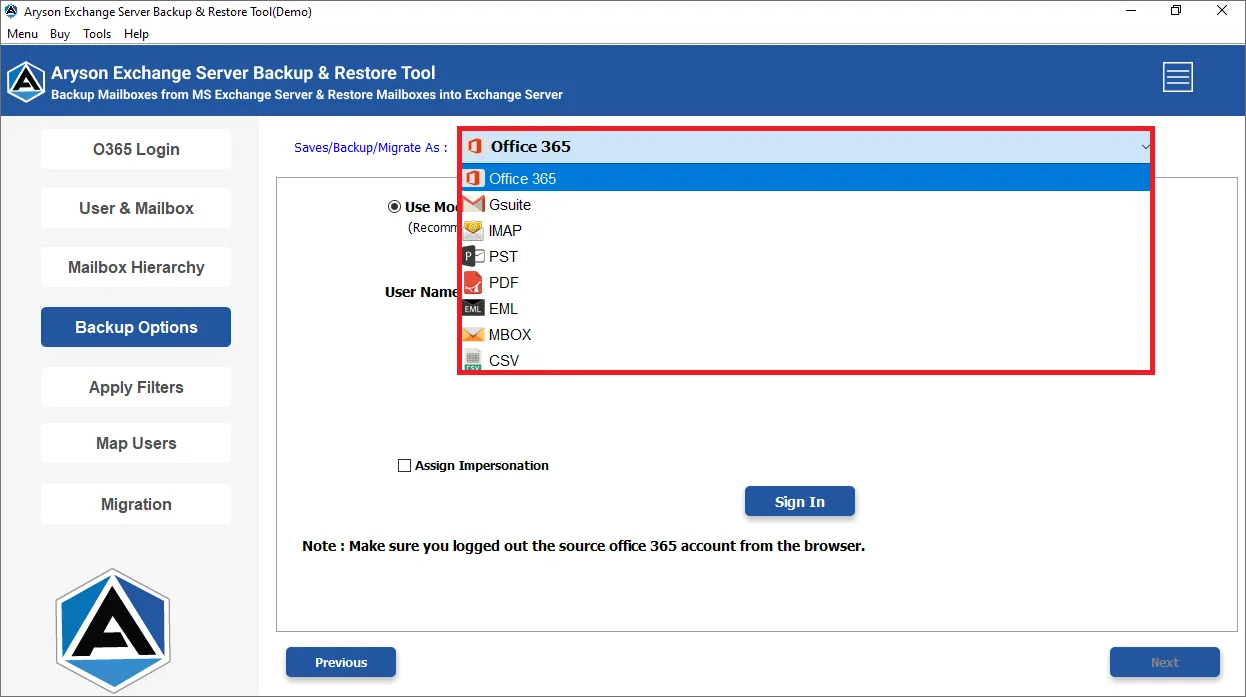
Step 8: From the drop-down menu select PST as your saving format.
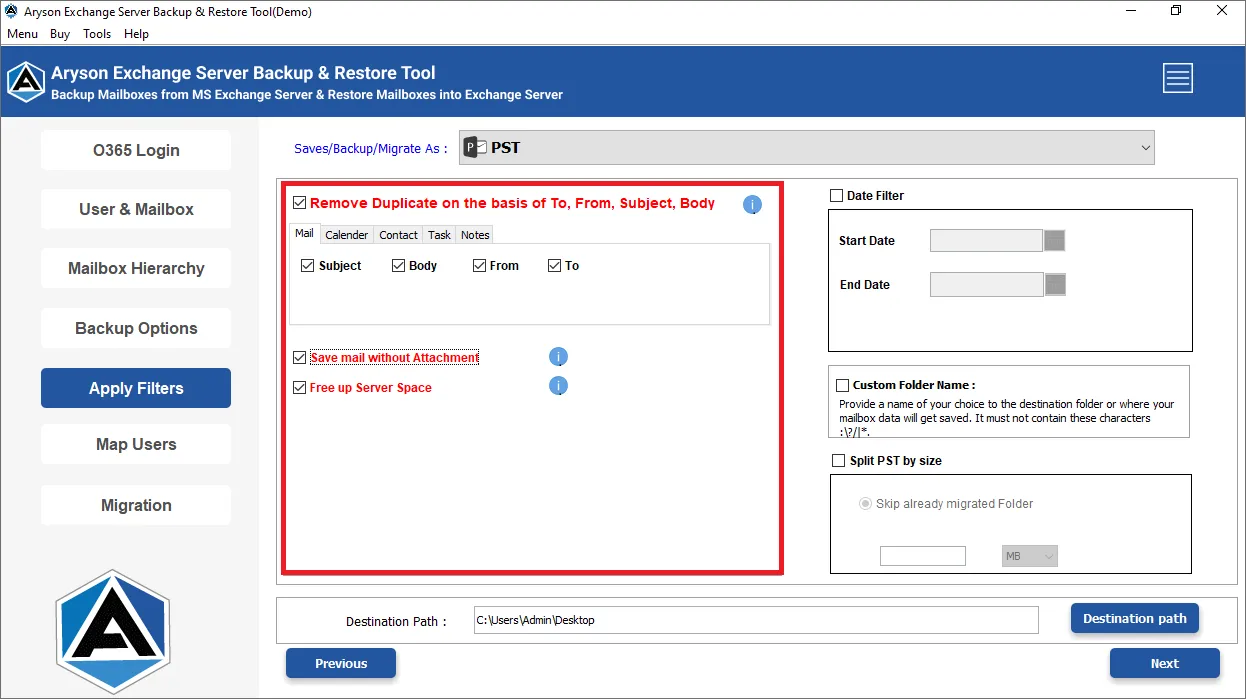
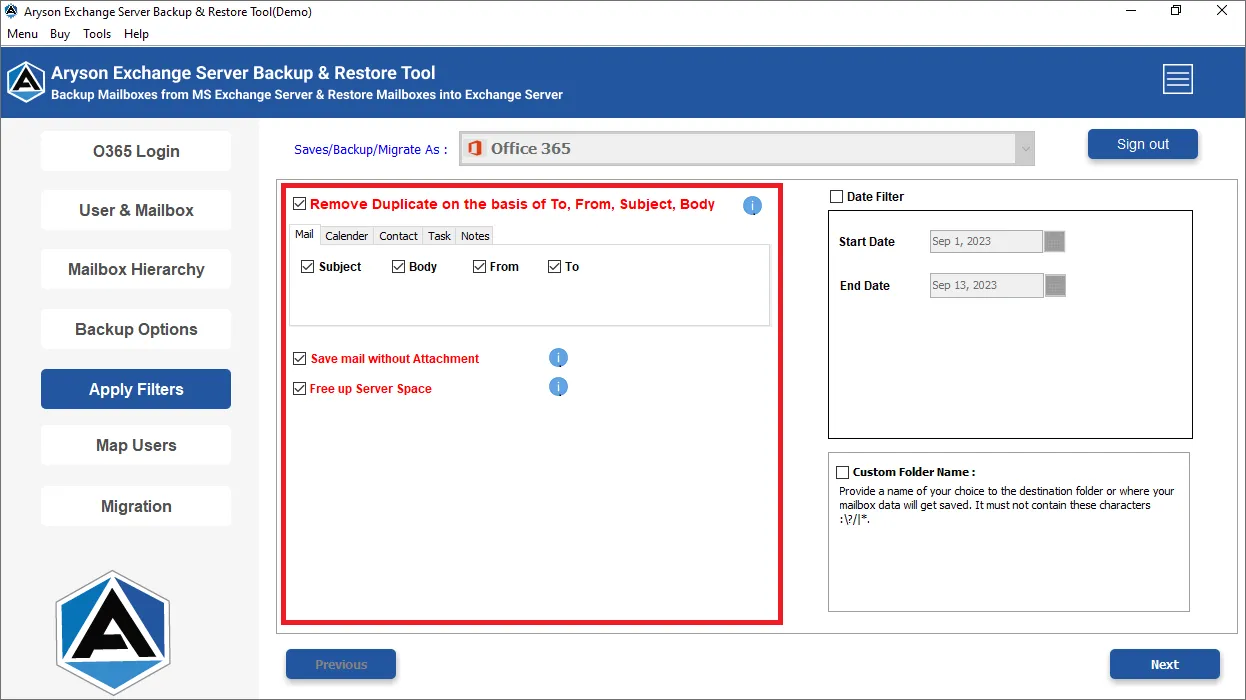
Step 9: Choose the additional features such as:
- Remove Duplicate Mail on the basis: By choosing this option you can skip the identical email on the basis of Subject, Body, From, and To.
- Free Up Server Space: It helps users to free up space on their webmail server.
- Save Emails Without Attachments: If you want to migrate emails without their attachments then select this option.
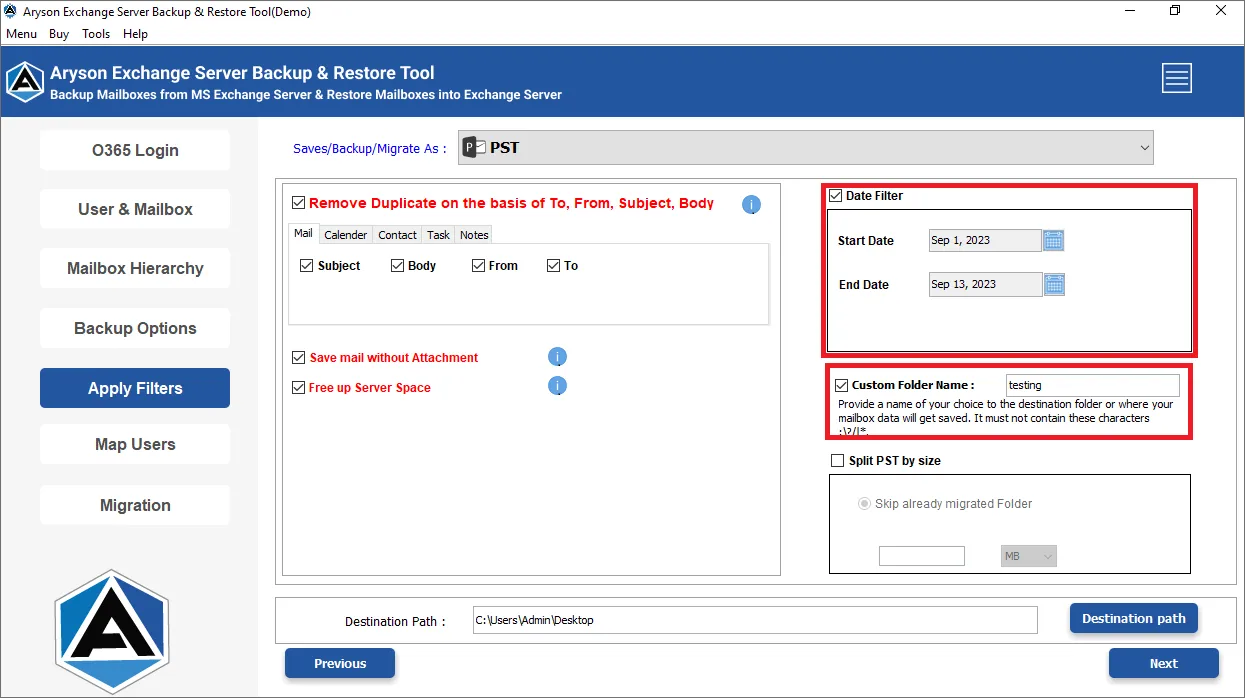
Step 10: If you want to backup specific emails according to date range then select Date Filter opinion. Also, you can assign a desired name for your file by using the Custom Folder Name feature.
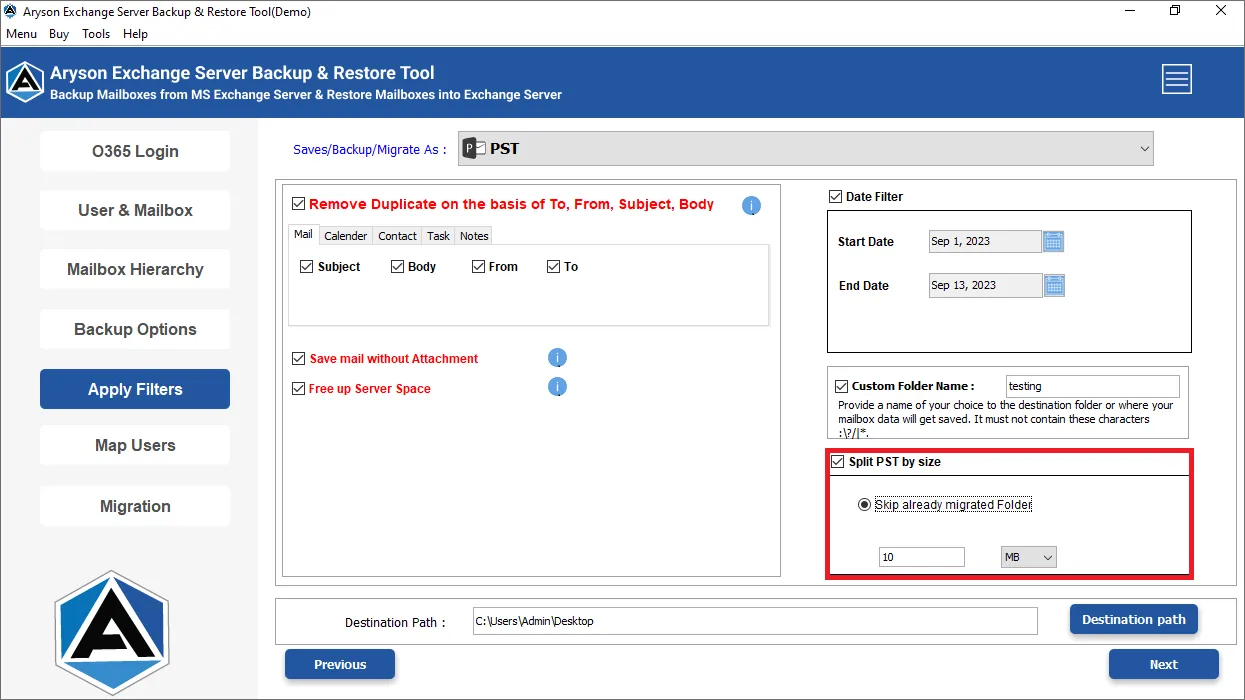
Step 11: In case you have a large PST file and you need to divide it into smaller PST files, select Split resultant PST file.
Step 12: Go to the Destination Path button to assign a location to save the resultant file, and click on the Next button.
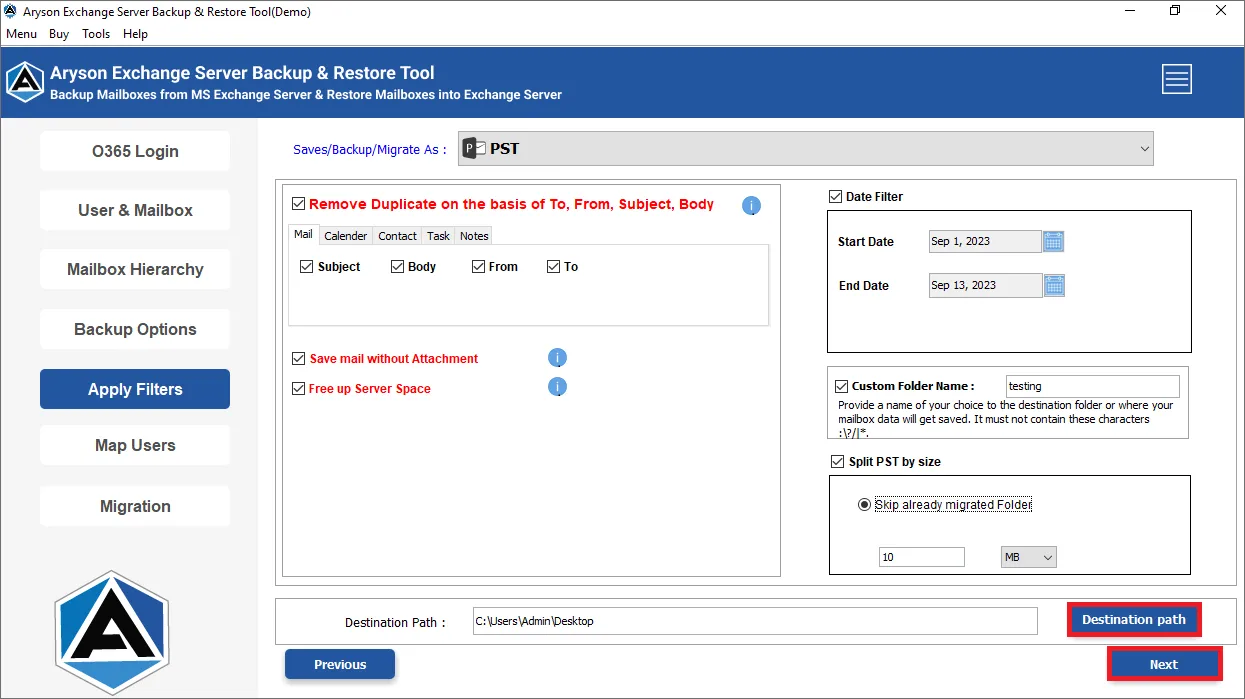
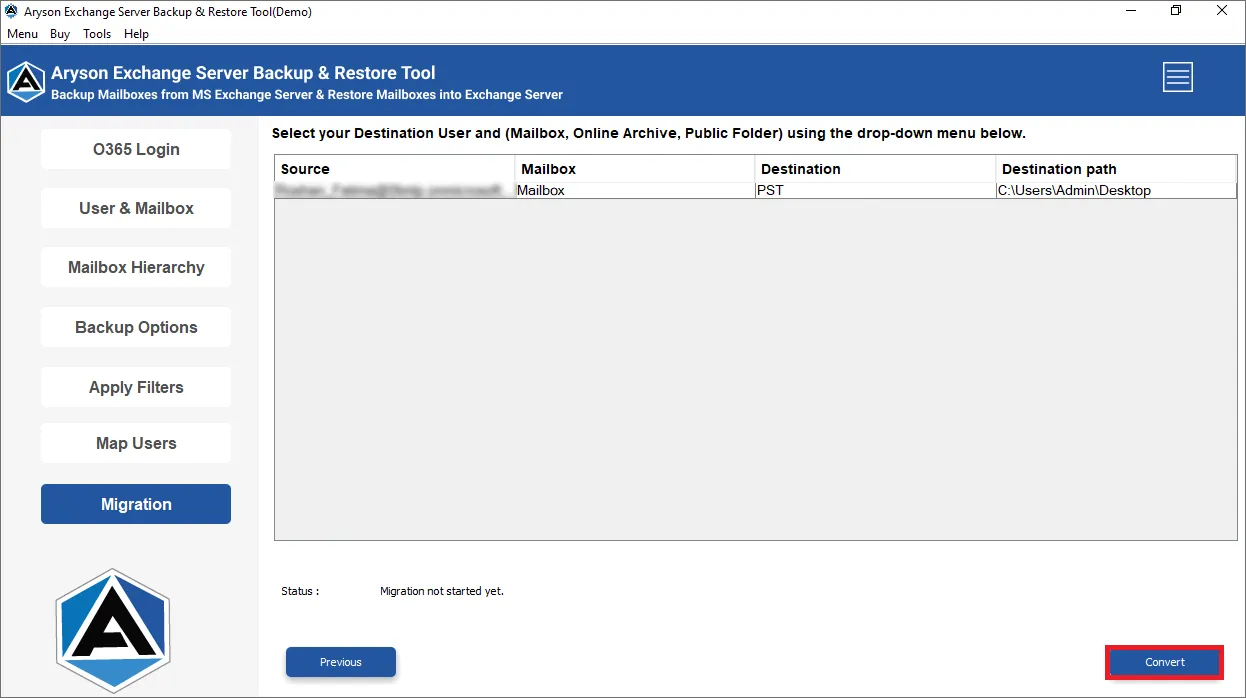
Step 13: Now, click on the Convert button to start the backup process.
Step 14: Soon the Backup process of Exchange Server Mailboxes into PST is completed, and click OK.

Step 1: Download, Install Aryson Exchange Server Backup & Restore Tool..
Step 2: Now, choose the Backup option from the displayed software interface.
Step 3: Here, the software shows you the 6 steps you need to follow, click Continue to move forward.
Step 4: There are two options to log in to your Exchange Server account.
- Choose Use Modern Authentication (Recommended), enter your Exchange Server ID, and click the Sign in button. If you want to backup multiple mailboxes then check the Assign Impersonation option.
- Now the software will authenticate your given Exchange Server ID. After Successful Authentication please go back to the tool’s interface.
- Choose Modern Authentication (By using user client ID and Secret). Enter your Application ID, Secret value, Directory ID, and Microsoft Azure Admin ID, then click Authenticate.
- Now the software will authenticate your given Exchange Server ID. After Successful Authentication please go back to the tool’s interface.
Step 5: After successful authentication, choose the types from which you need to back up. (Mailbox, Online Archive, Public folder)
Step 6: Please select (Mailbox, Online Archive, Public Folder) for each user as per your choice using drop-down list from Mailbox. Click on the Next button.
Step 7: After successful authentication, choose the types from which you need to back up. Check the folders from the interface that you need to back up and click on the Next button.
Step 8: From the drop-down menu select Exchange Server as your saving format.
Step 9: There are two options to log in to your Exchange Server account.
Step 10: Choose Use Modern Authentication (Recommended), enter your Exchange Server ID, and click the Sign in button. If you want to backup multiple mailboxes then check the Assign Impersonation option.
Step 11: Select Modern Authentication (By using user client ID and Secret). Enter your Application ID, Secret value, Directory ID, and Microsoft Azure Admin ID, then click Authenticate.
Step 12: Now the software will authenticate your given Exchange Server ID. After Successful Authentication please go back to the tool’s interface.
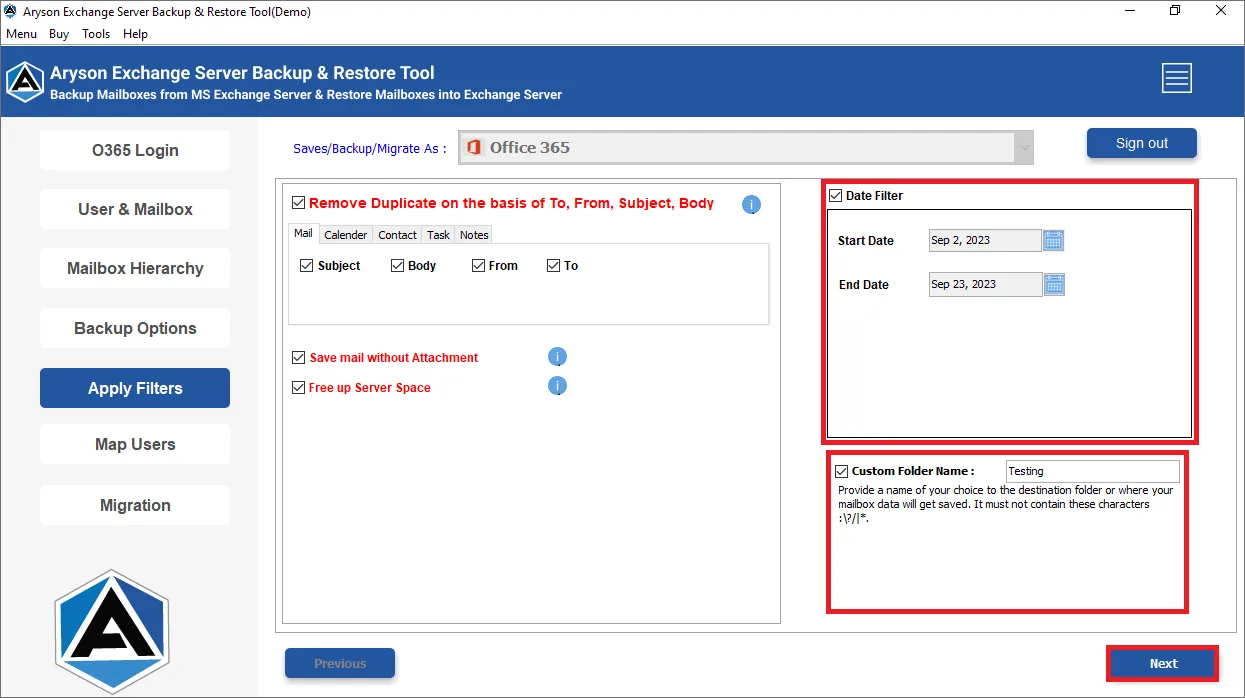
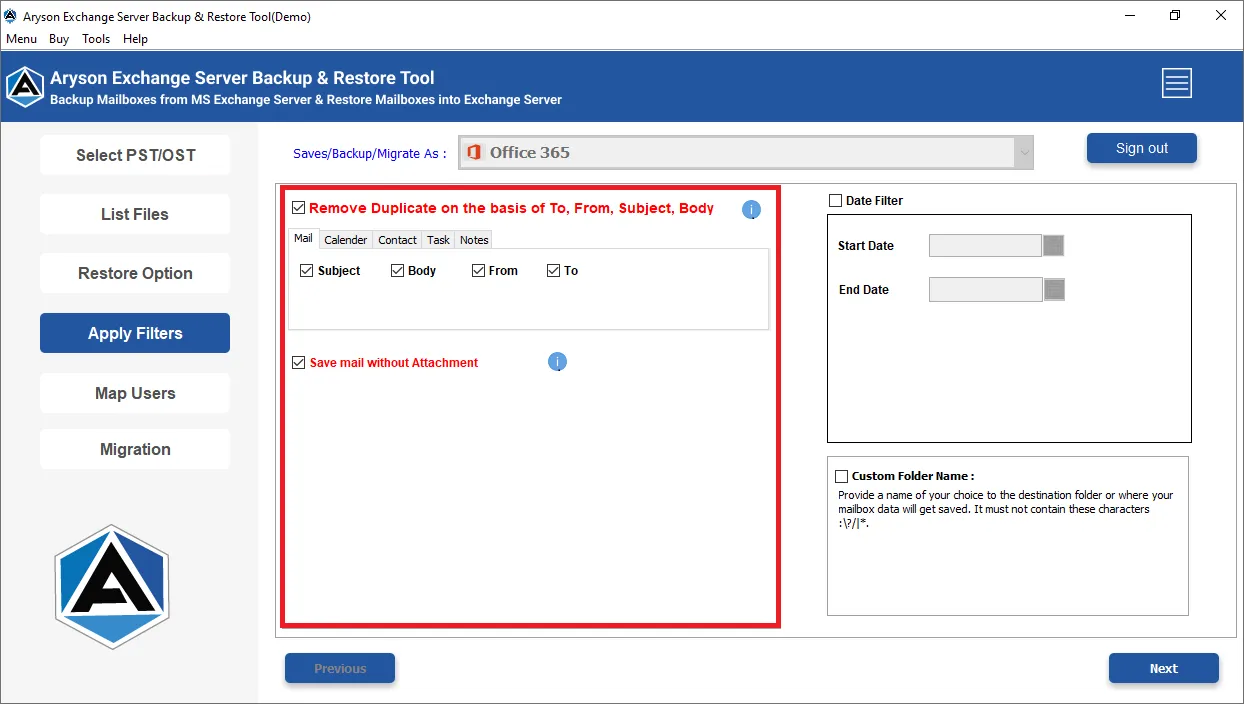
Step 13: Choose the additional features such as:
- Remove Duplicate Mail on the basis: By choosing this option you can skip the identical email on the basis of Subject, Body, From, and To.
- Free Up Server Space: It helps users to free up space on their webmail server.
- Save Emails Without Attachments: If you want to migrate emails without their attachments then select this option.
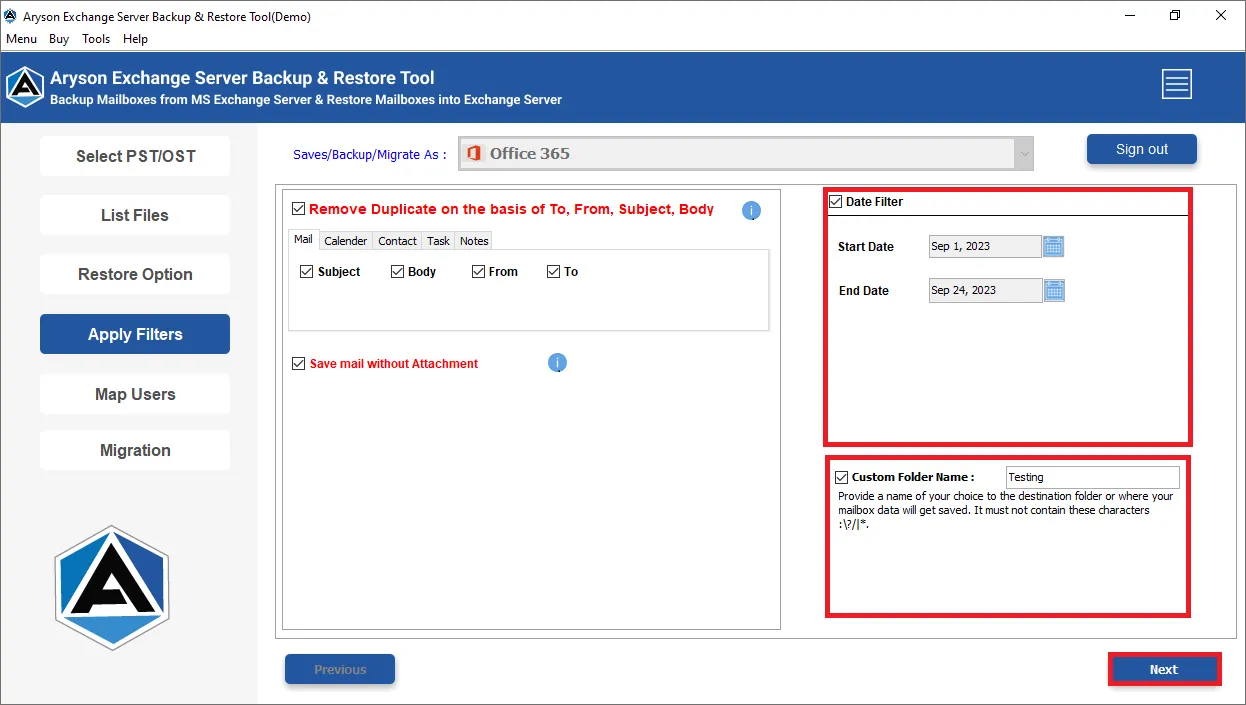
Step 14: If you want to backup specific emails according to date range then select Date Filter opinion. Also, you can assign a desired name for your file by using the Custom Folder Name feature. Click Next.
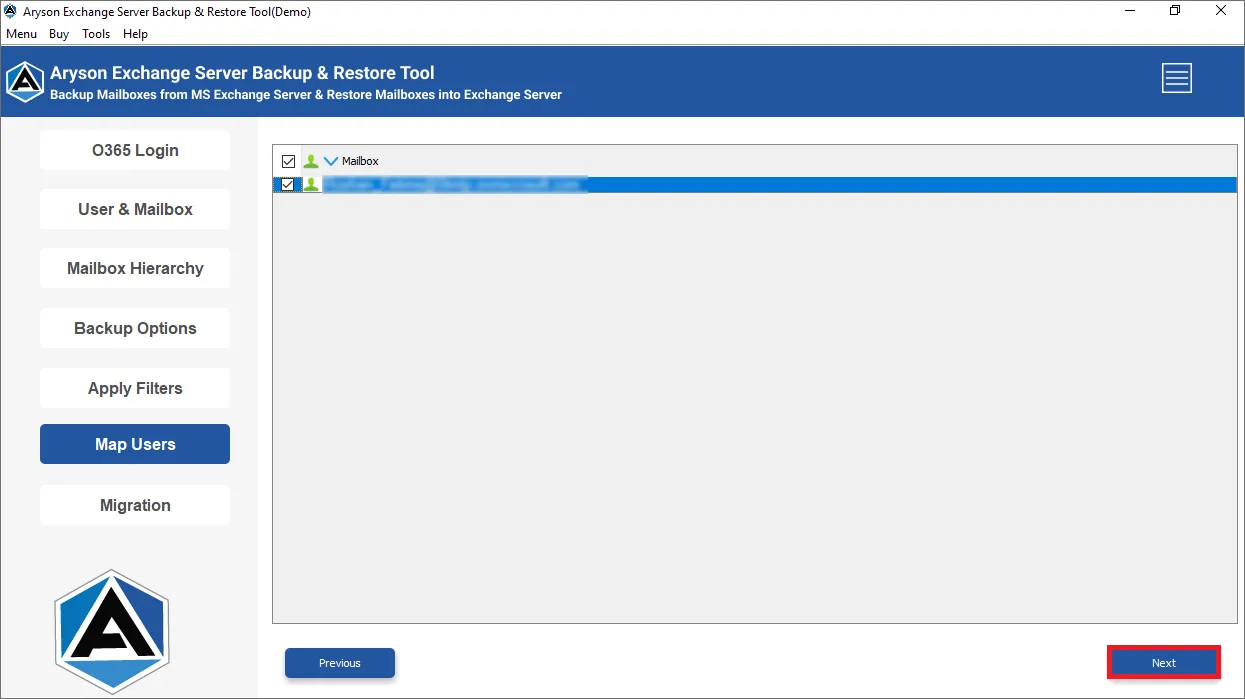
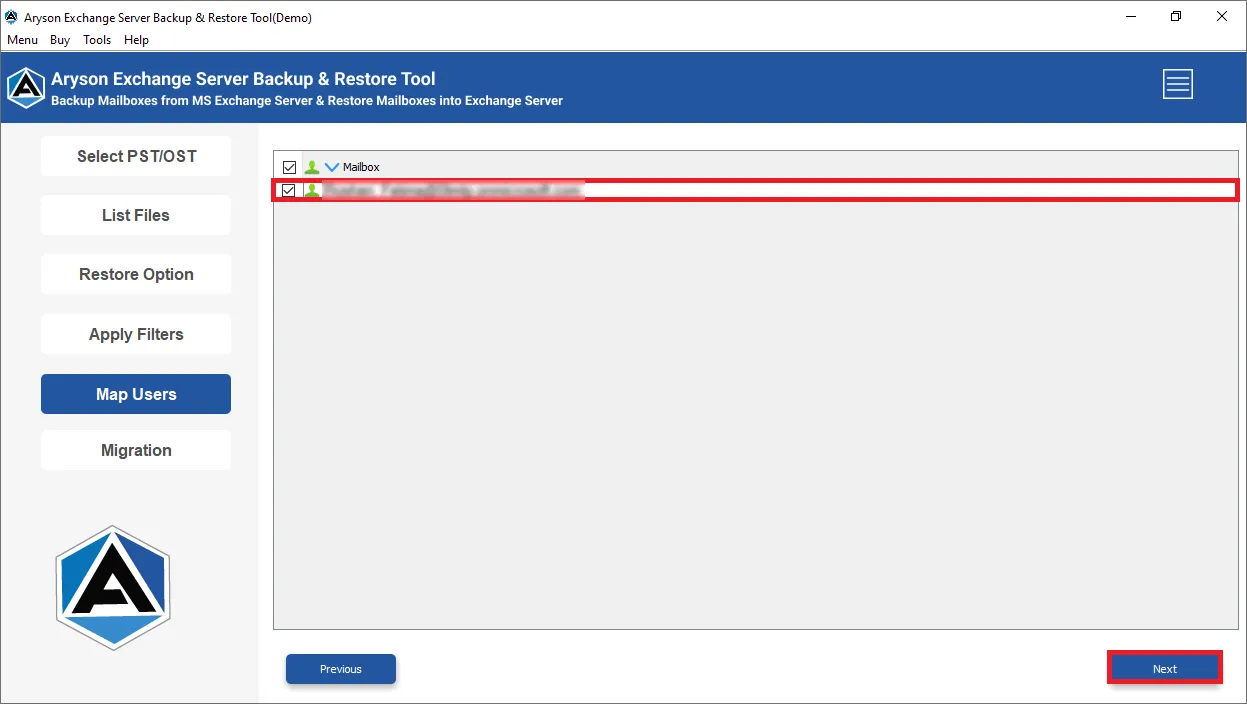
Step 15: Check the mailbox and click Next to move forward.
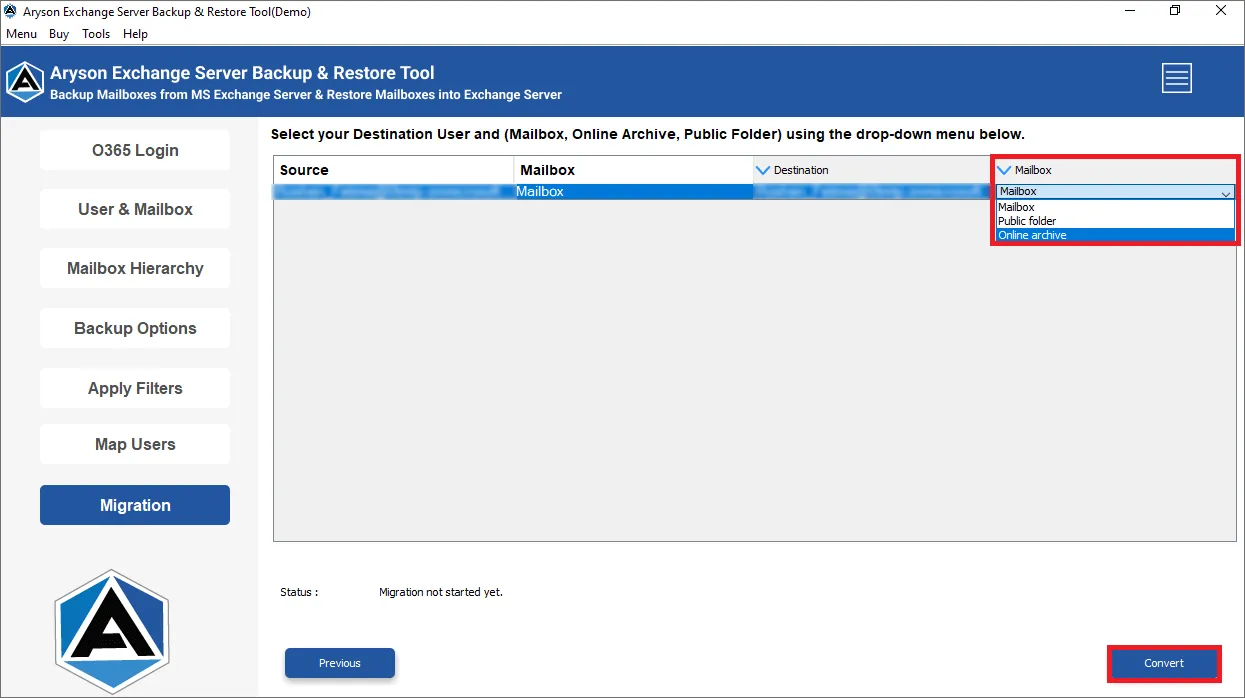
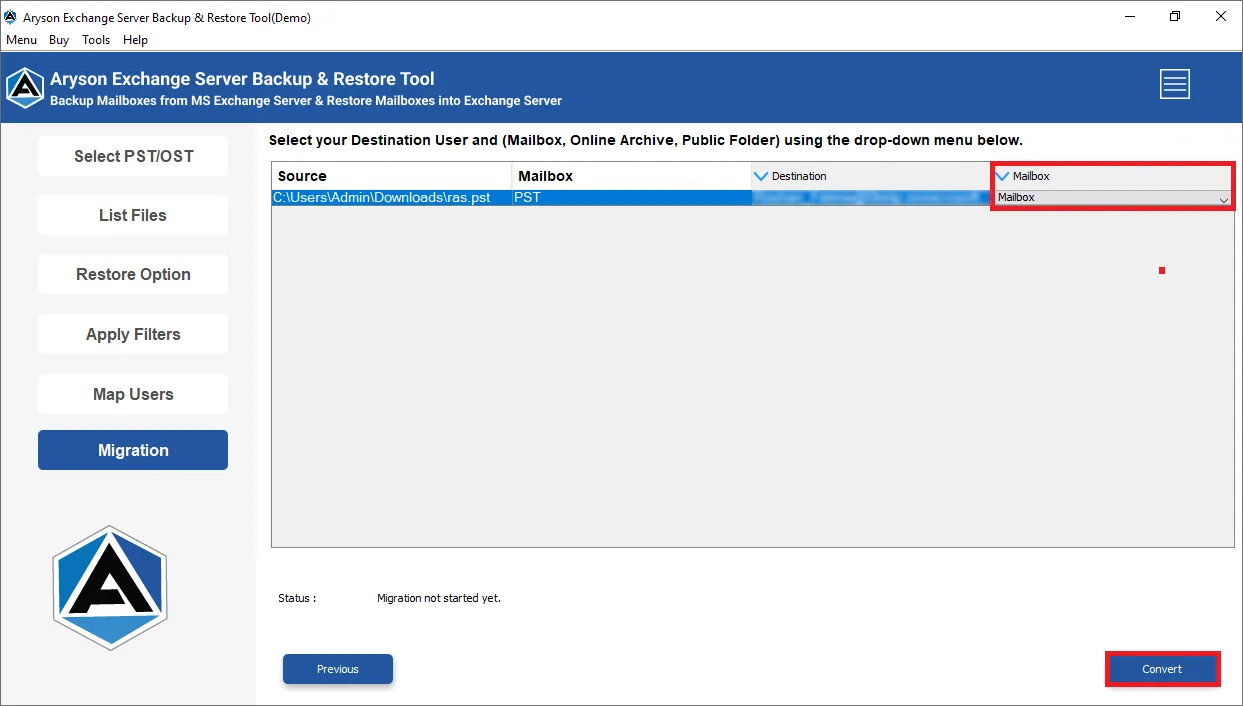
Step 16: Map your Exchange Server ID data to migrate it into Mailbox, Public Folder, and Online Archive, and click on the Convert button.
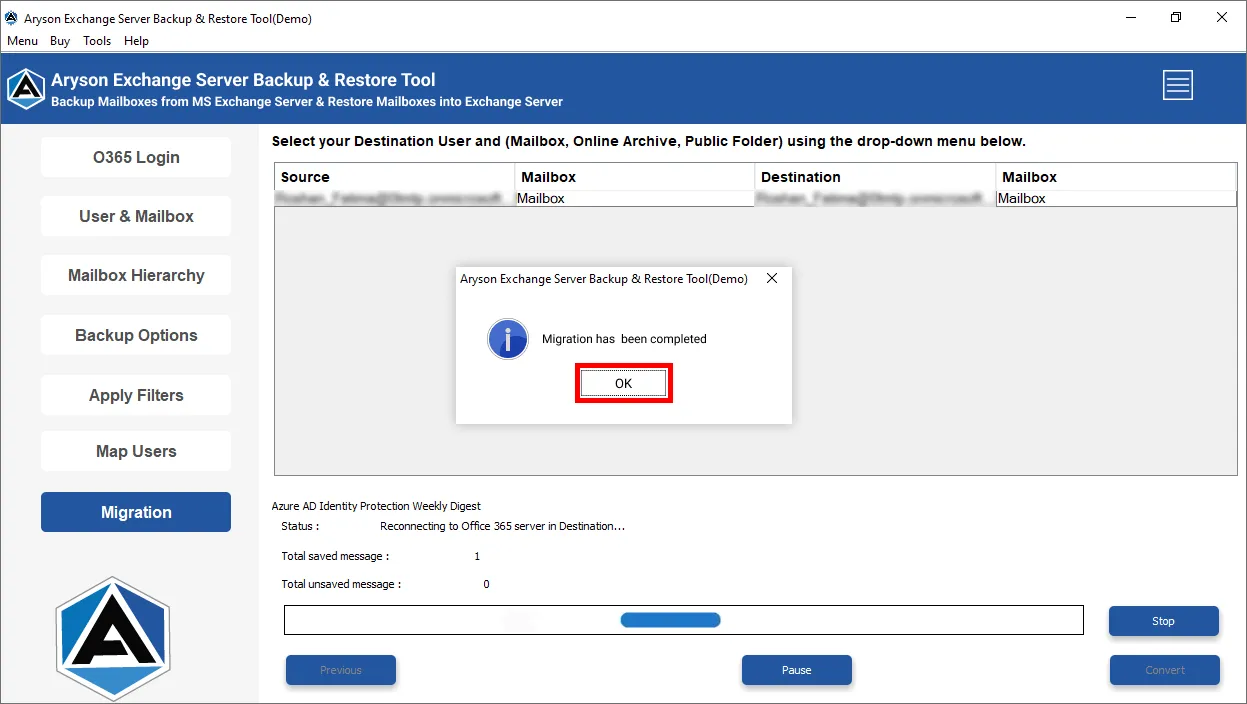
Step 17: Soon the Backup process of Exchange Server Mailboxes into Exchange Server is completed, and click OK.
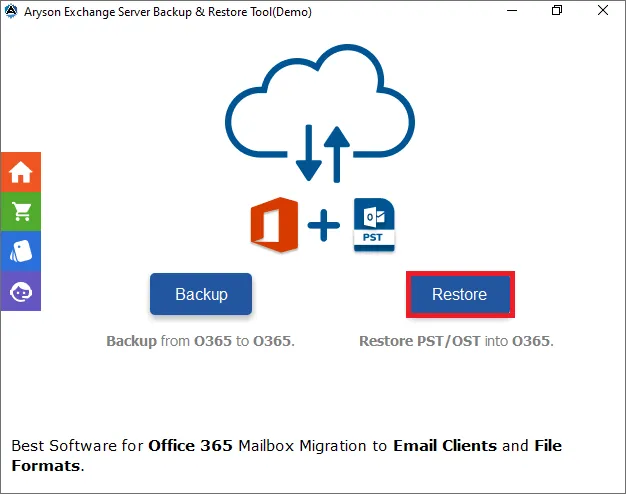
Step 1: Download and Install the Aryson Exchange Server Backup Tool and select Restore.
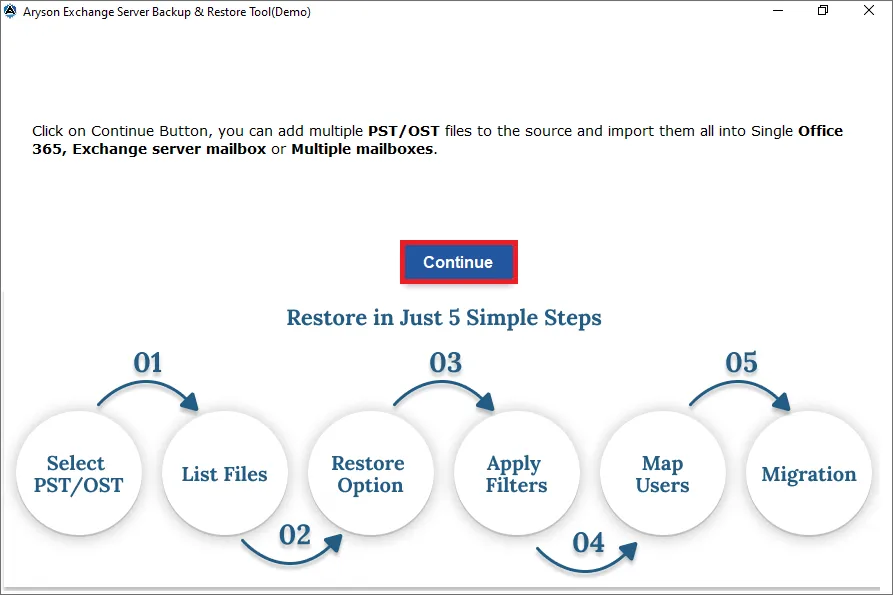
Step 2: Here, the software shows you the 5 steps you need to follow, click Continue to move forward.
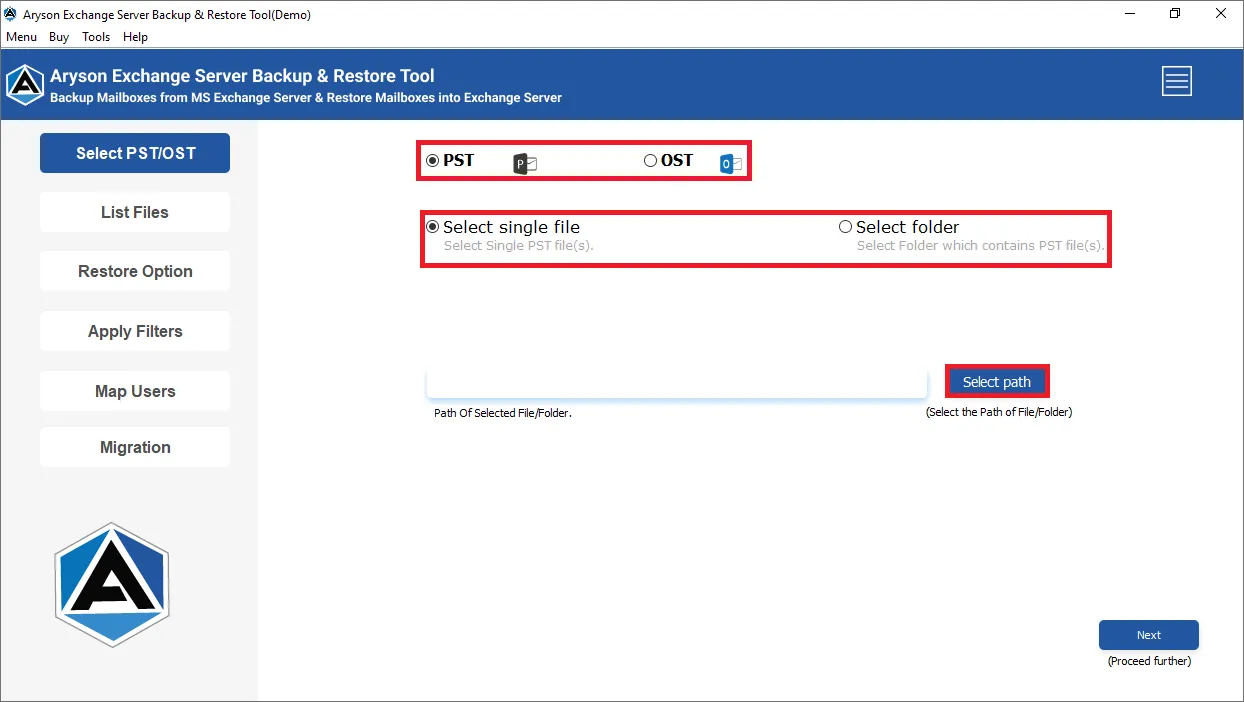
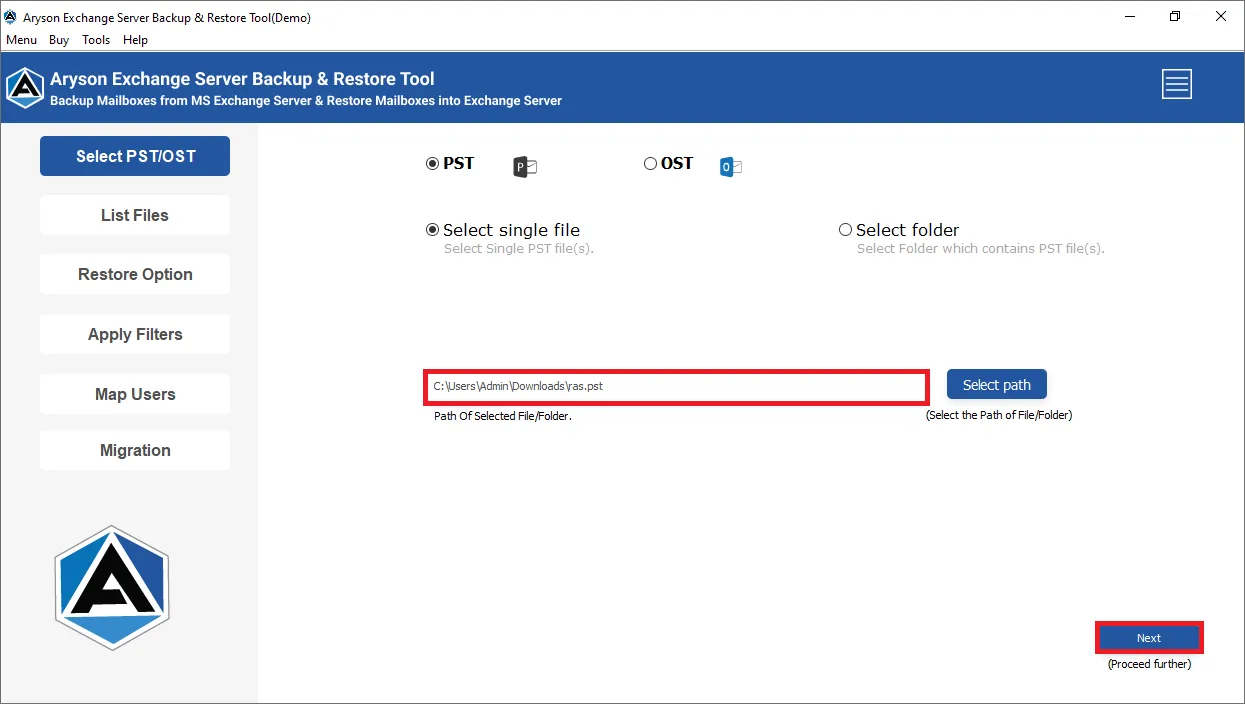
Step 3: Select PST/OST and choose Single File or Select Folder. Click the Select Path button to browse the PST file.
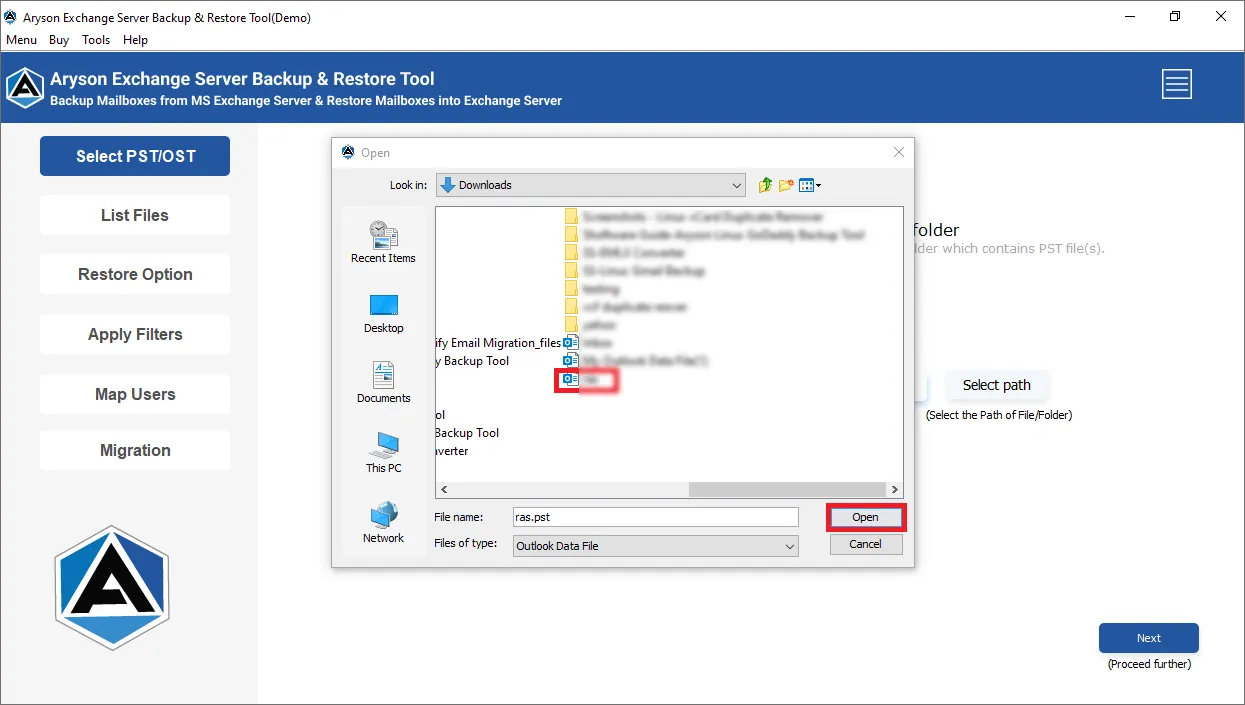
Step 4: Here we select a PST file and tap on the Open button.
Step 5: After adding the PST file click Next to move onto the panel ahead.
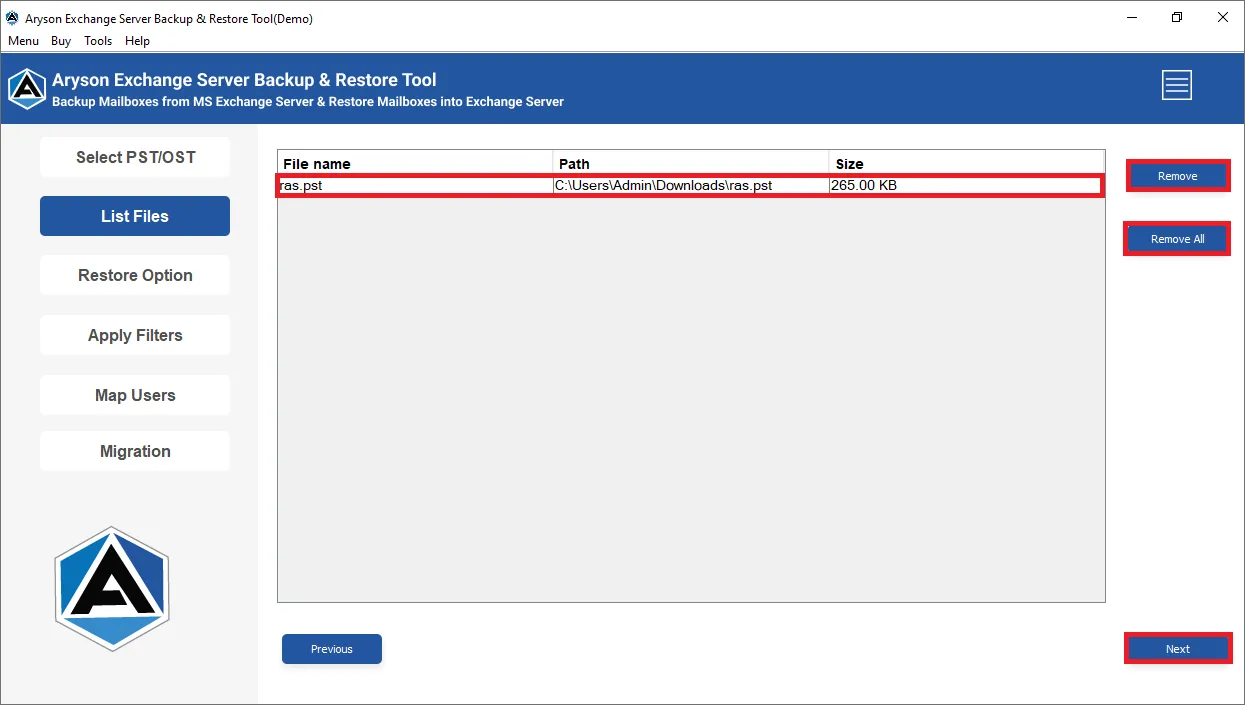
Step 6: In this interface you can see your selected file, you can also remove it by clicking on the Remove buttons. After selecting files click Next.
Step 7: Here are two options to log in to your Exchange Server account.
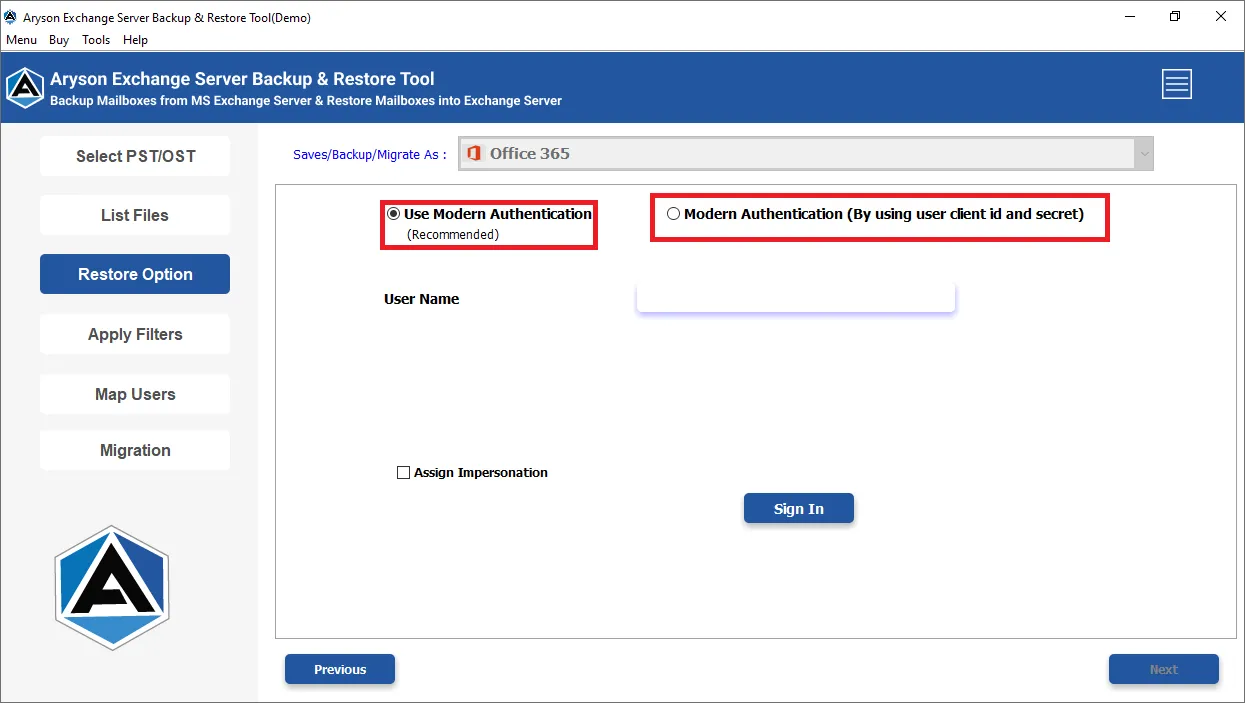
Step 8: Choose Use Modern Authentication (Recommended), enter your Exchange Server ID, and click the Sign in button. If you want to backup multiple mailboxes then check the Assign Impersonation option.

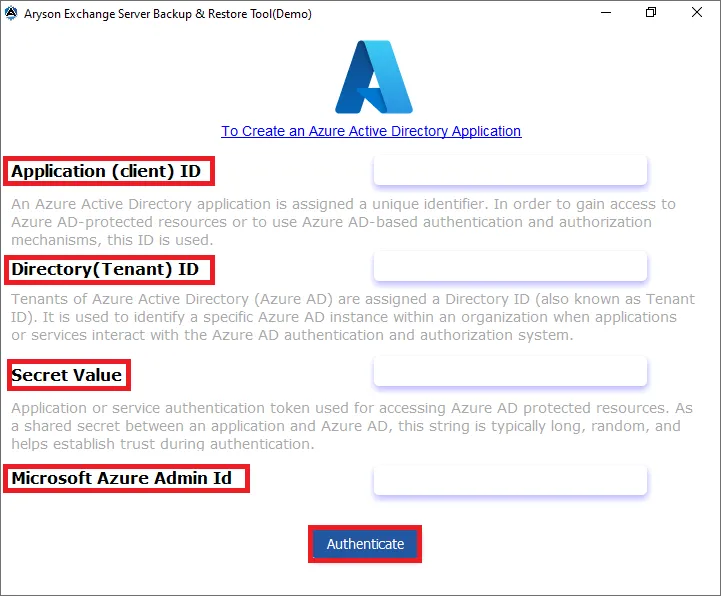
Step 9: Choose Modern Authentication (By using user client ID and Secret). Enter your Application ID, Secret value, Directory ID, and Microsoft Azure Admin ID, then click Authenticate.
Step 10: After successful authentication choose the additional features such as:
- Remove Duplicate Mail on the basis: By choosing this option you can skip the identical email on the basis of Subject, Body, From, and To.
- Save Emails Without Attachments: If you want to migrate emails without their attachments then select this option.
Step 11: If you want to backup specific emails according to date range then select Date Filter opinion. Also, you can assign a desired name for your file by using the Custom Folder Name feature. Click Next.
Step 12: Check the mailbox and click Next.
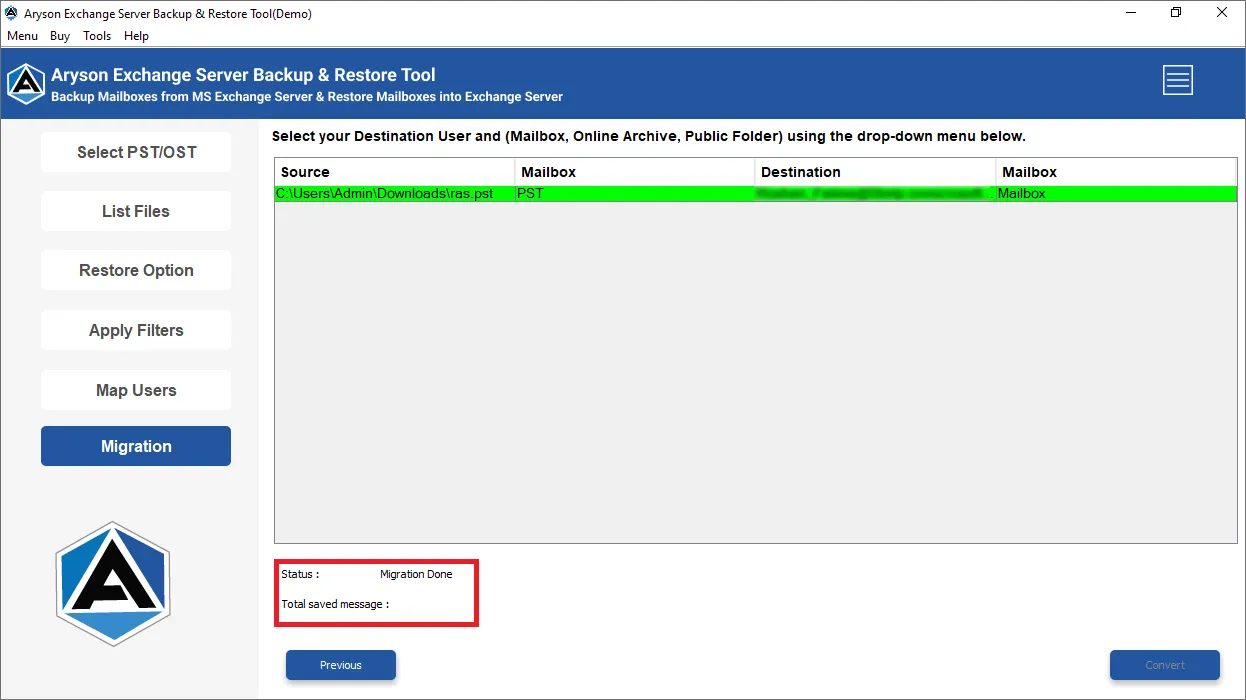
Step 13: Map your Exchange Server ID data to migrate it into Mailbox, Public Folder, and Online Archive, and click on the Convert button.
Step 14: Soon the Backup process of Exchange Server Mailboxes into Exchange Server is completed, and click OK.
Activation Guide
Activate the Software
Installation & Uninstallation
Installation & Uninstallation of Software
User Interface
User Interface
After downloading the Aryson Exchange Server Backup & Restore Tool, you will find the welcome screen as played below.