Software Guide - Aryson Email Migration Software
-
Table of Content
- Software Working Process
- Activation Guide
- Installation & Uninstallation
- User Interface
Software Working Process
Software Working Process:
Step 1: Select Source Type
Launch the software and click Source from the left navigation panel. The Select Source screen displays two options:
- OST/PST Migration: for migrating local Outlook PST files.
- IMAP Migration: for migrating from a live IMAP-connected mailbox.
Click OST/PST Migration to begin.
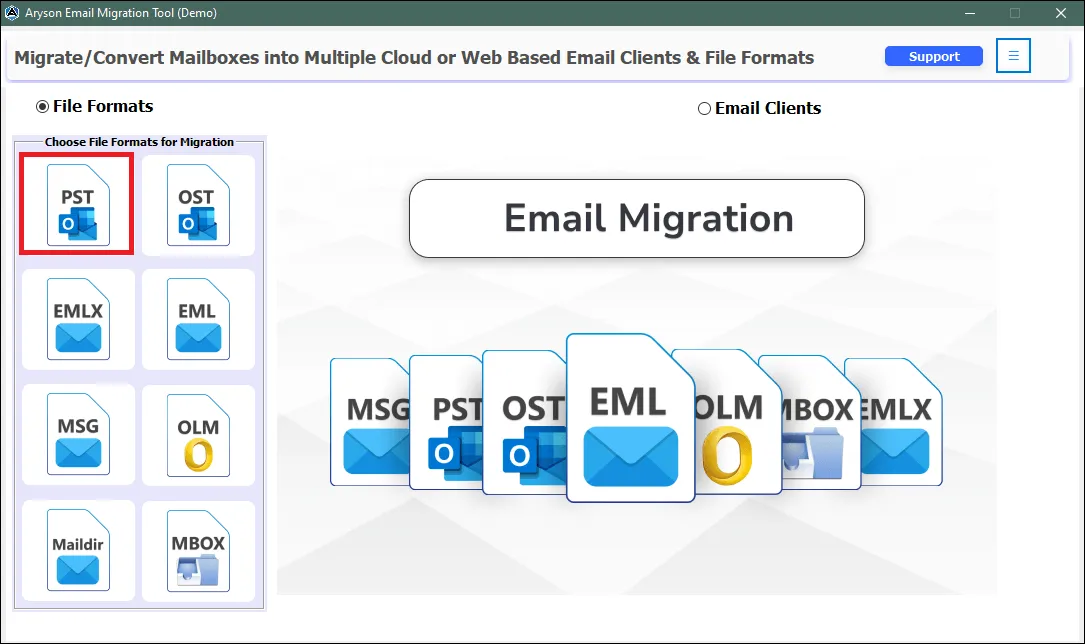
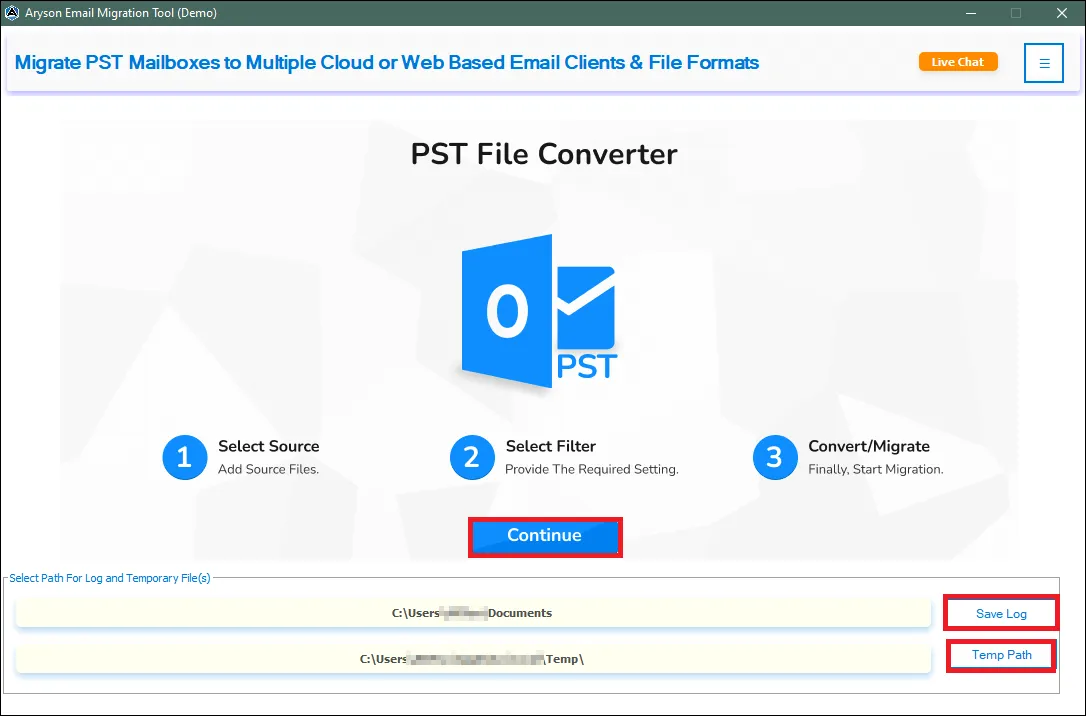
Step 2: Load Your PST/OST Files
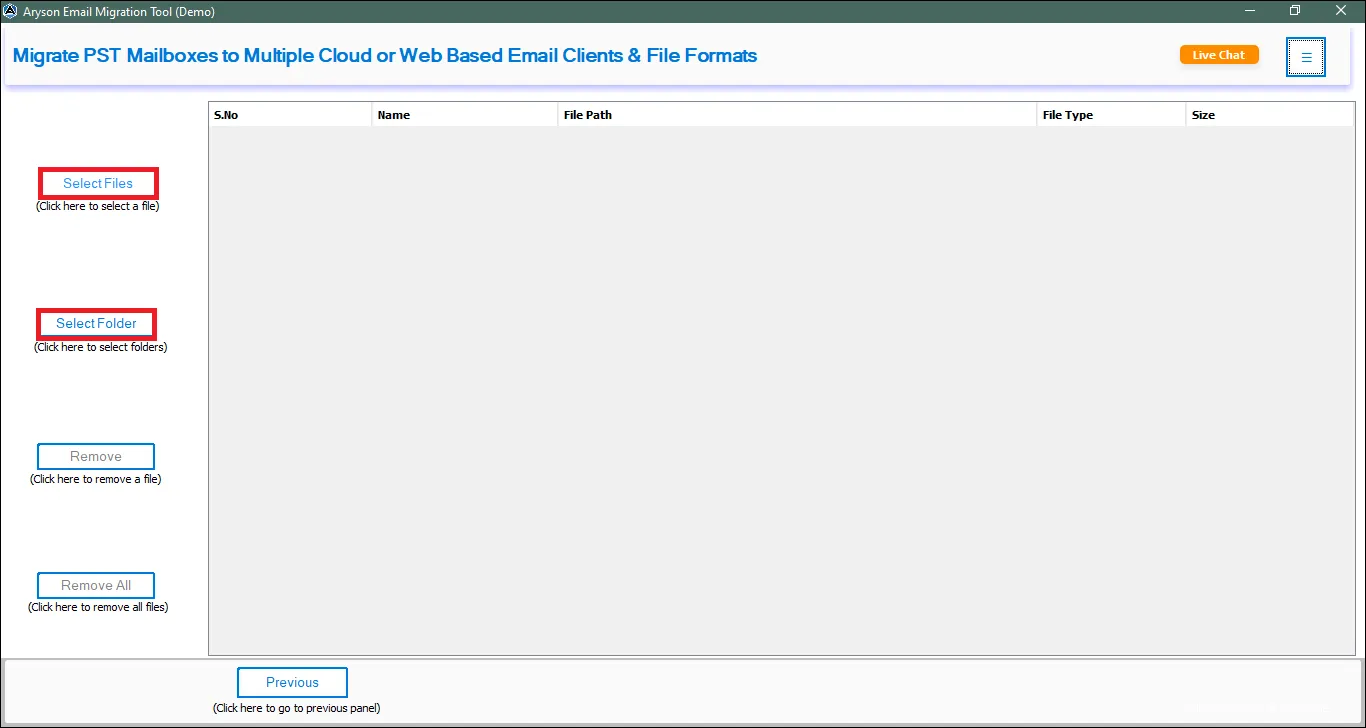
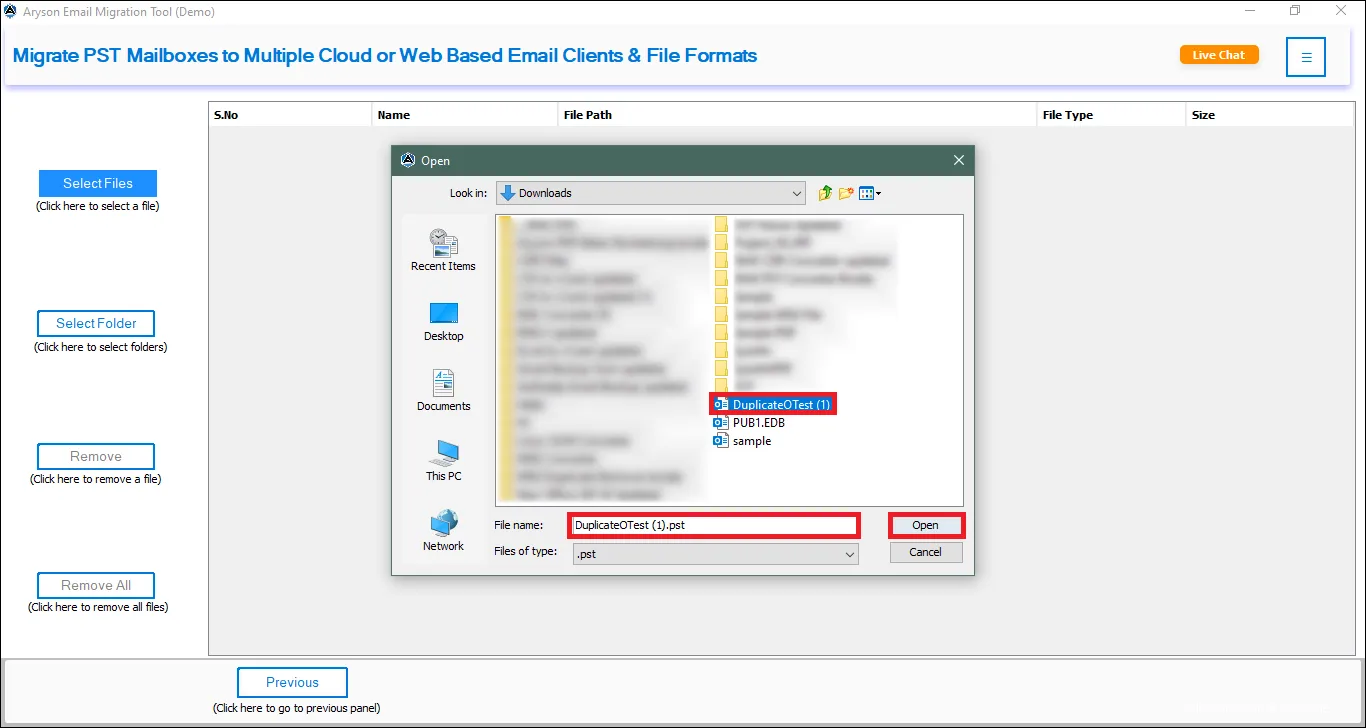
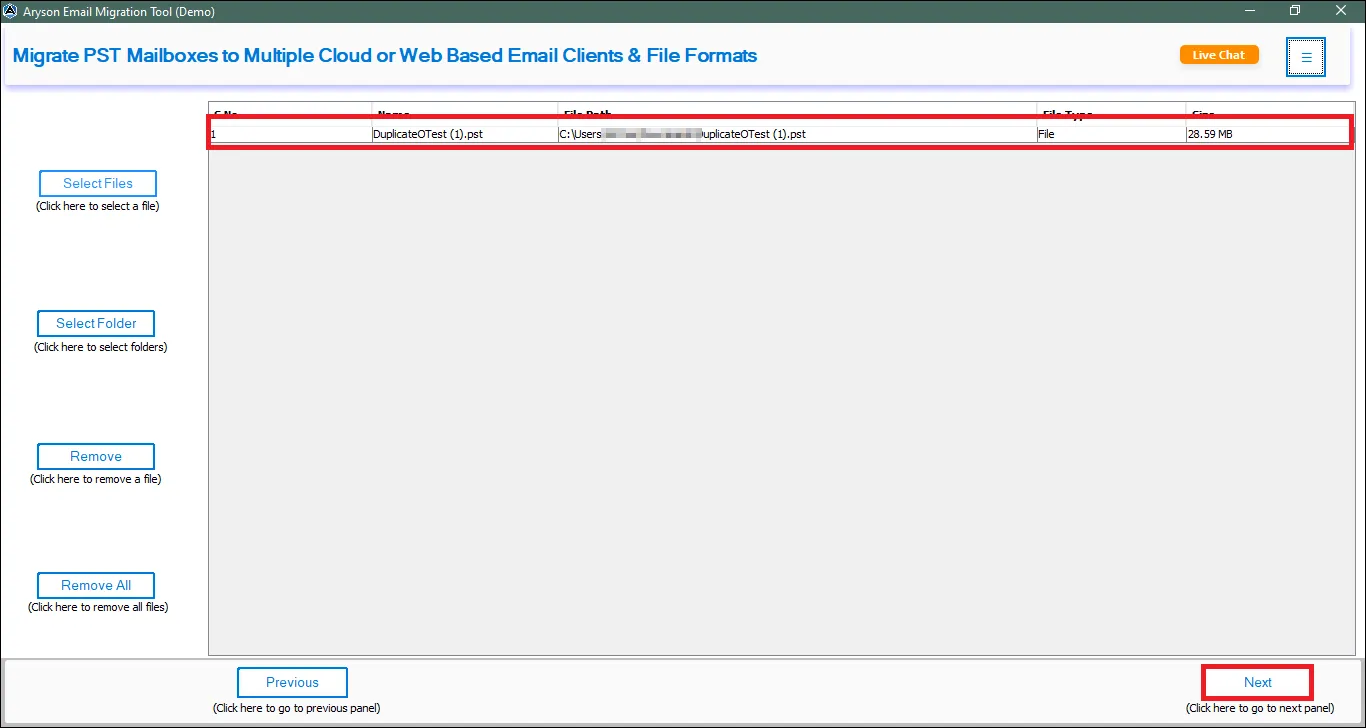
On the Select Files screen, you have two options:
- Select PST/OST: Click this to browse and load one or more individual PST/OST files from your system.
- Select Folder: Click this to load an entire folder containing multiple PST/OST files at once; recommended for bulk migrations.
- Remove Selected: Click this to remove selected files.
Once your files are loaded, click Next to proceed to the Preview panel.
Step 3: Preview the loaded PST/OST files
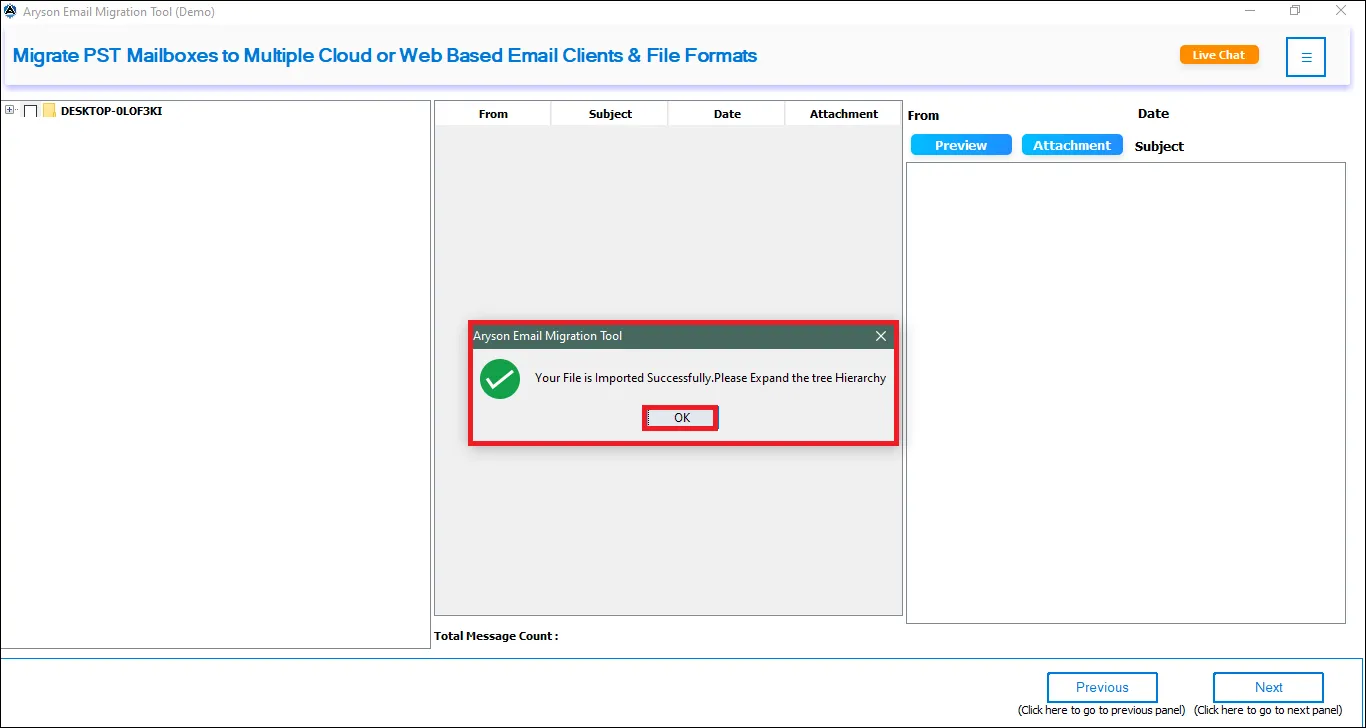
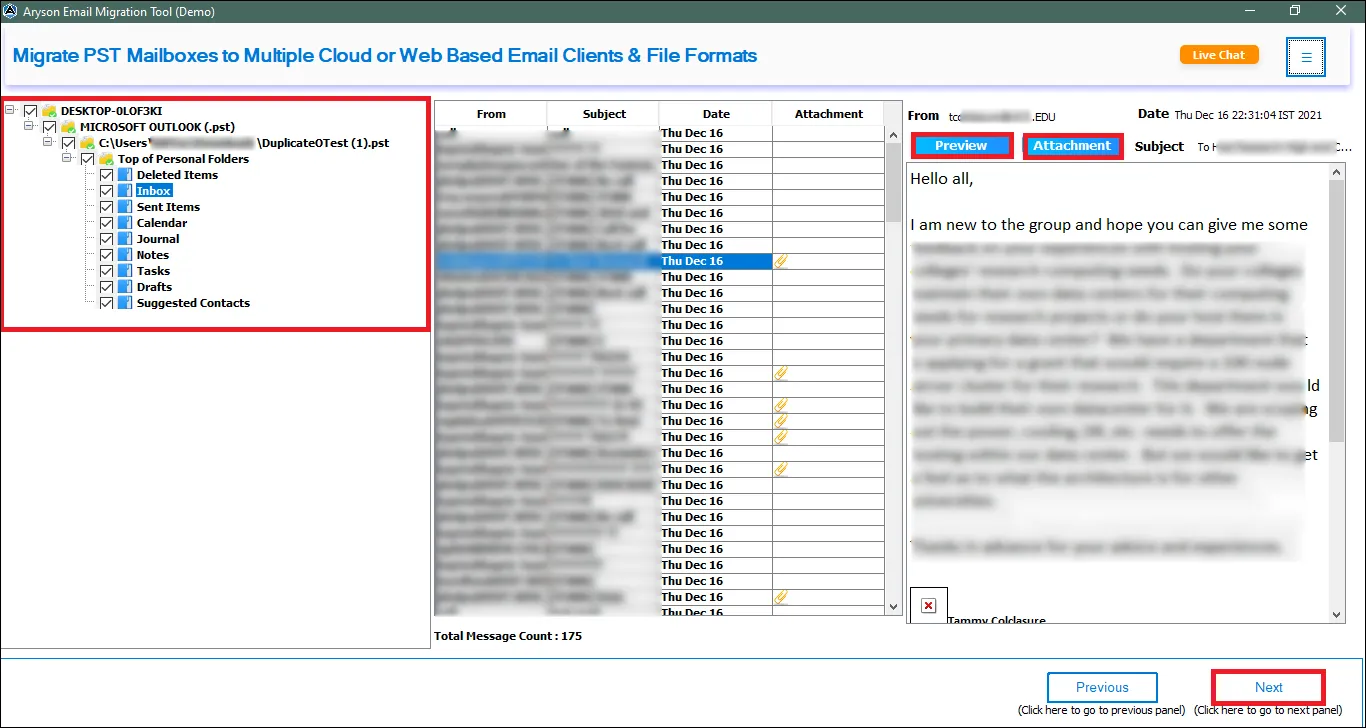
The Preview panel displays the complete folder tree of your loaded PST/OST file, including Inbox, Outbox, Sent Items, Drafts, Deleted Items, Contacts, Calendar, Tasks, and all custom folders.
- Click any folder in the left panel to load its emails in the center panel.
- Use the search tab or dropdown to filter emails by Subject, From, or To.
- Click any email to preview its full content in the right panel.
- Once you have reviewed your data and confirmed it is loading correctly, click Next to move to the destination settings.
Search Options: Use the search fields to quickly find specific folders and emails by entering the relevant folder name, subject, or other available criteria.
The Preview panel is available only when a single PST/OST file is loaded. If you loaded multiple files using the Select Folder option, the software will skip this step and proceed directly to the destination settings.
Preview Email Content: Double-clicking on any listed email opens its complete content, including sender, recipient, subject, and message body.
Step 4: Choose Your Destination
The Filters screen offers two destination tabs:
- File Format: Export your PST/OST data to a file format such as PST or PDF.
- Email Clients: Migrate directly into an email platform such as Office 365
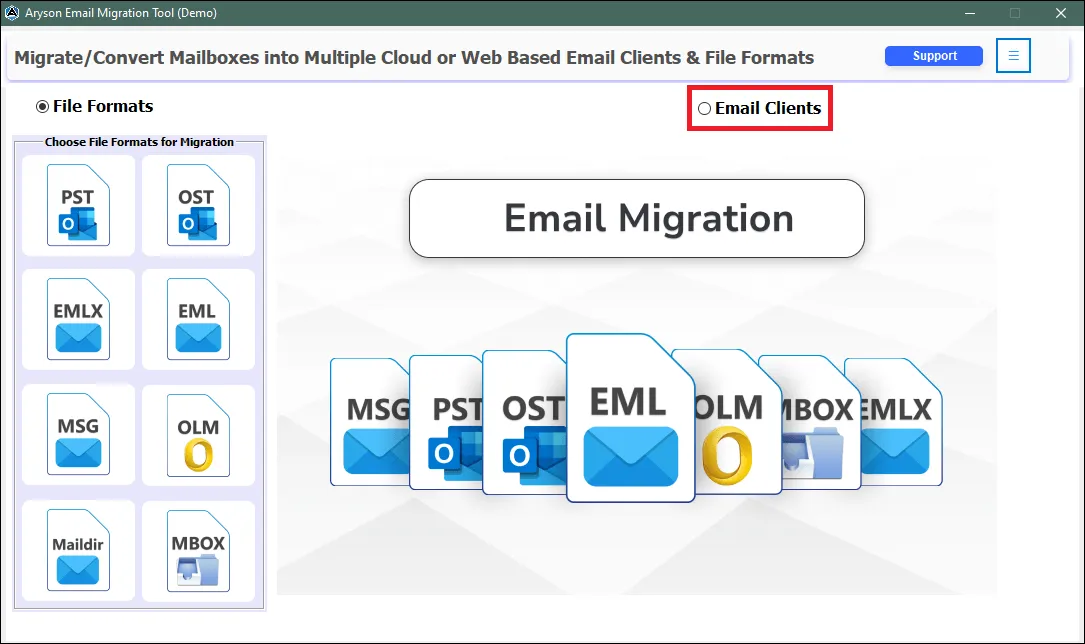
Select the File Formats tab and follow the corresponding steps below.
Step 5: Select File Format and Destination Path
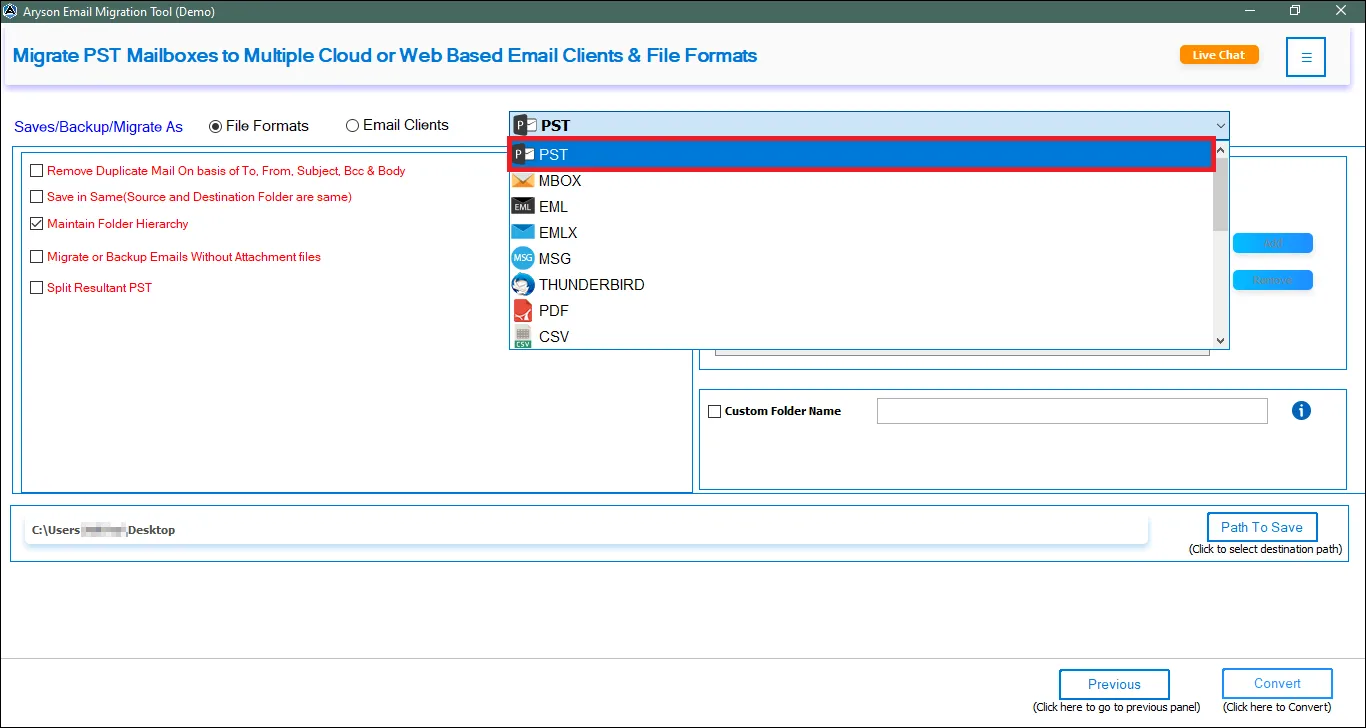
- Select File Format: Click the File Format dropdown and select either PST or PDF as your output format.
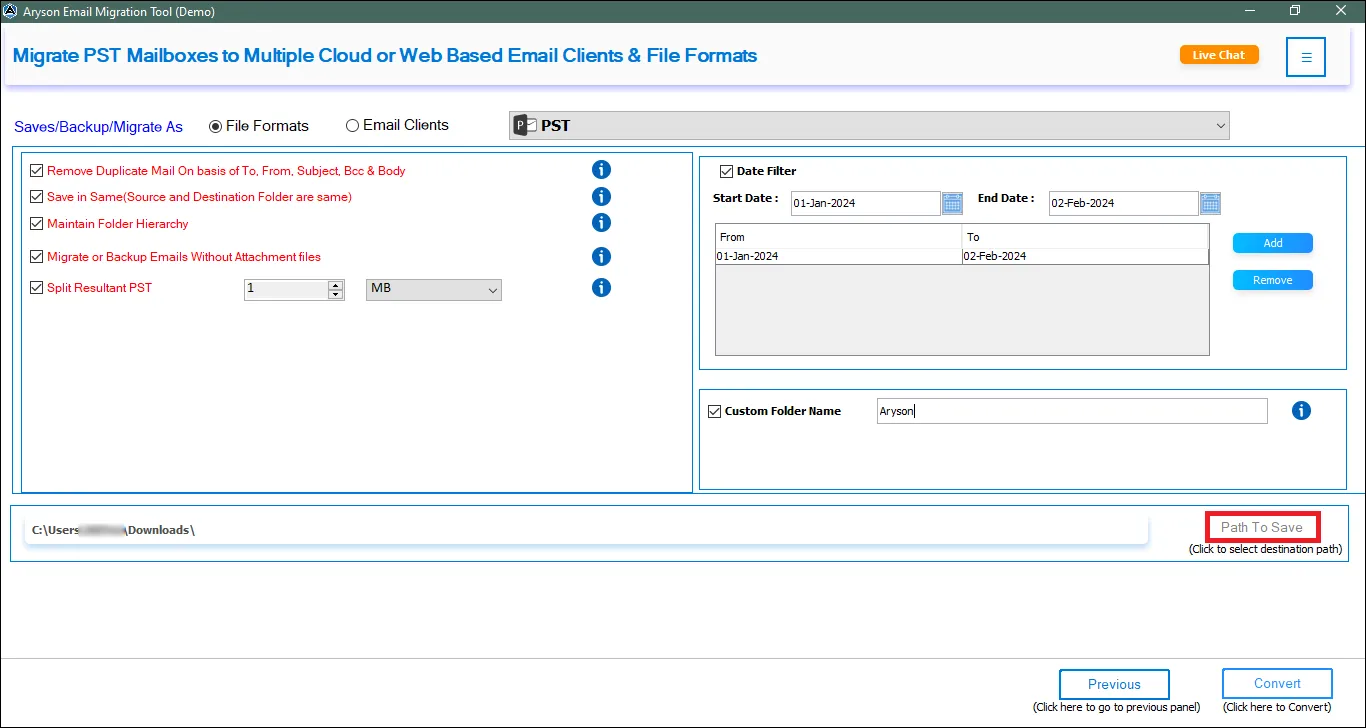
- Destination Path: Enter or browse the destination path where you want to save the migrated folder, then click Browse to select the required location.
Step 6: Configure Migration Filters
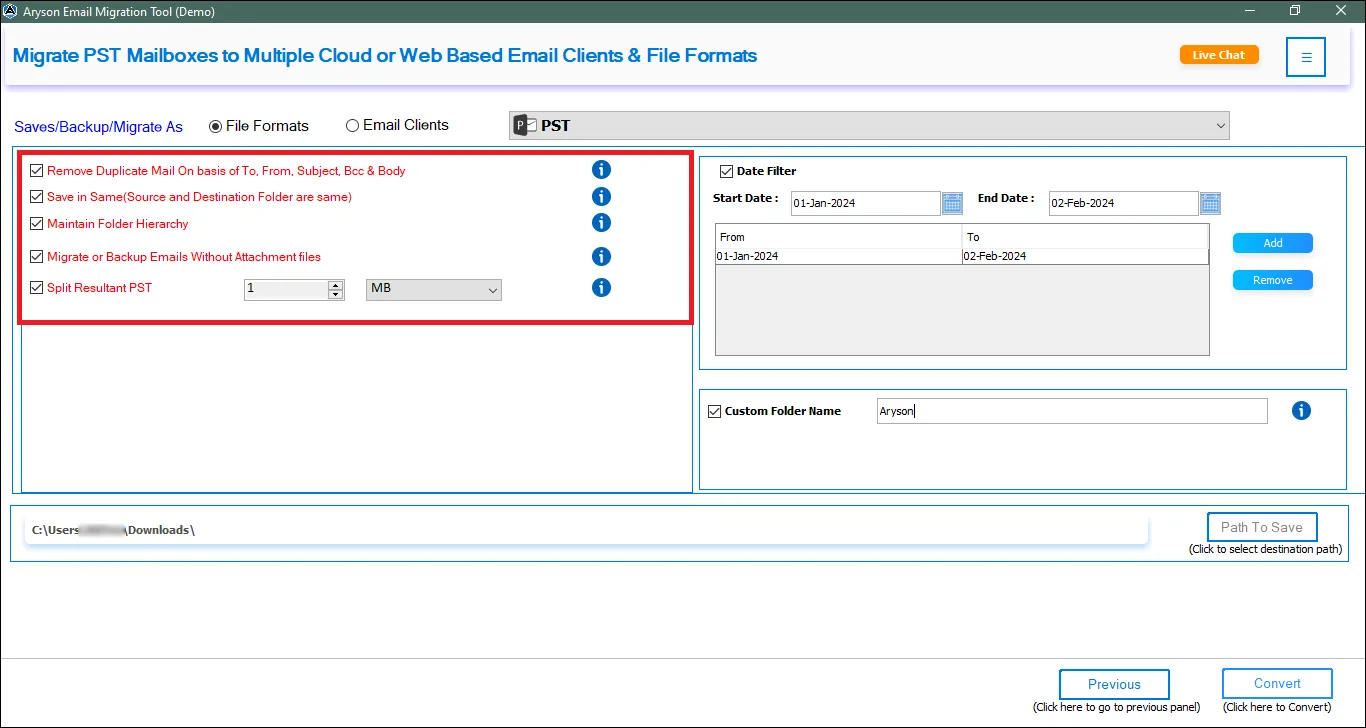
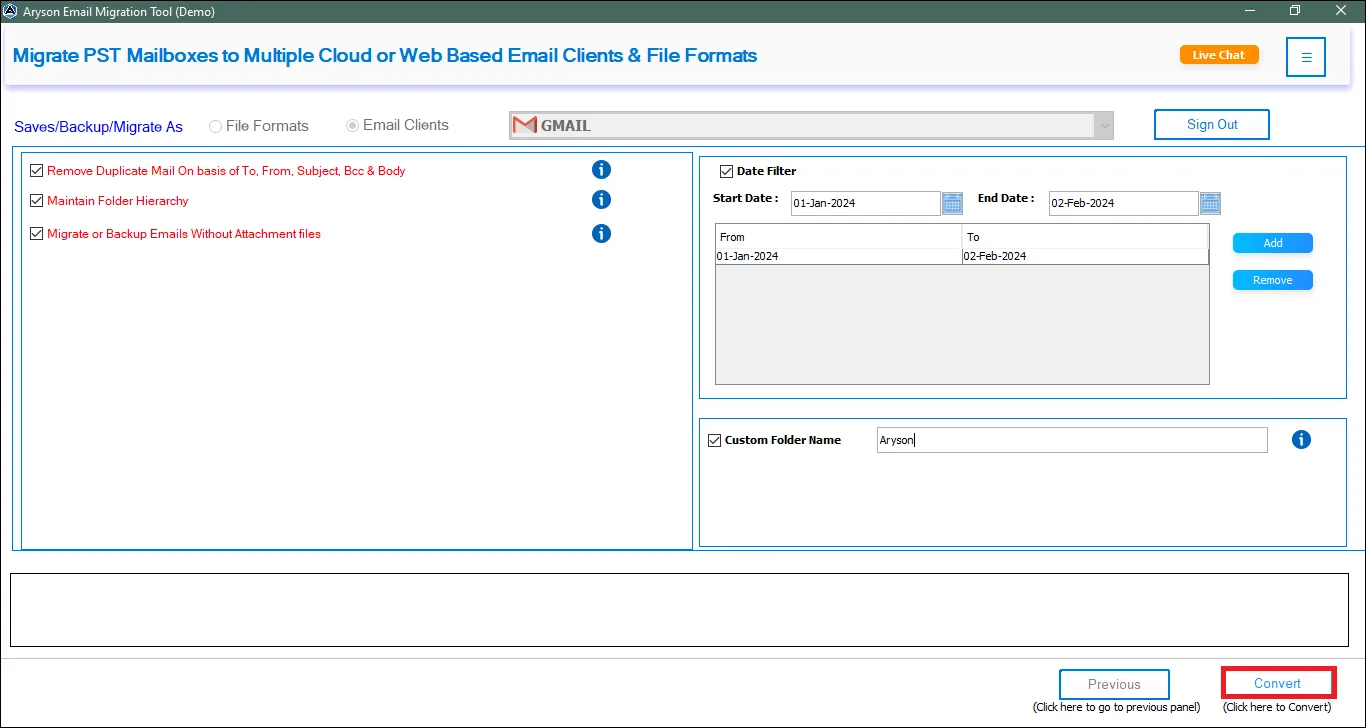
The Migration Filters section gives you complete control over what gets migrated. Configure the following options as needed:
- Skip Previously Migrated: Skips any items already migrated in a previous session, useful for incremental or interrupted migrations.
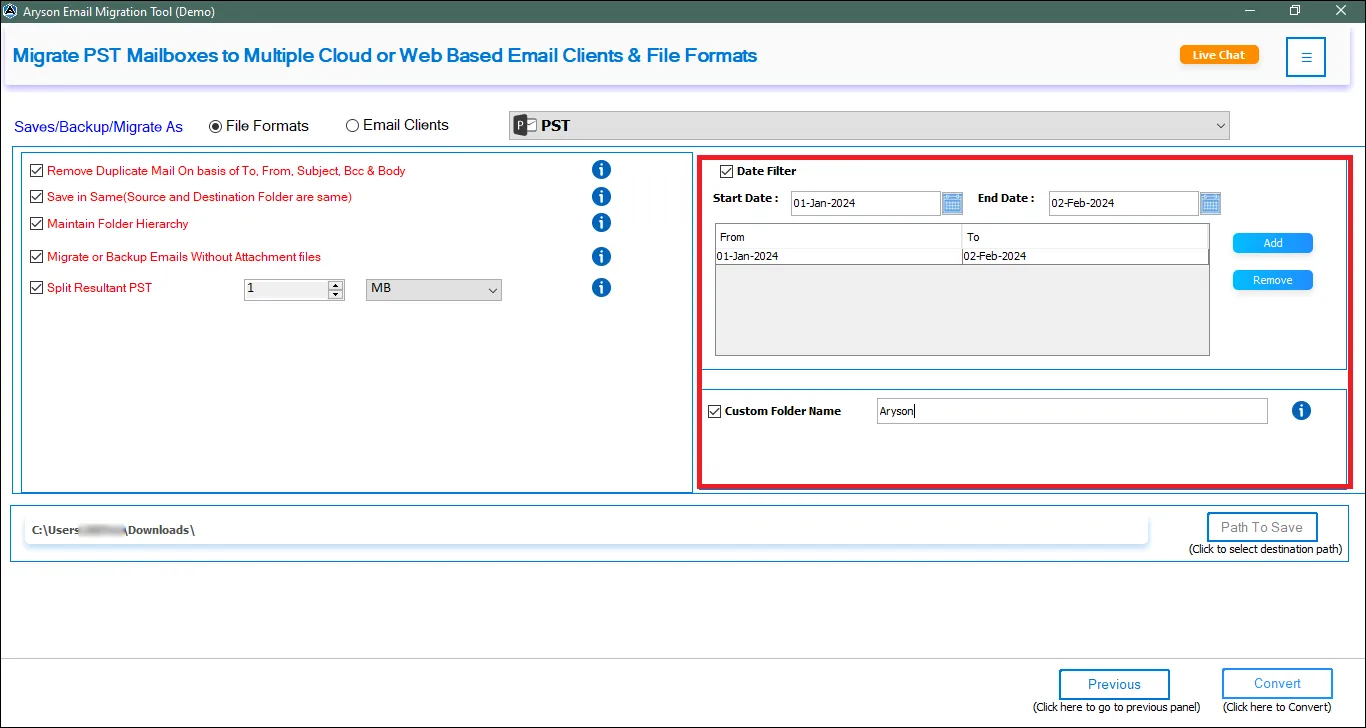
- Date Filter: Set a start and end date to migrate only emails within that specific time period.
- Item Types: Select which data types to include: Email, Contact, Calendar, and Task. Only checked item types will be migrated.
- Attachments: Check Skip Attachments if you want to migrate email content only without carrying over attached files.
- Save Contacts As VCF: Downloads all contact records locally in VCard format during migration.
- Save Calendar As ICS: Downloads all calendar entries locally in iCalendar format during migration.
- Split Resultant File: Define a maximum file size in MB to automatically split large PST output files into smaller, more manageable segments.
- Custom Folder Name: Enter a name for the output folder. If left blank, the tool uses a default folder name.
- Duplicate Handling: Select the parameters—Subject, From, Body, CC, and To—to automatically detect and remove duplicate emails before migration.
- PDF Size Restriction: Set a maximum PDF file size limit, and the software automatically splits large exports into multiple PDF files when the limit is reached.
Step 7:Review filters & Start Migration
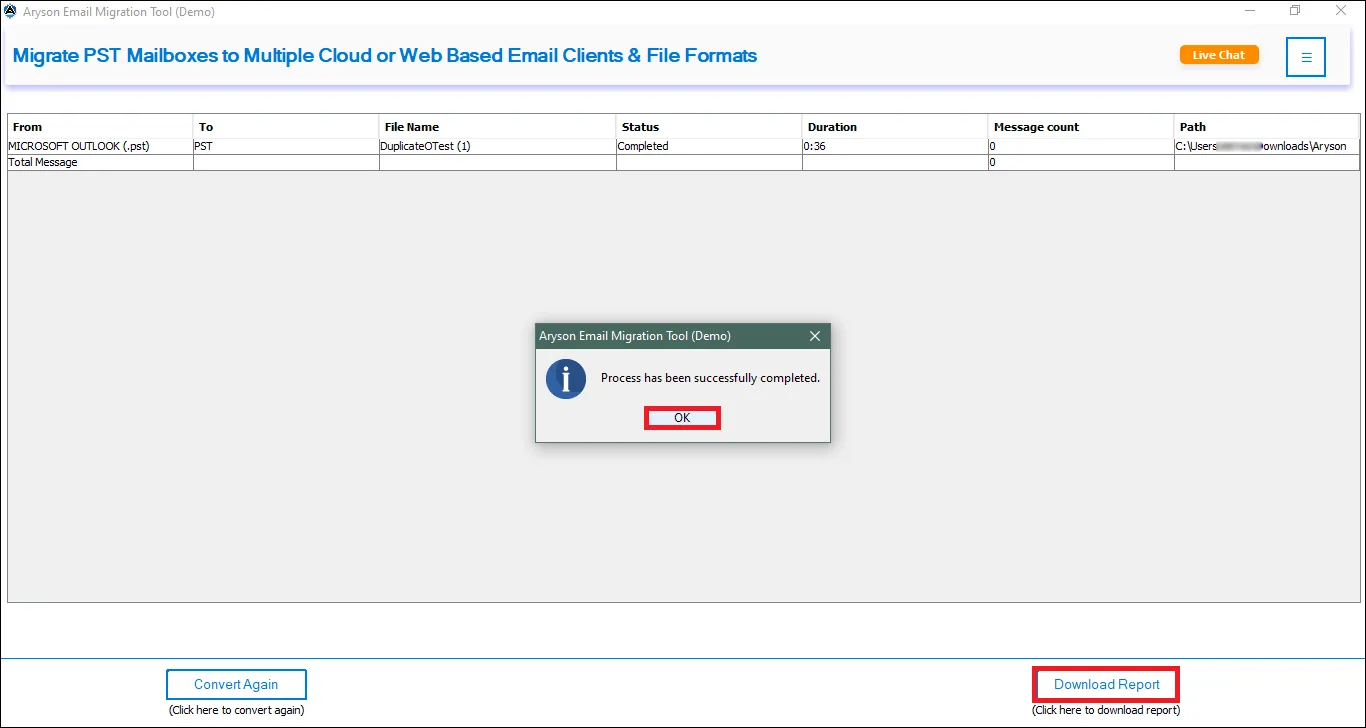
Once all filters are configured, click Start Migration. The tool processes all selected data, applies every configured filter, and saves the output to your specified destination folder.
Step 8: Monitor the Migration Process
- Processing Status: Shows the current migration status, connection status, target format, destination path, and progress.
- Total Items: Displays the total number of items selected for migration.
- Total Messages Migrated: Shows the number of messages successfully migrated.
- Total Files Migrated: Displays the number of files successfully migrated.
- Total Skipped: Shows the number of items skipped during migration.
- Total Processed Size: Displays the total size of data processed.
- Total Items Failed: Shows the number of items that failed to migrate.
- ETA: Displays the estimated time remaining for the migration.
- View the detailed migration report, which displays the export status, processed items, skipped items, and other relevant information.
Step 1: Select Source Type
Launch the software and click Source from the left navigation panel. The Select Source screen displays two options:
- OST/PST Migration: for migrating local Outlook PST files
- IMAP Migration: for migrating from a live IMAP-connected mailbox
Click OST/PST Migration to begin.
Step 2: Load Your PST/OST Files
On the Select Files screen, you have two options:
- Select PST/OST: Click this to browse and load one or more individual PST/OST files from your system.
- Select Folder: Click this to load an entire folder containing multiple PST/OST files at once; recommended for bulk migrations.
- Remove Selected: Click this to remove selected files.
Once your files are loaded, click Next to proceed to the Preview panel.
Step 3: Preview the loaded PST/OST files
The Preview panel displays the complete folder tree of your loaded PST/OST file, including Inbox, Outbox, Sent Items, Drafts, Deleted Items, Contacts, Calendar, Tasks, and all custom folders.
- Click any folder in the left panel to load its emails in the center panel.
- Use the search tab or dropdown to filter emails by Subject, From, or To.
- Click any email to preview its full content in the right panel.
- Once you have reviewed your data and confirmed it is loading correctly, click Next to move to the destination settings.
The Preview panel is available only when a single PST/OST file is loaded. If you loaded multiple files using the Select Folder option, the software will skip this step and proceed directly to the destination settings.
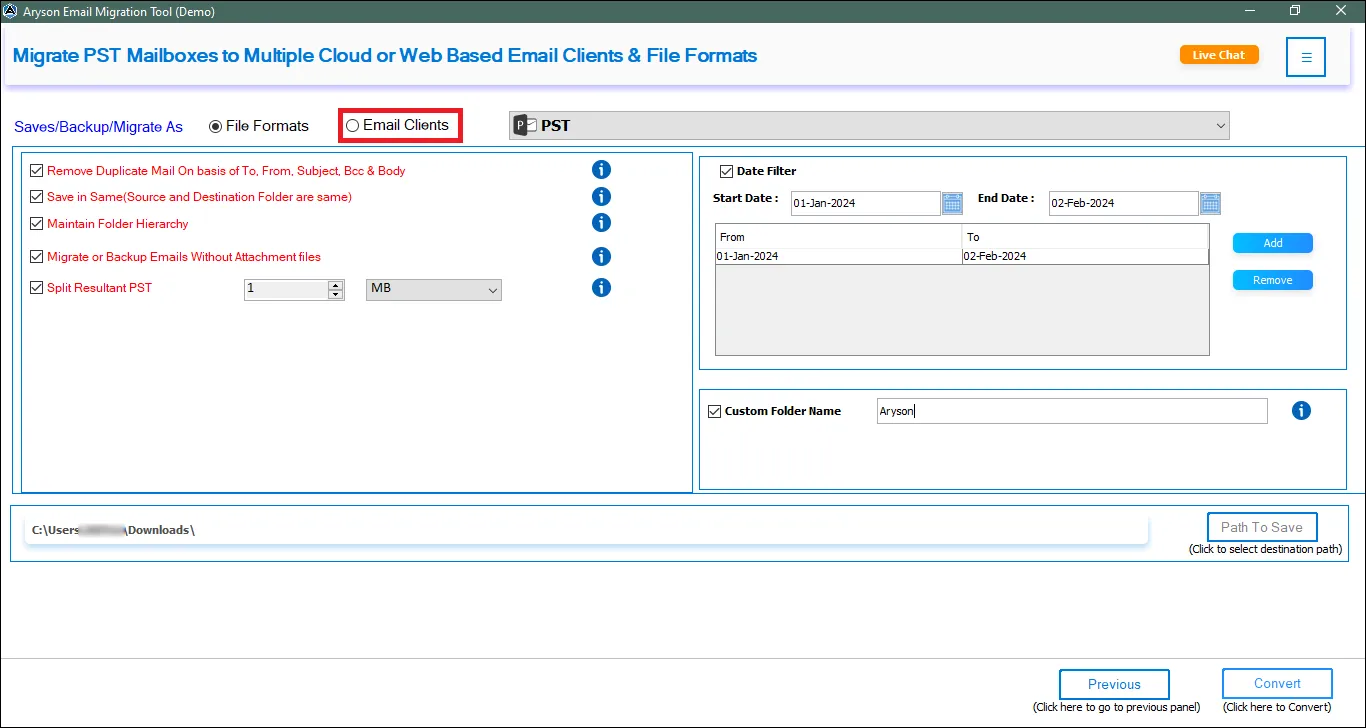
Step 4: Choose Your Destination
The Filters screen offers two destination tabs:
- File Format: Export your PST/OST data to a file format such as PST or PDF.
- Email Clients: Migrate directly into an email platform such as Office 365.
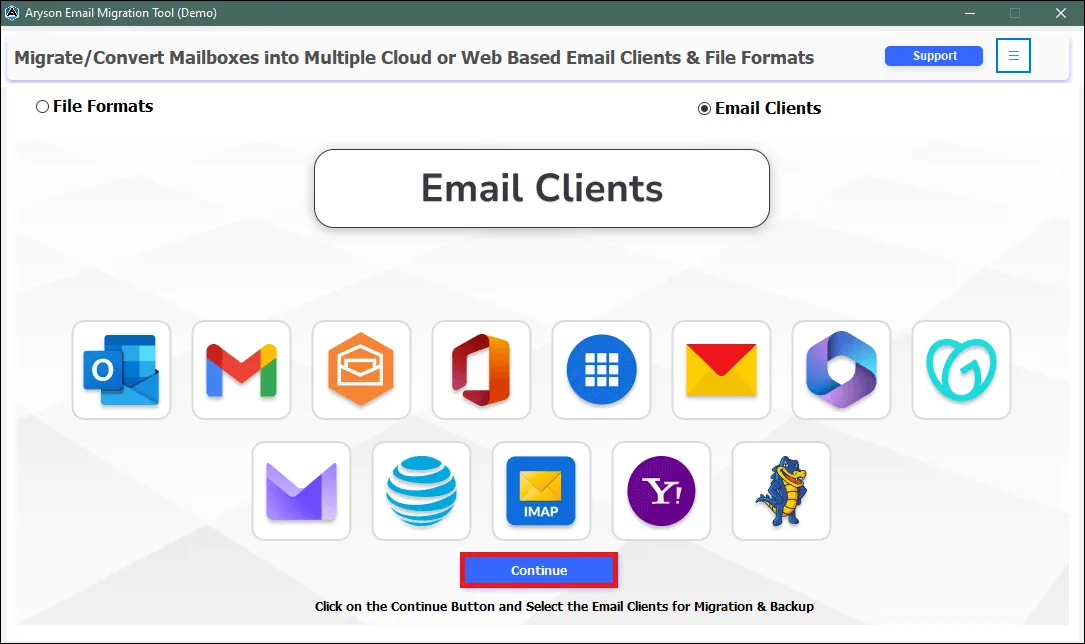
Select the Email Clients tab and follow the corresponding steps below.
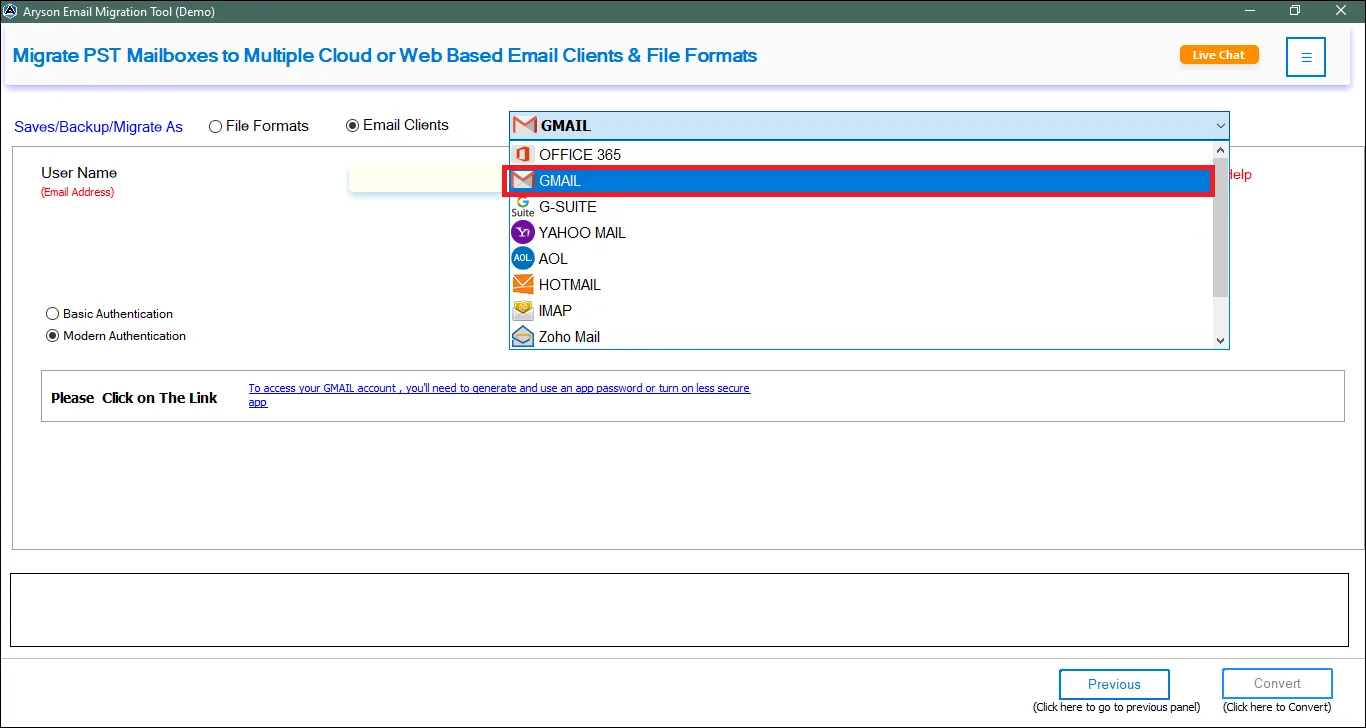
Step 5: Select Email Client
Click the Email Client dropdown and select Office 365 as your output format.
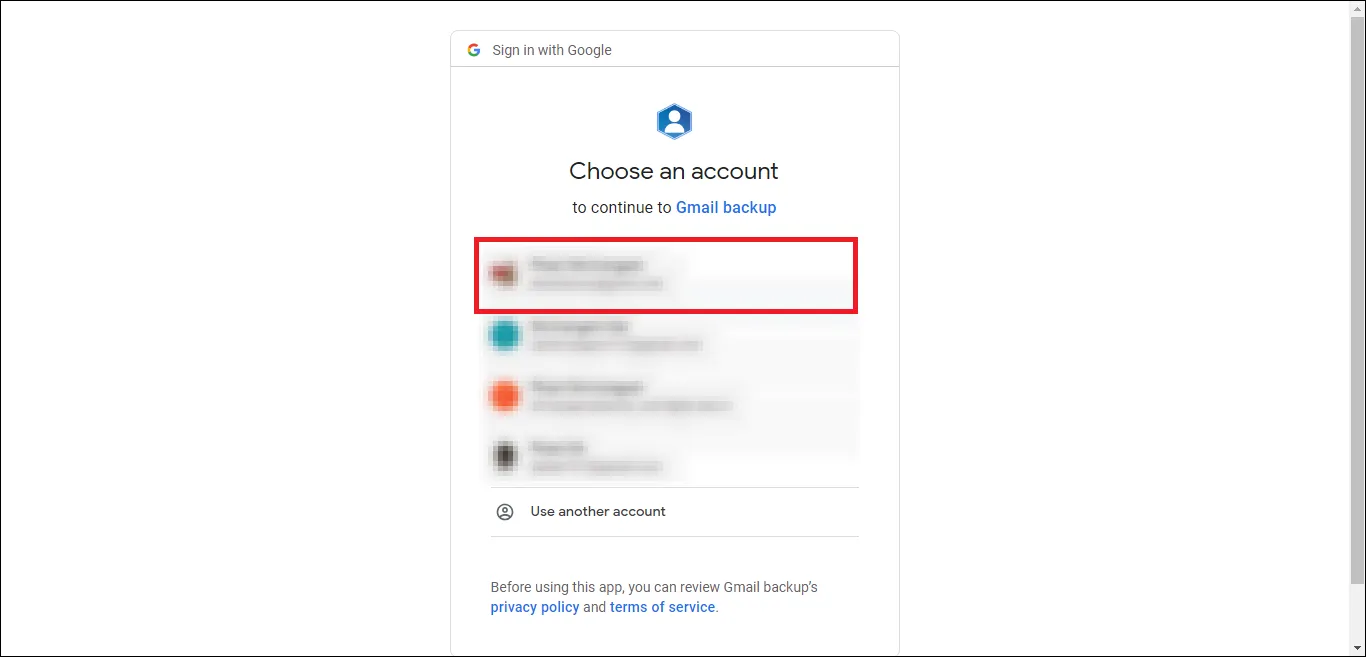
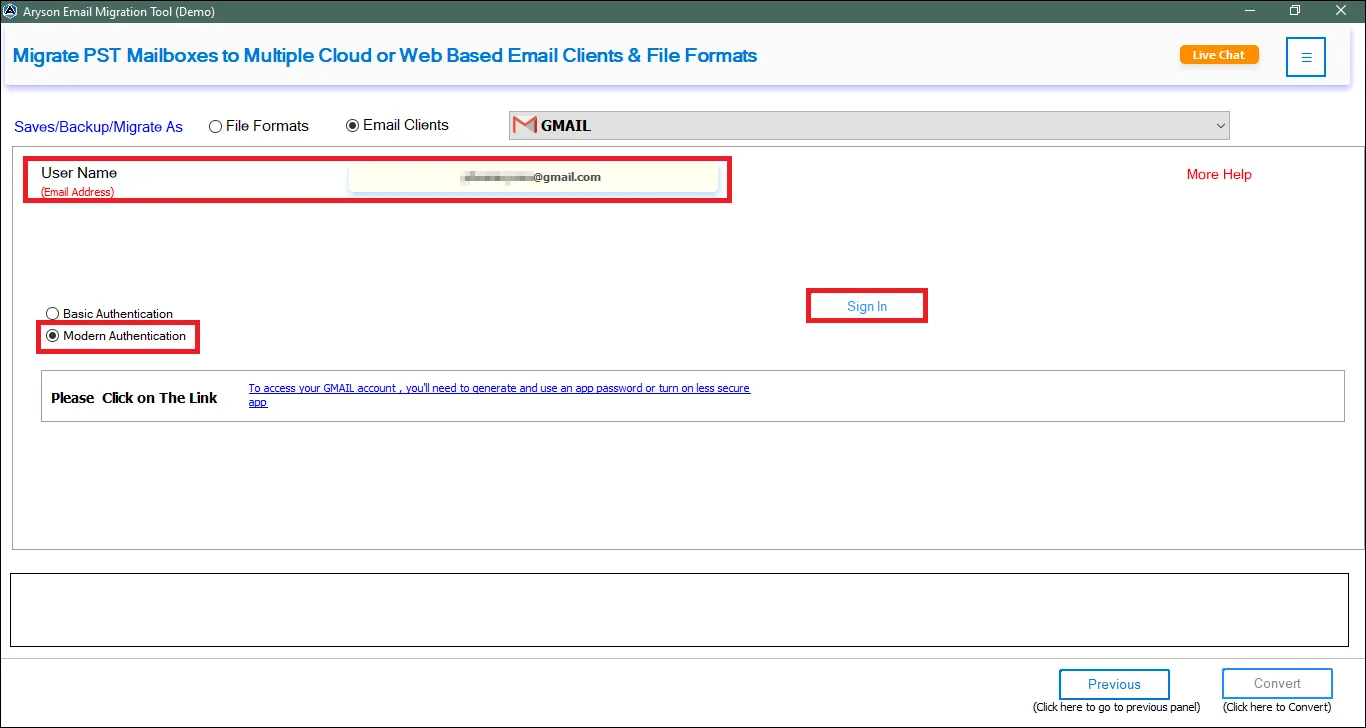
Step 6: Choose the login type as either Admin Login or Single Login based on your requirement.
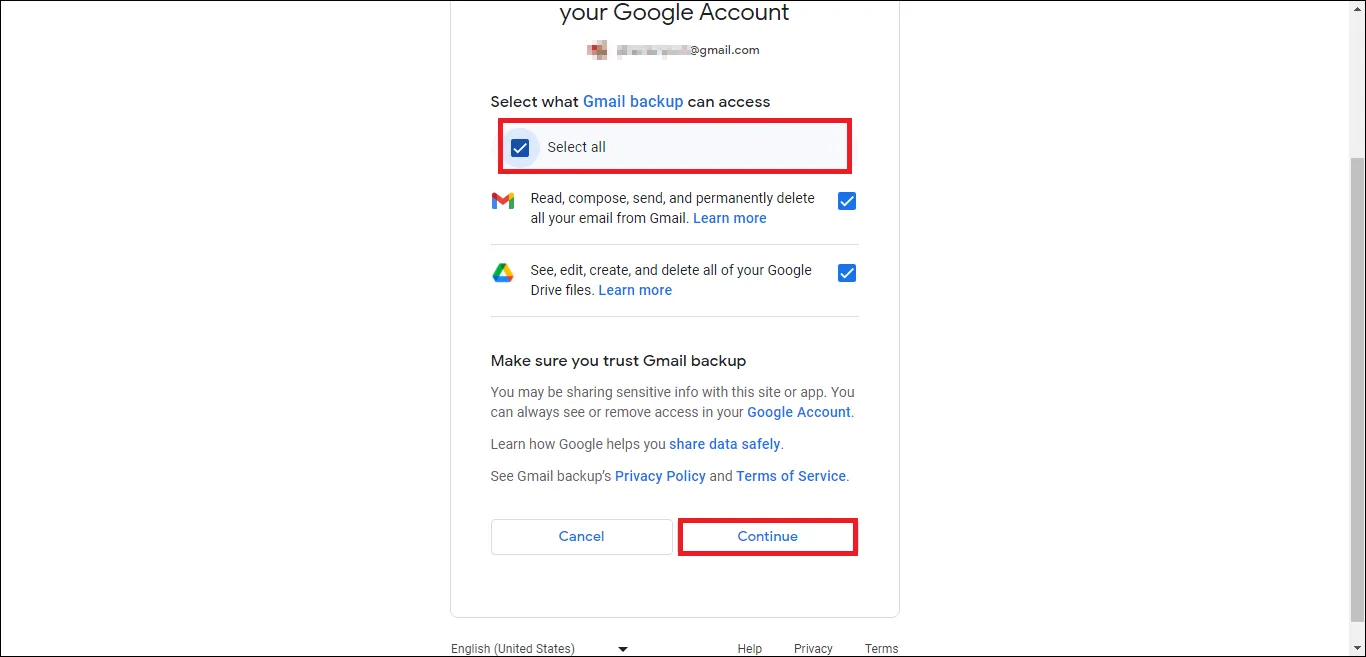
- Login Process using Admin Login:
- Select Modern Authentication, click Add Connection, and sign in using the Microsoft 365 Global Administrator account.
- Enter the required credentials and complete the authentication process securely.
- Select Client Secret, enter credentials (Tenant ID, Client ID, and Client Secret), and click Connect Tenant.
- Login Process using Single Login:
- Log in with a single mailbox, then click Add Connection.
- Enter the required credentials and complete the authentication process securely.
Step 7: After authentication, select the required mailboxes to migrate to Office 365.
- Import CSV: Bulk import mailbox list using a CSV file.
- Sample CSV: Download a sample CSV file to see the required format.
- Search mailboxes: Search bar to quickly find specific mailboxes.
- Mailbox list: Displays all available mailboxes with their license status (Licensed/Unlicensed).
Step 8: Then, select the destination mailbox to map the source PST/OST files to the desired mailbox.
- Choose the Source PST / Folder to migrate from.
- Choose the Target Mailbox to map the source data to.
- Click the View Mapping option to view the actual mapping data.
- Click on the Save Mapping option to save the current mapping.
Step 9: Configure the following Migration Filters for Office 365:
Configure the following filters for the Office 365 migration:
- Skip Previously Migrated: Avoids reprocessing already migrated items in subsequent runs
- Date Filter: Migrates only emails within your specified date range
- Item Types: Select Email, Contact, Calendar, and Task as needed
- Attachments: Enable "Skip Attachments" to exclude attached files from the migration
- Save Contacts As VCF: Saves contacts locally in VCard format
- Save Calendar As ICS: Saves calendar data locally in iCalendar format
- Folder Mapping: Enable Preserve Original Folder Hierarchy to recreate the exact source folder structure in the Office 365 destination mailbox
- Custom Folder Name: Define a custom name for the migrated folder in the destination
- Duplicate Handling: Automatically removes duplicate items based on your selected parameters
Step 10: Review the selected filters, then click Start Migration. The software authenticates with Office 365.
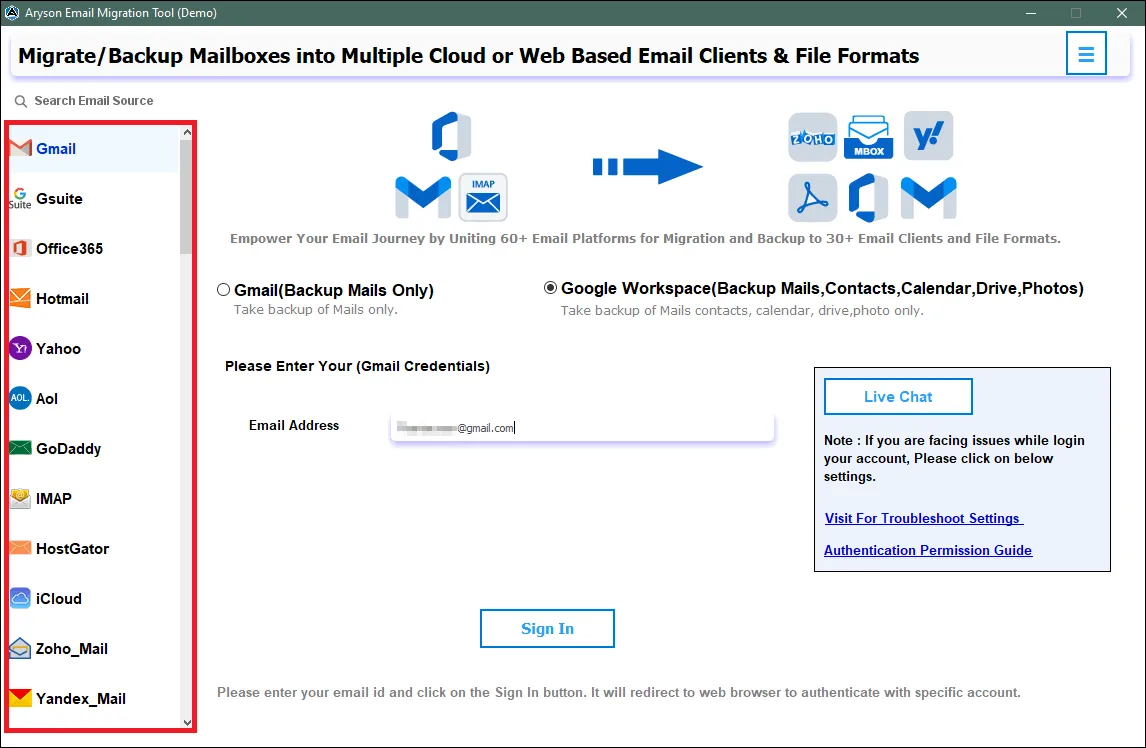
Step 11: Then Monitor the Migration of PST into Office 365
- Processing Status: Shows the current migration status, connection status, target format, destination path, and progress.
- Total Items: Displays the total number of items selected for migration.
- Total Messages Migrated: Shows the number of messages successfully migrated.
- Total Files Migrated: Displays the number of files successfully migrated.
- Total Skipped: Shows the number of items skipped during migration.
- Total Processed Size: Displays the total size of data processed.
- Total Items Failed: Shows the number of items that failed to migrate.
- ETA: Displays the estimated time remaining for the migration.
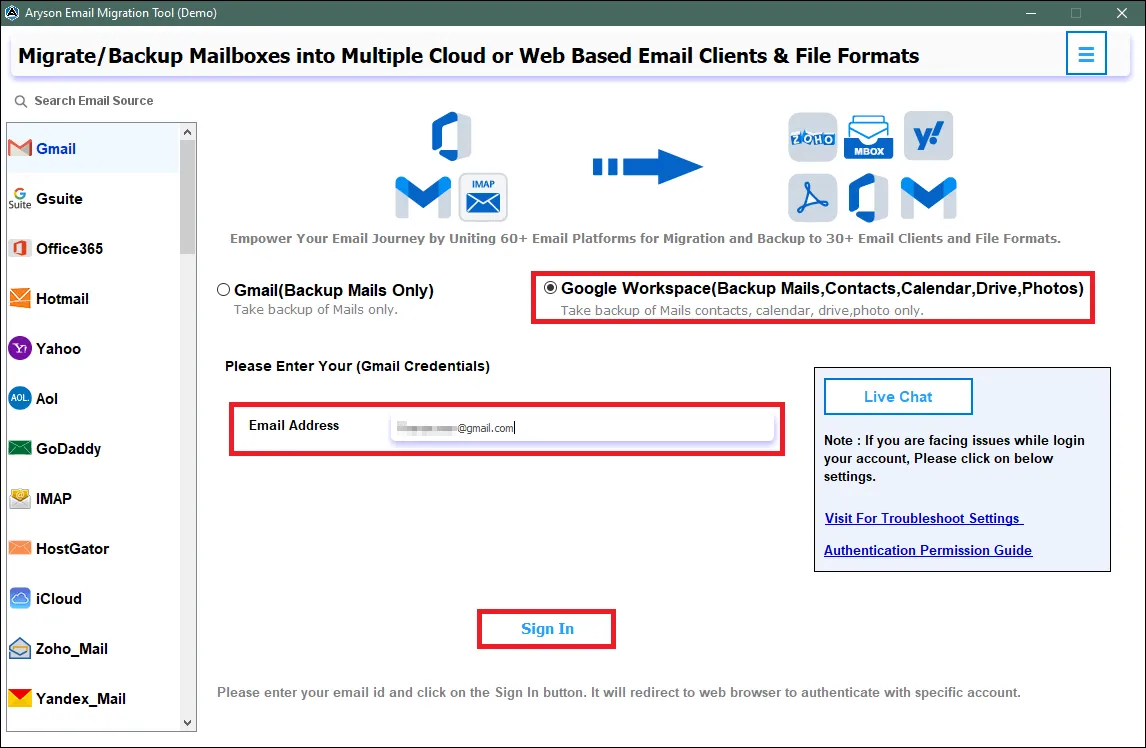
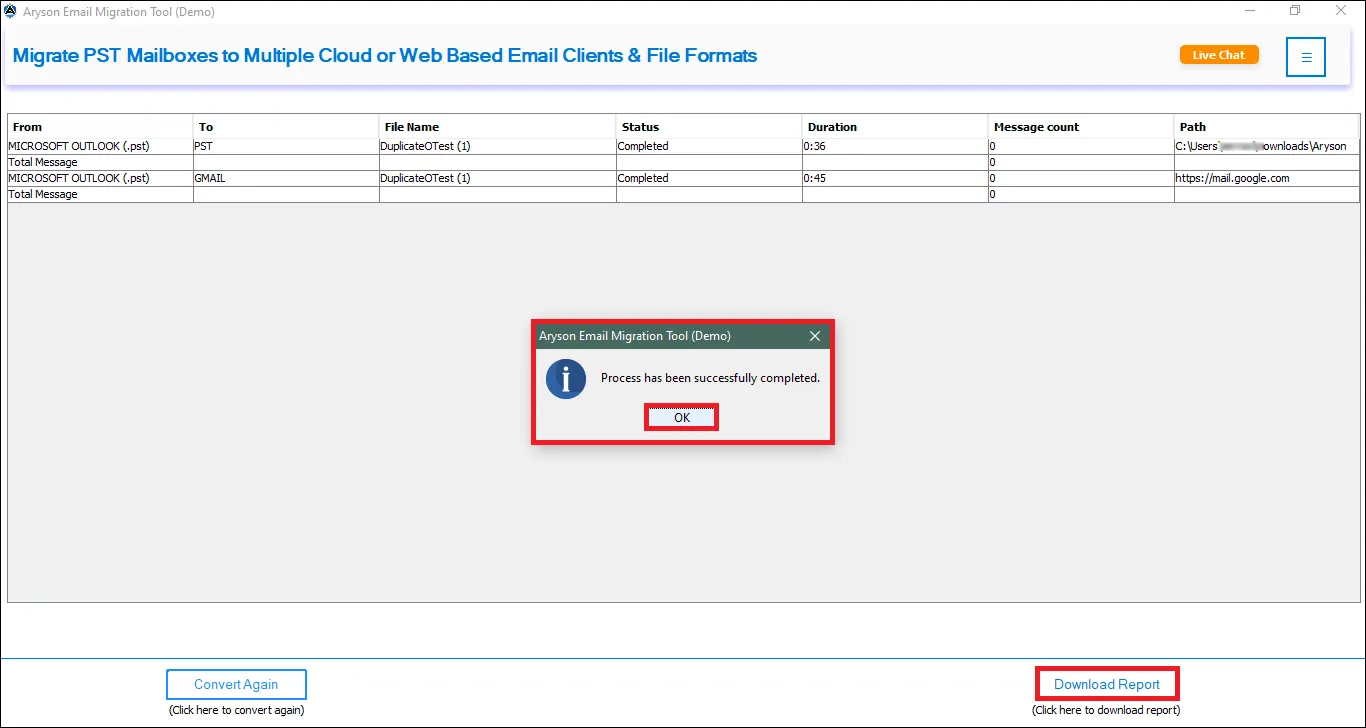
Step 12: After the export is completed, go to the All Reports section from the left panel and select Mail Migration Report.
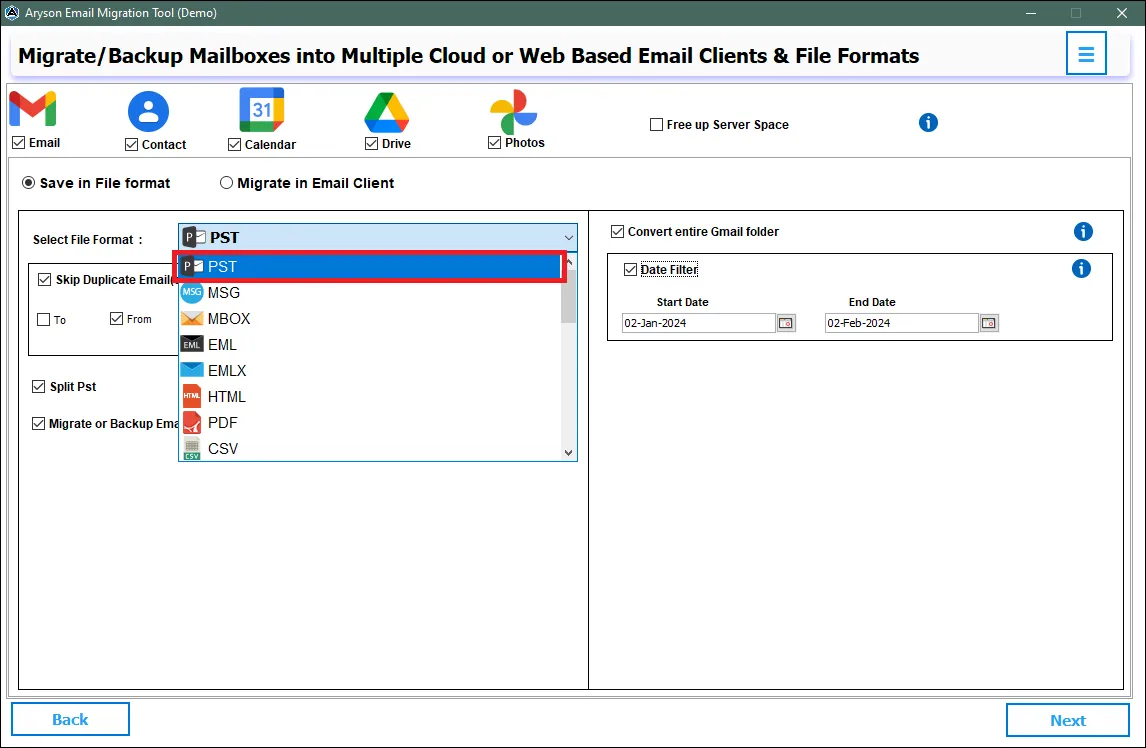
Step 13: View the detailed migration report, which displays the export status, processed items, skipped items, and other relevant information.
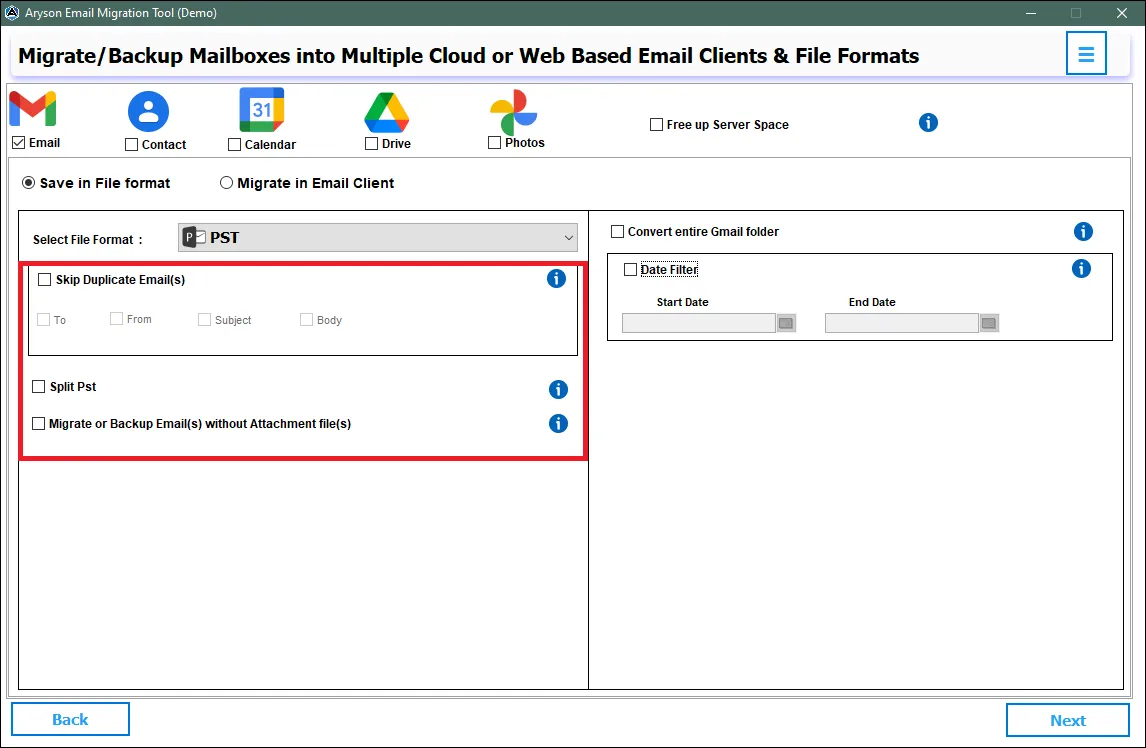
Step 1: Select IMAP Migration as the source
Use IMAP migration when your source data is stored in a live mailbox, such as Gmail, Yahoo Mail, GoDaddy, or any corporate IMAP server.
Step 2:Configure the account for Single Account and Batch CSV.
- For Single Account, enter the IMAP login credentials, then click Test Connection to verify that your credentials are correct and the connection is active. Once the connection is confirmed, click Continue to proceed.
- Email Address: Your full email address.
- Password / App Password: Your account password or an app-specific password if your provider requires it.
- IMAP Server: Your provider's IMAP server address (for example, imap.gmail.com for Gmail).
- Port: The IMAP port number (commonly 993 for SSL).
- Security: Select the appropriate security protocol (SSL, TLS, or None).
- For Batch CSV, add IMAP accounts via CSV upload or manual entry and validate them before starting migration. This ensures only verified accounts proceed for a smooth and error-free migration process.
- CSV Upload for Bulk Account Import: Upload a CSV file containing email addresses, passwords, IMAP server details, and port numbers to add multiple accounts simultaneously, reducing manual effort and streamlining large-scale migrations.
- Manual Account Addition for Individual Mailboxes: Enter account credentials and IMAP settings manually to add specific mailboxes one at a time, providing greater control when migrating a limited number of accounts.
Step 3: Select the mailboxes to migrate
- For Single Mode, review the mailbox tree and Select Folders.
- The Mailbox Tree screen displays the complete folder structure of your connected IMAP account, along with a summary showing: Total folders, total mail, total subfolders, and connection status.
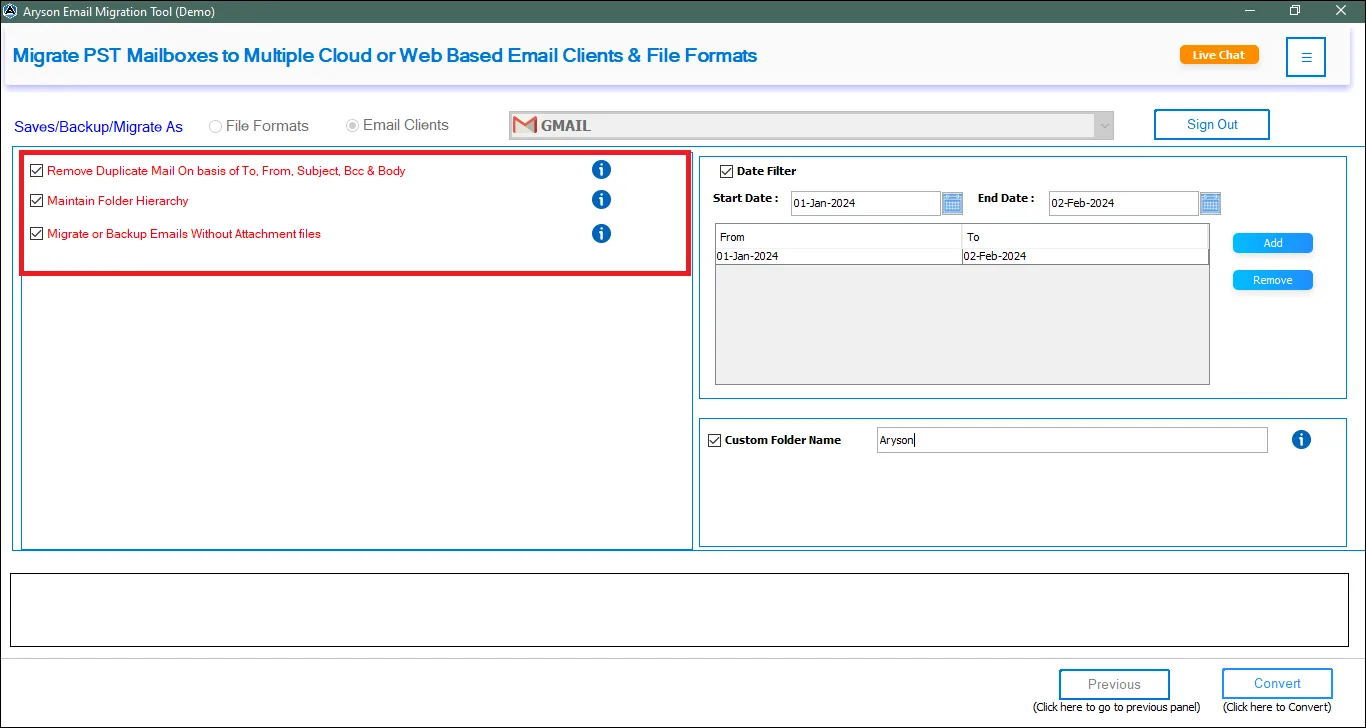
- Opt for the Maintain Folder Hierarchy option to keep your mailbox folder hierarchy intact.
- Browse the folder list and check or uncheck the folders you want to include in the migration. Click Fetch Mail Count to load the exact email count per folder before proceeding. Once your selection is confirmed, click Continue to Filter.
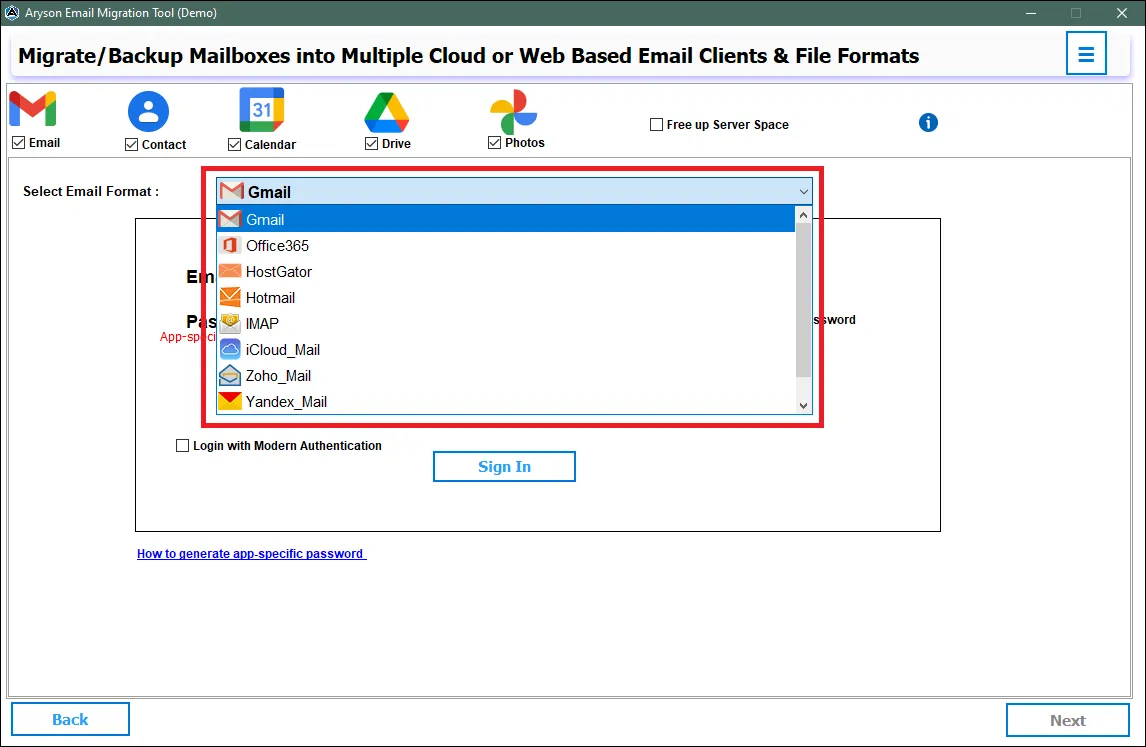
- For Batch Mode: Select the email IDs of sub-users whose mailboxes you want to migrate, validate the accounts, and click Continue.
The Preview panel is available only in Single Account mode. For large files or batch/CSV mode, the software proceeds directly to the filter configuration step without a preview.
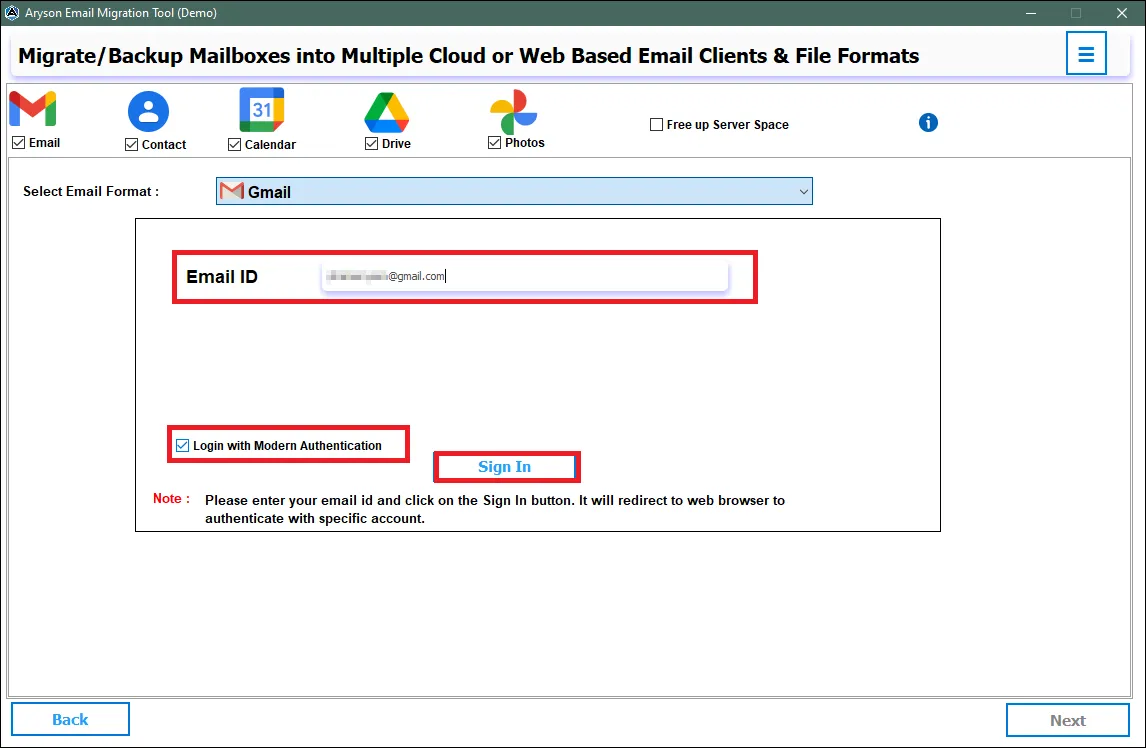
Step 4: Choose Your Destination
The Destination Filter Panel offers two tabs:
- File Formats: Export to your desired file format (PDF, PST, JSON, MBOX, DOC, DOCX, EML, MSG, and CSV)
- Email Client: Migrate directly to email clients (IMAP, Google Workspace, Office 365).
Choose File Formats from the tab, select the required format from the dropdown, and follow the steps given below.
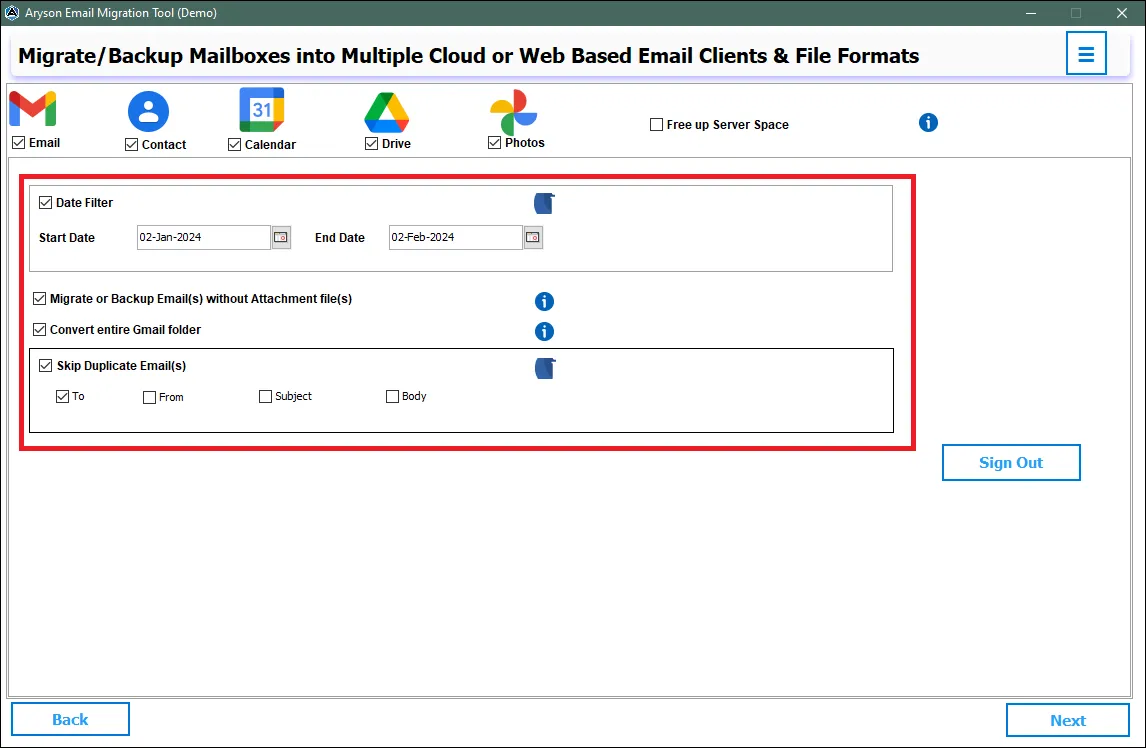
Step 5: Select the desired file format (PDF, PST, JSON, MBOX, DOC, DOCX, EML, MSG, and CSV) as per your requirement.
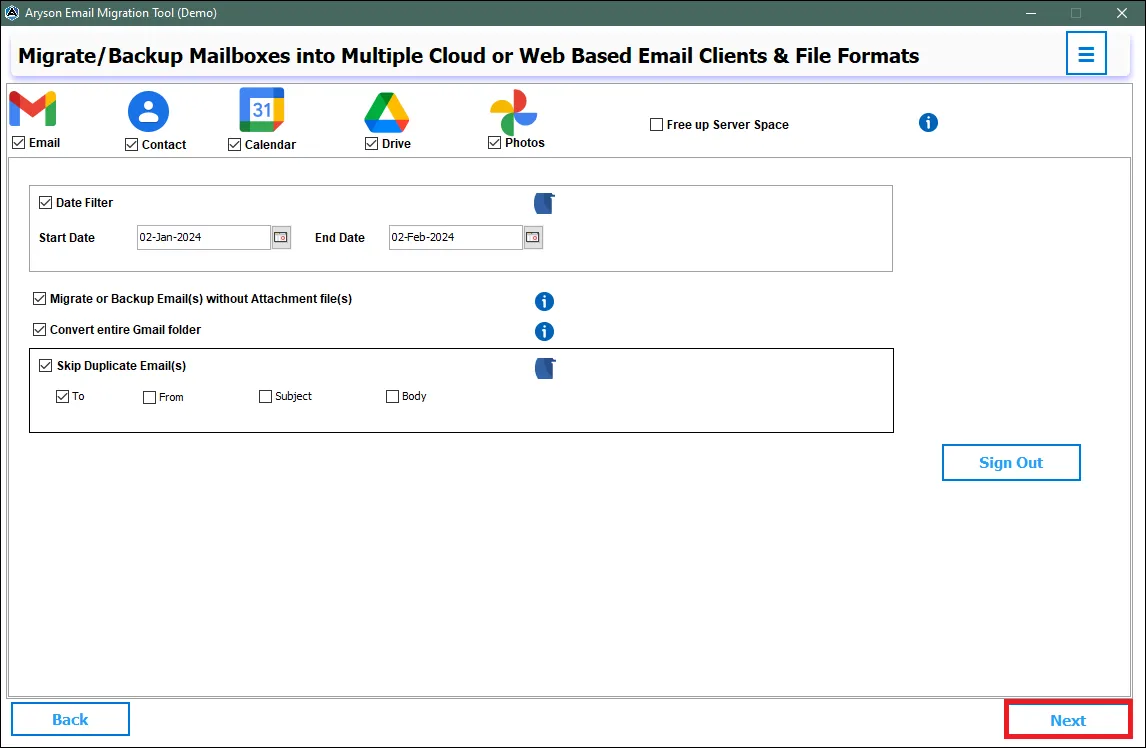
Step 6: Configure File Format Filters
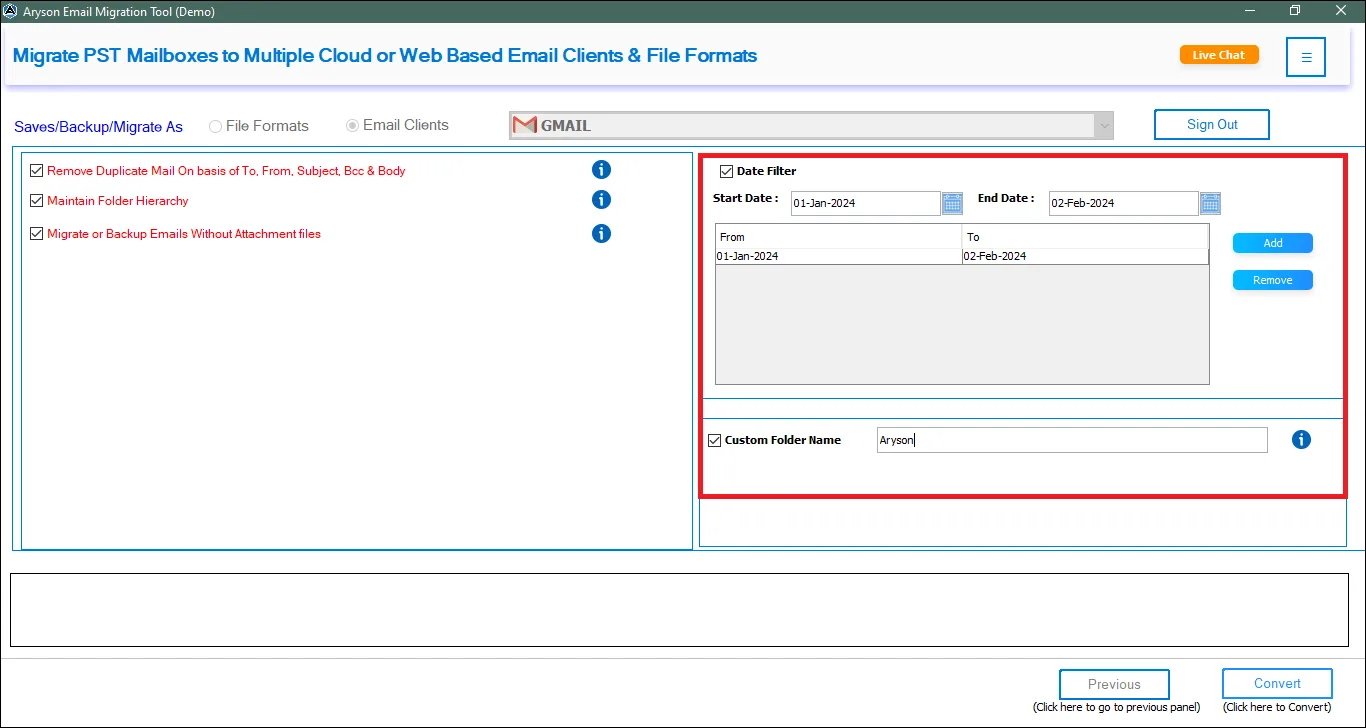
- Date Filter: Include only emails within a specific date range.
- Advanced Mail Filter: Apply additional keyword or header-based filtering for more targeted extraction.
- Remove Duplicates: Automatically detect and remove duplicate emails from the output.
- Free UP Server Space: Removes or archives emails from the source IMAP mailbox after successful migration to free up storage.
- Output Folder: Browse and select the destination folder where migrated files will be saved.
- Save Attachments in Folder: Saves all email attachments separately in a dedicated folder alongside the migrated output.
- Miscellaneous Options: Additional output and formatting preferences for the migration.
- Custom Folder Name: Define a personalized name for the output folder.
- Split PST (50 GB): Divides large PST files into smaller parts up to 50 GB for easy management.
- For MBOX: Split MBOX File– Divides large MBOX files into smaller files based on the specified size limit for easier storage and management.
- For PDF: Create Merged PDF – Combines all selected emails into a single PDF file for easy access and management.
- Add Attachments in PDF – Embeds email attachments directly within the PDF along with the corresponding email content.
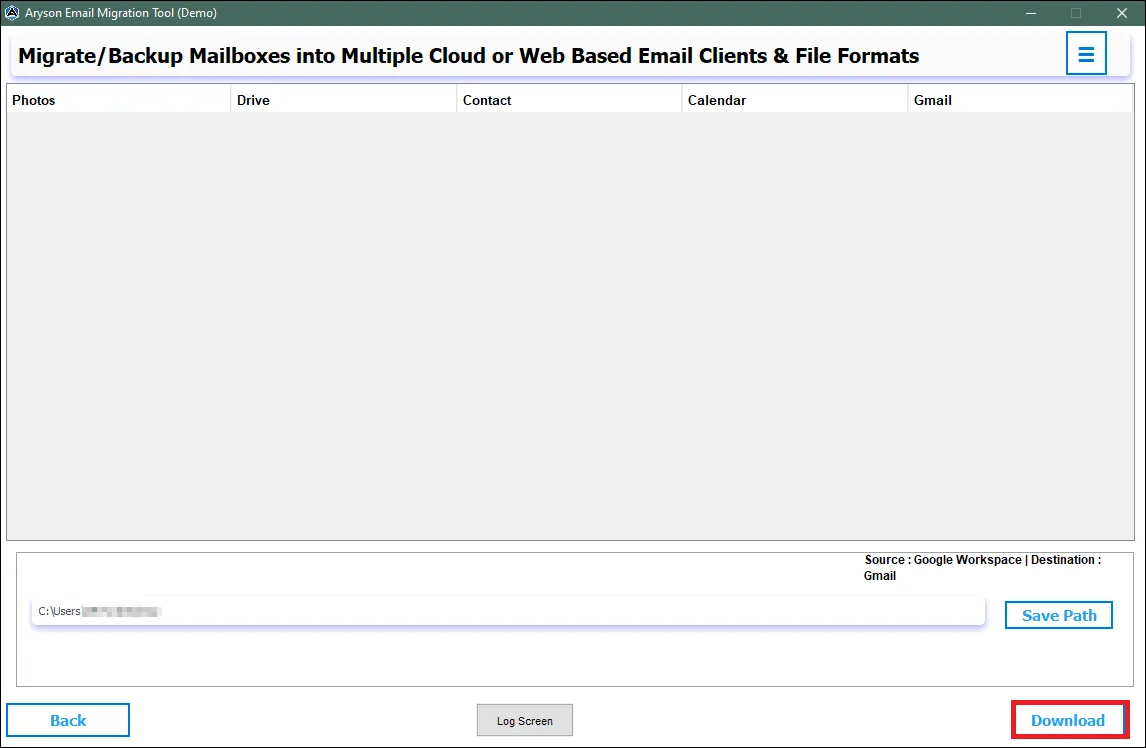
Step 7: Review the selected filters, then click Start Migration.
The software applies the selected filters and exports all chosen IMAP mailbox data directly into the selected file format (PST, PDF, MBOX, EML, MSG, CSV, DOC, DOCX, or JSON) at the specified destination location.
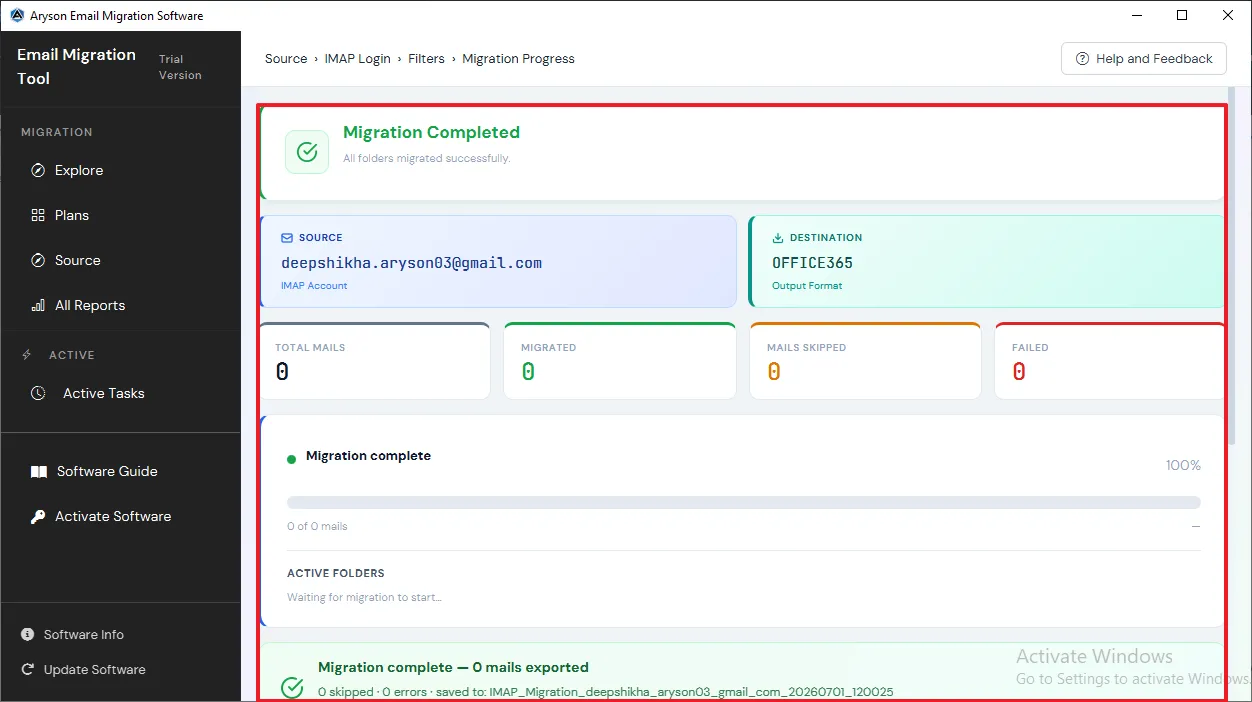
Step 8: Monitor the Migration of IMAP Email into File Formats
- Review the migration completion status and verify that all folders were migrated successfully.
- Check the source account and destination platform/file format details.
- Validate migration statistics, including total, migrated, skipped, and failed items.
- Monitor the progress bar and active folder status during the migration process.
- Review the final migration summary, including exported items and output location.
Step 9: After the export is completed, go to the All Reports section from the left panel and select IMAP Migration Report.
Step 10: View the detailed migration report, which displays the export status, processed items, skipped items, and other relevant information.
Step 1: Select IMAP Migration as the source
Use IMAP migration when your source data is stored in a live mailbox, such as Gmail, Yahoo Mail, GoDaddy, or any corporate IMAP server.
Step 2: Configure the account for Single Account and Batch CSV.
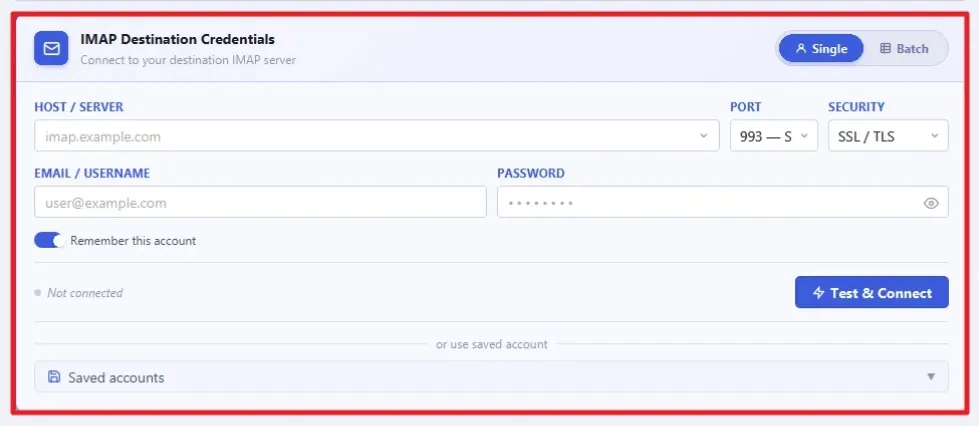
- For Single Account, enter the IMAP login credentials, then click Test Connection to verify that your credentials are correct and the connection is active. Once the connection is confirmed, click Continue to proceed.
- Email Address: Your full email address.
- Password / App Password: Your account password or an app-specific password if your provider requires it.
- IMAP Server: Your provider's IMAP server address (for example, imap.gmail.com for Gmail).
- Port: The IMAP port number (commonly 993 for SSL).
- Security: Select the appropriate security protocol (SSL, TLS, or None).
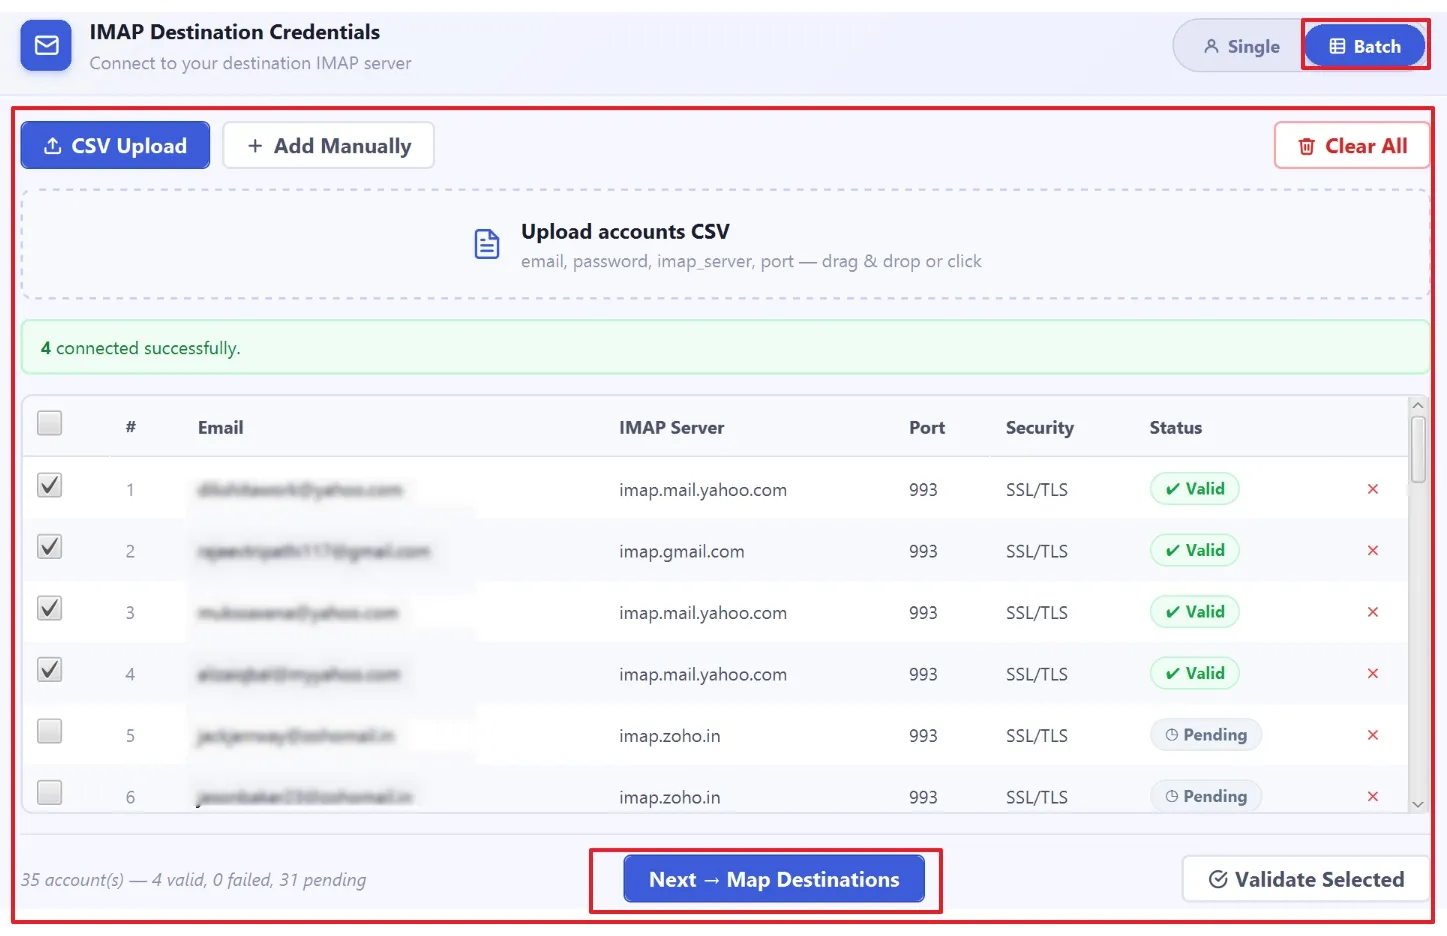
- For Batch CSV, add IMAP accounts via CSV upload or manual entry and validate them before starting migration. This ensures only verified accounts proceed for a smooth and error-free migration process.
- CSV Upload for Bulk Account Import: Upload a CSV file containing email addresses, passwords, IMAP server details, and port numbers to add multiple accounts simultaneously, reducing manual effort and streamlining large-scale migrations.
- Manual Account Addition for Individual Mailboxes: Enter account credentials and IMAP settings manually to add specific mailboxes one at a time, providing greater control when migrating a limited number of accounts.
Step 3: Select the mailboxes to migrate
- For Single Mode, review the mailbox tree and Select Folders.
- The Mailbox Tree screen displays the complete folder structure of your connected IMAP account, along with a summary showing: Total folders, total mail, total subfolders, and connection status.
- Opt for the Maintain Folder Hierarchy option to keep your mailbox folder hierarchy intact.
- Browse the folder list and check or uncheck the folders you want to include in the migration. Click Fetch Mail Count to load the exact email count per folder before proceeding. Once your selection is confirmed, click Continue to Filter.
- For Batch Mode: Select the email IDs of sub-users whose mailboxes you want to migrate, validate the accounts, and click Continue.
The Preview panel is available only in Single Account mode. For large files or batch/CSV mode, the software proceeds directly to the filter configuration step without a preview.
Step 4: Choose Your Destination
The Destination Filter Panel offers two tabs:
- File Formats: Export to your desired file format (PDF, PST, JSON, MBOX, DOC, DOCX, EML, MSG, and CSV)
- Email Client: Migrate directly to email clients (IMAP, Google Workspace, Office 365).
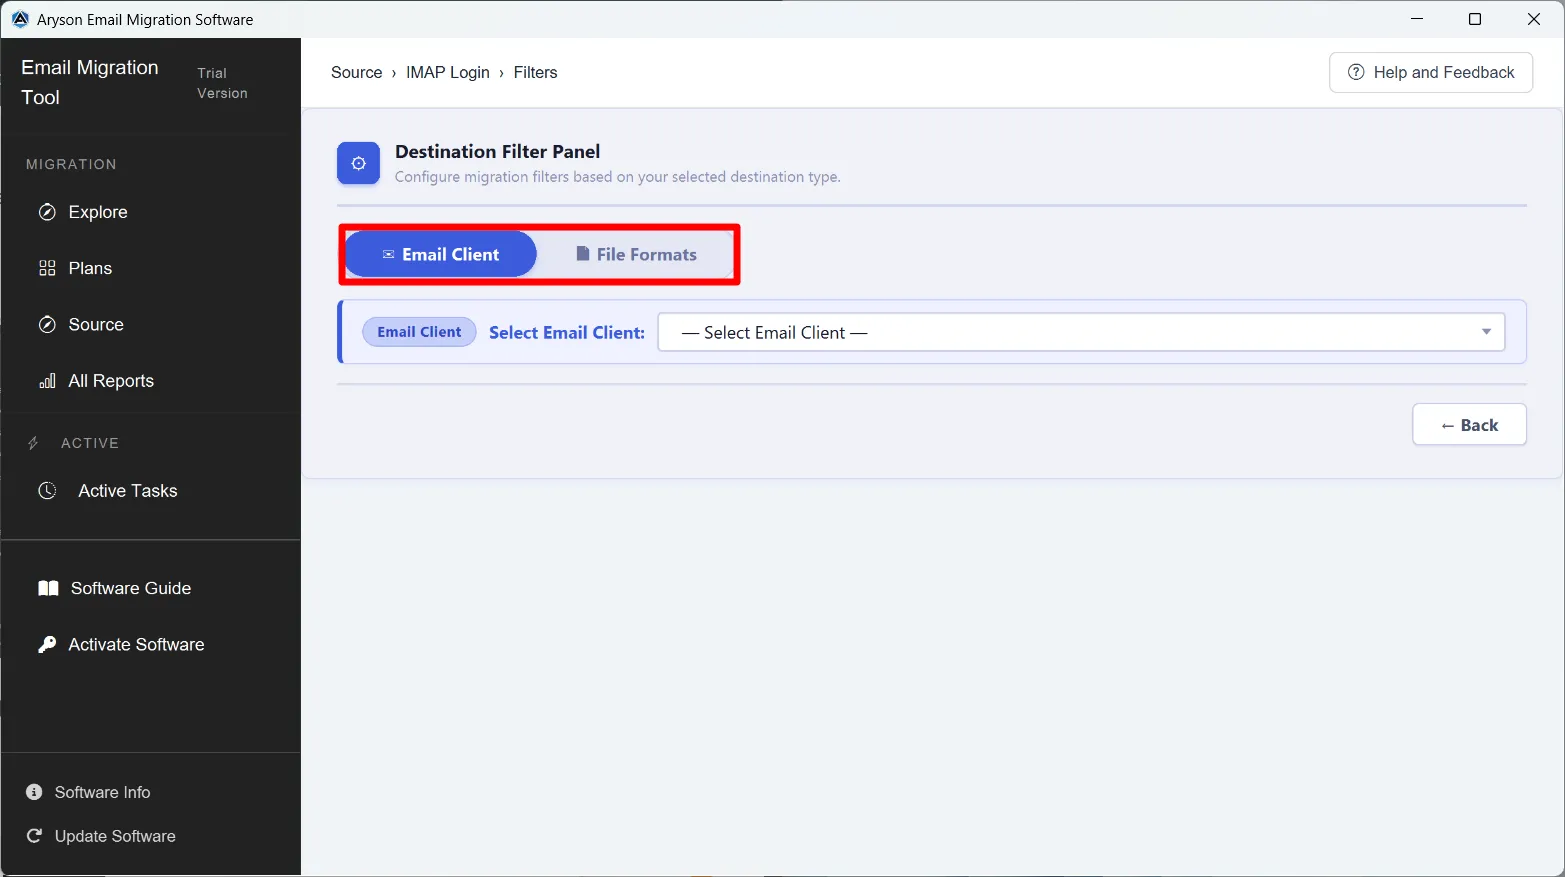
Choose Email Clients from the tab, select the required email client from the dropdown, and follow the steps given below.
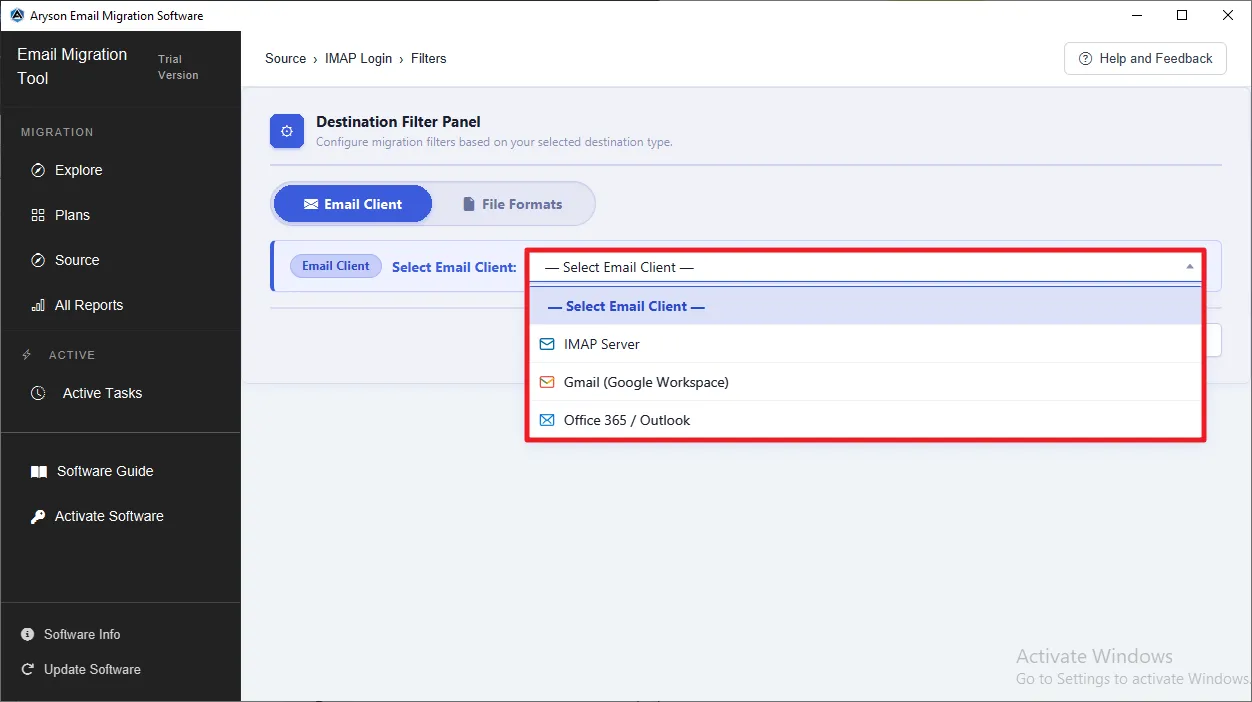
Step 5:Under Email Client, choose the required email client as the destination format, such as IMAP, Gmail (Google Workspace), & Office 365/Outlook.
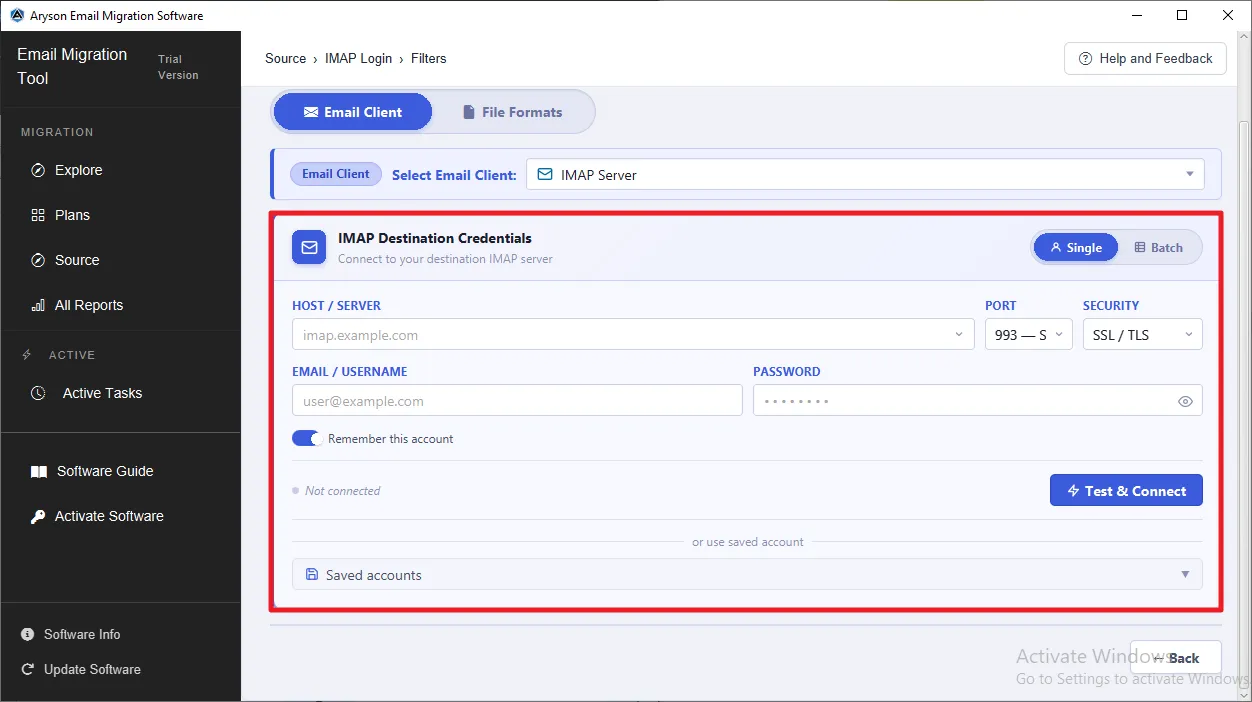
- Login Process using IMAP for a Single Account
For a single account, enter the IMAP login credentials, test the connection, and click Continue.
- Login Process using IMAP for Batch CSV
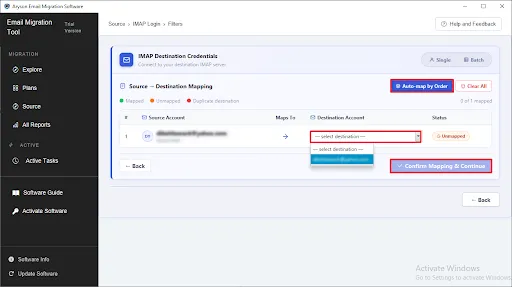
For Batch CSV, add IMAP accounts via CSV upload or manual entry and validate them before starting migration. This ensures only verified accounts proceed for a smooth and error-free migration process. Then click the Map Destinations option.
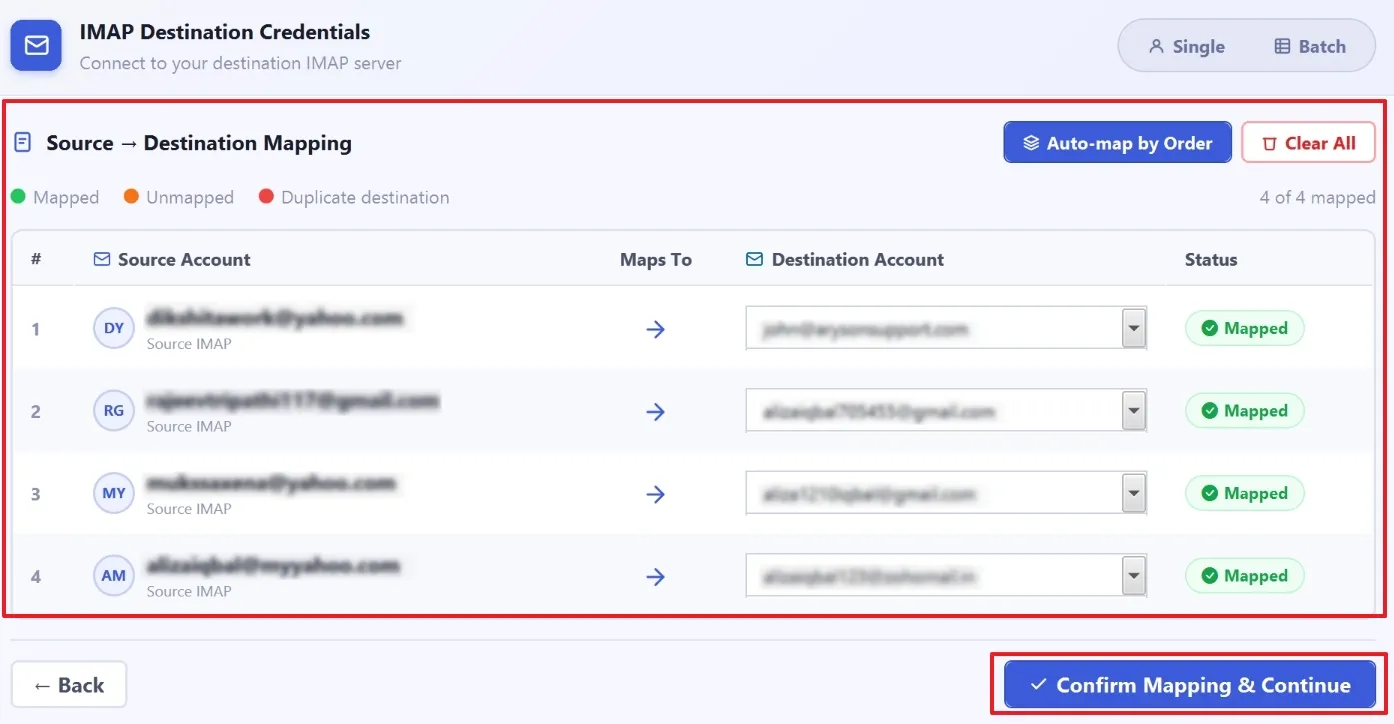
The Source → Destination Mapping section maps each source IMAP account to its corresponding destination account and displays the mapping status. Click Confirm Mapping & Continue to finalize the mappings and proceed with the migration. Then, after being redirected, apply filters.
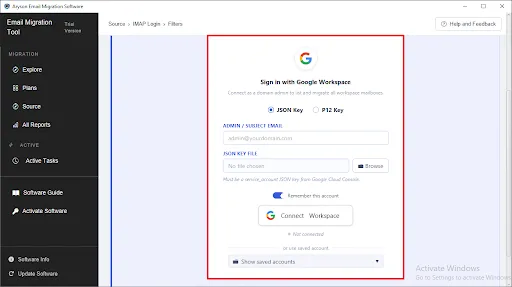
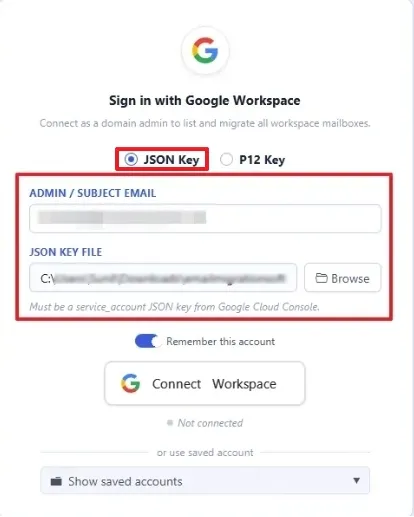
3. (A) Log in using Gmail (Google Workspace) via JSON
Use a Google Workspace JSON service account key to securely authenticate your domain admin account. This method enables safe access to mailboxes for seamless and reliable Google Workspace migration.
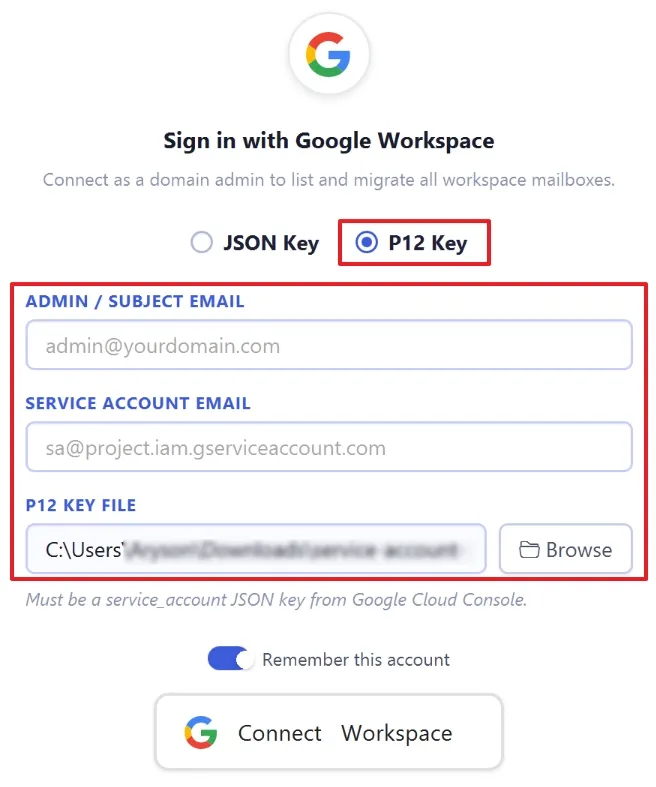
(B) Log in using Gmail (Google Workspace) via P12 Key
Use a P12 service account key file to authenticate your Google Workspace domain admin account. Enter the Admin/Subject Email, Service Account Email, and upload the P12 Key File using the Browse option. This method securely connects the Google Workspace account and enables mailbox migration.
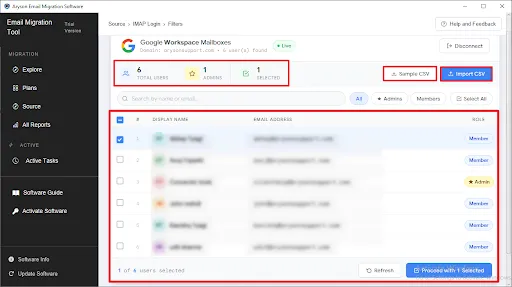
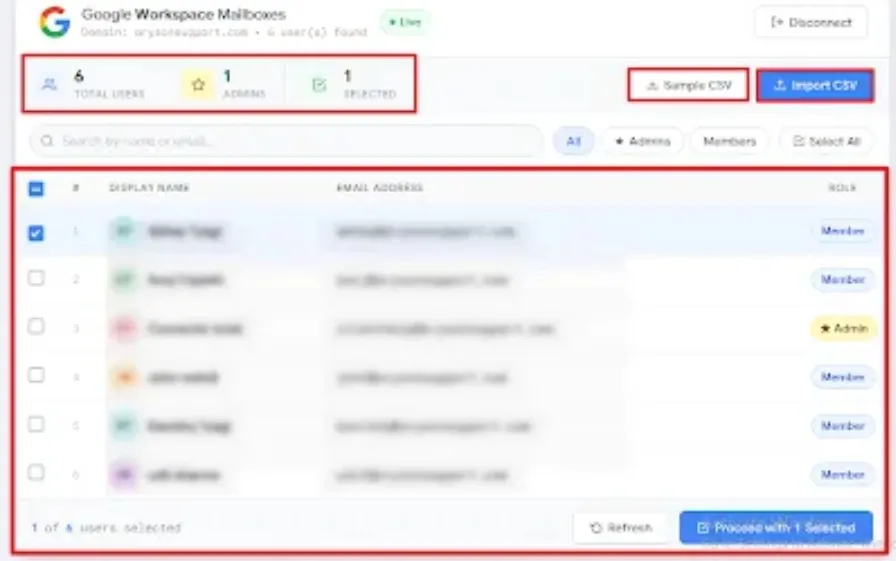
- Gmail (Google Workspace) Mailboxes
- Displays all Google Workspace mailboxes after successful authentication.
- Search and filter users by name, email, or role.
- Select single or multiple mailboxes for bulk migration.
- Distinguishes Admin and Member accounts for easy management.
- Supports CSV import for efficient bulk user selection.
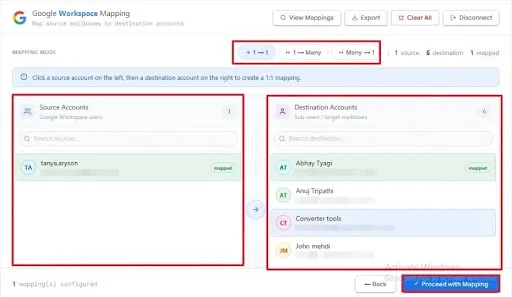
- Google Workspace Mailbox Mapping
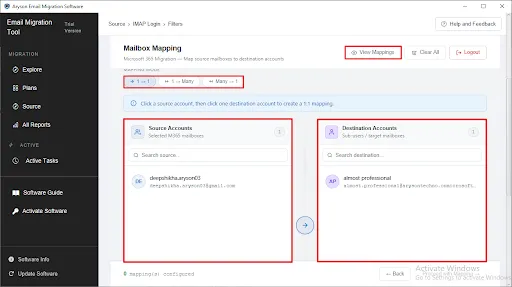
- Flexible Mapping Modes
Supports 1:1, 1:Many, and Many:1 mailbox mapping to meet different migration requirements. - Easy Source & Destination Selection
Select source mailboxes on the left and map them to the desired destination mailboxes on the right. - Search and Filter Accounts
Quickly locate source or destination mailboxes using the built-in search option for faster mapping. - View and Export Mapping
Review configured mailbox mappings and export them for documentation or future migration tasks. - Manage Mappings Efficiently
Clear existing mappings, disconnect accounts, or proceed with the configured mappings for accurate and organized mailbox migration.
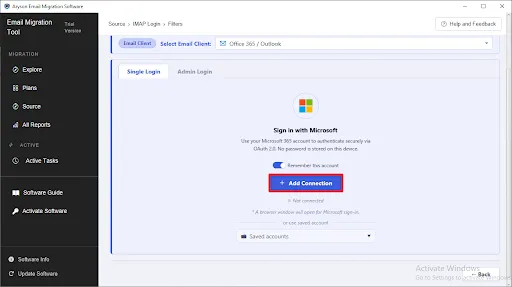
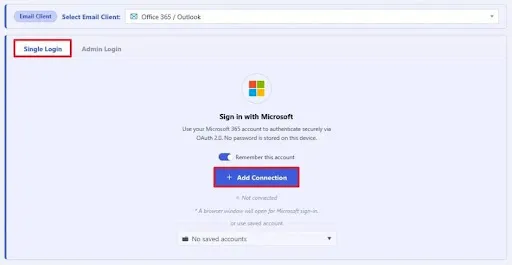
- Login using Microsoft 365 for Single Login
- Secure OAuth 2.0 Login
Sign in to your Microsoft 365 or Outlook account using secure OAuth 2.0 authentication without storing your password. - Single Login Support
Choose Single User modes based on your migration requirements for individual mailboxes. - Easy Account Connection
Click Add Connection to authenticate your Microsoft 365 account and establish a secure migration connection.
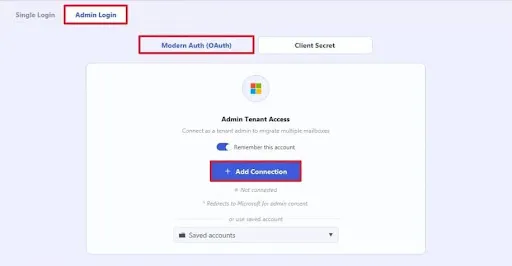
- Microsoft 365 Admin Login (Modern OAuth)
- Admin Tenant Authentication
Sign in as a Microsoft 365 tenant administrator using secure Modern OAuth authentication to manage multiple mailboxes. - Modern OAuth Support
Authenticate without storing passwords, ensuring secure access and Microsoft-recommended authentication. - Bulk Mailbox Access
Connect your Microsoft 365 tenant to access and migrate multiple user mailboxes from a single admin account. - Quick and Secure Connection
Click Add Connection to authorize your tenant and establish a secure connection for enterprise-level mailbox migration.
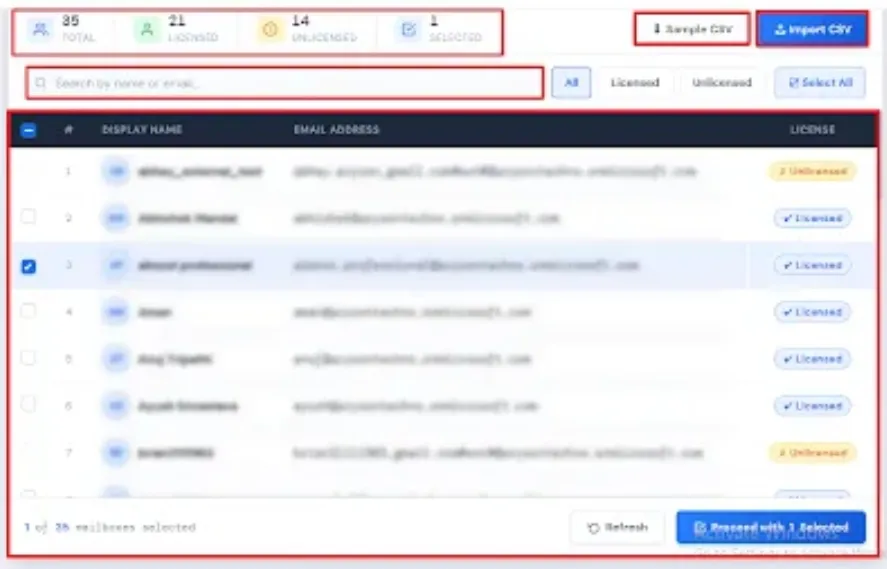
- Microsoft 365 Mapping
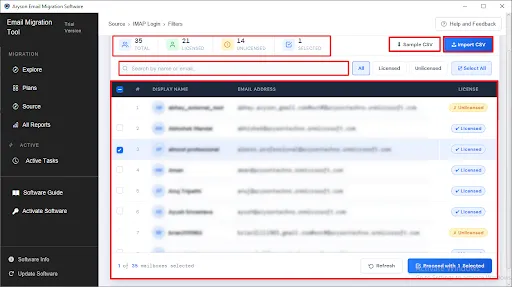
- View All Tenant Mailboxes
Display all Microsoft 365 mailboxes, including licensed, unlicensed, shared, and guest accounts in a single interface. - Search and Filter Users
Quickly locate specific mailboxes using the search bar or filter accounts by license type for easier management. - Select Multiple Mailboxes
Choose single or multiple user mailboxes simultaneously for efficient bulk migration and backup operations. - CSV-Based Bulk Selection
Import mailbox lists through a CSV file or download a sample CSV for simplified enterprise-level mailbox management. - Proceed with Selected Mailboxes
Review the selected accounts and click Proceed with Selected to continue the migration process securely and accurately.
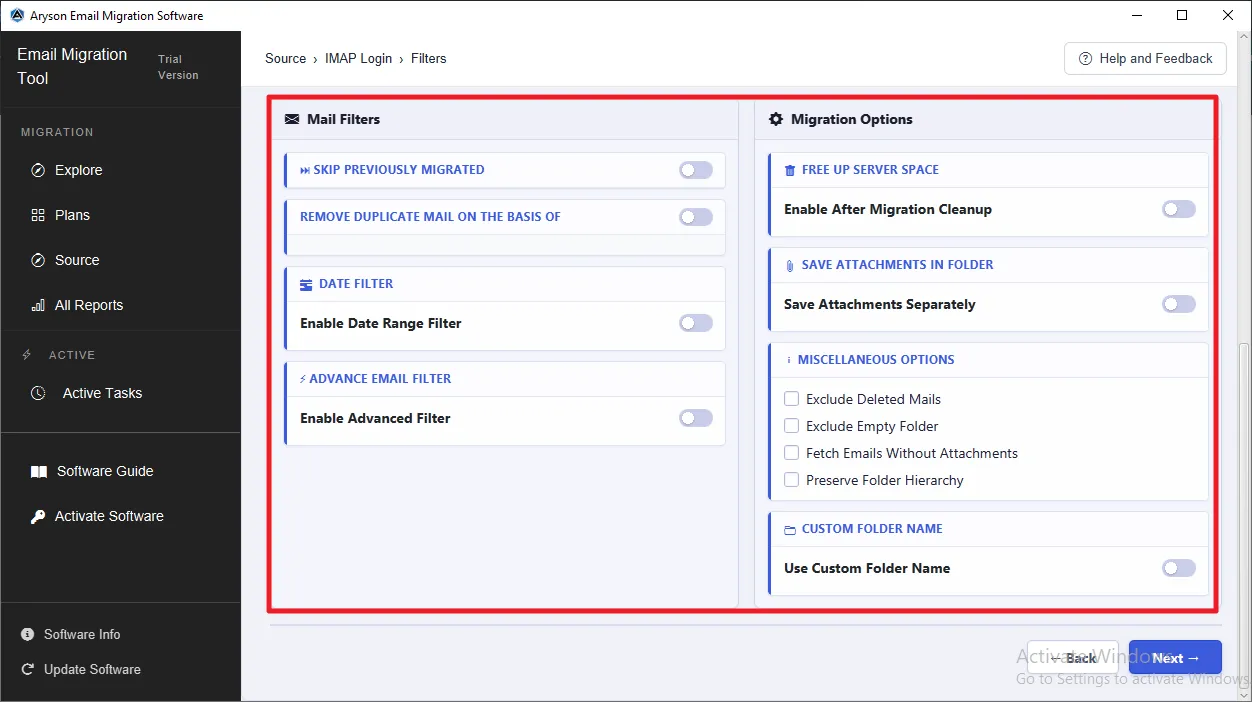
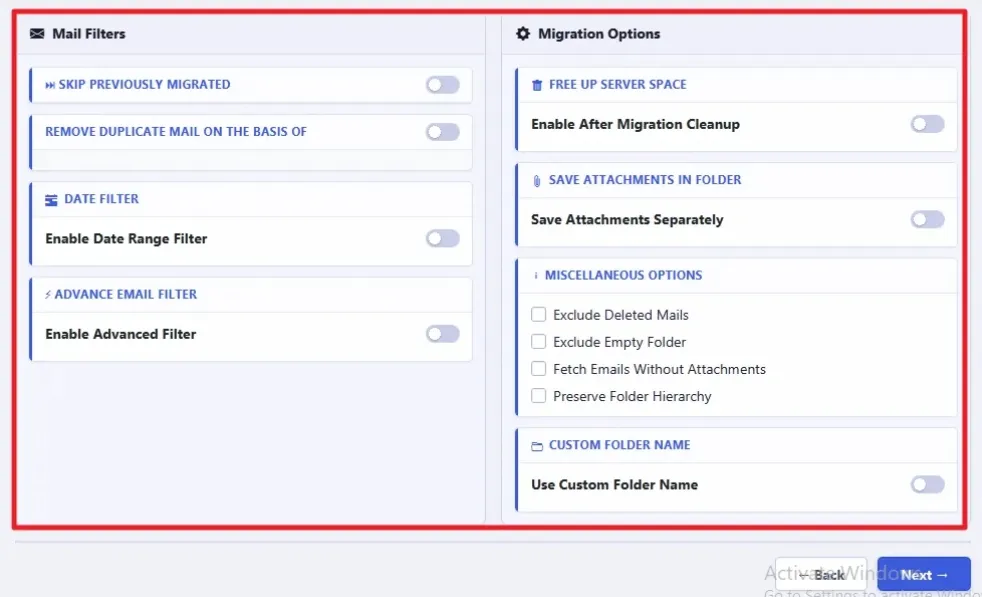
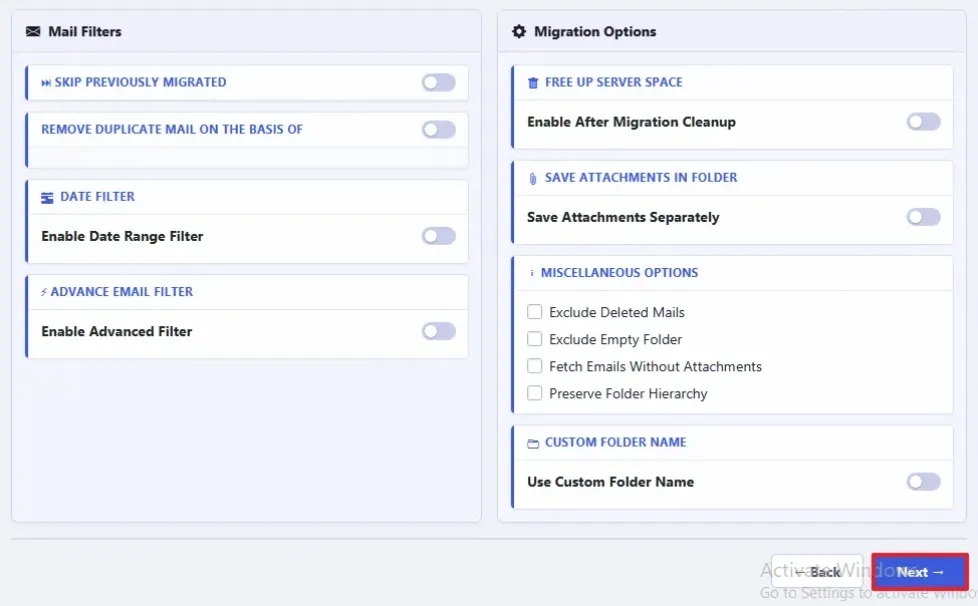
Step 6: Configure the export settings as needed:
- Skip Previously Migrated: Avoids re-processing already migrated emails to prevent duplication.
- Date Filter (Start & End Date): Migrates emails within a specific time range only.
- Advanced Mail Filter: Filters emails based on Subject, To, From, BCC, CC, and Body content.
- Duplicate Email Removal: Eliminates duplicates using Subject, To, From, and Body matching.
- Free Up Server Space: Moves emails to the bin and permanently deletes them to free storage.
- Custom Folder Name: Allows users to define a personalized folder name for exported data.
-
Miscellaneous Options: Excludes deleted emails, skips empty folders, and fetches emails without attachments.
- Save Attachments in Folder: Stores email attachments separately in a chosen directory.
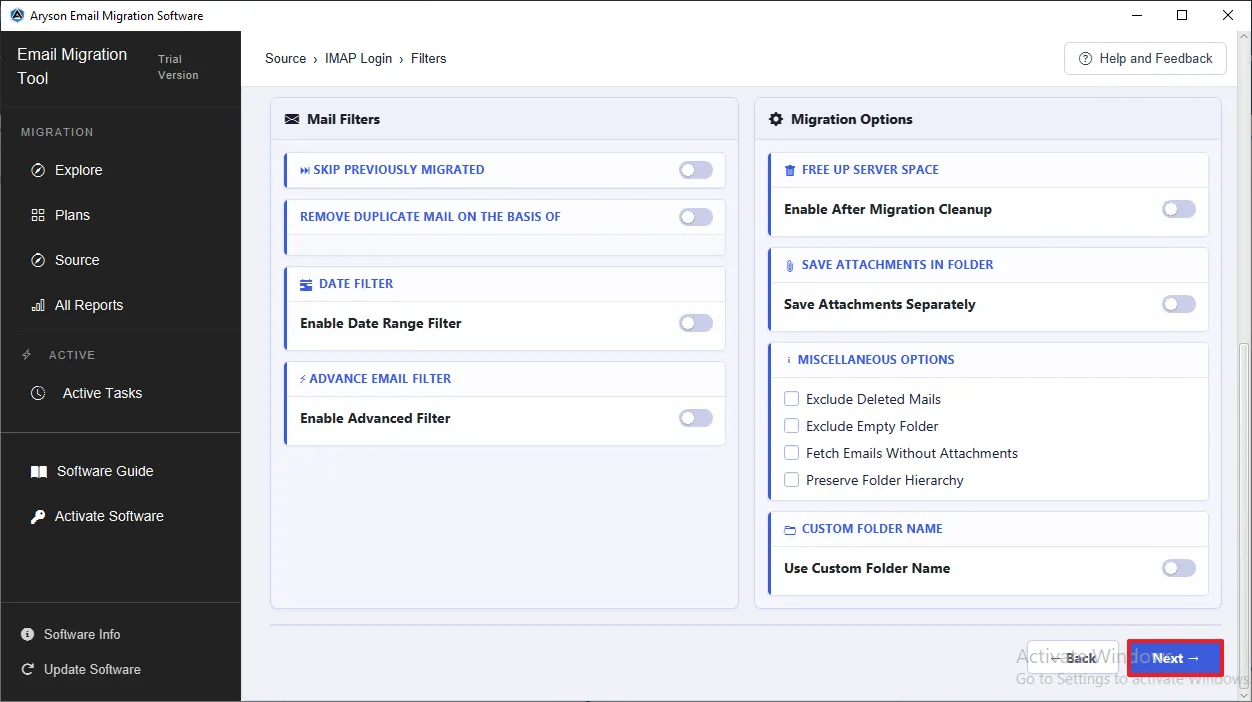
Step 7: Review the selected filters, then click Start Migration.
The software applies the selected filters and exports all chosen IMAP mailbox data directly into the selected email client at the specified destination location.
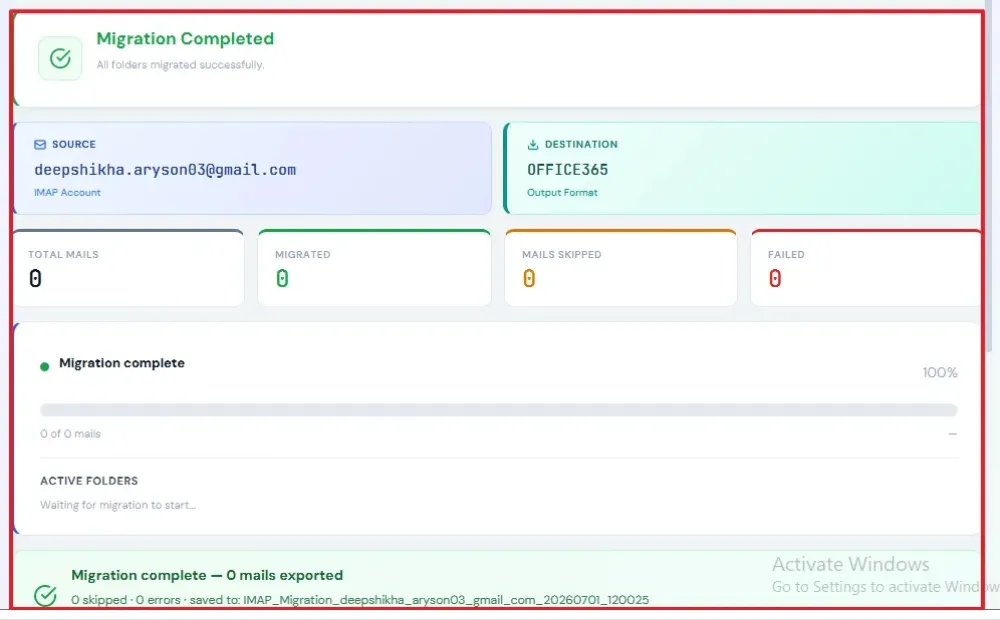
Step 8: Monitor the Migration of IMAP Email into Email Client:
- Source: Shows the source IMAP account from which the emails are being migrated.
- Destination: Displays the target email account or email service where the emails are migrated.
- Total Mails: Shows the total number of emails selected for migration.
- Migrated Mails: Displays the number of emails successfully migrated.
- Skipped Mails: Shows the number of emails skipped during the migration.
- Failed Mails: Displays the number of emails that could not be migrated due to errors.
- Migration Progress: Shows the overall migration status and completion percentage.
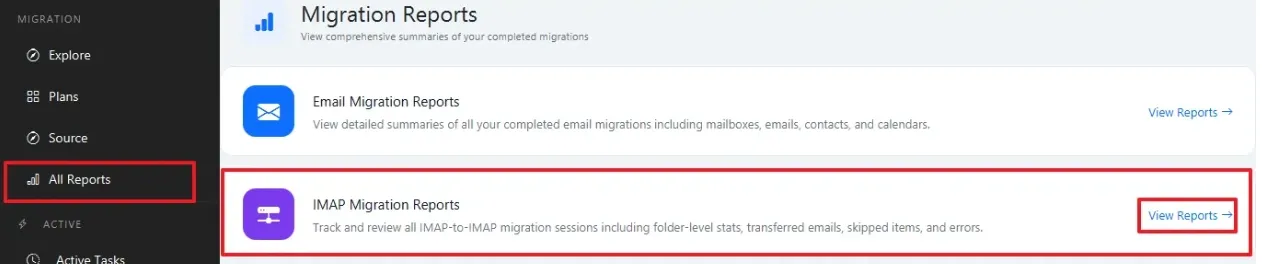
Step 9: After the export is completed, go to the All Reports section from the left panel and select IMAP Migration Report.
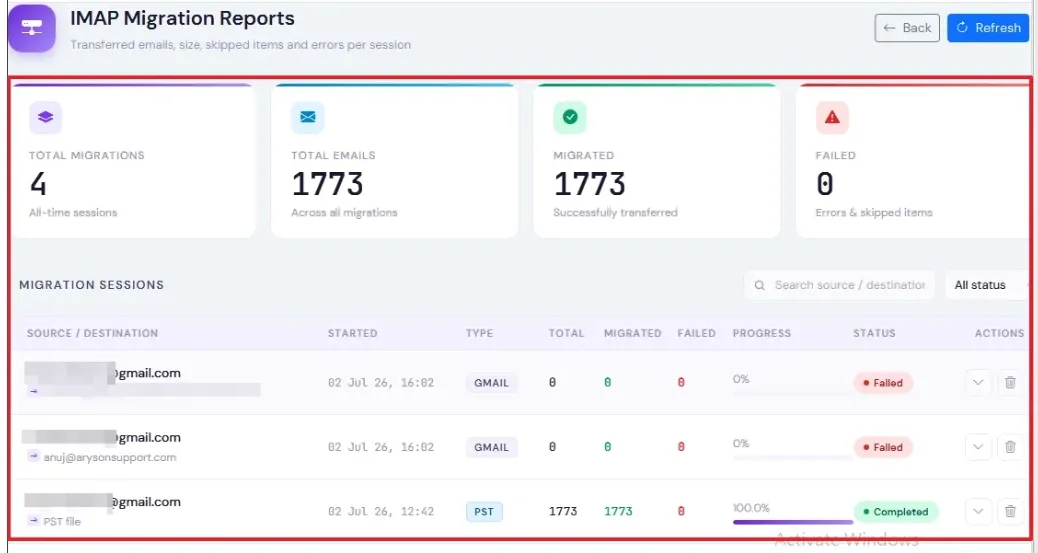
Step 10: View the detailed migration report, which displays the export status, processed items, skipped items, and other relevant information.
Activation Guide
Activate the Software
Installation & Uninstallation
Installation & Uninstallation of Software
User Interface
User Interface
After downloading the Aryson Email Migration Tool, you will find the welcome screen as played below.