A Complete Guide of Aryson to Import or upload MBOX files to -Microsoft Office 365
-
Table of Content
- Software Working Process
- Activation Guide
- Installation & Uninstallation
- User Interface
Software Working Process
Software Working Process
Follow the Steps to import or upload single and multiple MBOX files to Microsoft Office 365 or other email clients:-
Step 1: Download, Install and Run the MBOX to Office 365 Migration Tool.
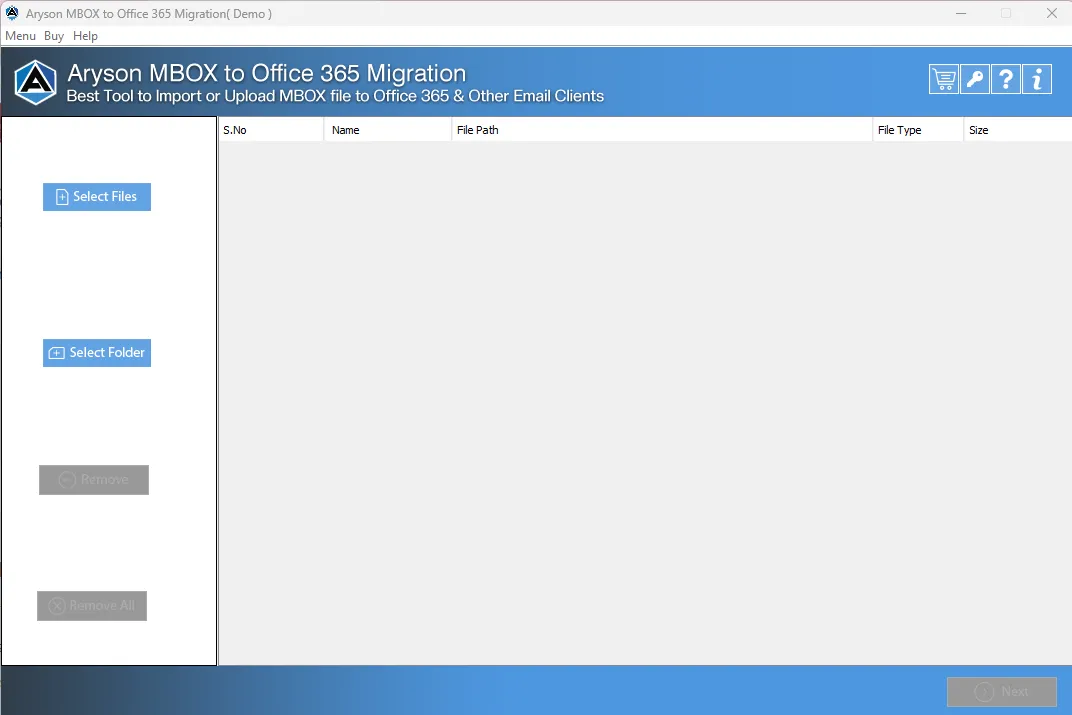
Step 2: The software shows you two different options: Select Files or Select Folder.
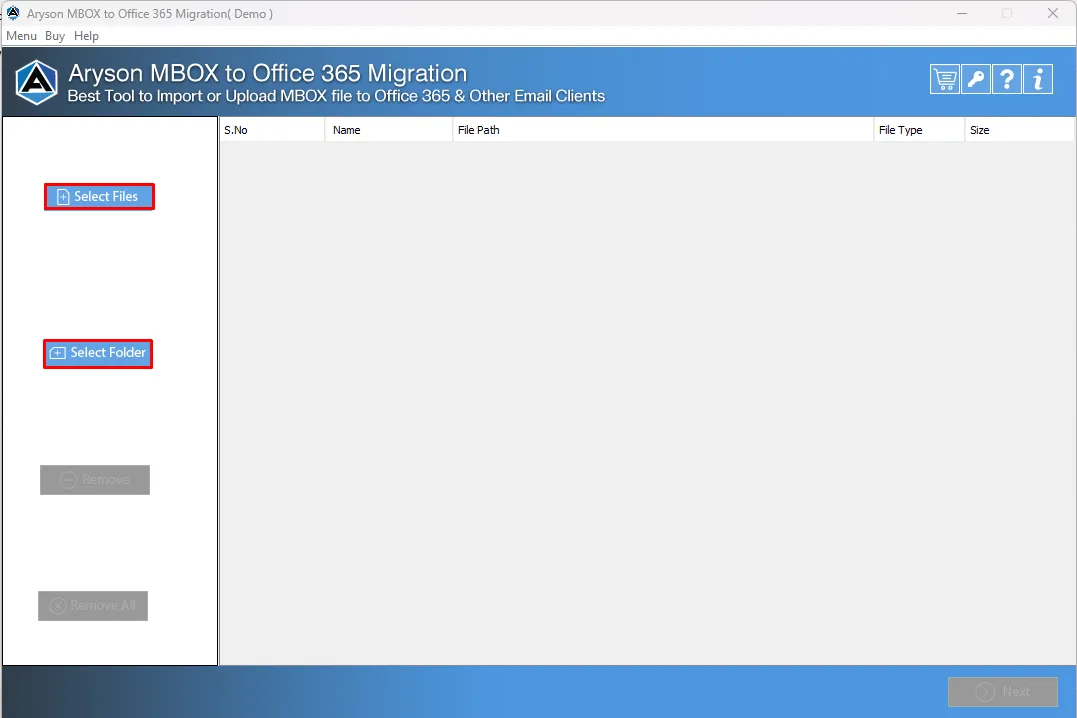
Step 3: Click the Select Files to browse MBOX files.

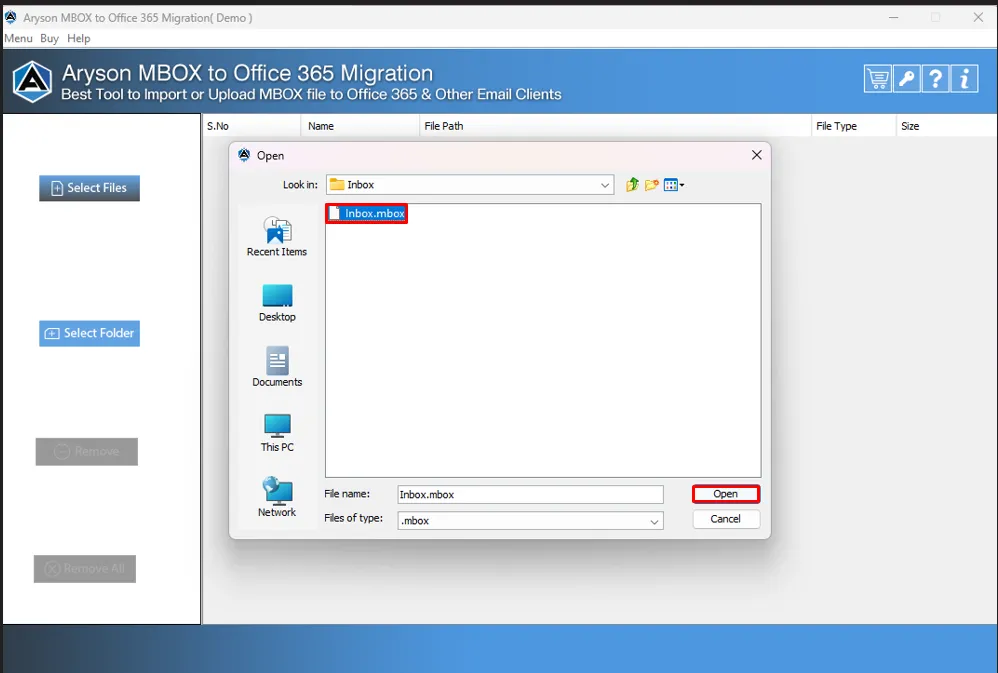
Step 4: Select the MBOX files from your system and click the Open button.
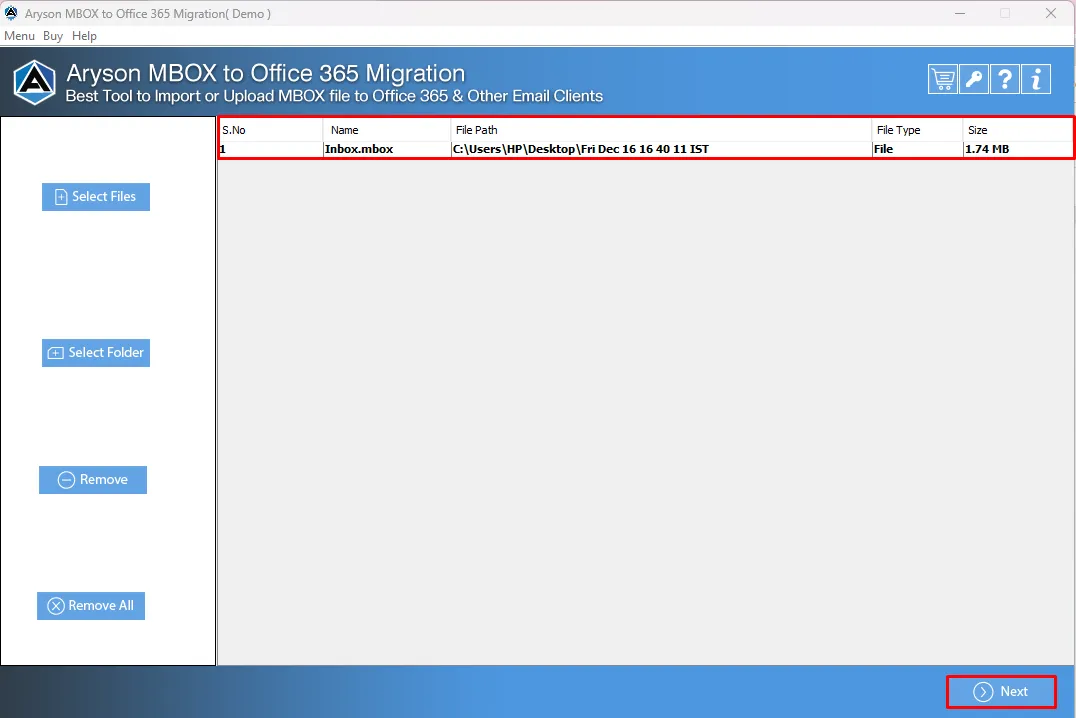
Step 5: Here, you will preview the MBOX file name, path, type, and size. Click Next.
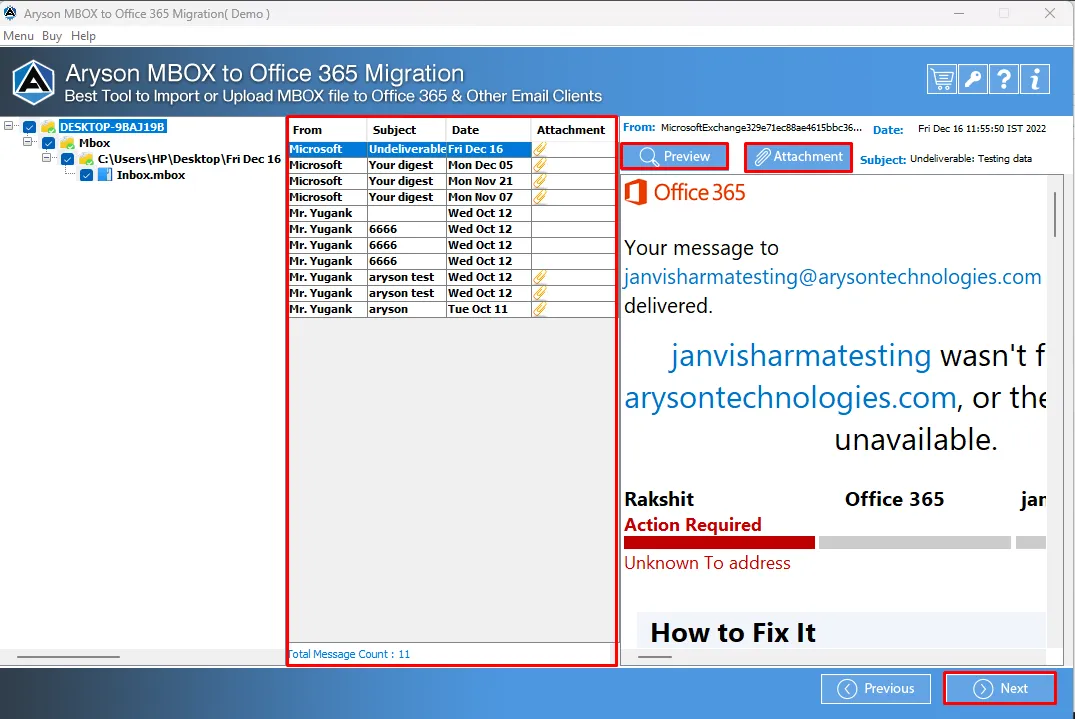
Step 6: Select the mailbox folders in the tree structure you need to import.
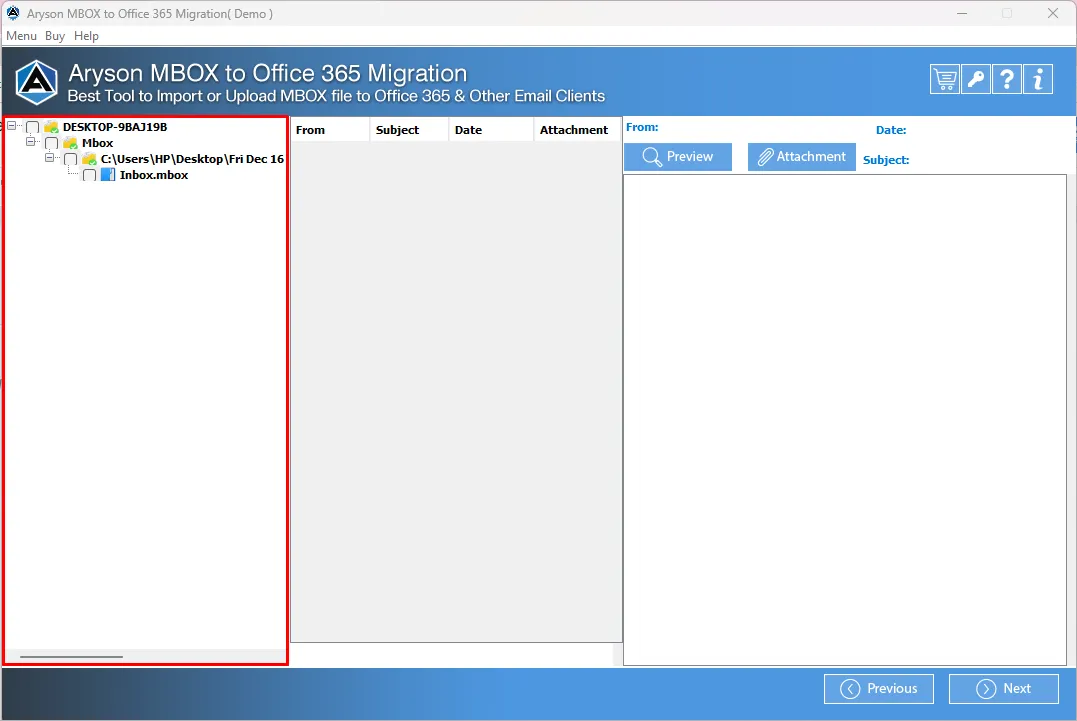
Step 7: You can also check the details of a specific folder like Total Messages Count, From, Subject, Date Email messages, and Attachments files. Tap Next.
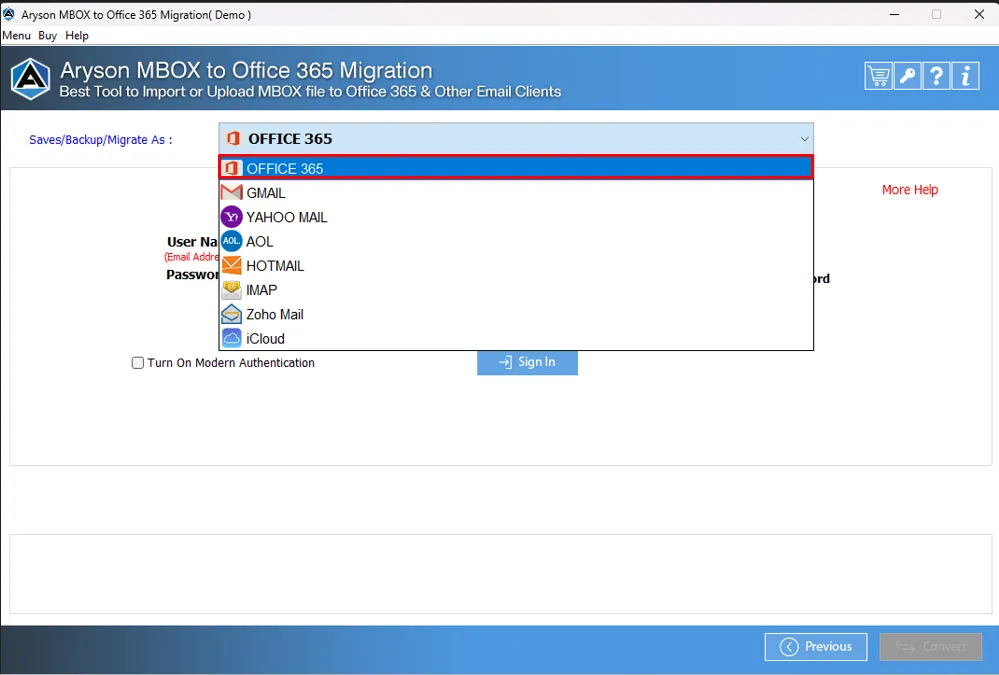
Step 8: Choose Office 365 from the Saves/Backup/Migrate As options drop-down list.
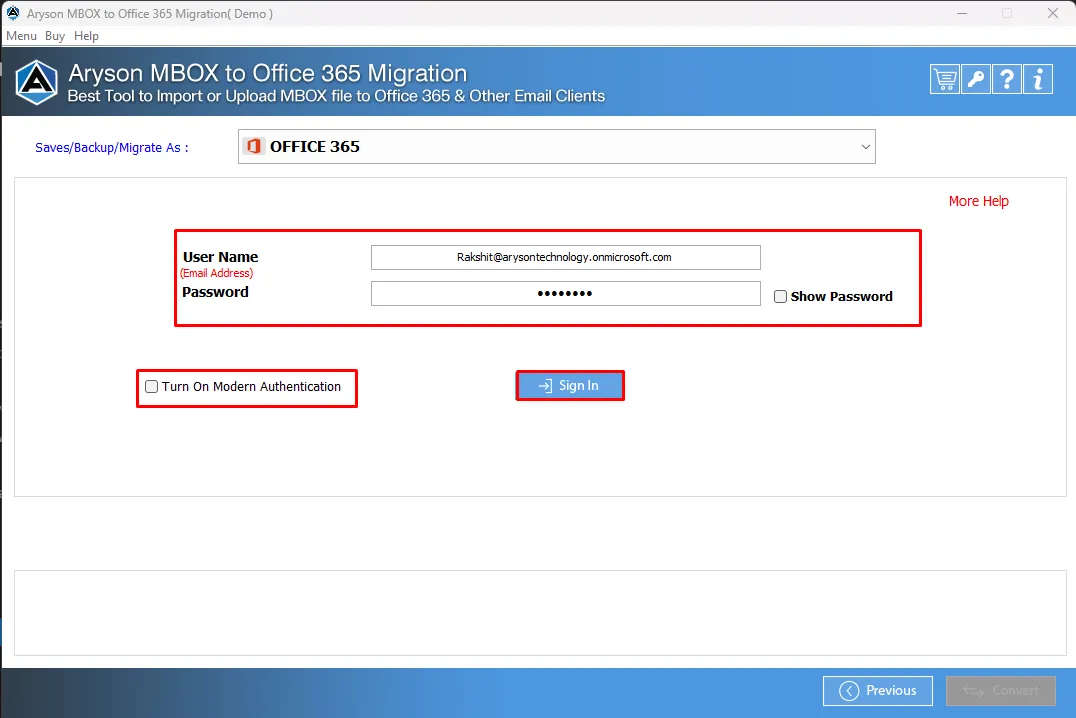
Step 9: Enter your Office 365 email address and password to Sign_In. Or, you can also authenticate your Office 365 account using the Turn On Modern Authentication option.
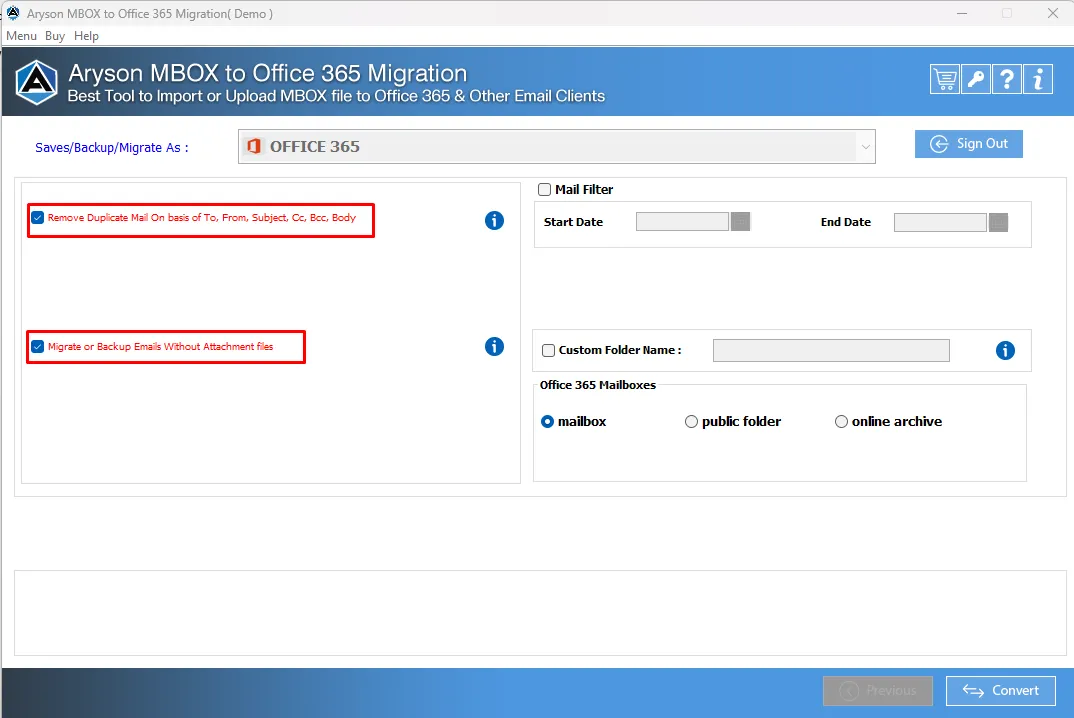
Step 10: Check these software features:
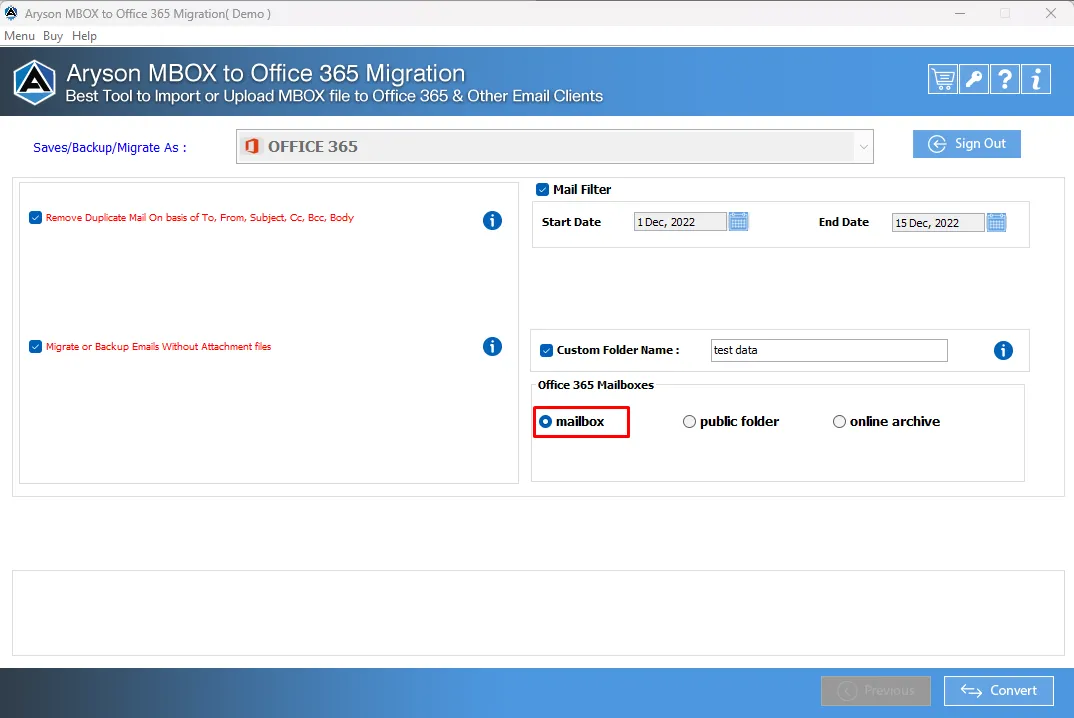
- Remove Duplicate Mail:- Tick this option to exclude similar emails from the MBOX folders.
- Migrate or Backup Emails Without Attachments files:- It allows you to exclude the attachments from the MBOX email messages.
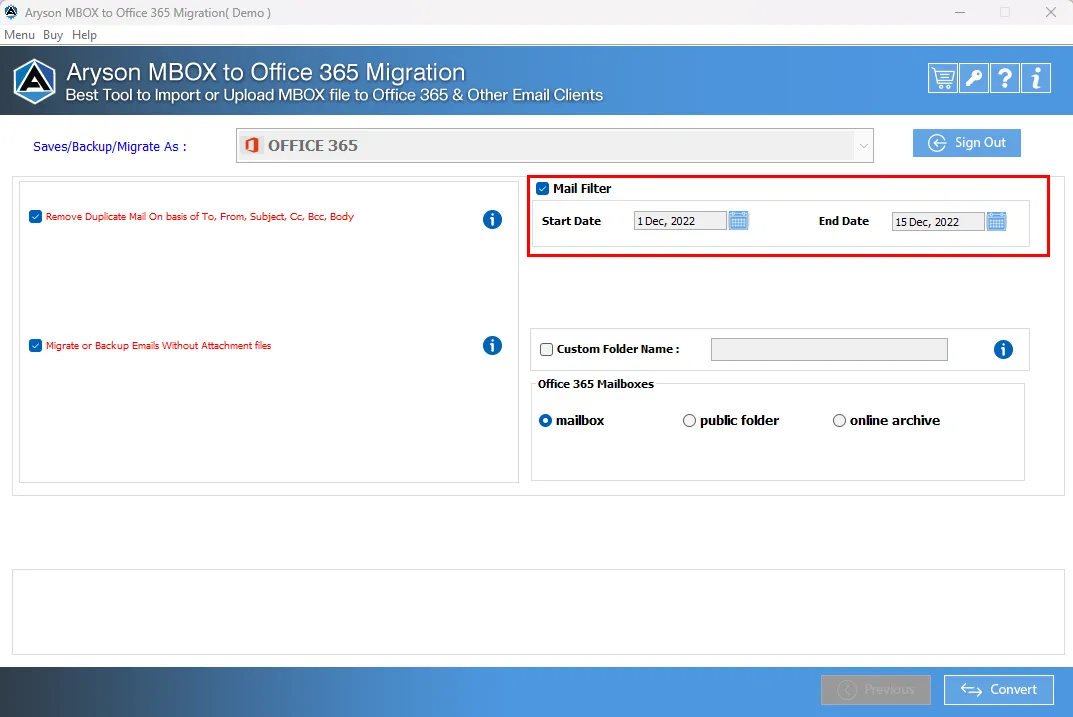
Step 11: Check the Mail Filter option to perform the selective selection of MBOX data based on the Date Range.
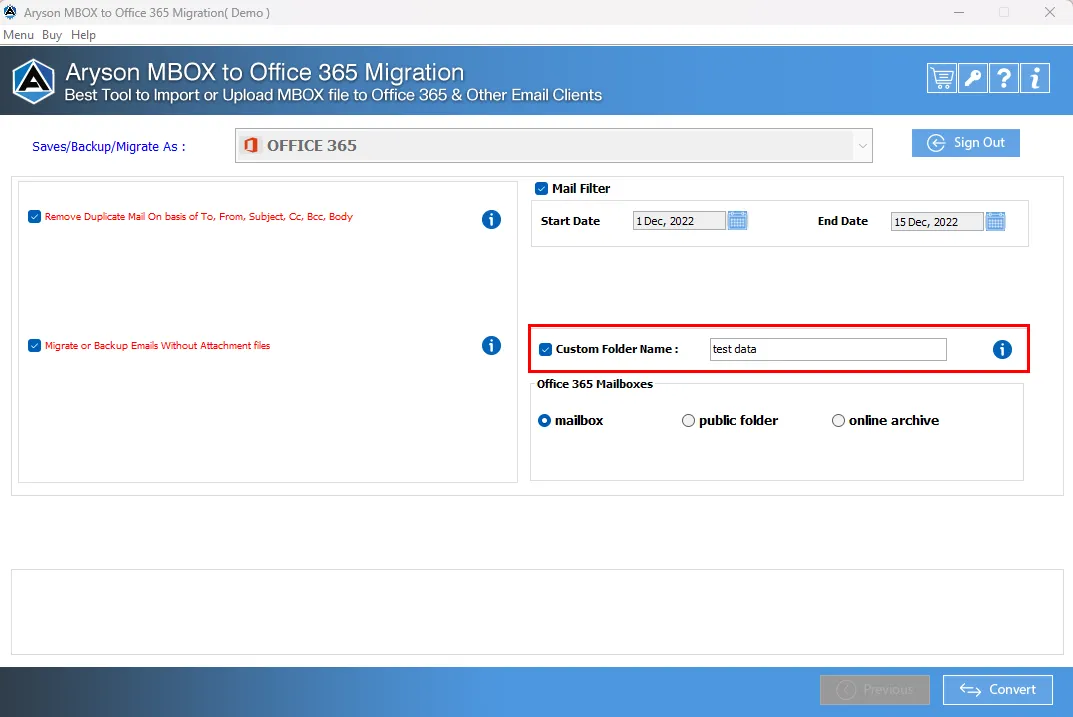
Step 12: The Custom Folder Name helps you to name the resultant folder name.
Step 13: Choose the Office 365 mailboxes, either Mailbox/Public Folder/Online Archive.
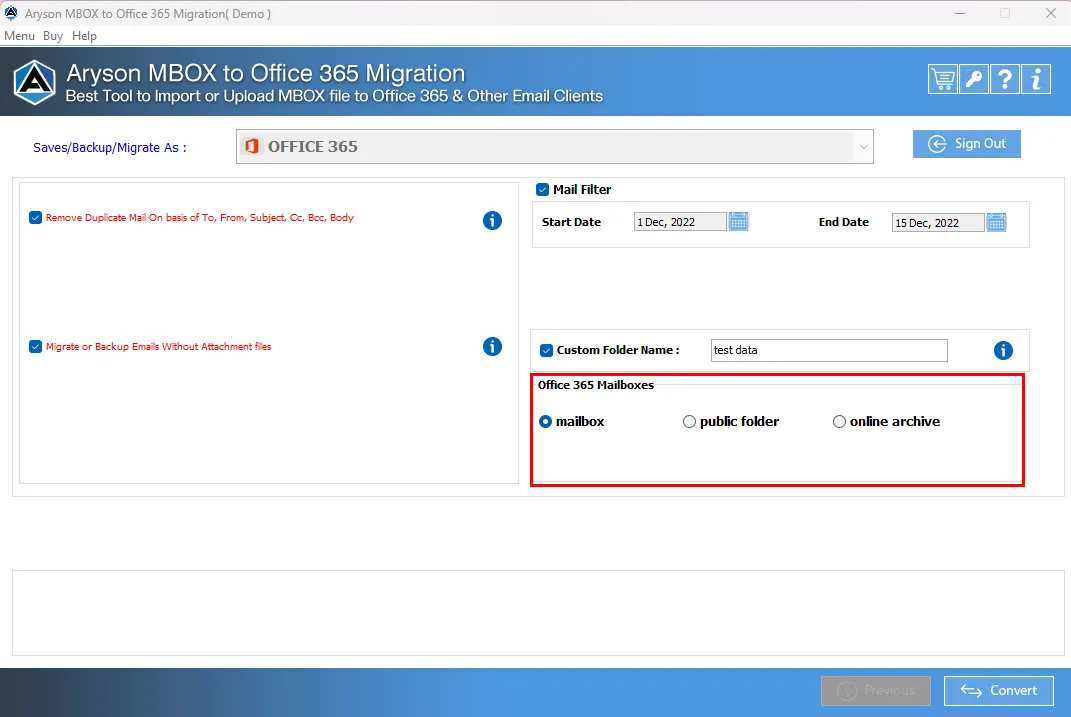
Step 14:Here, we select the Mailbox option.
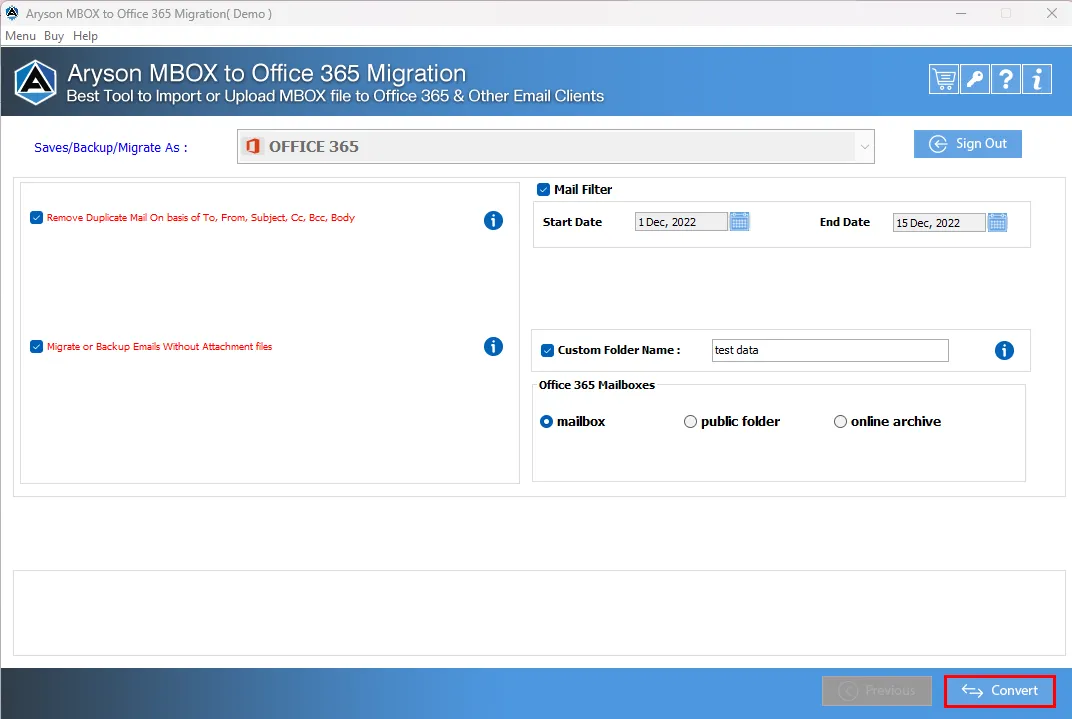
Step 15: Click Convert to start the importing process of MBOX files to Office 365 account.
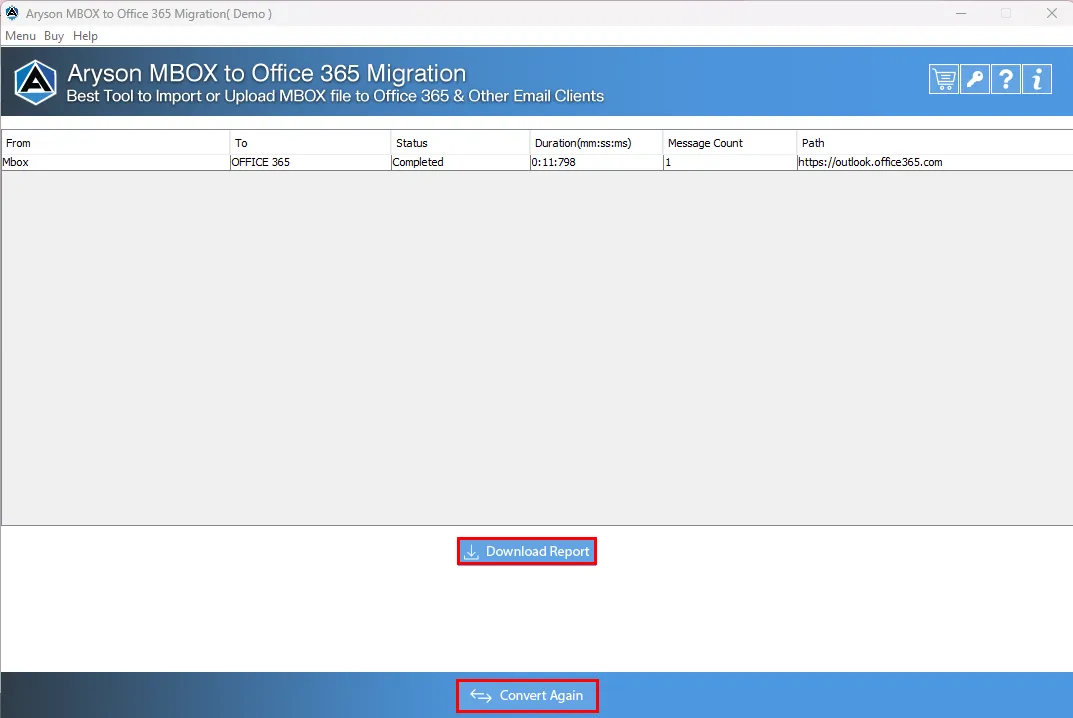
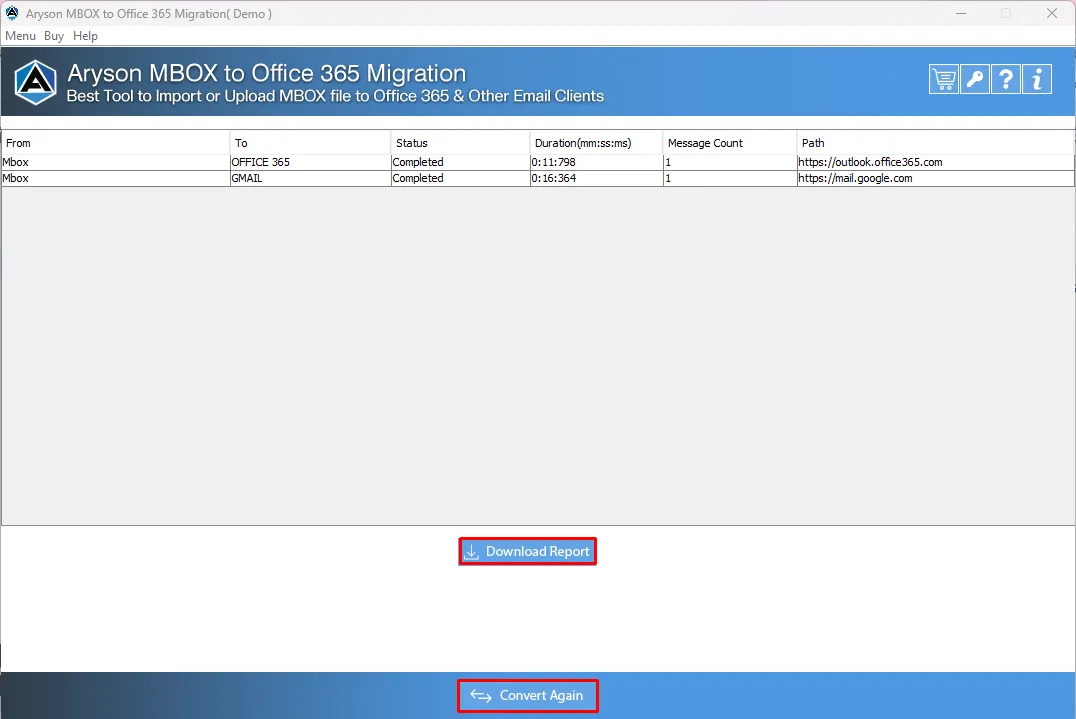
Step 16: Now, the importing process of MBOX files into Office 365 is completed. Click the Download Report button to save the process report.
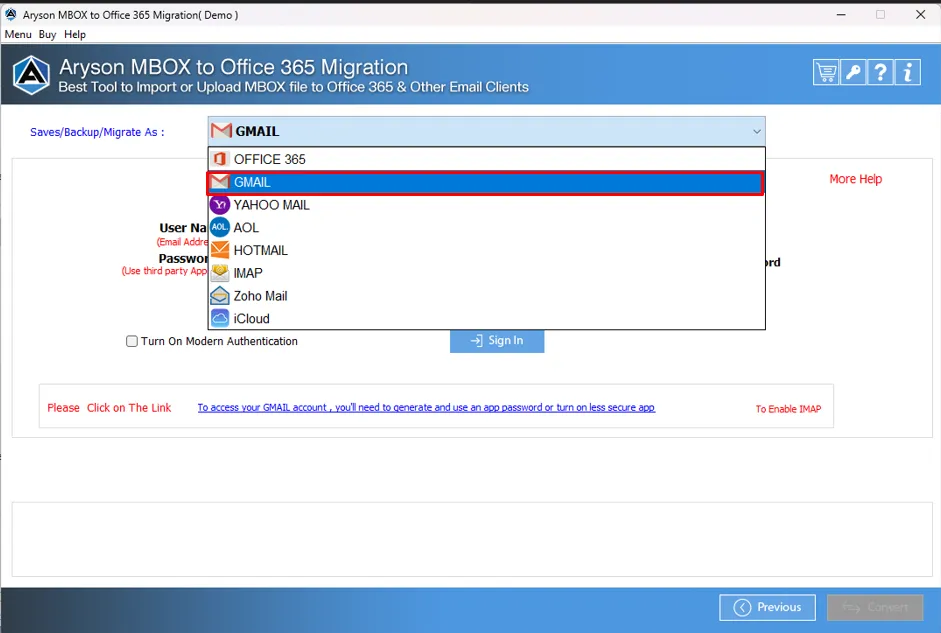
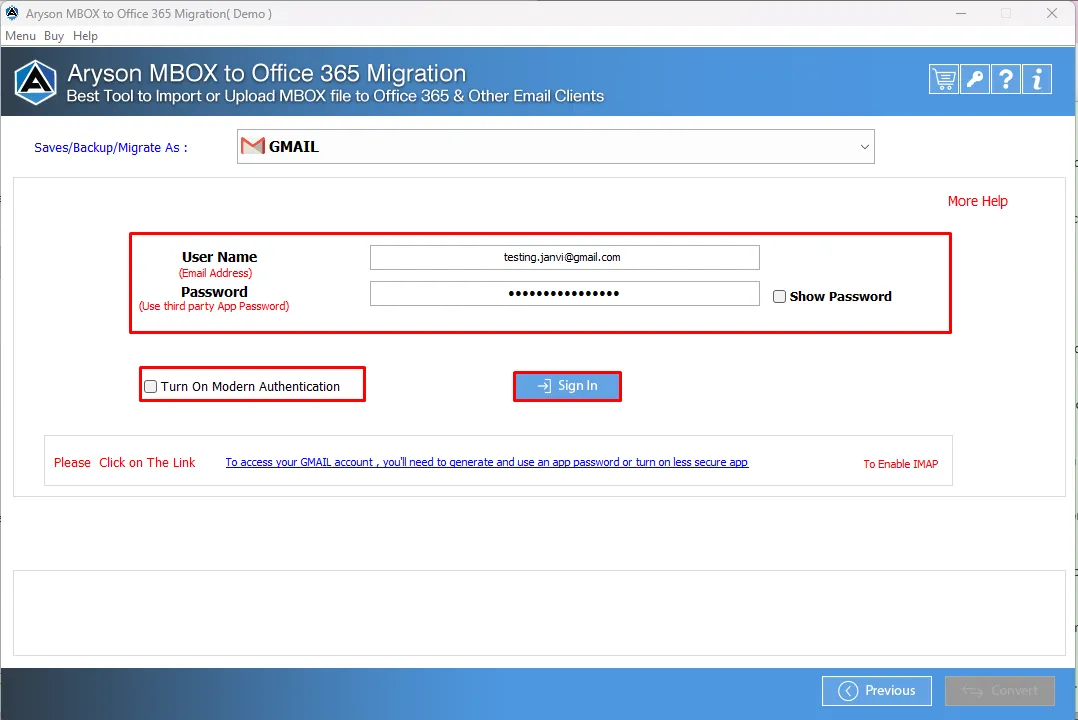
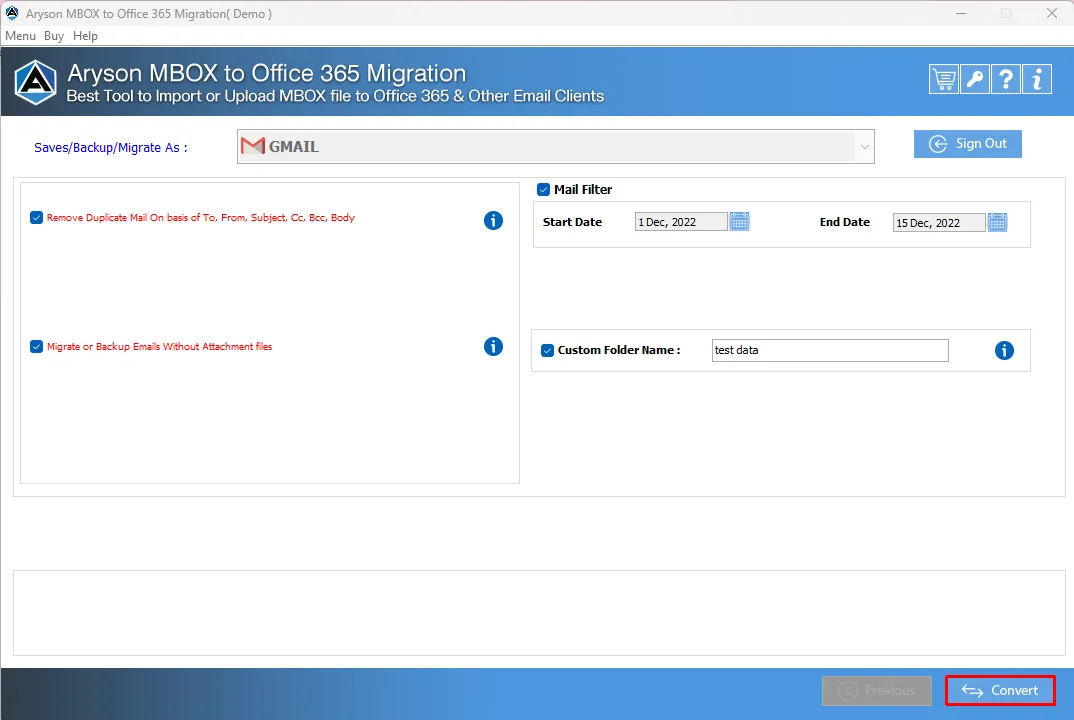
Step 8: Select Gmail as an uploading option from the drop-down list.
Step 9: Enter your Gmail email address>>App password and click the Sign_In button.
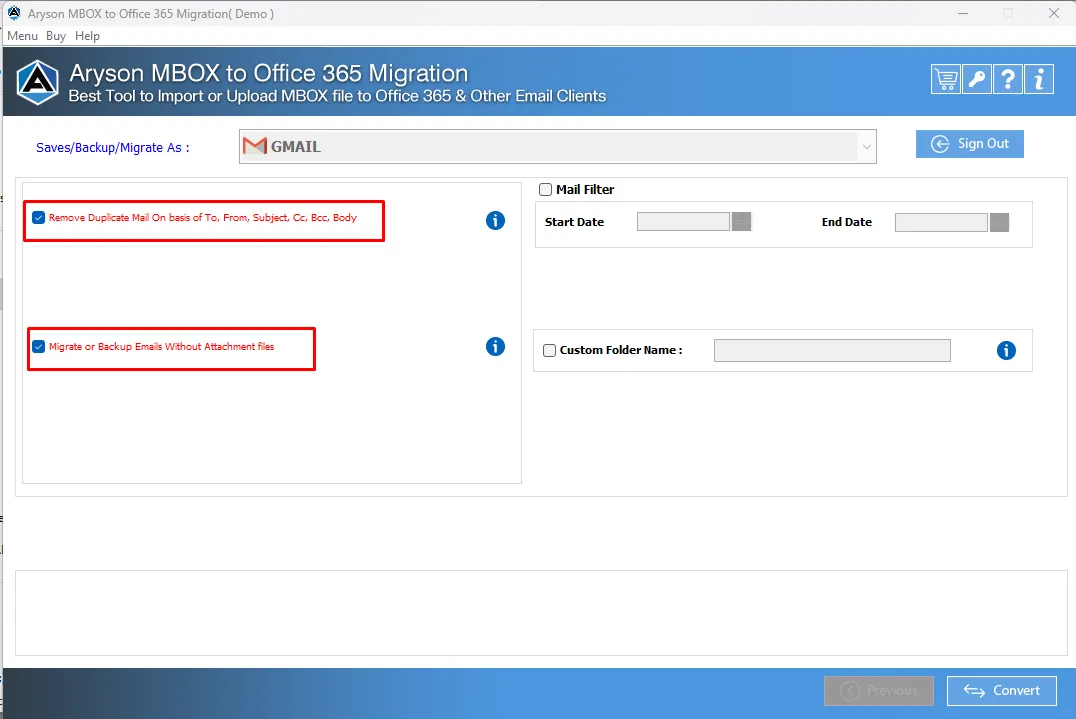
Step 10: Go for these options:
- Remove Duplicate Mail:- It will help you to remove similar emails.
- Migrate or Backup Emails Without Attachments files:- Opt for this to exclude the attachments files.
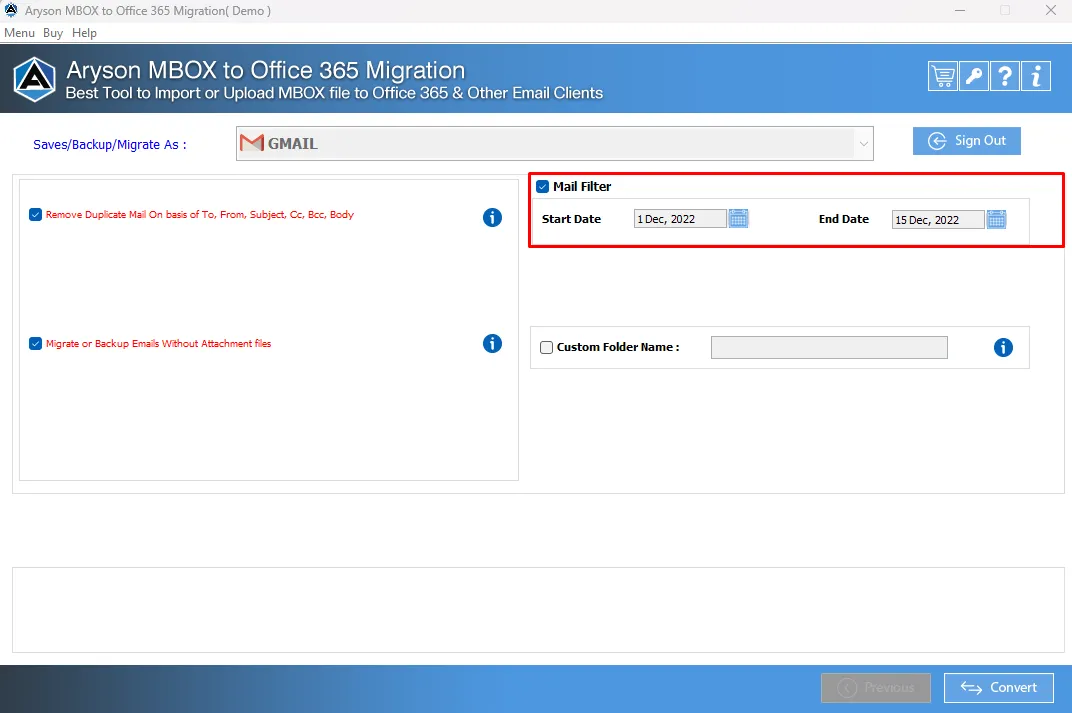
Step 11:Mail Filter:- Tick this feature to move MBOX file dates separately based on a particular date range.
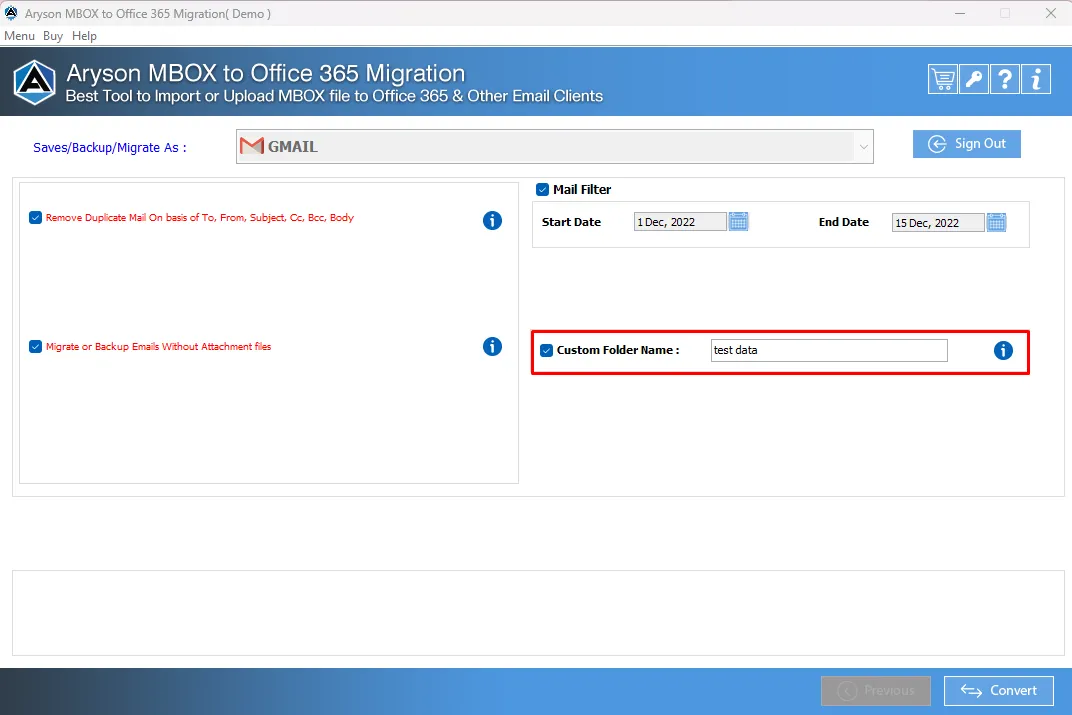
Step 12:Custom Folder Name:- Mark this to enter the output folder name.
Step 13: Click the Convert button to upload MBOX files into your Gmail account.
Step 14: The Download Report button helps you save the final process report.
Activation Guide
Activate the Software
Installation & Uninstallation
Installation & Uninstallation of Software
User Interface
User Interface
After downloading the Aryson MBOX to Office365 Tool, you will find the welcome screen as played below.