Know How to Take Backup of Mailboxes from Hotmail/Outlook.com into Various File formats & Email Clients on macOS
-
Table of Content
- Software Working Process
- Activation Guide
- Installation & Uninstallation
- User Interface
Software Working Process
Application Pre-Requisites
- Use App Password to sign in on the software if 2 step verification is enabled or Turn off 2 steps verification. Read More.
- Internet Connectivity is Required.
Software Working Process
Step 1: Download, Install, and Run Aryson Mac Hotmail Backup Software.
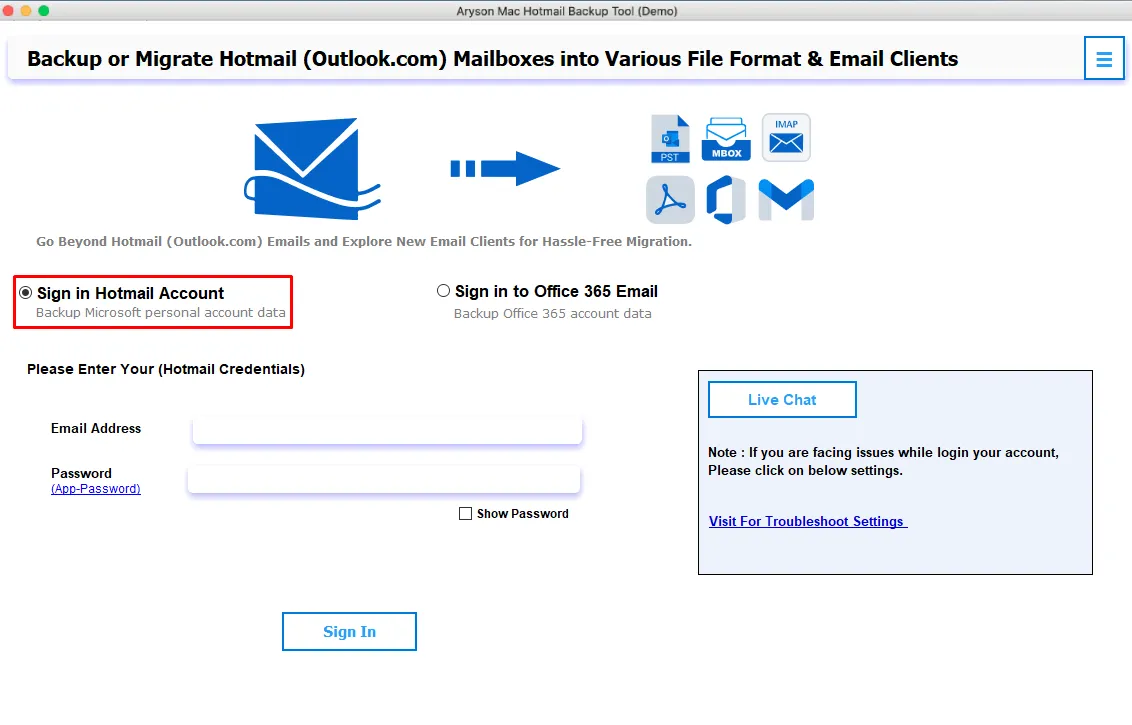
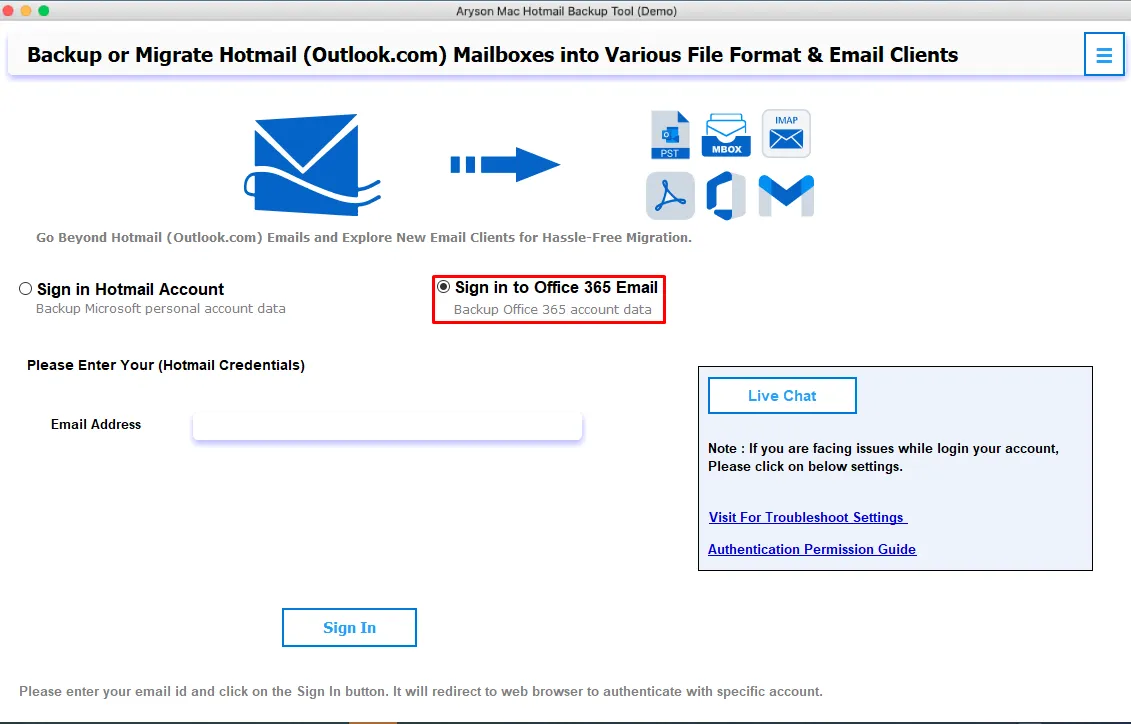
Step 2: Choose Sign In options on macOS.
Note: When your Outlook Web Access (Outlook.com) account is free or basic then you can choose Sign in Hotmail Account options.
OR
Your Hotmail (Outlook.com) is a business or premium account then you can choose Sign In to Office 365 Email options.
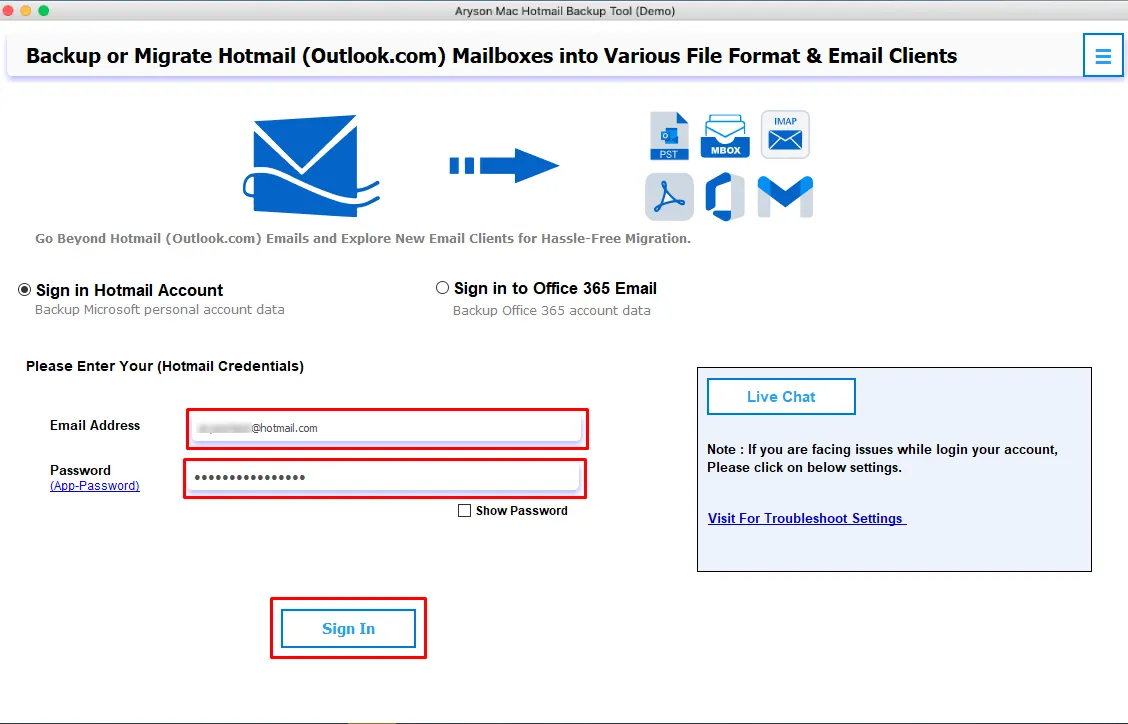
Step 3: Choose Sign in Hotmail Account options and Enter Hotmail Email Address and Third-Party App Password after that click on the Sign In button.
Step 4: Now, the fetching process of the all folder from your Hotmail Account will start.
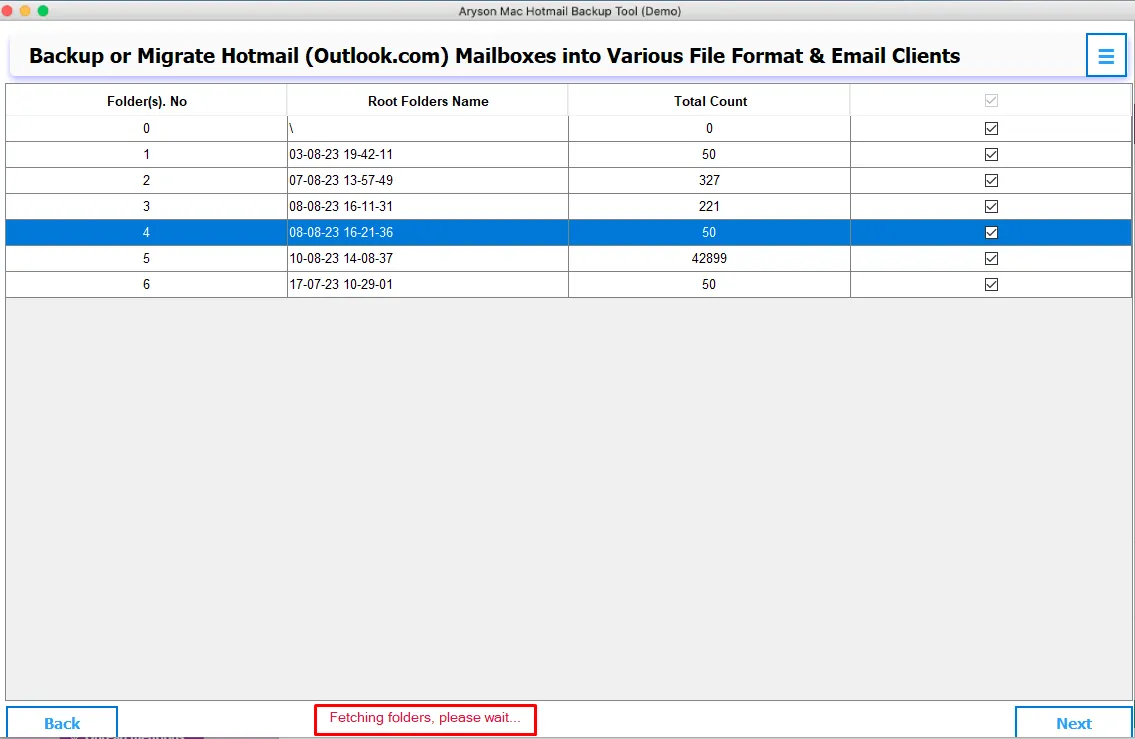
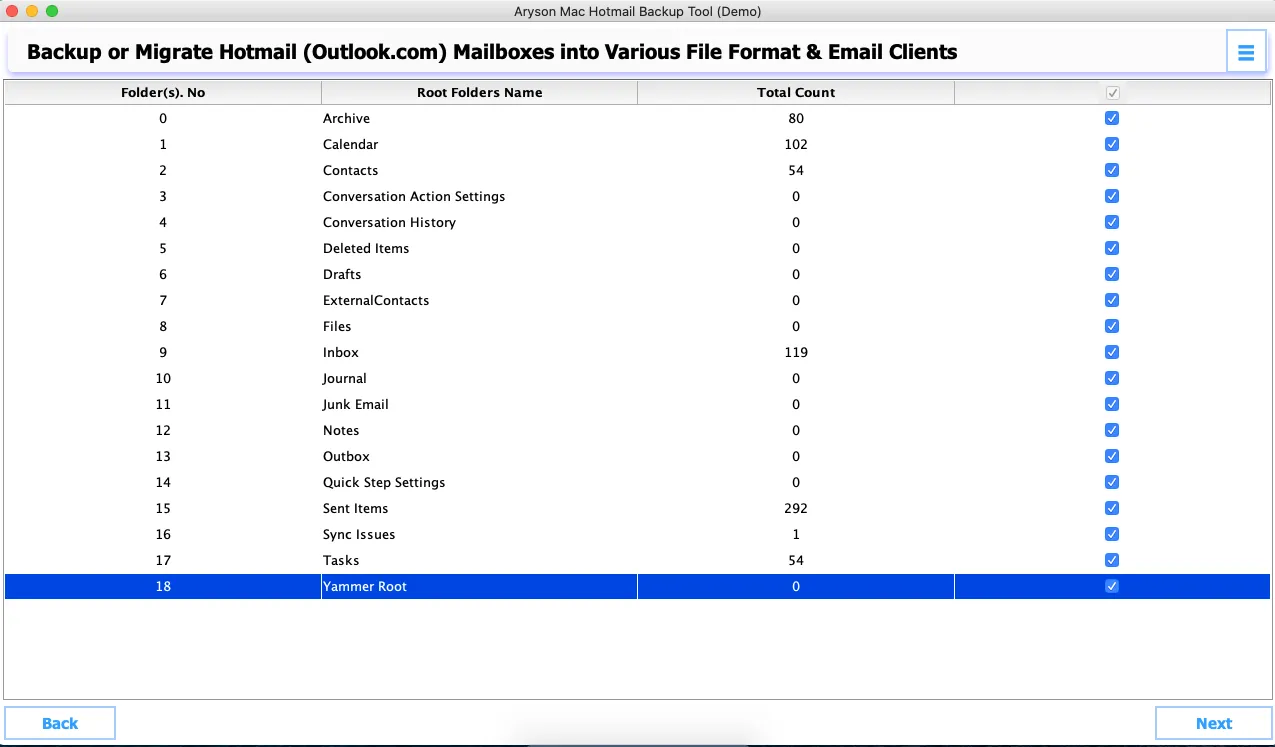
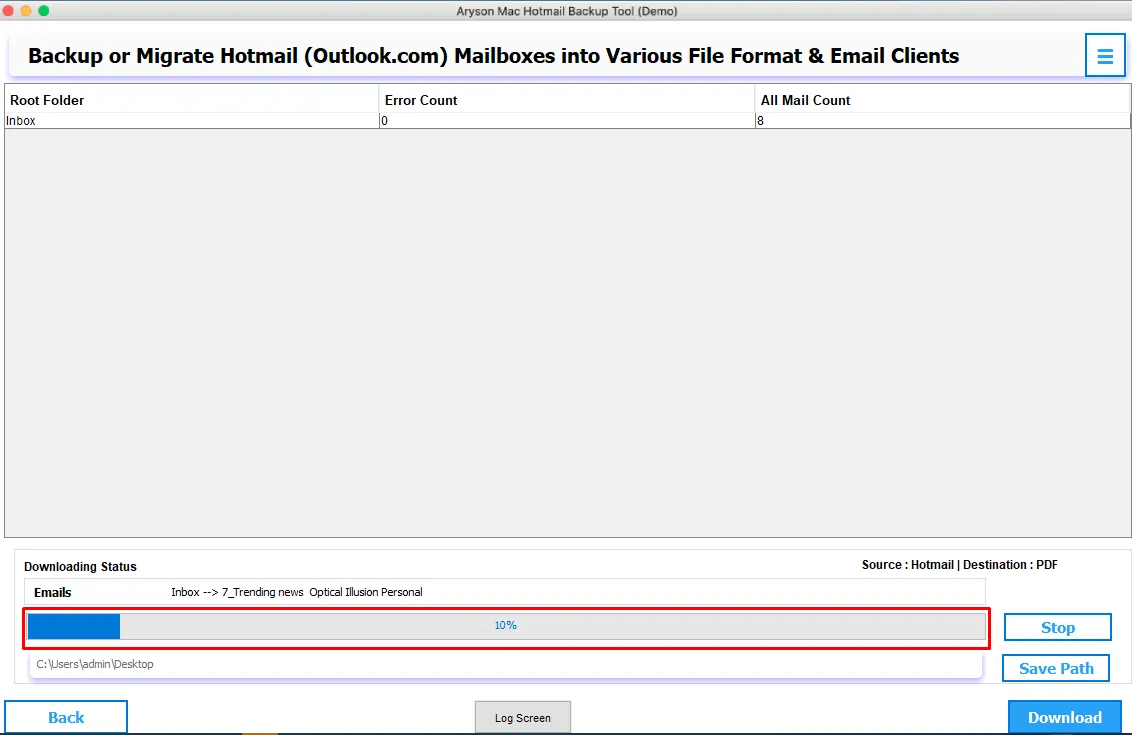
Step 5: After Fetching All Folders of Hotmail Account display the Hotmail Account Mailbox with Root Folder Name & Total Count. Here, you can check out the Folder Mailbox, Contact, Calendars etc. which you want to take backup and Click on the Next button.
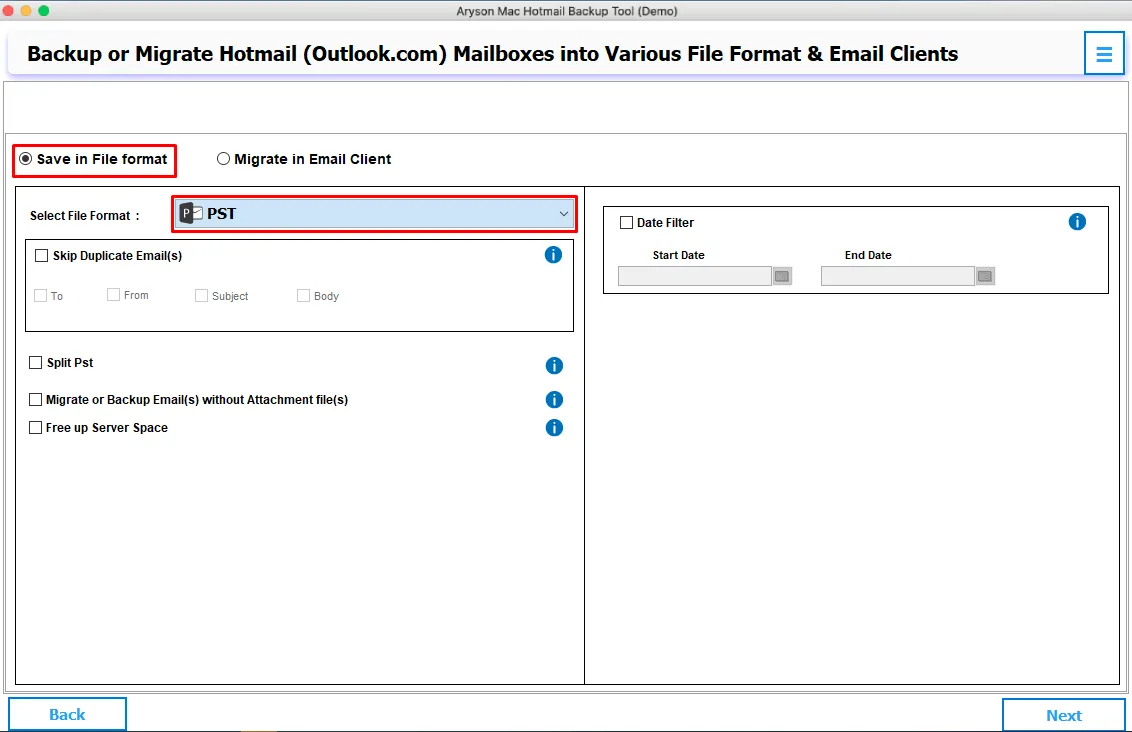
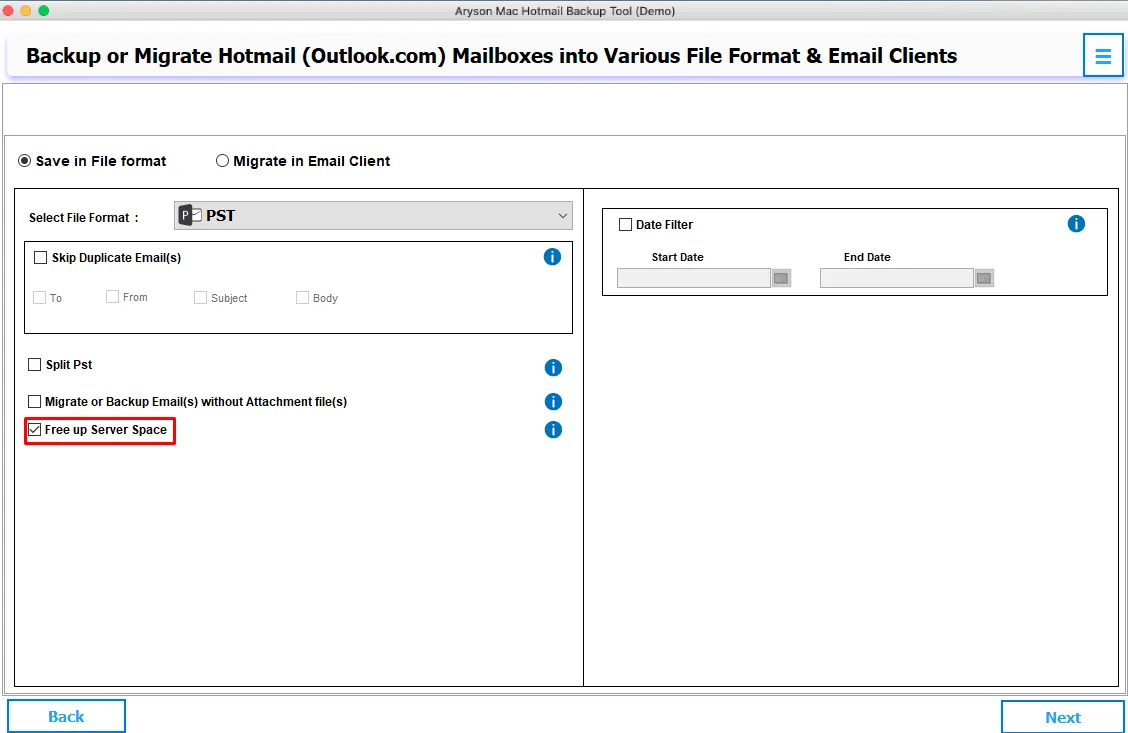
Step 6: Choose Save in File Format options and Select File Format as PST option from drop down list.
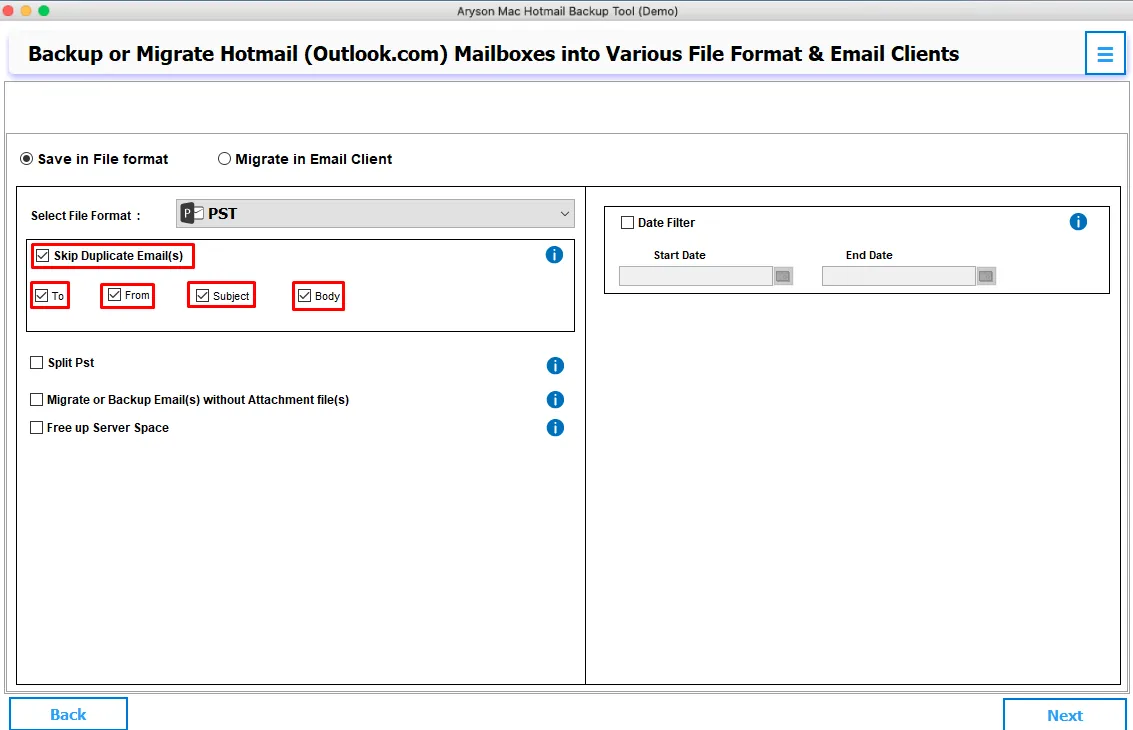
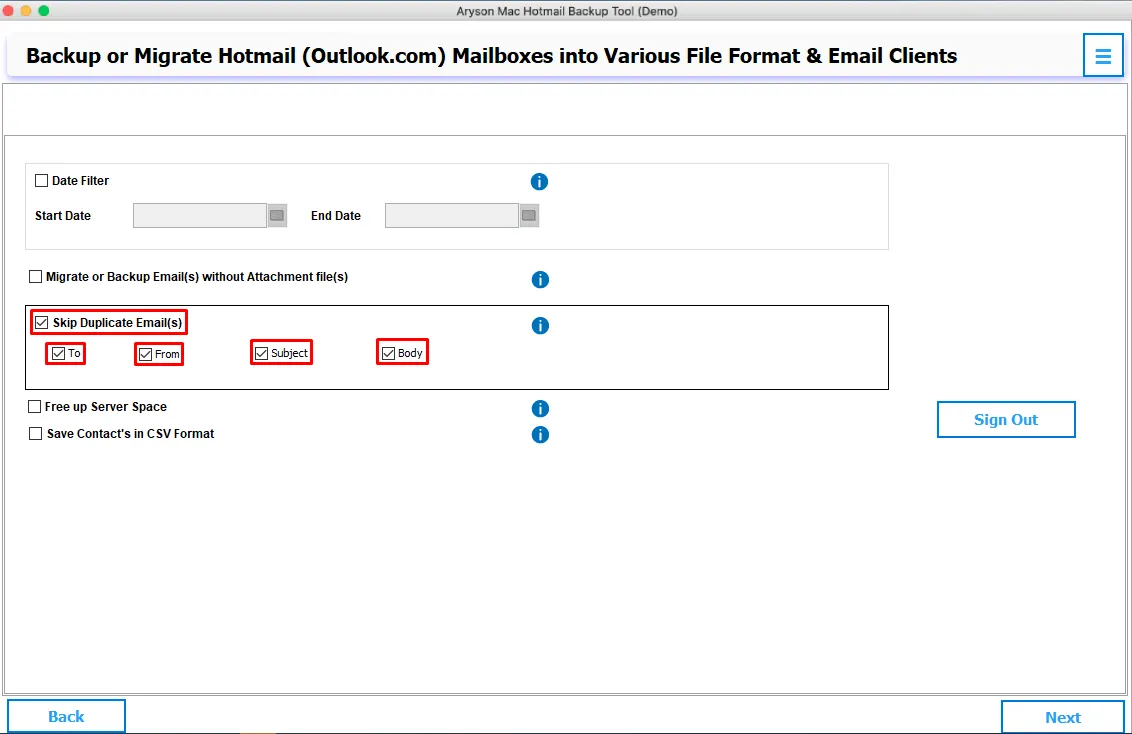
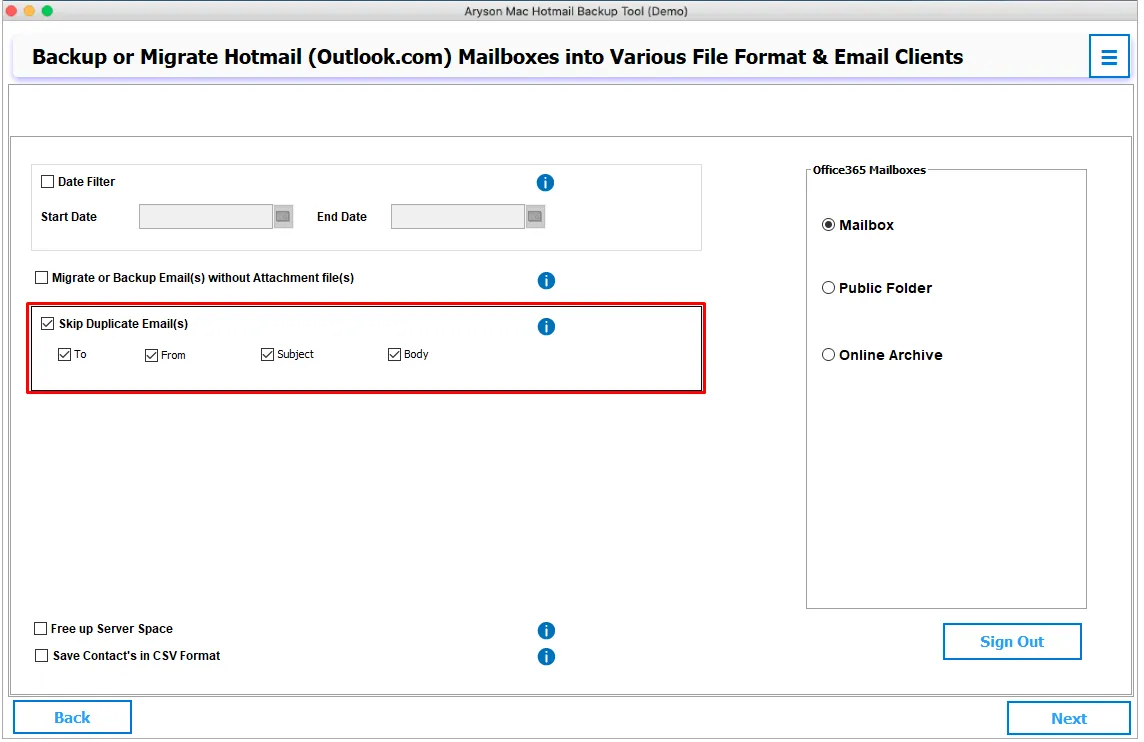
Step 7: Check out the Skip Duplicate Email(S) options and remove the duplicate email items on the basis of To, From, Subject, and Body before exporting mailboxes.
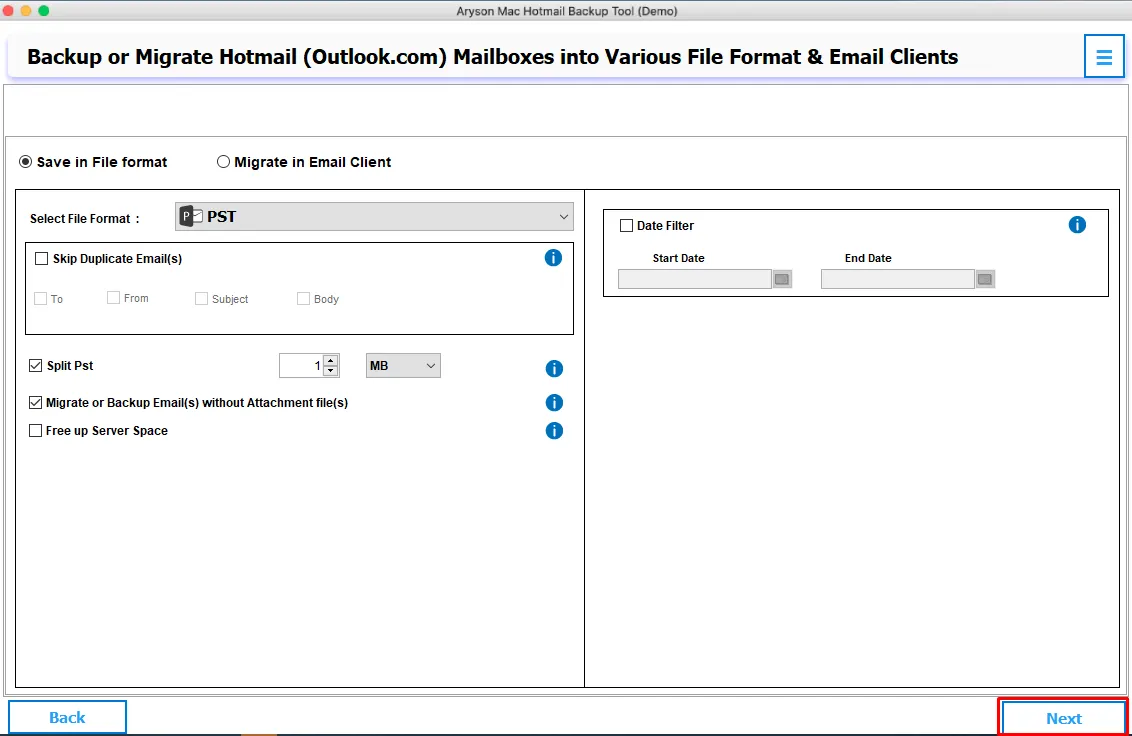
Step 8: Check out the Split PST option and split the resultant PST file on the basis of MB and GB.

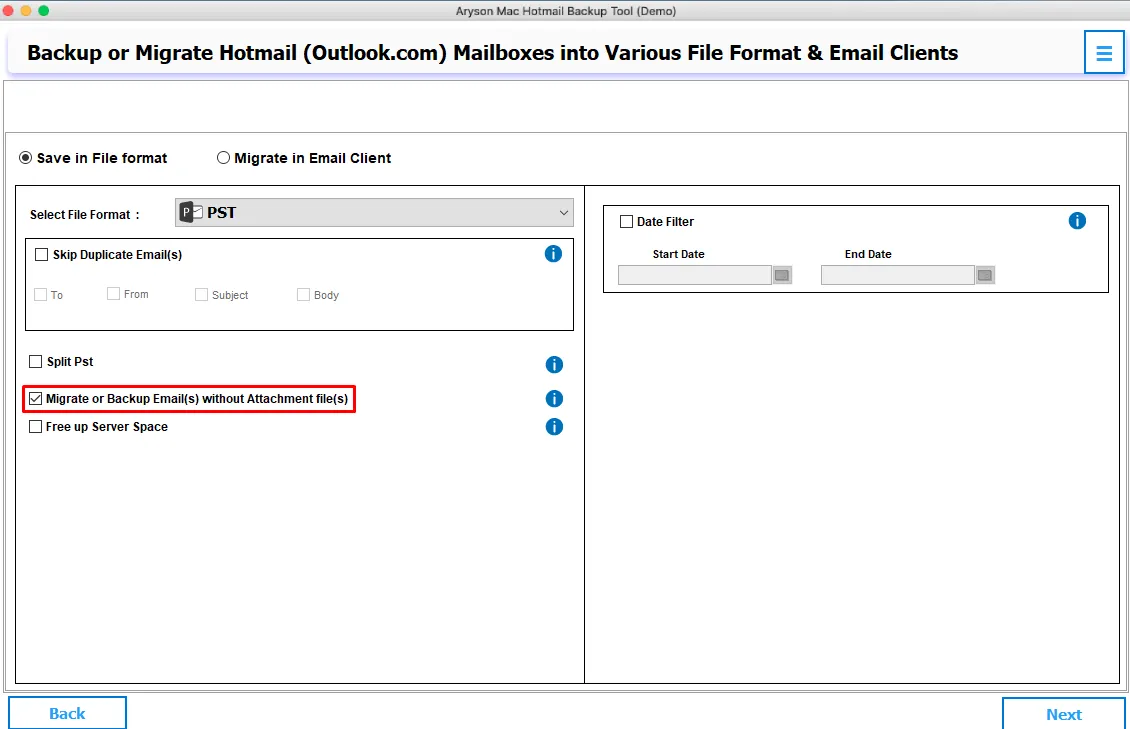
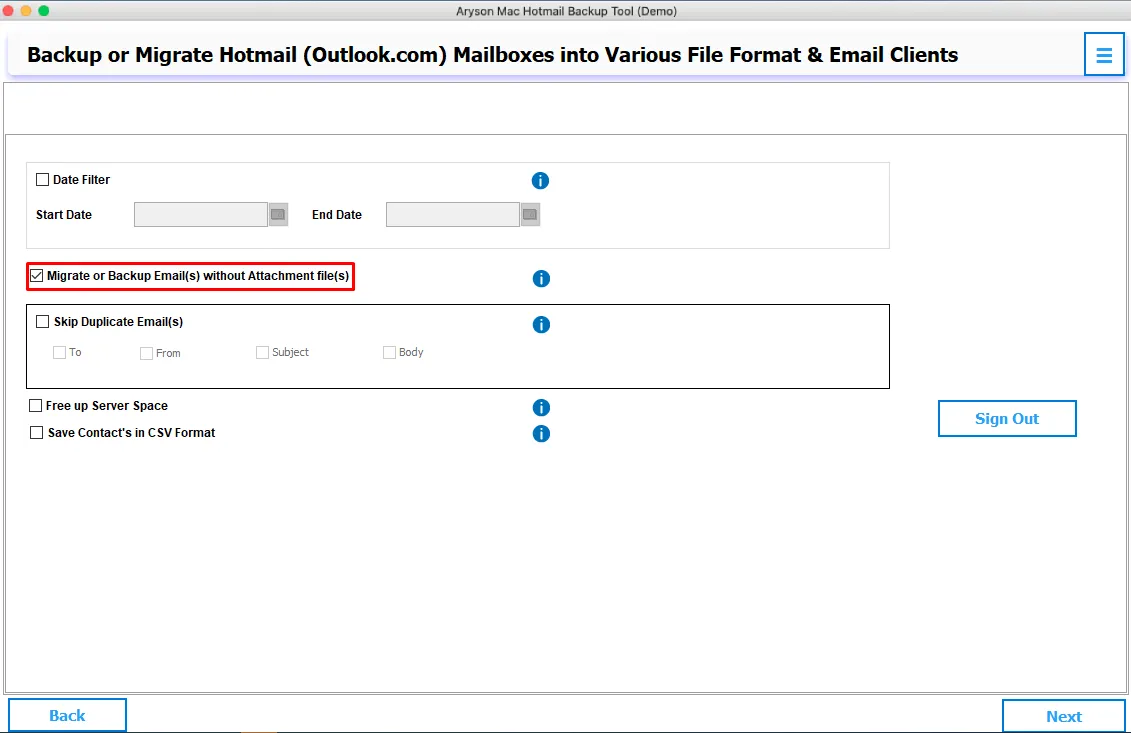
Step 9: Select the Migrate or Backup Email (s) without Attachment(s) options and backup or migrate Hotmail Email without attachments.
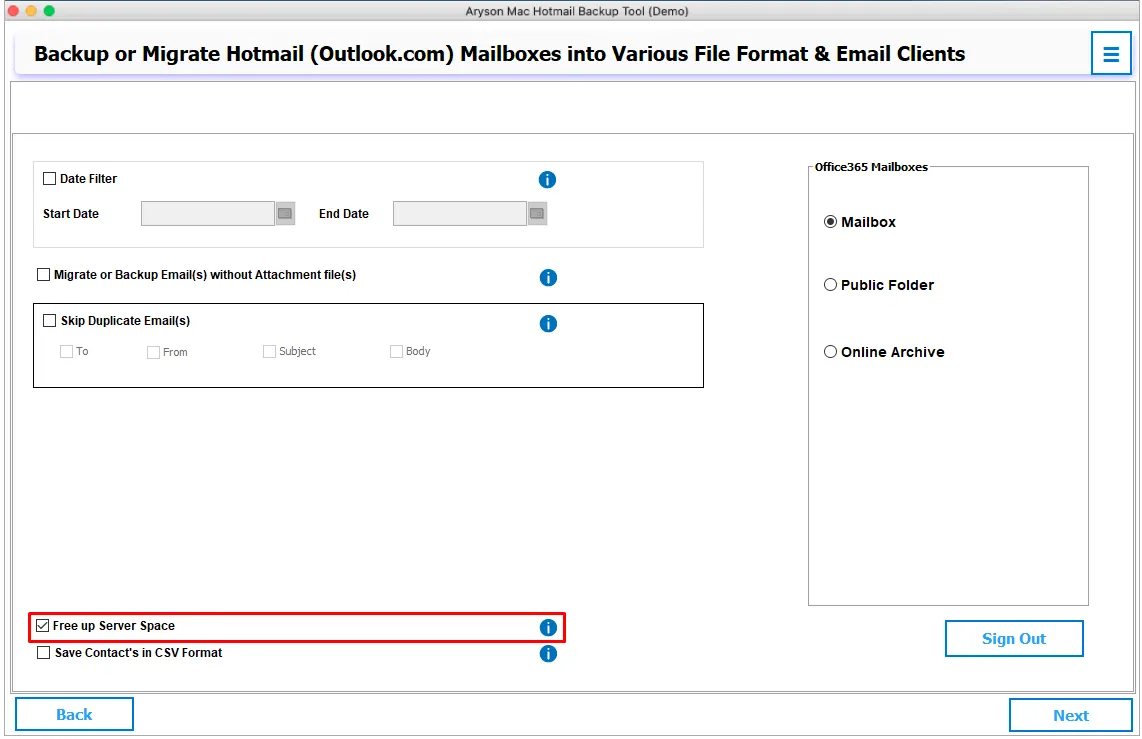
Step 10: Choose the Free Up Server Space option and permanently delete the mailboxes or folder of Hotmail Account after backup.
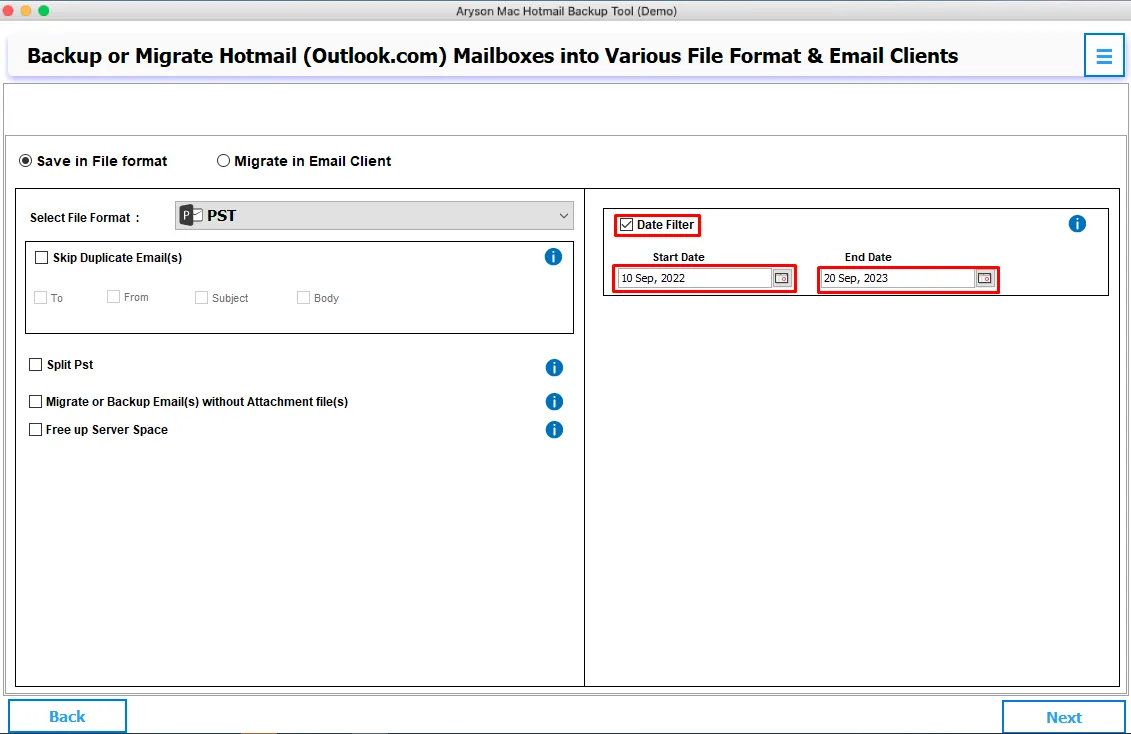
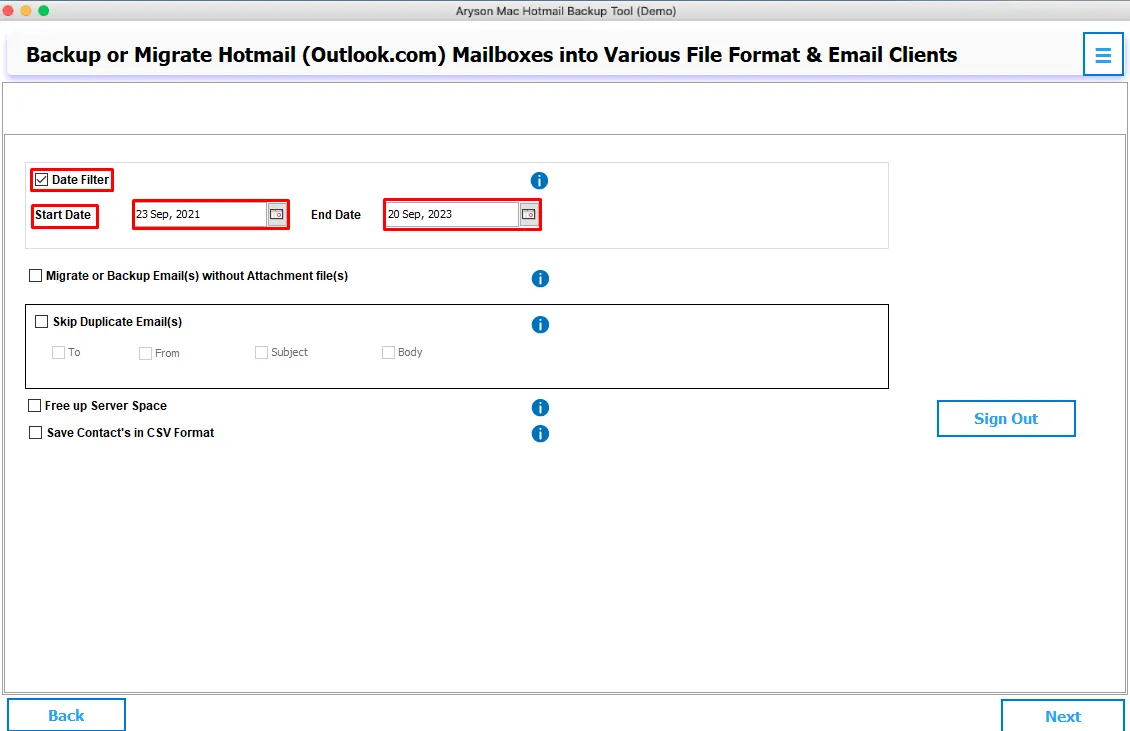
Step 11: Select Date Filter option and Choose Start Date as well as End Date then take backup of mailboxes according to date range.
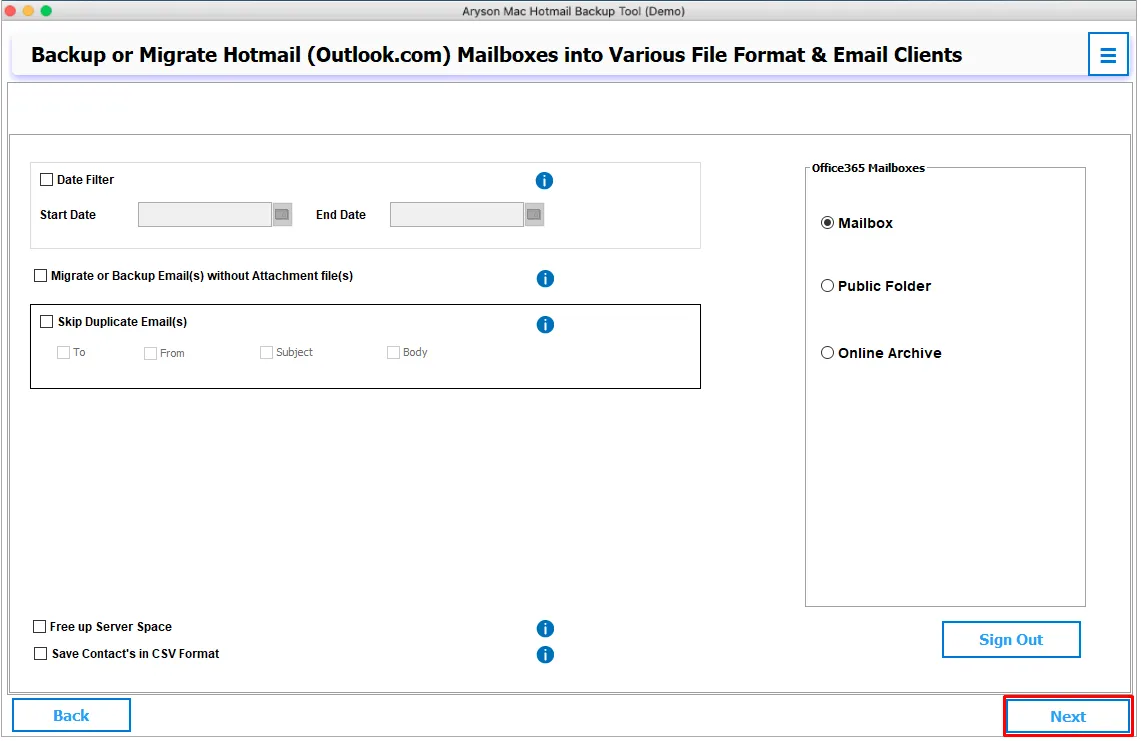
Step 12: Click on the Next button.
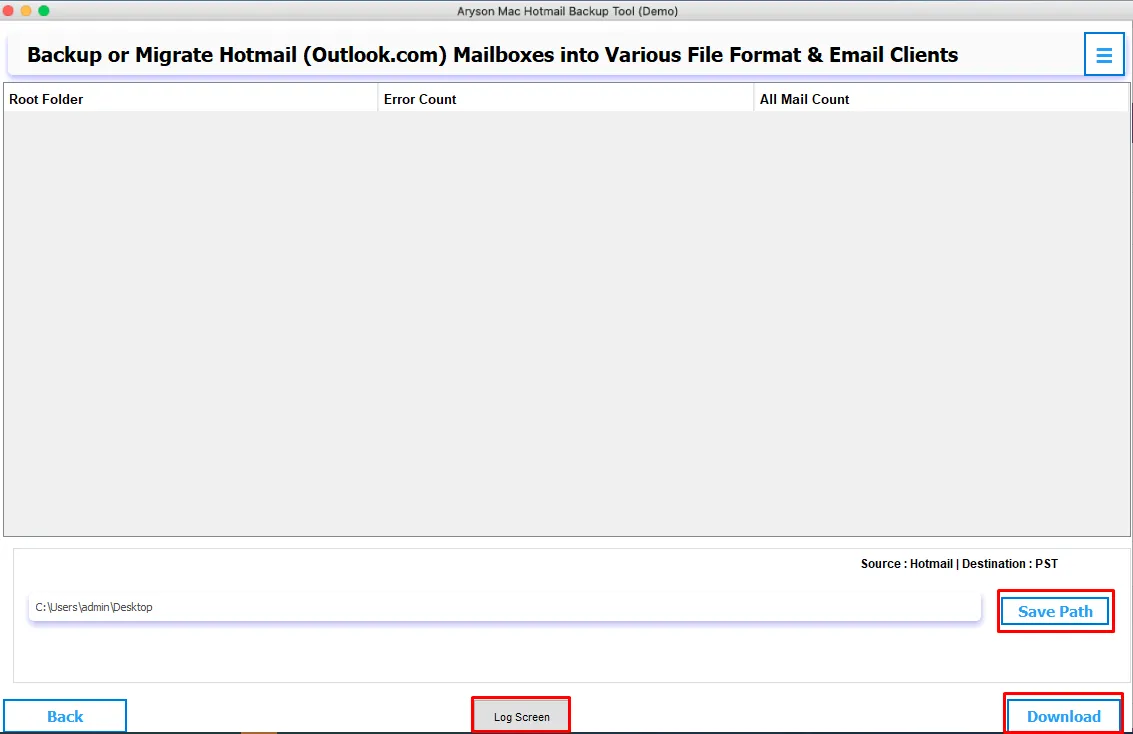
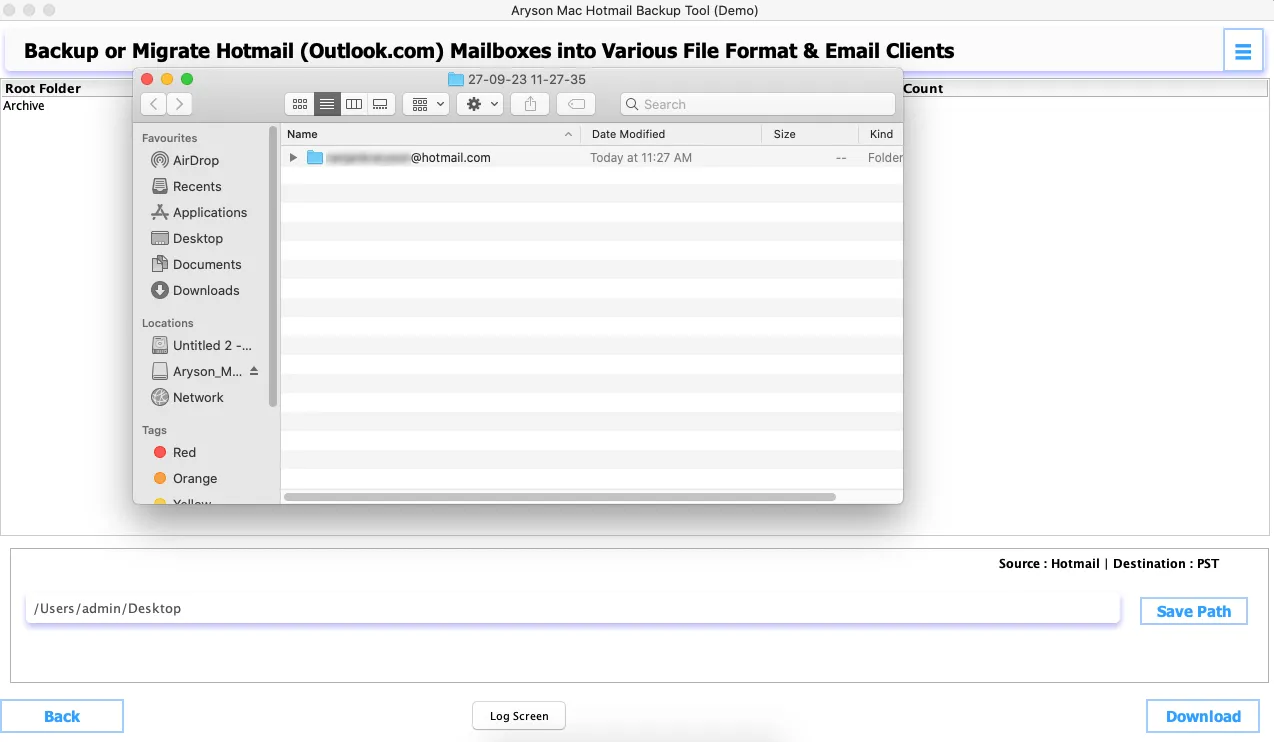
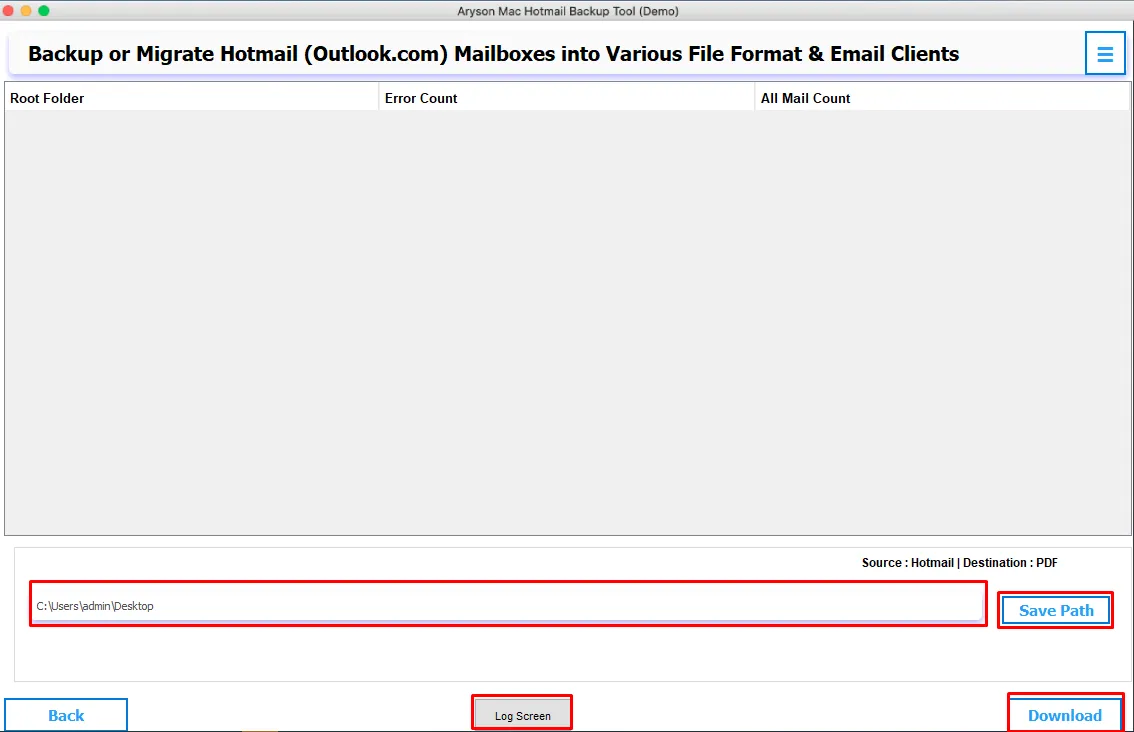
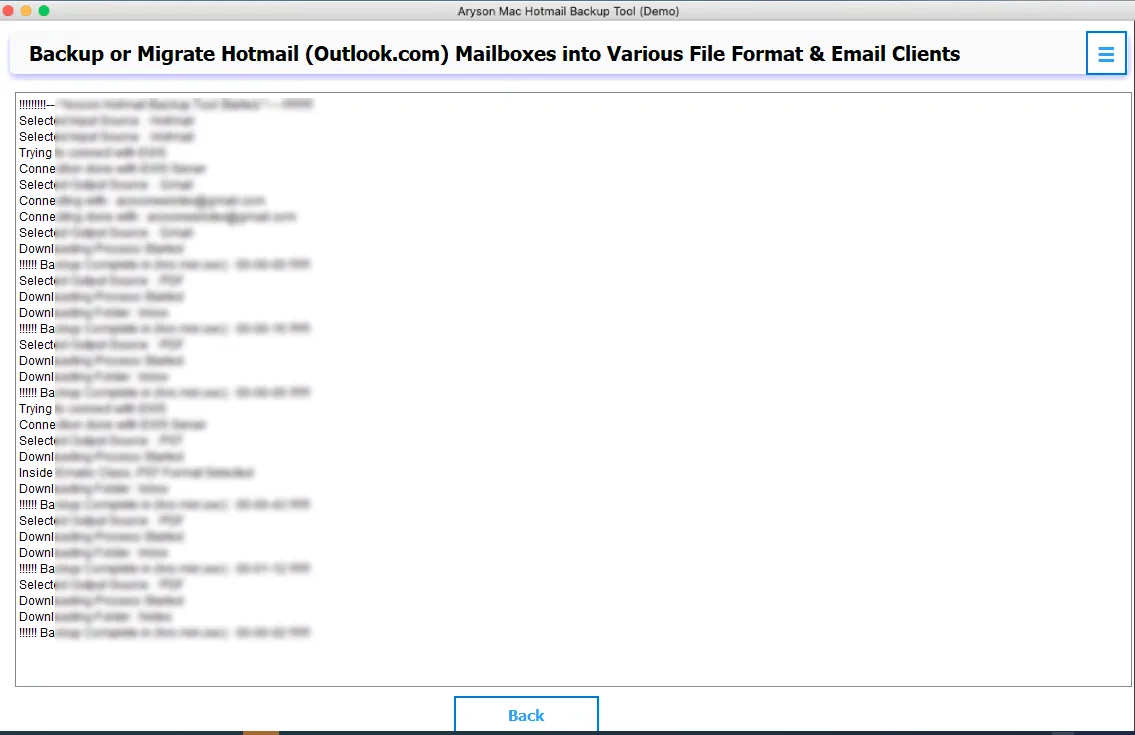
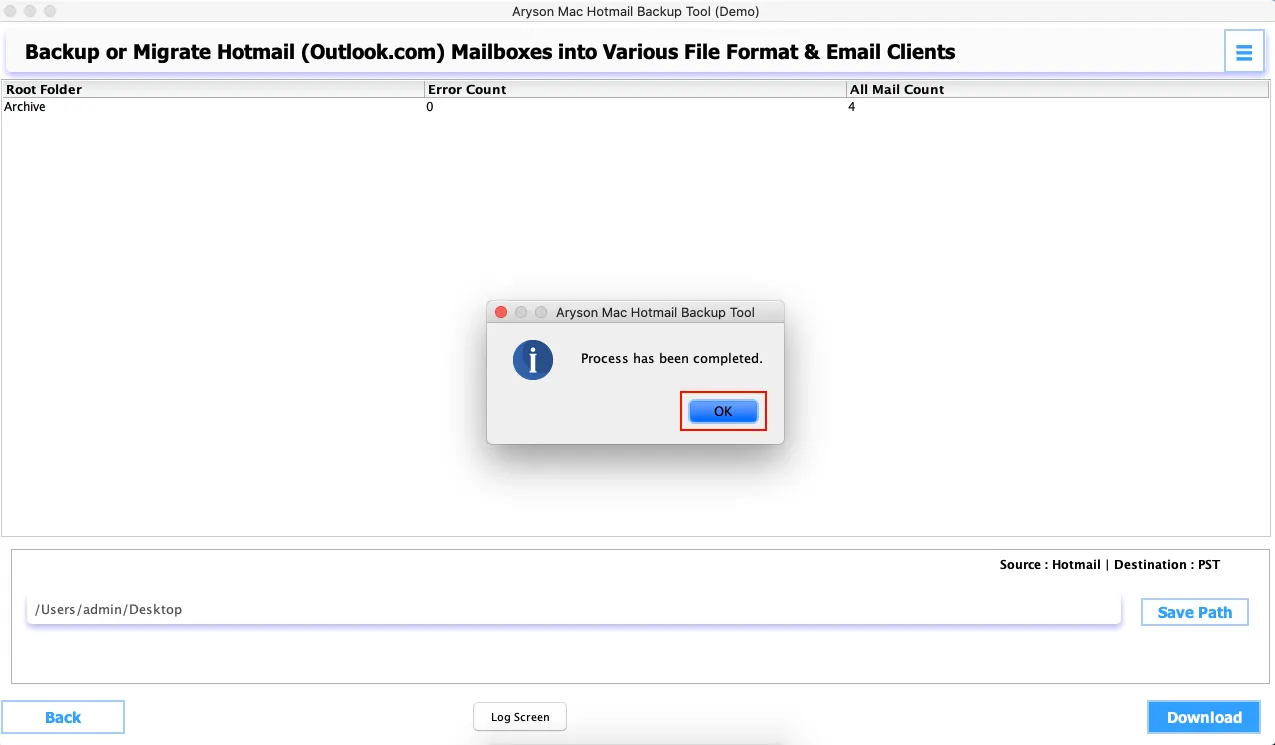
Step 13: Click on the Save Path button and set the destination path where you want to save the backup. Click on the Log Screen button then see the entire process of conversion. Now click on the Download option.
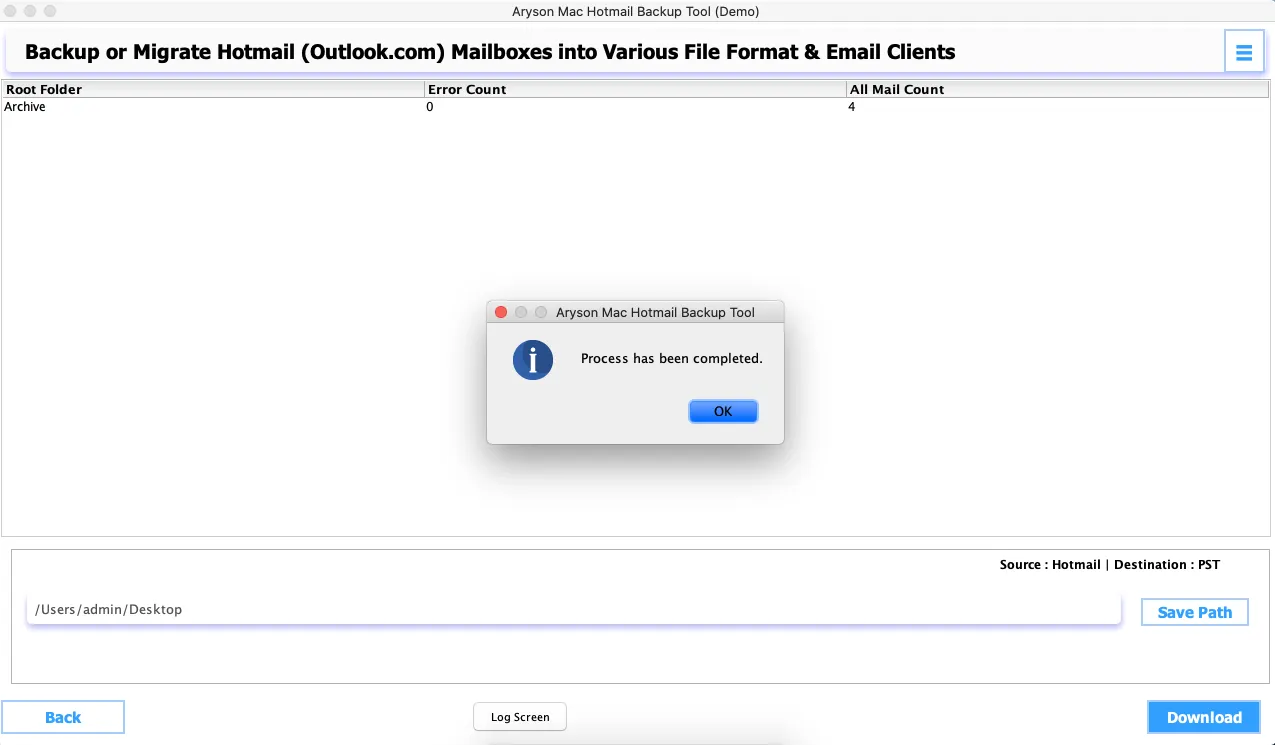
Step 14: Now, the backup process of Hotmail mailboxes will start. After some time the backup process is complete.

Step 15: Click on the OK button, and check the restaurant backup file in the selected destination path.
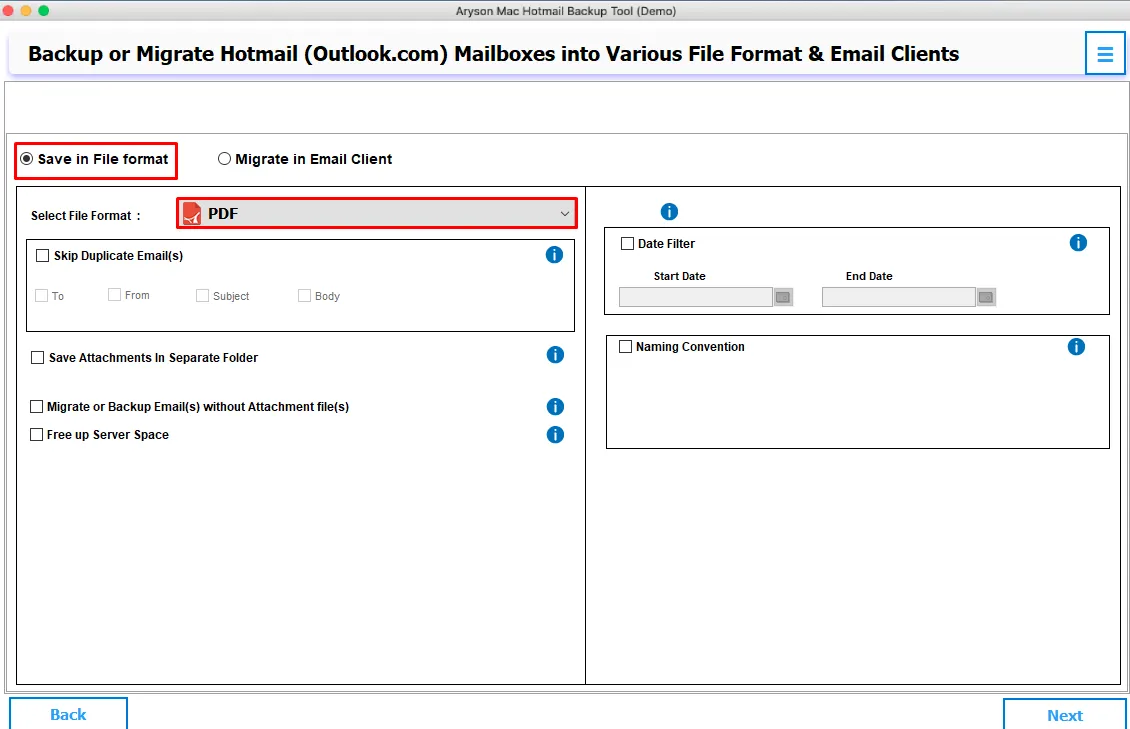
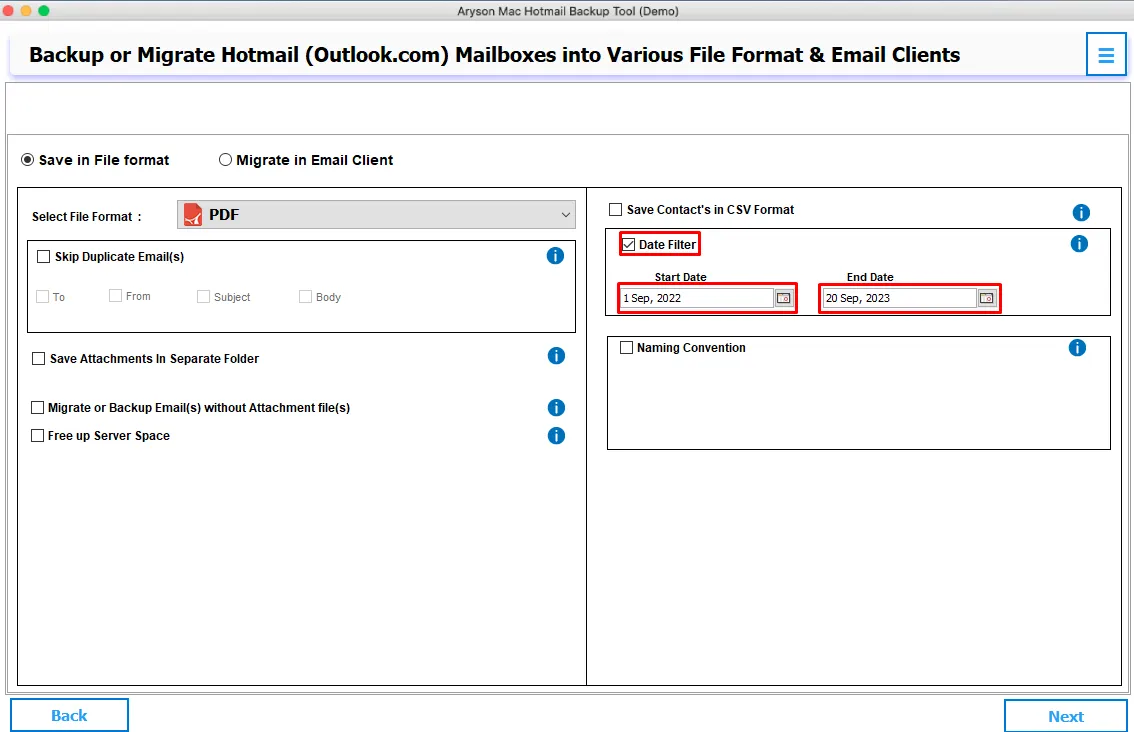
Step 6: Choose Save in File Format options and Select File Format as PDF option from drop down list.
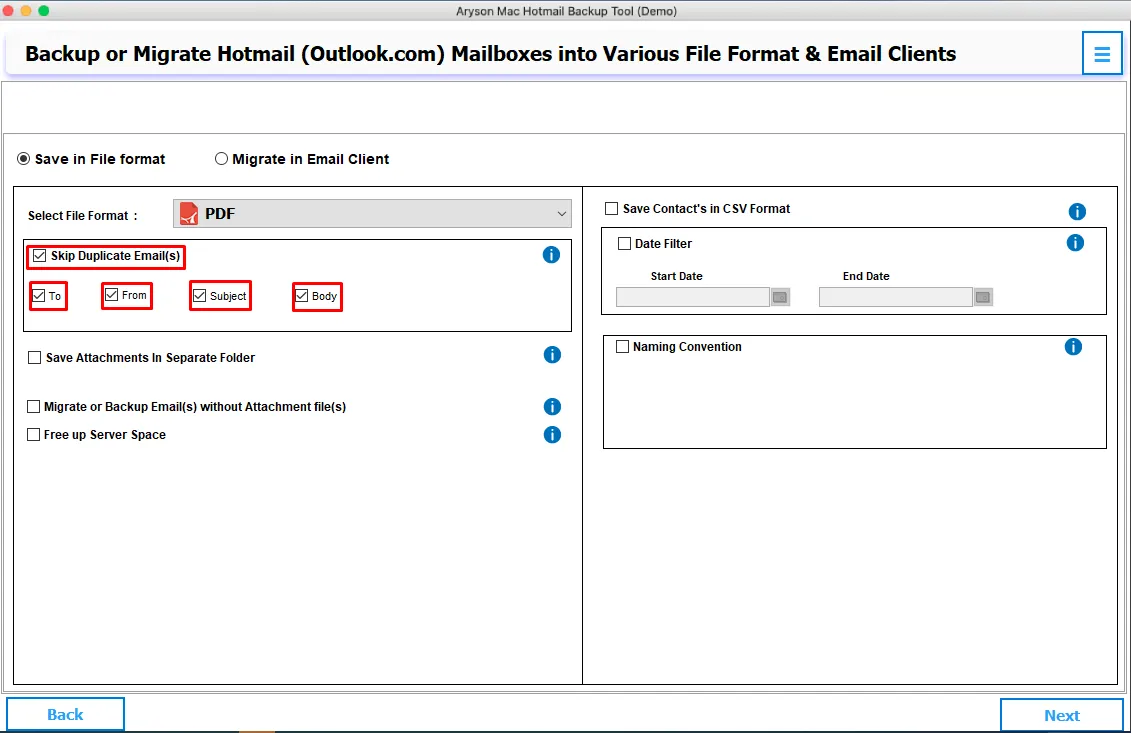
Step 7: Check out the Skip Duplicate Email(S) options and remove the duplicate email items on the basis of To, From, Subject, and Body before exporting mailboxes.
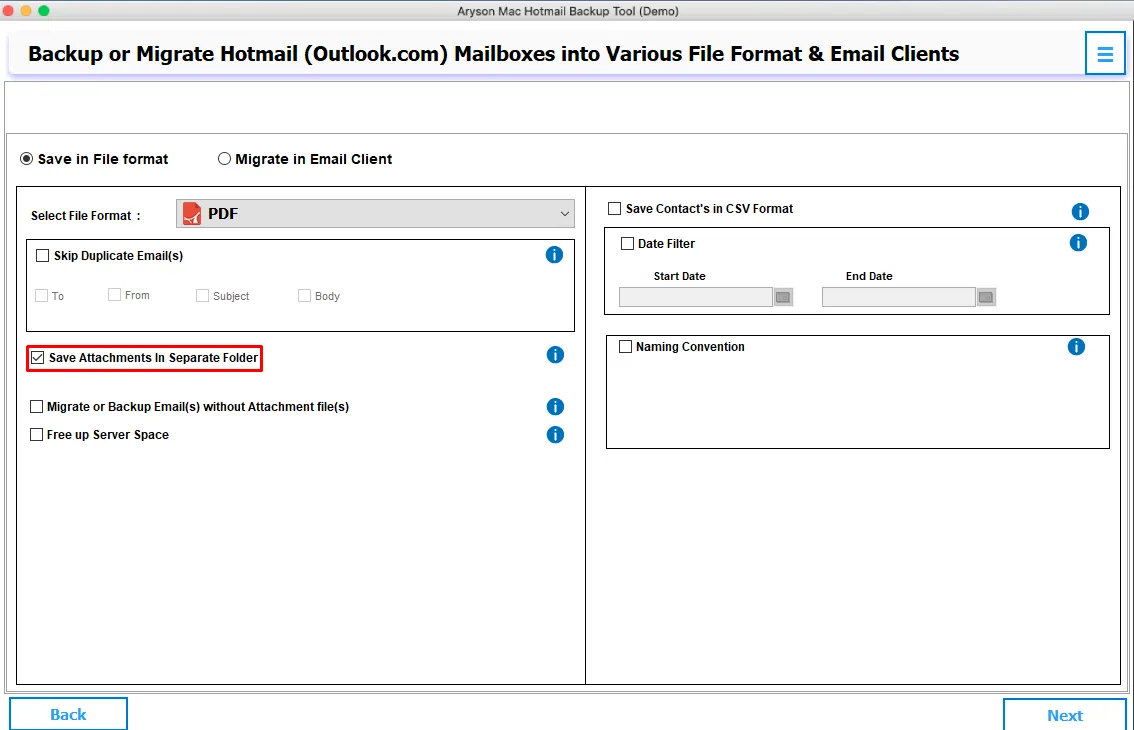
Step 8: Check out the Save Attachment in Separate Folder option and save the attachments of emails in separate folders.
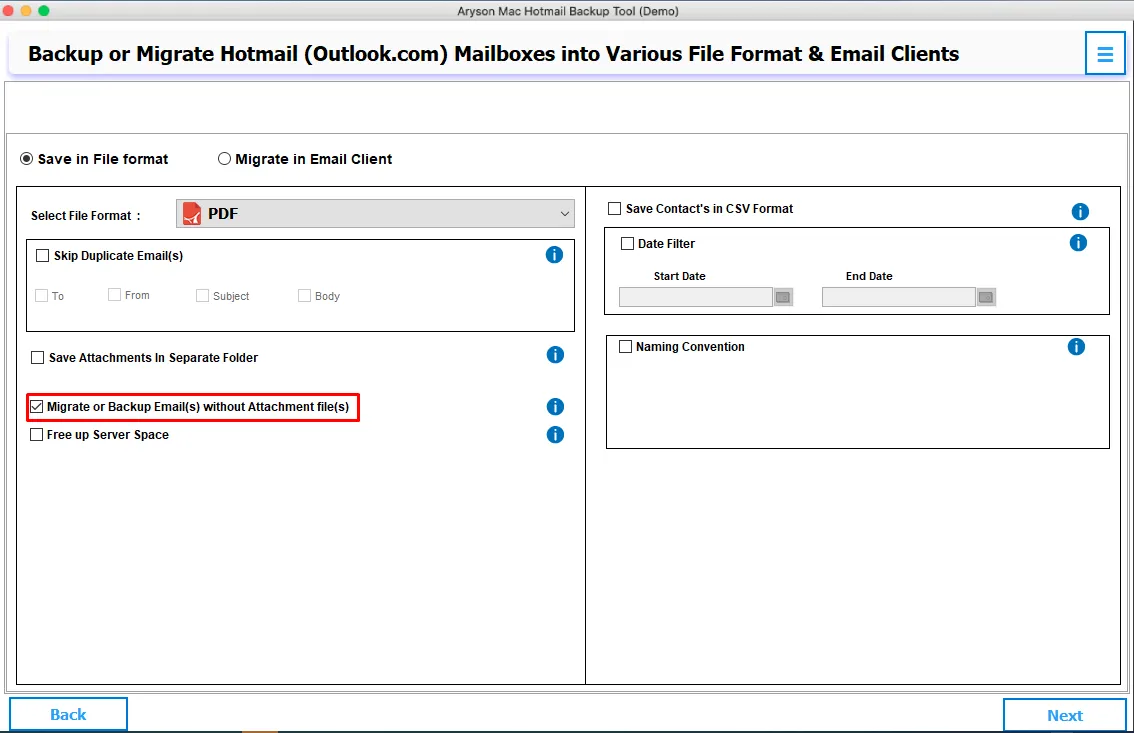
Step 9: Select the Migrate or Backup Email (s) without Attachment(s) options and backup or migrate Hotmail Email to PDF without attachments.
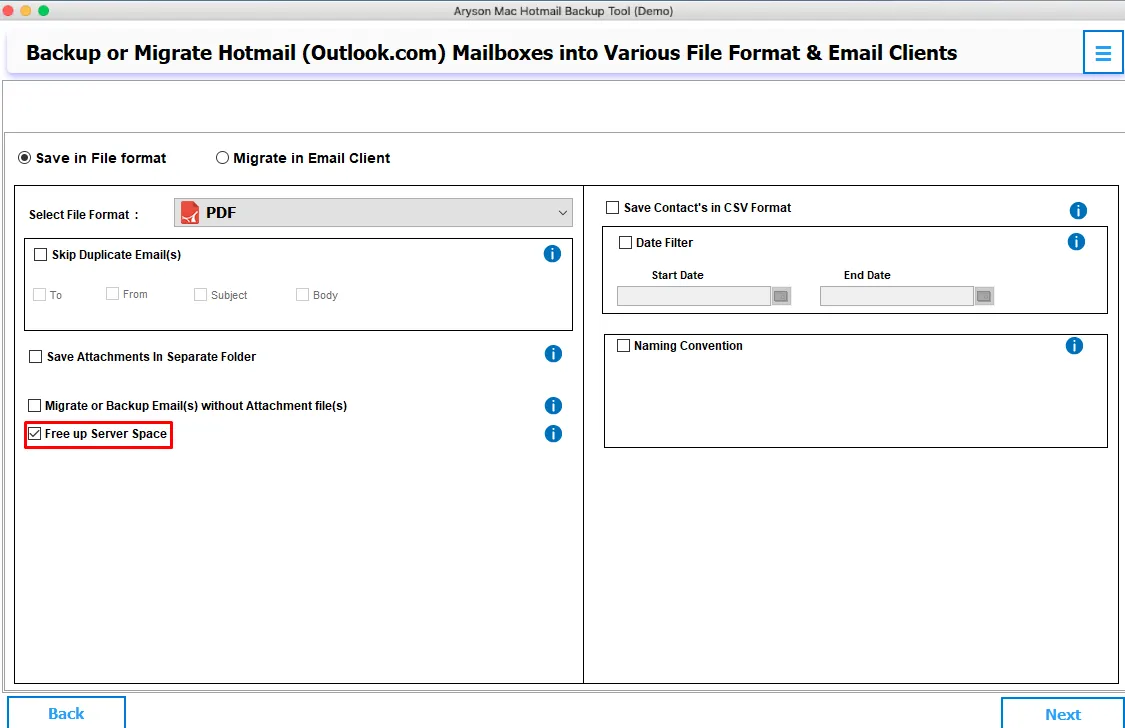
Step 10: Choose the Free Up Server Space option and permanently delete the mailboxes or folder of Hotmail Account after backup.
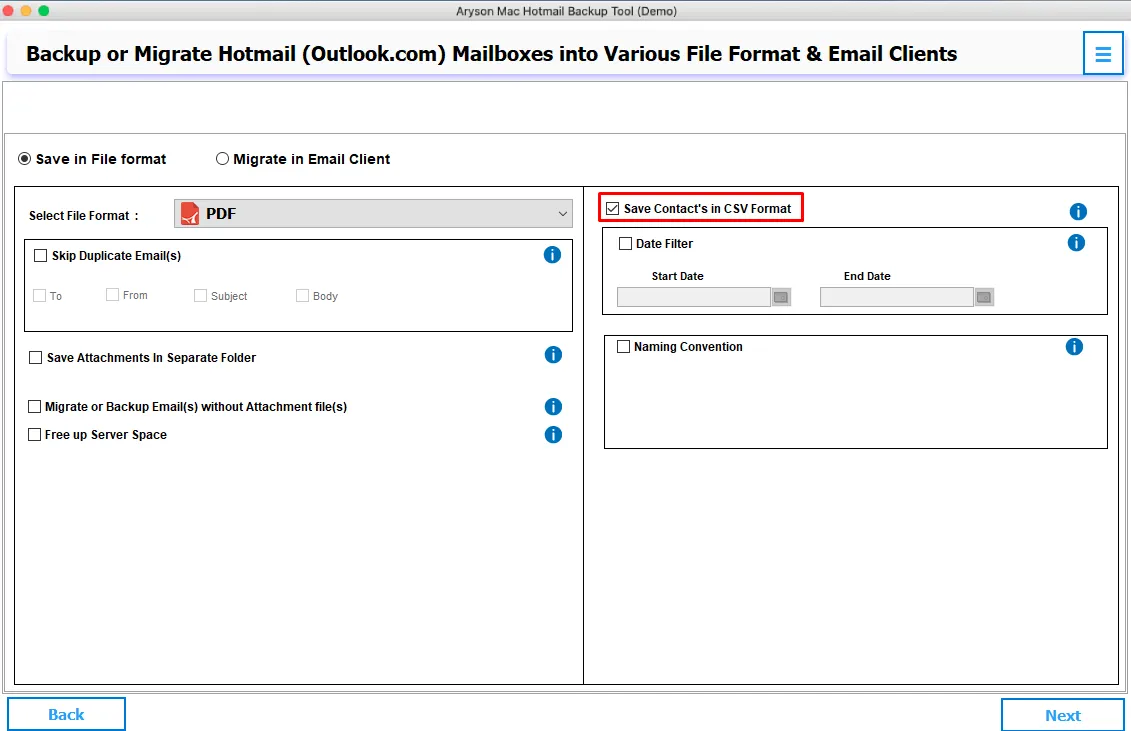
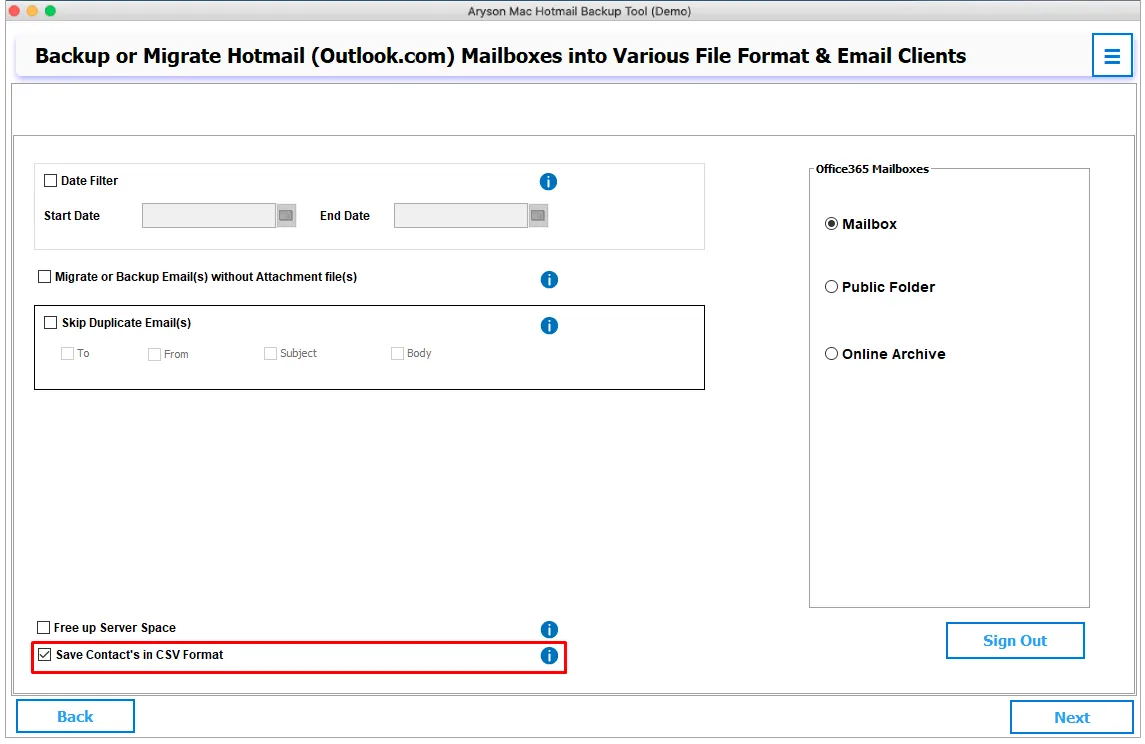
Step 11: Select the Save Contacts in CSV File Format option and save the contacts of Hotmail Accounts in CSV file format.
Step 12: Select Date Filter option and Choose Start Date as well as End Date then take backup of mailboxes according to date range.
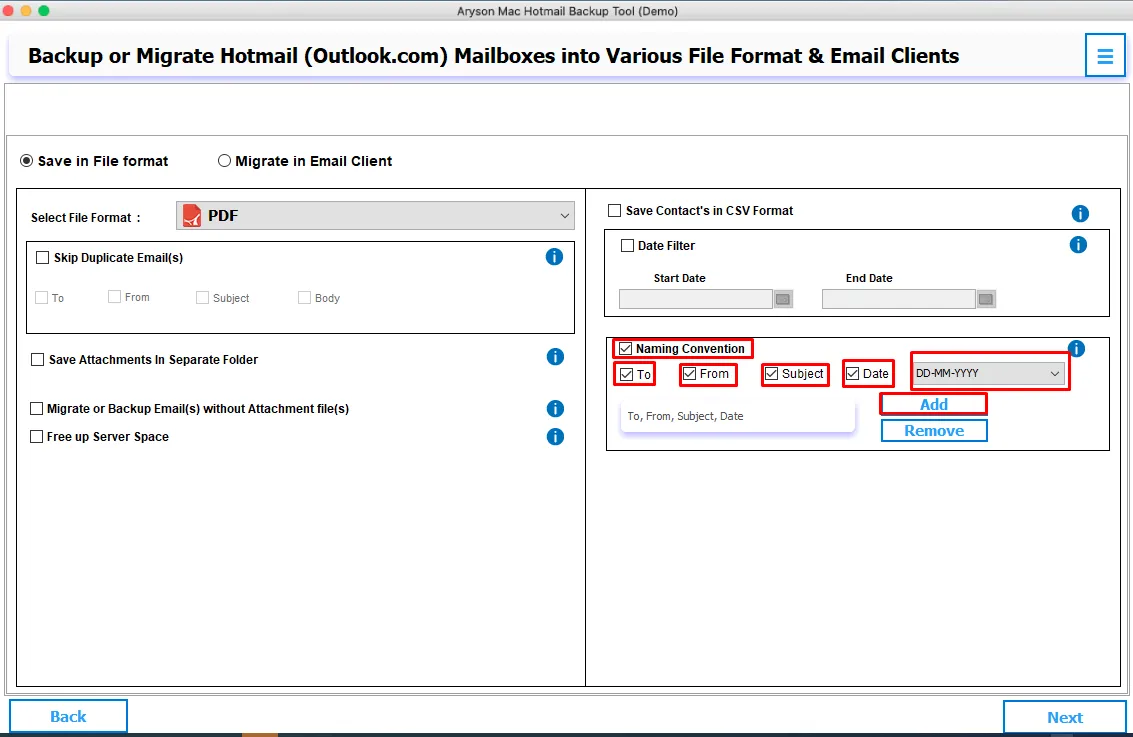
Step 13: Naming Convention options allows you to save emails according to To, From, Subject, and Date.
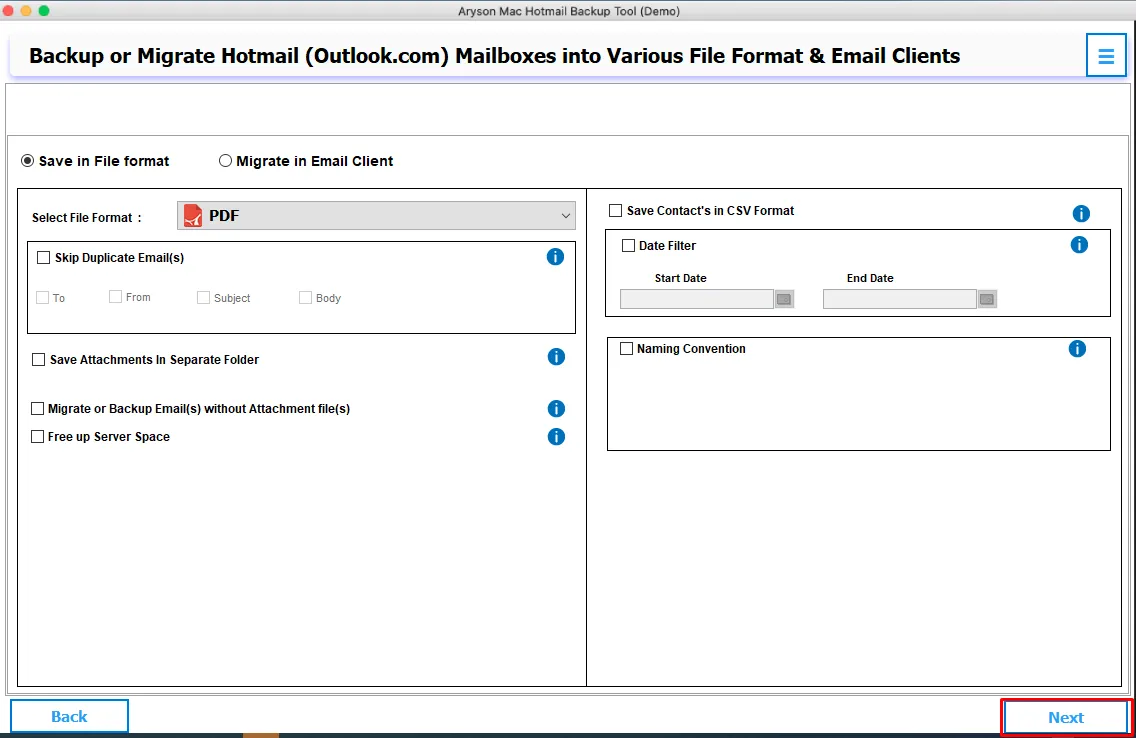
Step 14: Click on the Next button.
Step 15: Click on the Save Path button and set the destination path where you want to save the backup. Click on the Log Screen button then see the entire process of conversion. Now click on the Download option.
Step 16: Now, the backup process of Hotmail mailboxes will start. After some time the backup process is complete.
Step 17: Click on the OK button, and check the restaurant backup file in the selected destination path.
Step 6: Choose Migrate in Email Client options and Select Email Client as Gmail option from drop down list.
Note:- Login Gmail Account with Third Party App Password or Login with Modern Authentication.
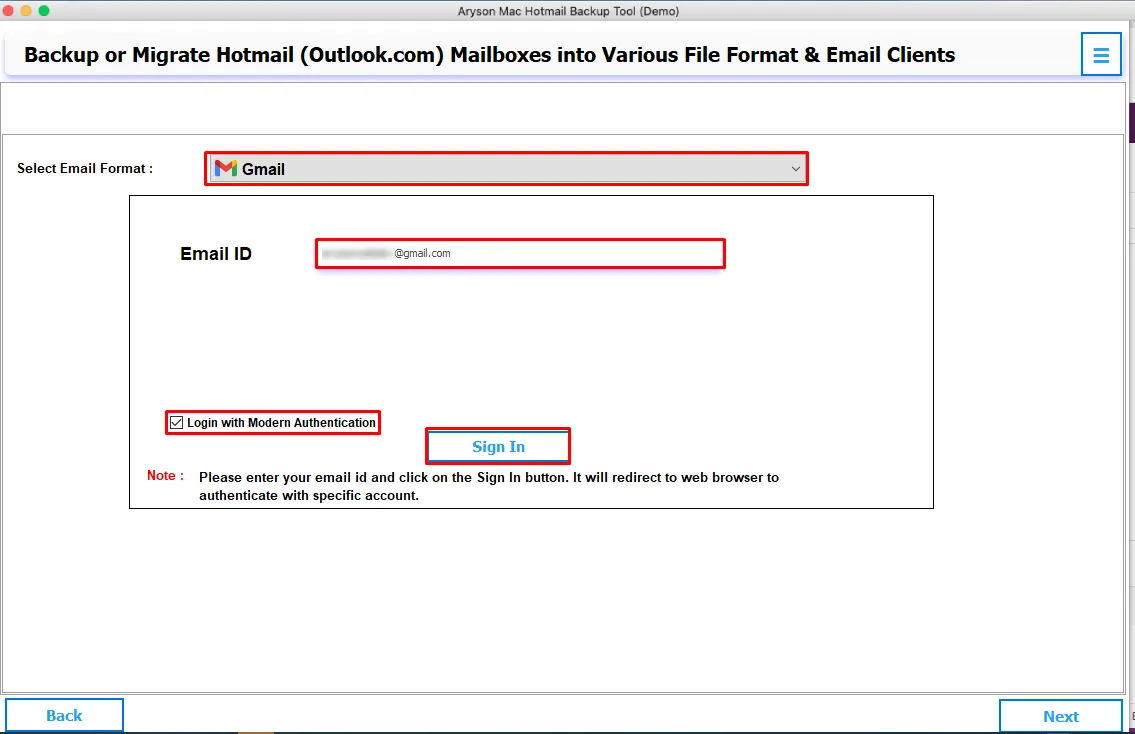
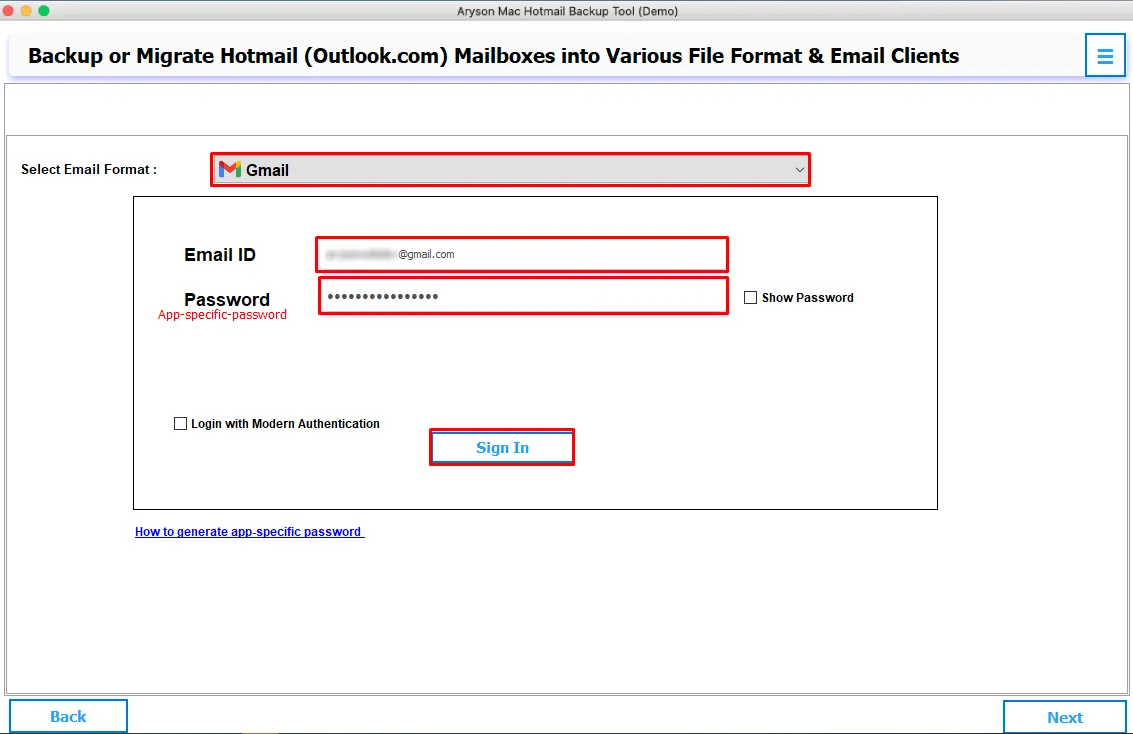
Here we choose Login with Modern Authentication option and Click on the Sign In button.
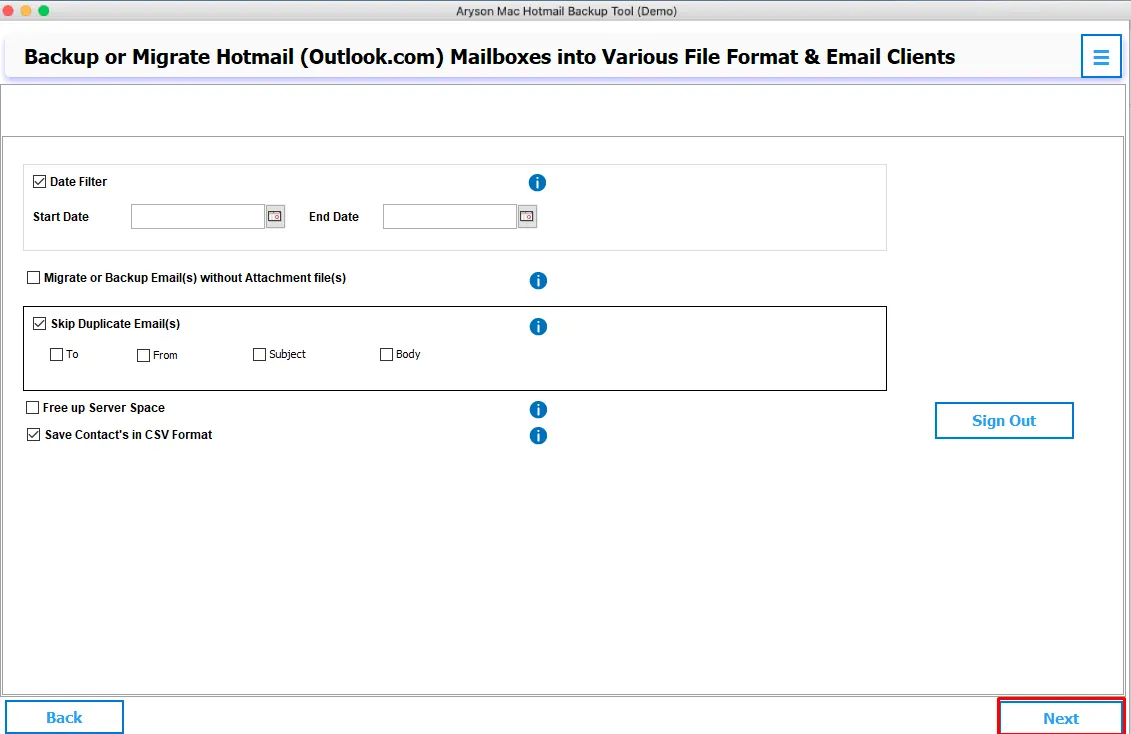
Step 7: Select Date Filter option and Choose Start Date as well as End Date then take backup of mailboxes according to date range.
Step 8: Select the Migrate or Backup Email (s) without Attachment(s) options and backup or migrate Hotmail Email without attachments.
Step 9: Check out the Skip Duplicate Email(S) options and remove the duplicate email items on the basis of To, From, Subject, and Body before exporting mailboxes.
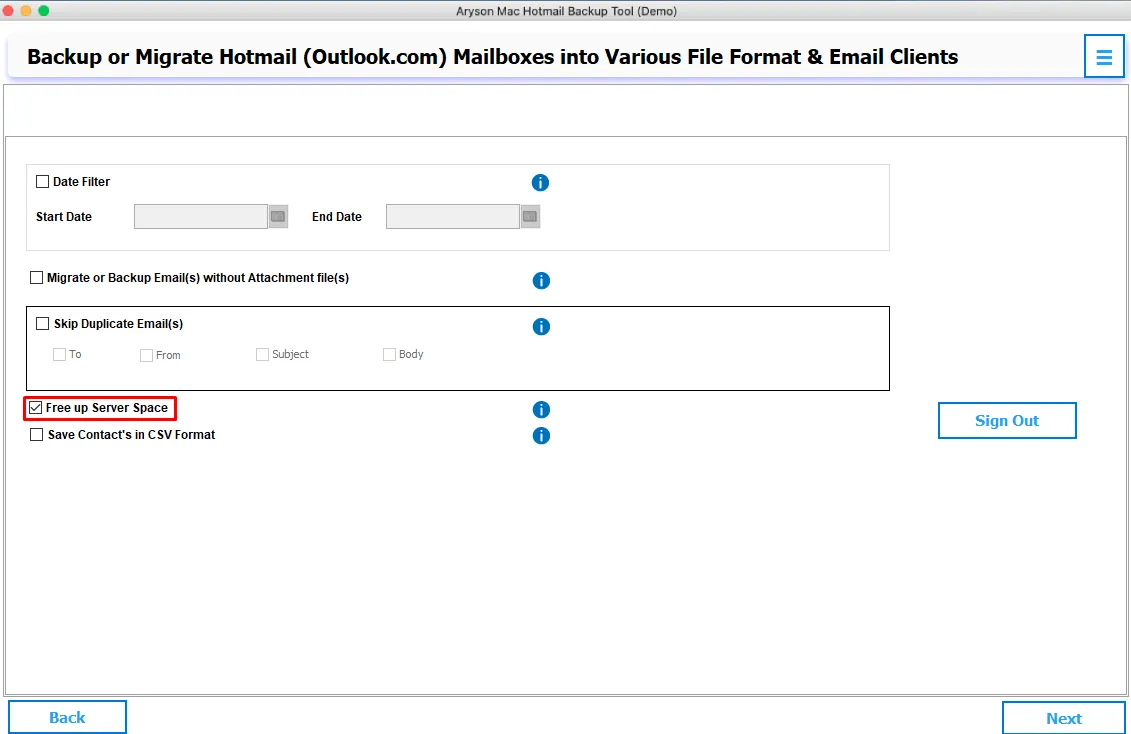
Step 10: Choose the Free Up Server Space option and permanently delete the mailboxes or folder of Hotmail Account after migration.
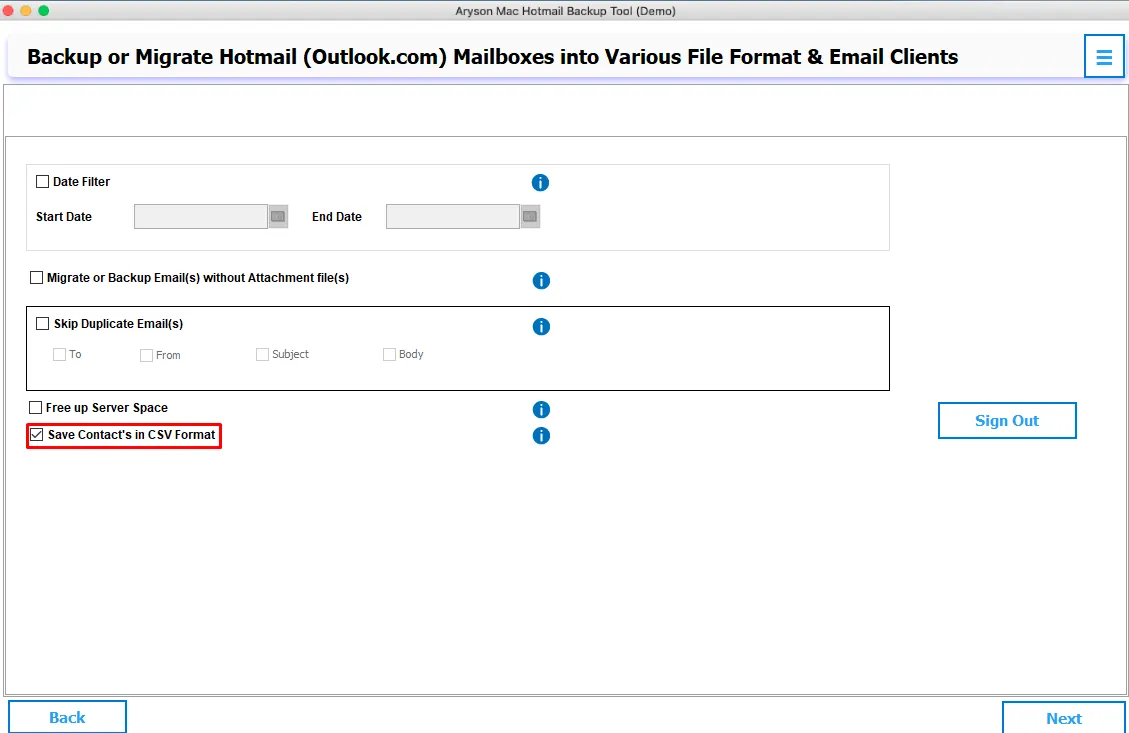
Step 11: Select the Save Contacts in CSV File Format option and save the contacts of Hotmail Accounts in CSV file format on your local device.
Step 12: Click on the Next button.
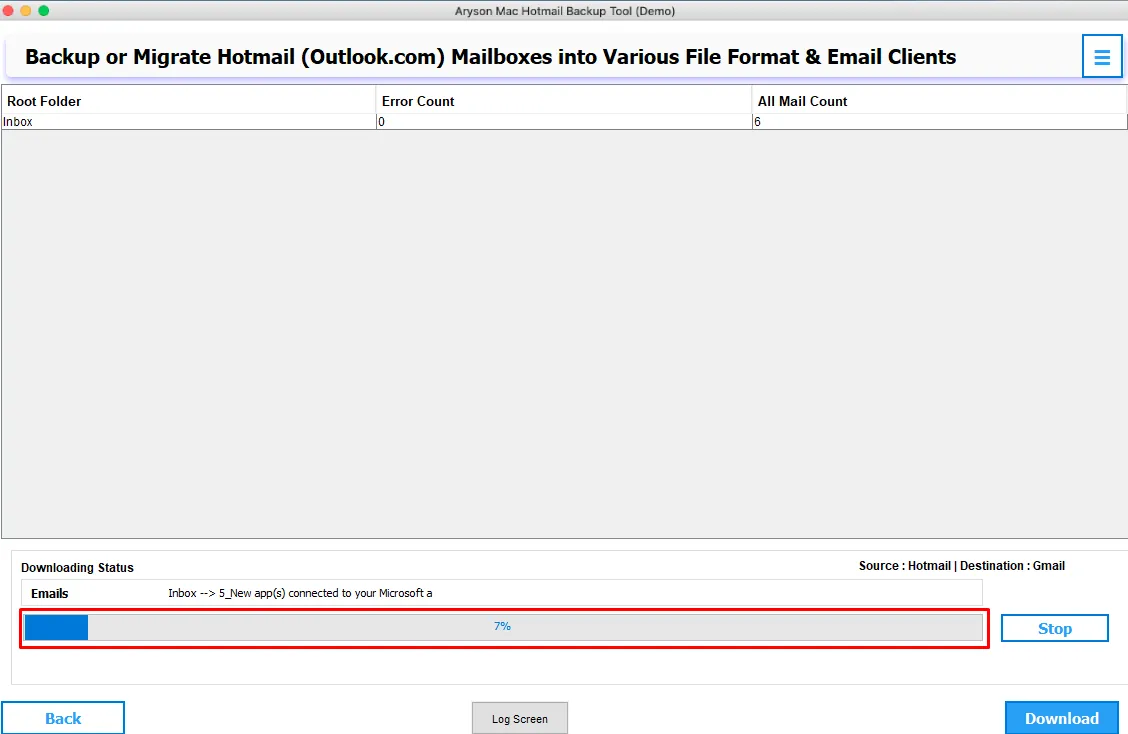
Step 13: Now click on the Download option. The migration process of Hotmail mailboxes will start. After some time the backup process is complete.
Step 14: Click on the OK button.

Step 6: Choose Migrate in Email Client options and Select Email Client as Office 365 option from drop down list.
Note:- Login with Login with Modern Authentication.
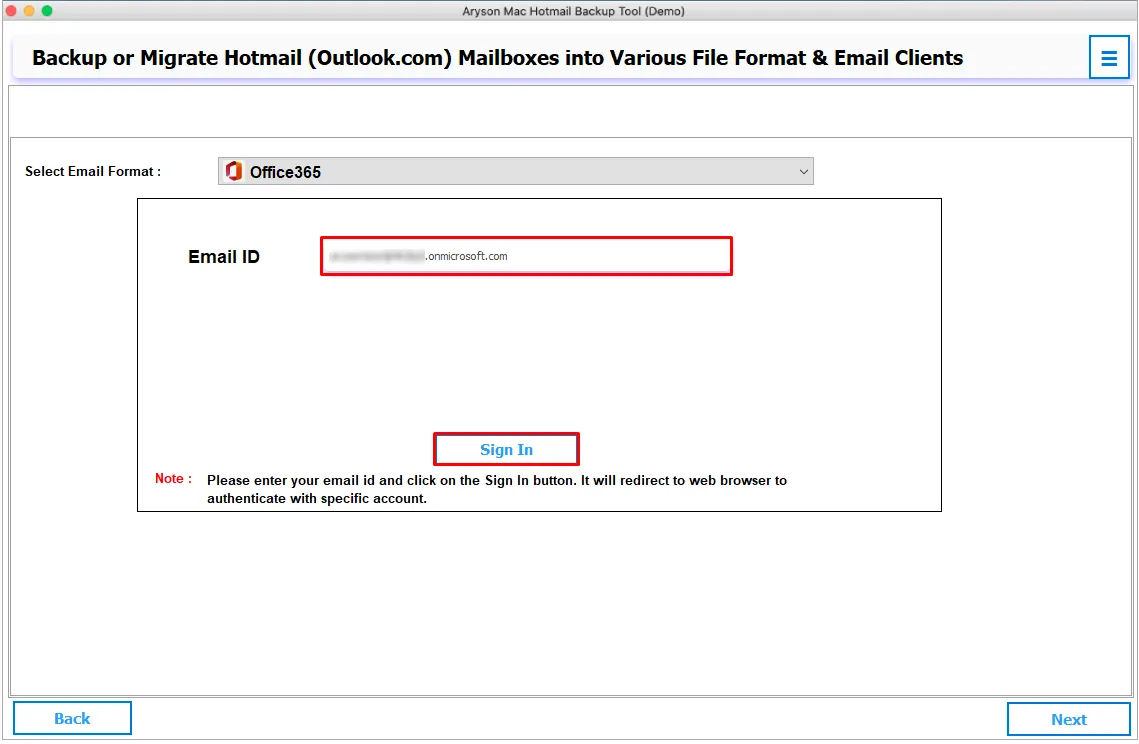
Here we choose Login with Modern Authentication option and Click on the Sign In button. After successful authentication, it will display a message.

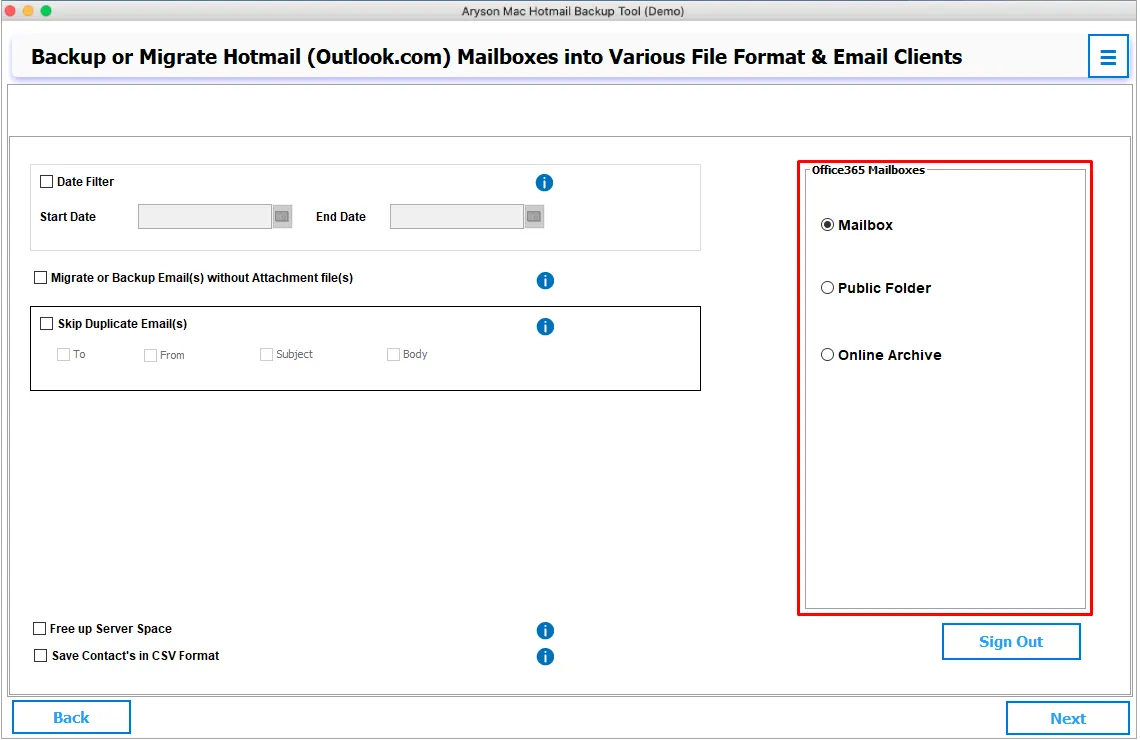
Step 7: After authentication, go back to software and choose Office 365 - Mailbox, Public Folder, or Online Archive option where you want to migrate the mailboxes from Hotmail Account according to your need.
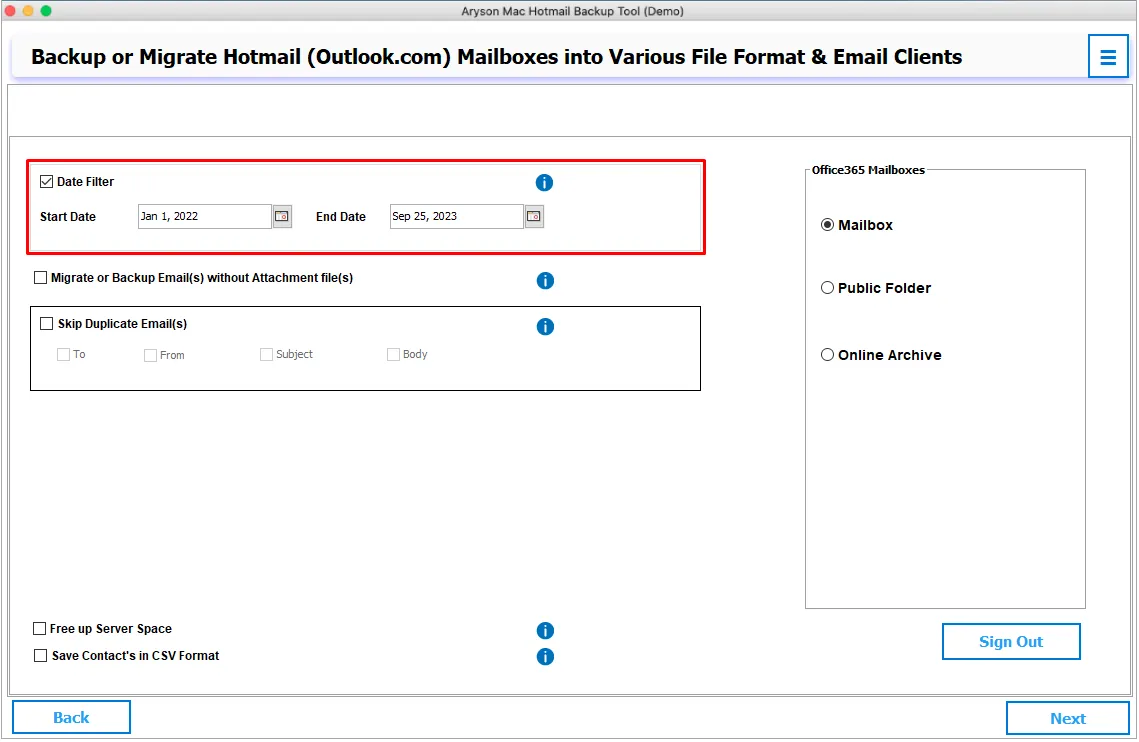
Step 8: Select Date Filter option and Choose Start Date as well as End Date then take backup of mailboxes according to date range.
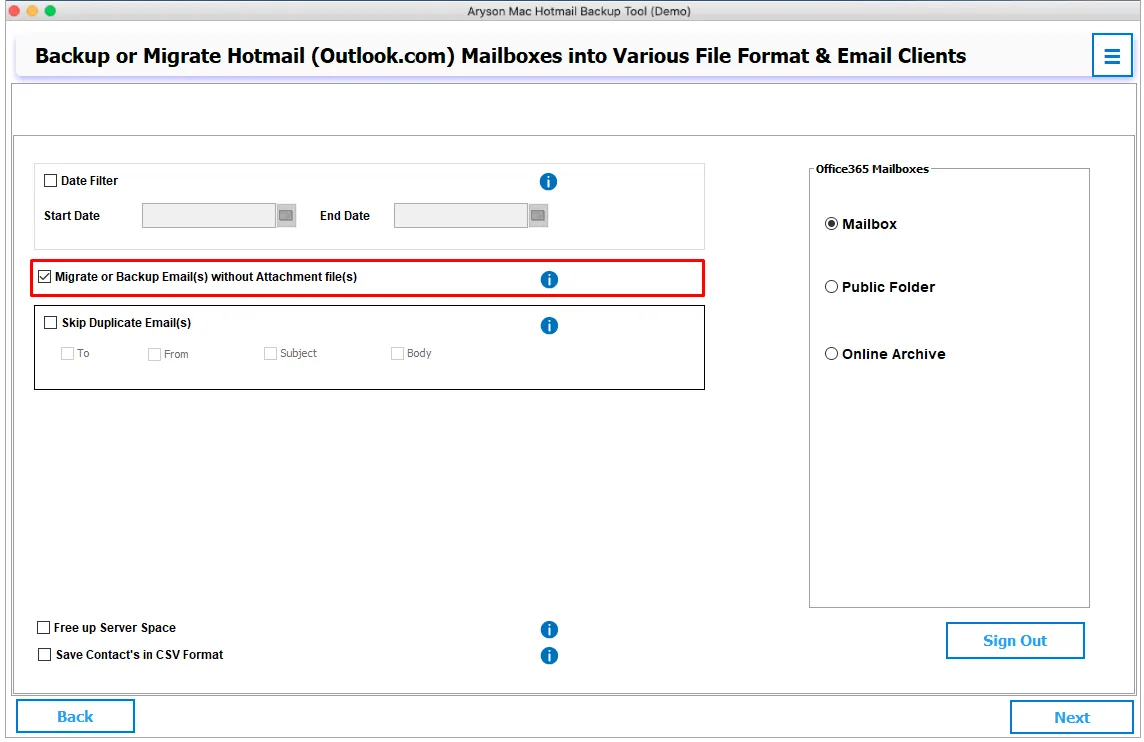
Step 9: Select the Migrate or Backup Email (s) without Attachment(s) options and backup or migrate Hotmail Email without attachments.
Step 10: Check out the Skip Duplicate Email(S) options and remove the duplicate email items on the basis of To, From, Subject, and Body before exporting mailboxes.
Step 11: Choose the Free Up Server Space option and permanently delete the mailboxes or folder of Hotmail Account after migration.
Step 12: Select the Save Contacts in CSV File Format option and save the contacts of Hotmail Accounts in CSV file format on your local device.
Step 13: Click on the Next button.
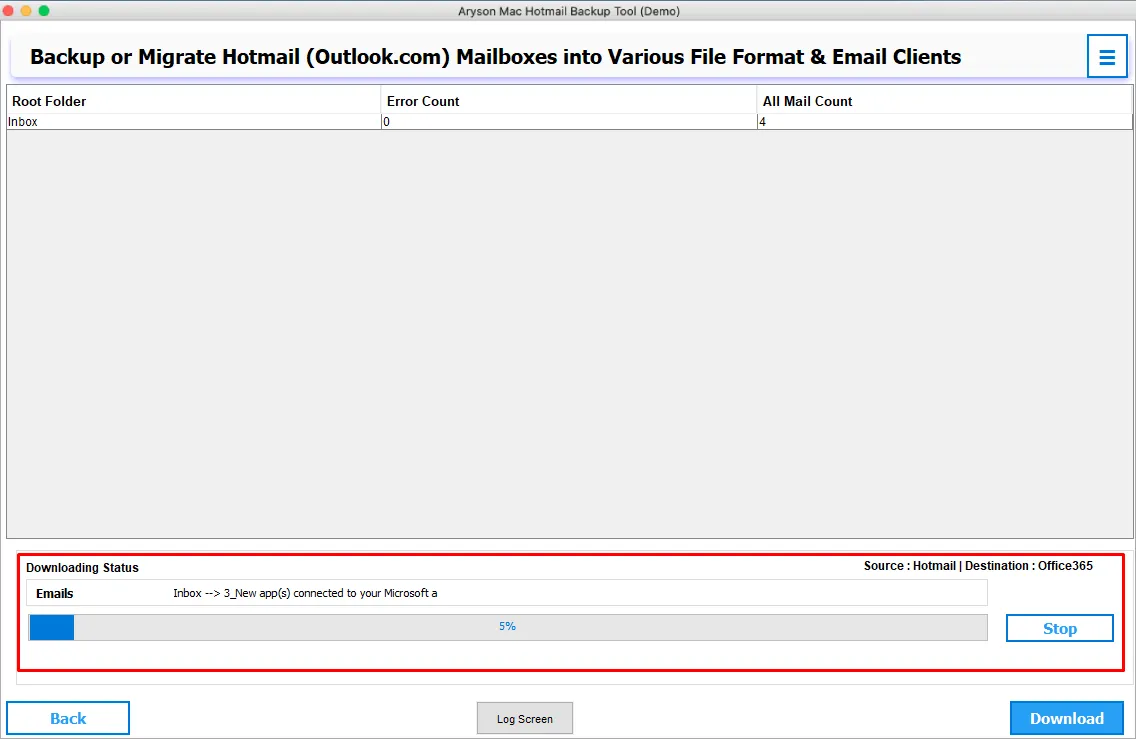
Step 14: Now click on the Download option. The migration process of Hotmail mailboxes will start. After some time the backup process is complete.
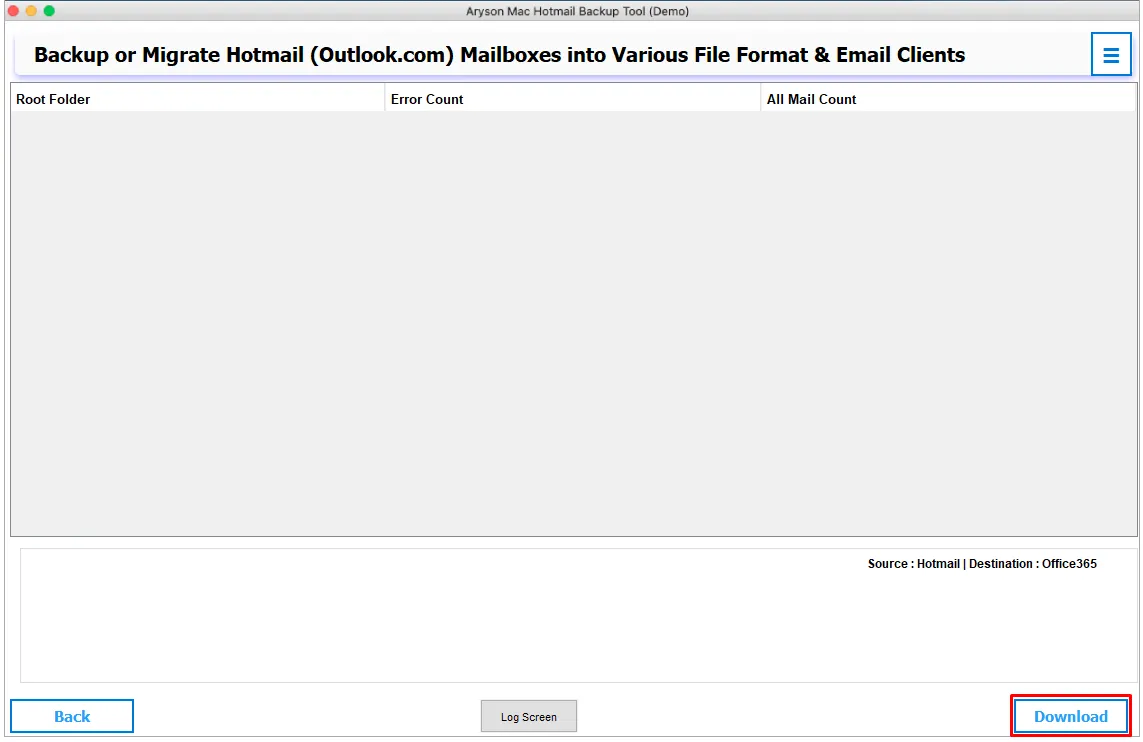
Step 15: Click on the OK button.

Activation Guide
Activate the Software
Installation & Uninstallation
Installation & Uninstallation of Software
User Interface
User Interface
After downloading the Aryson Mac Hotmail Backup Tool, you will find the welcome screen as played below.