Complete Step-by-Step Guide for Aryson Amazon S3 to SharePoint Tool
Migrate data from Amazon S3 buckets to SharePoint Online with a secure and reliable solution. The software transfers files, folders, and metadata while maintaining the original folder structure. It supports bulk migration for faster data movement, minimizes manual effort, and ensures a seamless transition. Users can also refer to the Functional & Technical Documentation (FTD) Guide for assistance.
-
Table of Content
- Software Working Process
- Activation Guide
- Installation & Uninstallation
- User Interface
Software Working Process
Migrate Amazon S3 to SharePoint
Step 1:Download and install the Aryson Amazon S3 to SharePoint Migration Tool.
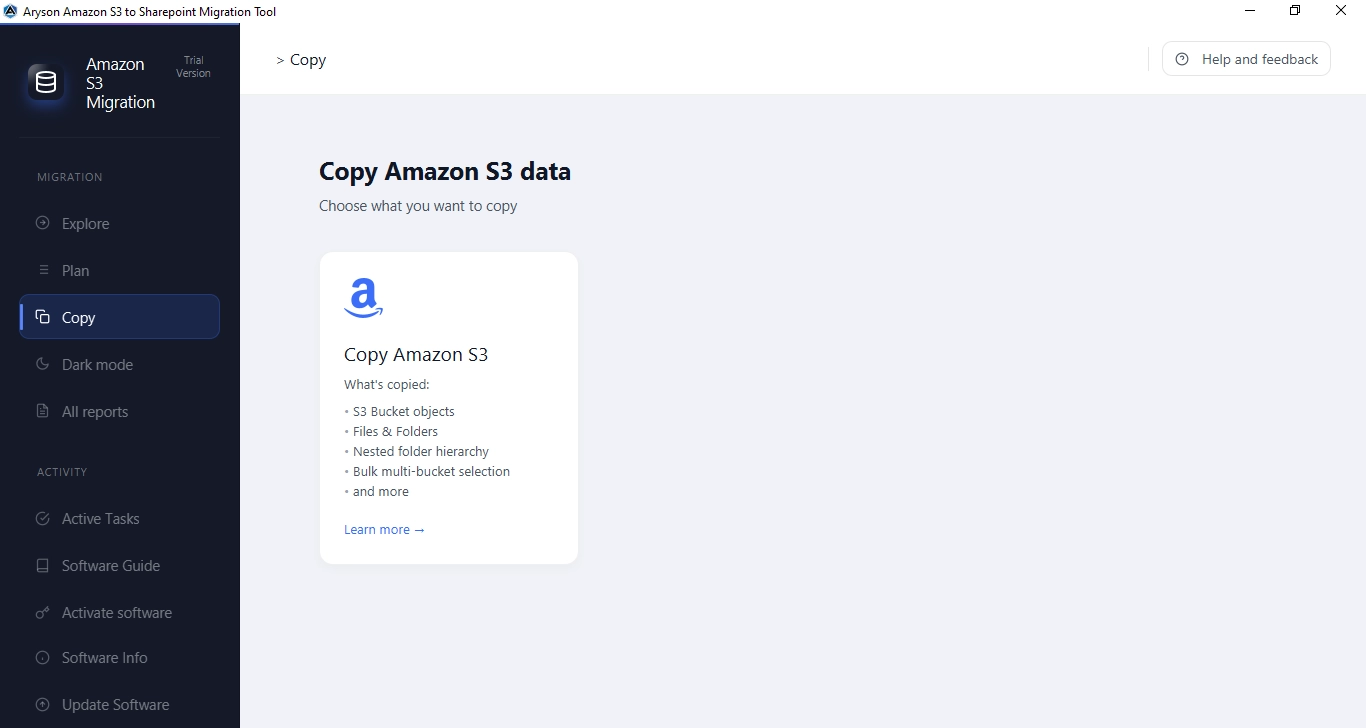
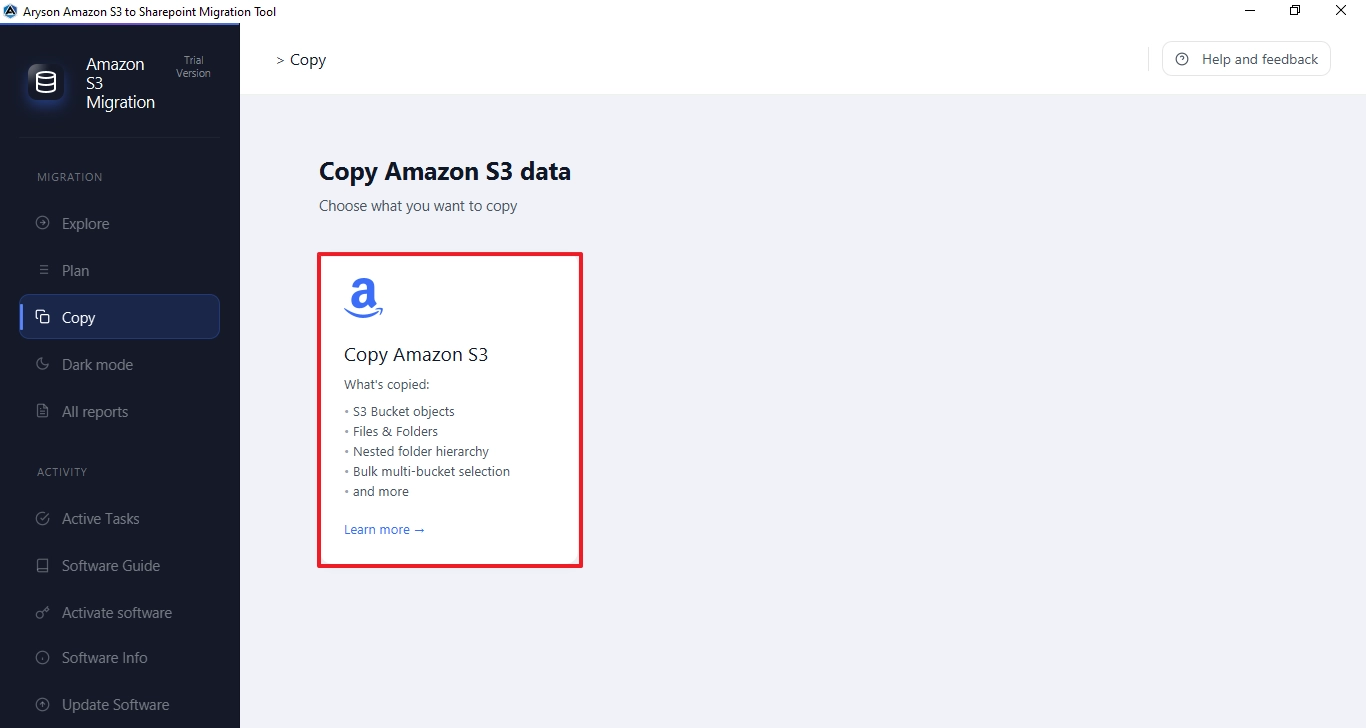
Step 2:In the left sidebar under MIGRATION, click Copy, then click the Copy Amazon S3 card to begin the migration wizard.
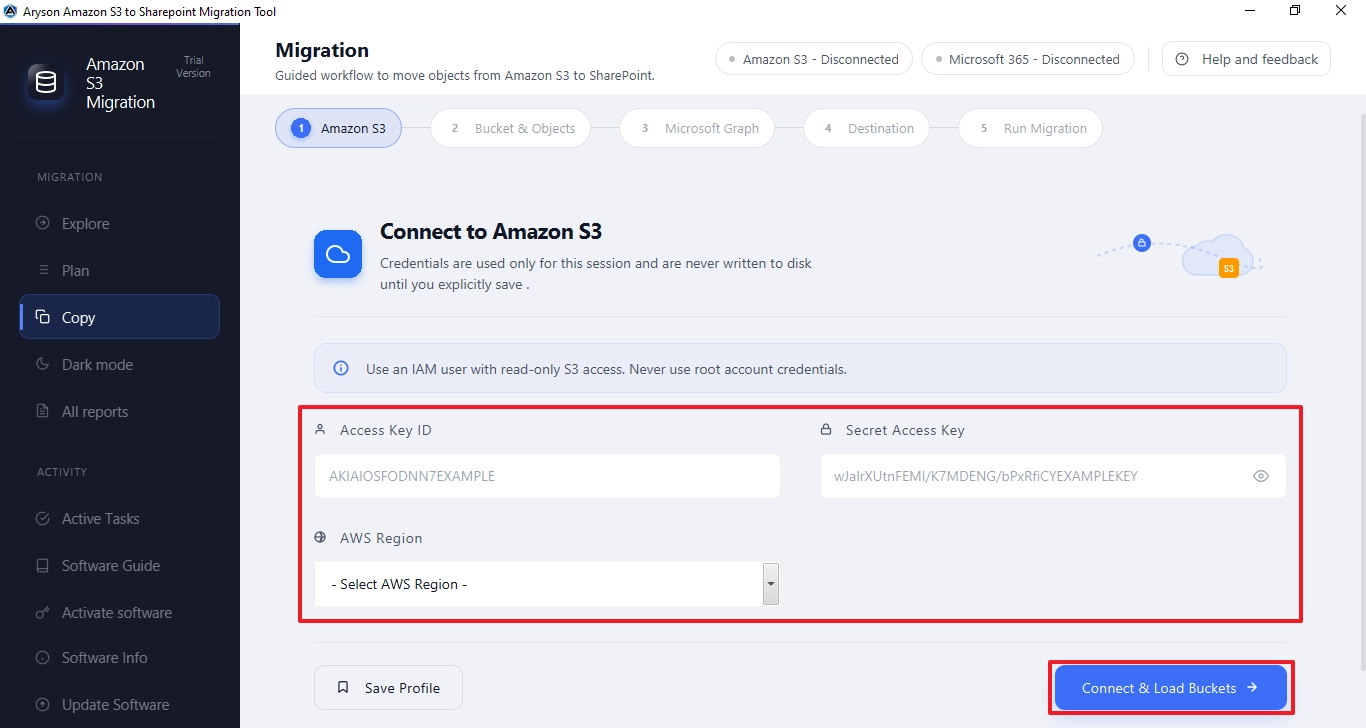
Step 3: Enter your AWS IAM credentials: Access Key ID, Secret Access Key, and select your AWS Region from the dropdown. Use a read-only IAM user — never root credentials. Click Connect & Load Buckets to proceed.
Step 4:View all the discovered S3 buckets with their region and creation date. Check the buckets that you want to migrate. Use the View button to browse files inside any bucket. The counter at the top right shows the total buckets found and objects selected.

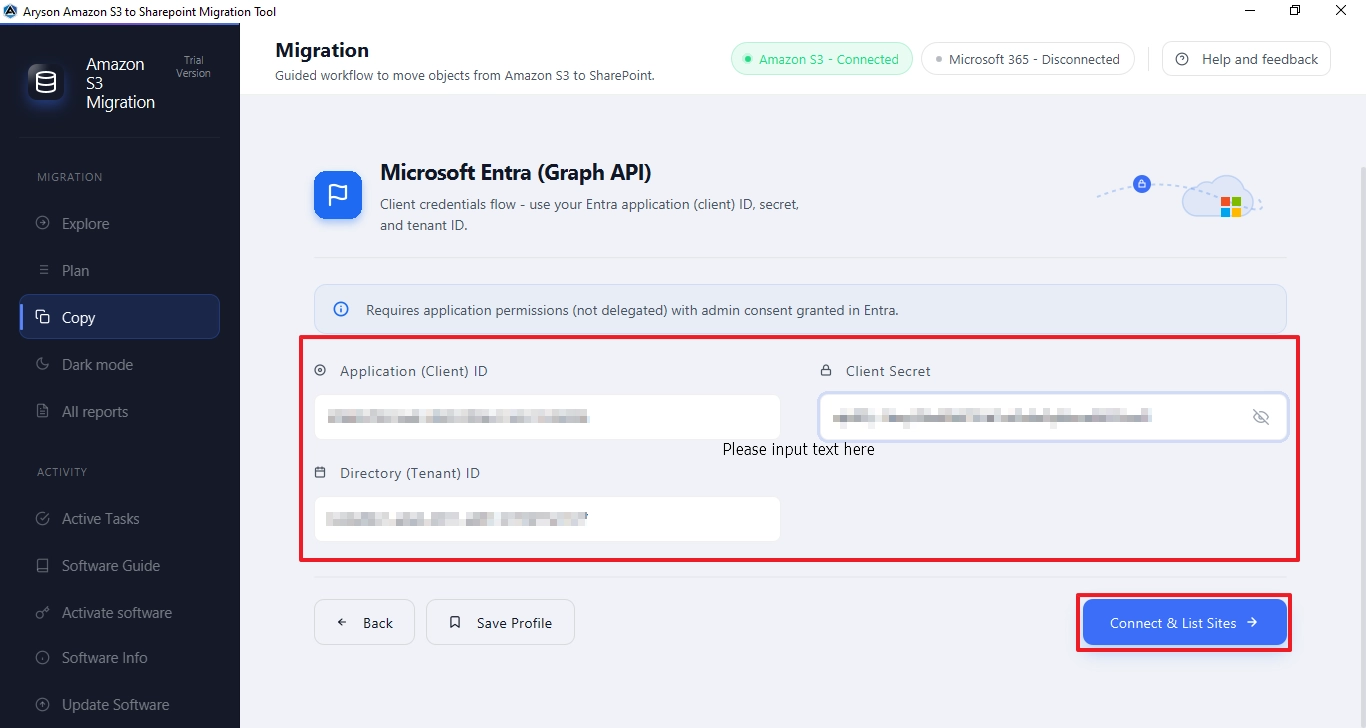
Step 5: (Microsoft Graph) requires your Microsoft Entra (Azure AD) app credentials: Application (Client) ID, Client Secret, and Directory (Tenant) ID. Make sure the app has application permissions with admin consent granted in Entra. Click Connect & List Sites to proceed.
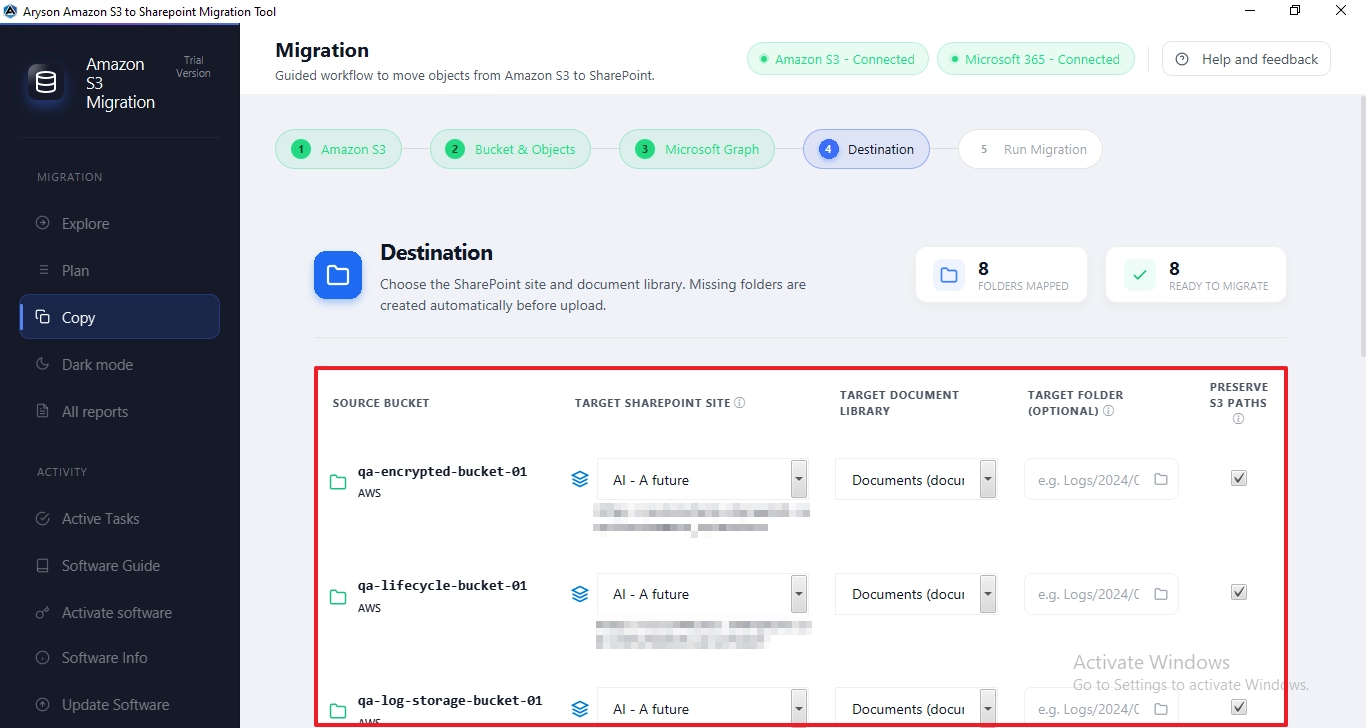
Step 6: (Destination) maps each source S3 bucket to a target SharePoint site and Document Library. Select the Target SharePoint Site and Target Document Library for each bucket. Optionally specify a Target Folder and enable Preserve S3 Paths to maintain folder structure. Click Review & Migrate when ready.
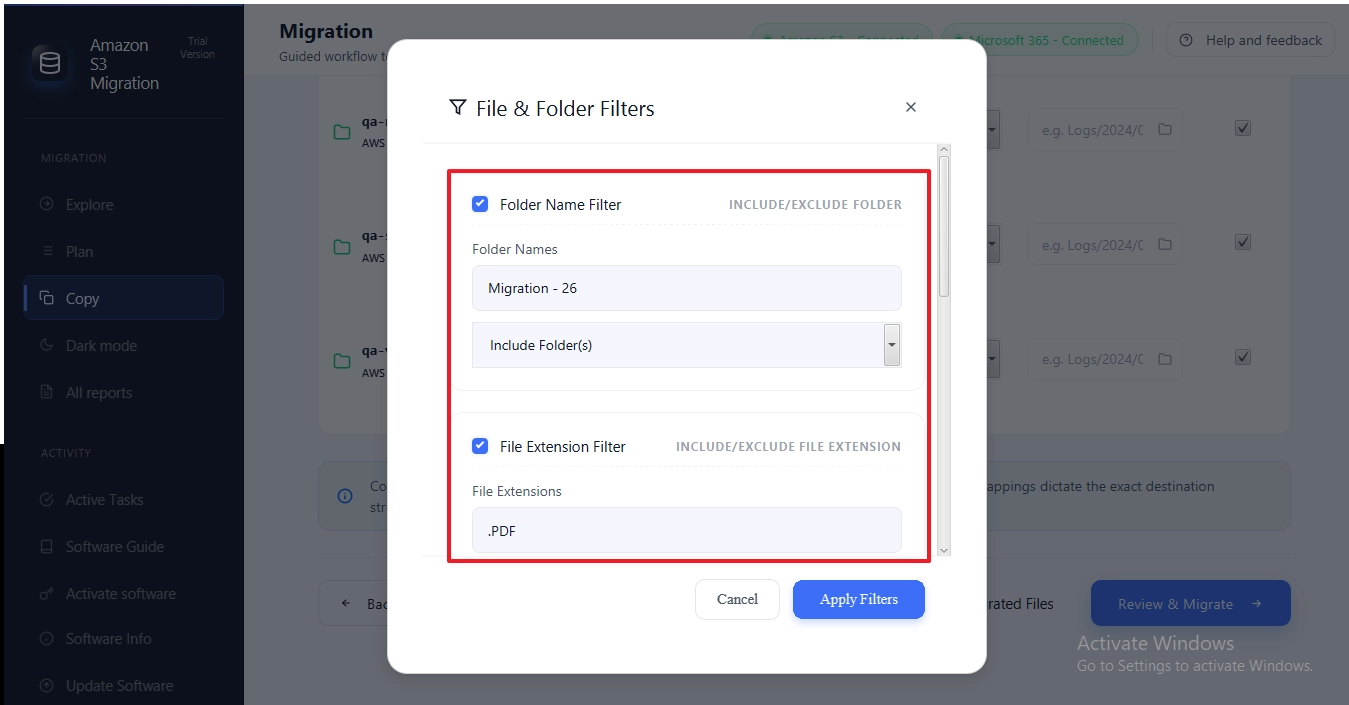
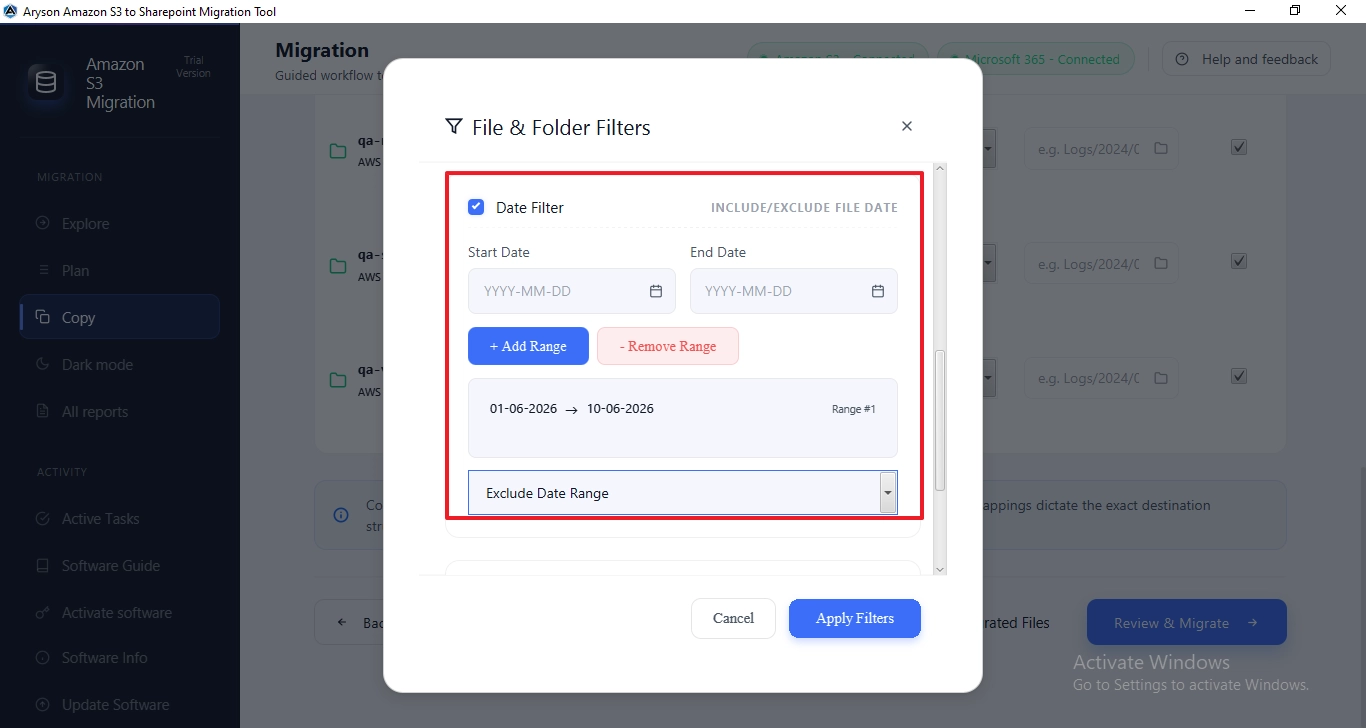
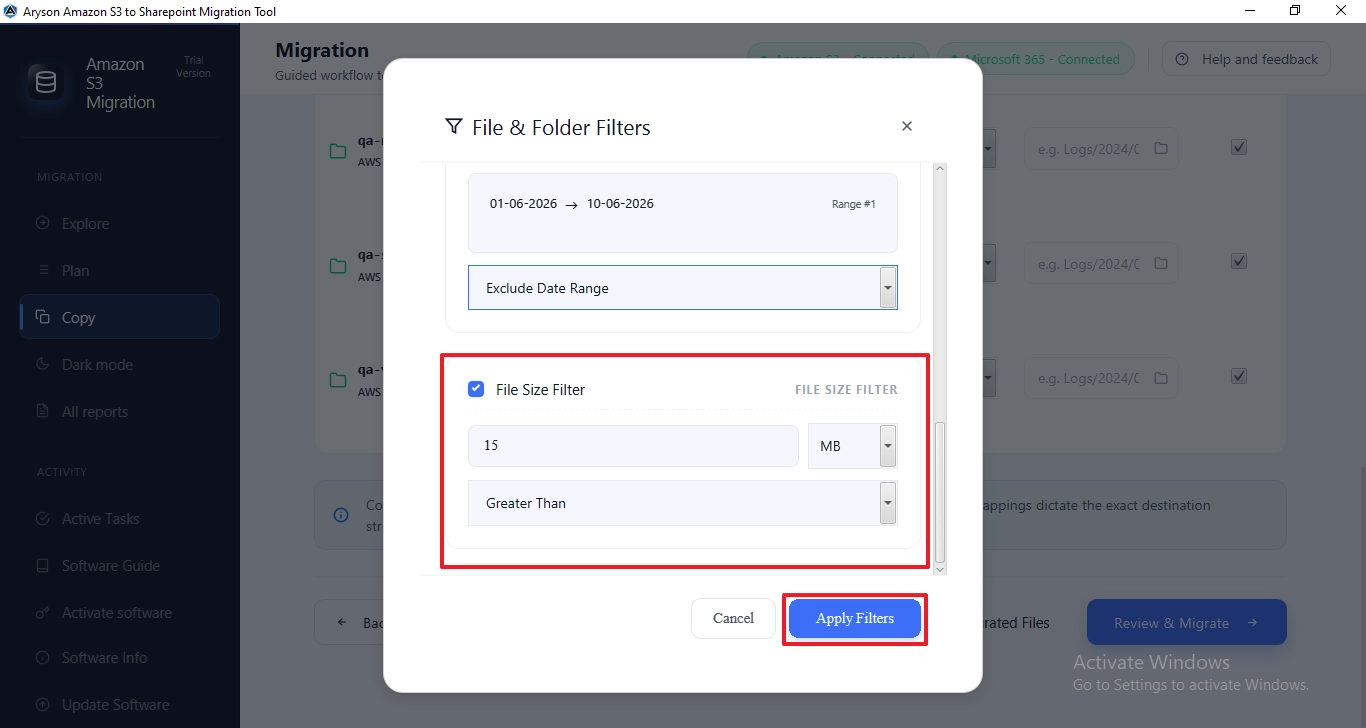
Step 7:Before clicking Review & Migrate, click Apply Filter to open the File & Folder Filters dialog.
- Folder Name Filter:Migrate only selected folders by specifying folder names from Amazon S3 buckets.
- File Extension Filter: Include or exclude files based on their extensions, such as .pdf, .docx, .jpg, and more.
- Date Range Filter:Transfer files created or modified within a specific date range for targeted migration.
- File Size Filter: Migrate files based on size criteria to optimize transfer time and storage usage.
- Click Apply Filters to confirm.
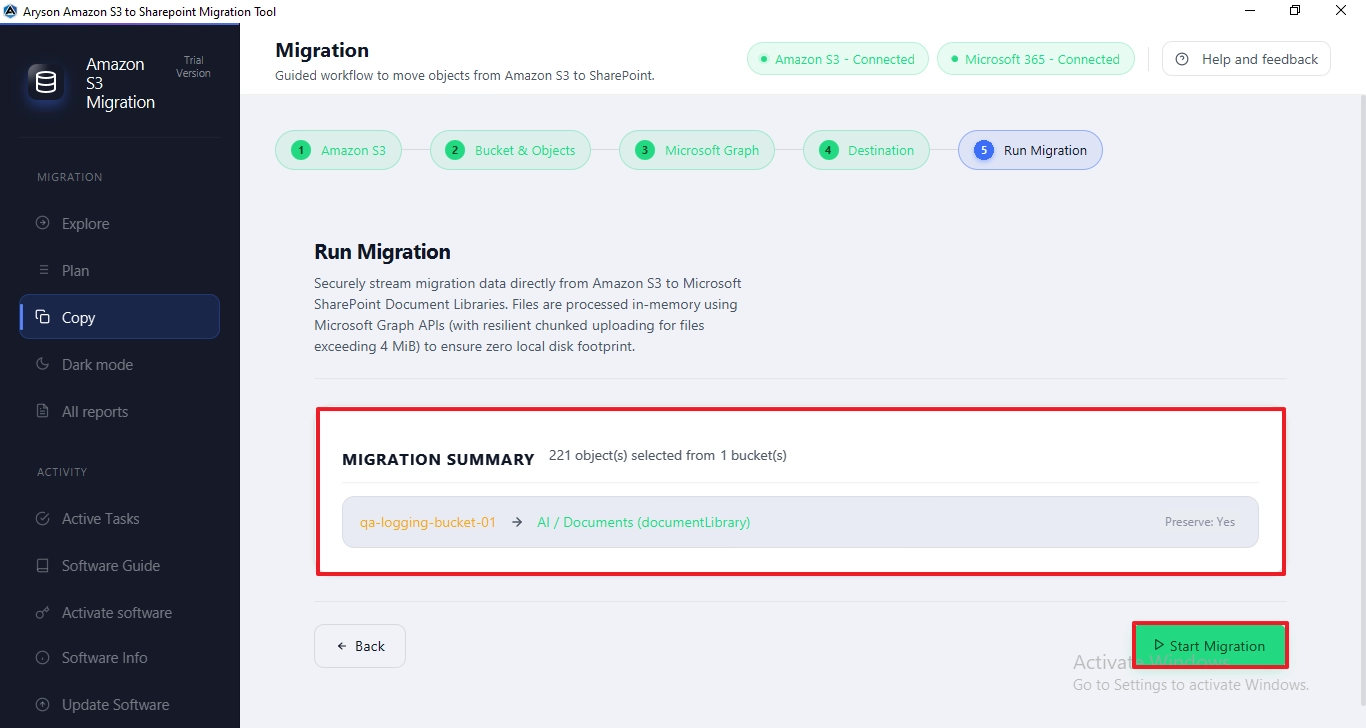
Step 8: Now you can see a Migration Summary, total objects selected, and the bucket-to-library mapping with path preservation status. Review the summary carefully, then click Start Migration to begin the live transfer.
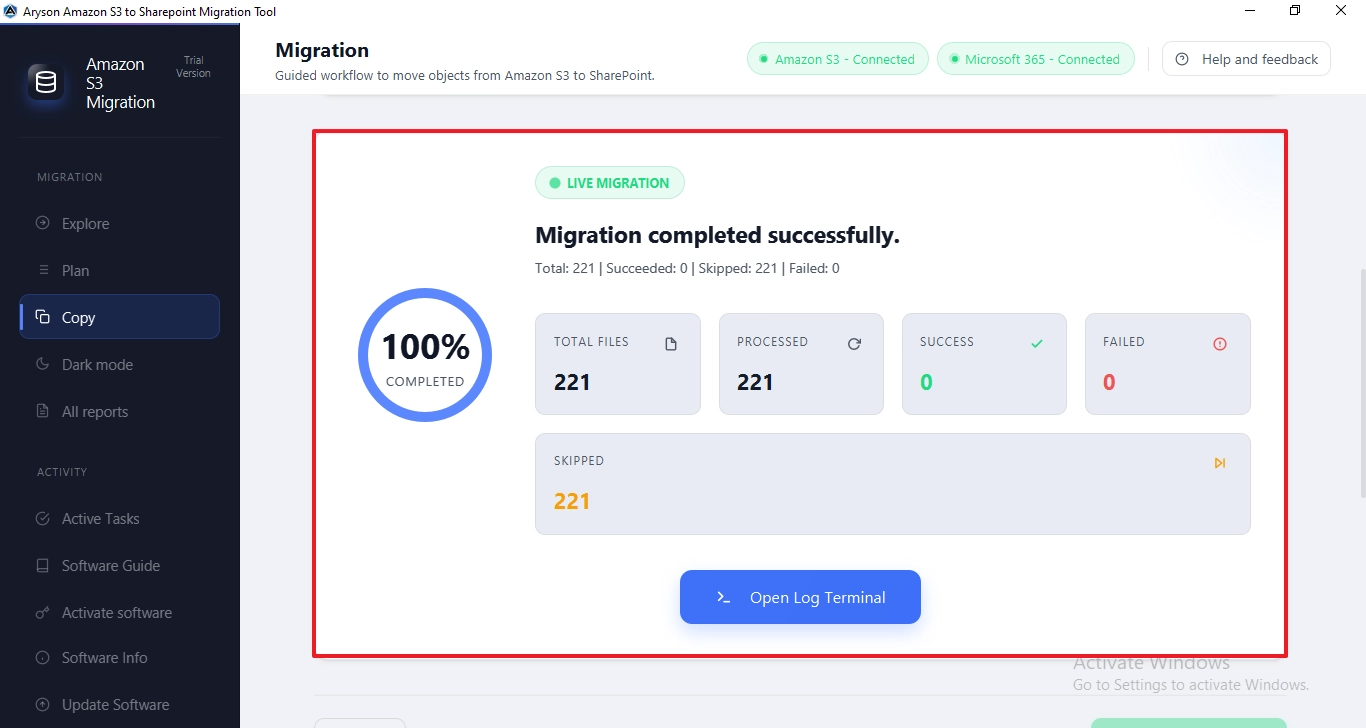
Step 9: The live migration dashboard shows real-time progress: Total Files, Processed, Success, Failed, and Skipped counts with a completion percentage. Once complete, the status shows Migration completed successfully. Click Open Log Terminal to review detailed logs for any skipped or failed files.
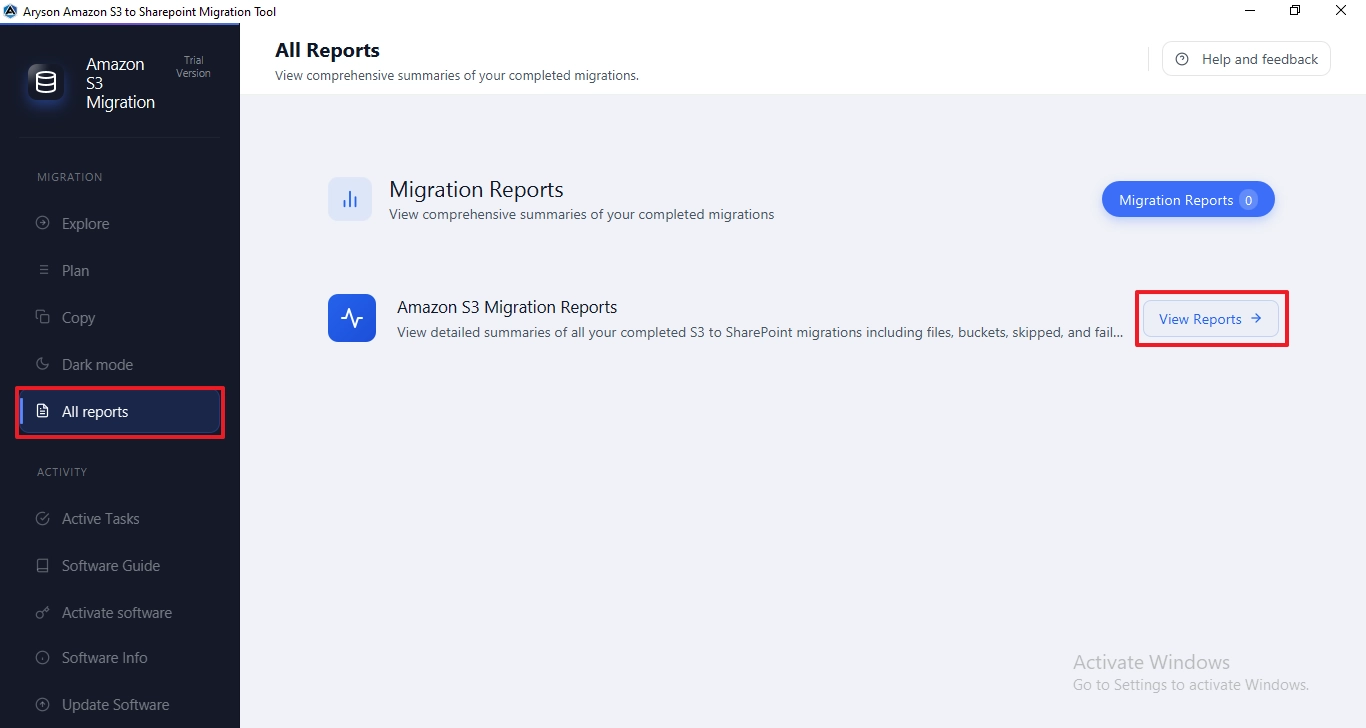
Step 10: From the left panel, click on All Reports to view the Amazon S3 Migration Reports
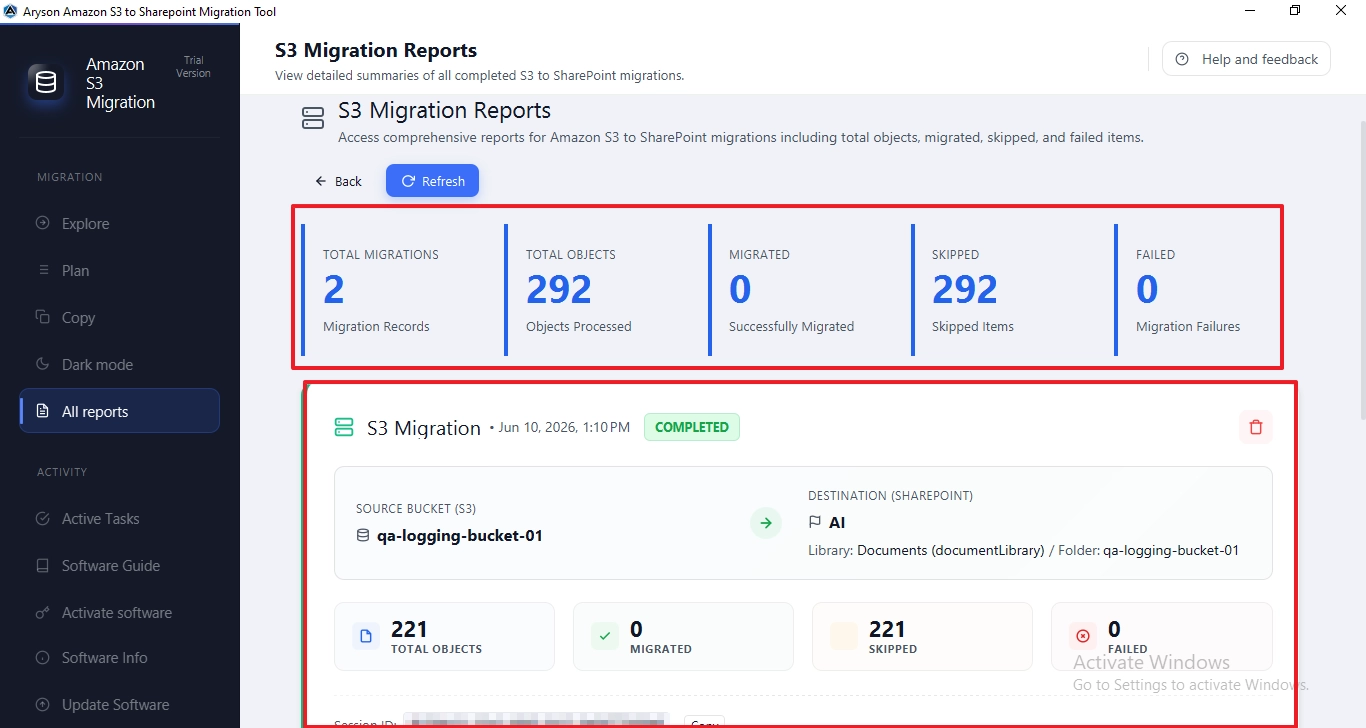
Step 11:The S3 Migration Reports page helps users monitor Amazon S3 to SharePoint migrations by displaying key metrics such as total objects, migrated items, skipped files, and failures. It also provides detailed migration records for easy tracking and verification.
Activation Guide
Activate the Software
Installation & Uninstallation
Installation & Uninstallation of Software
User Interface
User Interface
After downloading the Aryson Amazon S3 to SharePoint Tool, you will find the welcome screen as played below.