Complete Step-by-Step Guide for Aryson PST Viewer
Easily open, read, and export Outlook PST files without installing Microsoft Outlook. Aryson PST Viewer allows you to preview complete email details and save MSG data into multiple formats, including PST, HTML, MSG, MBOX, DOC, EML, EMLX, PDF, CSV, and Thunderbird on Windows & Mac Systems. For any issues, you can refer to the Functional & Technical Documentation (FTD) Guide for complete assistance.
-
Table of Content
- Software Working Process
- Activation Guide
- Installation & Uninstallation
- User Interface
Software Working Process
Software Working Process
Step 1: Download and install the Aryson PST Viewer Tool on your system.
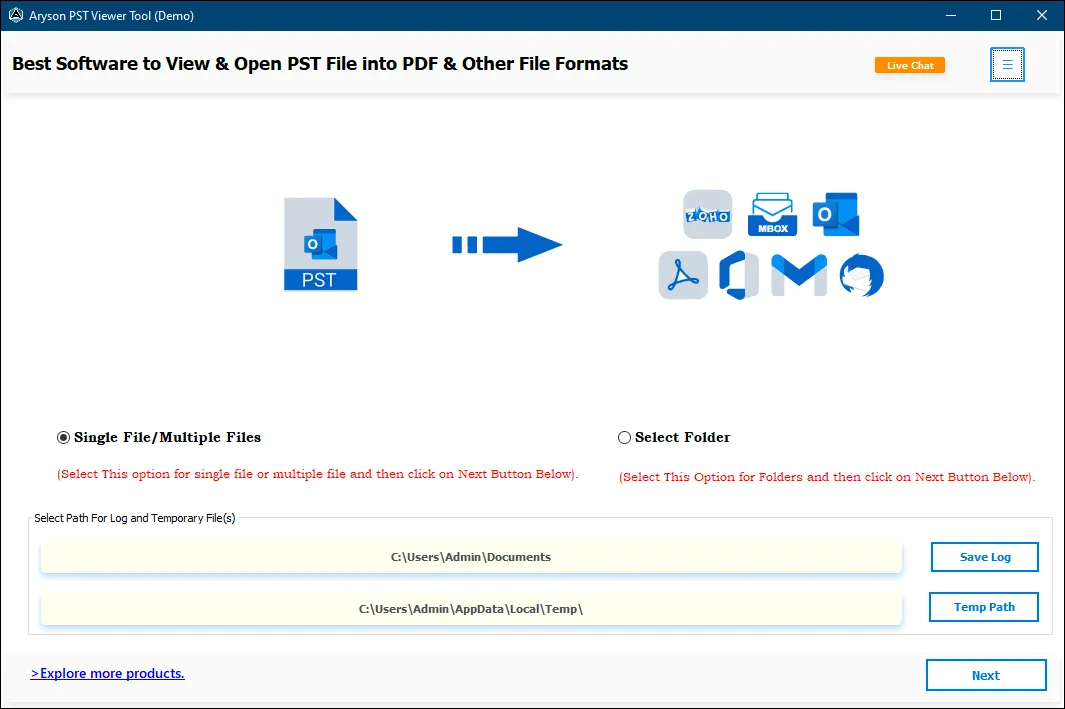
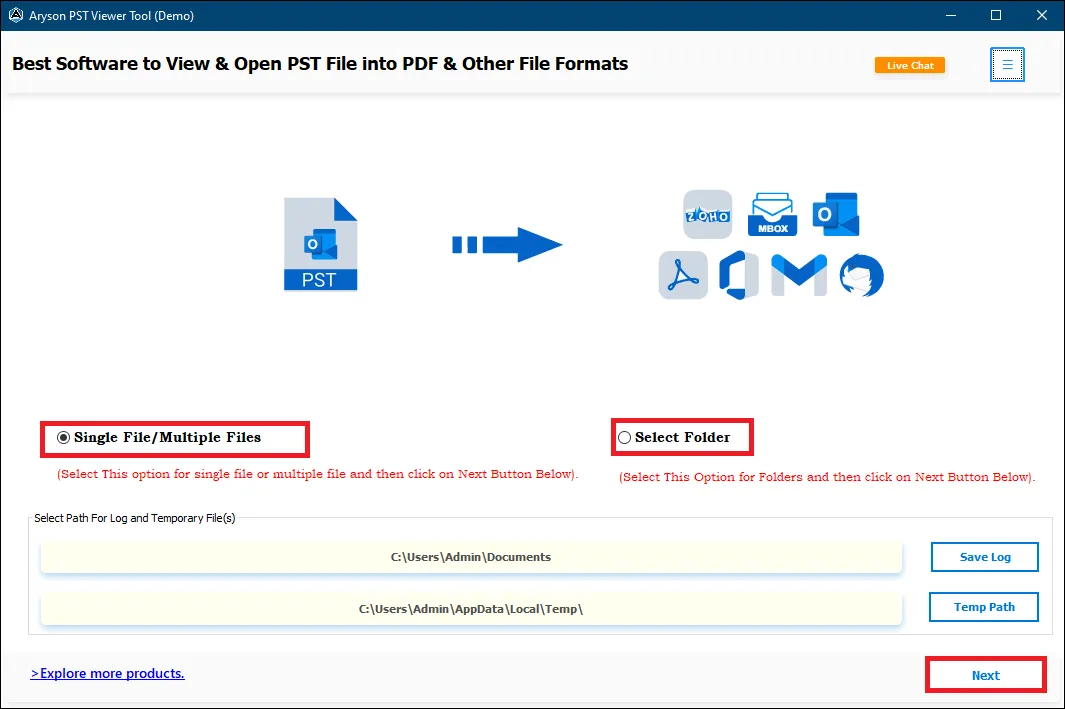
Step 2: Choose the Single Files/Multiple Files or Select Folder option and click on Next.
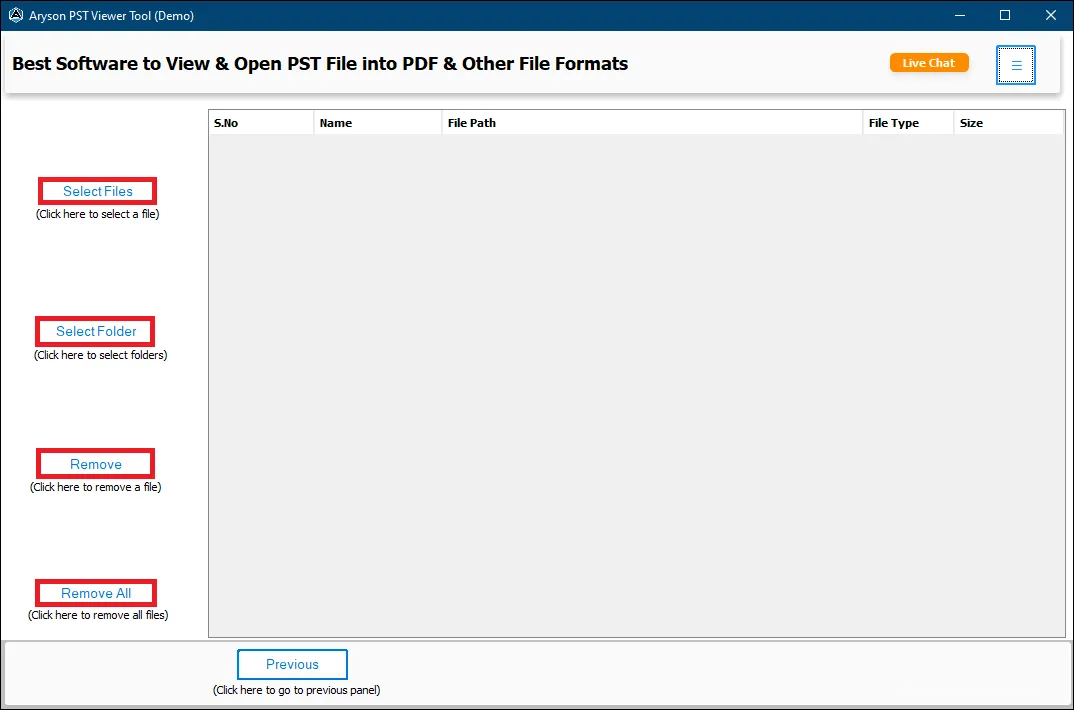
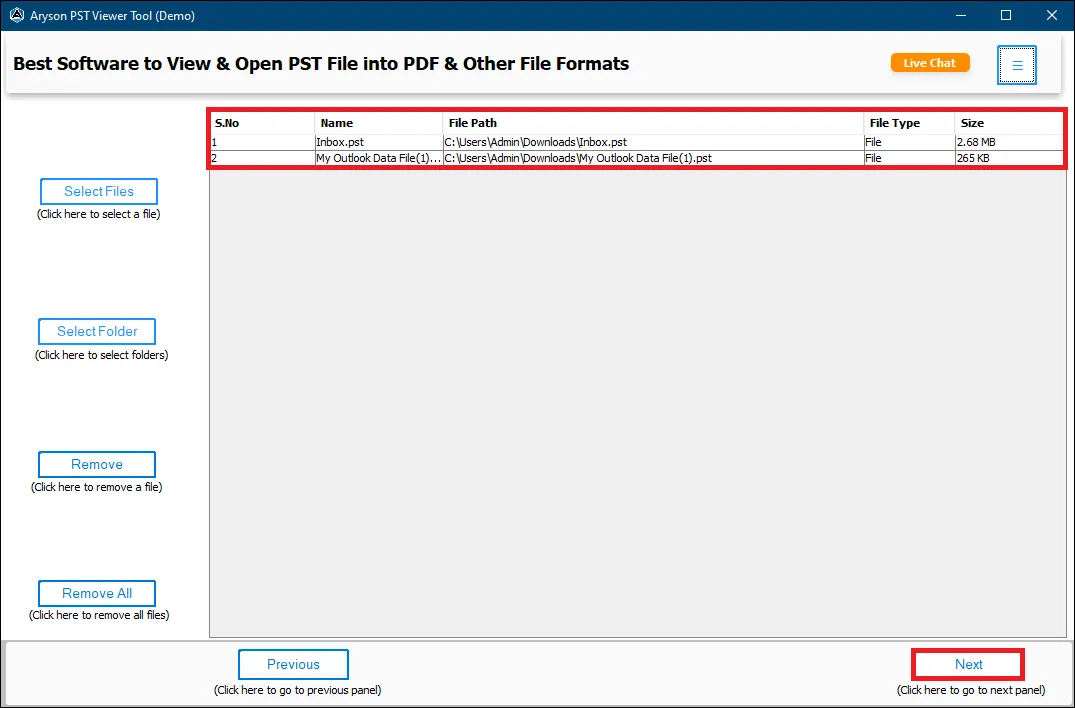
Step 3: Select any options for file management:
- Select Files: Allows you to browse and add individual PST files from your system.
- Folder: Lets you add an entire folder containing multiple PST files at once.
- Remove: Removes the selected PST file from the added list.
- Remove All: Clears all selected PST files from the list in one click.
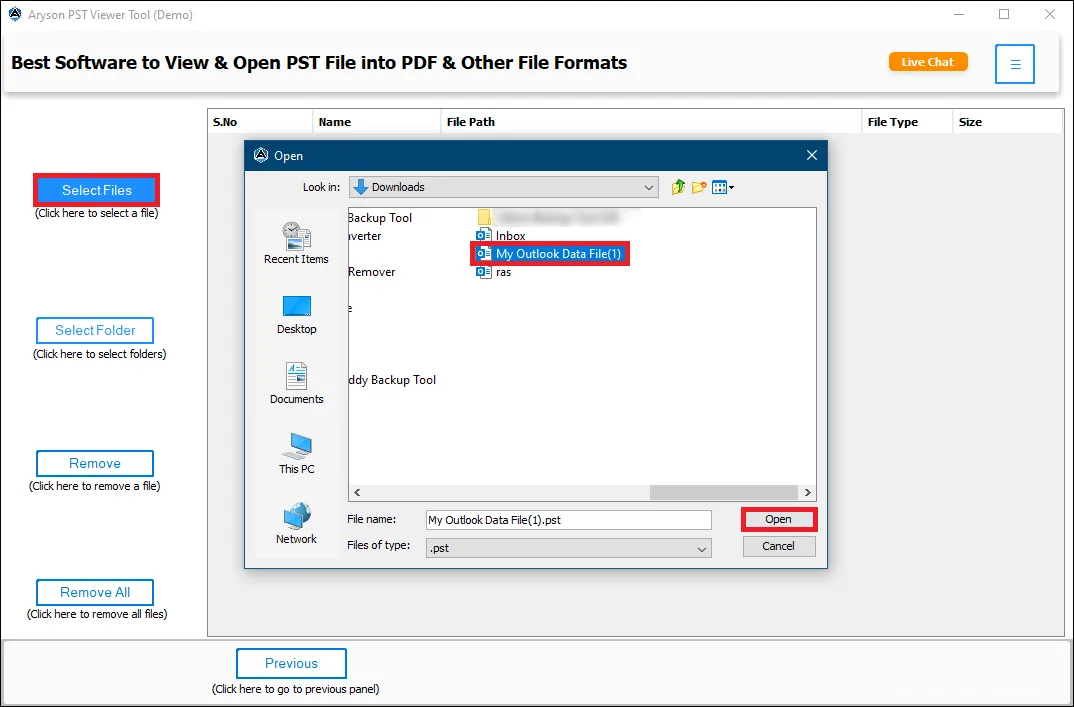
Step 4: Click on Select Files, browse to the required .pst file, select it, and then click Open.
Step 5: The file listing table, where all selected PST files are displayed:
- S.No.: Displays the serial number of each added PST file.
- Name: Shows the name of the selected PST file.
- File Path: Indicates the complete location of the PST file on your system.
- File Type: Displays the file format type (e.g., PST file).
- Size: Shows the total size of the selected PST file.
- Previous: Takes you back to the previous panel or step.
- Next: Moves you forward to the next step in the process.
Step 6: After loading, this tool presents all PST files in a structured tree view, allowing you to browse and navigate them easily.
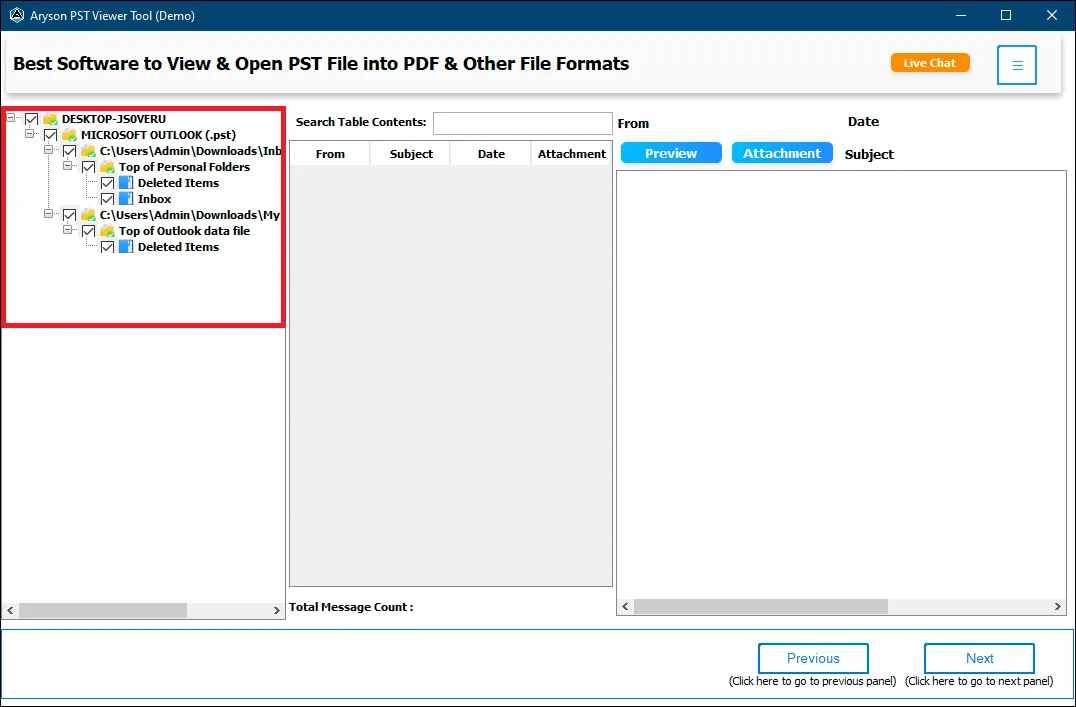
Step 7: Select any folder to preview its emails along with attachments. The middle panel displays detailed information such as:
- From: Displays the sender of the email or the creator of the event.
- Subject: Shows the title or main topic of the email or calendar item.
- Date: Indicates the date the email was received or the event is scheduled.
- Attachment: Shows whether the email or item includes attached files.
- Select Folder: The Search Table Contents panel allows you to quickly locate specific emails within the selected PST folder.
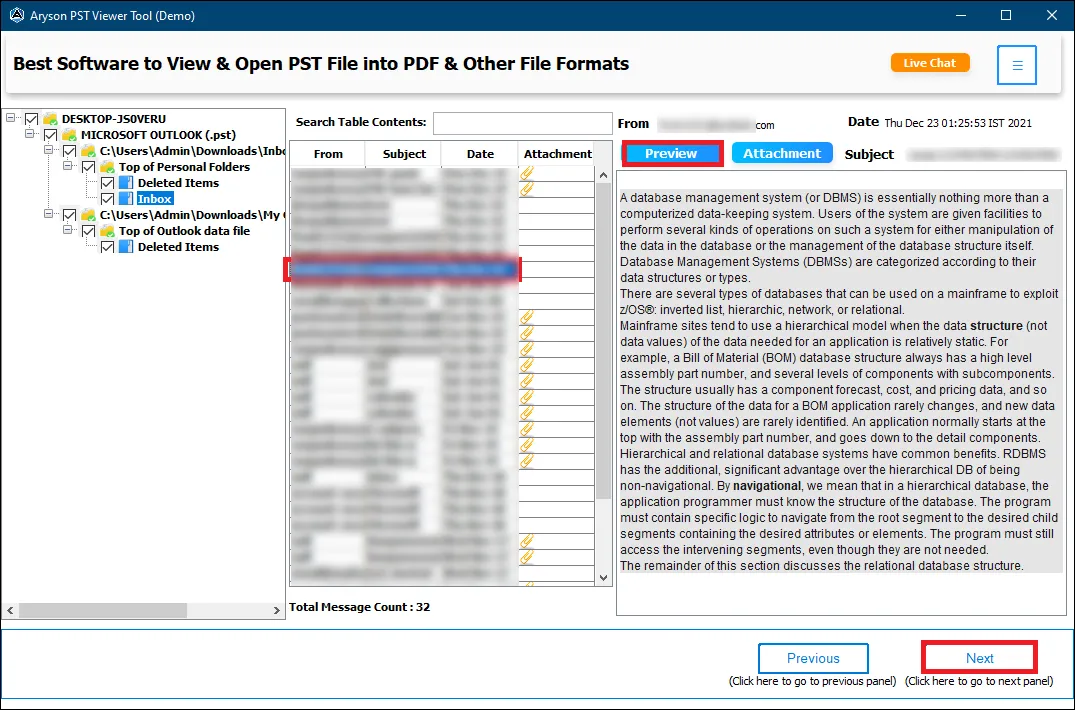
Step 8: View Attachments
- Displays the complete content of the selected email.
- Shows sender details, subject, and date information.
- Preserves original email formatting and structure.
- Allows users to read the full message before proceeding.
- Previous: Takes you back to the previous panel or step.
- Next: Moves you forward to the next step in the process.

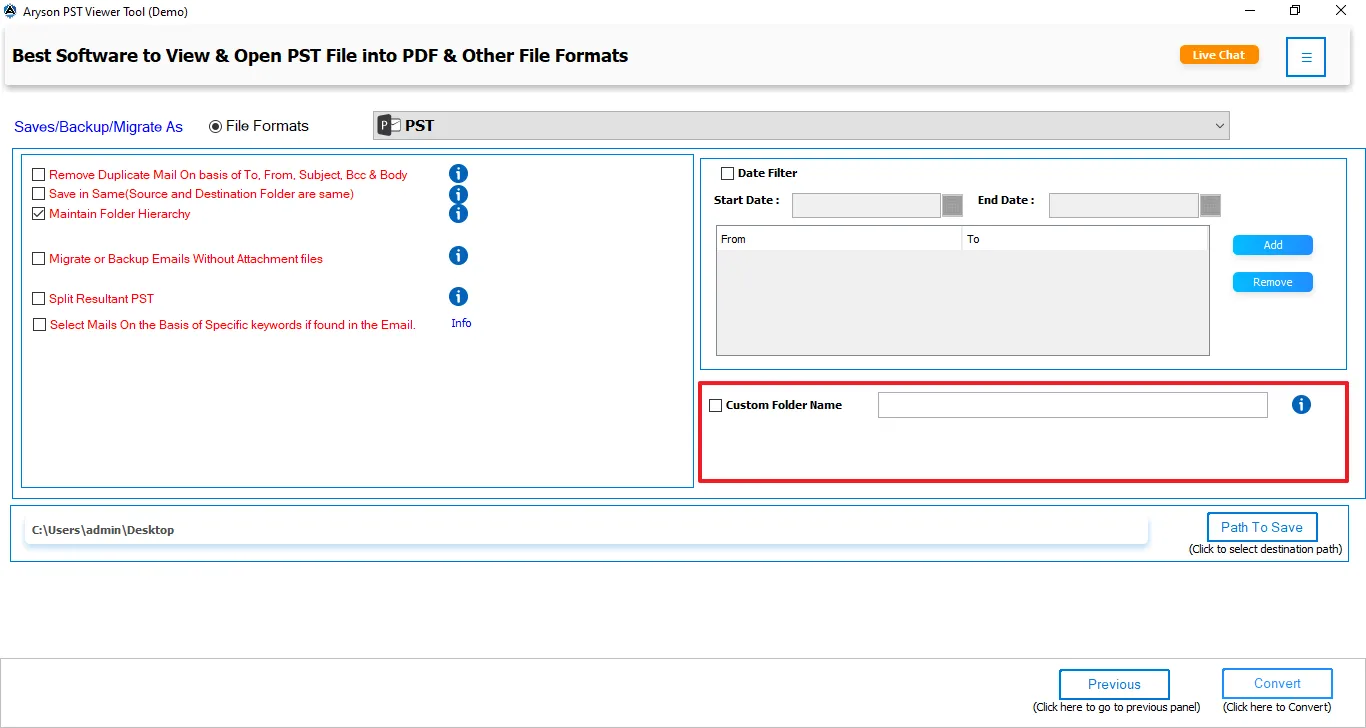
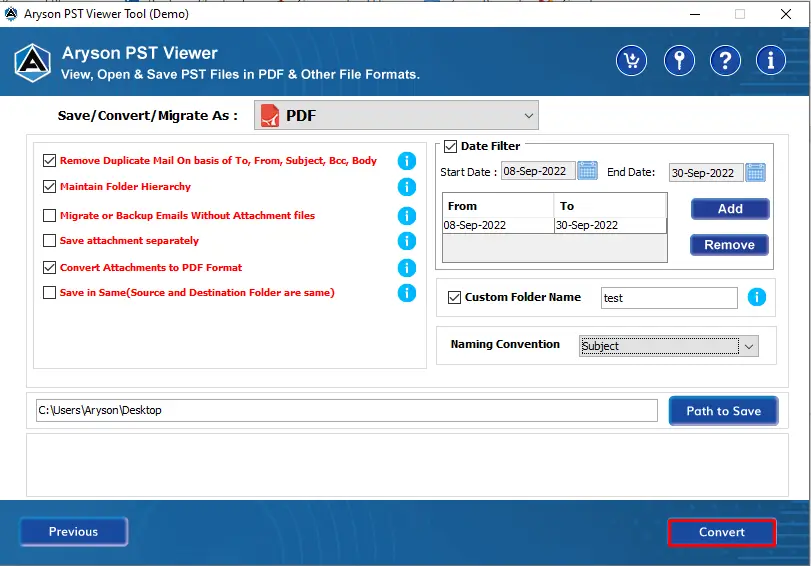
Step 9: Choose file format and select the desired file formats in which you want to export (here we use PST).
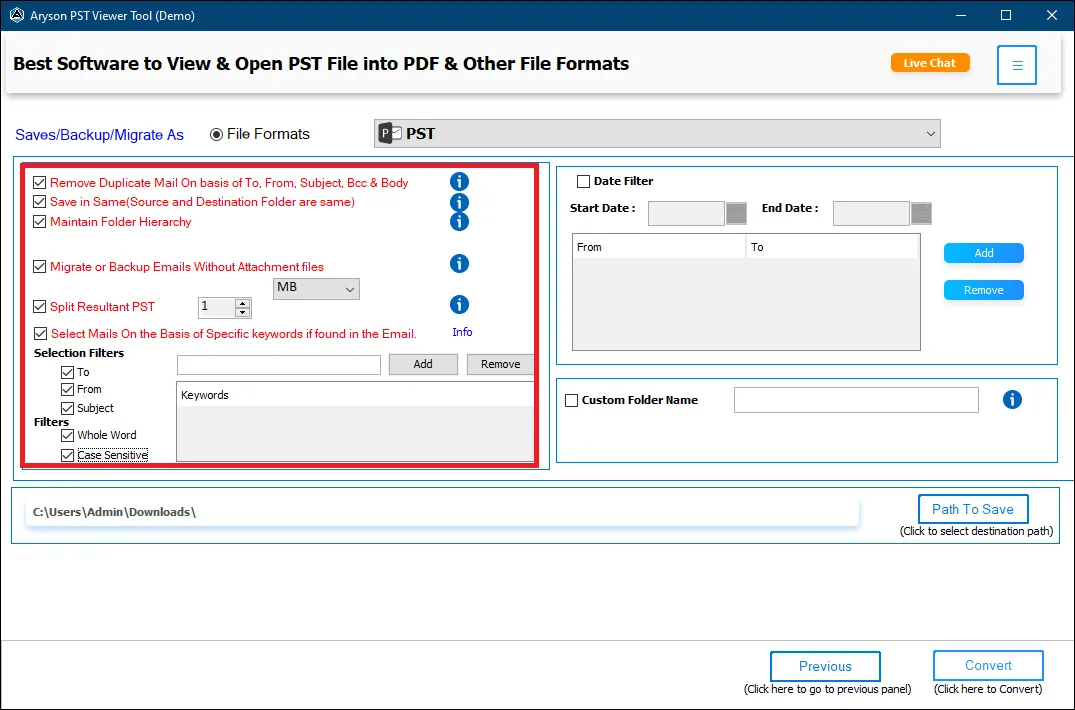
Step 10: Apply Filters as Needed:
- Remove Duplicate Mail: Eliminates duplicate emails based on To, From, Subject, Bcc, and Body fields.
- Save in Same (Source and Destination Folder are the same): Saves the output file in the same location as the source file.
- Maintain Folder Hierarchy: Preserves the original folder structure during backup or conversion.
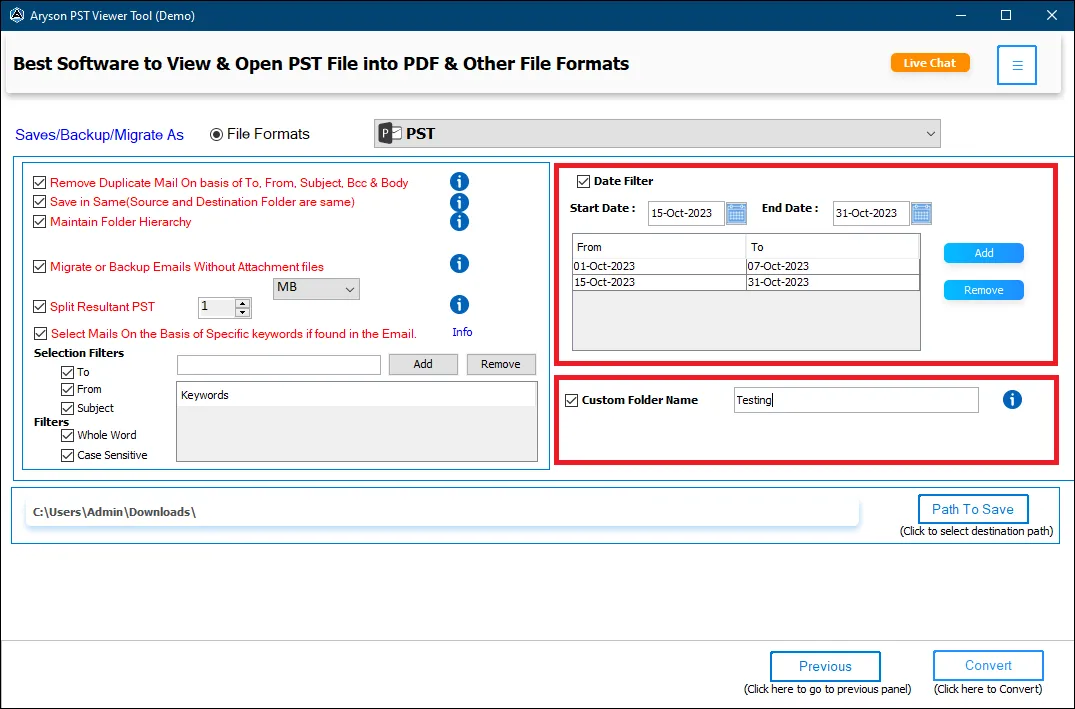
Step 11: Apply advanced features:
- Migrate or Backup Emails Without Attachment Files: Exports emails while excluding attachment files to reduce file size.
- Split Resultant PST: Divides the output PST file into smaller parts for easier management.
- Select Mails on the Basis of Specific Keywords: Filters and exports emails containing specific keywords found in the message content.
Step 12: Date Filter: Allows you to filter emails based on a specific date range by selecting the Start Date and End Date. This helps export only the required emails within the chosen time period.
Step 13: Custom Folder Name – Enables you to enter a preferred name for the output folder where the converted or saved file will be stored.
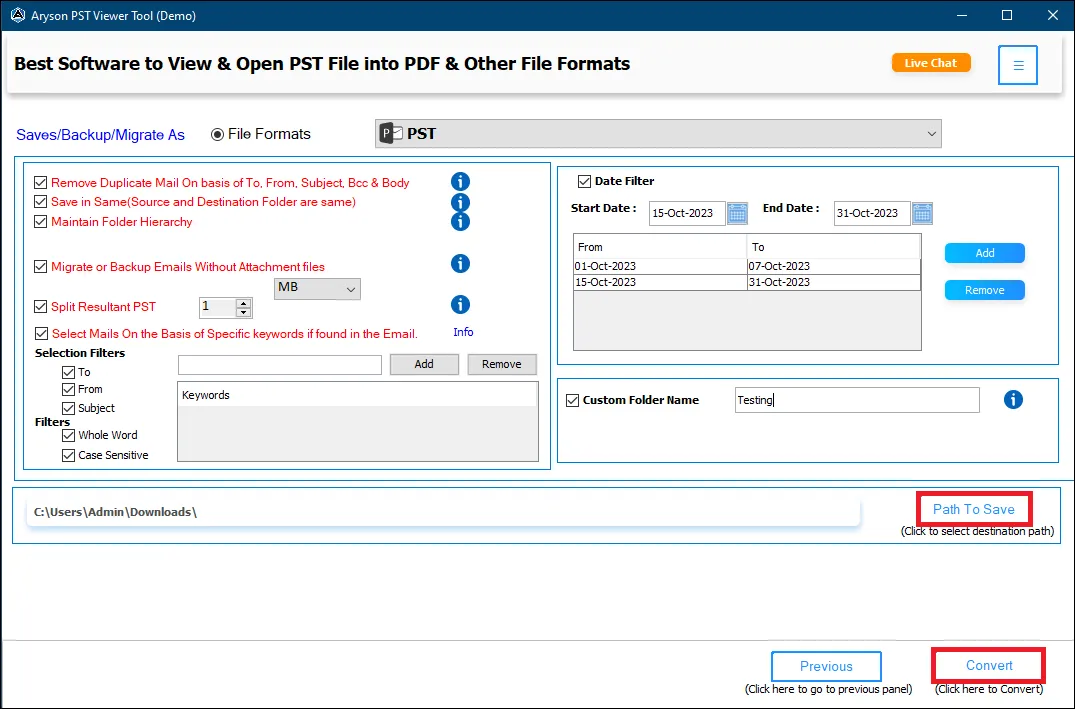
Step 14: Path to Save: Lets you choose the destination location on your system where the final output file will be saved.
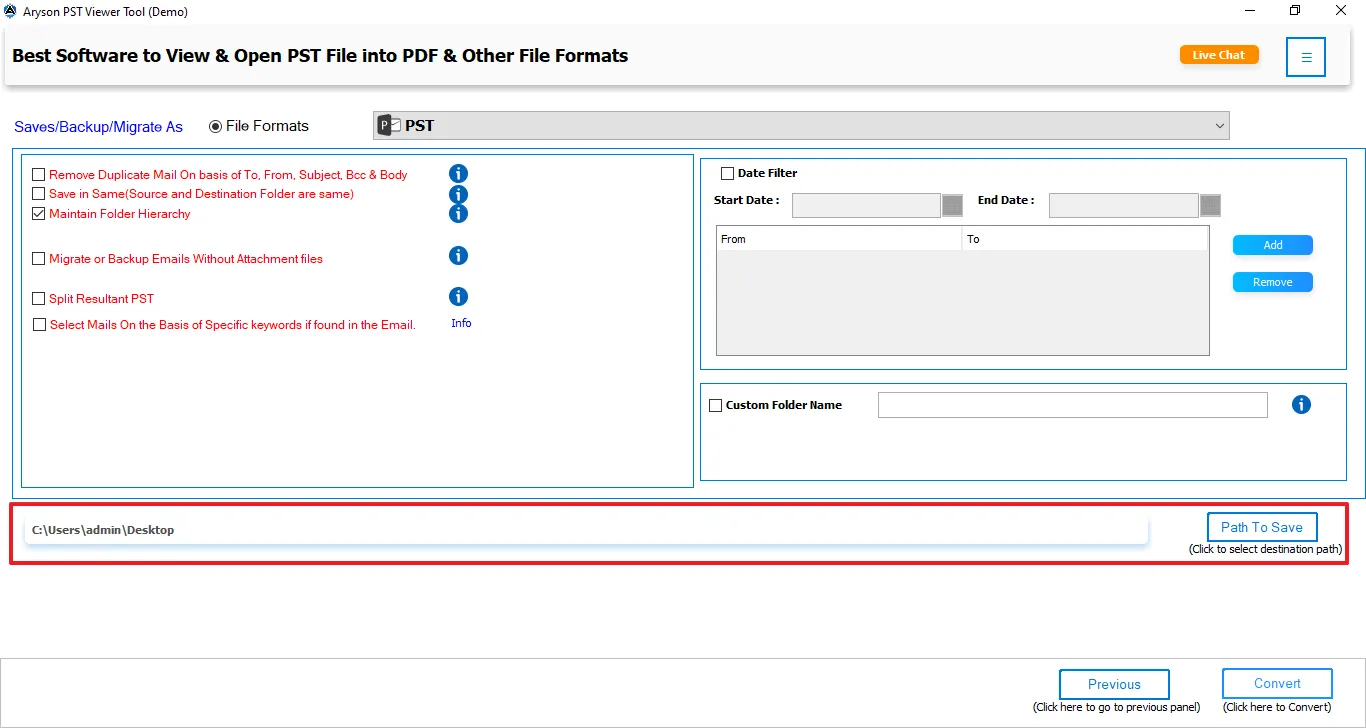
Step 15: Convert: Starts the conversion or saving process based on the selected options and filters.
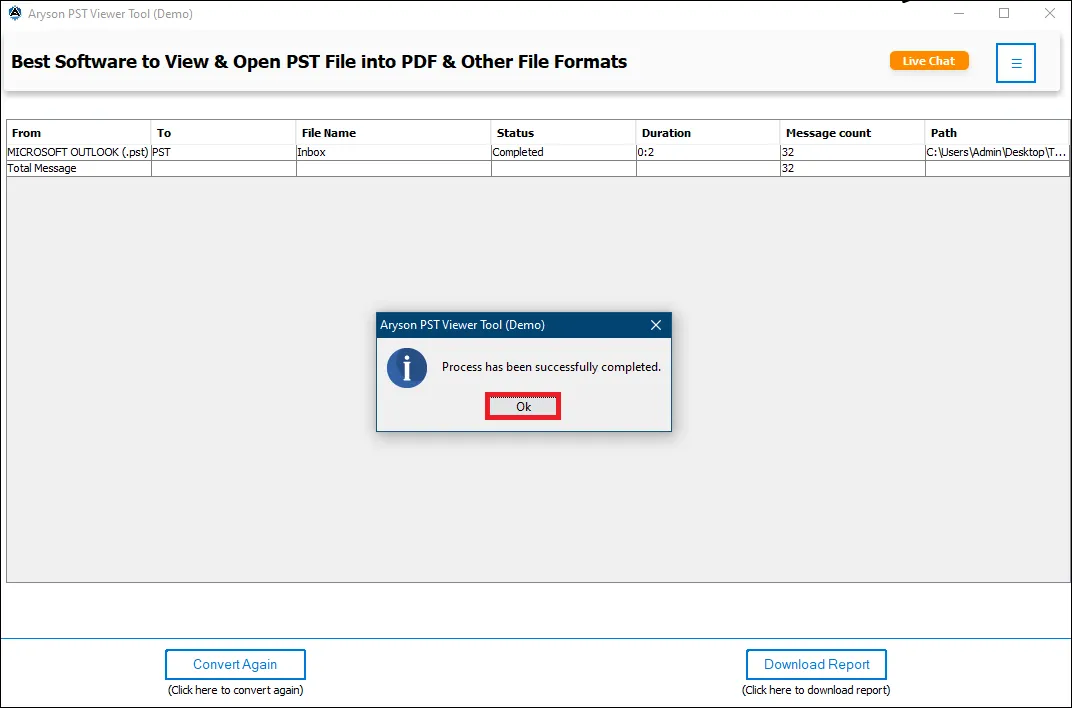
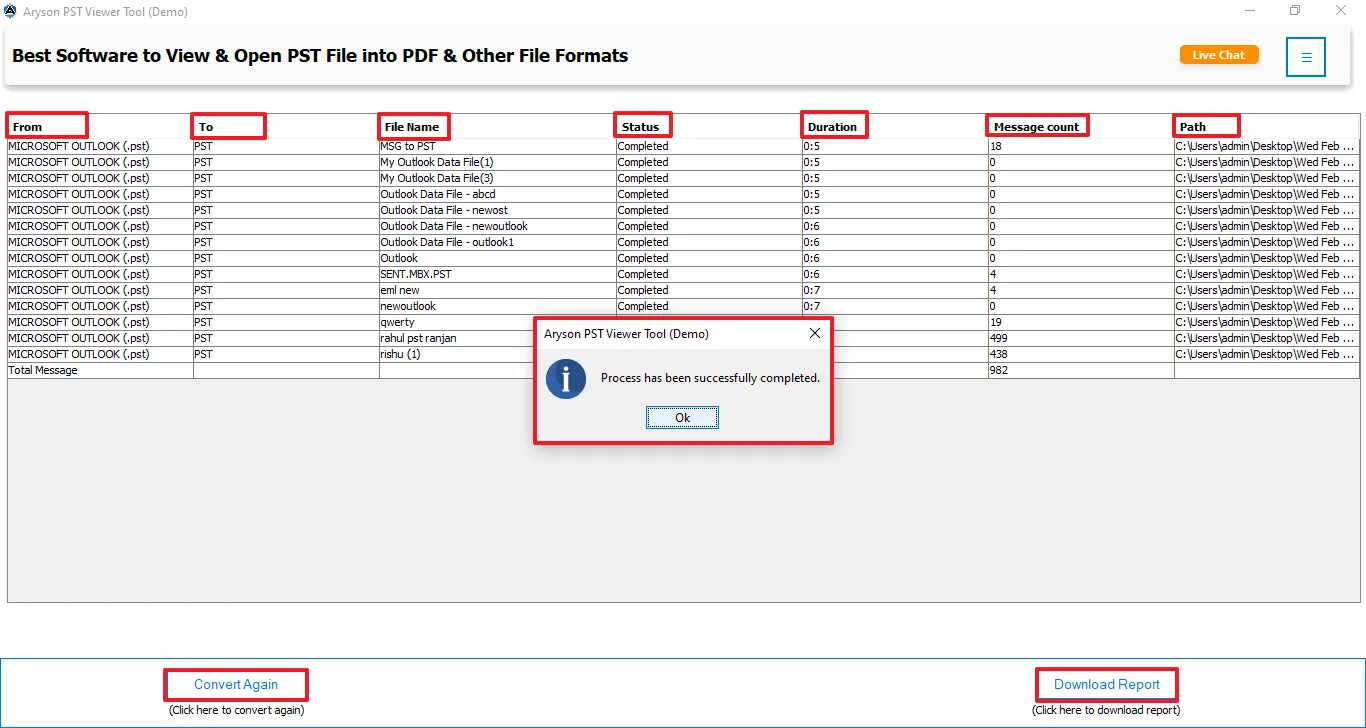
Step 16: After clicking on the Convert button, it will show the real-time processing of files.

Step 17: After conversion details:
- Shows a summary table with From, To, File Name, Status, Duration, Message Count, and Path.
- Indicates “Completed” status for all processed PST files.
- Confirms success through a pop-up message.
- Provides a “Convert Again” option to start a new process.
- Offers “Download Report” to save the conversion details.
Activation Guide
Activate the Software
Installation & Uninstallation
Installation & Uninstallation of Software
User Interface
User Interface
After downloading the Aryson PST Viewer tool, you will find the welcome screen as played below.