Complete Step-by-Step Guide for Aryson PST File Converter
Easily convert and migrate PST & OST files to MSG, MBOX, EML, PDF, DOCX, CSV, and 6+ more formats with complete accuracy. The software also allows direct migration of Outlook mailboxes to Microsoft 365, Google Workspace, IMAP servers, Outlook.com, and GoDaddy
-
Table of Content
- Software Working Process
- Activation Guide
- Installation & Uninstallation
- User Interface
Software Working Process
Software Working Process
Step 1: Download and install the Aryson PST Converter Tool on your system.

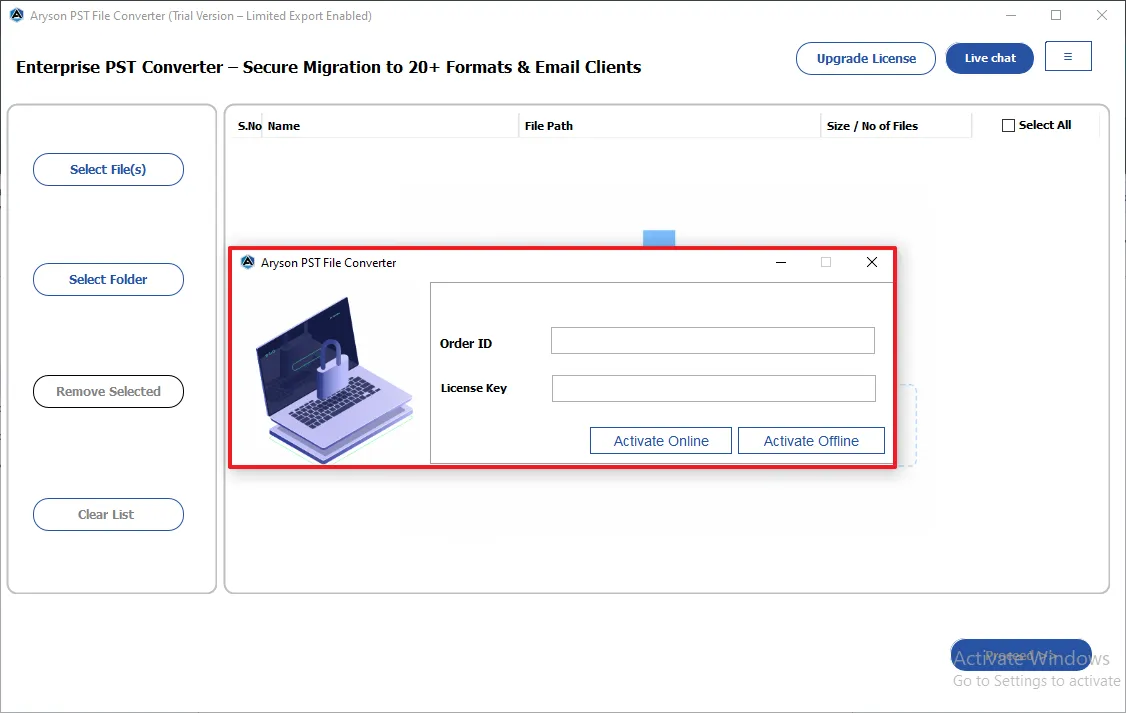
Step 2: Run it as administrator and activate it using the license key (or continue with the demo version ).

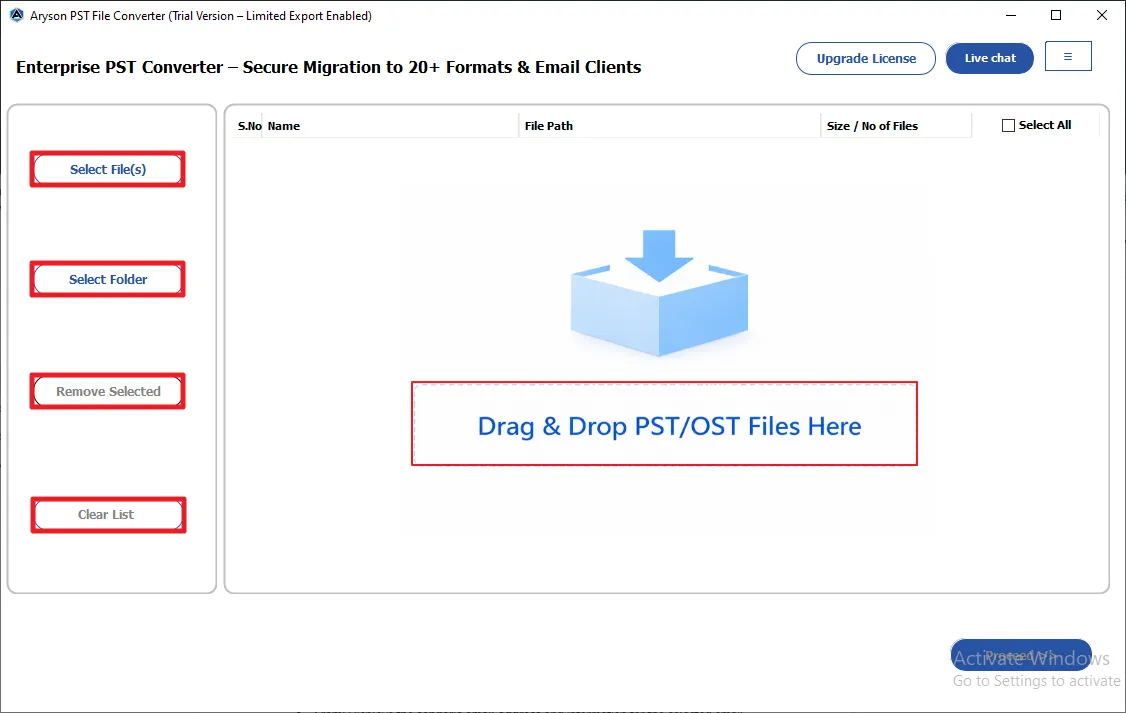
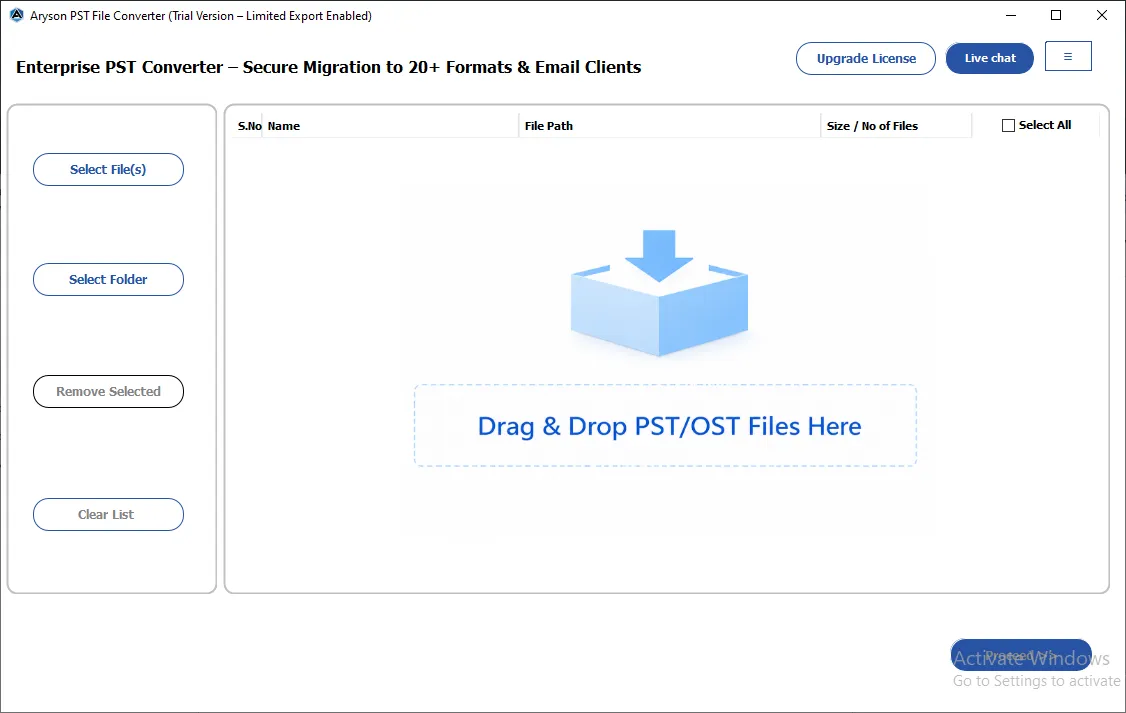
Step 3: Choose how you want to add the required PST data into the software:
- Select Files: Press this button to add single or multiple PST/OST files.
- Select Folder: Use it to add an entire folder that contains PST/OST files.
- Remove Selected: Delete selected PST/OST files from the list.
- Clear List: Clear all added PST/OST files.
- Proceed: Click on the Proceed button to proceed further.
- Drag and Drop functionality: The user may add the required PST/OST files using the drag-and-drop features of the software.
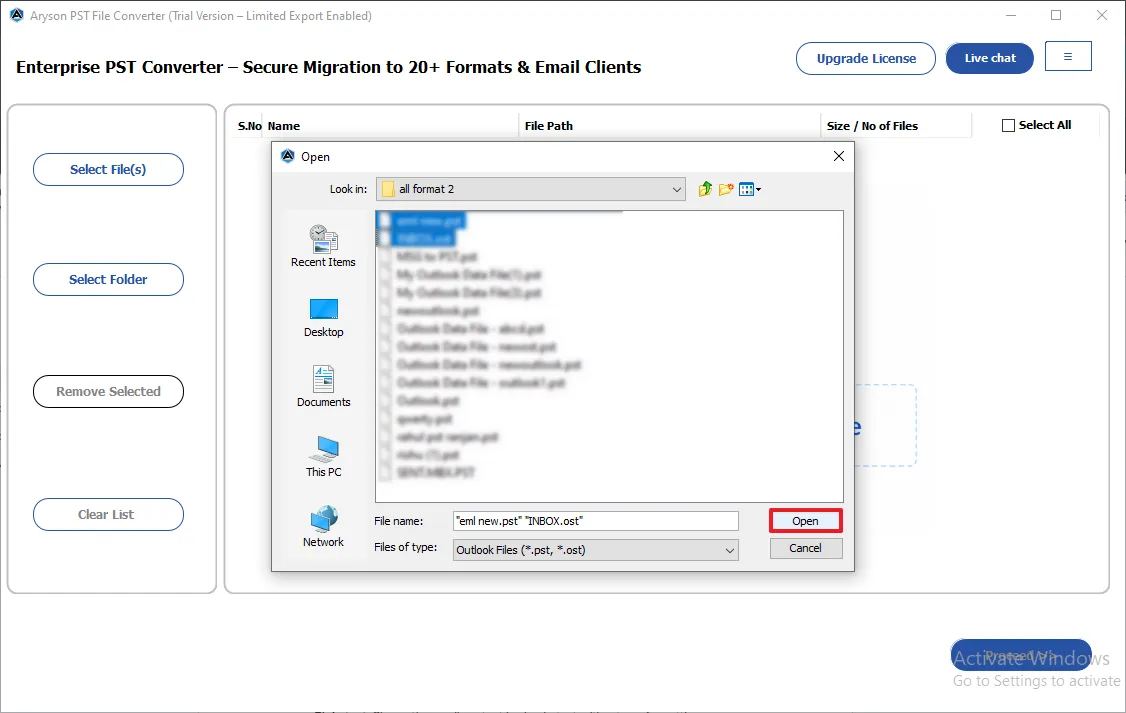
Step 4: Browse your system, select the required PST or OST file/folder, and click "Open" to load them into the software.
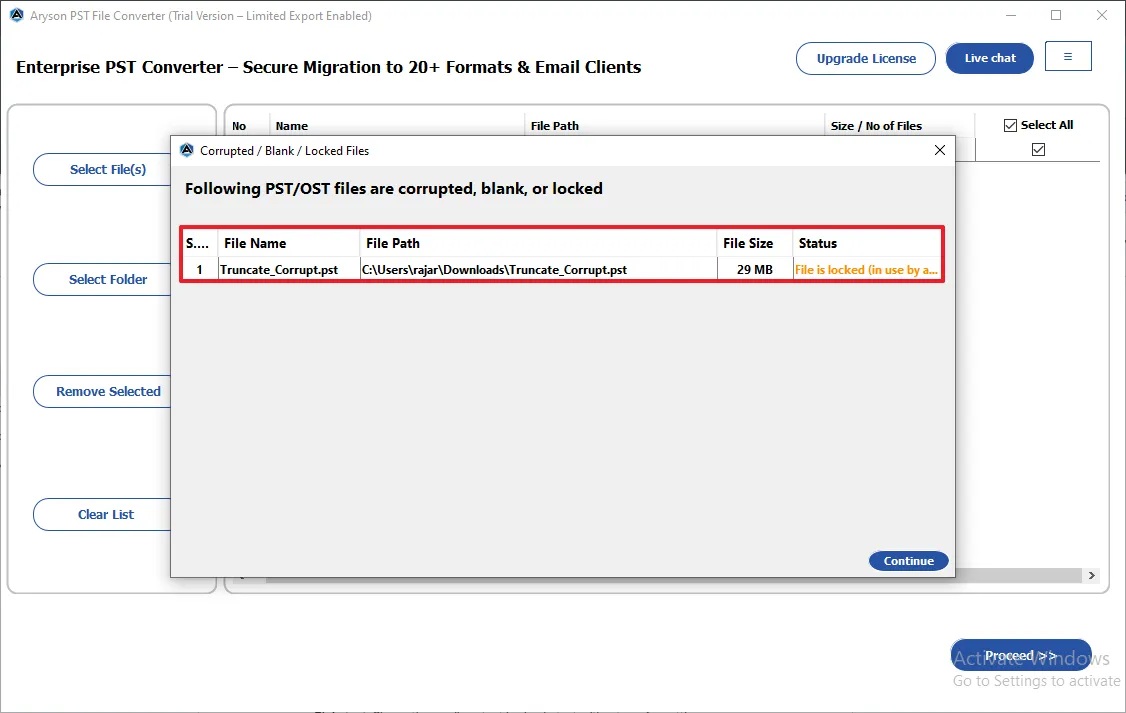
Step 5: The software will automatically detect the corrupted, blank, and invalid PST/OST files and display them in the software panel.
Step 6: The loaded PST files appear in a structured table with the To, From, and Subject fields of the emails. Verify the selected files and click Next.

Step 7: Now, an advanced preview panel will appear. Expand the tree-like hierarchy of the selected files and folders.
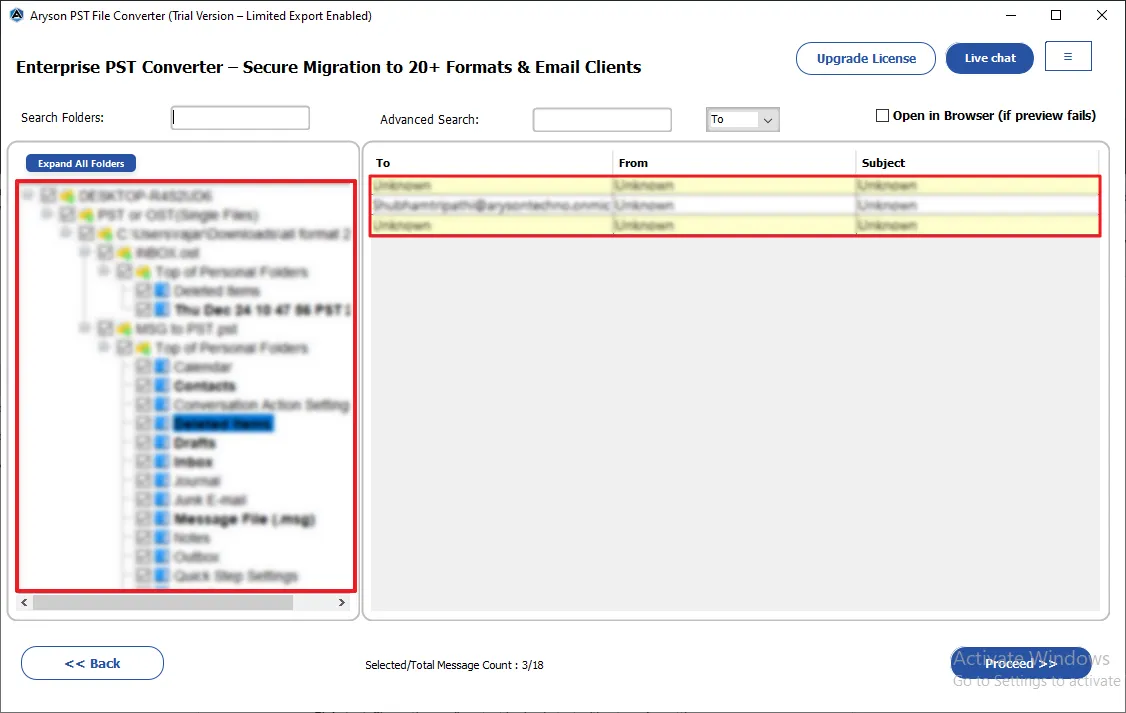
Step 8: Preview the emails and their associated attachments. The preview panel displays:
- From: Displays the sender’s email address and information for the selected email.
- To: Shows the recipient’s email address to whom the message was sent.
- Subject: Indicates the subject line of the selected email.
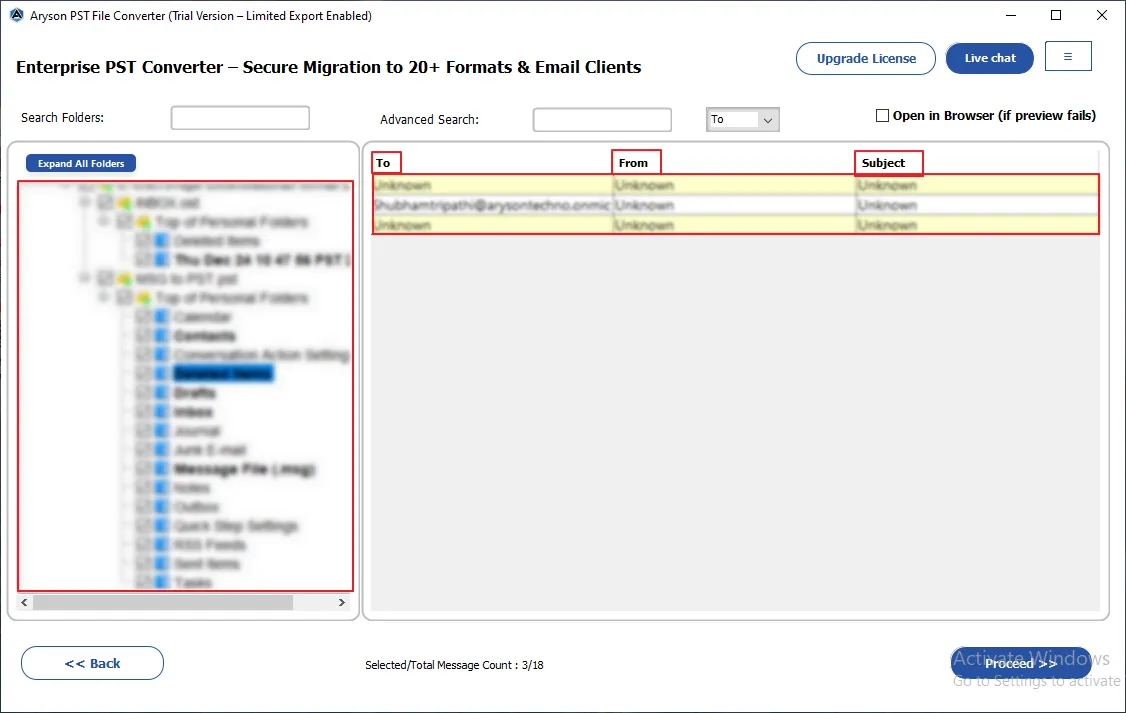
Step 9: You may use the other options for better filtering of PST/OST data.
- Search Folders: Find specific folders by entering keywords from the folder name.
- Advanced Search: Search emails using "To," "From," or "Subject" criteria of emails.
- Open in Browser: Opens the selected email in a web browser if the preview is not displayed properly in the software.
You can also preview emails in the following:
- HTML format: Displays the email with its original formatting, including fonts, colors, and images.
- Plain text: Shows the email content in simple text without any formatting.
- Headers: Displays detailed technical header information of the email.
- MIME: Shows the MIME structure and encoding details of the message.
- Calendars: Displays the calendars' associated fields.
- Contacts: Shows the information like phone numbers, emails, etc.
- Tasks: Displays the fields like start date, end date, due date, and sensitivity.
- Notes: To preview the notes' content and their creation date.
- Raw HTML: Displays the original HTML source code of the email message.

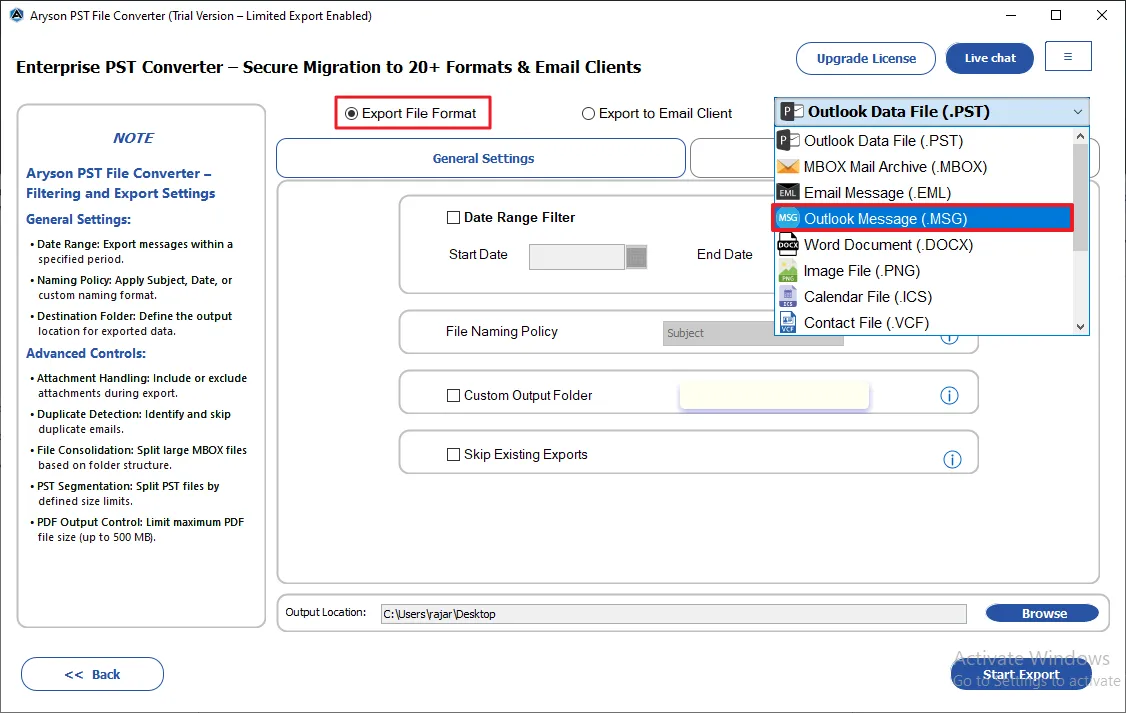
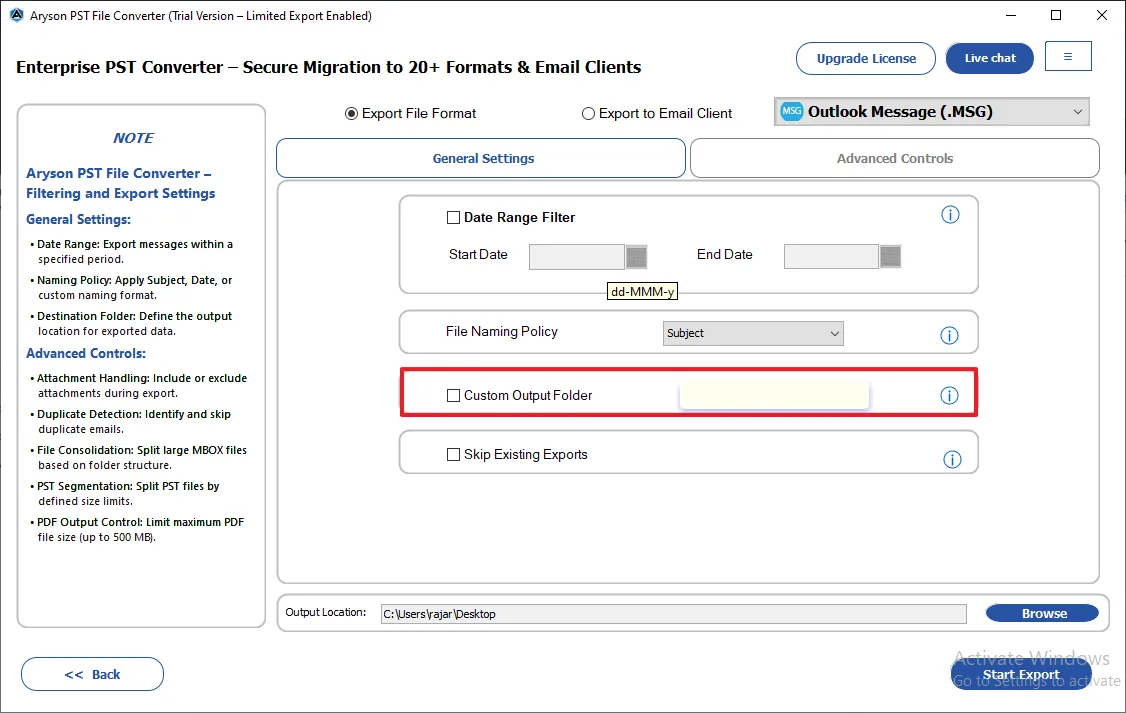
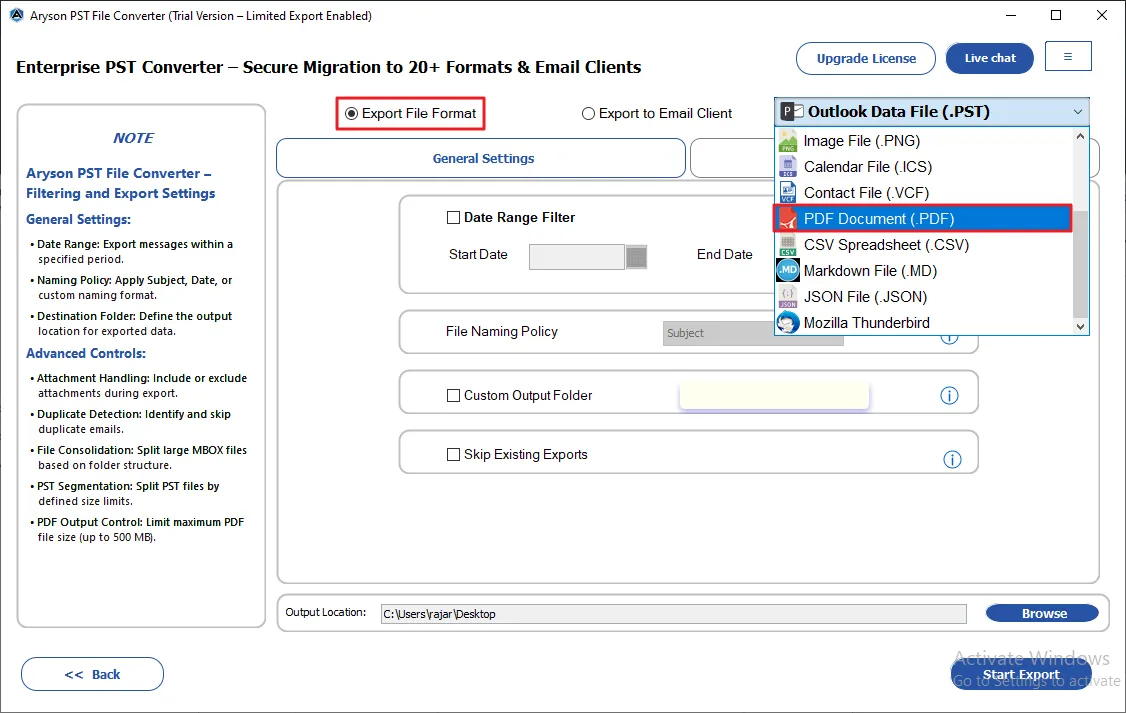
Step 10: Select Outlook Message (.msg) under the Export File Formats drop-down list.
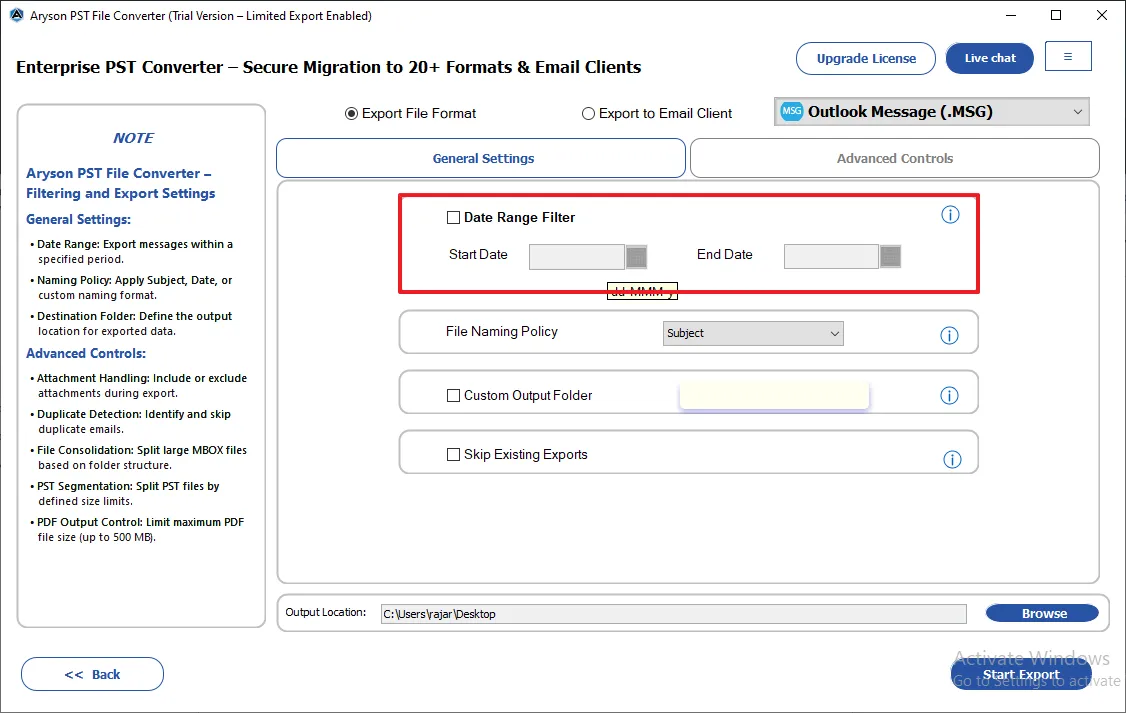
Step 11: Date Range Filter: Allows you to export emails within a specific date range by selecting the Start Date and End Date.
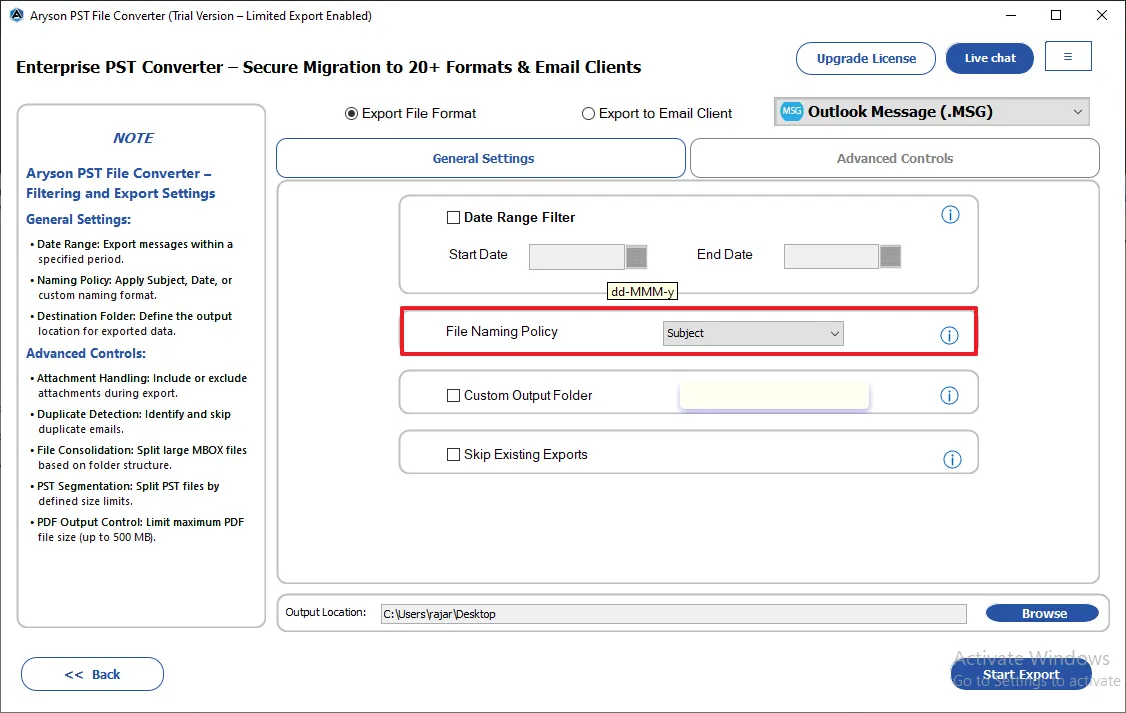
Step 12: File Naming Policy: Lets you rename output files using options like subject, date, or other naming patterns.
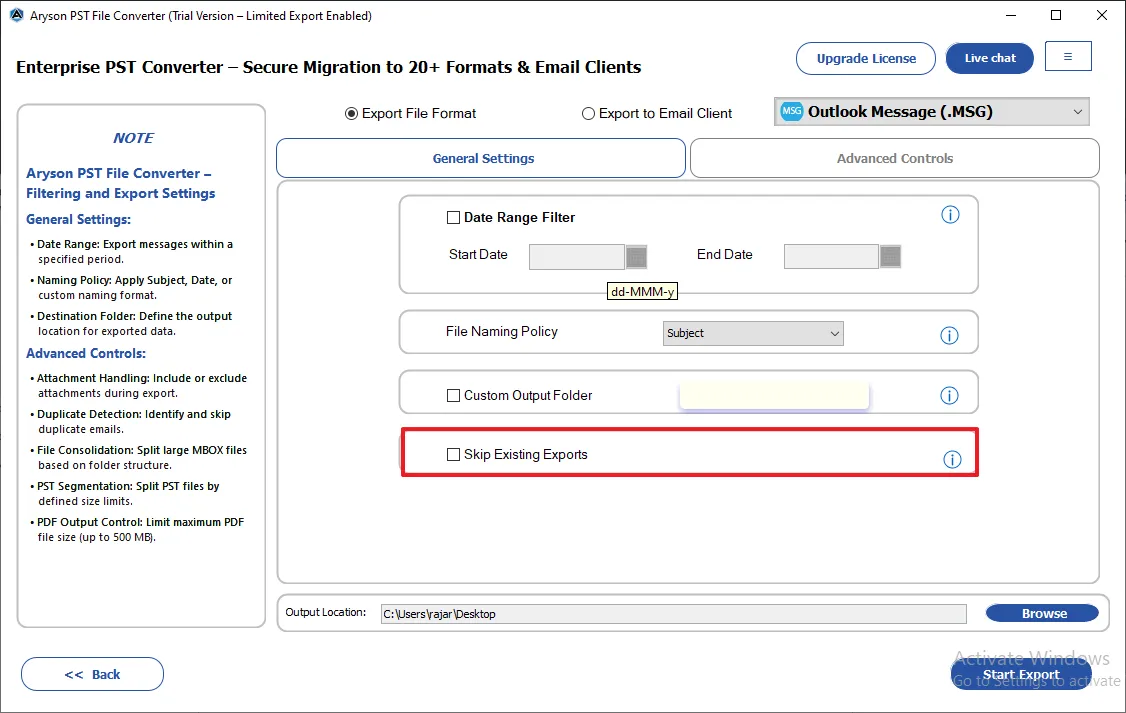
Step 13: Custom Output Folder: Enables you to set a custom name for the destination folder where the exported files will be saved.
Step 14: Skip Existing Exports: Prevents re-exporting of already saved files in order to avoid duplication.
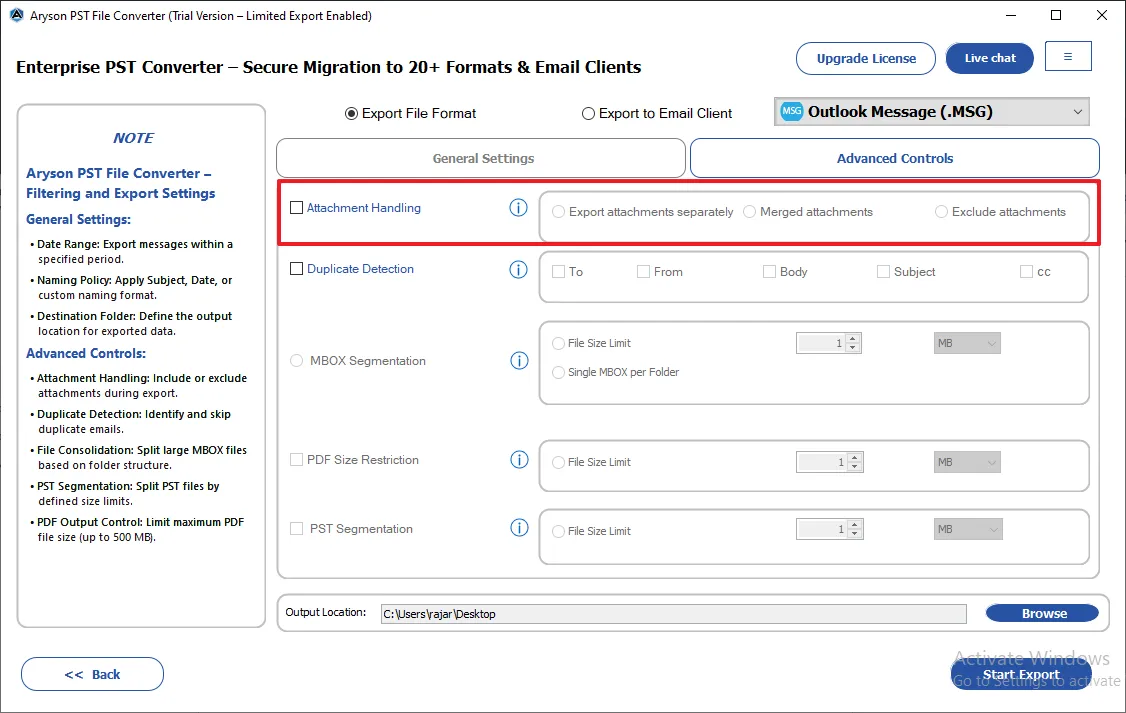
Step 15: Attachment Handling: Provides options to export attachments separately or exclude them from emails.
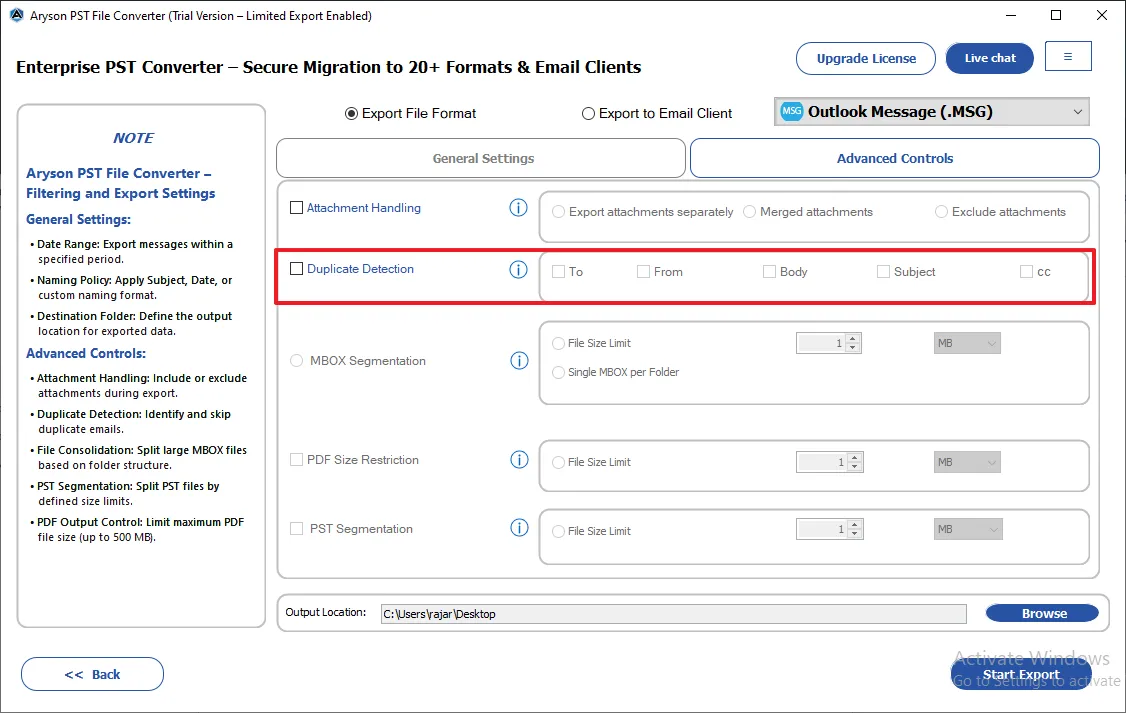
Step 16: Duplicate Detection: Identifies and removes duplicate emails based on selected fields like "To," "From," "Body," "Subject," and "CC."
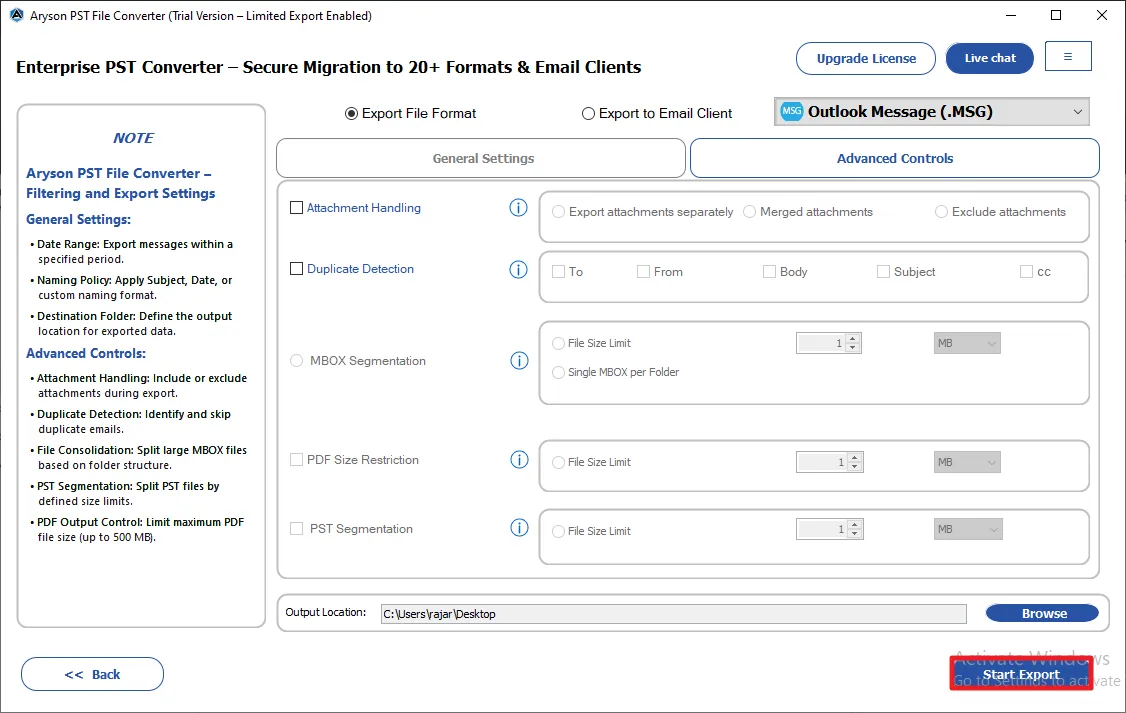
Step 17: Click on the Browse button to provide the destination path of the resultant files.
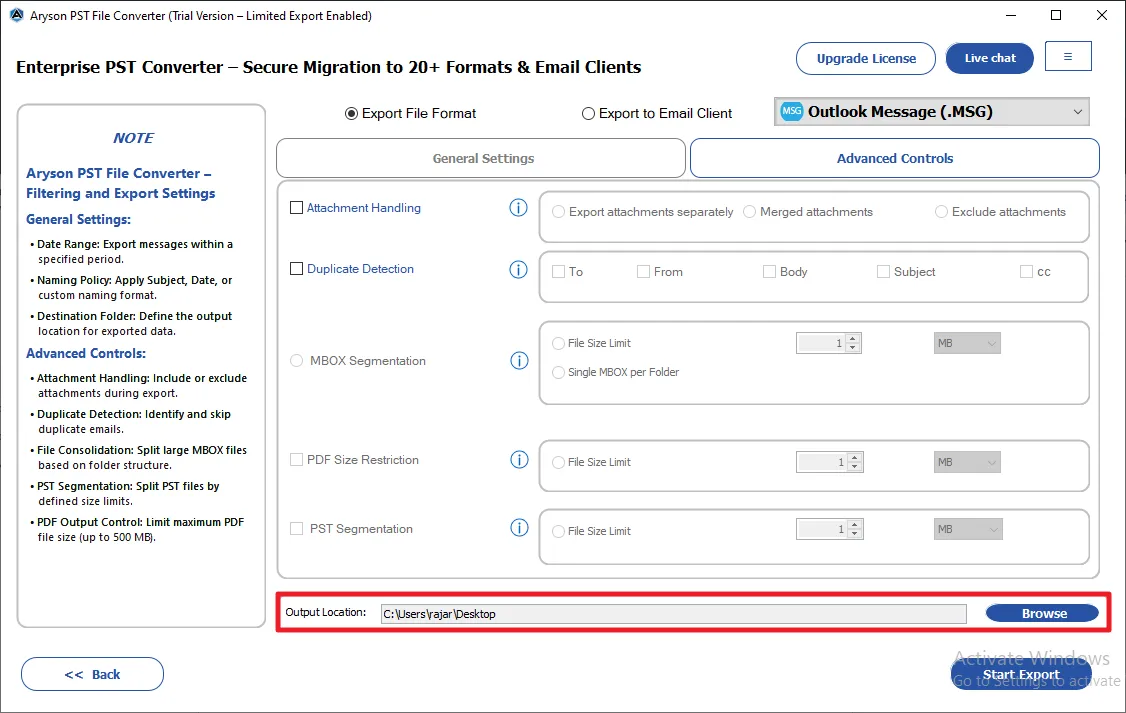
Step 18: Click on the Start Export button to begin the conversion process.
Step 19: After completion, the software displays Source, Destination, File Count, Processing Time, Execution Time, Total Messages, and Output Location.
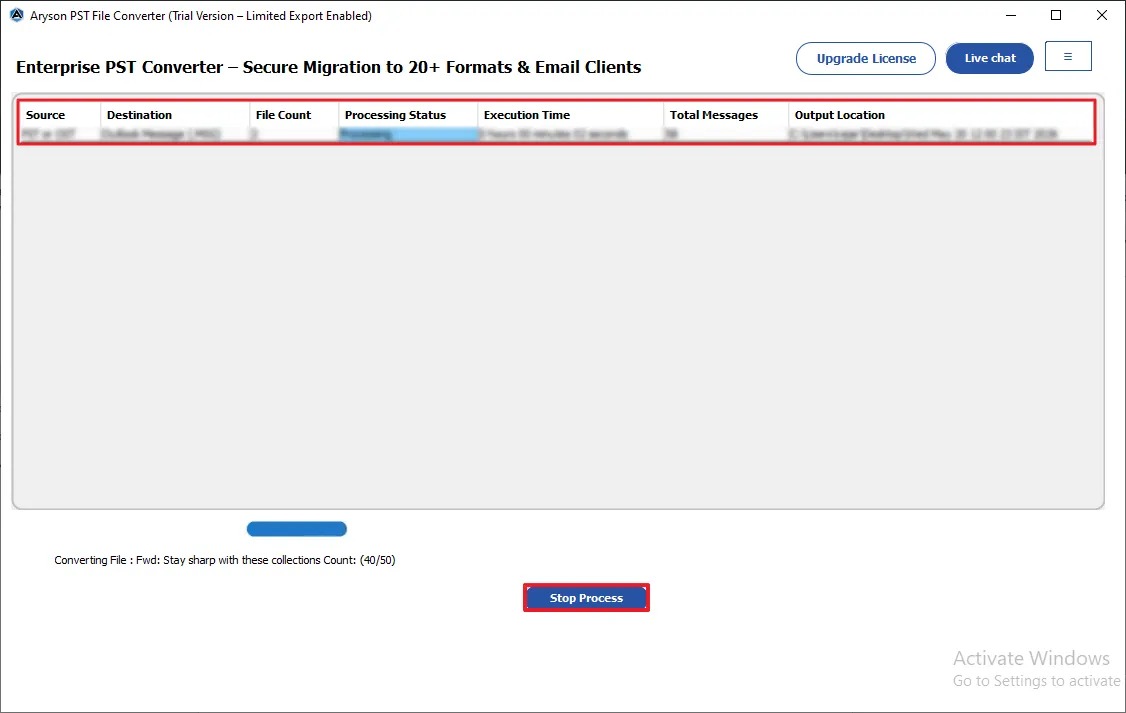
Step 20: After conversion, details
- Start New Export: Start another conversion
- Export Log: Save the conversion report in CSV format.

Step 1: Download and install the Aryson PST Converter Tool on your system.
Step 2: Run it as administrator and activate it using the license key (or continue with the demo version ).

Step 3: Choose how you want to add the required PST data into the software:
- Select Files: Press this button to add single or multiple PST/OST files.
- Select Folder: Use it to add an entire folder that contains PST/OST files.
- Remove Selected: Delete selected PST/OST files from the list.
- Clear List: Clear all added PST/OST files.
- Proceed: Click on the Proceed button to proceed further.
- Drag and Drop functionality: The user may add the required PST/OST files using the drag-and-drop features of the software.

Step 4: Browse your system, select the required PST OR OST file/folder, and click "Open" to load them into the software.

Step 5: The software will automatically detect the corrupted, blank, and invalid PST/OST files and display them in the software panel.

Step 6: The loaded PST files appear in a structured table with the To, From, and Subject fields of the emails. Verify the selected files and click Next.

Step 7: Now, an advanced preview panel will appear. Expand the tree-like hierarchy of the selected files and folders.

Step 8: Preview the emails and their associated attachments. The preview panel displays:
- From: Displays the sender’s email address and information for the selected email.
- To: Shows the recipient’s email address to whom the message was sent.
- Subject: Indicates the subject line of the selected email.

Step 9: You may use the other options for better filtering of PST/OST data.
- Search Folders: Find specific folders by entering keywords from the folder name.
- Advanced Search: Search emails using "To," "From," or "Subject" criteria of emails.
- Open in Browser: Opens the selected email in a web browser if the preview is not displayed properly in the software.
You can also preview emails in the following:
- HTML format: Displays the email with its original formatting, including fonts, colors, and images.
- Plain text: Shows the email content in simple text without any formatting.
- Headers: Displays detailed technical header information of the email.
- MIME: Shows the MIME structure and encoding details of the message.
- Calendars: Displays the calendars' associated fields.
- Contacts: Shows the information like phone numbers, emails, etc.
- Tasks: Displays the fields like start date, end date, due date, and sensitivity.
- Notes: To preview the notes' content and their creation date.
- Raw HTML: Displays the original HTML source code of the email message.

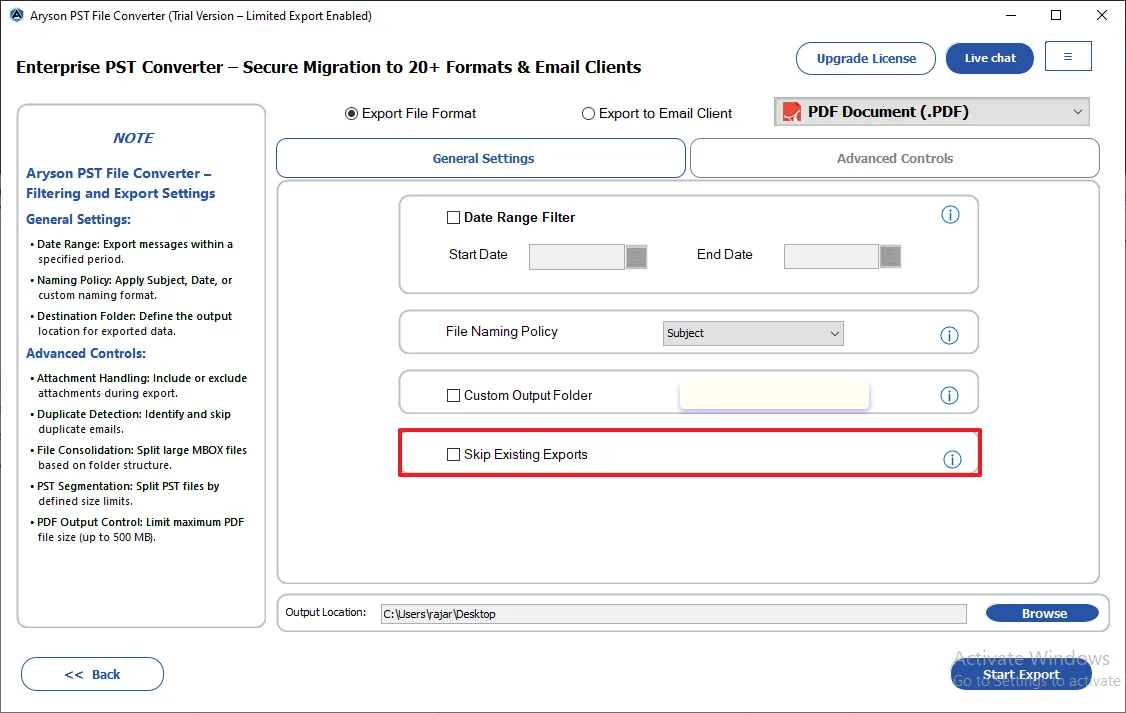
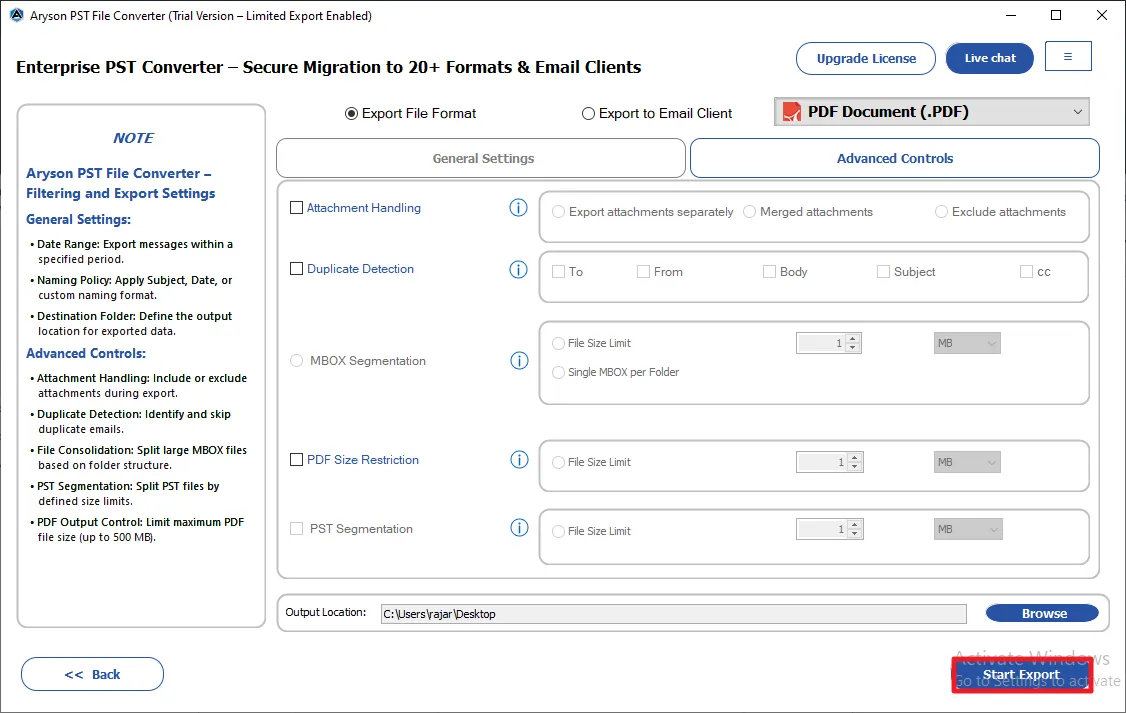
Step 10: Select PDF Document (.PDF) under the Export File Formats drop-down list.
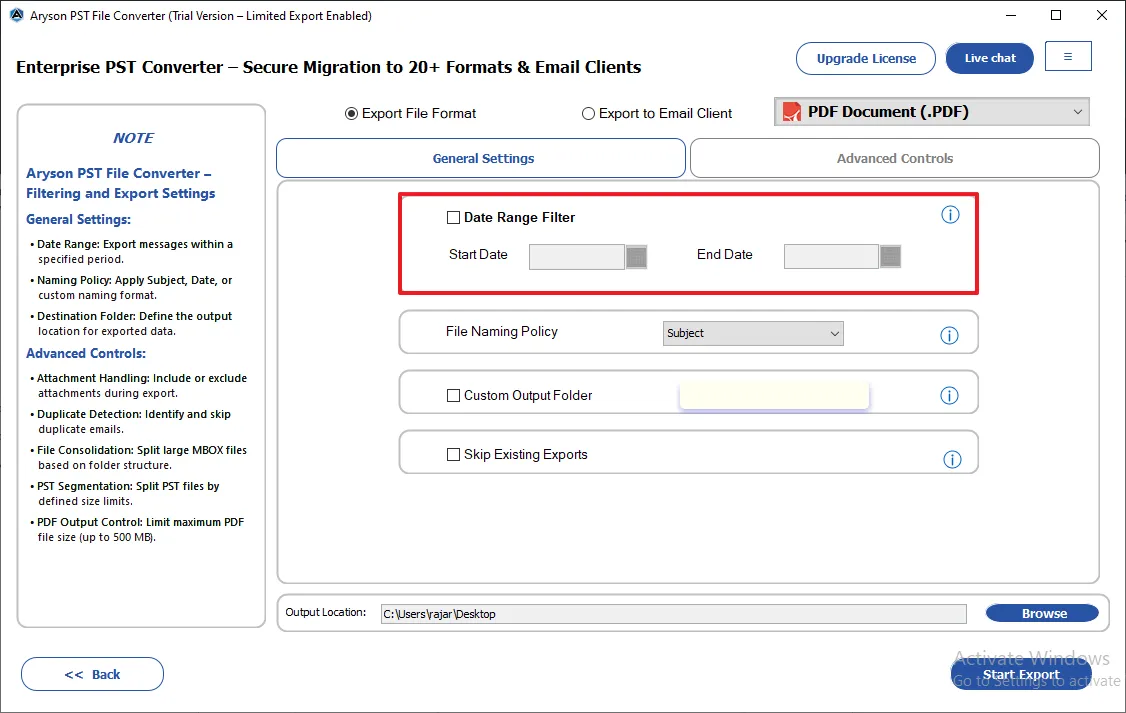
Step 11: Date Range Filter: Allows you to export emails within a specific date range by selecting the Start Date and End Date.
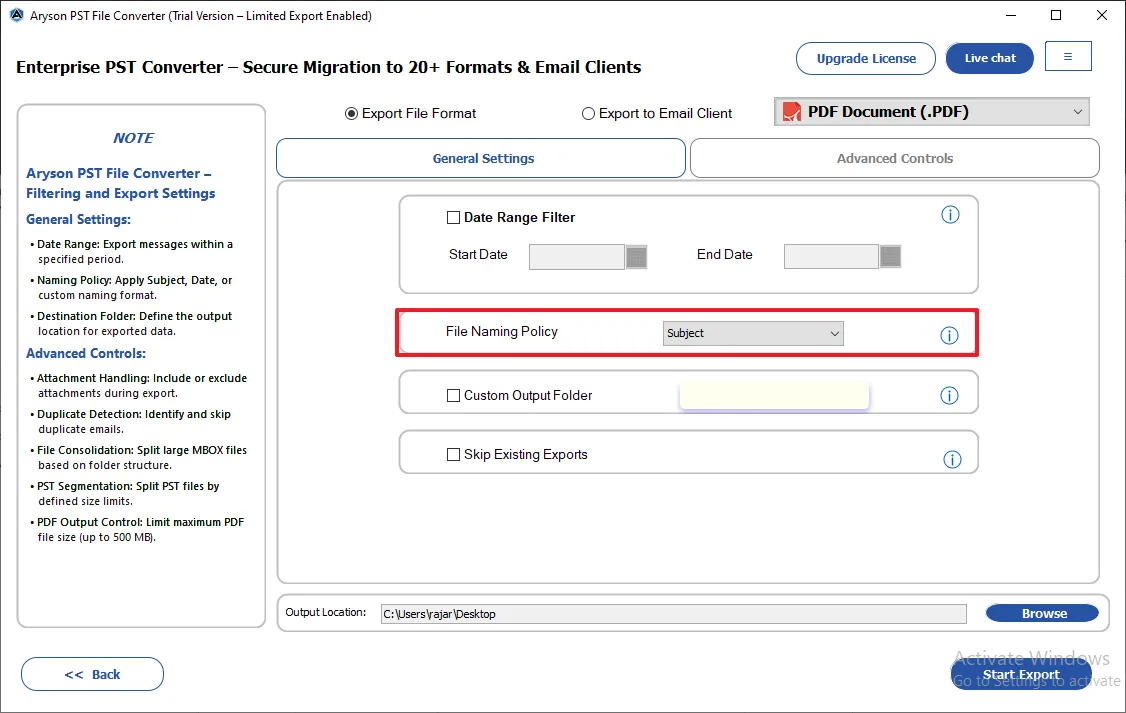
Step 12: File Naming Policy: Lets you rename output files using options like subject, date, or other naming patterns.
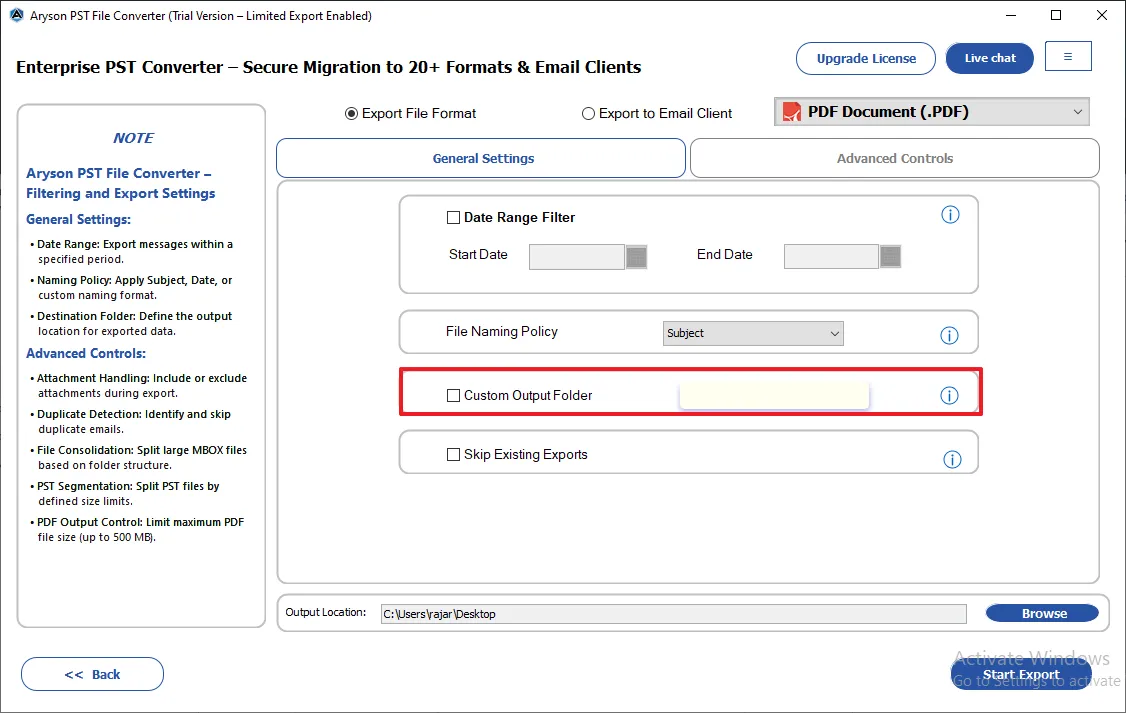
Step 13: Custom Output Folder: Enables you to set a custom name for the destination folder where the exported files will be saved.
Step 14: Skip Existing Exports: Prevents re-exporting of already saved files in order to avoid duplication.
Step 15: Attachment Handling: Provides options to export attachments separately, merge them, or exclude them from emails.
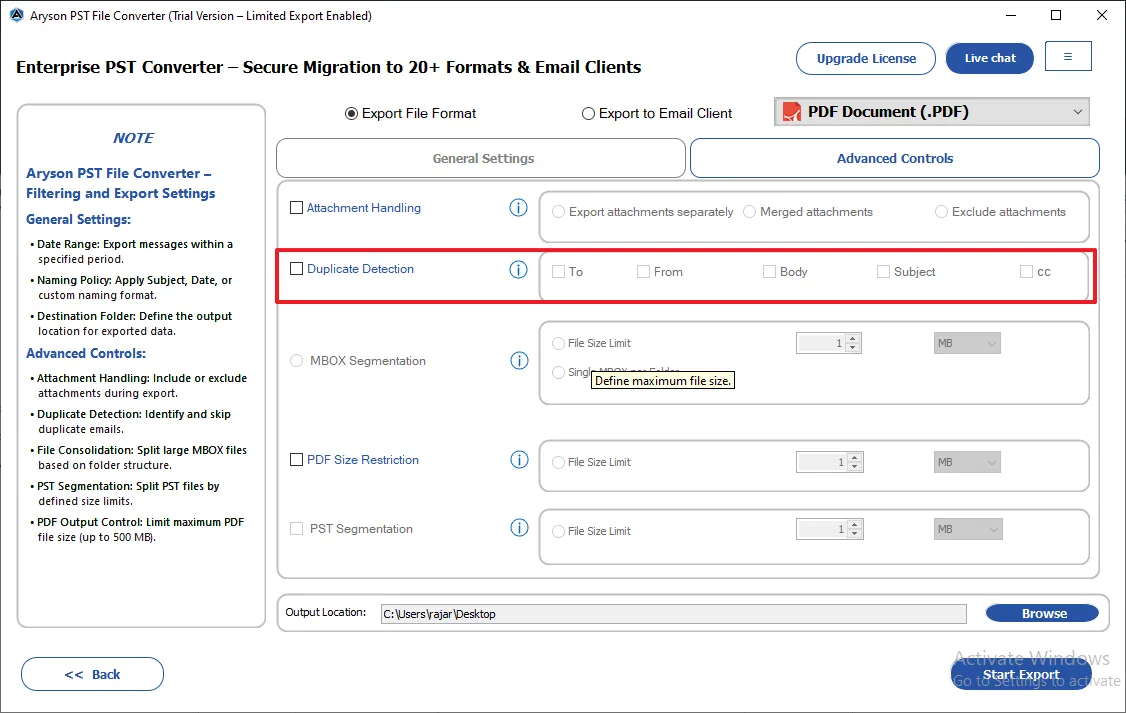
Step 16: Duplicate Detection: Identifies and removes duplicate emails based on selected fields like "To," "From," "Body," "Subject," and "CC."

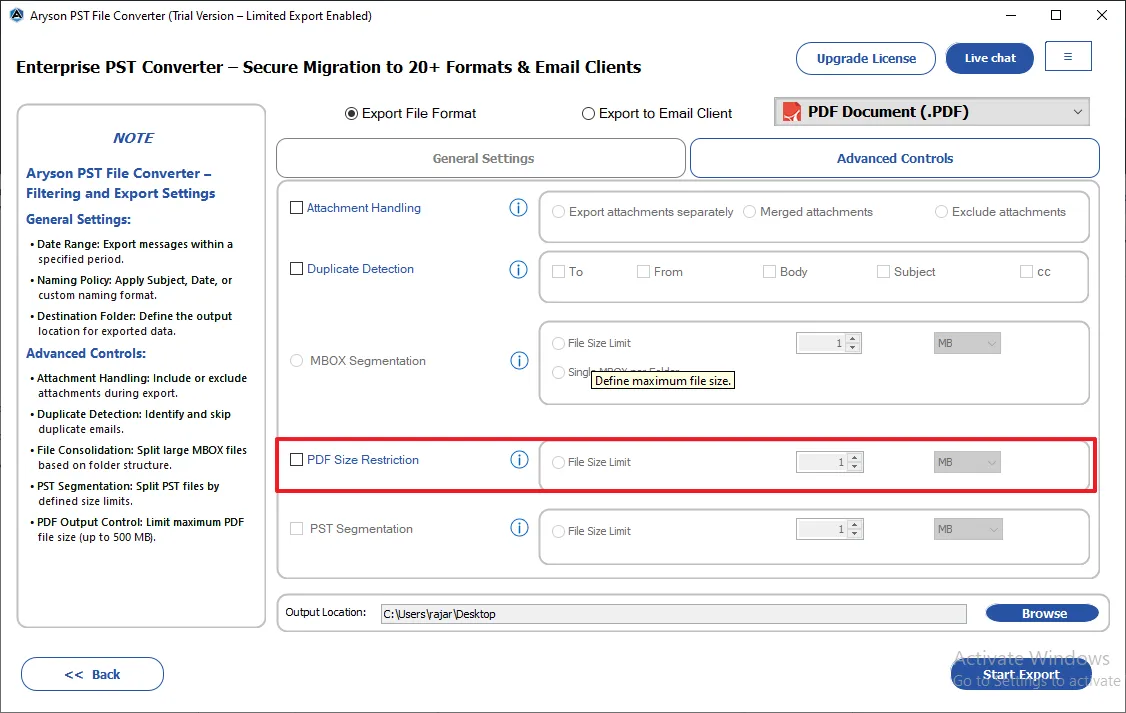
Step 17: PDF Size Restriction: Specify a value and parameter of the resultant PDF file.
Step 18: Click on the Browse button to provide the destination path of the resultant files.
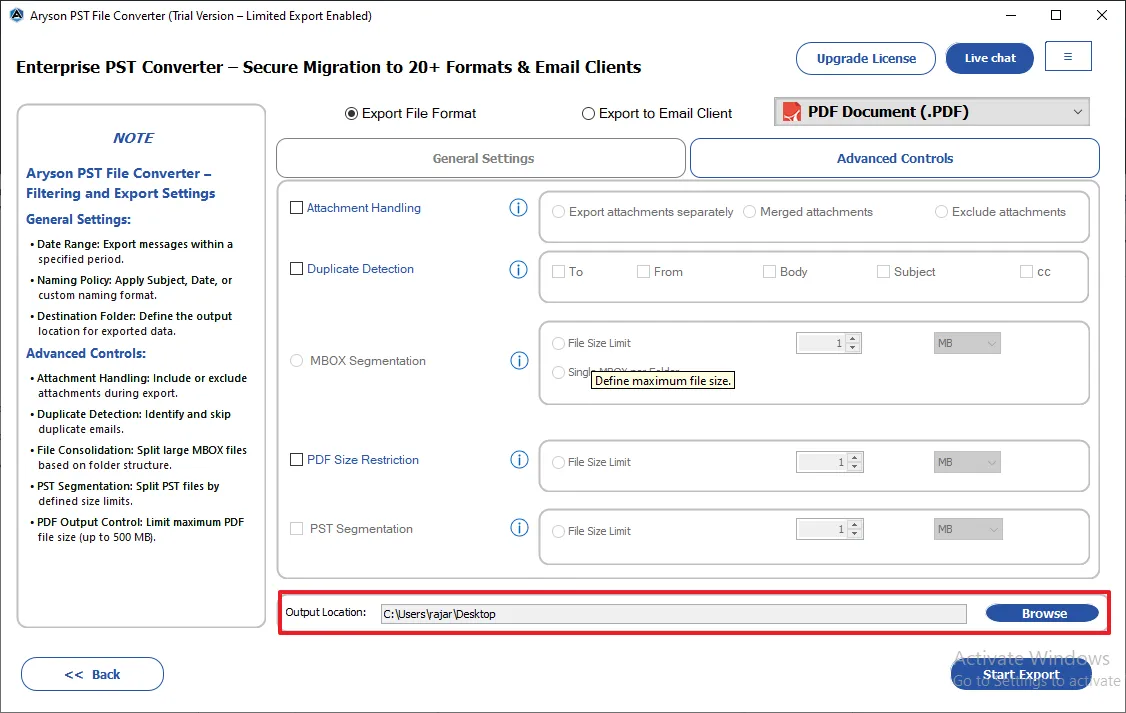
Step 19: Click on the Start Export button to begin the conversion process.
Step 20: After completion, the software displays Source, Destination, File Count, Processing Time, Execution Time, Total Messages, and Output Location.

Step 21: After conversion, details
- Start New Export: Start another conversion
- Export Log: Save the conversion report in CSV format.

Step 1: Download and install the Aryson PST Converter Tool on your system.

Step 2: Run it as administrator and activate it using the license key (or continue with the demo version ).
Step 3: Choose how you want to add the required PST data into the software:
- Select Files: Press this button to add single or multiple PST files.
- Select Folder: Use it to add an entire folder that contains PST files.
- Remove Selected: Delete selected PST files from the list.
- Clear List: Clear all added PST files.
- Proceed: Click on the Proceed button to proceed further.
- Drag and Drop functionality: The user may add the required PST files using the drag-and-drop features of the software.

Step 4: Browse your system, select the required PST/OST file/folder, and click Open to load them into the software.

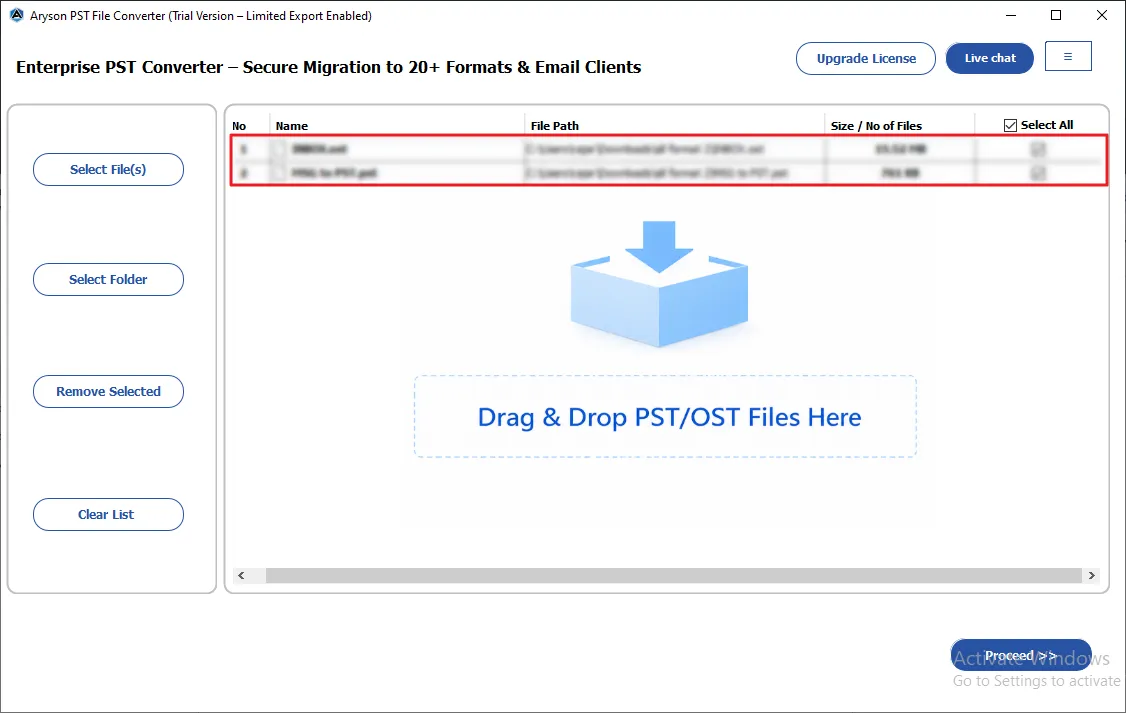
Step 5: The loaded PST/OST files appear in a structured Table of the selected data
- Sr. no.: Displays the serial number assigned to each loaded PST/OST file.
- Name: Shows the name of the selected PST/OST file added to the software.
- File Path: Indicates the exact location where the PST/OST file is stored on the system
- No. of Files: Displays the total number of PST/OST files added for conversion or migration.
- Select All: Allows you to quickly select or deselect all listed PST/OST files at once.
Verify the selected files and click Proceed.

Step 6: The software will automatically detect the corrupted, blank, and invalid PST/OST files and display them in the software panel.

Step 7: Now, an advanced preview panel will appear. Expand the tree-like hierarchy of the selected files and folders.

Step 8: Preview the emails and their associated attachments. The preview panel displays:
- From: Displays the sender’s email address and information for the selected email.
- To: Shows the recipient’s email address to whom the message was sent.
- Subject: Indicates the subject line of the selected email.

Step 9: You may use the other options for better filtering of PST/OST data.
- Search Folders: Find specific folders by entering keywords from the folder name.
- Advanced Search: Search emails using "To," "From," or "Subject" criteria of emails.
- Open in Browser: Opens the selected email in a web browser if the preview is not displayed properly in the software.
You can also preview emails in the following:
- HTML format: Displays the email with its original formatting, including fonts, colors, and images.
- Plain text: Shows the email content in simple text without any formatting.
- Headers: Displays detailed technical header information of the email.
- MIME: Shows the MIME structure and encoding details of the message.
- Raw HTML: Displays the original HTML source code of the email message.
- Calendars: Displays the calendars' associated fields.
- Contacts: Shows the information like phone numbers, emails, etc.
- Tasks: Displays the fields like start date, end date, due date, and sensitivity.
- Notes: To preview the notes' content and their creation date.
- Raw HTML: Displays the original HTML source code of the email message.

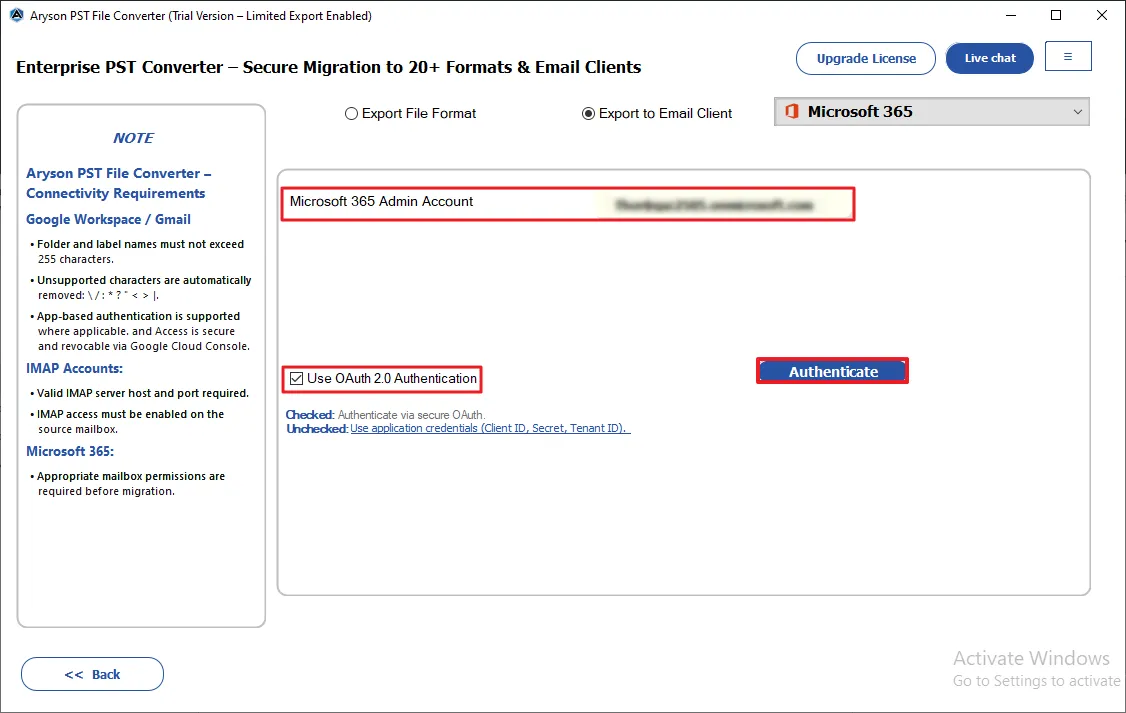
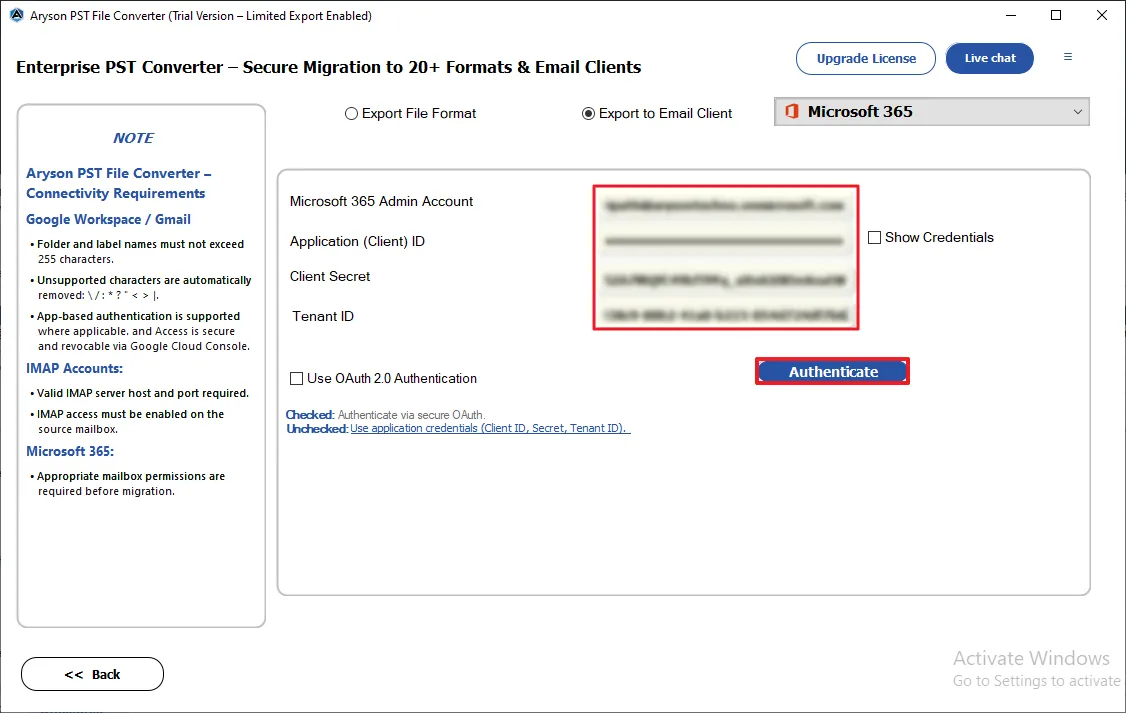
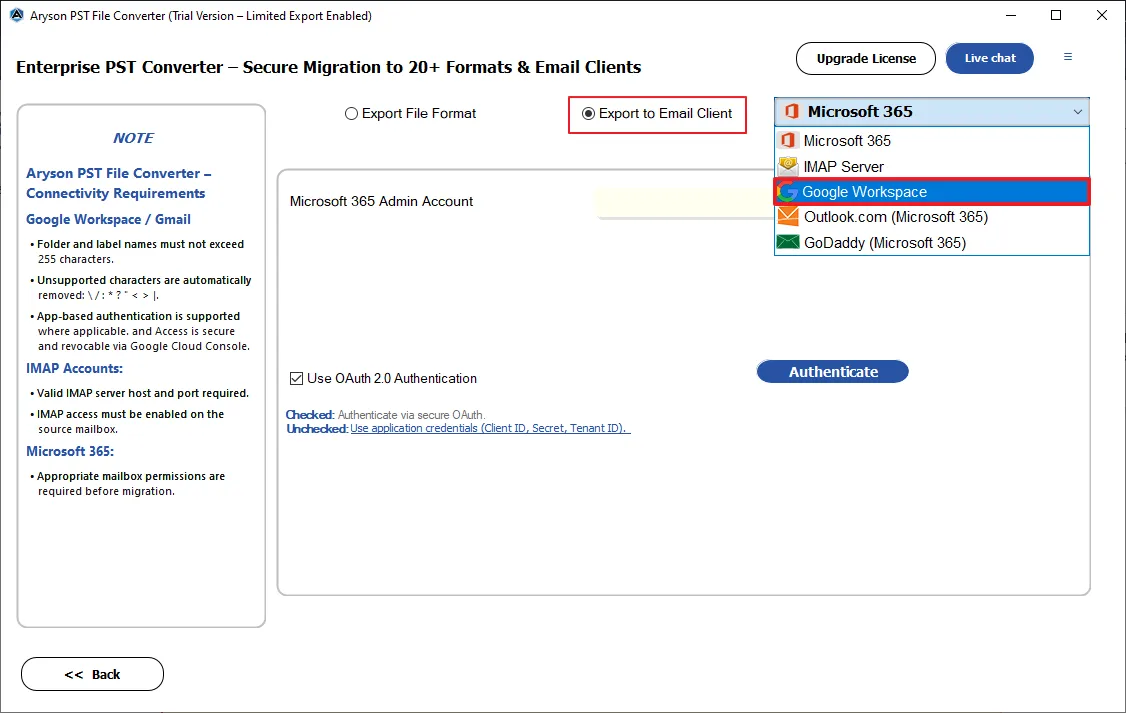
Step 10: Under the Export to Email Clients dropdown list, choose Microsoft 365.
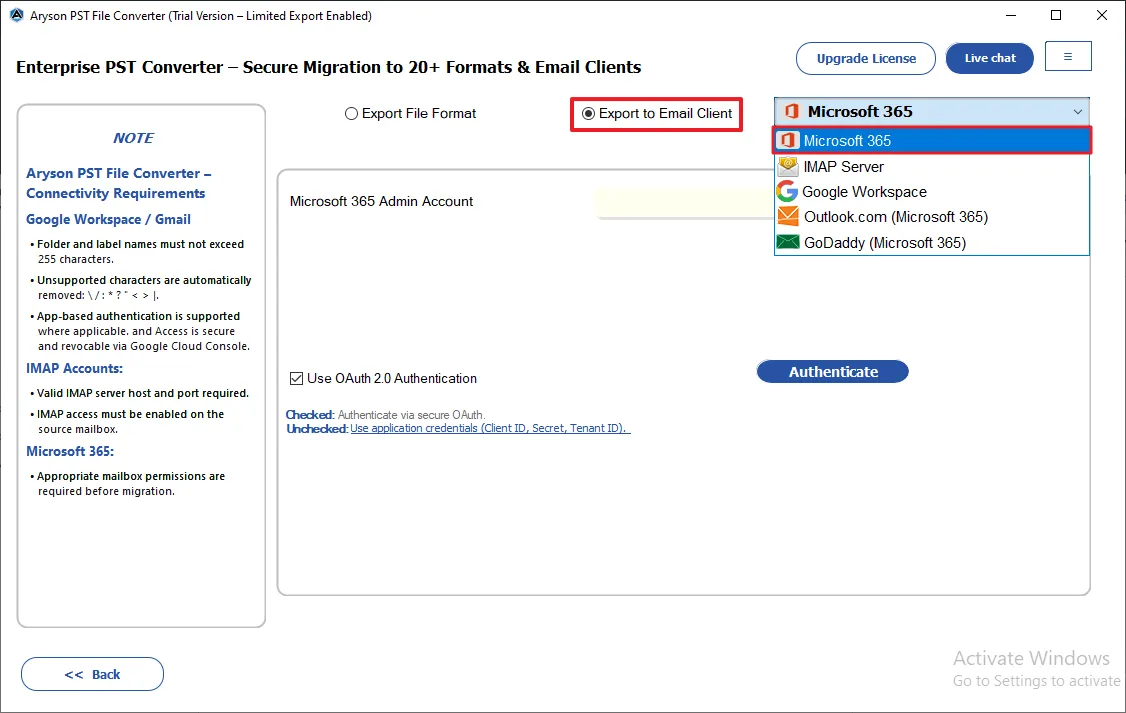
Step 11: Modern Auth 2.0: Enter your Office 365 email address and log in to it.
Step 11.1: Client Secret ID (Admin-based login): Provide the admin ID, client ID, Tenant ID, and secret value to log in.
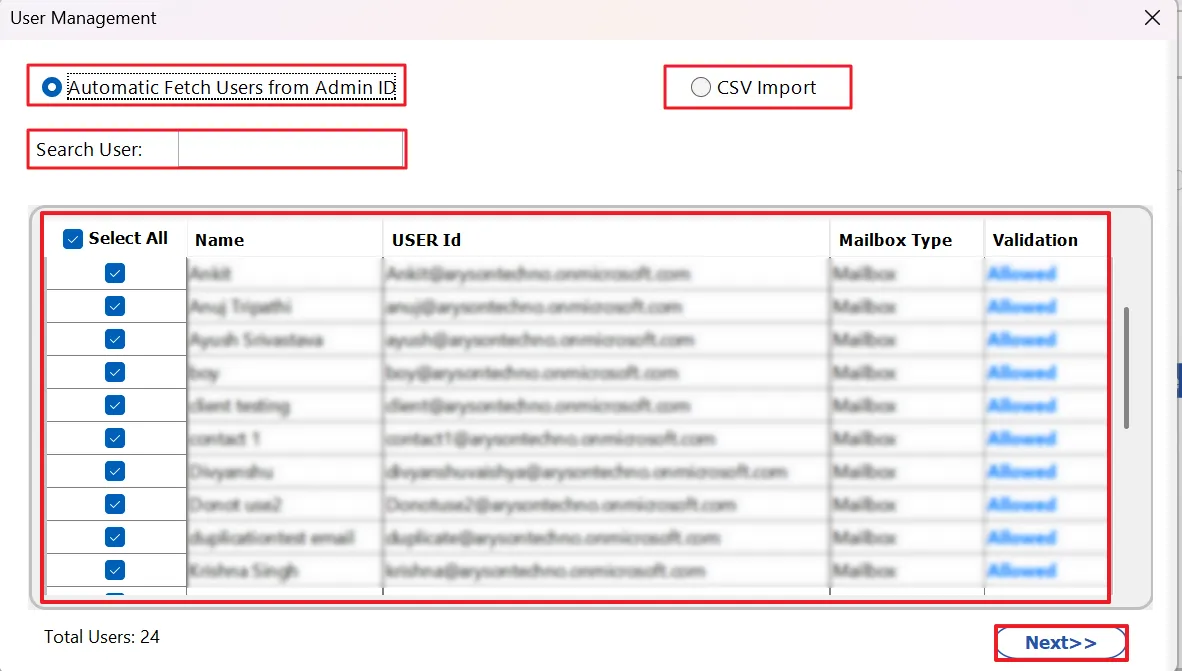
Step 12: Map the required sub-users displayed or import CSV file containing the list of sub-users.
Step 13: Date Range Filter: Allows you to migrate emails within a specific date range by selecting the Start Date and End Date.

Step 14: Custom Output Folder: Enables you to define a custom folder name for storing migrated data.
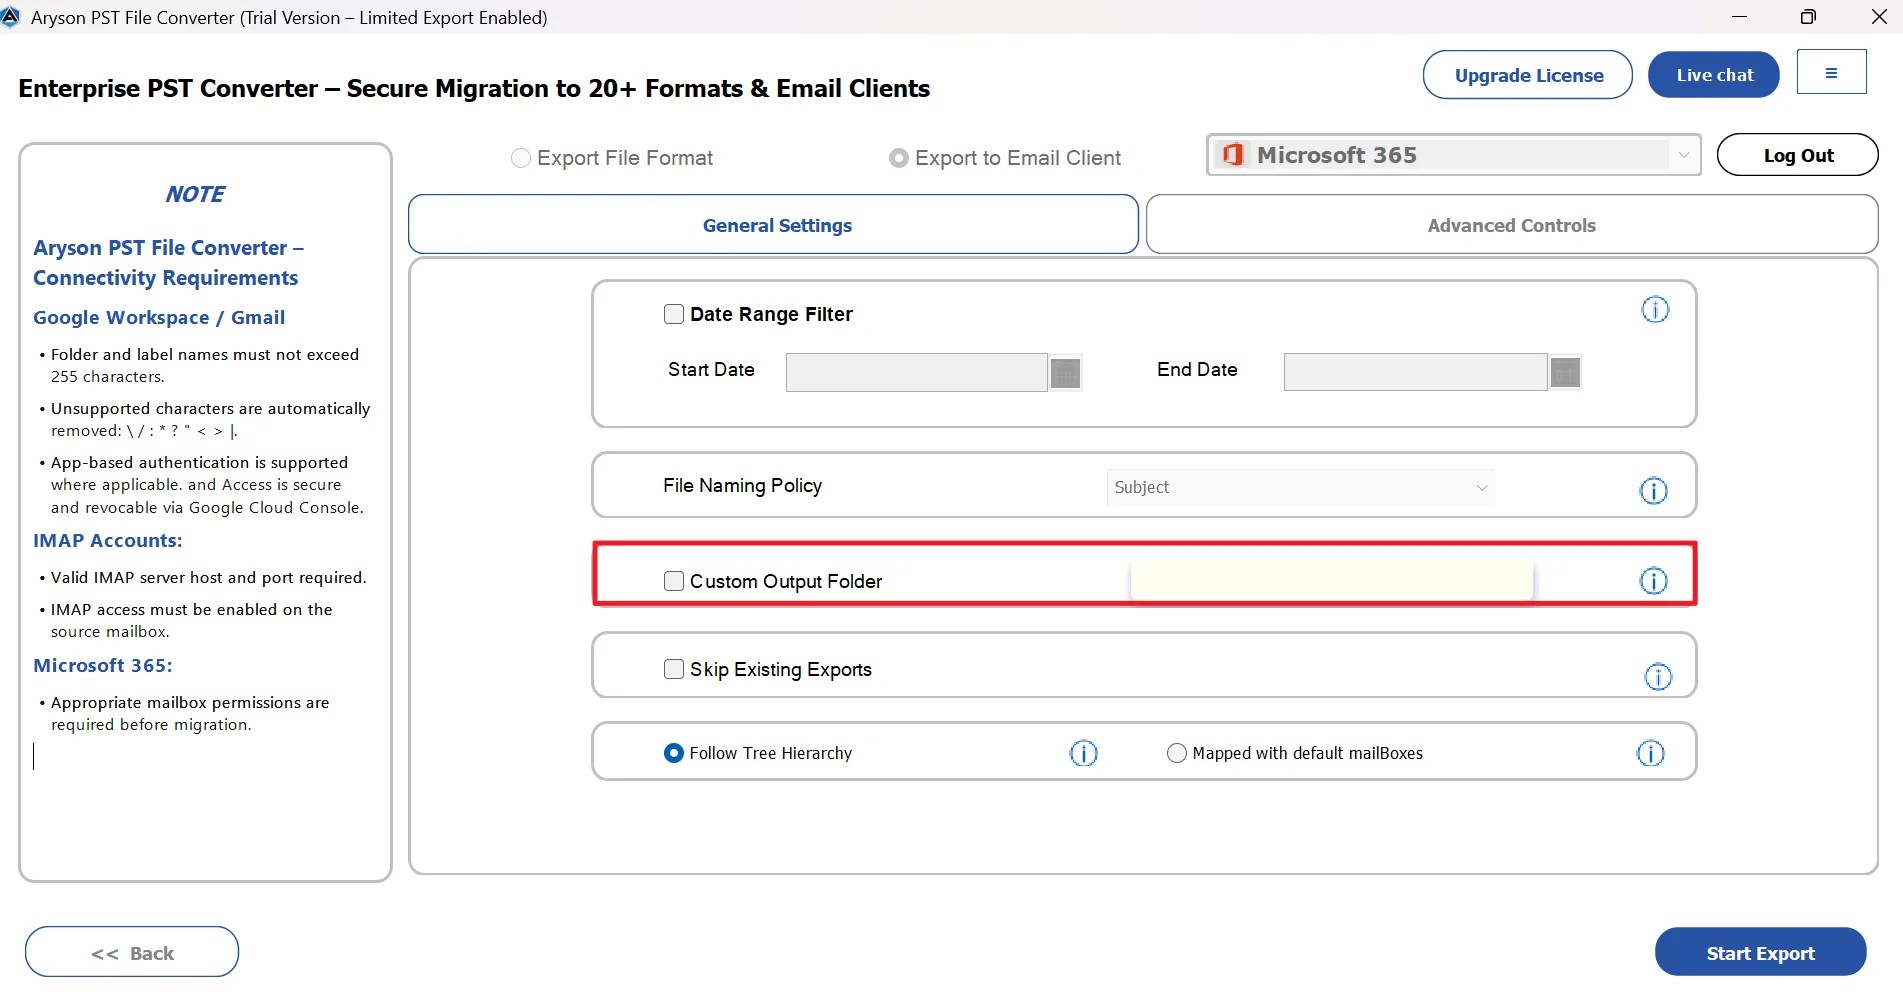
Step 15: Skip Existing Exports: Prevents duplicate migration by skipping already-migrated emails.
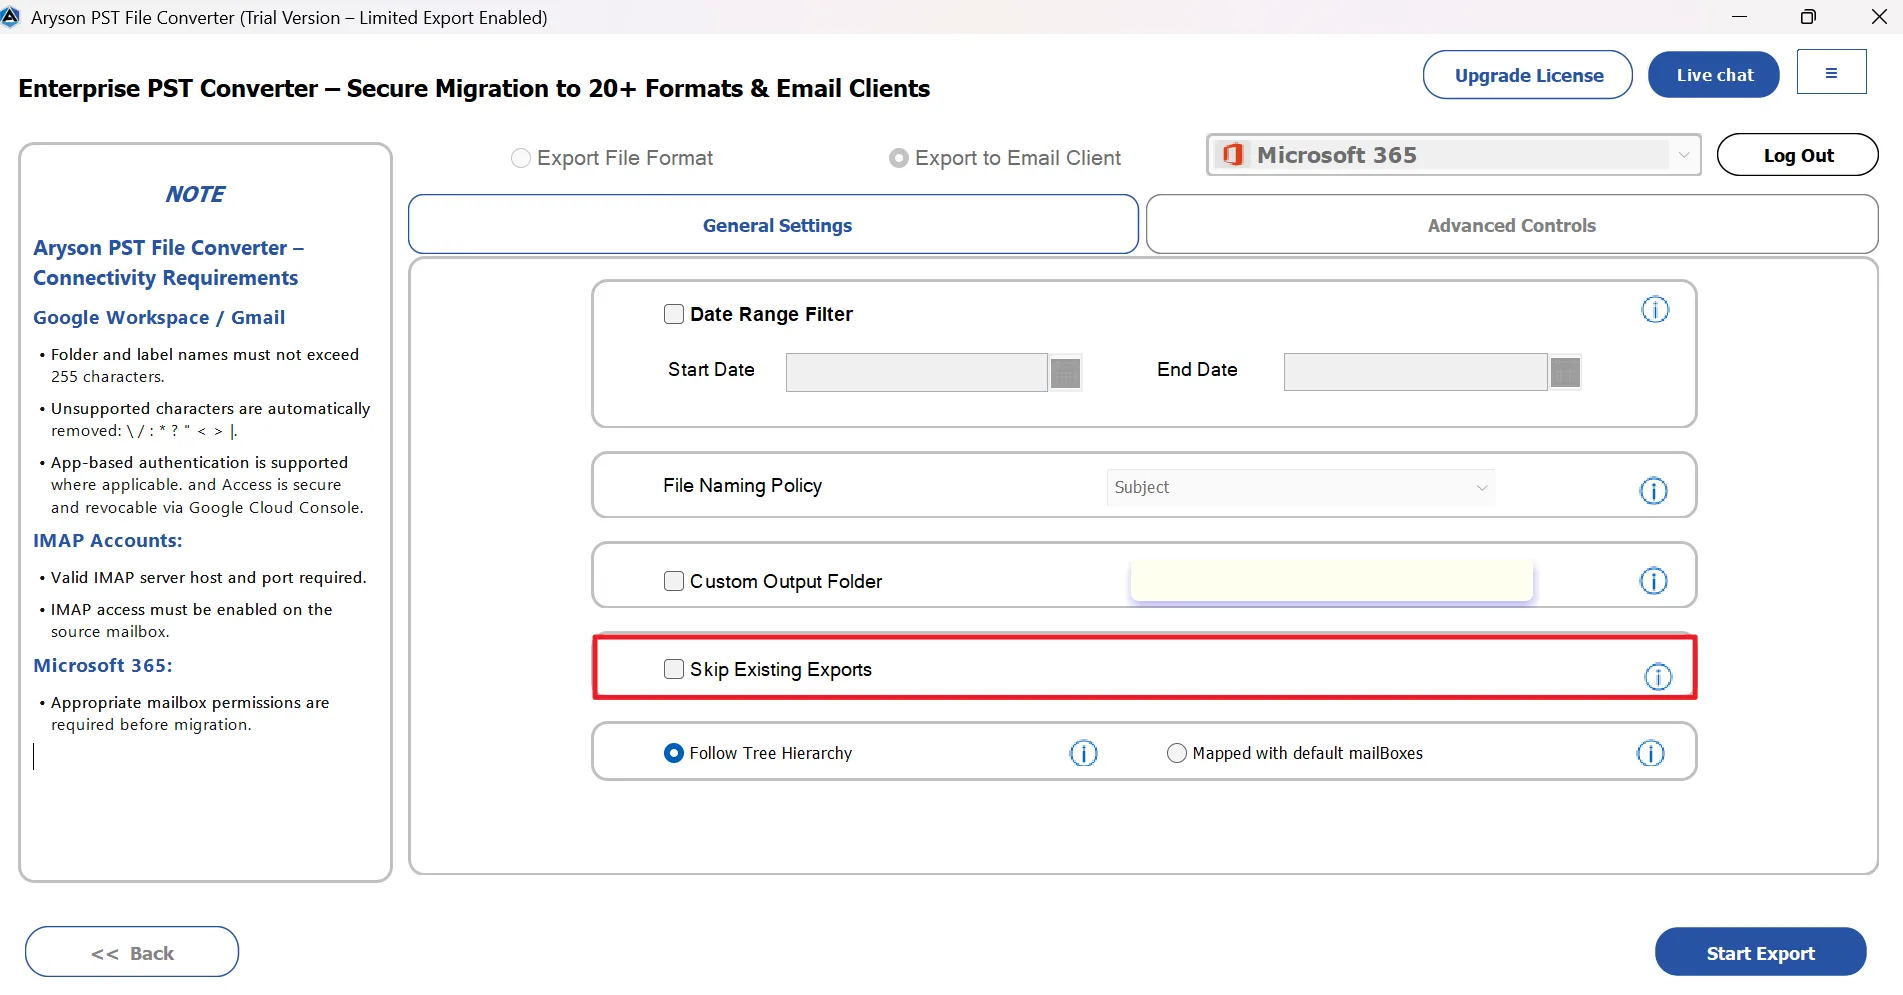
Step 16: Follow Tree Hierarchy: Select this radio button to maintain the original folder structure during migration to Office 365.

Step 17: Attachment Handling: Provides options to embed attachments, export them separately, or exclude them.
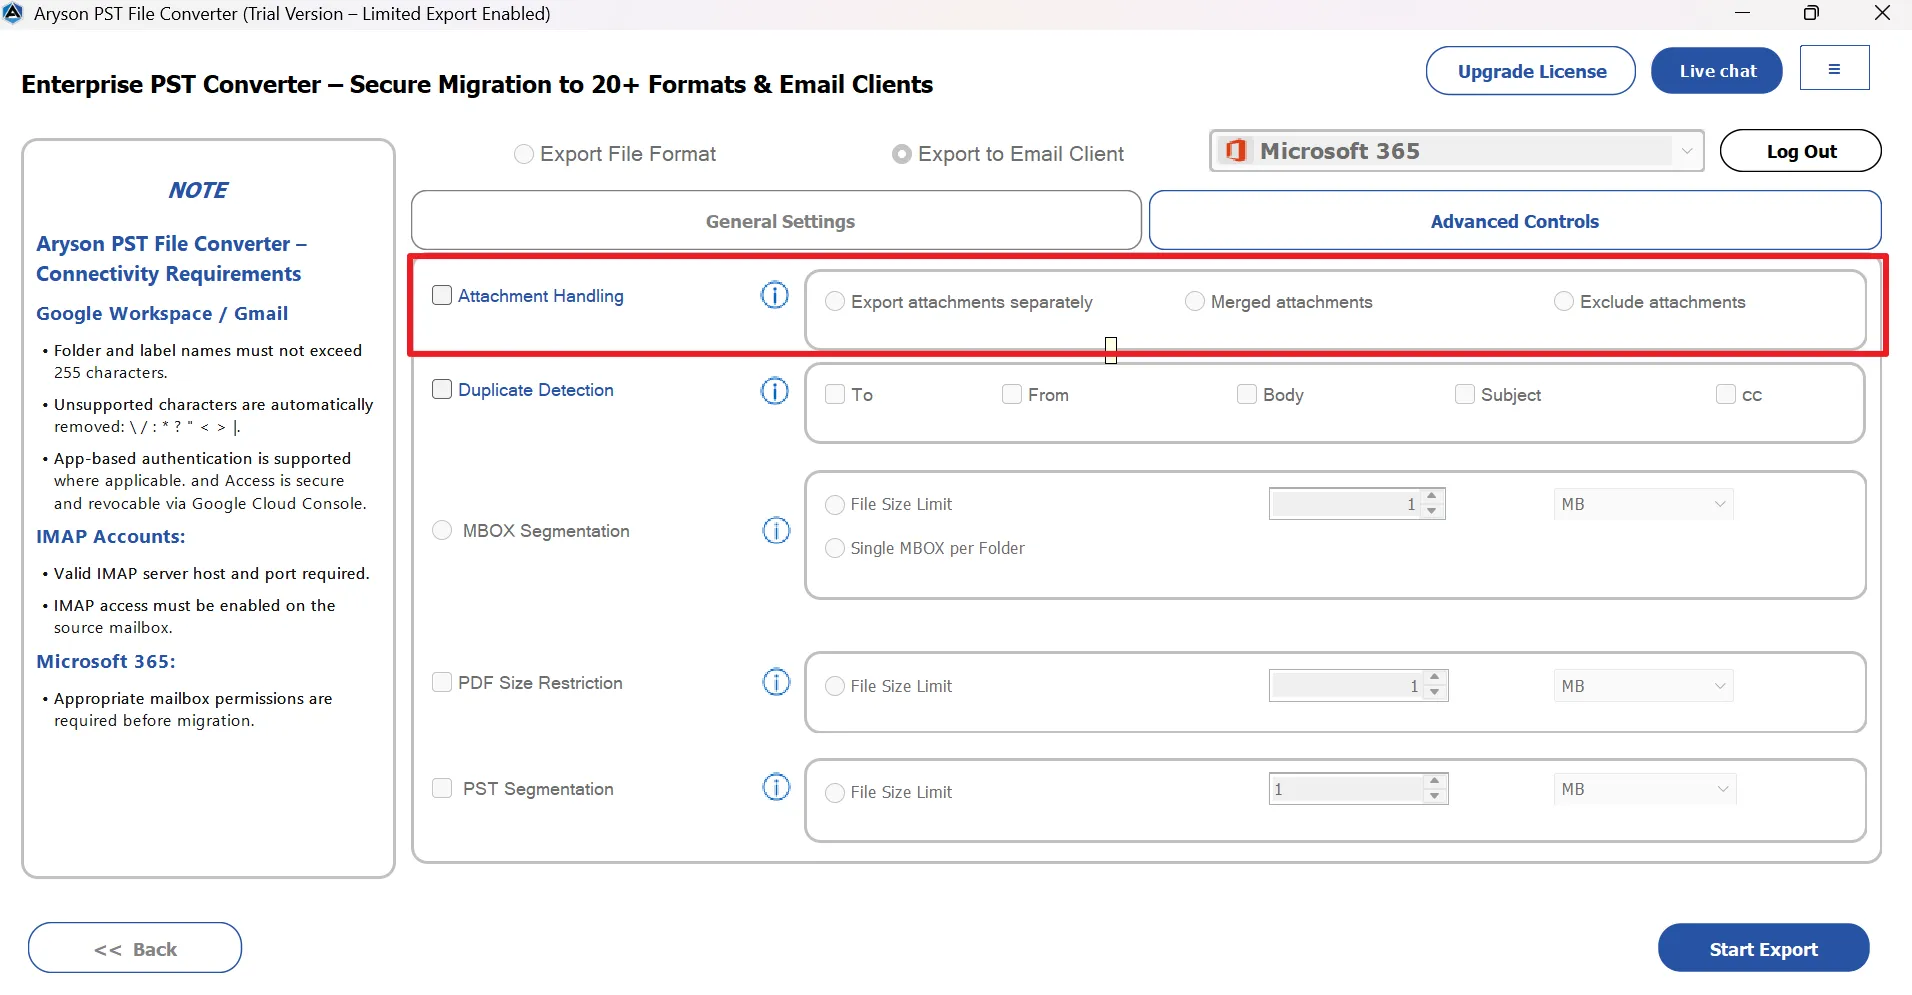
Step 18: Duplicate Detection: Removes duplicate emails based on selected fields like "To," "From," "Subject," or
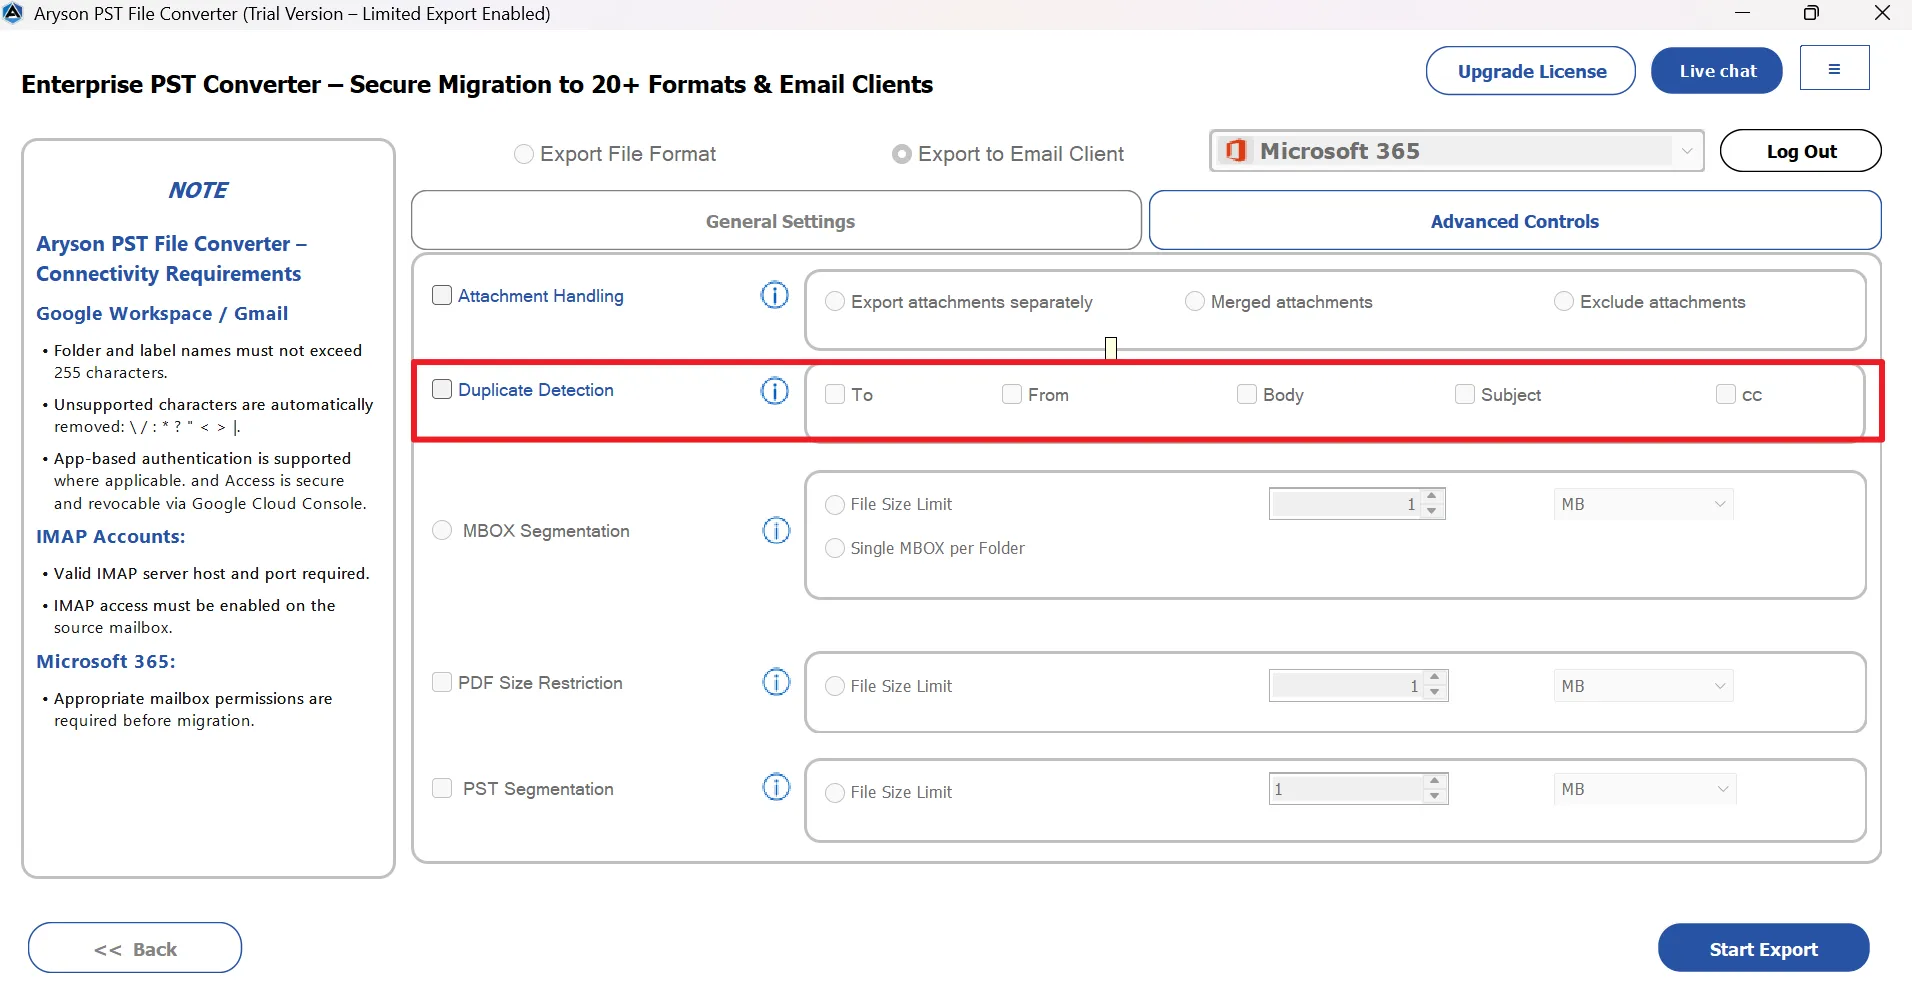
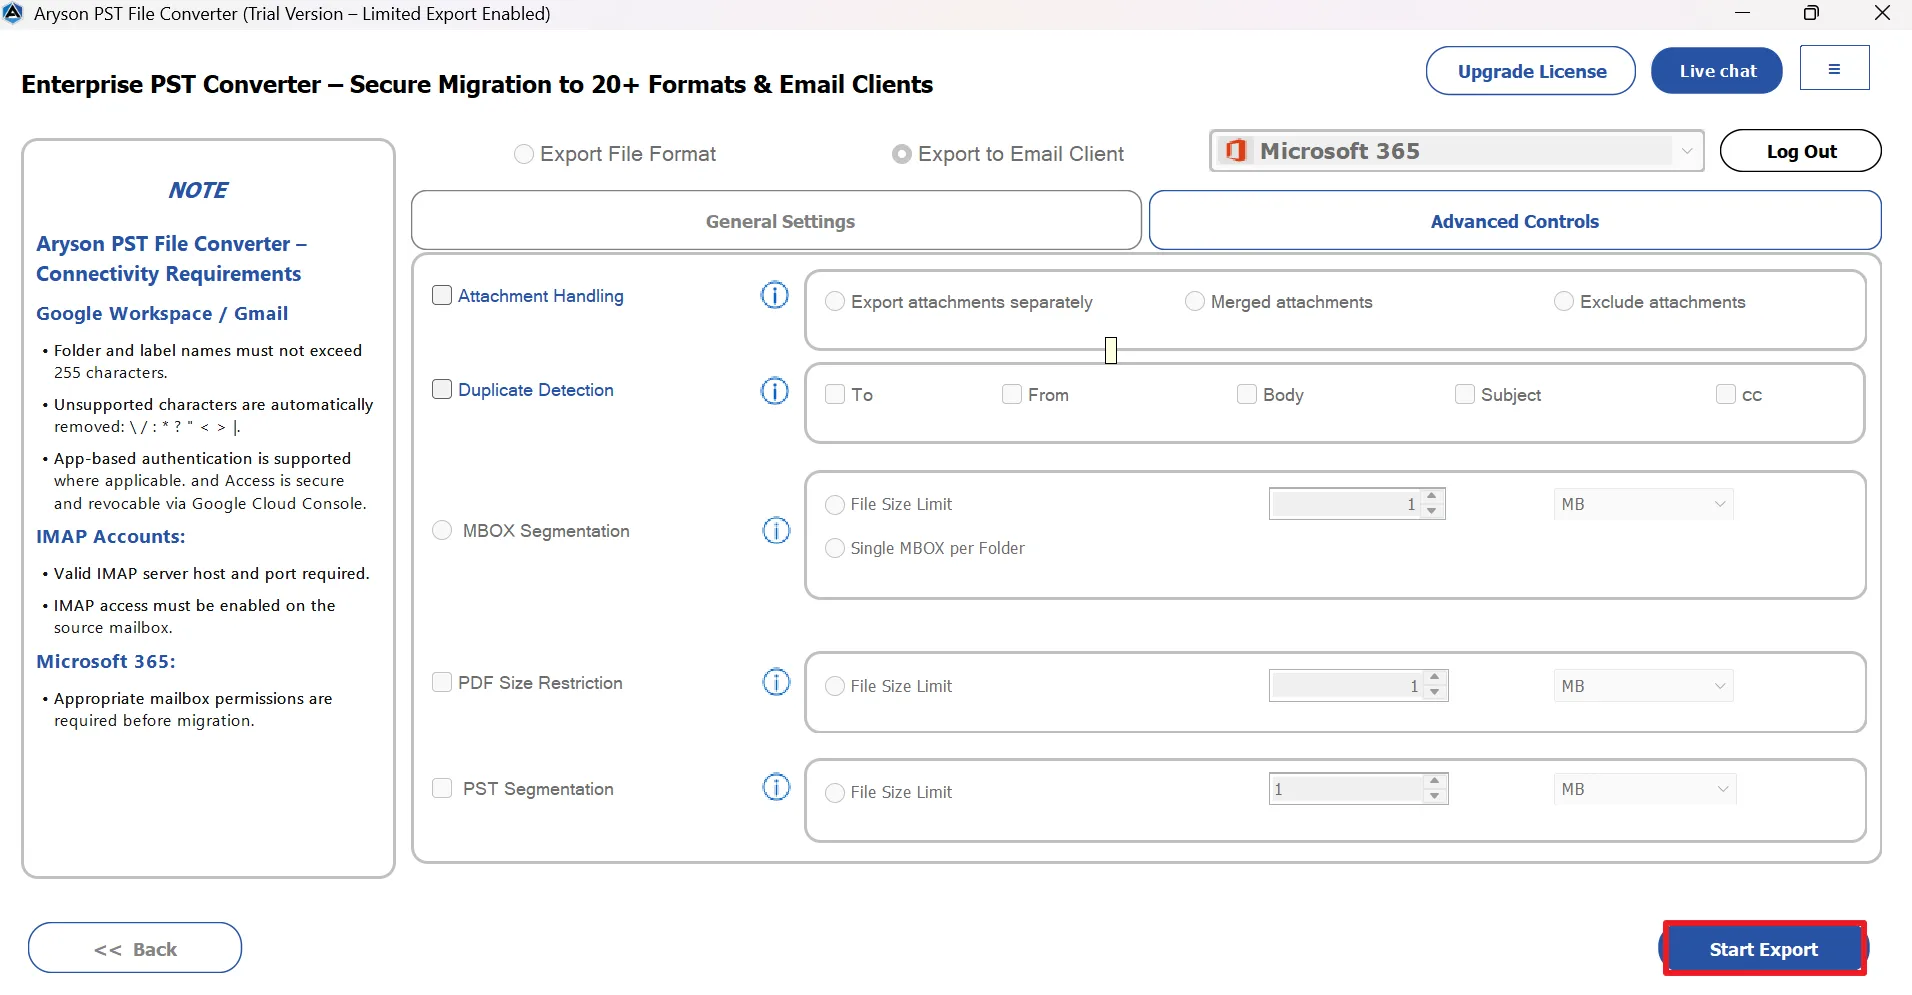
Step 19: Click on the Start Export button to begin the conversion process.
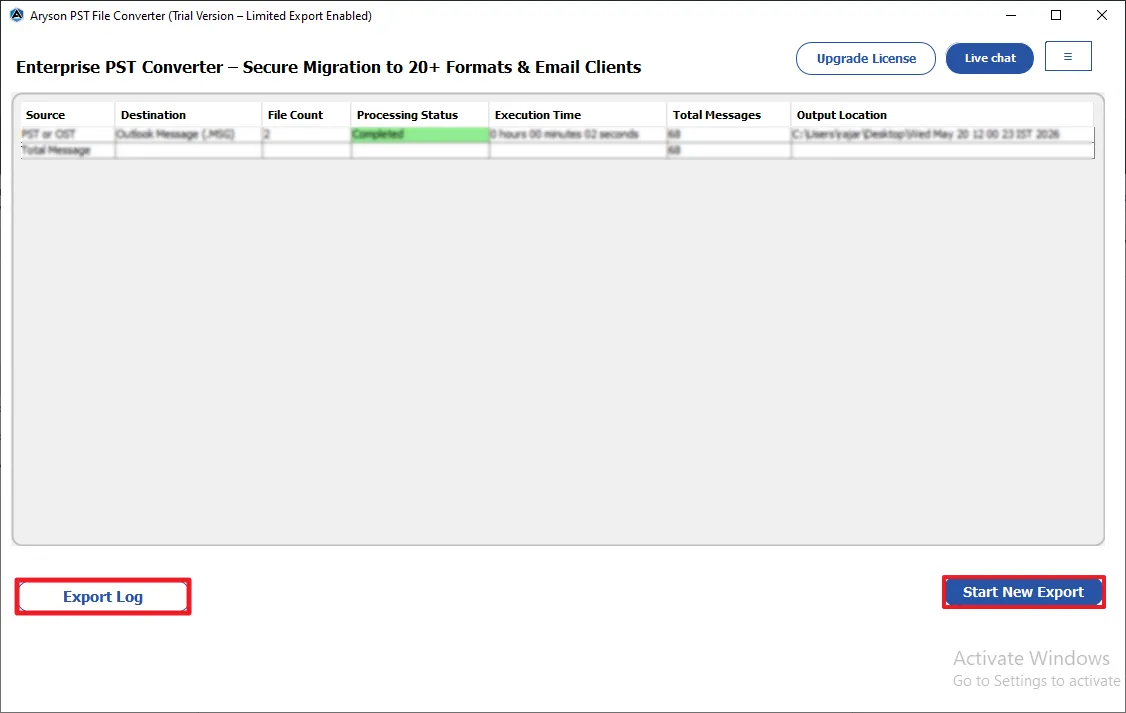
Step 20: After completion, the Conversion Report displays Source, Destination, File Count, Processing Time, Execution Time, Total Messages, and Output Location.

Step 21: After conversion, details:
- Start New Export: Start another conversion
- Export Log: Save the conversion report in CSV format.
Step 1: Download and install the Aryson PST Converter Tool on your system.

Step 2: Run it as administrator and activate it using the license key (or continue with the demo version ).

Step 3: Choose how you want to add the required PST data into the software:
- Select Files: Press this button to add single or multiple PST files.
- Select Folder: Use it to add an entire folder that contains PST files.
- Remove Selected: Delete selected PST files from the list.
- Clear List: Clear all added PST files.
- Proceed: Click on the Proceed button to proceed further.
- Drag and Drop functionality: The user may add the required PST files using the drag-and-drop features of the software.

Step 4: Browse your system, select the required PST/OST file/folder, and click Open to load them into the software.

Step 5: The loaded PST/OST files appear in a structured Table of the selected data
- Sr. no.: Displays the serial number assigned to each loaded PST/OST file.
- Name: Shows the name of the selected PST/OST file added to the software.
- File Path: Indicates the exact location where the PST/OST file is stored on the system
- No. of Files: Displays the total number of PST/OST files added for conversion or migration.
- Select All: Allows you to quickly select or deselect all listed PST/OST files at once.
Verify the selected files and click Proceed.

Step 6: The software will automatically detect the corrupted, blank, and invalid PST/OST files and display them in the software panel.
Step 7: Now, an advanced preview panel will appear. Expand the tree-like hierarchy of the selected files and folders.

Step 8: Preview the emails and their associated attachments. The preview panel displays:
- From: Displays the sender’s email address and information for the selected email.
- To: Shows the recipient’s email address to whom the message was sent.
- Subject: Indicates the subject line of the selected email.

Step 9: You may use the other options for better filtering of PST/OST data.
- Search Folders: Find specific folders by entering keywords from the folder name.
- Advanced Search: Search emails using "To," "From," or "Subject" criteria of emails.
- Open in Browser: Opens the selected email in a web browser if the preview is not displayed properly in the software.
You can also preview emails in the following:
- HTML format: Displays the email with its original formatting, including fonts, colors, and images.
- Plain text: Shows the email content in simple text without any formatting.
- Headers: Displays detailed technical header information of the email.
- MIME: Shows the MIME structure and encoding details of the message.
- Raw HTML: Displays the original HTML source code of the email message.
- Calendars: Displays the calendars' associated fields.
- Contacts: Shows the information like phone numbers, emails, etc.
- Tasks: Displays the fields like start date, end date, due date, and sensitivity.
- Notes: To preview the notes' content and their creation date.
- Raw HTML: Displays the original HTML source code of the email message.

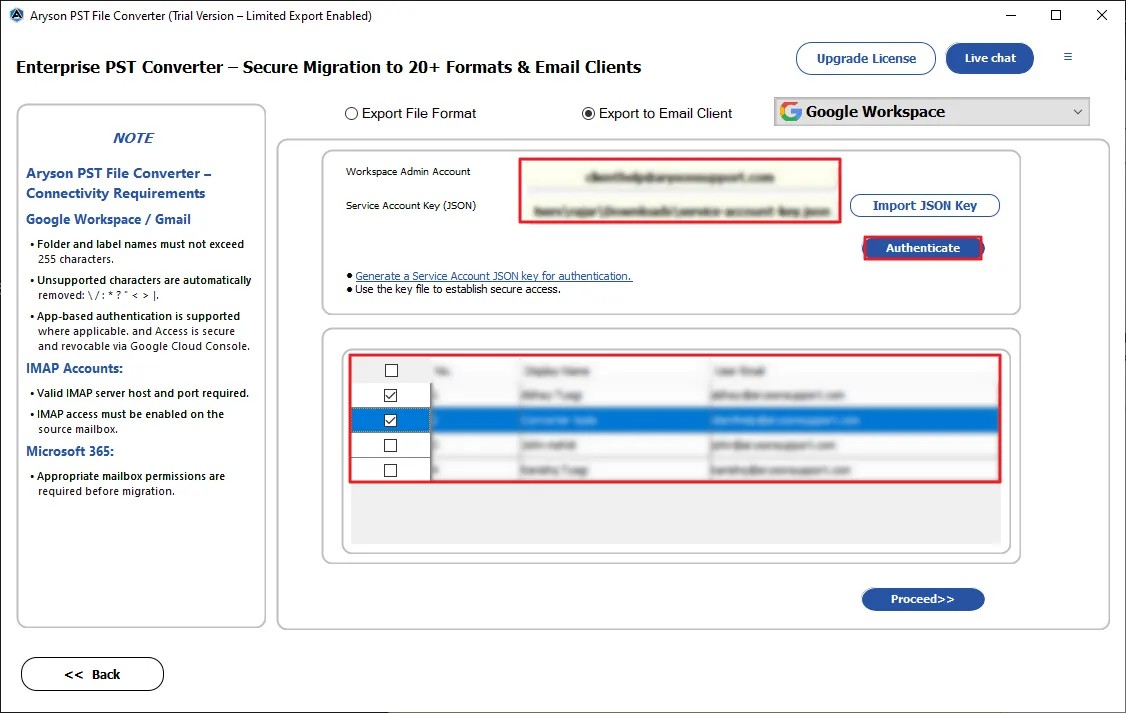
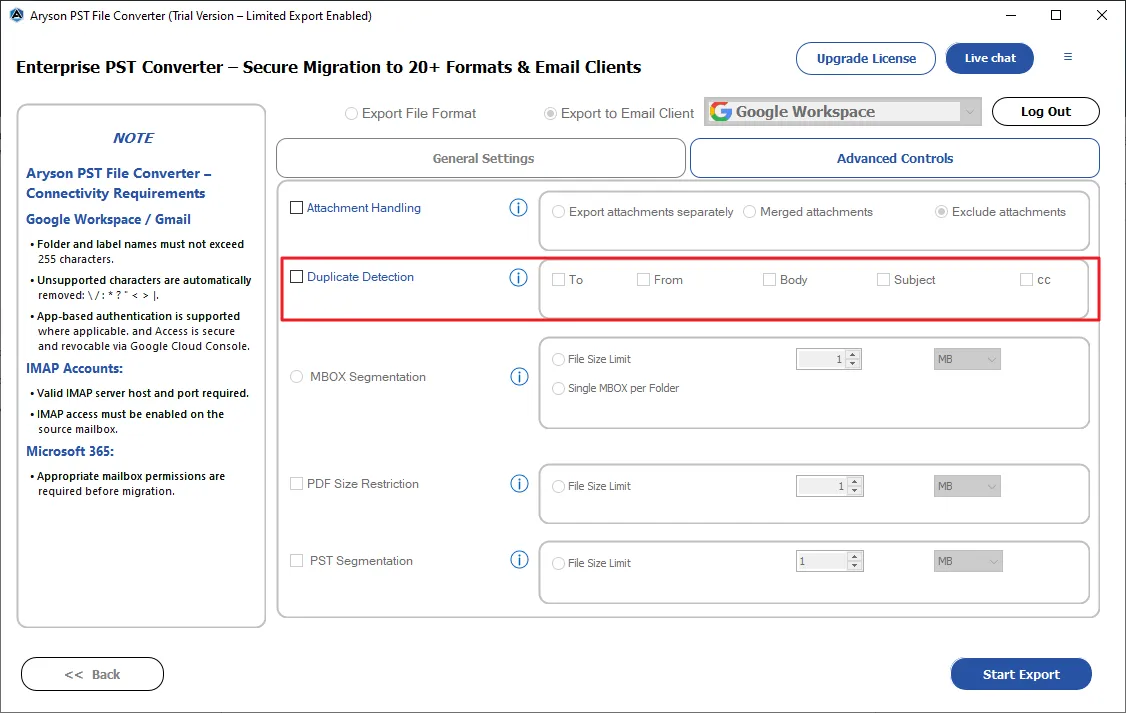
Step 10: Under the Export to Email Clients dropdown list, choose Google Workspace.
Step 11: Enter the required admin account ID and JSON key to log in.
Step 12: Date Range Filter: Allows you to migrate emails within a specific date range by selecting the Start Date and End Date.
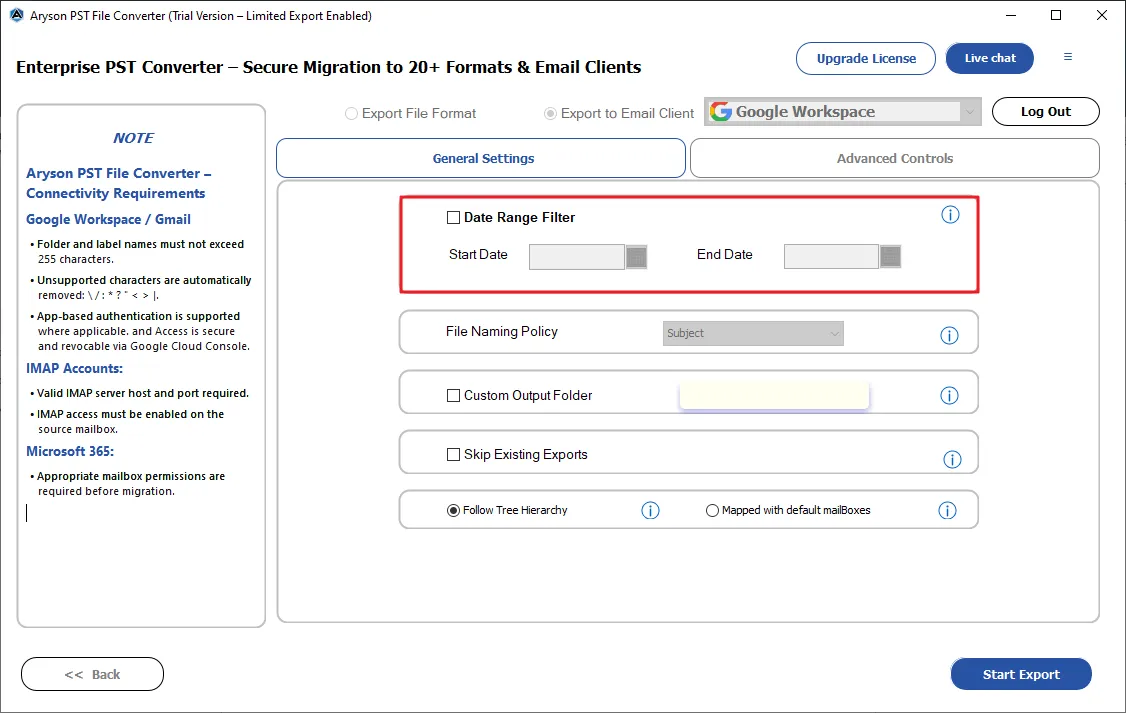
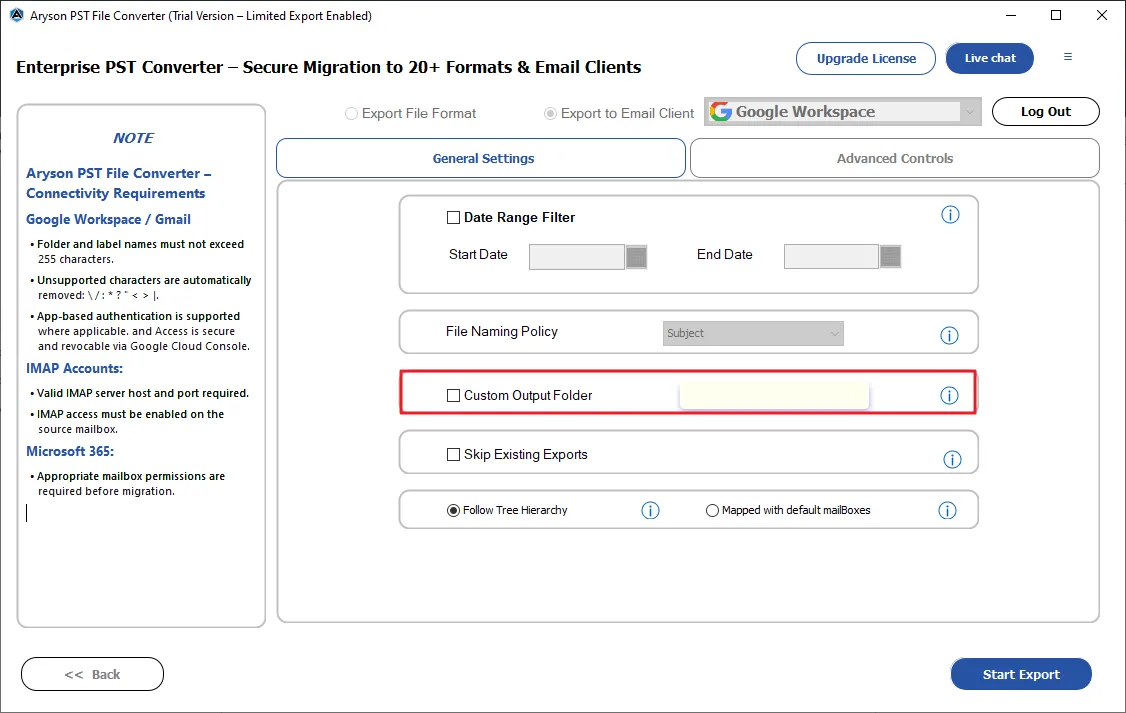
Step 13: Custom Output Folder: Enables you to define a custom folder name for storing migrated data.
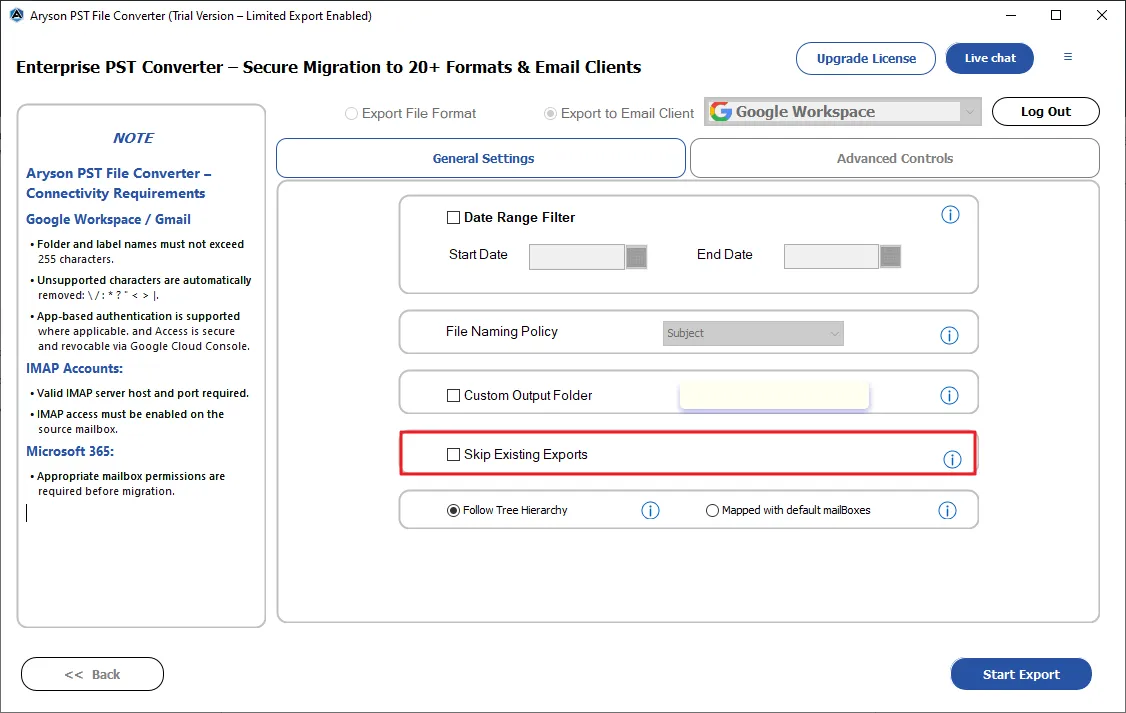
Step 14: Skip Existing Exports: Prevents duplicate migration by skipping already-migrated emails.
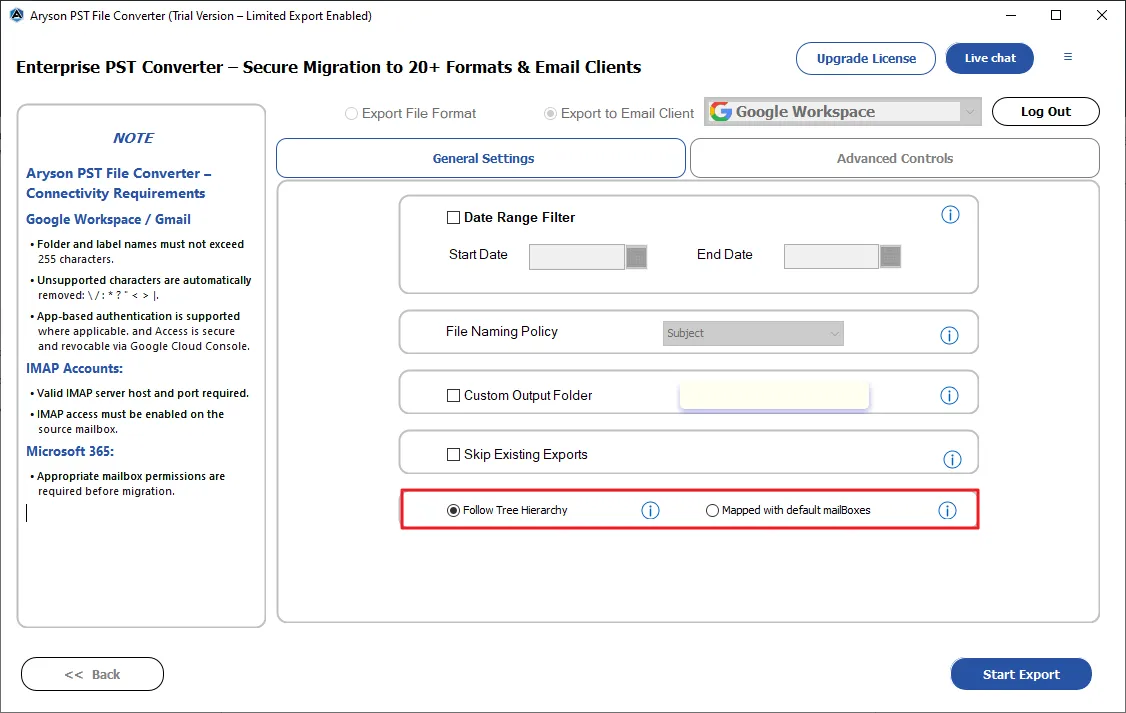
Step 15: Follow Tree Hierarchy: Select this radio button to maintain the original folder structure during migration to Office 365.
- Mapped with Default Mailboxes: To map OST/PST files to the default Outlook folders.
Step 16: Attachment Handling: Provides options to embed attachments, export them separately, or exclude them.
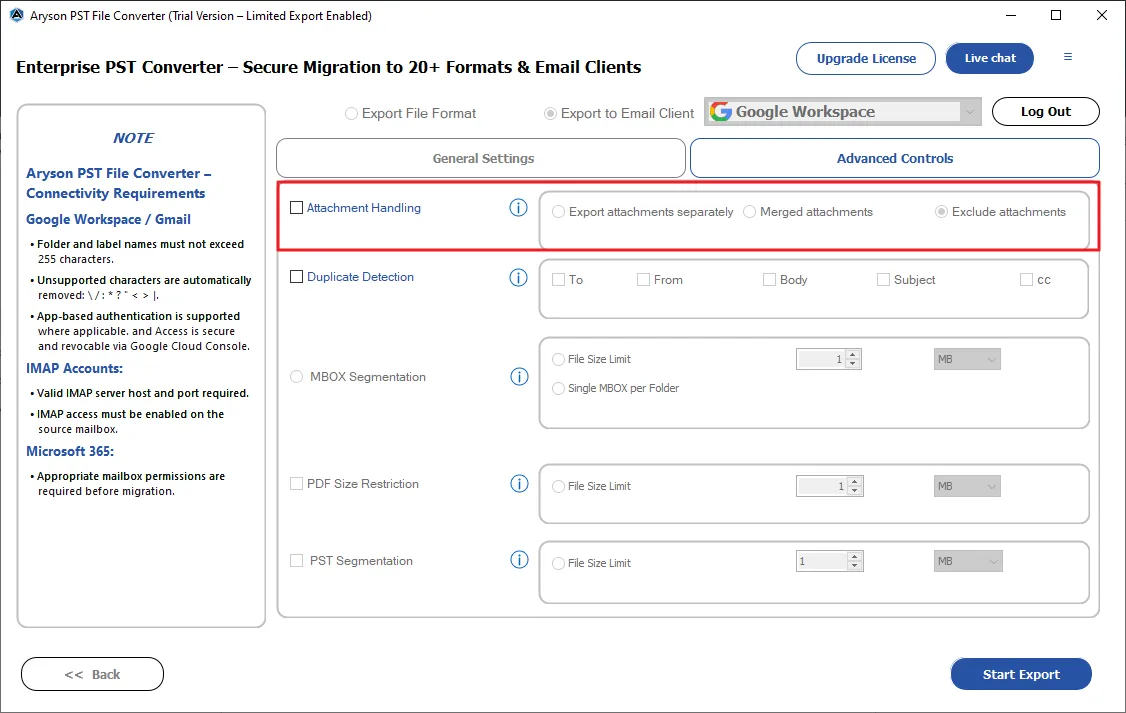
Step 17: Duplicate Detection: Removes duplicate emails based on selected fields like "To," "From," "Subject," or "Body."
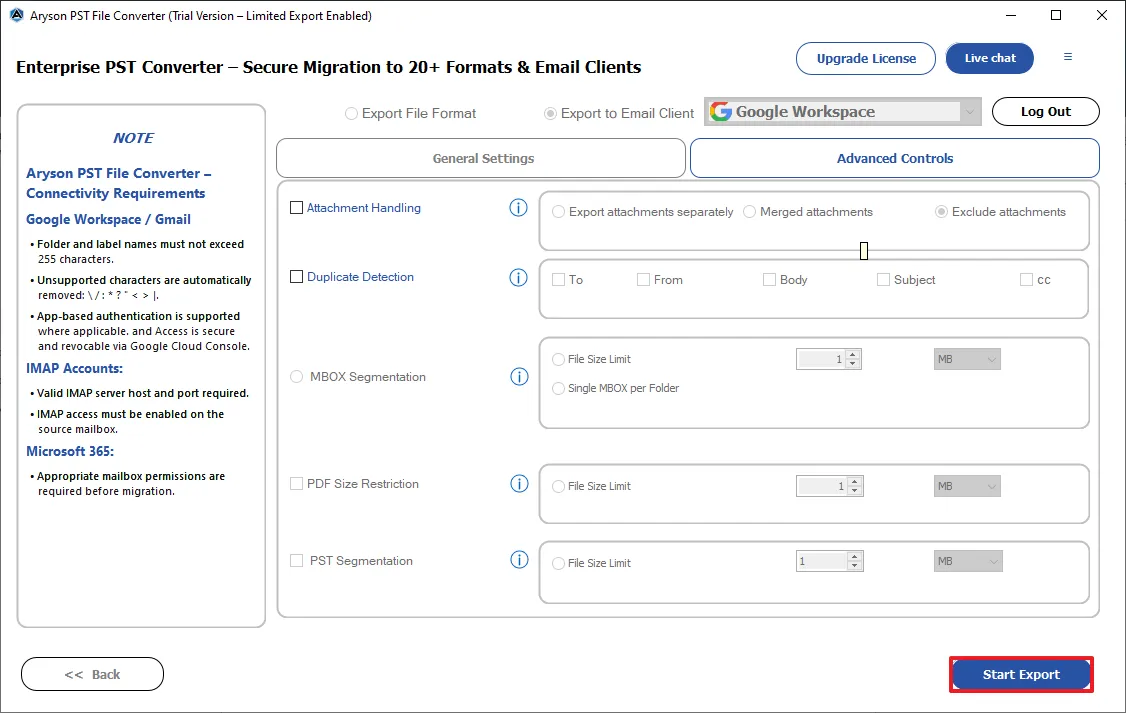
Step 18: Click on the Start Export button to begin the conversion process.
Step 19: After completion, the Conversion Report displays Source, Destination, File Count, Processing Time, Execution Time, Total Messages, and Output Location.
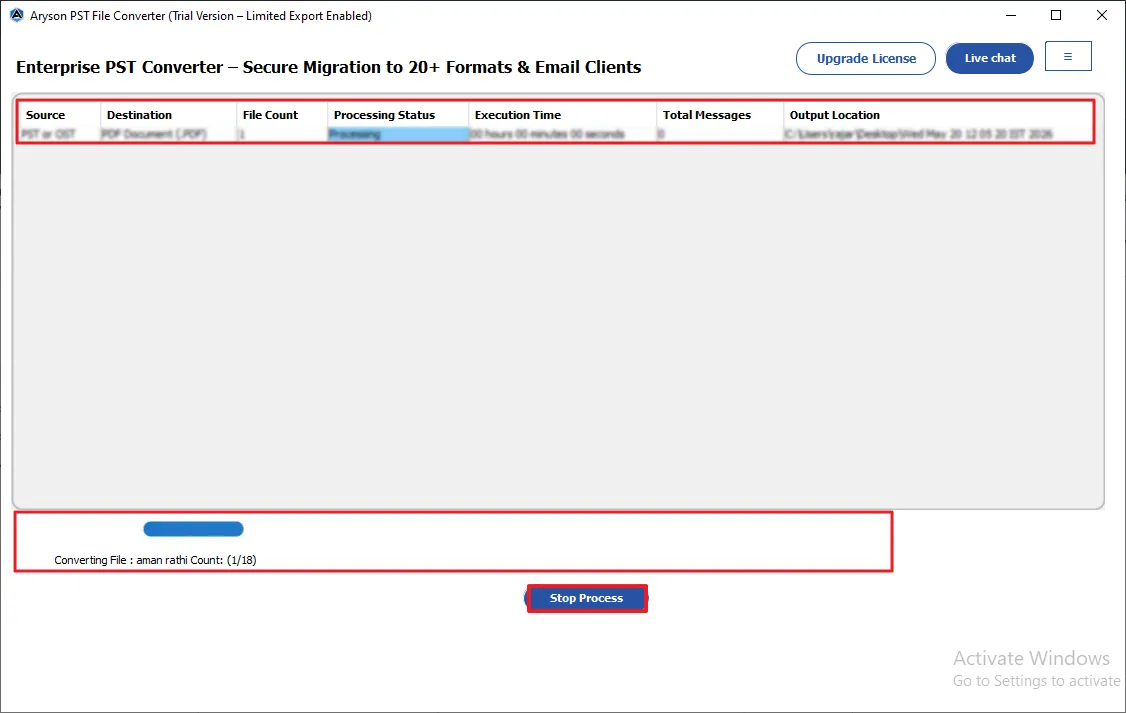
Step 20: After conversion, details
- Start New Export: Start another conversion
- Export Log: Save the conversion report in CSV format.

Activation Guide
Activate the Software
Installation & Uninstallation
Installation & Uninstallation of Software
User Interface
User Interface
After downloading the Aryson PST Converter Tool, you will find the welcome screen as played below.