Complete Step-Wise Guides for Aryson OneDrive Migration Tool
Easily transfer your files between OneDrive accounts, to other cloud platforms like Google Drive, or to a local system with ease. This software is powered by Microsoft Graph API and OAuth 2.0 authentication; the tool ensures safe, reliable, and lossless migration for both individual users and enterprise-level, admin-managed environments. For any issues, you can refer to the Functional & Technical Documentation (FTD) Guide for complete assistance.
- Table of Content
- Software Working Process
- Activation Guide
- Installation & Uninstallation
- User Interface
Software Working Process
Software Working Process
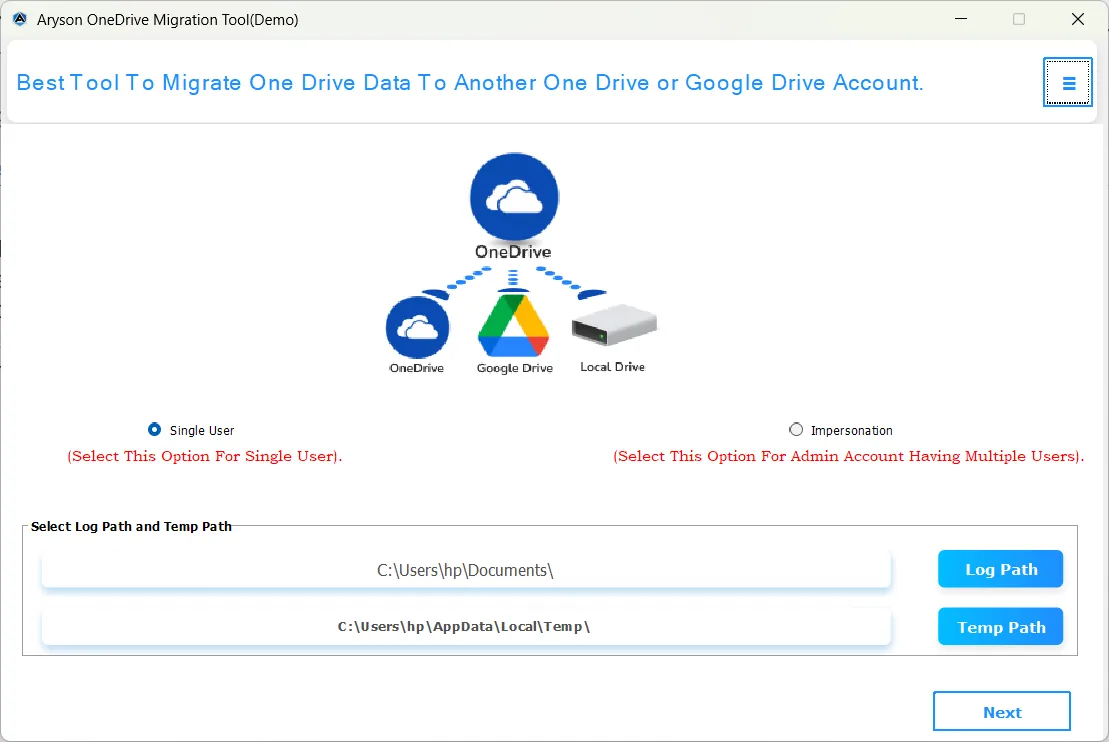
Step 1: Download & install the Aryson OneDrive Migration Tool, and launch it.

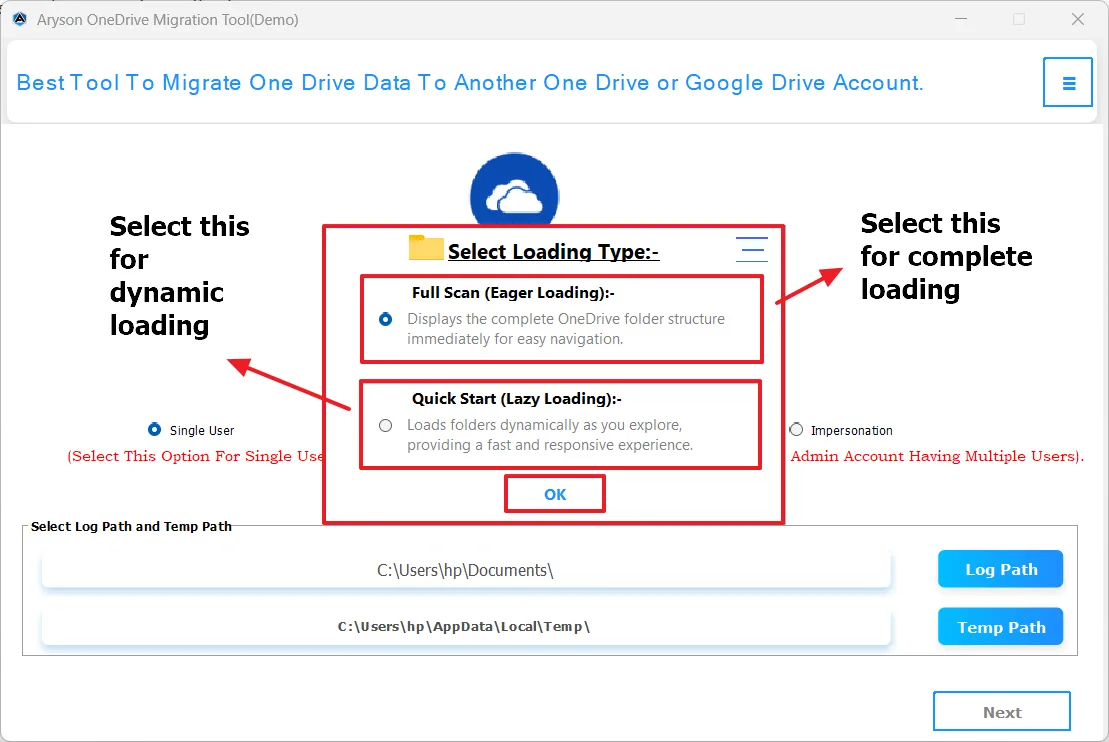
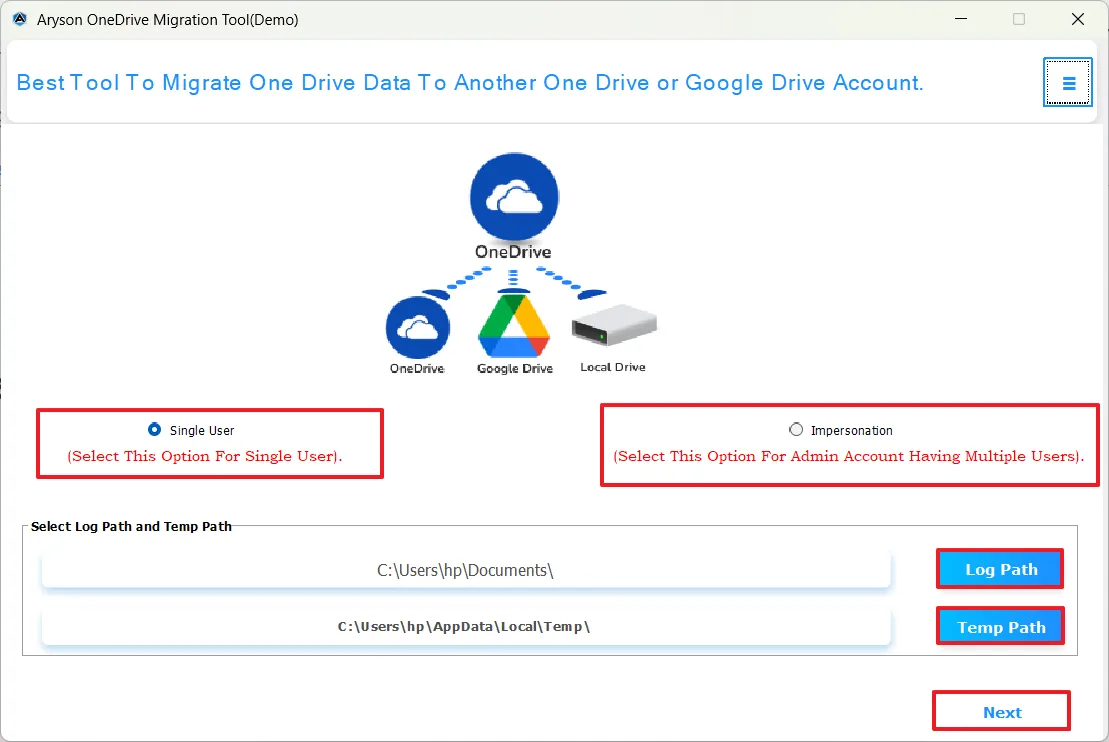
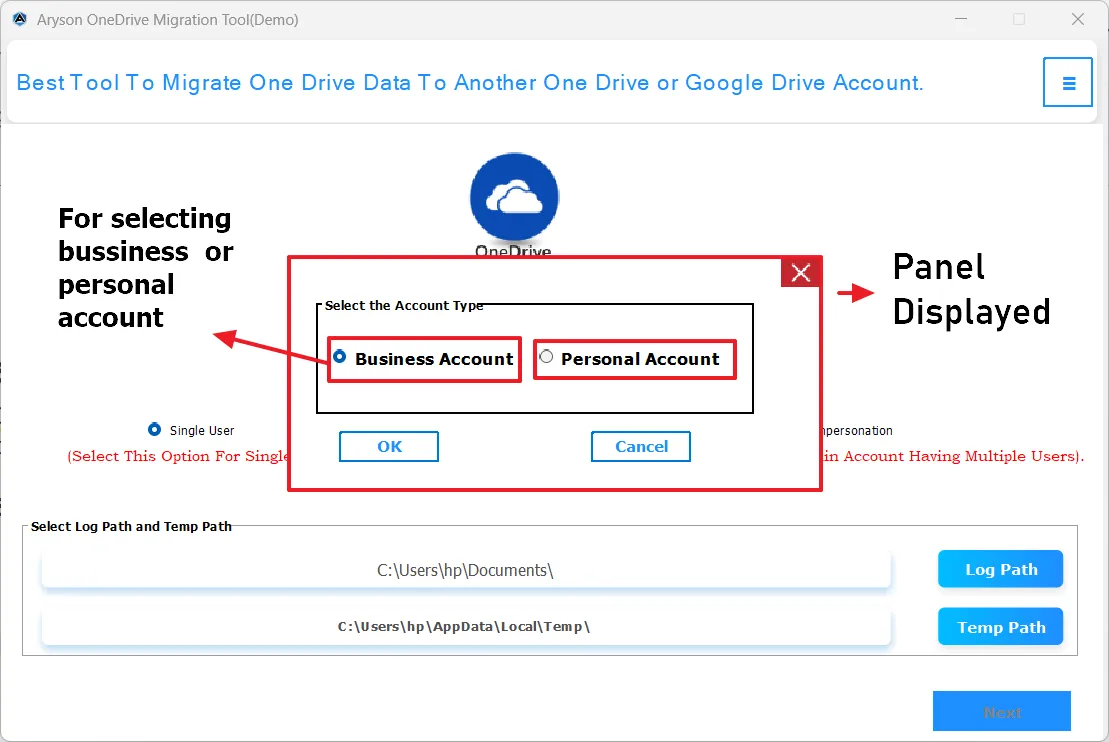
Step 2: Select Single User or Impersonation login method as per your preference. Specify the Log Path and Temp Path as you require.

Step 3: For the Single User login, select the personal or business account.

Step 4: Now, specify the type of loading, i.e the full scan or dynamic loading.
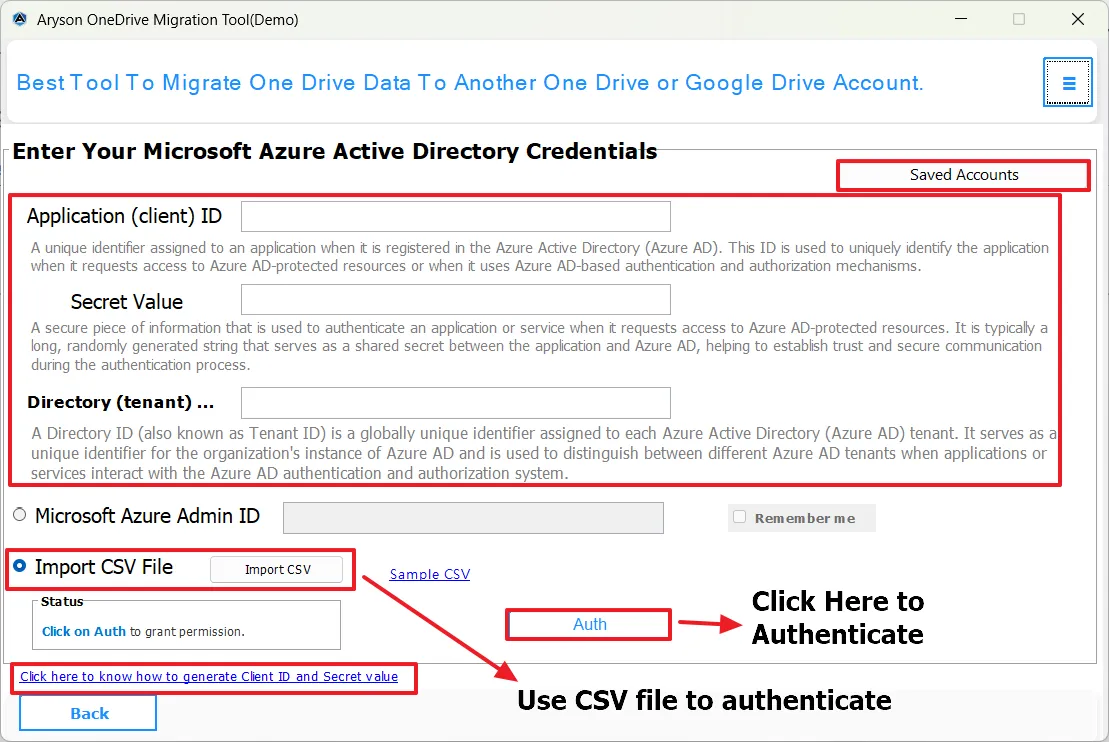
Step 5: For impersonation login, choose the authentication method (Azure AD credentials or CSV import). In this panel, you have to enter:
- Application (Client) ID: Unique Azure AD identifier for application authentication.
- Secret Value: Secure key used to authenticate the application.
- Directory (Tenant) ID: Unique Azure AD Tenant identifier.
- Microsoft Azure Admin ID: Enter the administrator account ID.
- Import CSV File: Upload a CSV containing multiple user accounts (sample provided).
- Auth Action: Click Auth to grant required permissions.
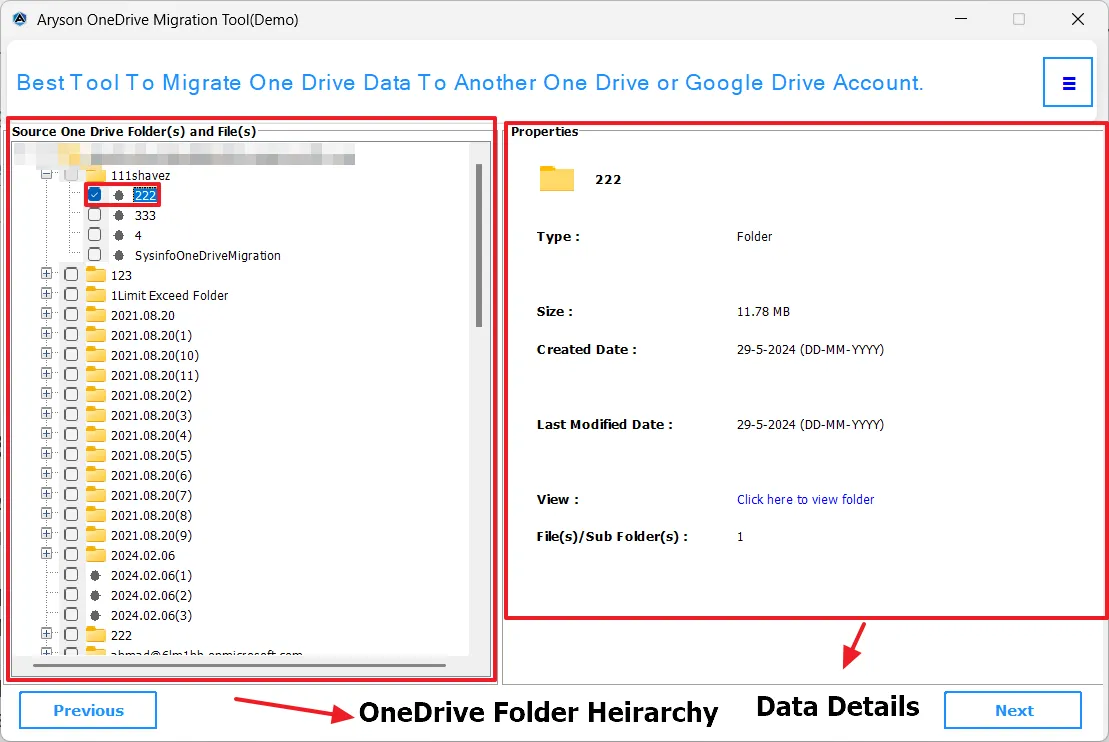
Step 6: All your Outlook data is loaded into the software. You can review and verify OneDrive data before migration. This preview panel includes:
- OneDrive Folder Structure: Displays files and folders in a tree view on the left panel.
- Storage Details: Shows the Total space, used space, and remaining space of the source account in the right panel.
- Data Selection: Expand the tree and select specific files or folders for migration.
- File Type: Indicates whether the selected item is a file or folder.
- Size: Displays the size of the selected data.
- Creation Date: Shows when the file or folder was created.
- Last Modified Date: Indicates the most recent modification date.
- Browser View: Allows users to preview OneDrive folders directly in the browser.

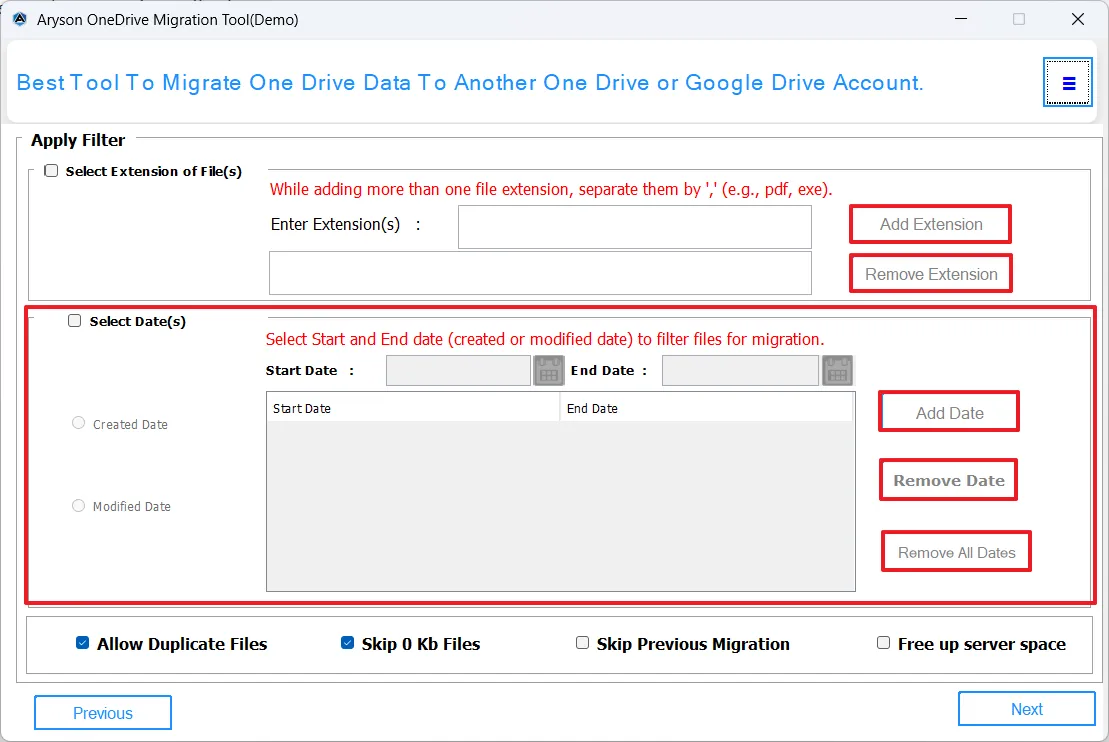
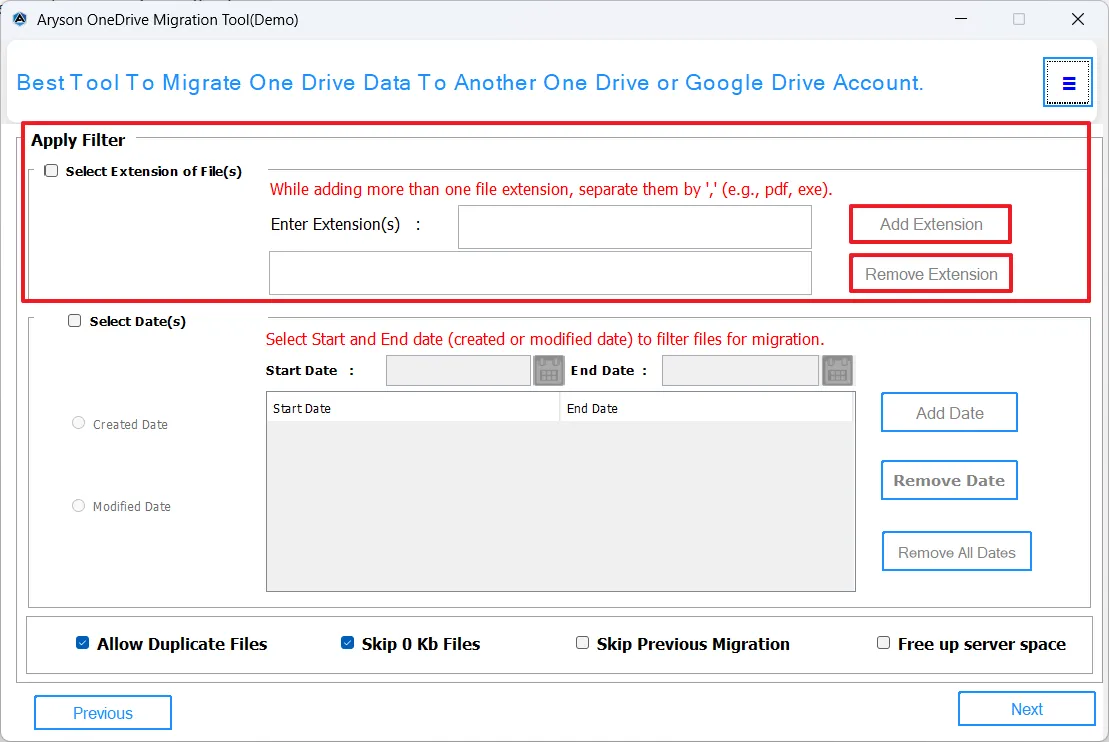
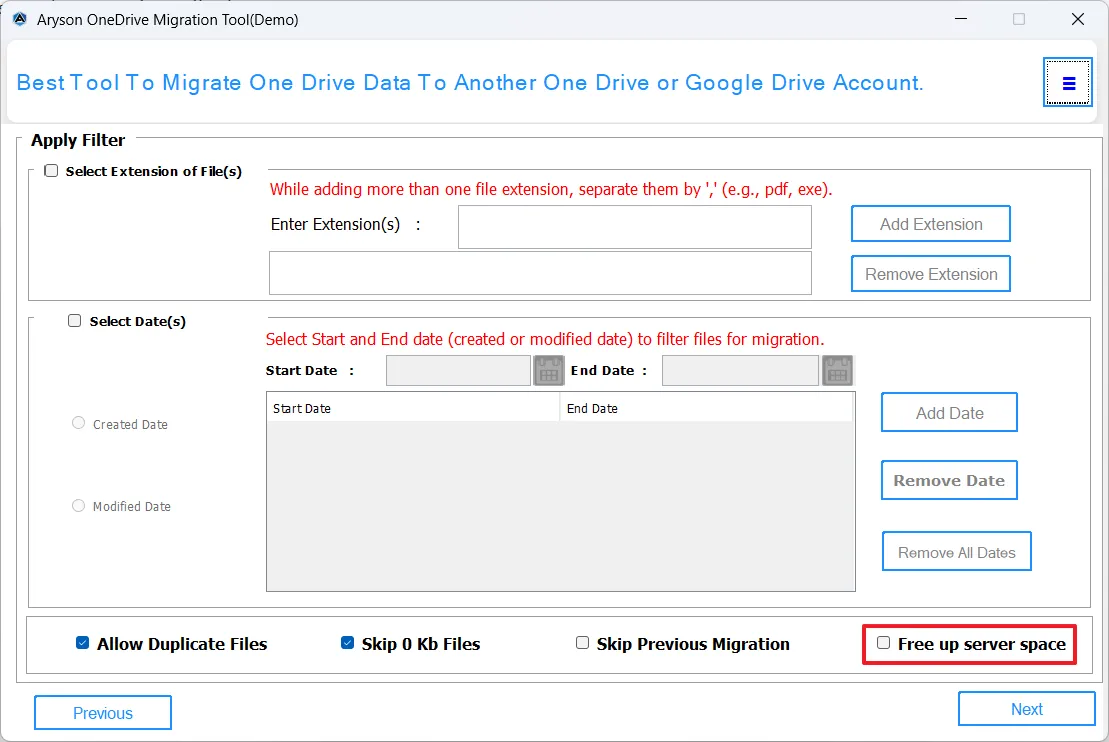
Step 7: Enable the File Extension Filter to migrate only specific file types (such as PDF, DOC, JPG, EXE). Add multiple extensions separated by commas, use the following buttons:
- Add Extension: to include different formats of files.
- Remove Extension: to exclude unwanted formats.

Step 8: Apply the Date-Based Filter to migrate files based on their Created or Modified dates. Set the Start Date and End Date to transfer data from a specific time range only.
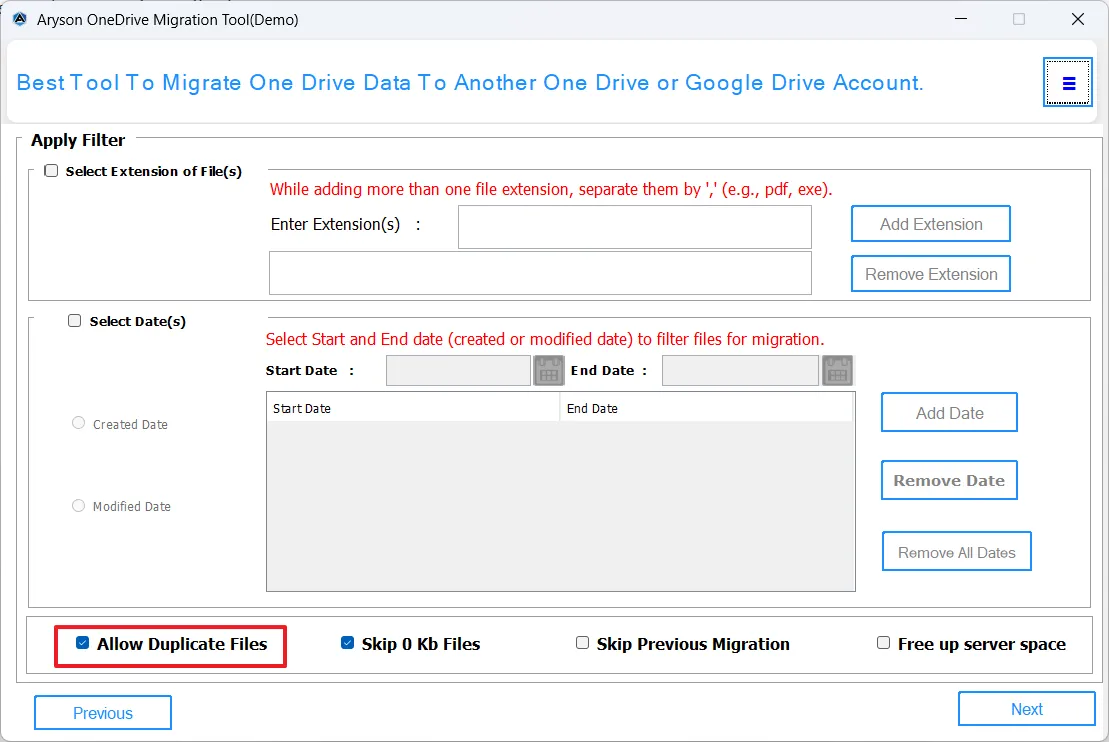
Step 9: Turn on Allow Duplicate Files if you want to migrate duplicate files as well, ensuring that no data is skipped during the migration.

Step 10: Enable Skip 0 KB Files to exclude empty files from migration, improving performance and keeping unnecessary items out of the destination drive.
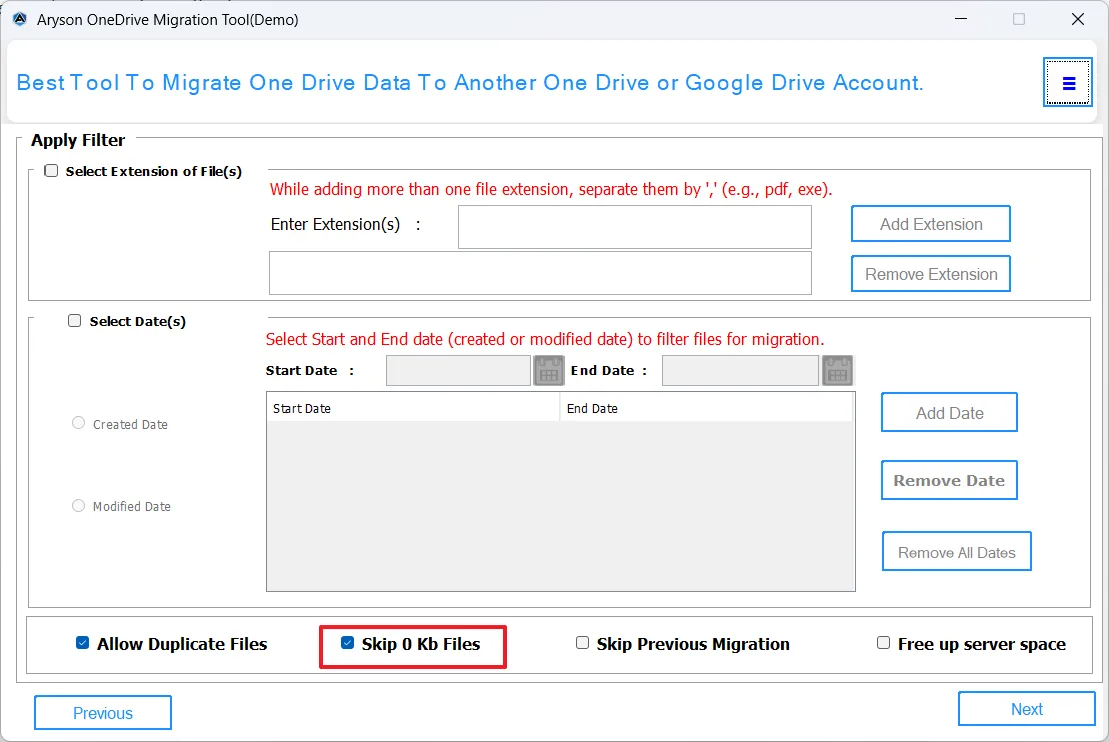
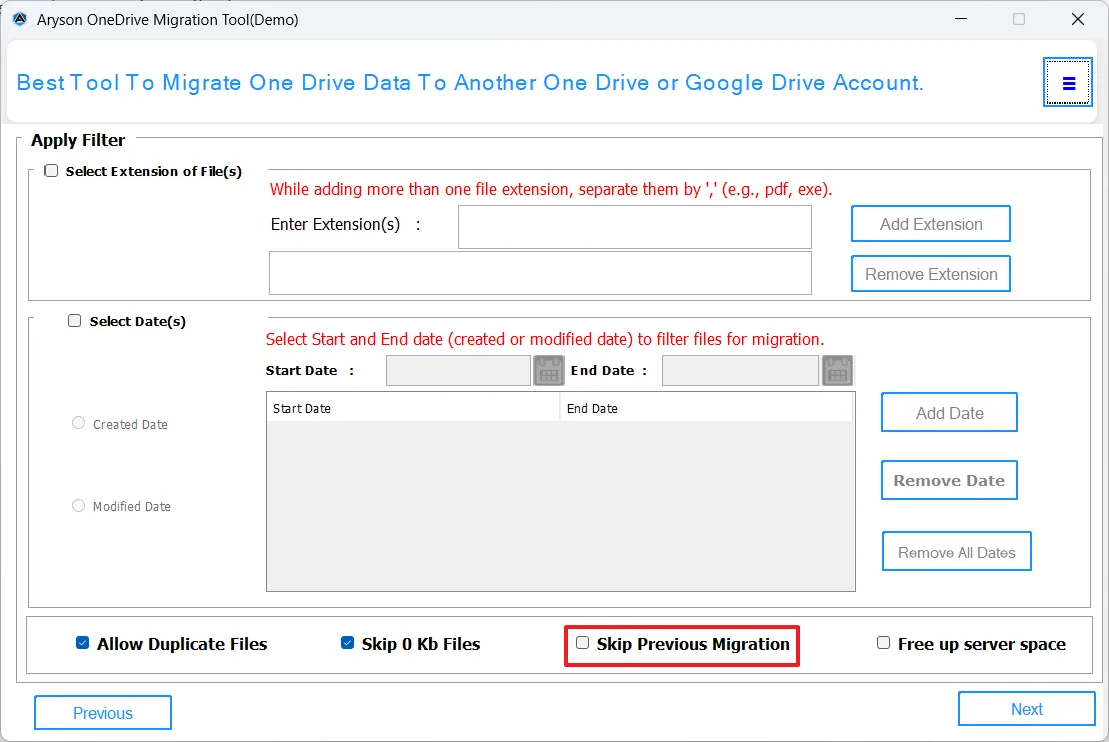
Step 11: Select Skip Previously Migrated Files to avoid re-migrating files that were already transferred in earlier sessions, saving time and storage.

Step 12: Activate Free Up Server Space to automatically delete files from the source after successful migration, helping reclaim storage space efficiently.

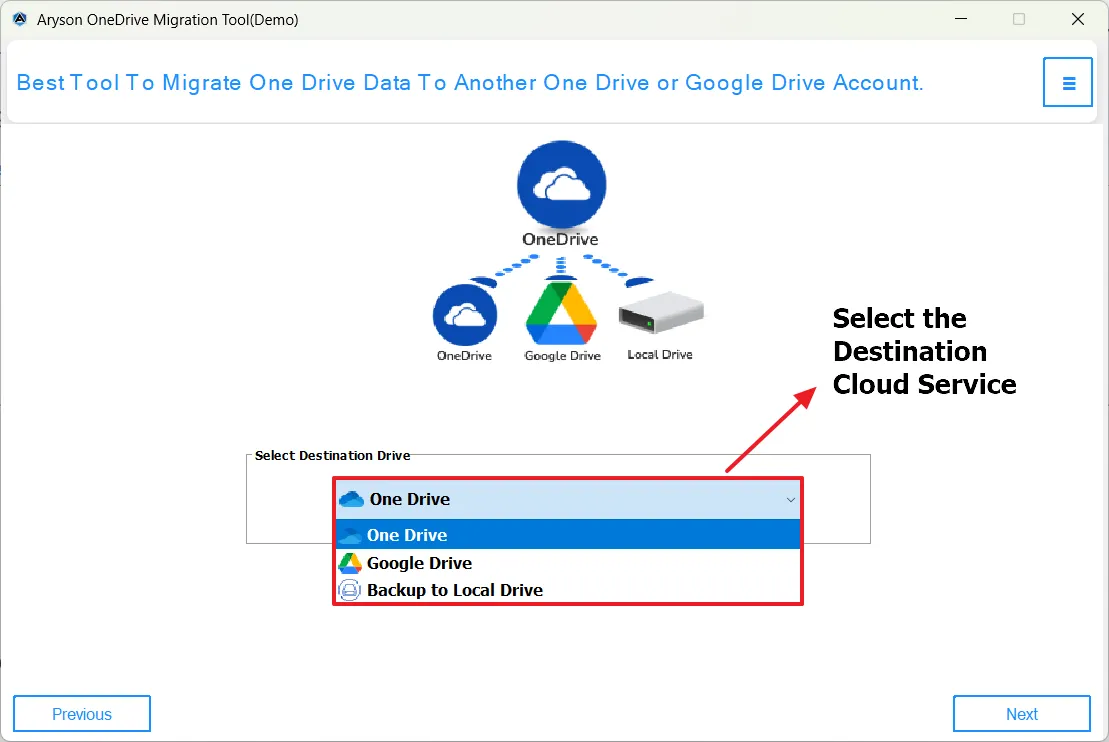
Step 13: Now, choose OneDrive among the listed platforms (OneDrive, Google Drive, Backup to Local Drive).
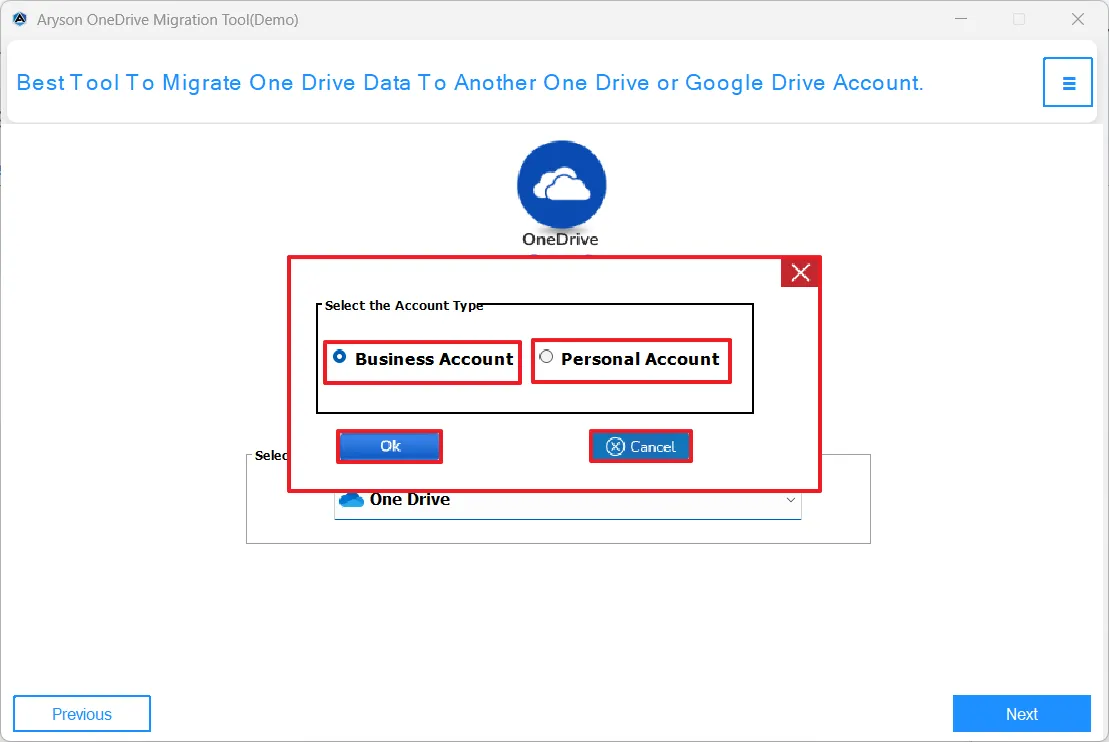
Step 14: Choose the account type as per your requirement, enter credentials & login.
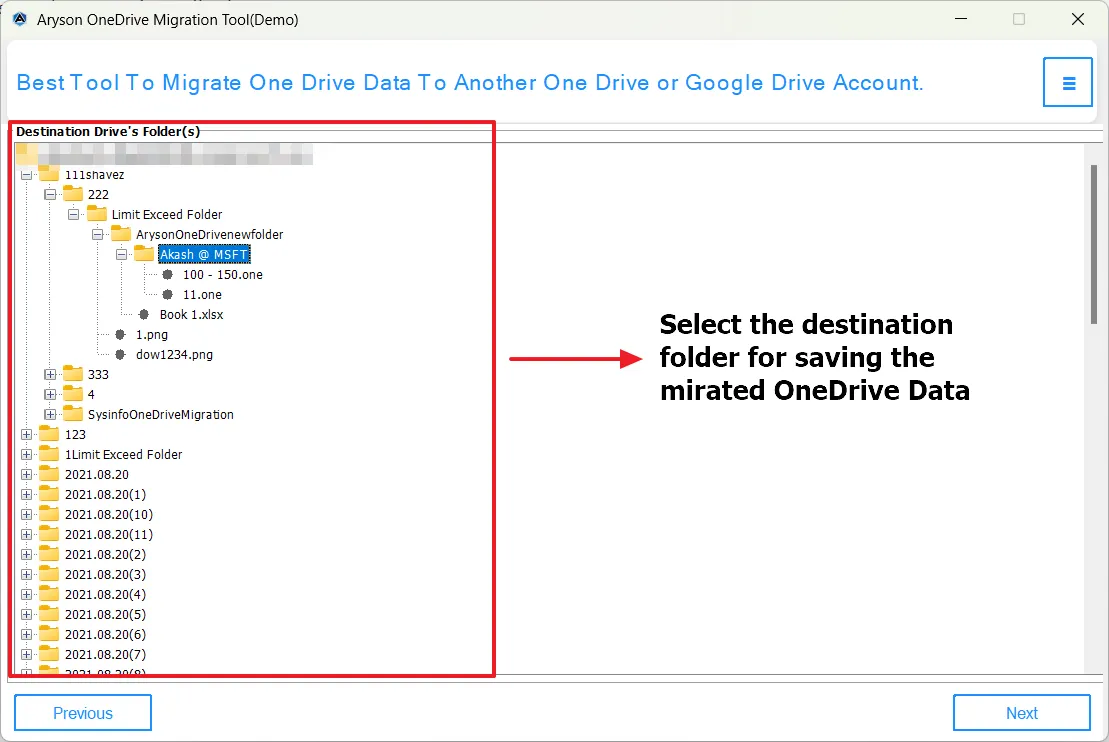
Step 15: Now, from the tree structure appearing on the screen, select the destination folder for your OneDrive data.
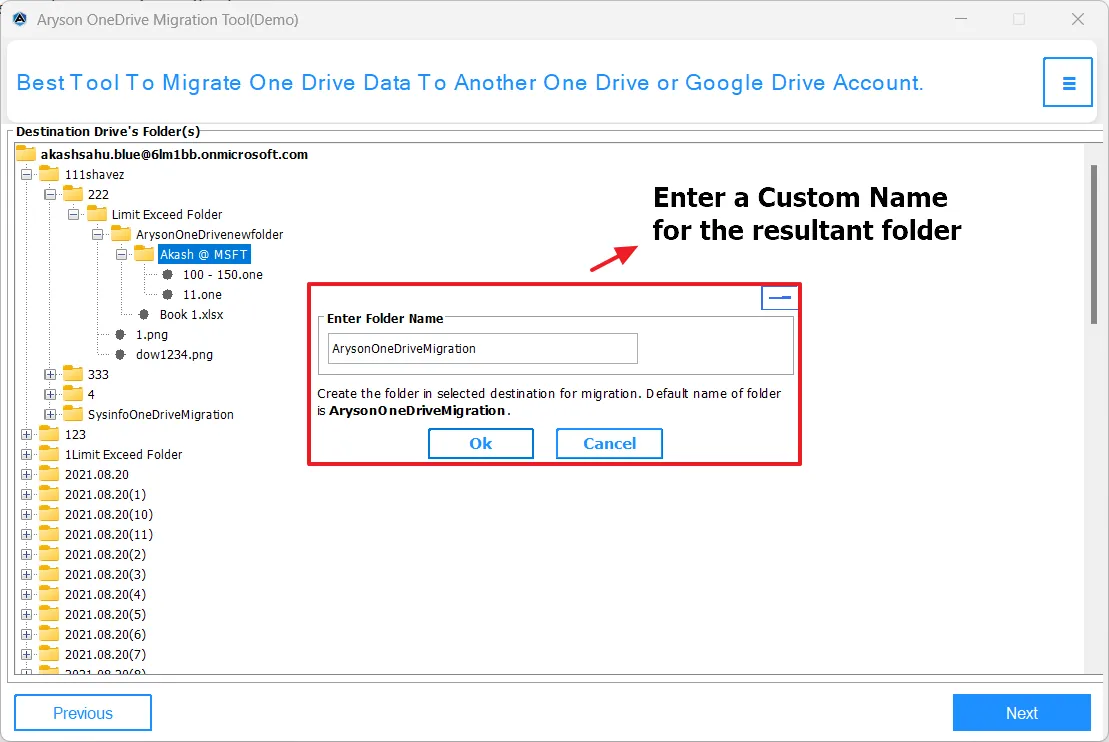
- Custom Folder Name: Set a personalized name for the destination folder as needed.
Step 16: Start the migration and monitor progress in real-time.
- Migration Details Table: Shows the Name, Status, and Size of files being migrated.
- Live Progress Tracking: Displays a progress bar indicating completion percentage.
- Automatic Data Handling: The software manages all files; do not close it during migration.
- Backup Location Access: Quickly access the folder where migrated files are saved.
- Completion Confirmation: Receive a success message once migration finishes.
- Detailed Migration Report: Download a report listing all migrated files, their status, and size.

Step 1: Download and install the Aryson OneDrive Migration software, then launch the application on your system.
Step 2: Choose between Single User or Impersonation login depending on your needs.Set the Log Path and Temp Path according to your preferences.
Step 3: For Single User login, select whether it’s a personal or business account.

Step 4: Choose between Full Scan or Dynamic Loading mode.

Step 5: For Impersonation login, pick your authentication method (Azure AD credentials or CSV import) and provide the following details:
- Application (Client) ID: Unique identifier for application authentication.
- Secret Value: Secure key for application verification.
- Directory (Tenant) ID: Unique Azure AD tenant identifier.
- Microsoft Azure Admin ID: Administrator account ID.
- Import CSV File: Upload a CSV containing multiple user accounts (sample CSV available).
- Auth Action: Click Auth to grant necessary permissions.

Step 6 : Once your OneDrive data is loaded, review and verify it using the preview panel, which includes:
- OneDrive Folder Structure: Shows files and folders in a tree format on the left panel.
- Storage Details: Displays the Total, used, and remaining space of the source account on the right panel.
- Data Selection: Expand folders and choose the specific files/folders for migration.
- File Type: Indicates whether an item is a file or folder.
- Size: Displays the size of each item.
- Creation Date: Shows when the file/folder was created.
- Last Modified Date: Displays the most recent modification date.
- Browser View: Lets you preview OneDrive folders directly in the browser.

Step 7: Use the File Extension Filter to migrate only certain file types (PDFs, DOCs, images, EXEs, etc.). You can add multiple extensions separated by commas.
- Add Extension: Include specific file types.
- Remove Extension: Exclude unwanted formats.

Step 8: Apply the Date-Based Filter to migrate files created or modified within a specific time range by setting the Start Date and End Date.

Step 9: Enable Allow Duplicate Files if you want the tool to include duplicate files, ensuring no data is missed.

Step 10: Turn on Skip 0 KB Files to exclude empty files, improving migration speed and efficiency.

Step 11: Activate Skip Previously Migrated Files to avoid transferring files that have already been migrated in prior sessions, saving time and storage.

Step 12: Enable Free Up Server Space to automatically delete source files after successful migration, helping reclaim storage efficiently.

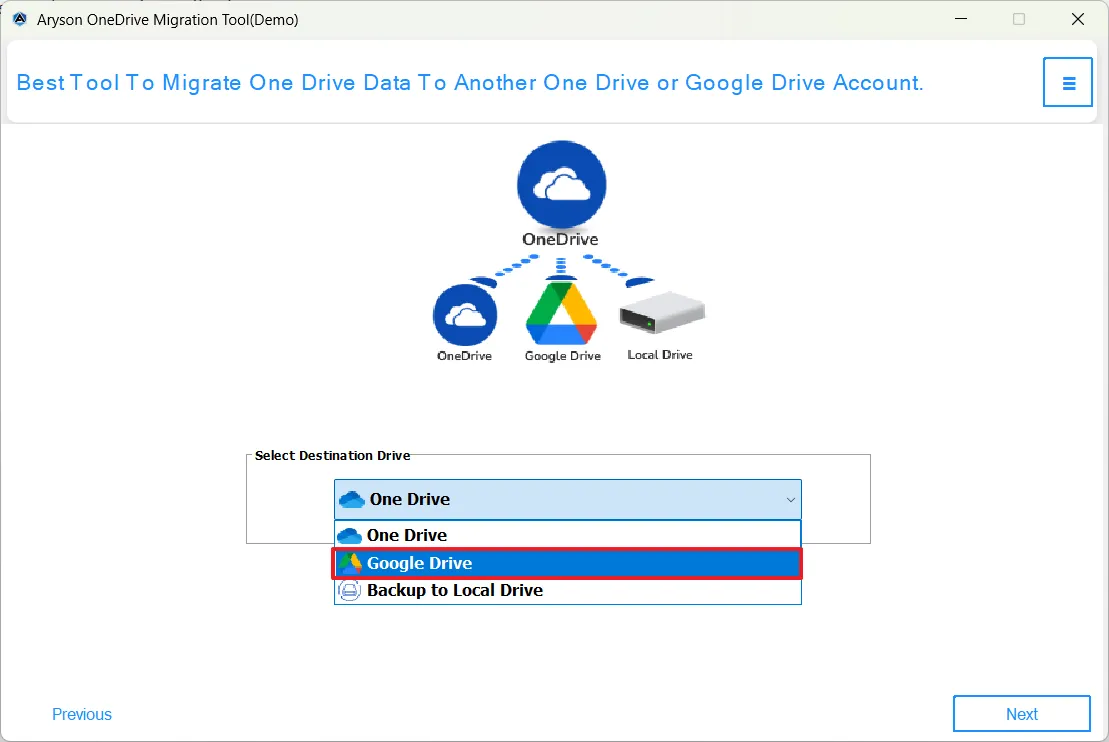
Step 13: From the list of supported cloud services, select Google Drive as the destination platform.
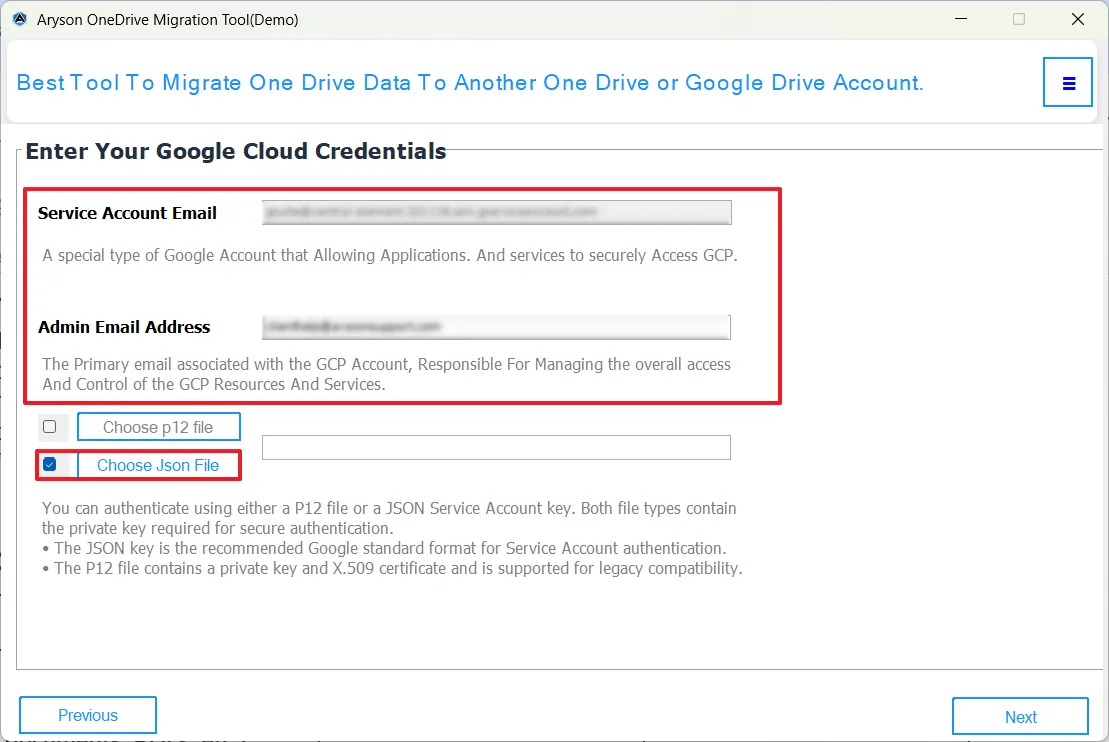
Step 14: Authenticate your Google Drive account by entering the required details:
- Service Account Email: Enter the Service Account email to securely access Google Cloud Platform.
- Admin Email Address: Provide the primary admin email associated with the GCP account.
Authentication Method: Choose your preferred login method for Google Drive authentication. Upload the authentication key file using one of the following options:
- Choose P12 File: Browse and upload a P12 certificate file for legacy authentication support.
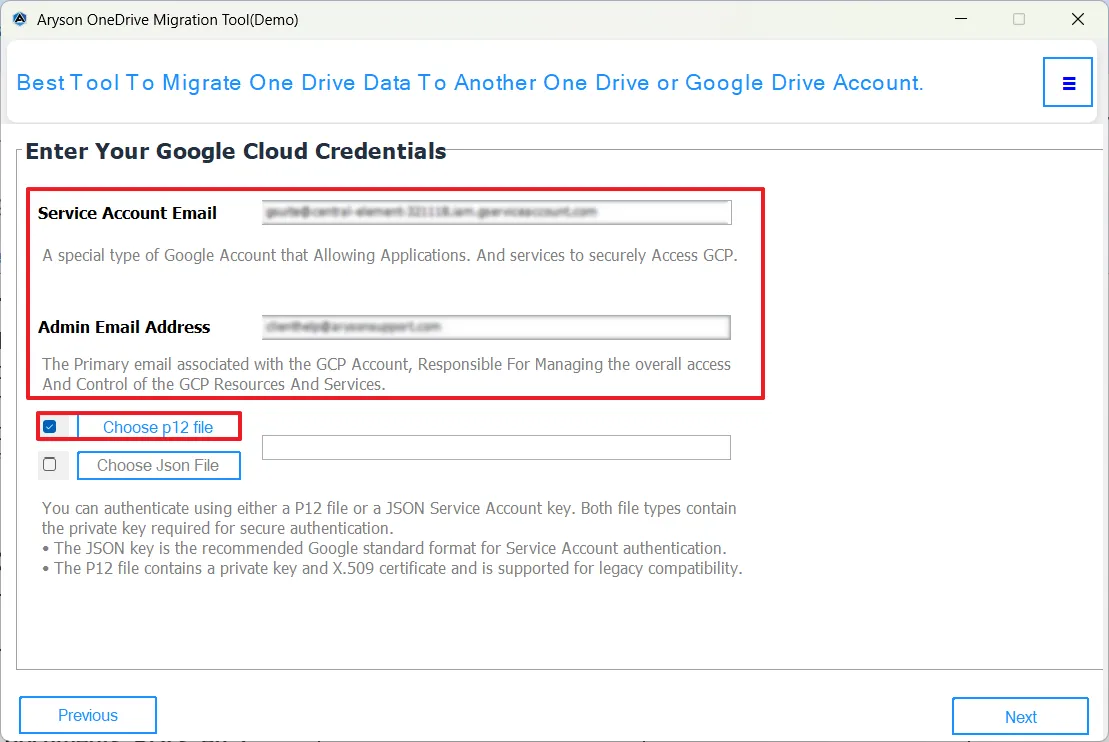
- Choose JSON File: Upload a JSON Service Account Key file (recommended by Google for secure authentication).
- Choose P12 File: Browse and upload a P12 certificate file for legacy authentication support.
Step 15: Select the user account whose data you want to migrate from the tree hierarchy displaying all sub-users under the admin account.

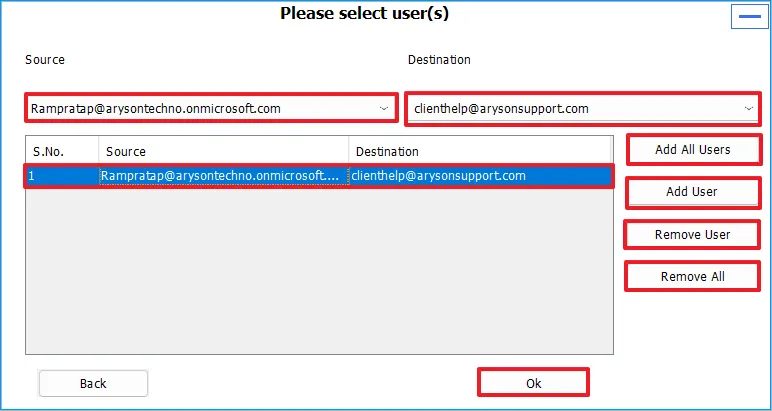
Step 16: Define the source and destination user accounts for migration. This panel includes:
- Source/Destination Selection: Choose the originating user and the target user account.
- User Mapping List: Displays all confirmed user pairs scheduled for migration.
- Add User: Add the selected source and destination accounts to the list.
- Remove User: Delete a selected user pair from the list.
- Add All Users: Add all eligible users for bulk migration.
- Remove All: Clear the entire migration list.
- OK: Confirm the user mapping and proceed to the next step.
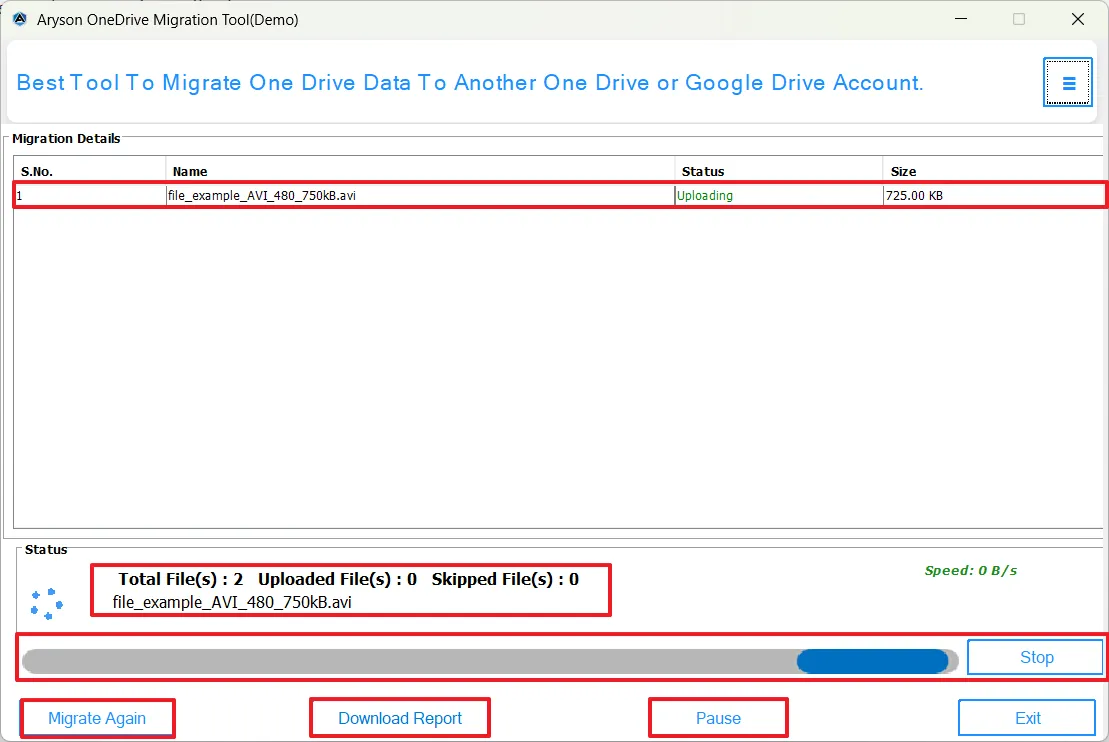
Step 17: Start the migration process. Once initiated, a migration panel appears showing:
- Summary Table: Displays migrated user pairs along with file counts and skipped items.
- Migration Log Panel: Shows file names, destination paths, and real-time transfer speed.
- Progress Bar: Tracks overall migration progress with an option to stop the process.
- Migration Again: Allows you to rerun the migration if needed.
Step 1: Download the Aryson OneDrive Migration Tool, install it on your system, and open the application.

Step 2: Select the appropriate login option: Single User or Impersonation, based on your migration requirements. Define the Log Path and Temporary Path locations as per your convenience.

Step 3: If you choose Single User login, specify whether the account is Personal or Business.
Step 4: Choose between Full Scan or Dynamic Loading mode.

Step 5: For Impersonation login, select your preferred authentication method (Azure AD credentials or CSV file) and enter the following information:
- Application (Client) ID: The unique ID used for application authentication.
- Secret Value: A secure key for validating the application.
- Directory (Tenant) ID: The unique Azure AD tenant identifier.
- Microsoft Azure Admin ID: The administrator’s account ID.
- Import CSV File: Upload a CSV containing multiple user accounts (sample file available).
- Auth Action: Click Auth to authorize access and continue.

Step 6: After loading the OneDrive data, carefully review and validate it using the preview window, which offers:
- Folder Hierarchy: Displays OneDrive files and folders in a tree structure on the left panel.
- Storage Information: Shows total, used, and available storage on the right panel.
- Data Selection: Expand folders to select specific files or directories for migration.
- Item Type: Identifies whether the selected item is a file or folder.
- File Size: Displays the size of each selected item.
- Created On: Indicates when the file or folder was originally created.
- Last Updated: Shows the most recent modification date.
- Browser Preview: Allows direct viewing of OneDrive folders within the interface.
Step 7: Apply the File Extension Filter to transfer only selected file formats such as PDFs, documents, images, or executables. Multiple extensions can be added using commas.
- Add Extension: Include required file formats.
- Remove Extension: Exclude unnecessary file types.
Step 8: Use the Date Filter to migrate files created or modified within a specific date range by setting the Start and End dates.

Step 9: Enable Allow Duplicate Files to ensure duplicate items are also included during migration.
Step 10: Select Skip 0 KB Files to omit empty files, improving performance and reducing clutter in the destination.

Step 11: Turn on Skip Previously Migrated Files to prevent re-transfer of data already migrated in earlier sessions.
Step 12: Activate Free Up Server Space to automatically remove files from the source OneDrive account after successful migration, helping recover storage space efficiently.
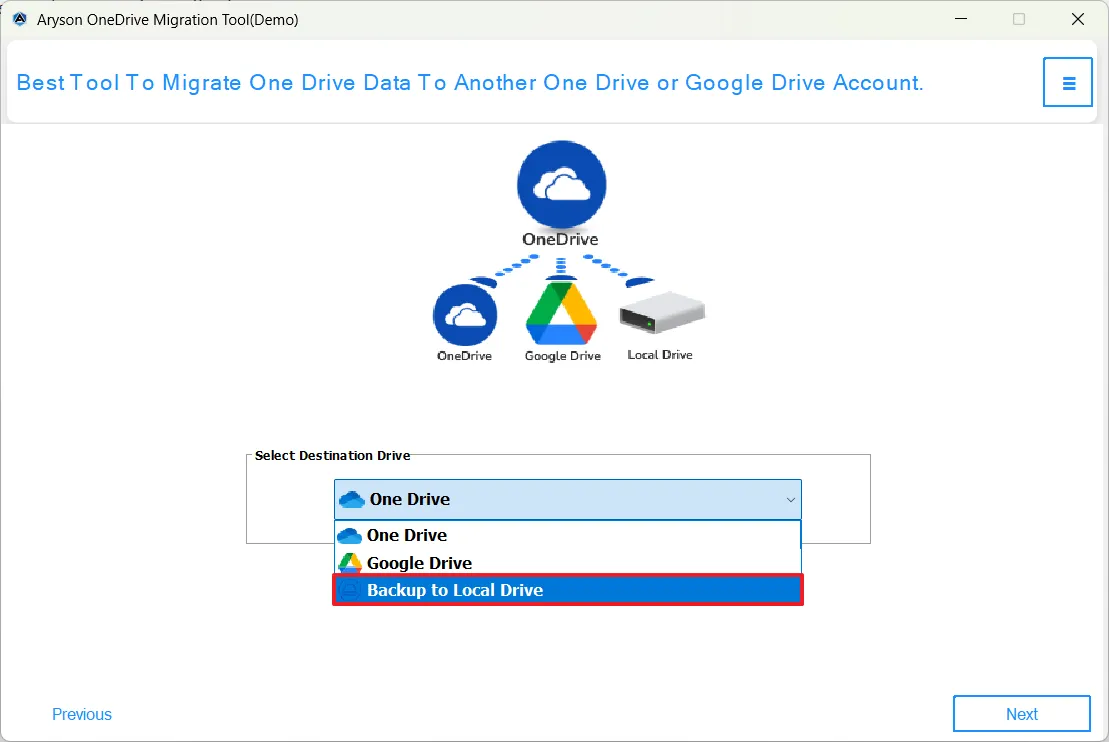
Step 13: From the available destination options, choose Backup to Local Drive.
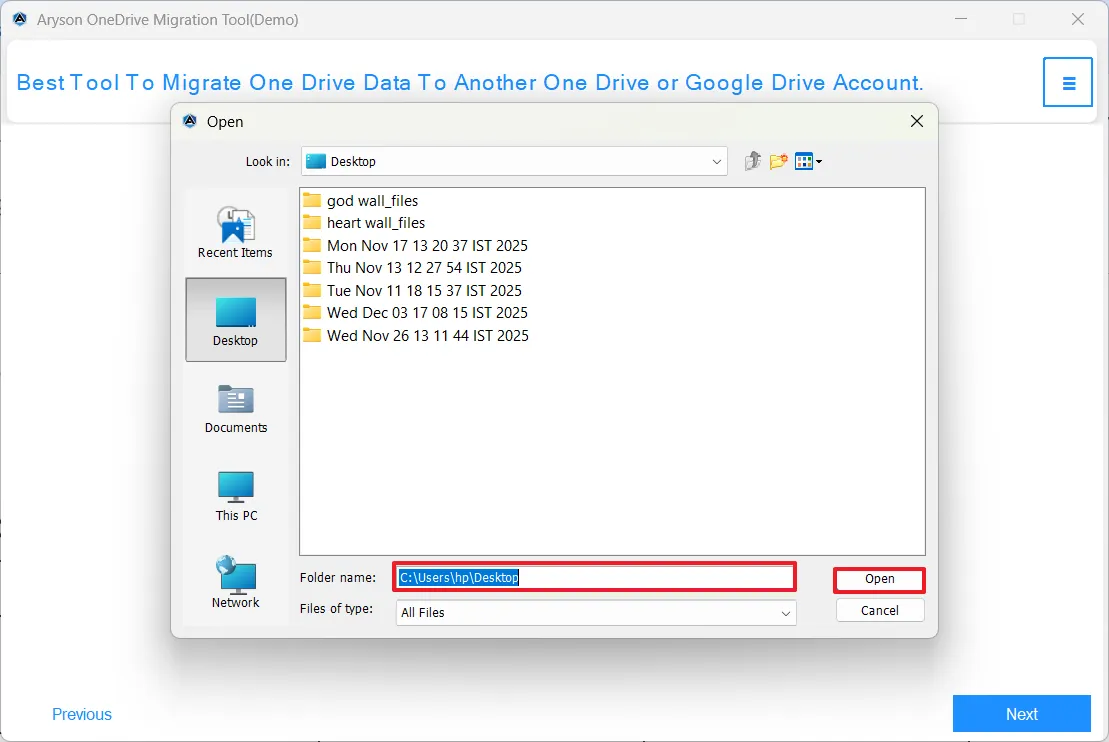
Step 14: Browse your local system and select the folder location where the OneDrive data will be saved.
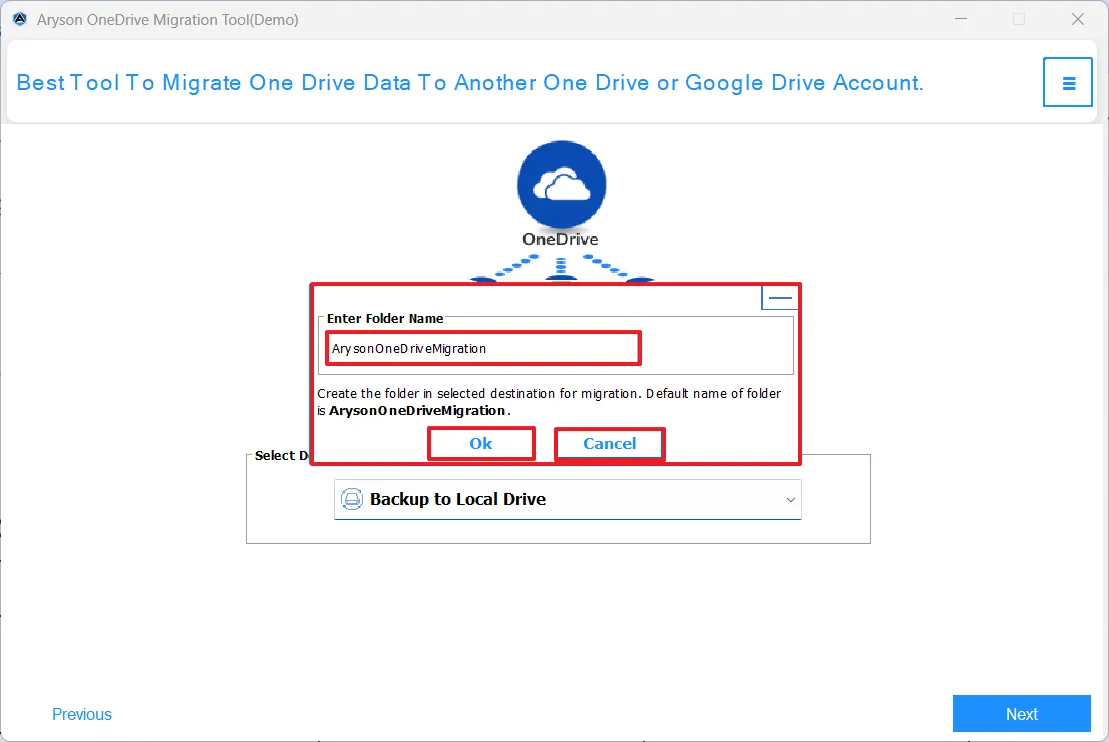
- Enter a Custom Folder Name to define how the migrated OneDrive data folder should appear on your system.
Step 15: Start the migration process. Once initiated, the migration panel appears and displays:
- File Details Table: Shows the file name, migration status, and file size during transfer.
- Live Progress Bar: Tracks real-time migration progress and completion percentage.
- Automatic Processing: The software handles all files automatically; do not close the application while migration is in progress.
- Migration Again: Allows you to restart the migration if required.
- Migration Report: Enables you to download a detailed report containing migrated files, their status, and size for verification.

Activation Guide
Activate the Software
Installation & Uninstallation
Installation & Uninstallation of Software
User Interface
User Interface
After downloading the Aryson OneDrive Migration Tool, you will find the welcome screen as played below.