Software Guides to Remove OneDrive Duplicate Files
-
Table of Content
- Software Working Process
- Pre-Requisites
- Activation Guide
- Installation & Uninstallation
- User Interface
Software Working Process
Software Working Process
Step 1: First, install and run the Aryson OneDrive Duplicate Remover Tool as an administrator on your computer. The software will redirect you to the default browser.
Supported Browsers for OneDrive
- Microsoft Edge – Fully supported, best performance with all features.
- Google Chrome – Fully supported, receives regular updates.
- Mozilla Firefox – Supported, though some advanced features may have minor limitations.
- Opera – Generally works, though not officially listed as fully supported.
- Apple Safari – Supported on Mac, but certain features may be limited compared to Edge or Chrome.
Notes:
- Always use the latest version of the browser for security and compatibility.
- Internet Explorer is no longer supported for OneDrive.
- Some features like real-time collaboration in Office Online work best on Edge or Chrome.

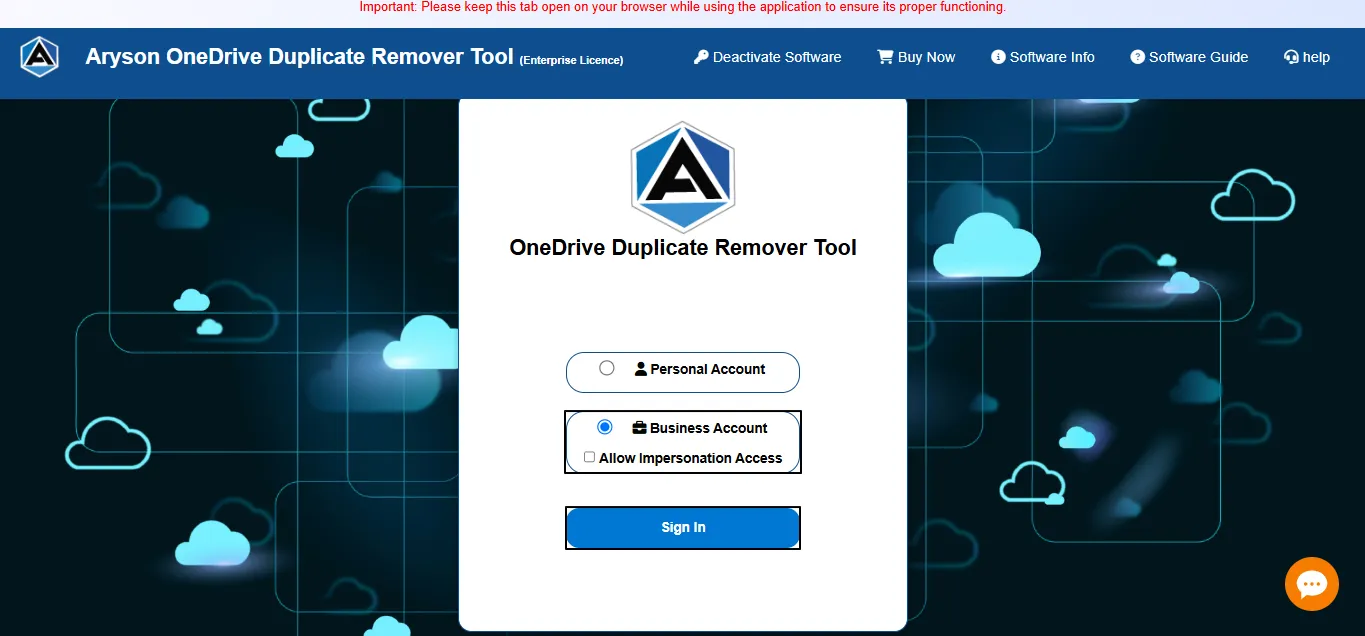
Step 2: After that, select one of the account types that you need to use: Personal Account or Business Account. Click Sign In.
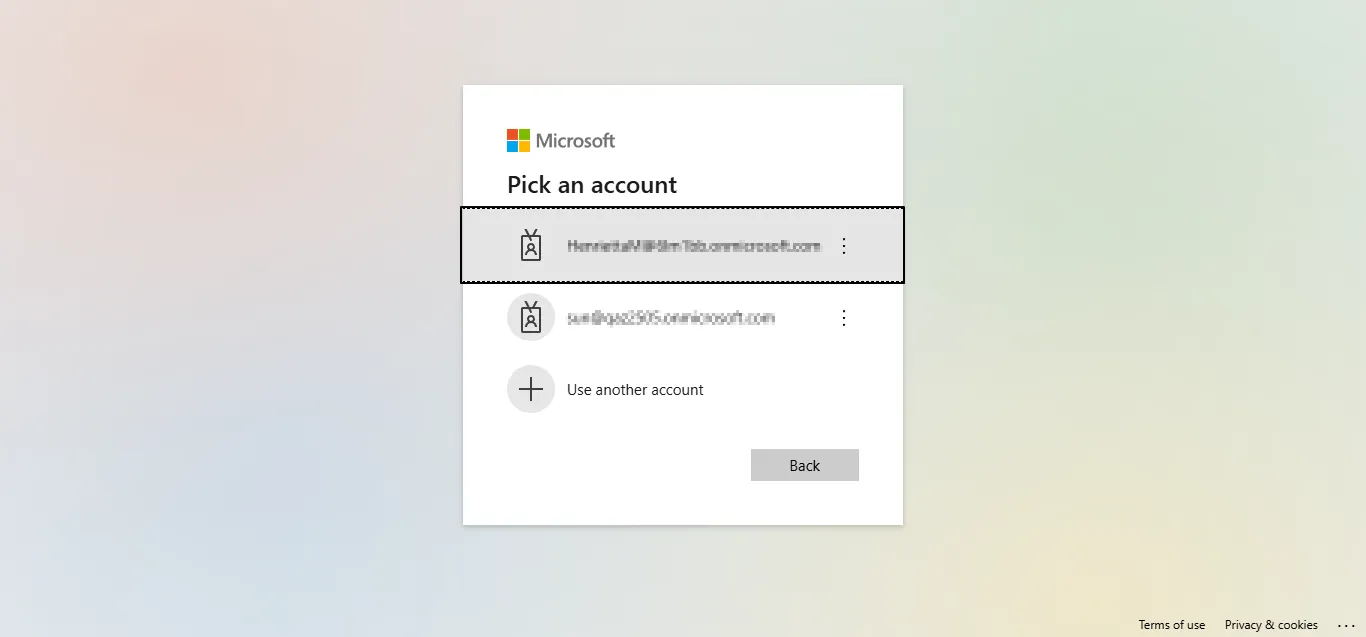
Step 3: Now, enter your valid credentials to log in and verify yourself.
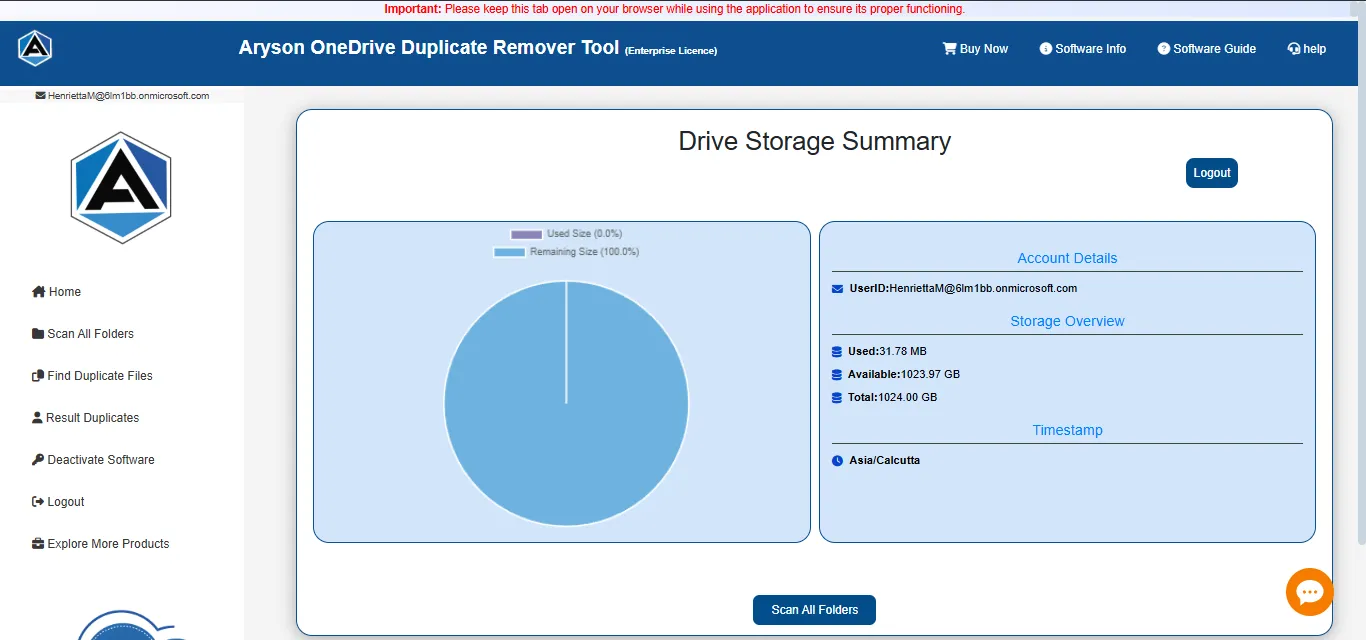
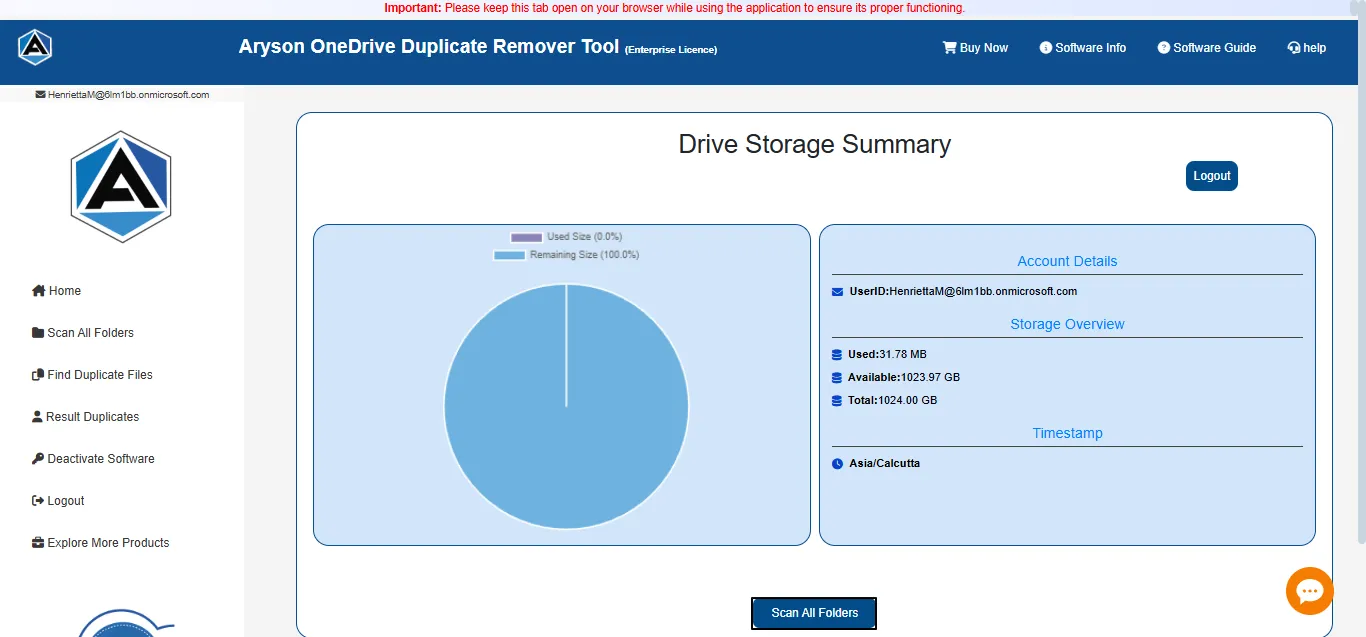
Step 4: Here, you can see the Drive Storage Summary for your desired account. You can preview your account details, storage, and TimeStamp.
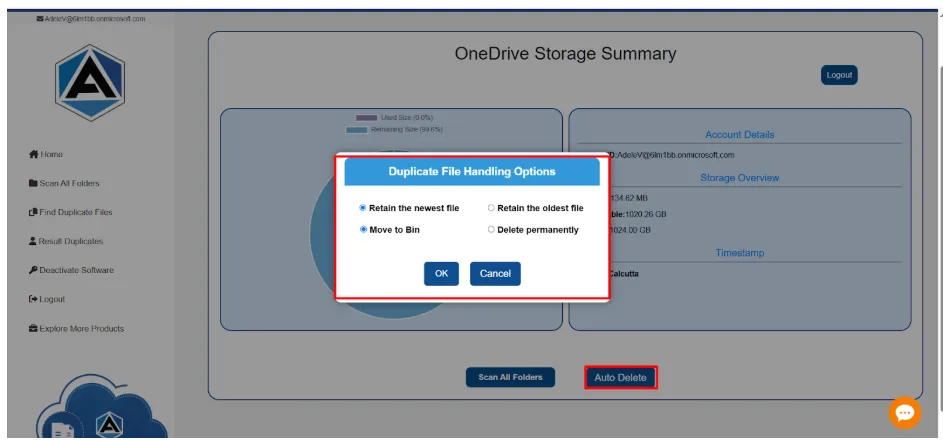
Step 5: Enable the Auto Remove option for quick, one-click duplicate file removal. When you select the Auto Delete option, a pop-up window titled Duplicate File Handling Options appears:
- Retain the Newest File: Keeps the most recently modified version and deletes older duplicates.
- Retain the Oldest File: Keeps the earliest version and removes newer duplicates.
- Move to Bin: Transfers deleted duplicates to the OneDrive Recycle Bin, ensuring recovery if needed.
- Delete Permanently: Removes duplicate files completely without sending them to the Recycle Bin.
Step 6: A pop-up will appear to confirm the auto deletion process >>Click OK to proceed further.
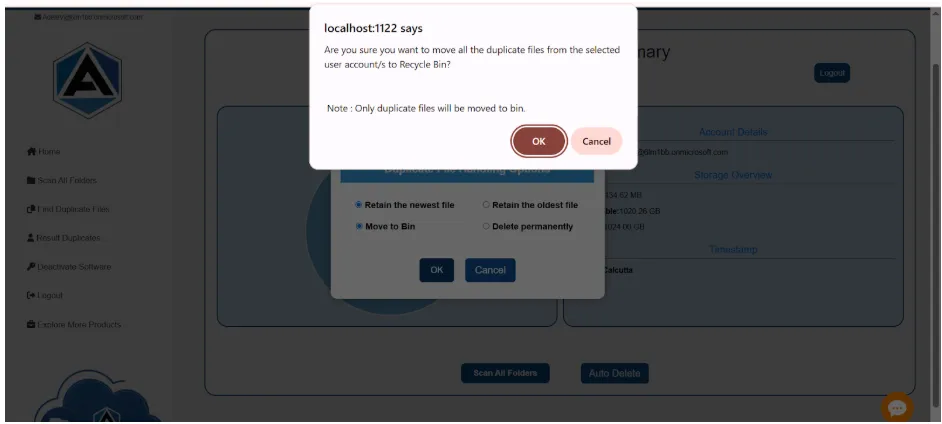
Step 7: If any file cannot be deleted because of OneDrive throttling or temporary system issues, the software automatically skips it and proceeds with the remaining files. All skipped items are logged, and once the process completes, users are notified and can choose to retry deletion later.
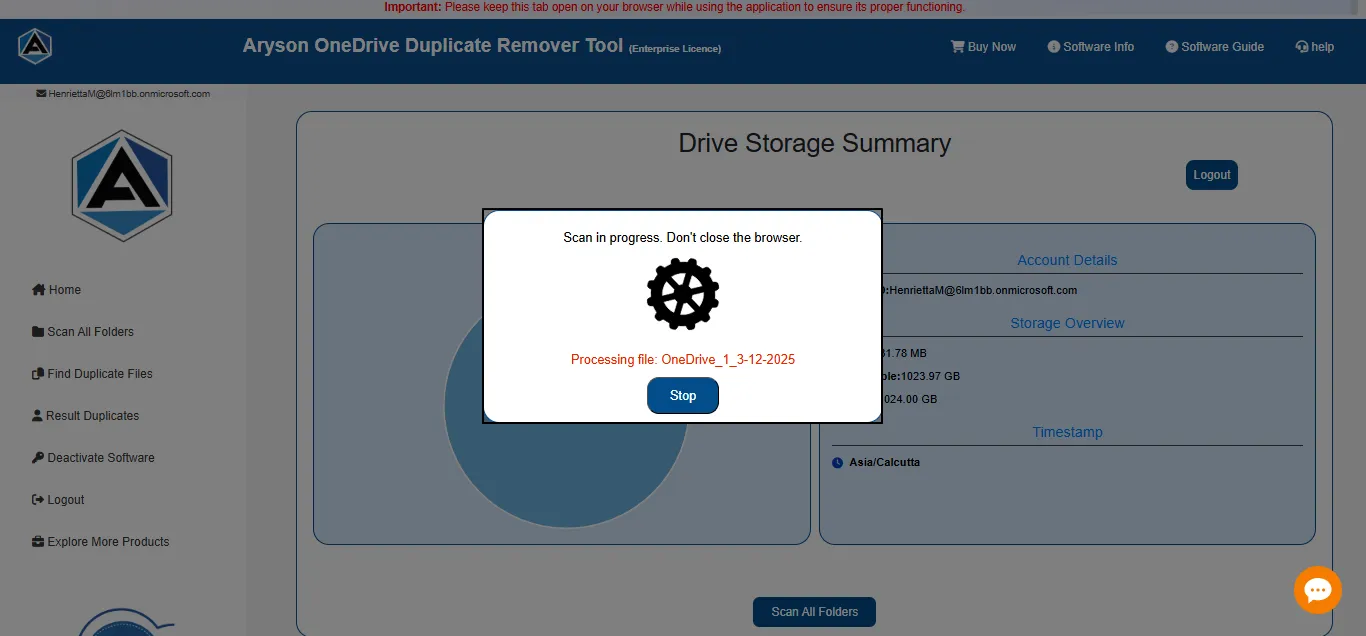
Step 8: Now, click on the Scan All Folder option to start the scanning process of your duplicate files.
Step 9: Here, you can wait here while the tool manages the storage and ensure everything is properly processed.
Step 10: Now, you see a preview of all the files and folders associated with the respective account.
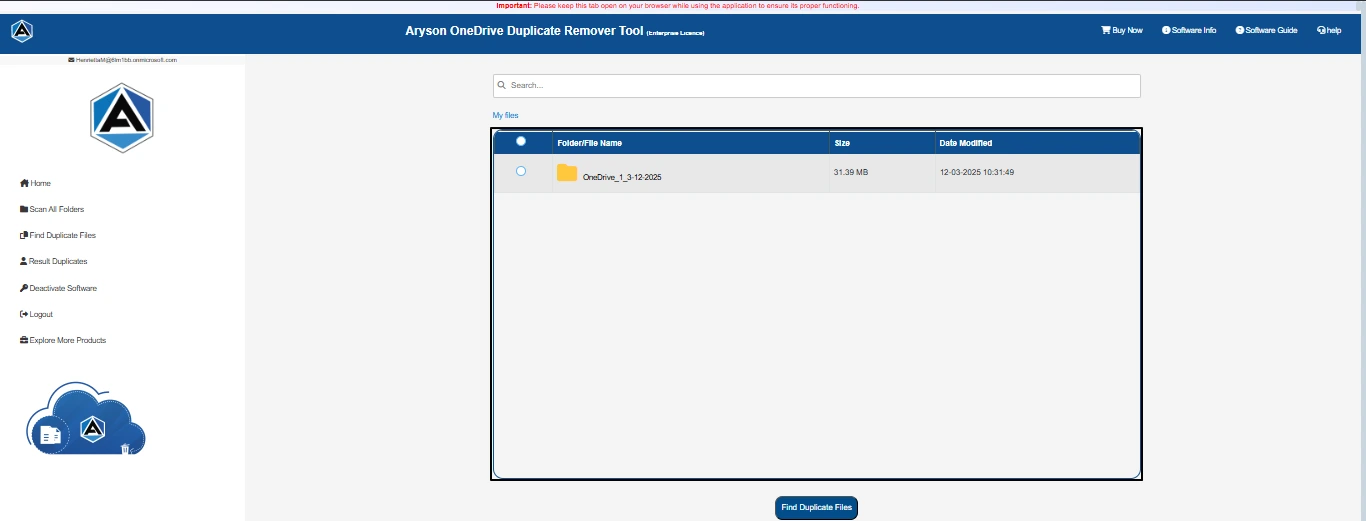
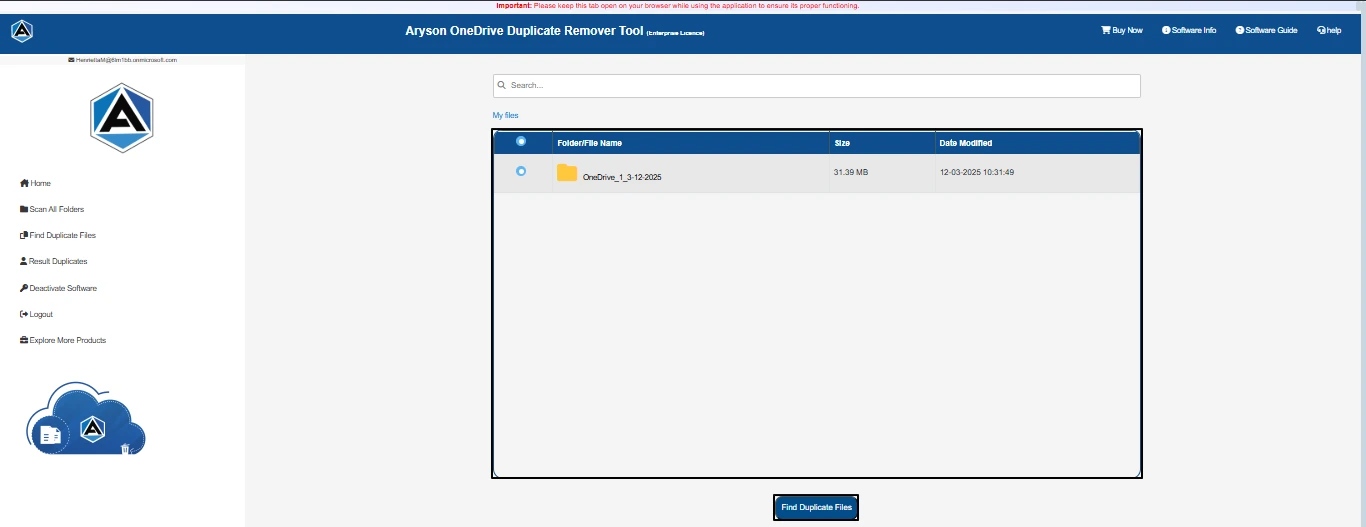
Step 11: Here, you can select the desired file to search for duplicate files in the chosen folder. Click Find Duplicate Files.
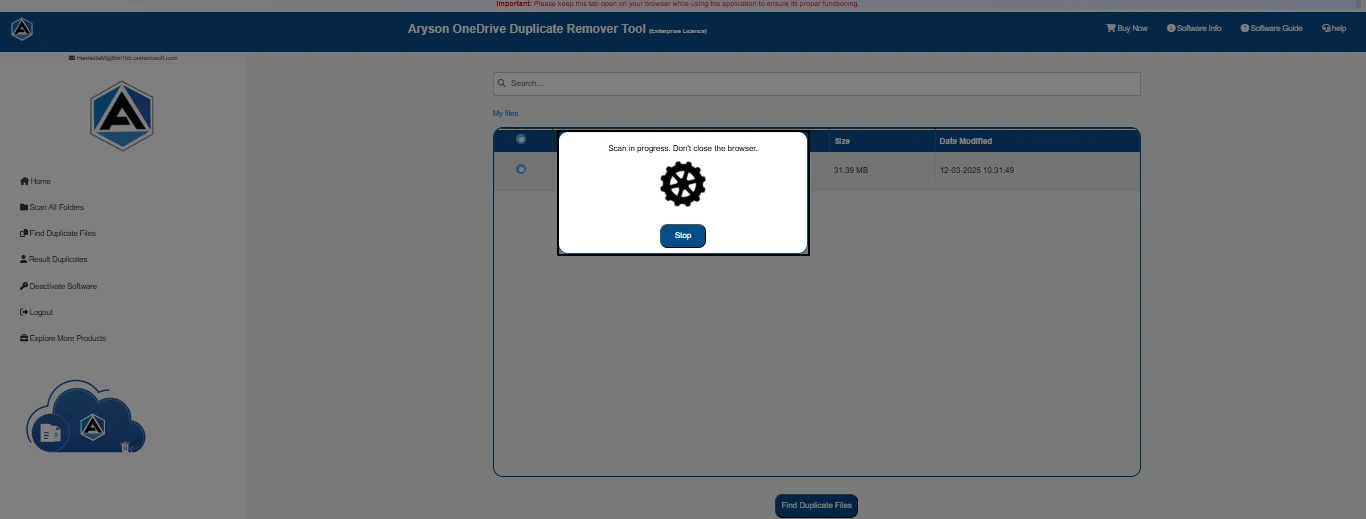
Step 12: You can wait here while the tool finds duplicate files.
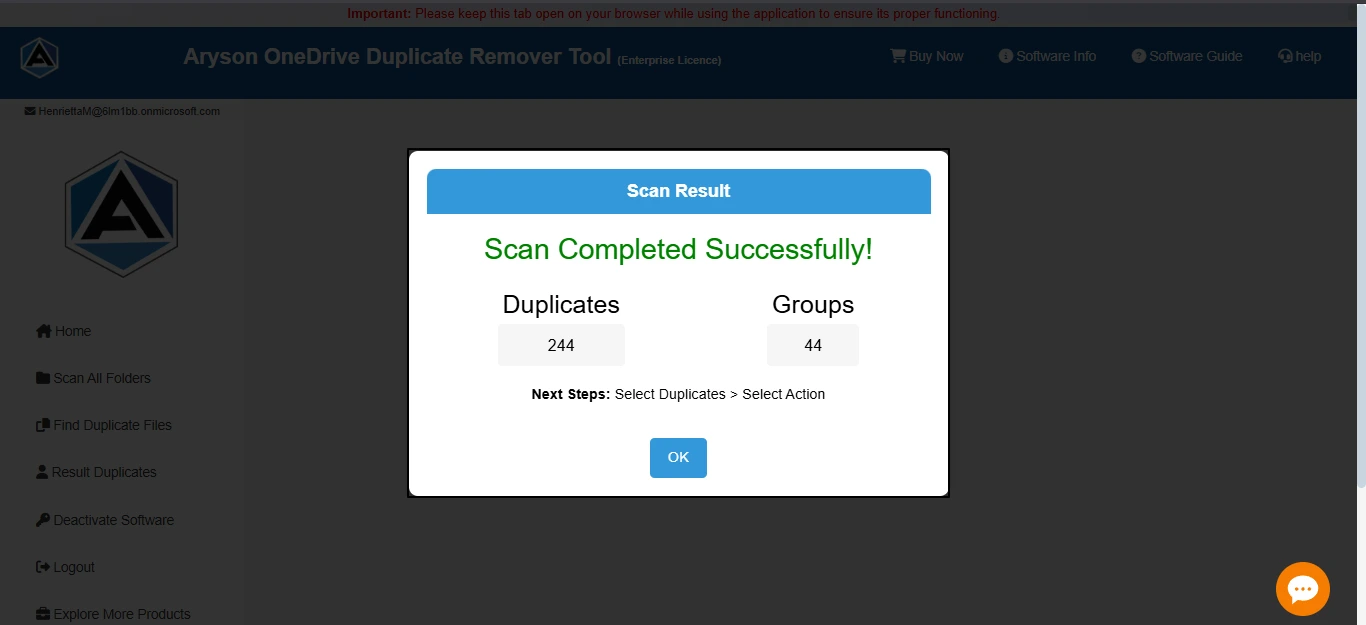
Step 13: Then, a pop-up message will appear showing the Total Number of Duplicate Files and Groups associated with your folder.
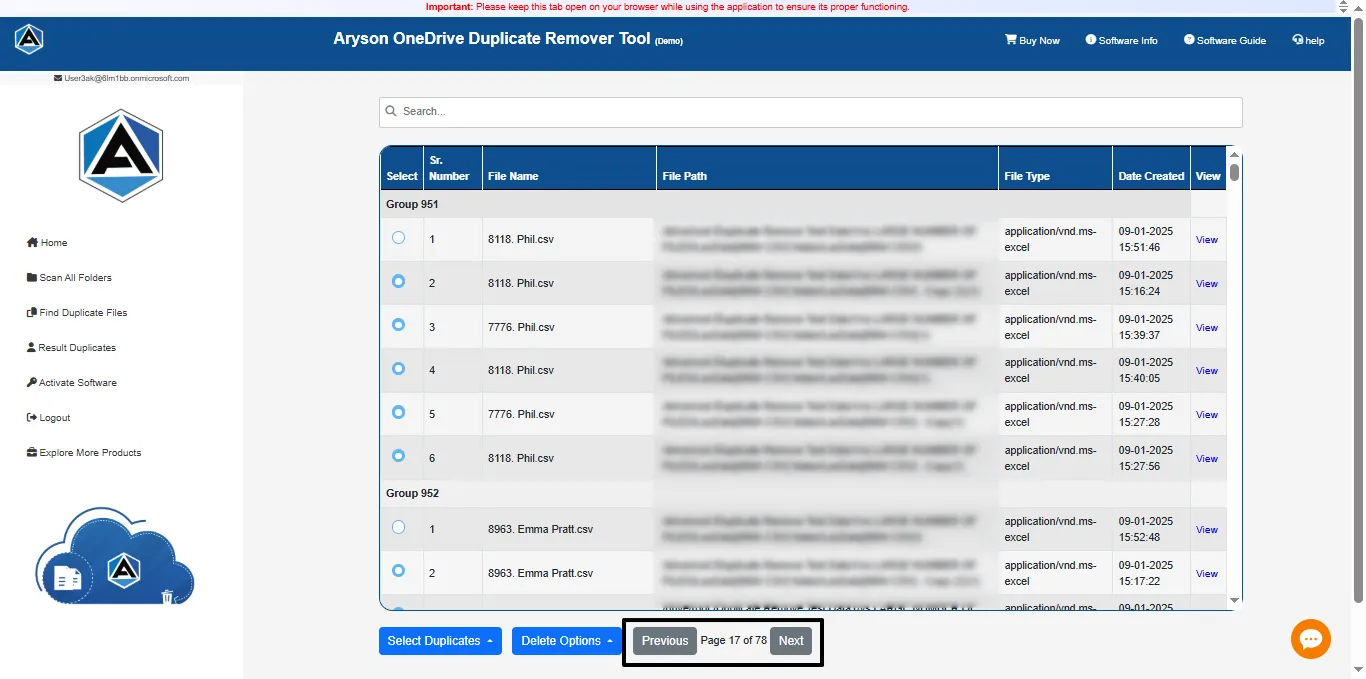
Step 14: In the next panel, all the duplicate files will be displayed for review and management. When the dataset is large and spans across multiple pages, users can click Next to move forward to the subsequent page and Previous to go back to the earlier page.
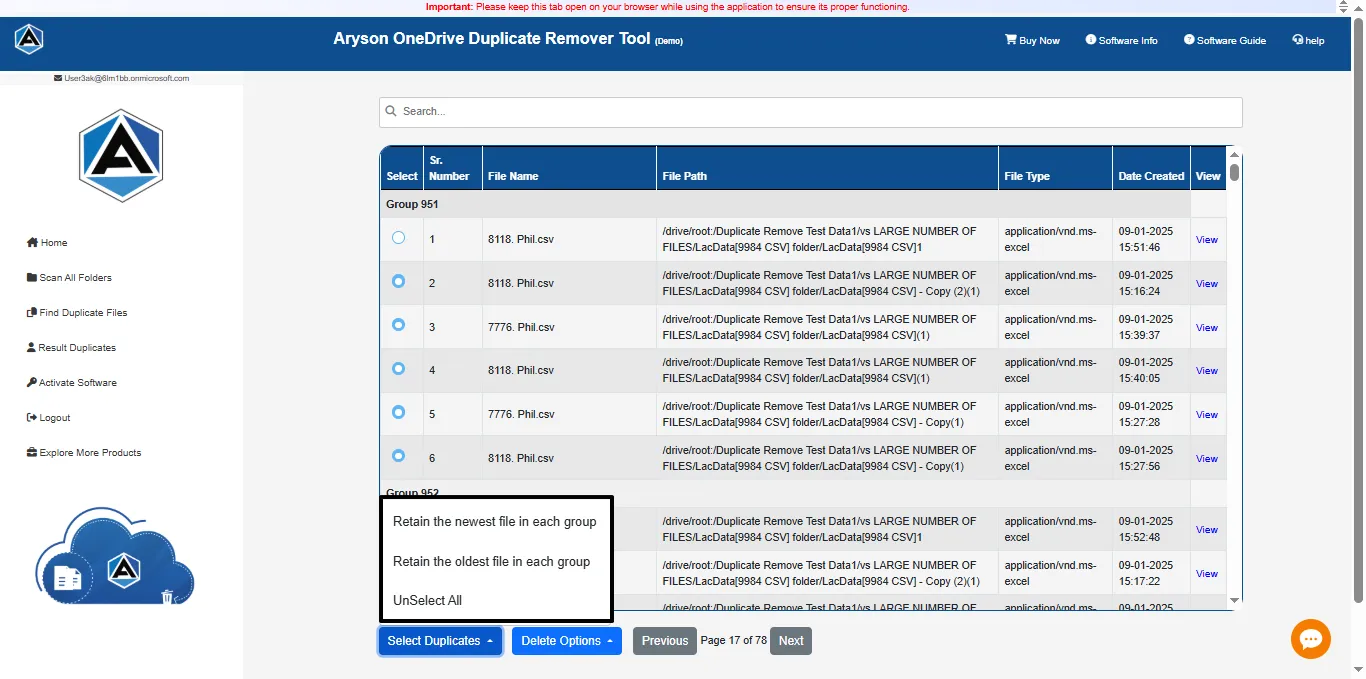
Step 15: Next, Under Select Duplicates you see several options:
- Retain the newest file in each group: Using this feature, the user can select all duplicate files, excluding the most recent one, based on a time-based sorting method.
- Retain the oldest file in each group: Using this feature, the user can select all duplicate files, excluding the oldest one, based on a time-based sorting method.
- Unselect All: This feature allows users to deselect all previously selected duplicate files.
Note:
- When the user selects the Retain Newest/Oldest One option, it will be applied to all pages. There is no need to select files on each page separately.
- For the custom selection of duplicate files, the user can manually choose by simply clicking on the hover option.
- The tool also provides a View option, allowing you to verify your data before deleting it. This ensures that the correct data is processed, reducing the risk of data loss and errors.
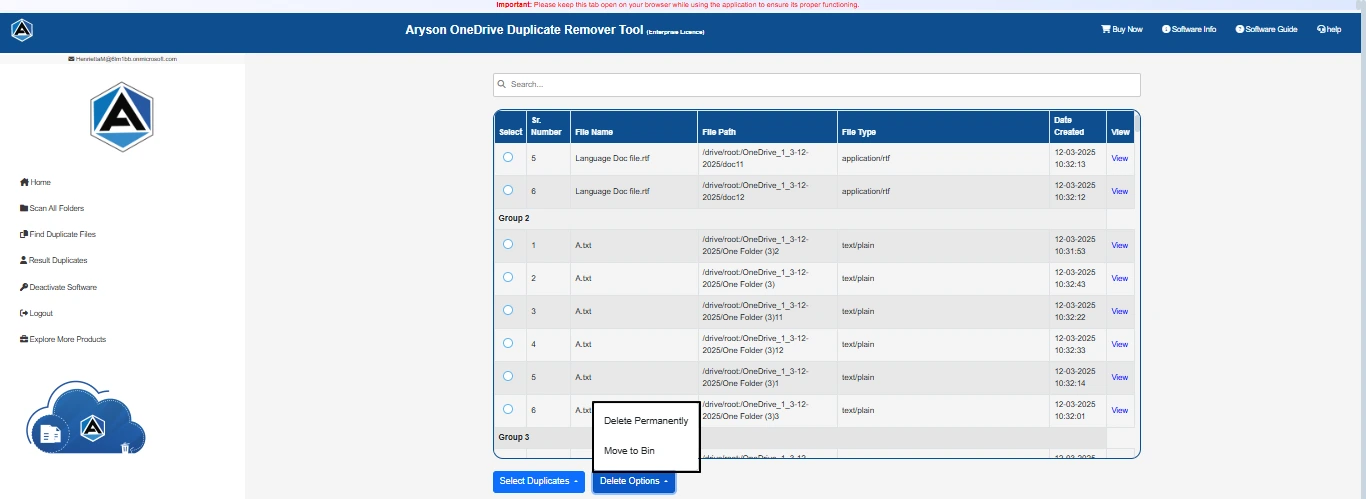
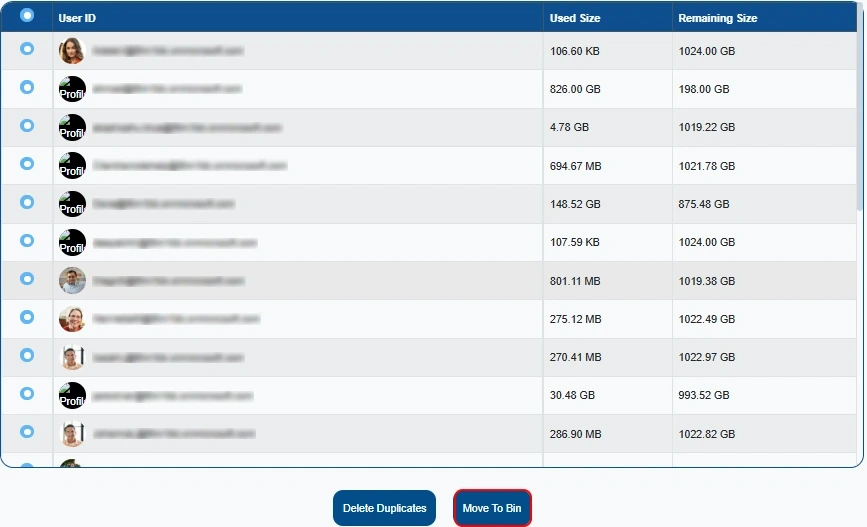
Step 16: In the last segment of this tab, you will see the two options:
- Delete Permanently: By using this option, you have permanently removed your duplicate file from the account.
- Move to Bin: By this option, you move your duplicate file to the bin. This means you can remove your duplicate file temporarily.
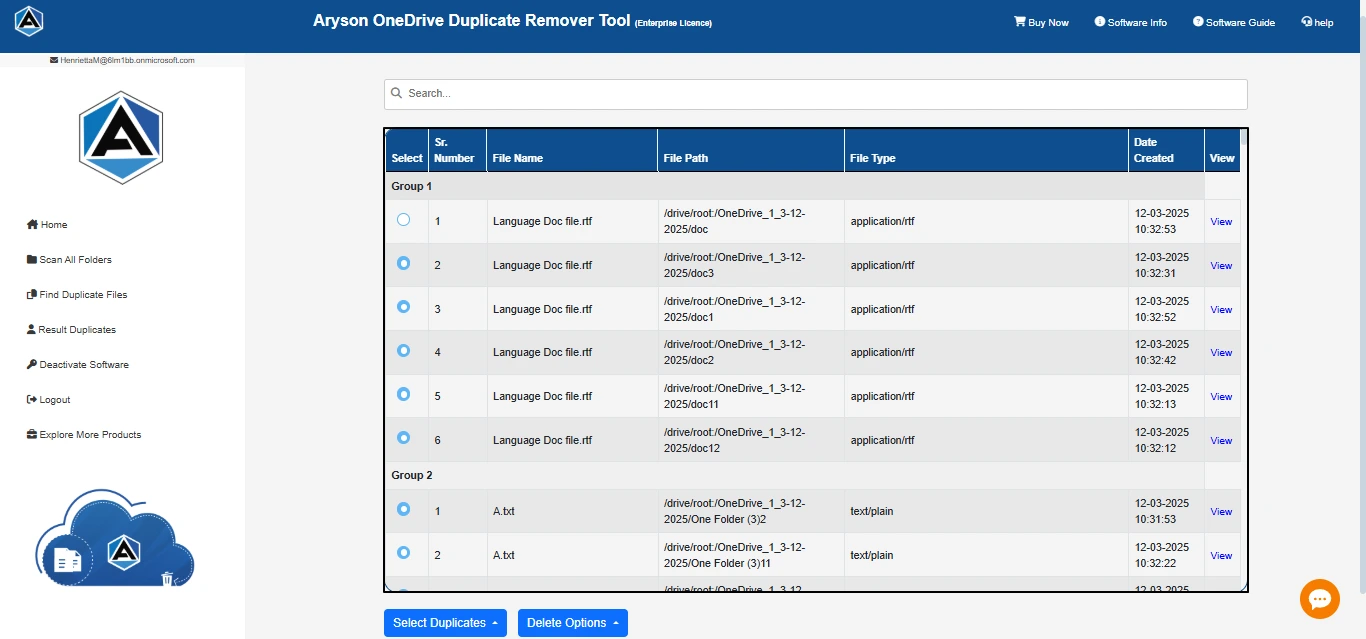
Step 17: Next, select the duplicated files based on your preferences and sorting criteria.
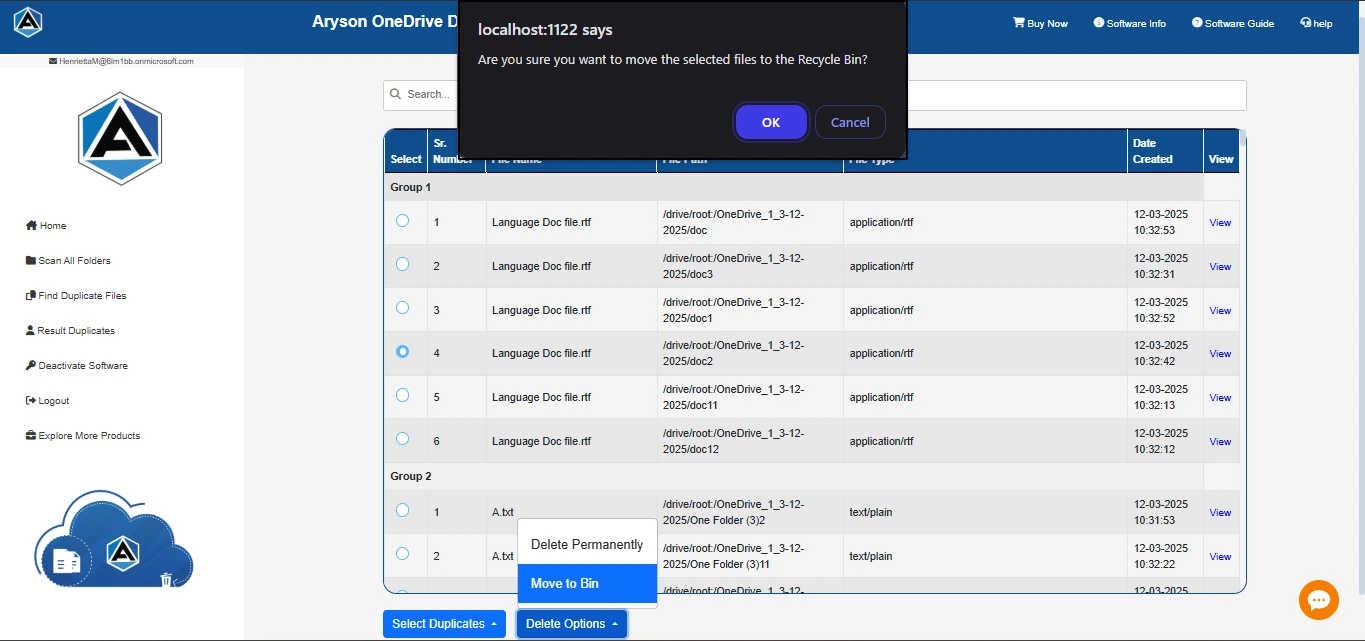
Step 18: Here, select the delete option according to your preference.

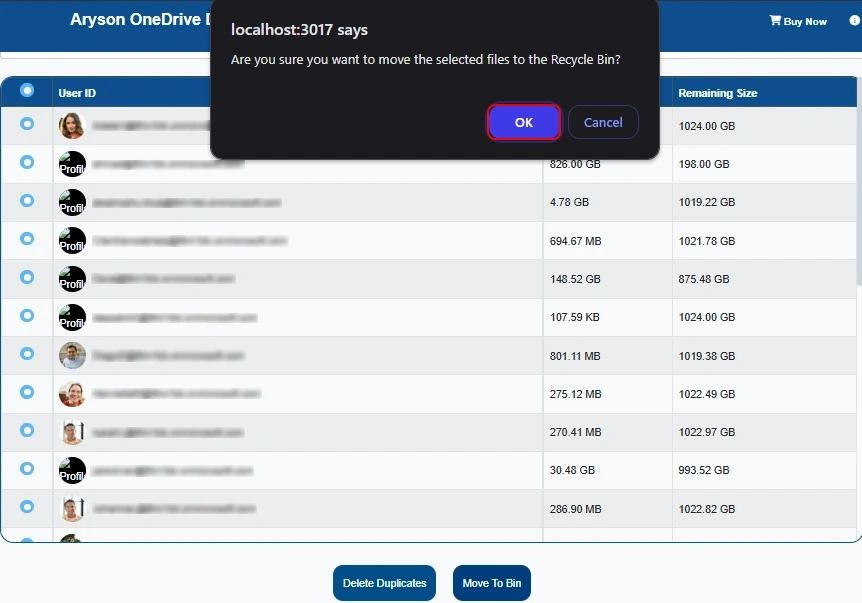
Step 19: After that, a pop-up will verify your permission to delete the file, either permanently or temporarily. Click OK
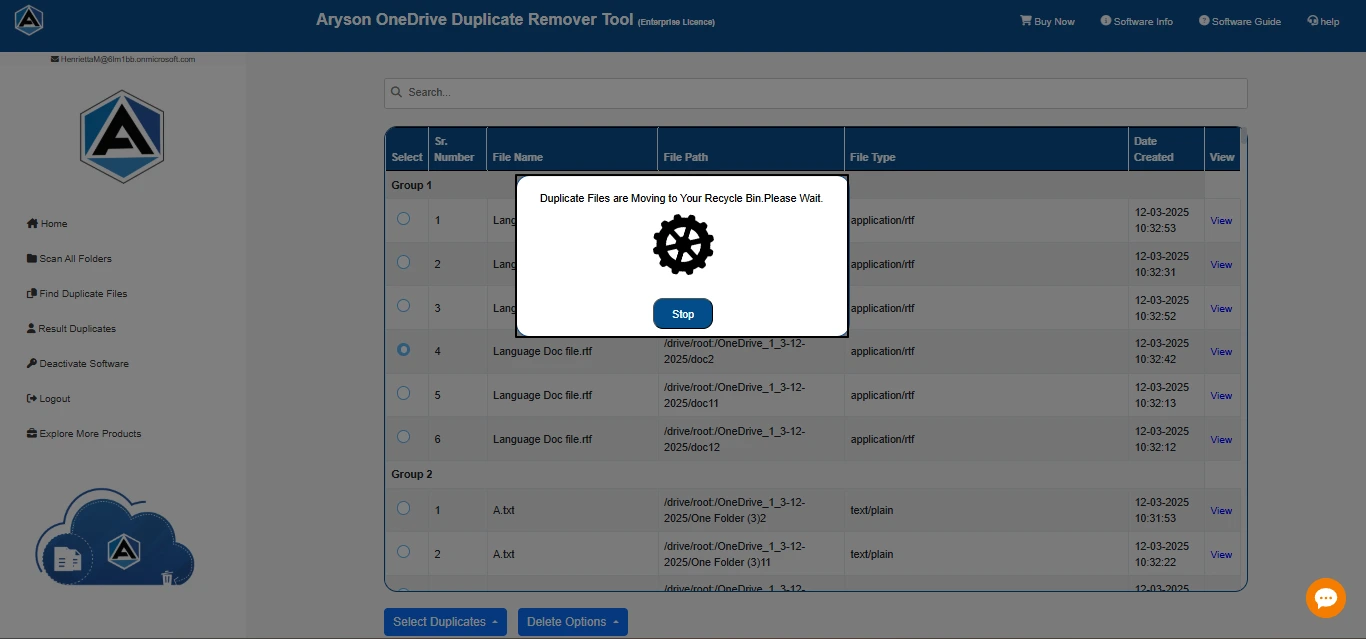
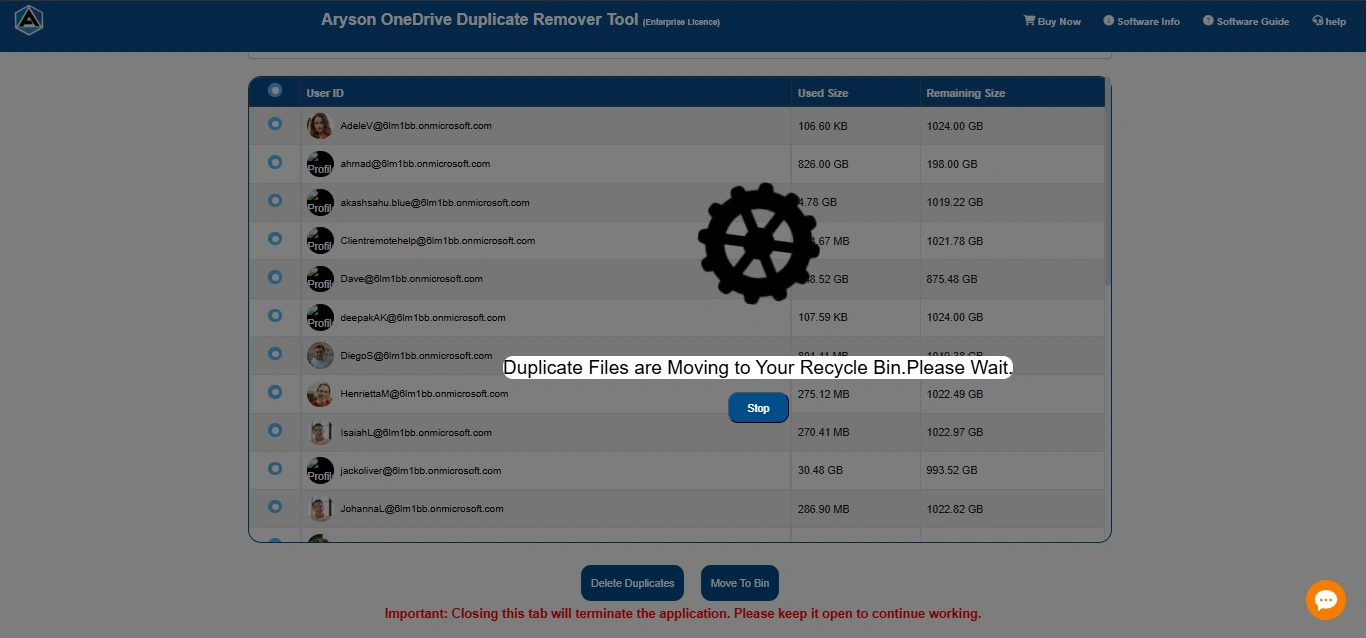
Step 20: Wait a moment while the tool deletes the duplicate file from your selected account and folder. After that click OK.
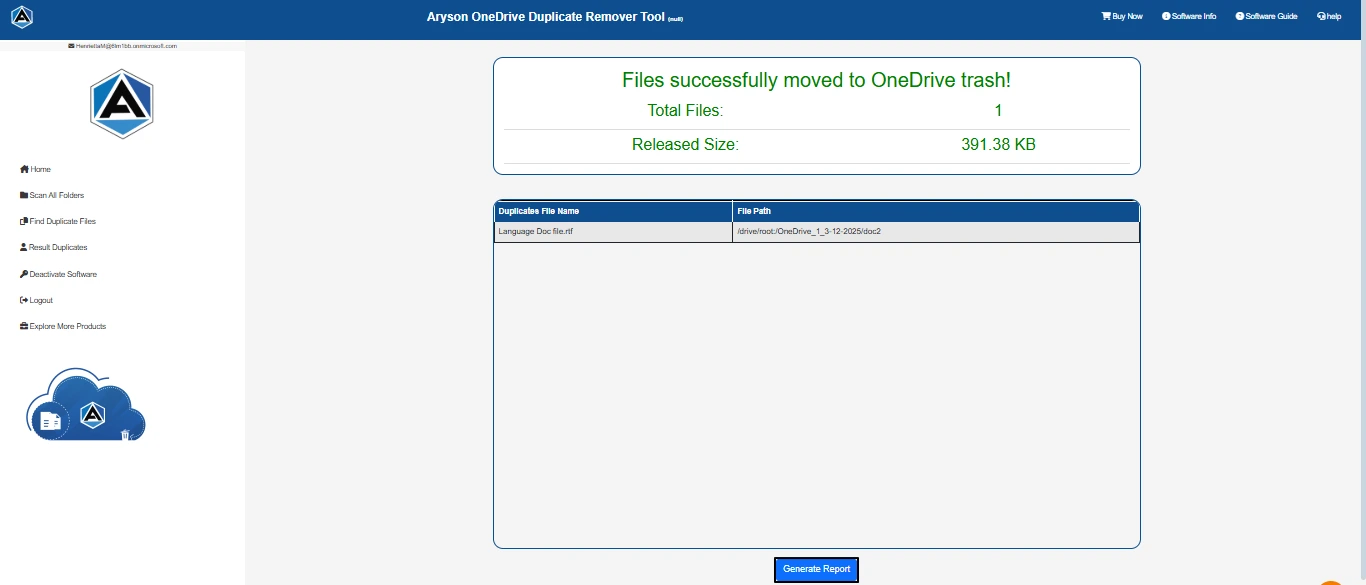
Step 21 : 18: After performing one of the actions, the software will display the results.
- Total files: The number of files you removed.
- Released size: Total size of your disk being free.
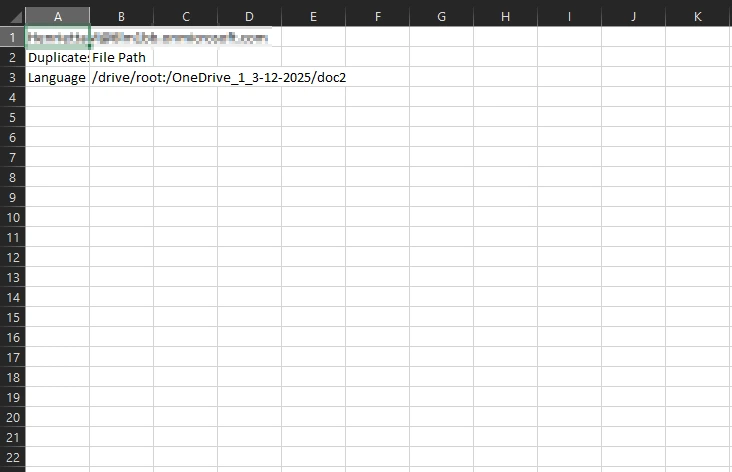
- Duplicate File Name: Name of each file that is identified as a duplicate.
- File Path: The location associated with the duplicate files.

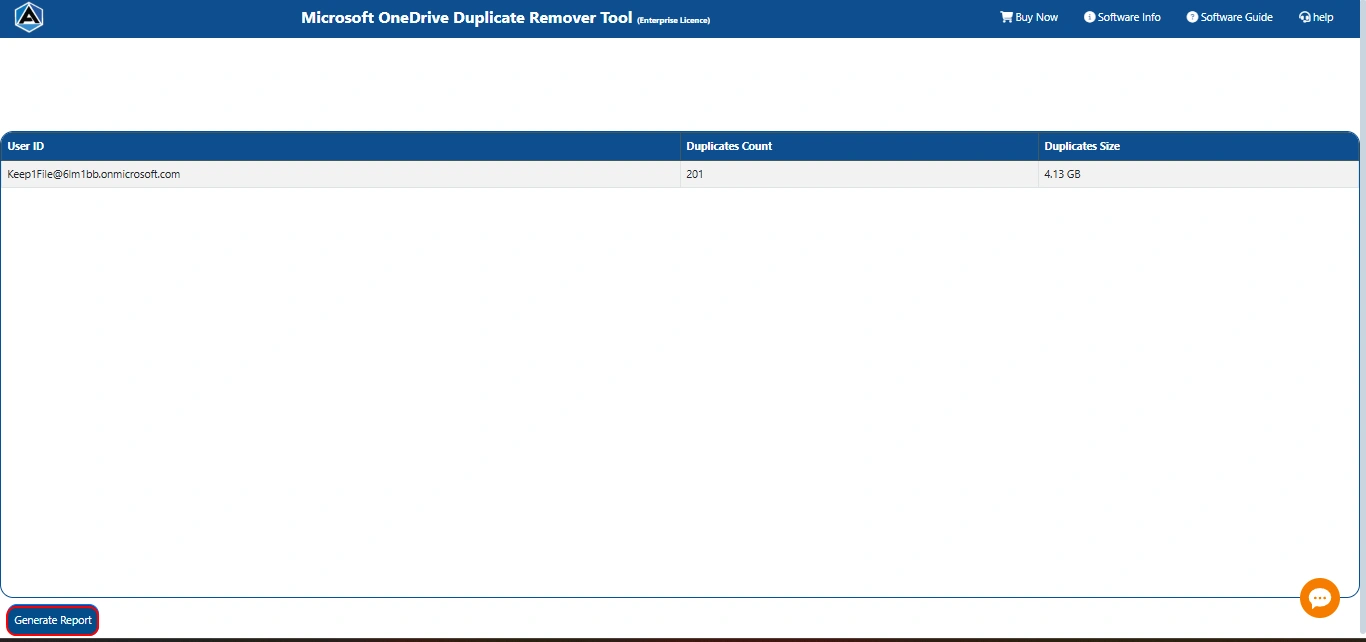
Step 22: Additionally, you can opt for a Generate Report. By this, you can summarize all the documentation of your account.
Step 23: Afterward, a pop-up will appear displaying the status of your report generation.
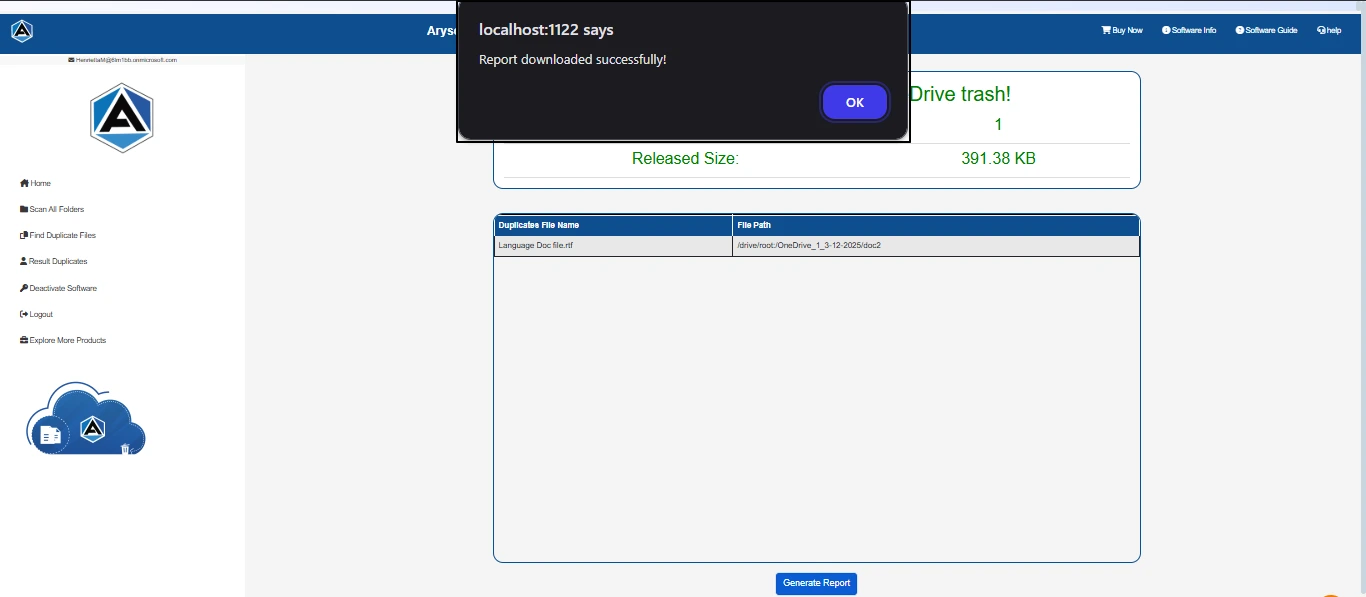
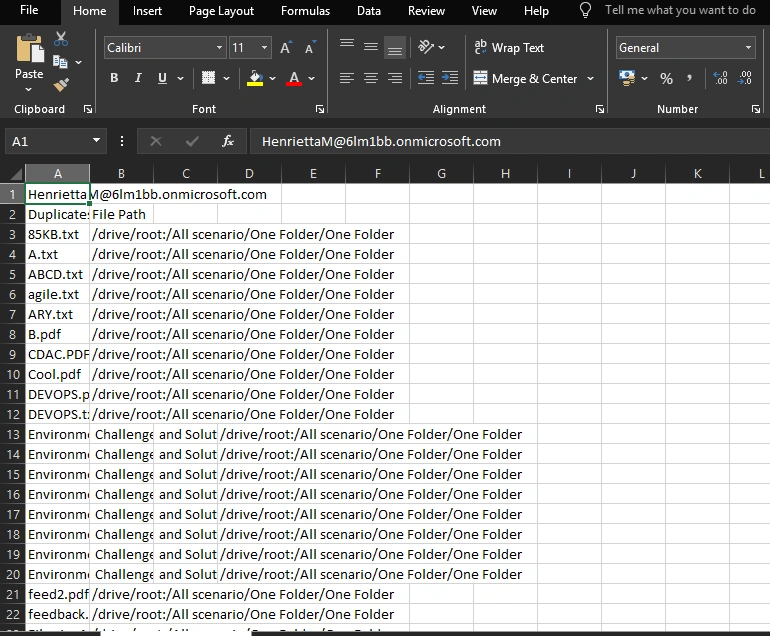
Step 24: In the end, you can see your report in an Excel sheet.
Step 1: Download and install the OneDrive Duplicate Remover Tool on your system. Run as an administrator.
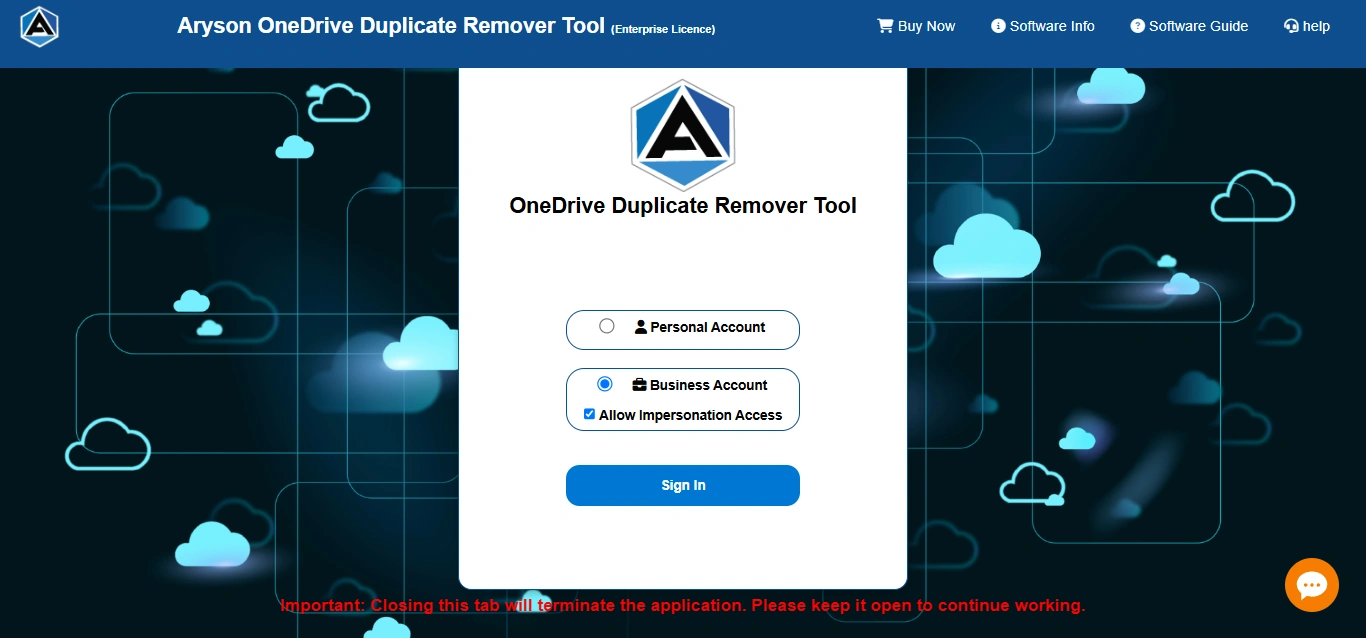
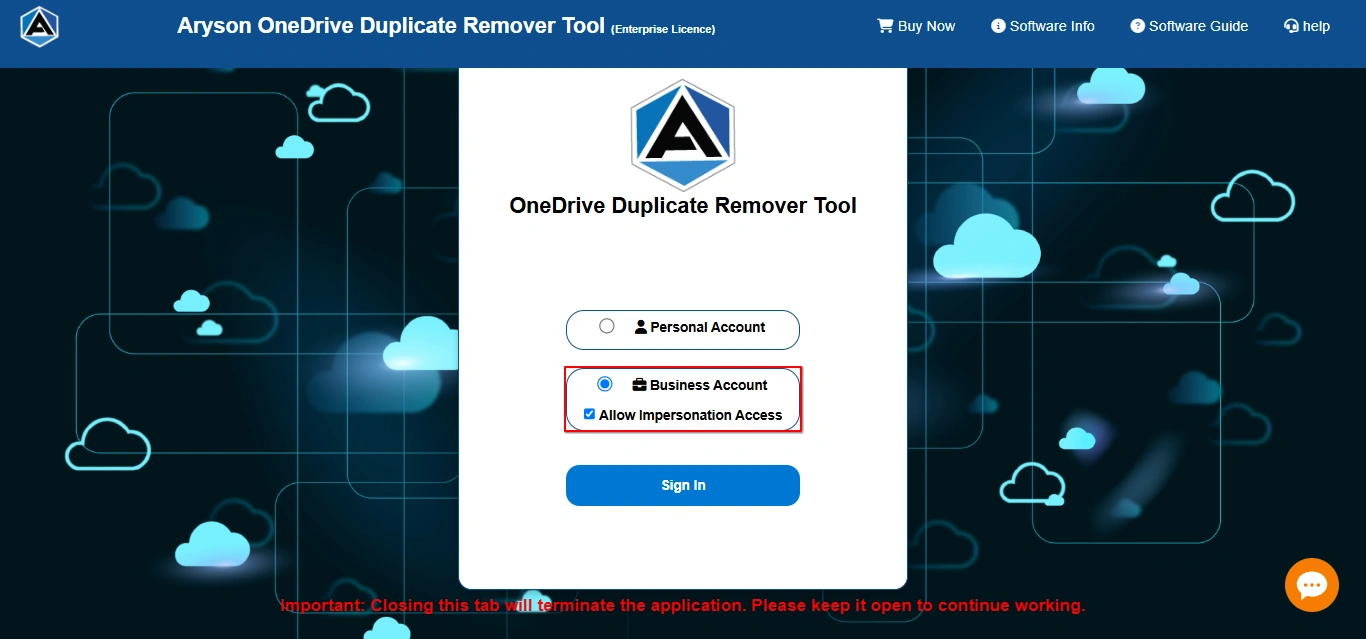
Step 2: After that, choose the option of Business Account and check Allow Impersonation Access.
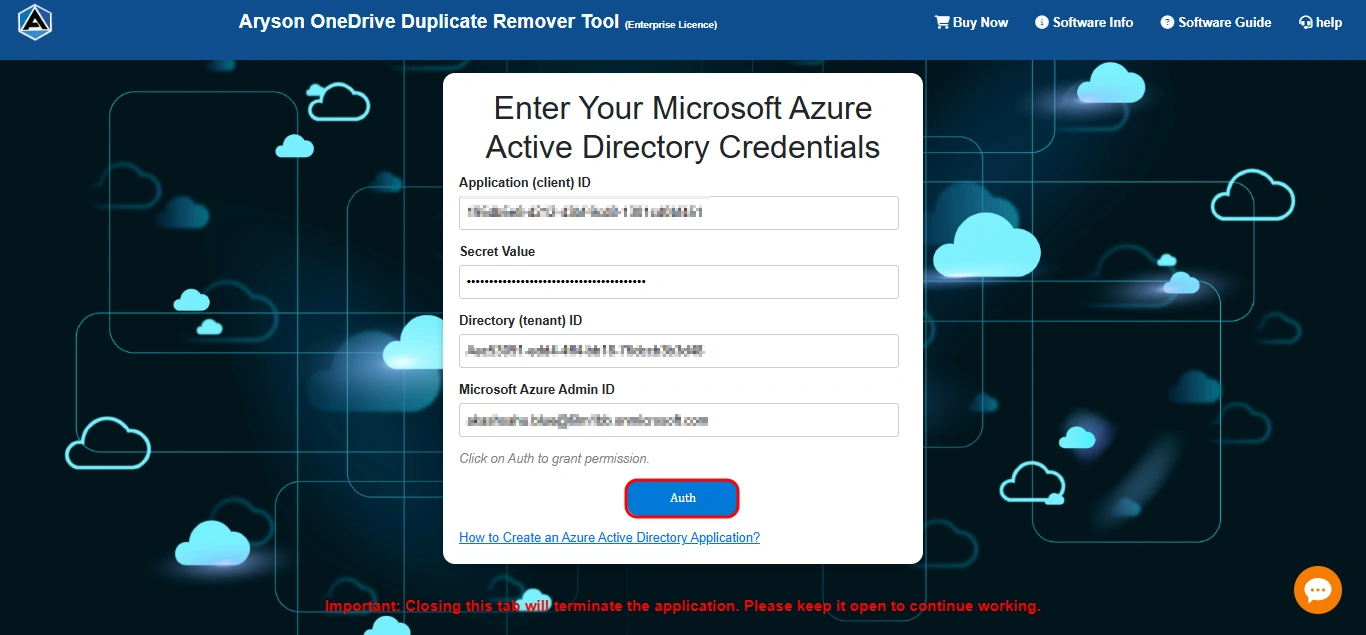
Step 3: Next, enter your Microsoft Azure Active Directory Credentials in the given panel.
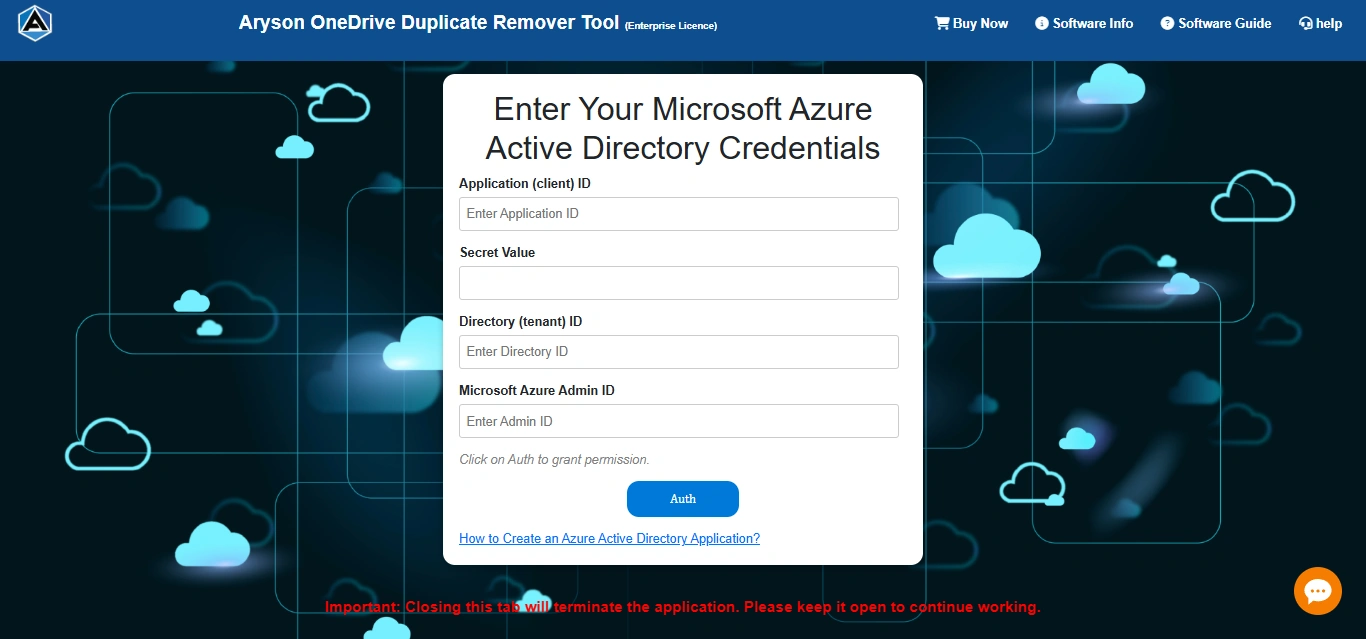
Step 4: After entering all the details, kindly click on the Auth button to authenticate.
Step 5: Enable the Auto Remove option for quick, one-click duplicate file removal. When you select the Auto Delete option, a pop-up window titled Duplicate File Handling Options appears:
- Retain the Newest File: Keeps the most recently modified version and deletes older duplicates.
- Retain the Oldest File: Keeps the earliest version and removes newer duplicates.
- Move to Bin: Transfers deleted duplicates to the OneDrive Recycle Bin, ensuring recovery if needed.
- Delete Permanently: Removes duplicate files completely without sending them to the Recycle Bin.
Step 6: A pop-up will appear to confirm the auto deletion process >>Click OK to proceed further.
Step 7: If any file cannot be deleted because of OneDrive throttling or temporary system issues, the software automatically skips it and proceeds with the remaining files. All skipped items are logged, and once the process completes, users are notified and can choose to retry deletion later.
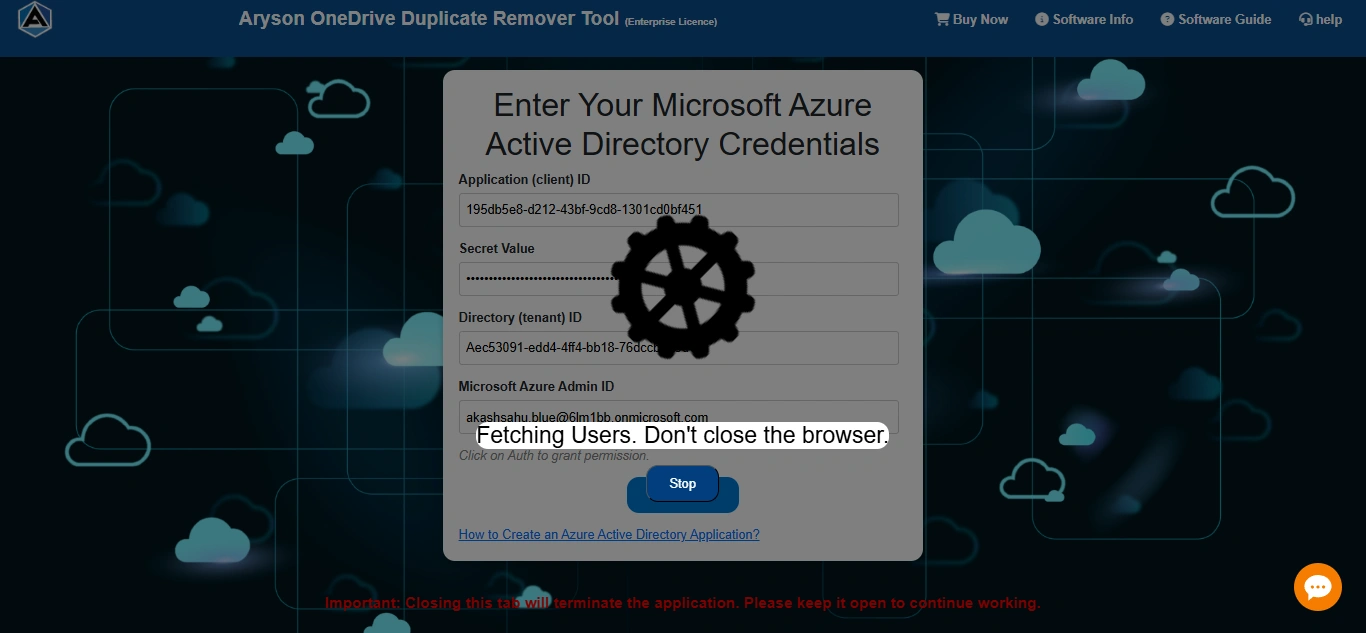
Step 8: Next, please wait while our system authenticates you with your credentials.
Step 9: Next, you will be able to view all the accounts associated with it.
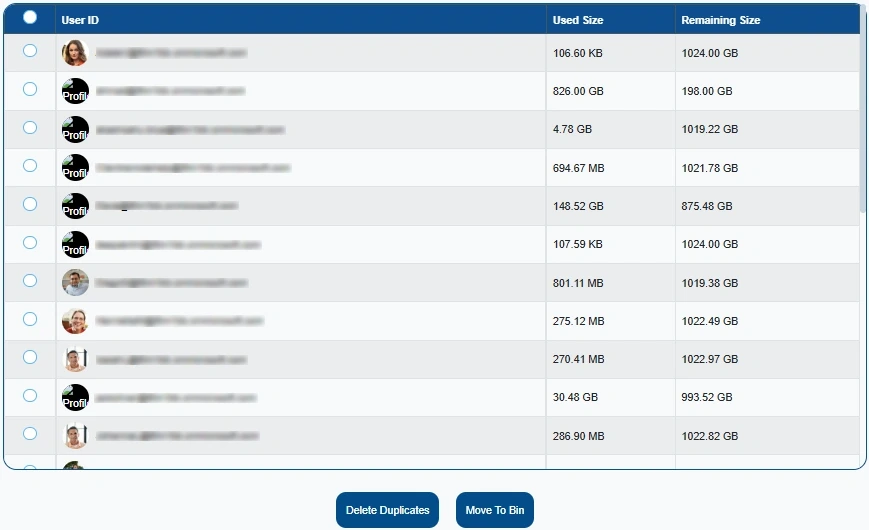
Step 10: Here, you can select the account from which you want to delete the duplicate file, folder, or data.
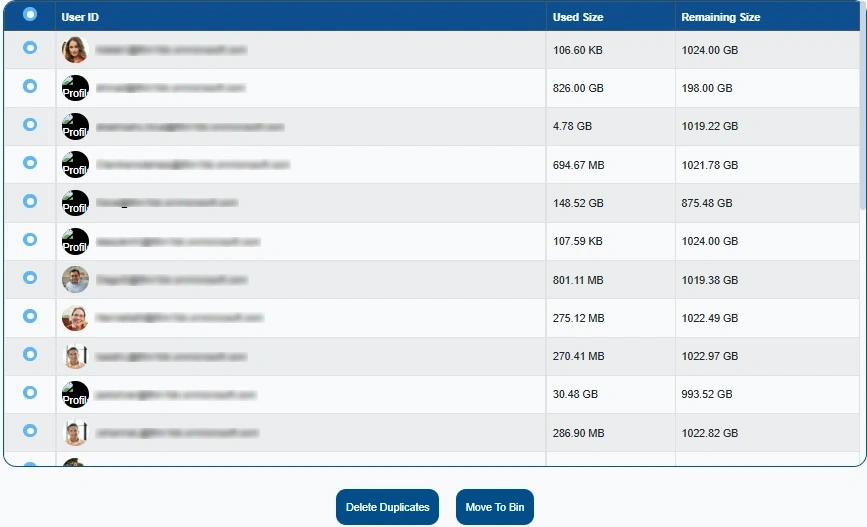
Step 11: After that, choose the option to either Move To Bin or Delete Duplicates, depending on your needs.
Step 12: Then, a pop-up message will appear asking for your permission.
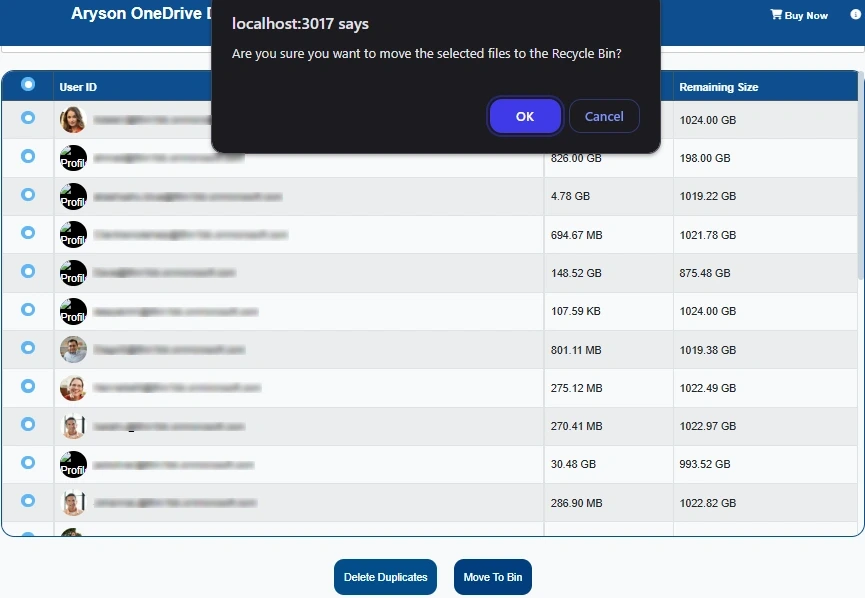
Step 13: Here, click the OK button to grant permission to move the duplicate files to the Bin.
Step 14: Now, please wait while the system processes the data in your account.
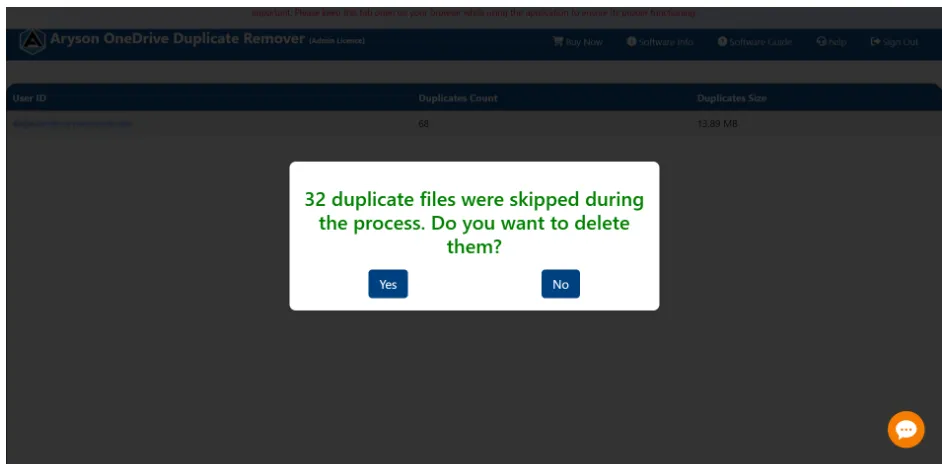
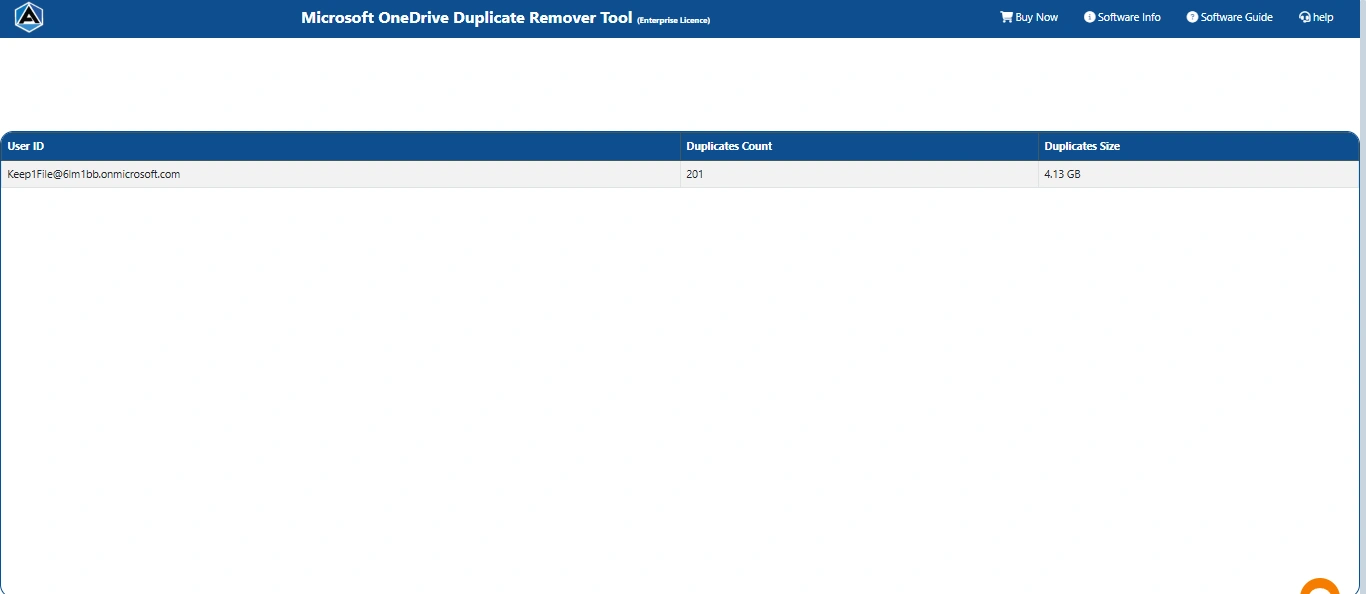
Step 15: After that, the system will display the count of duplicate files and their total size.
Step 16: Next, you can also generate a report of the data that has been removed.
Step 17: In the end, the report will be in an Excel sheet. Open it to analyze the details.
Software Working Video
Pre-Requisites of One Drive Duplicate Remover
General Requirements:
- The user must have a valid Personal or Business OneDrive account.
- Ensure that your Personal or Business OneDrive account is logged in on your default web browser.
- If using Impersonation Mode for Business account to remove duplicates from multiple sub-users, the following Microsoft Azure Active Directory Credential details are required:
- Application Client ID
- Secret Key
- Tenant ID
- Admin ID
- The OneDrive account must contain duplicate files; otherwise, the tool will display “No duplicate files found”.
Browser Requirements:
- A stable internet connection is required.
- The software runs on the web browser.
Activation Guide
Activate the Software
Installation & Uninstallation
Installation & Uninstallation of Software
User Interface
User Interface
After downloading the Aryson Onedrive Duplicate Remover Tool, you will find the welcome screen as played below.
