Complete Step-by-Step Guide for Aryson Office 365 Backup Tool
Easily backup and export Office 365 data into multiple file formats, including PST, EML, MSG, PDF, MBOX, CSV, and more on Windows, Mac, and Linux. This software also supports direct migration to Microsoft 365, Google Workspace, IMAP, and other email platforms. For any assistance, refer to the detailed user guide.
-
Table of Content
- Software Working Process
- Activation Guide
- Installation & Uninstallation
- User Interface
Software Working Process
Software Working Process
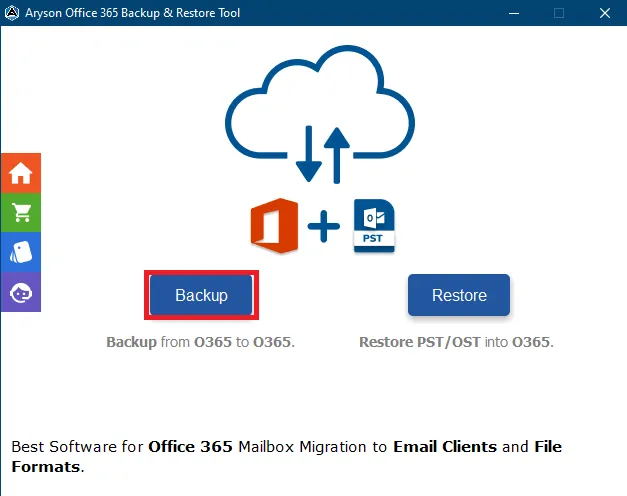
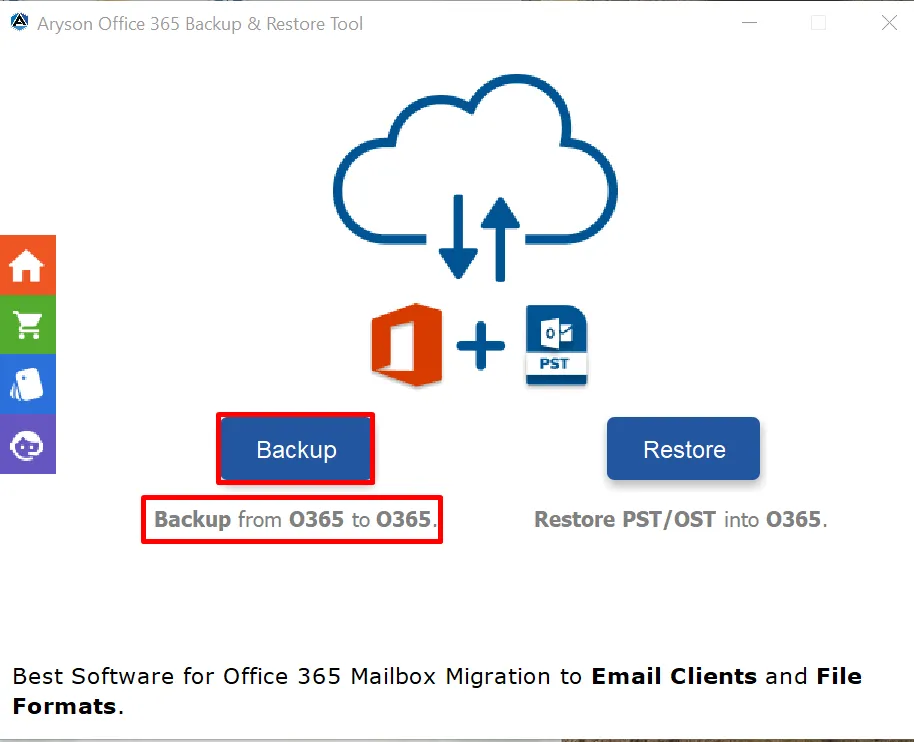
Step 1: Download and install the Aryson Office 365 Backup Tool on your system and click on the Backup Button.
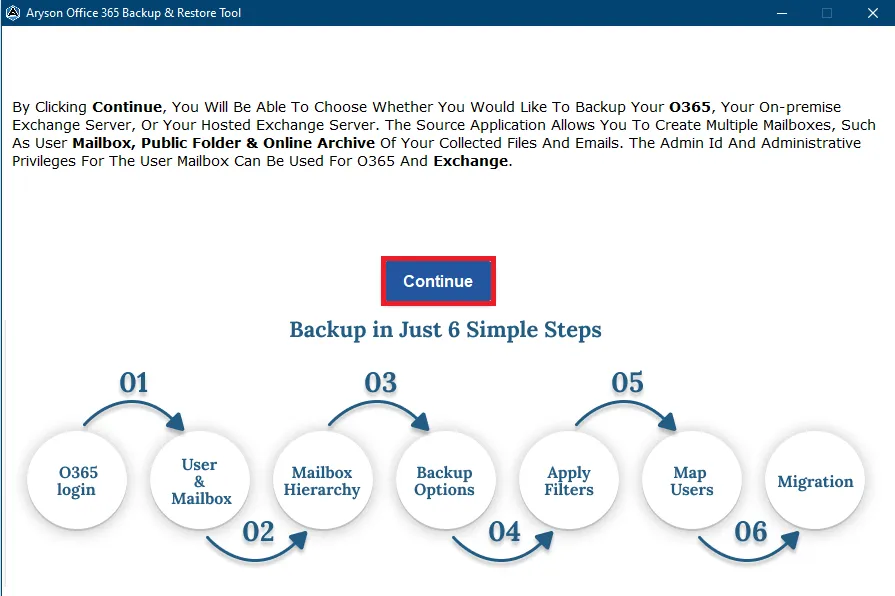
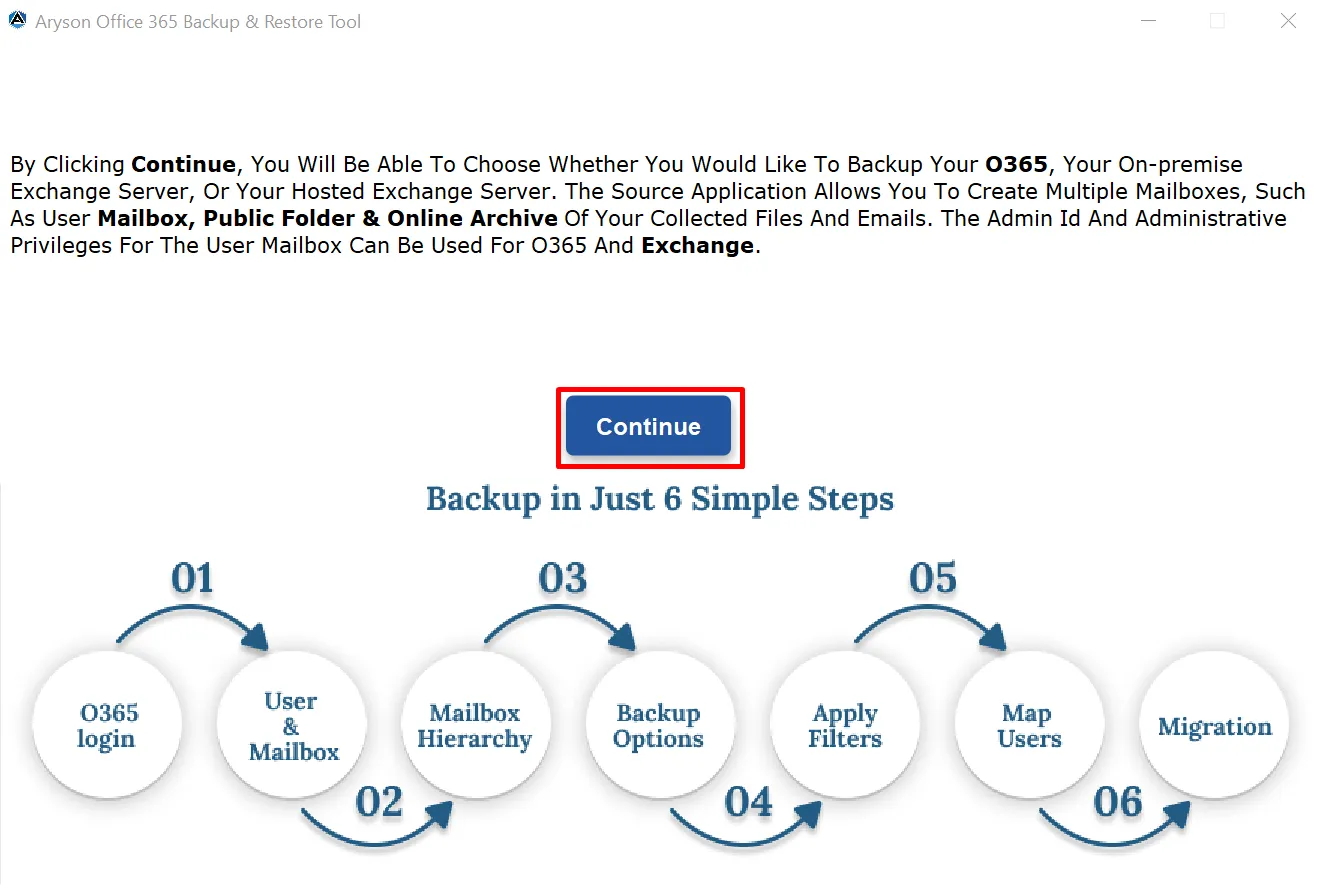
Step 2: Click on the Continue button on the welcome screen.
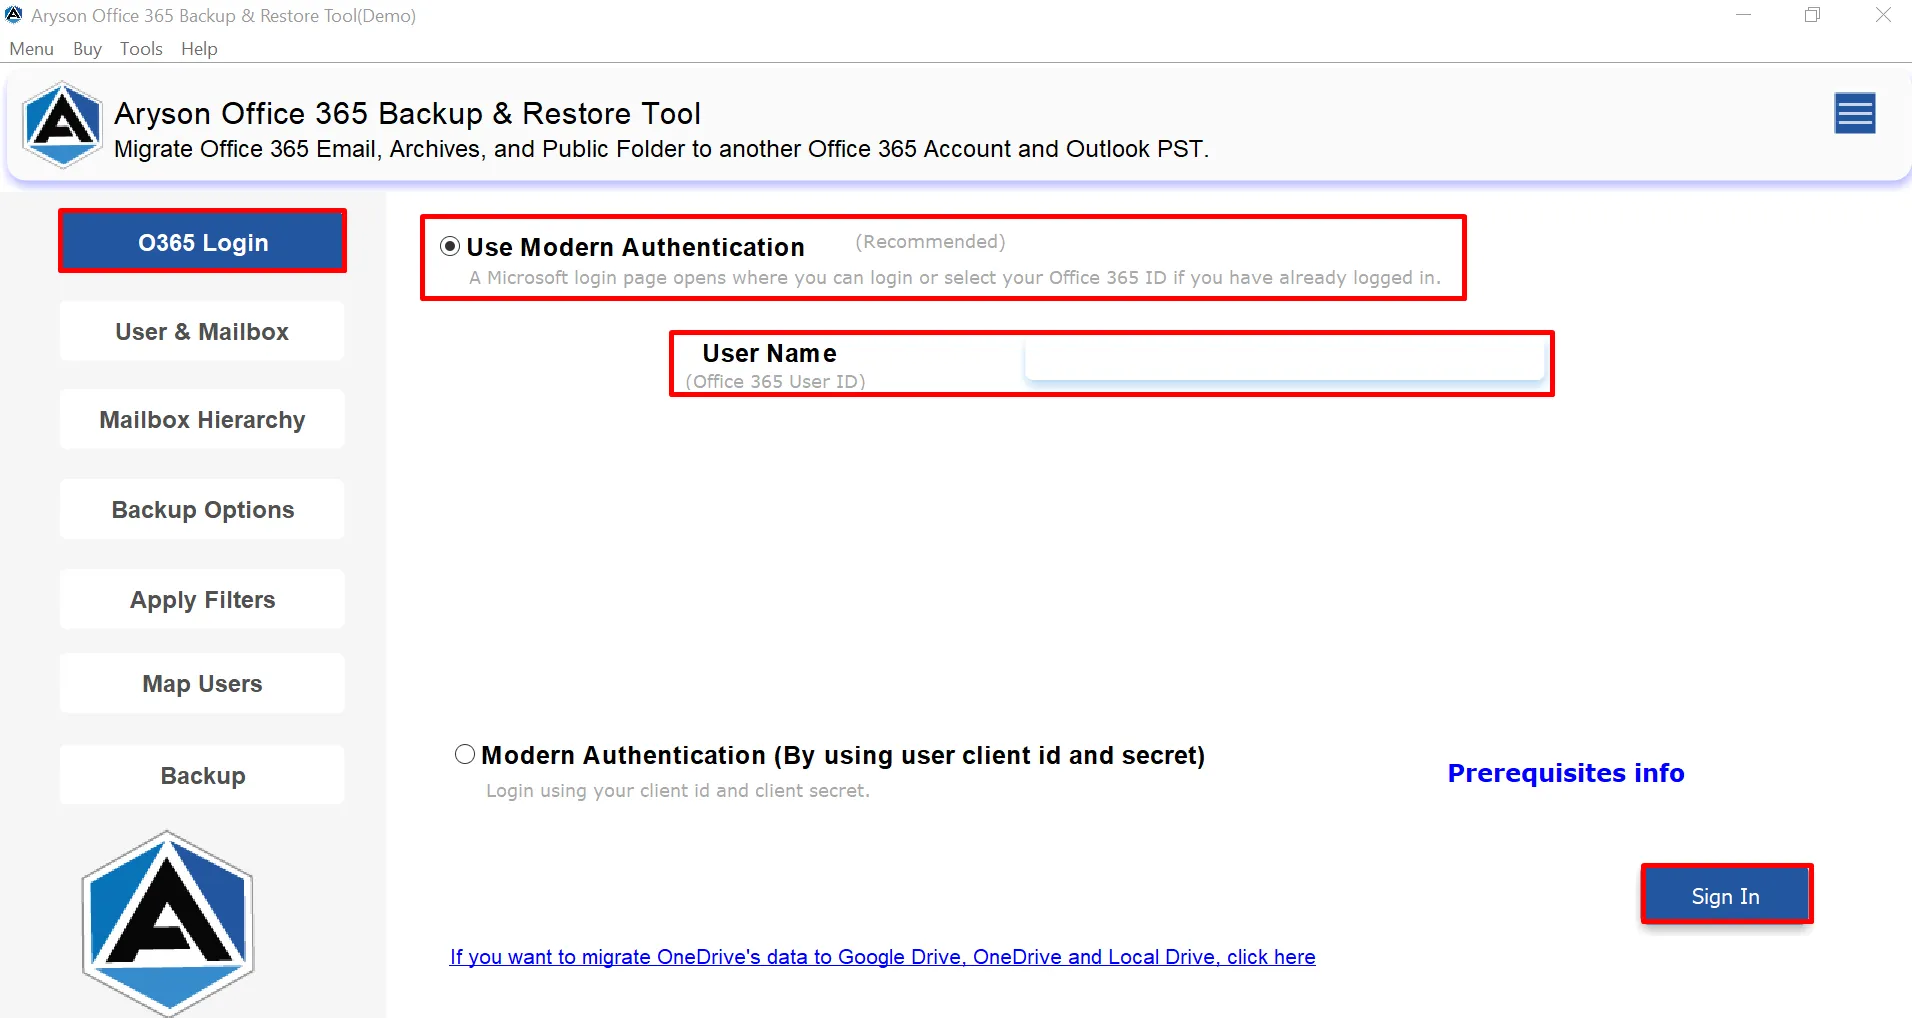
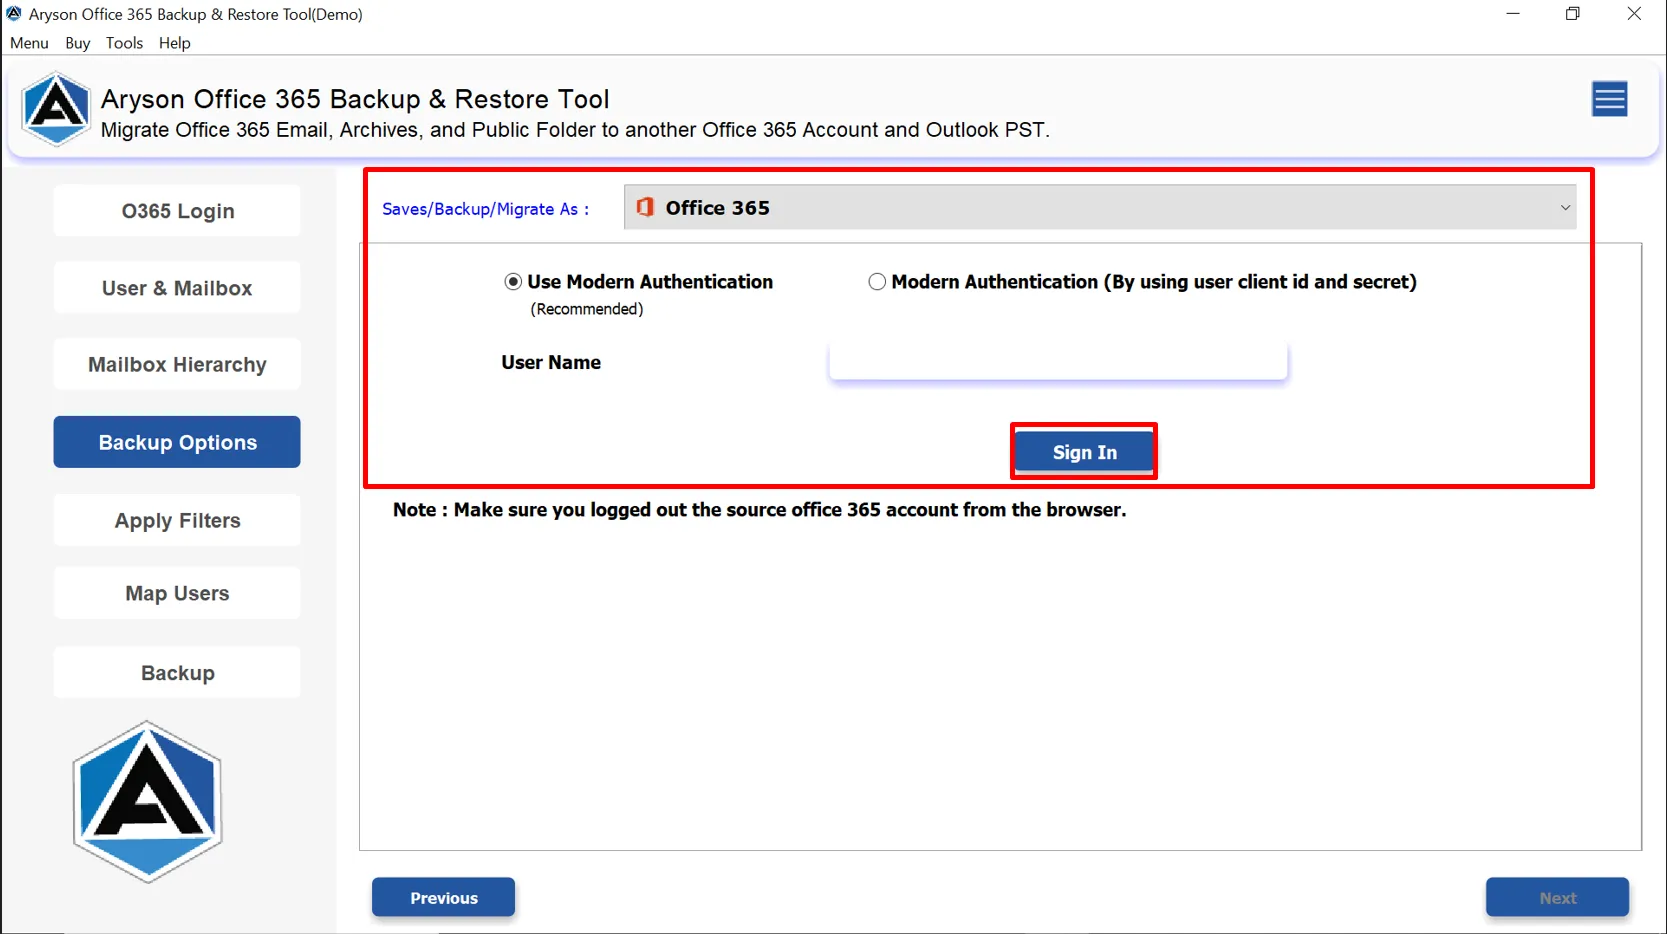
Step 3: Sign in to your Office 365 account using Modern Authentication (OAuth 2.0) or
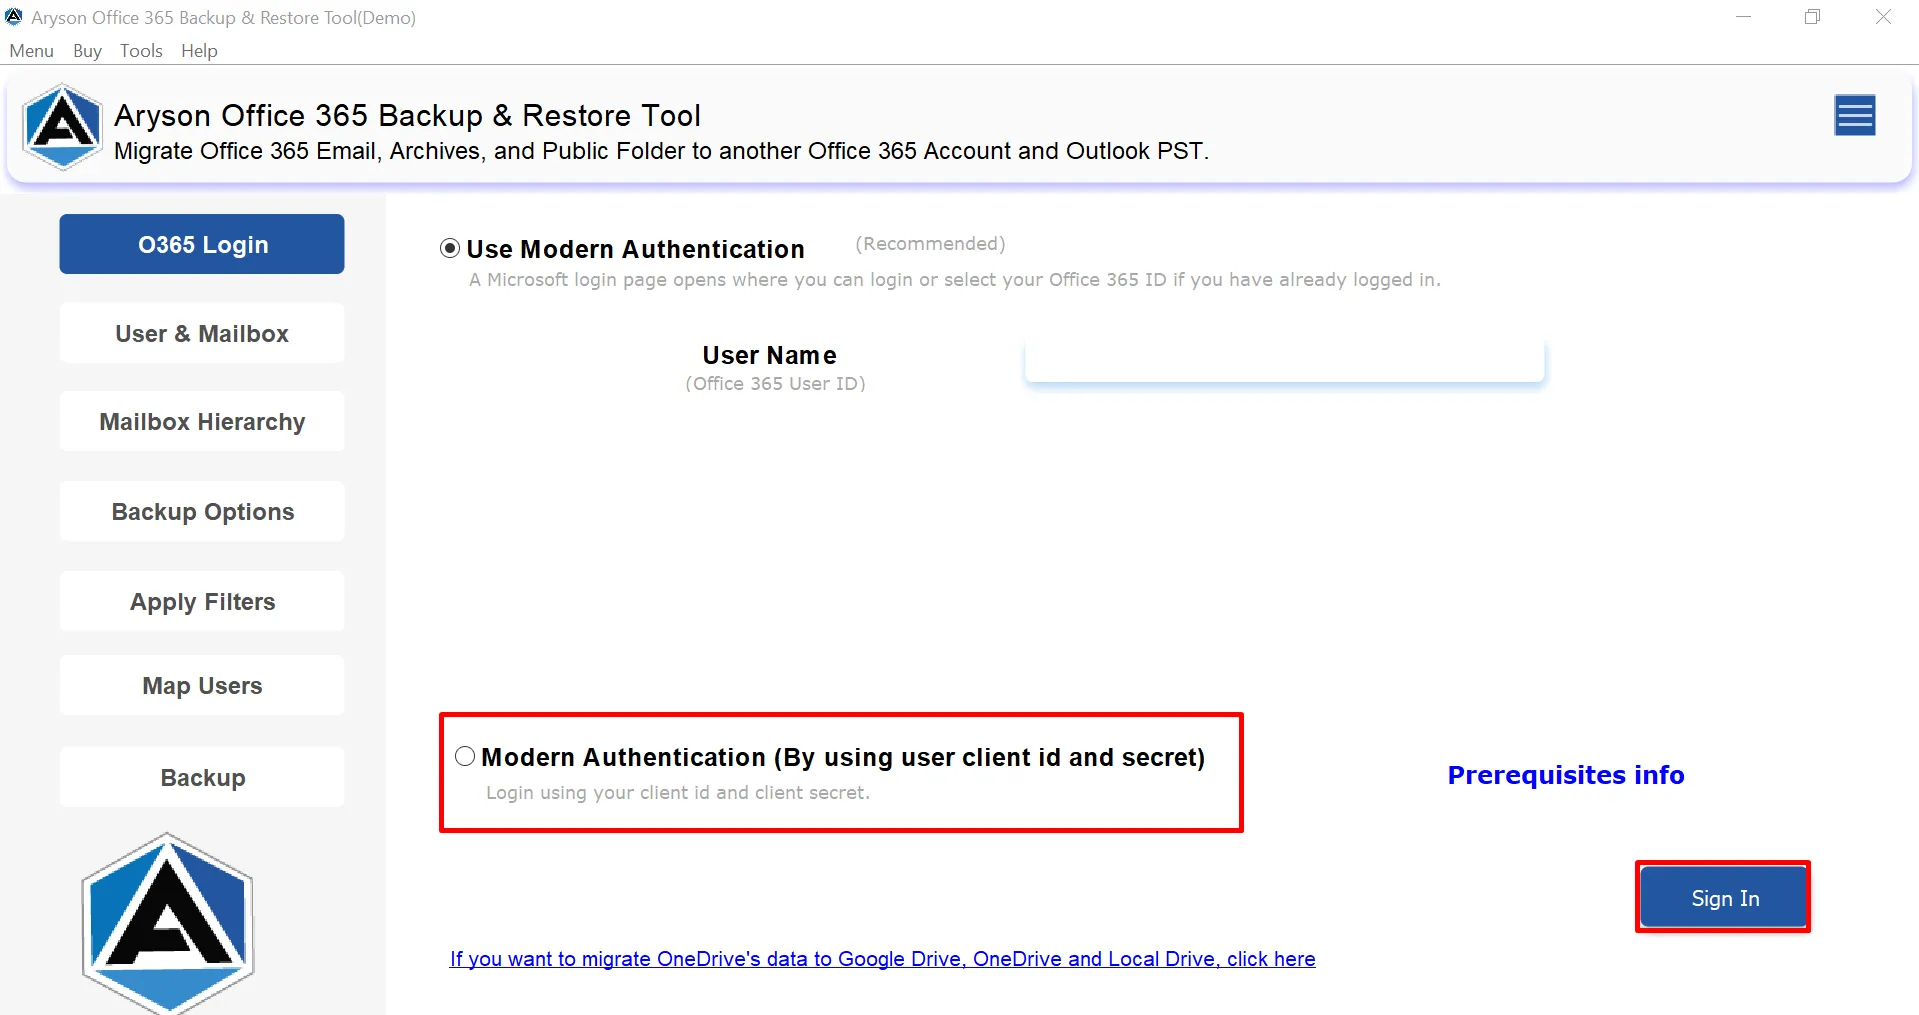
Step 4: Tick the Modern Authentication(By using user client id and secret) checkbox.
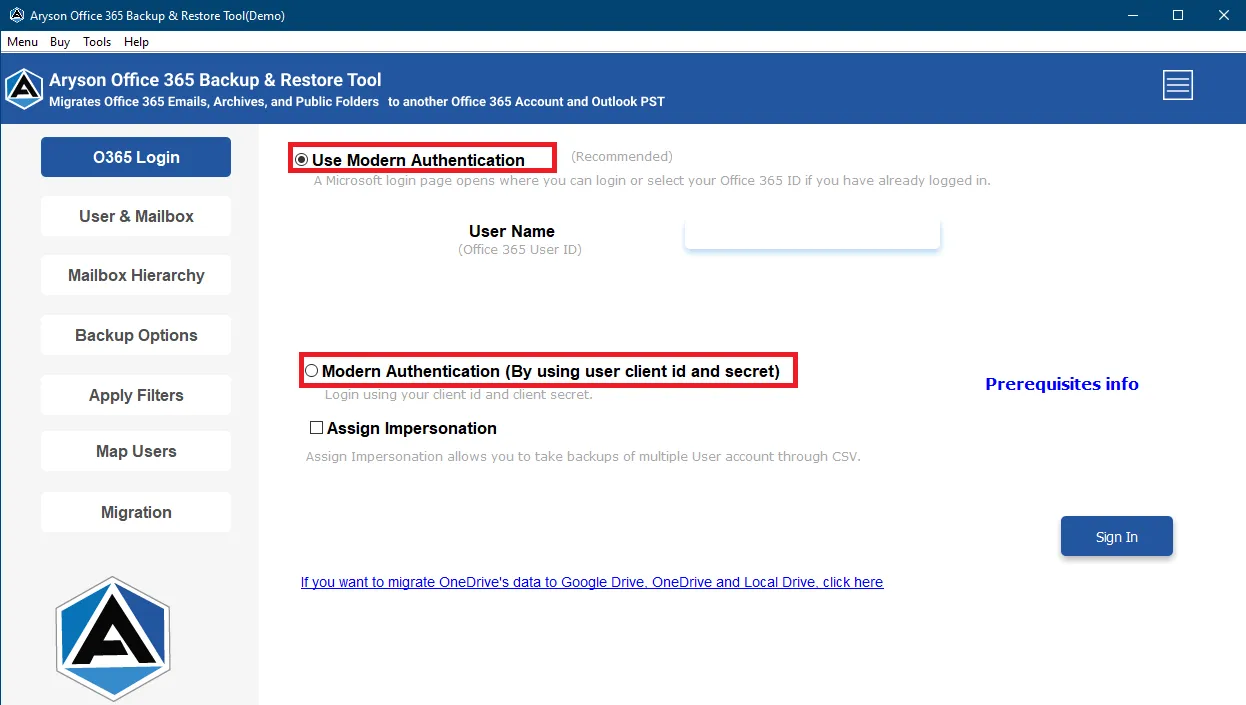
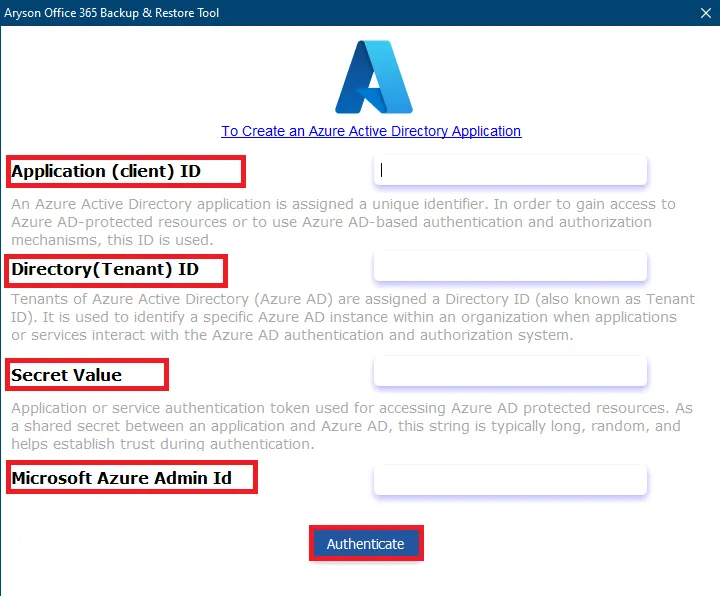
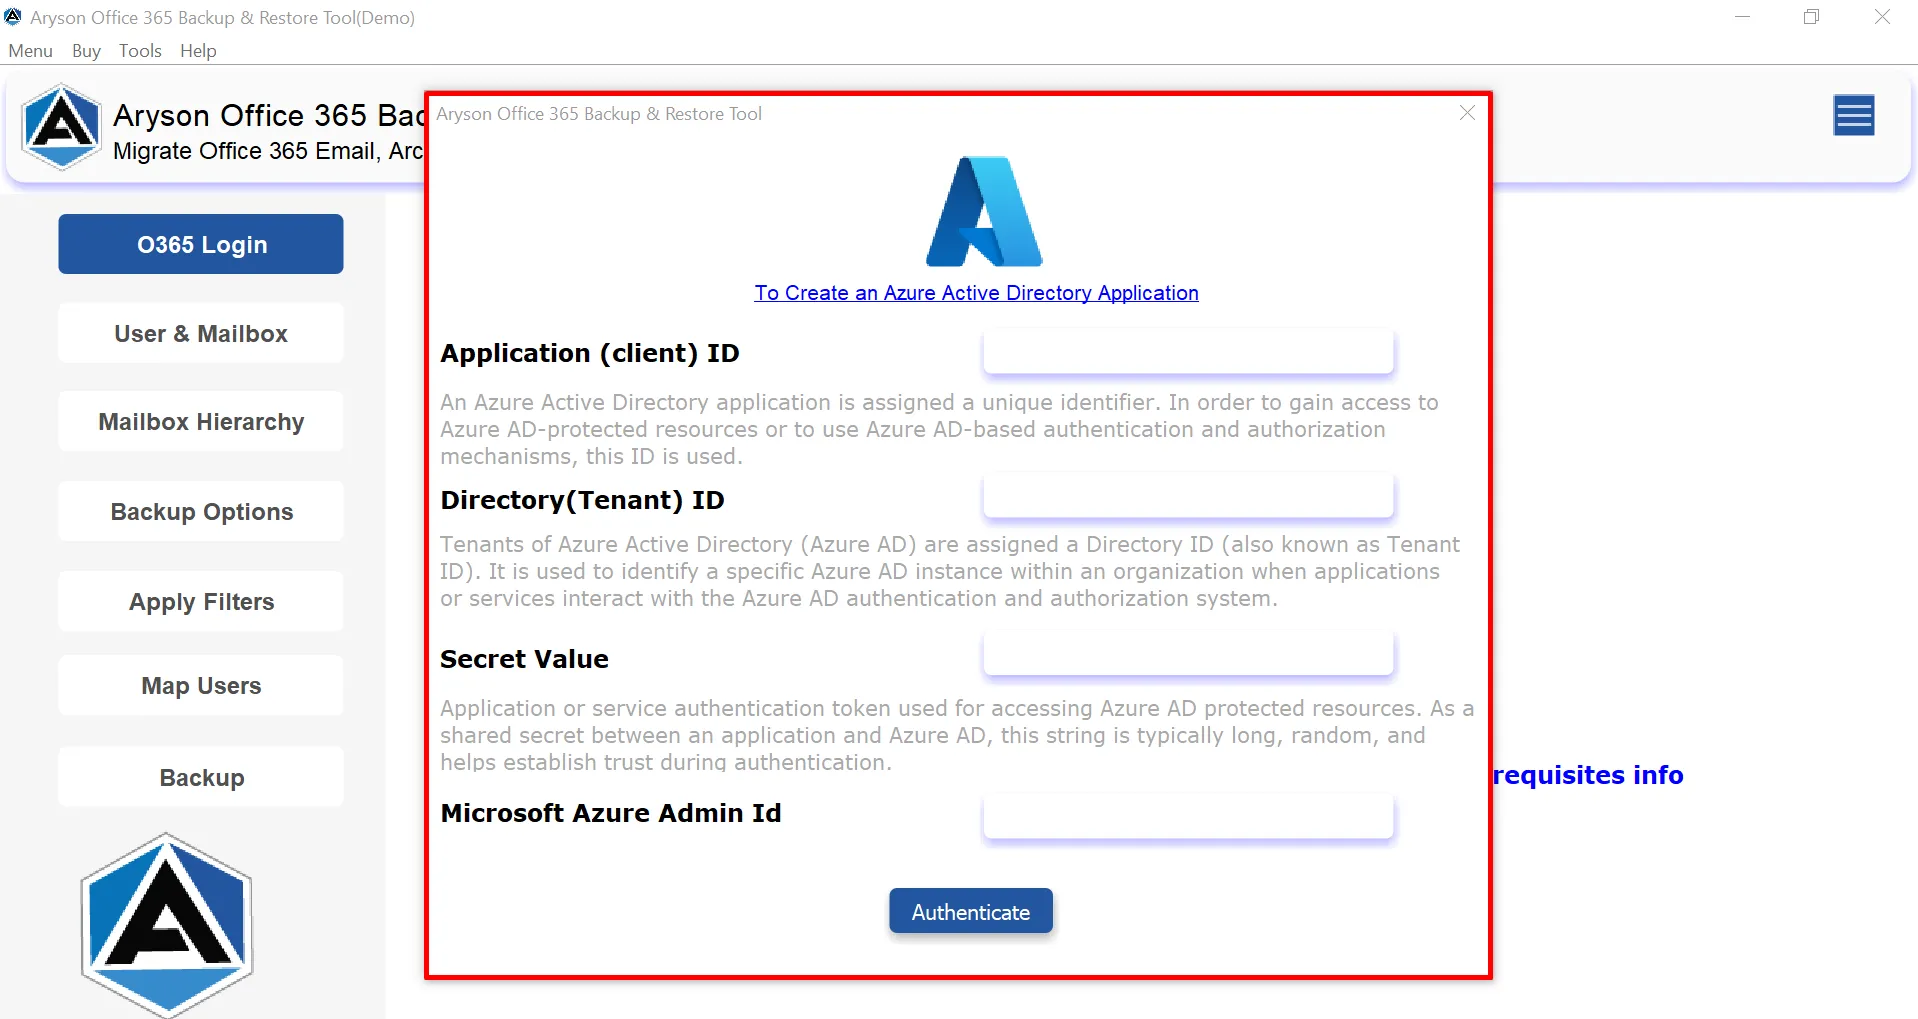
Step 5: Sign in to your Office 365 account using Client ID & Secret (admin-based login)
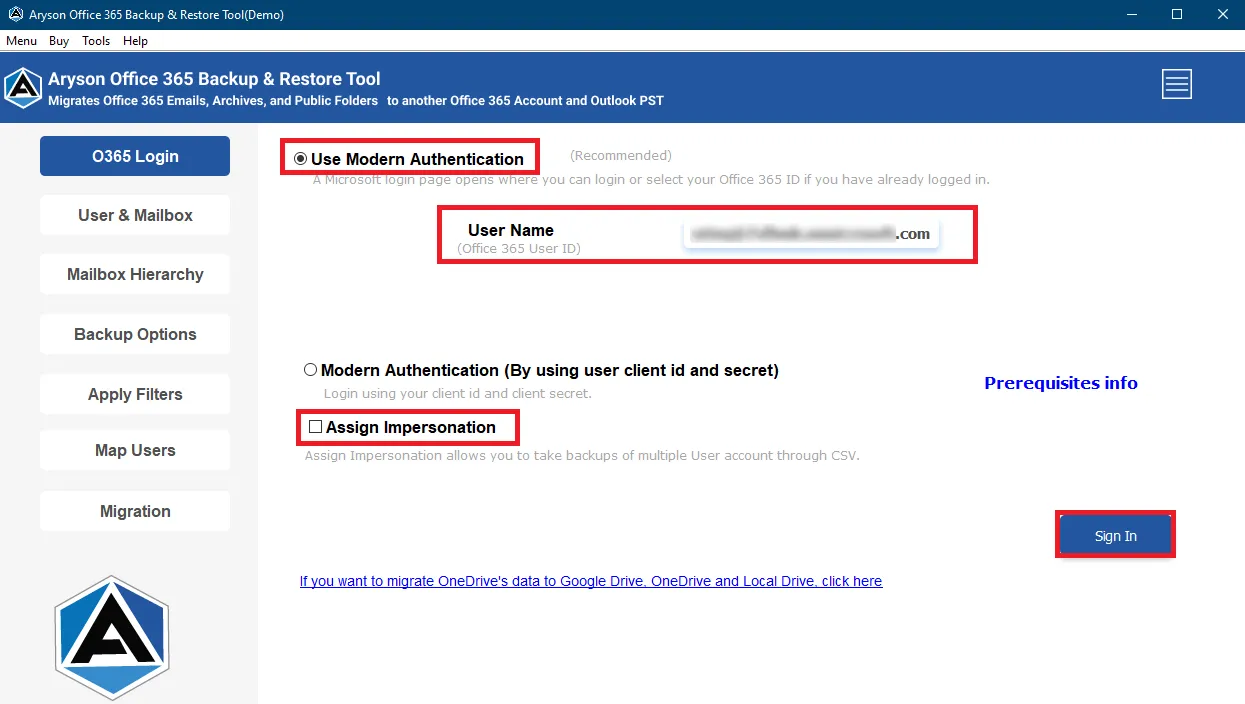
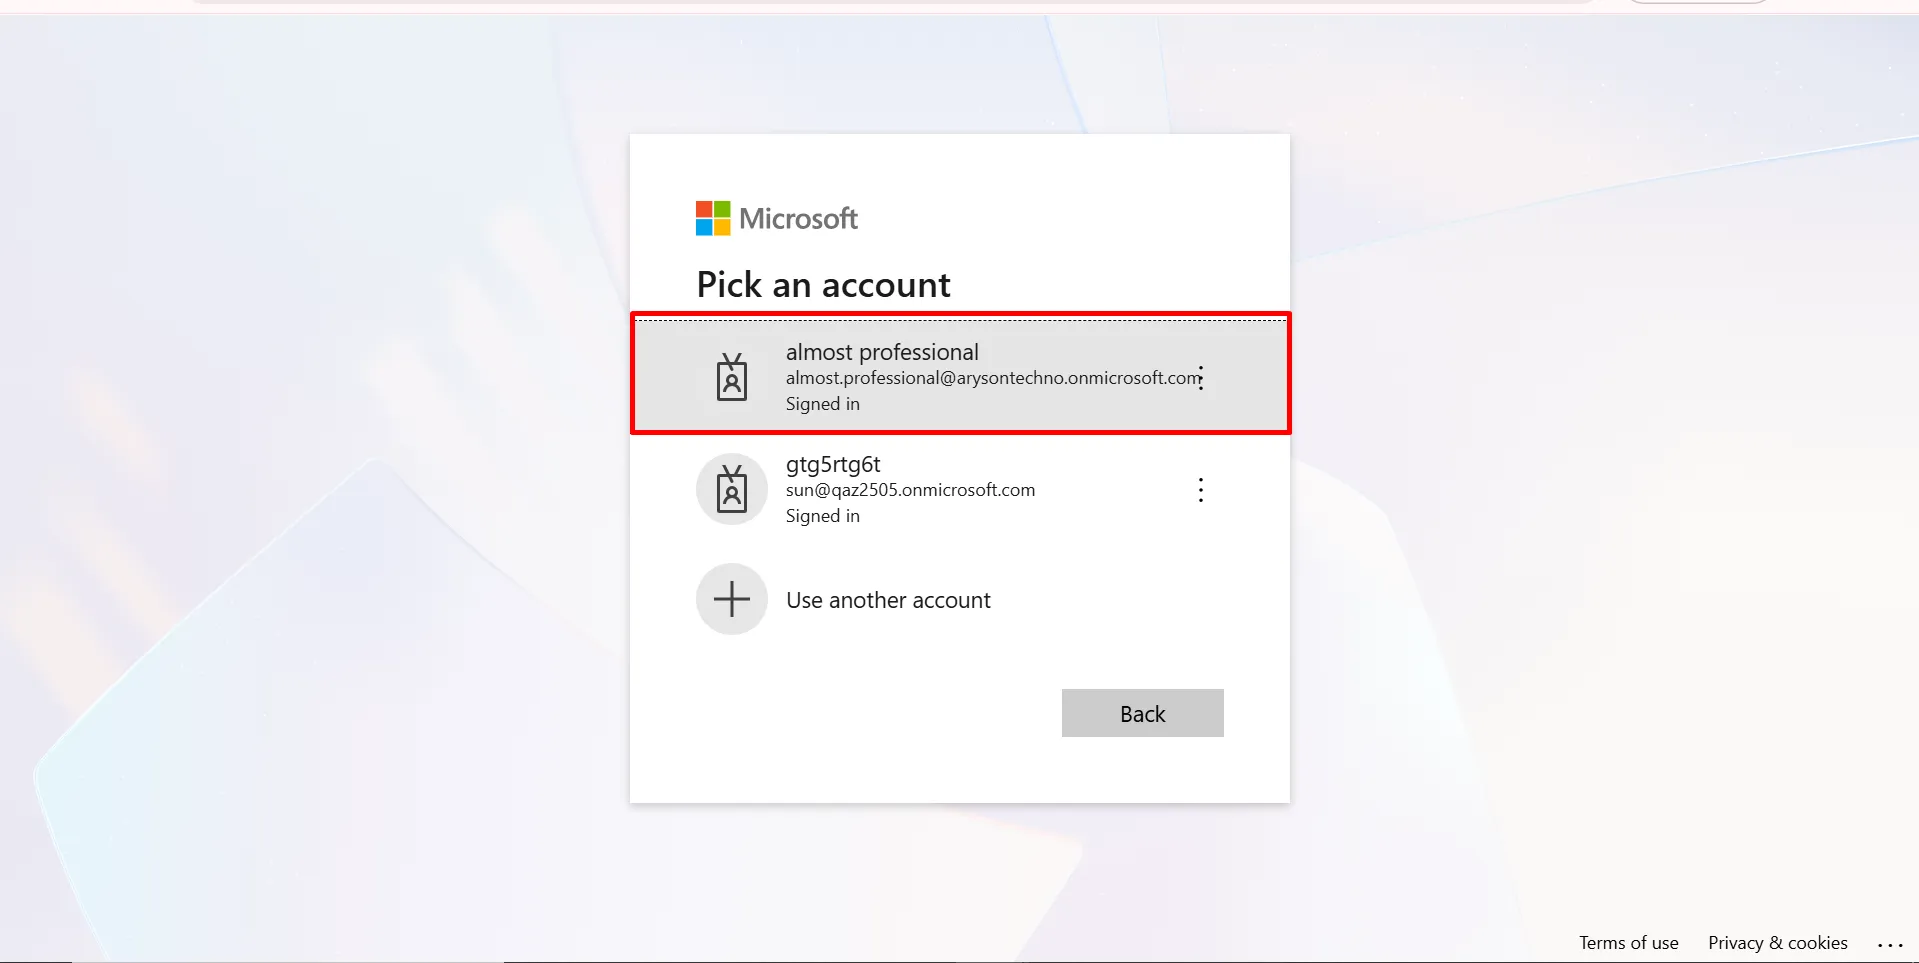
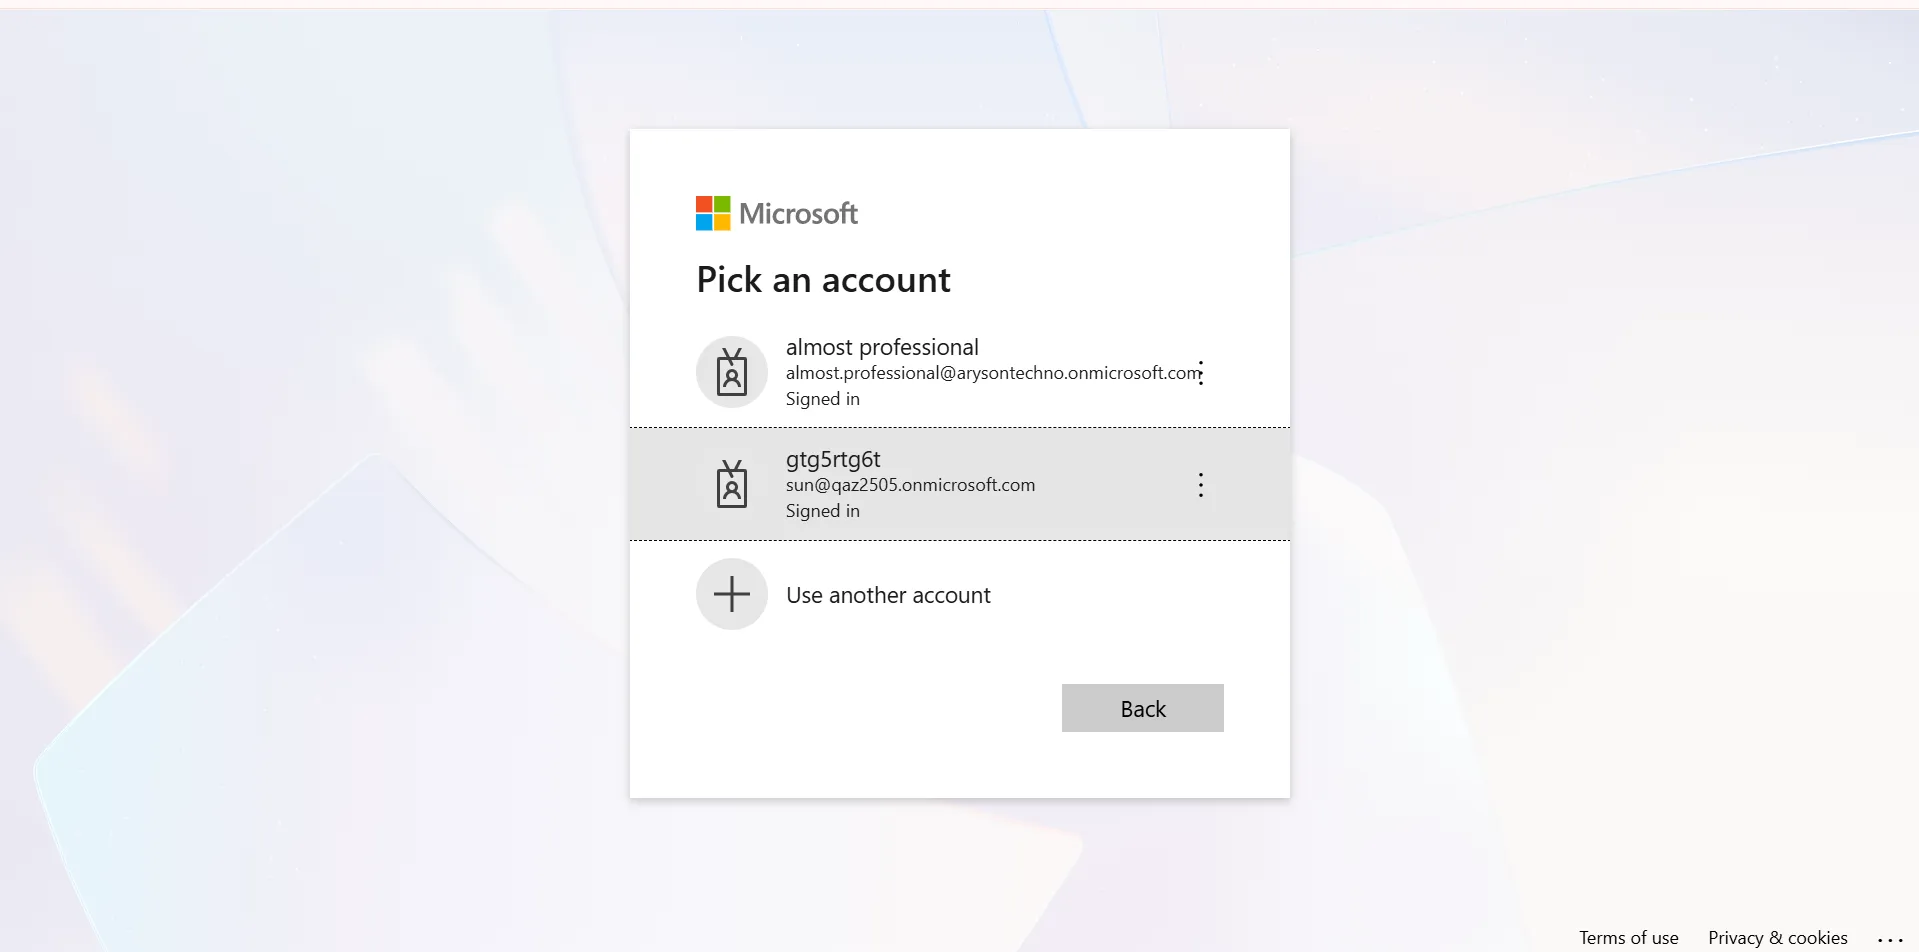
Step 6: Enter your required O365 credentials.

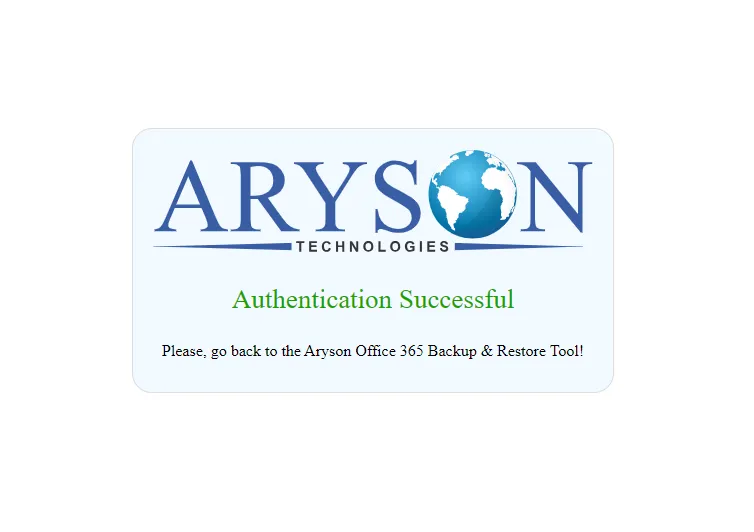
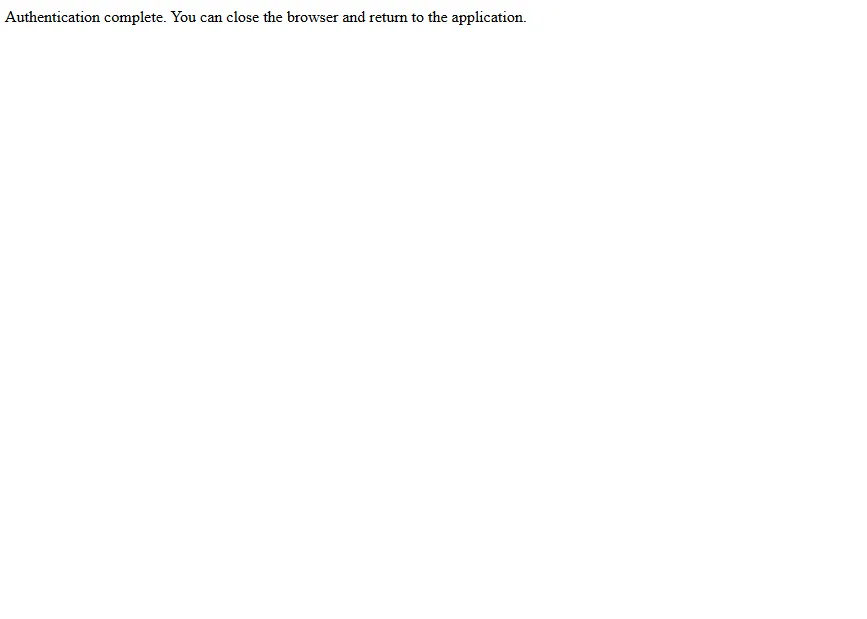
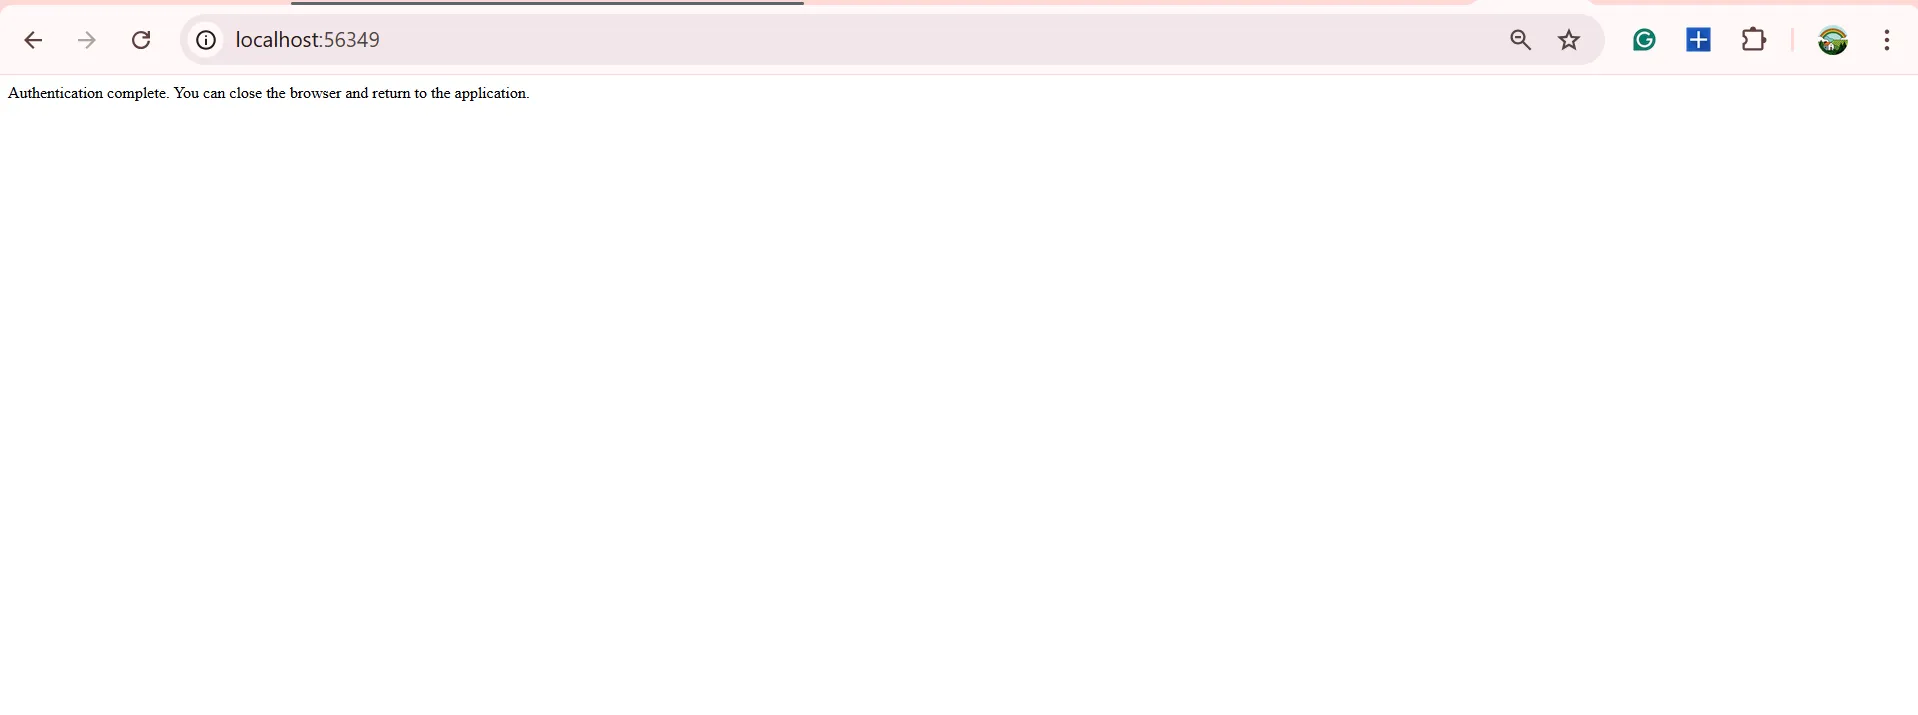
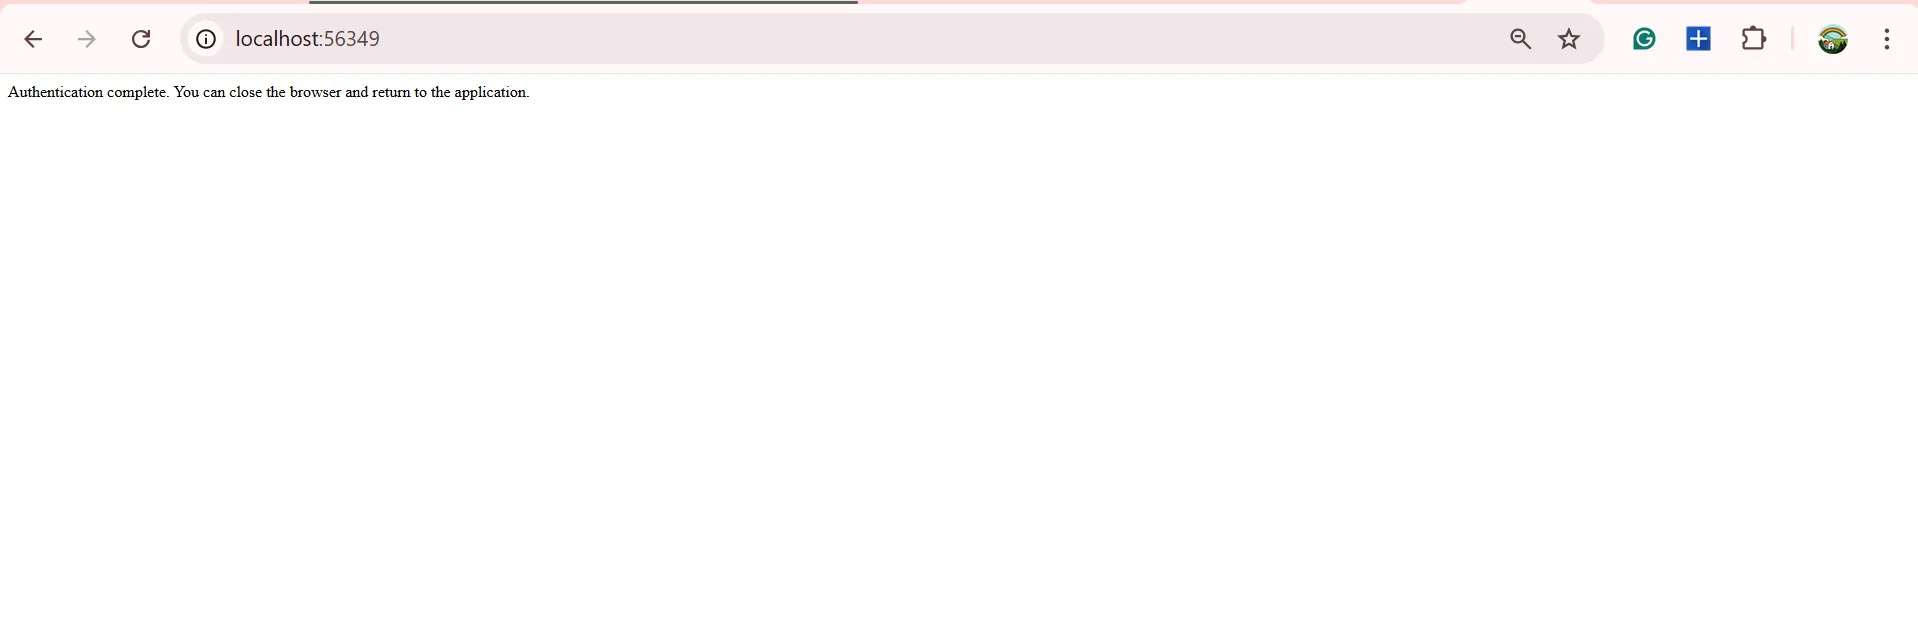
Step 7: An authentication completed pop-up will appear in the browser.
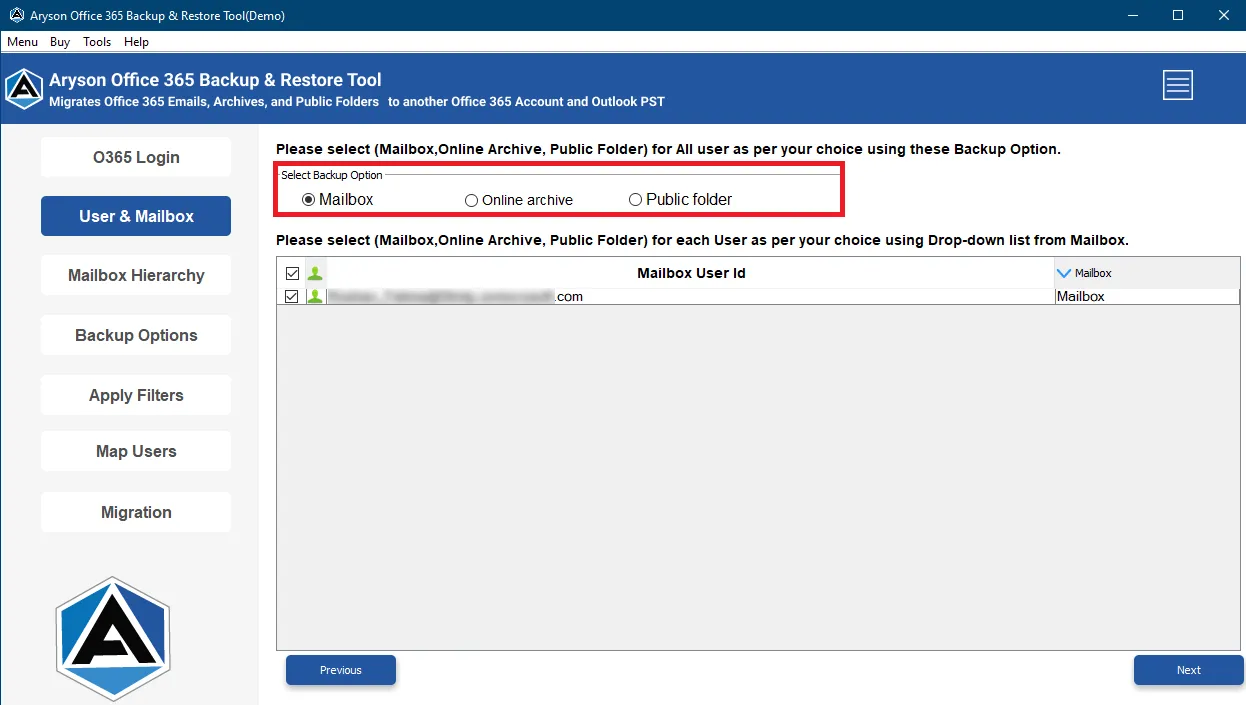
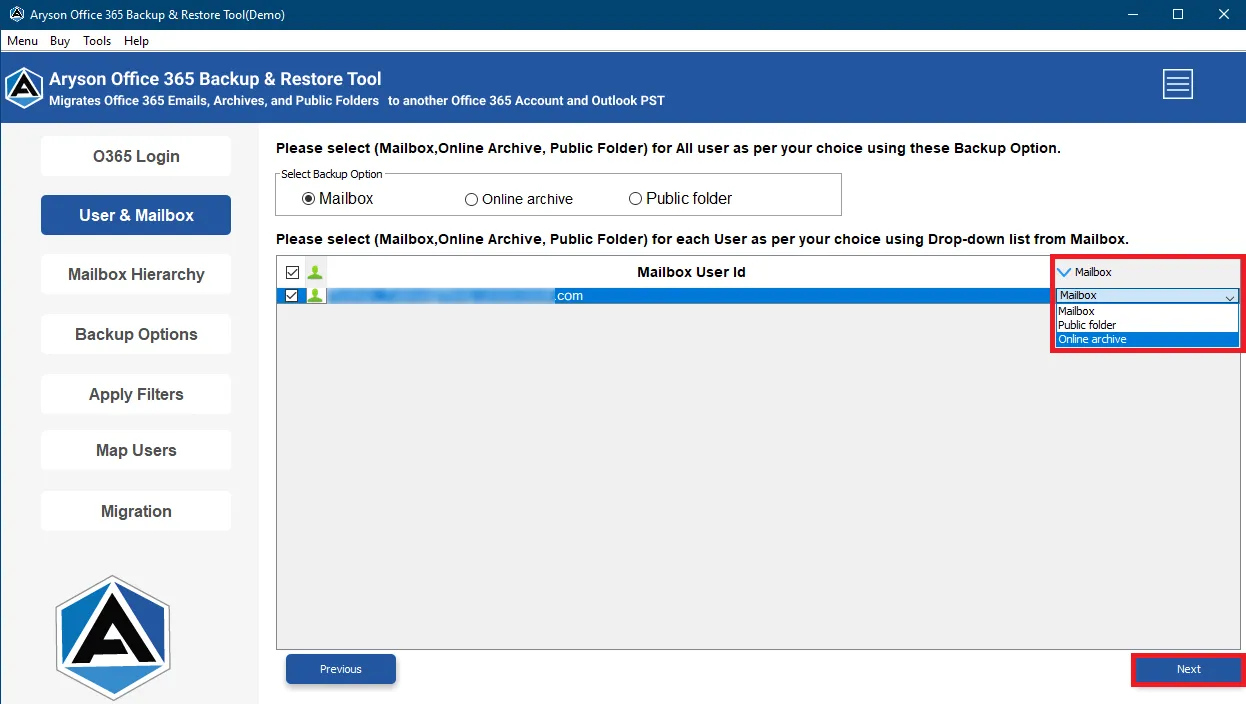
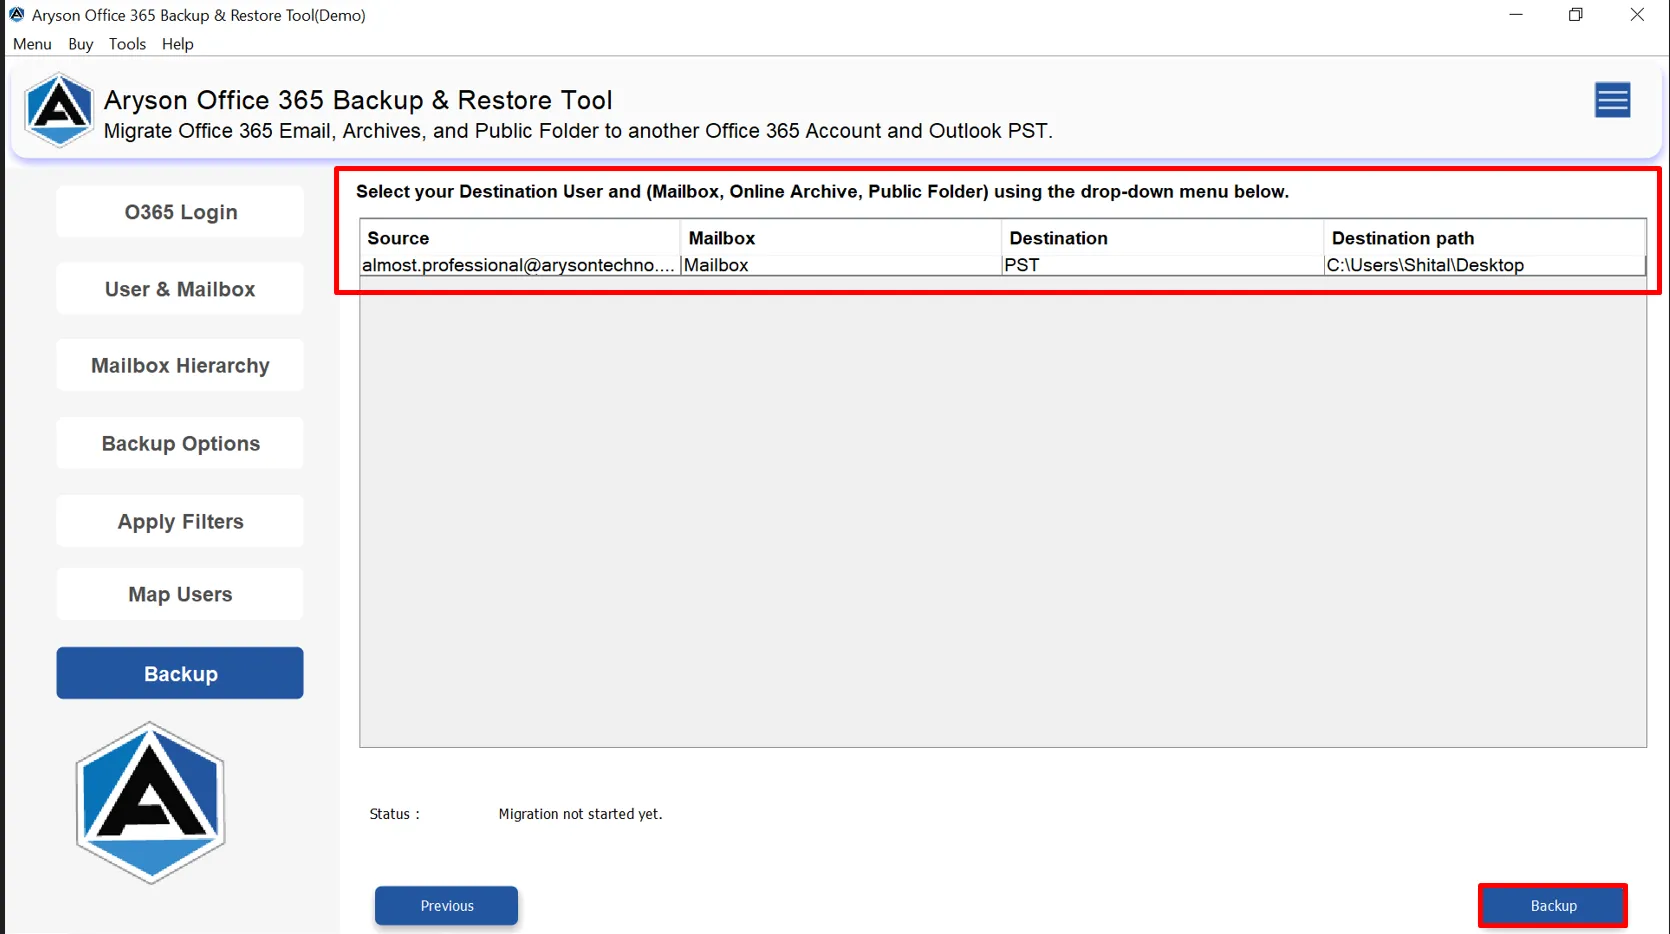
Step 8: Choose users and mailbox types such as Primary Mailbox, Online Archive, Public Folder, or Shared Mailbox.
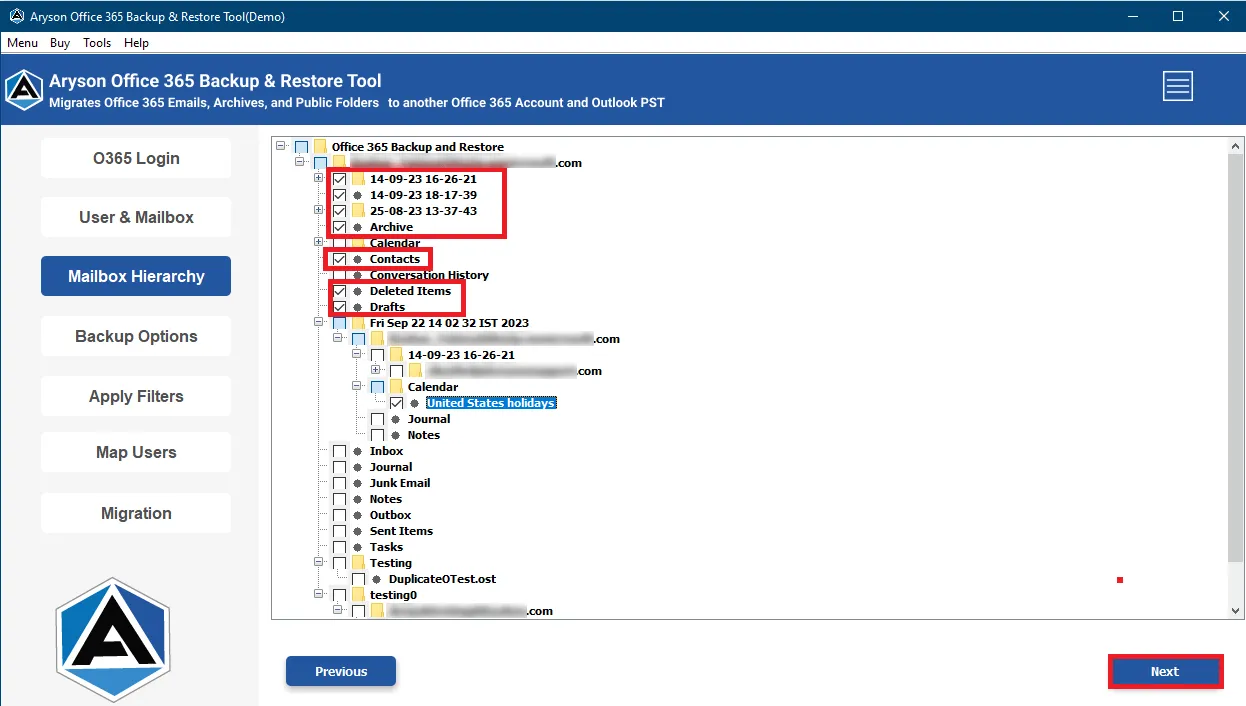
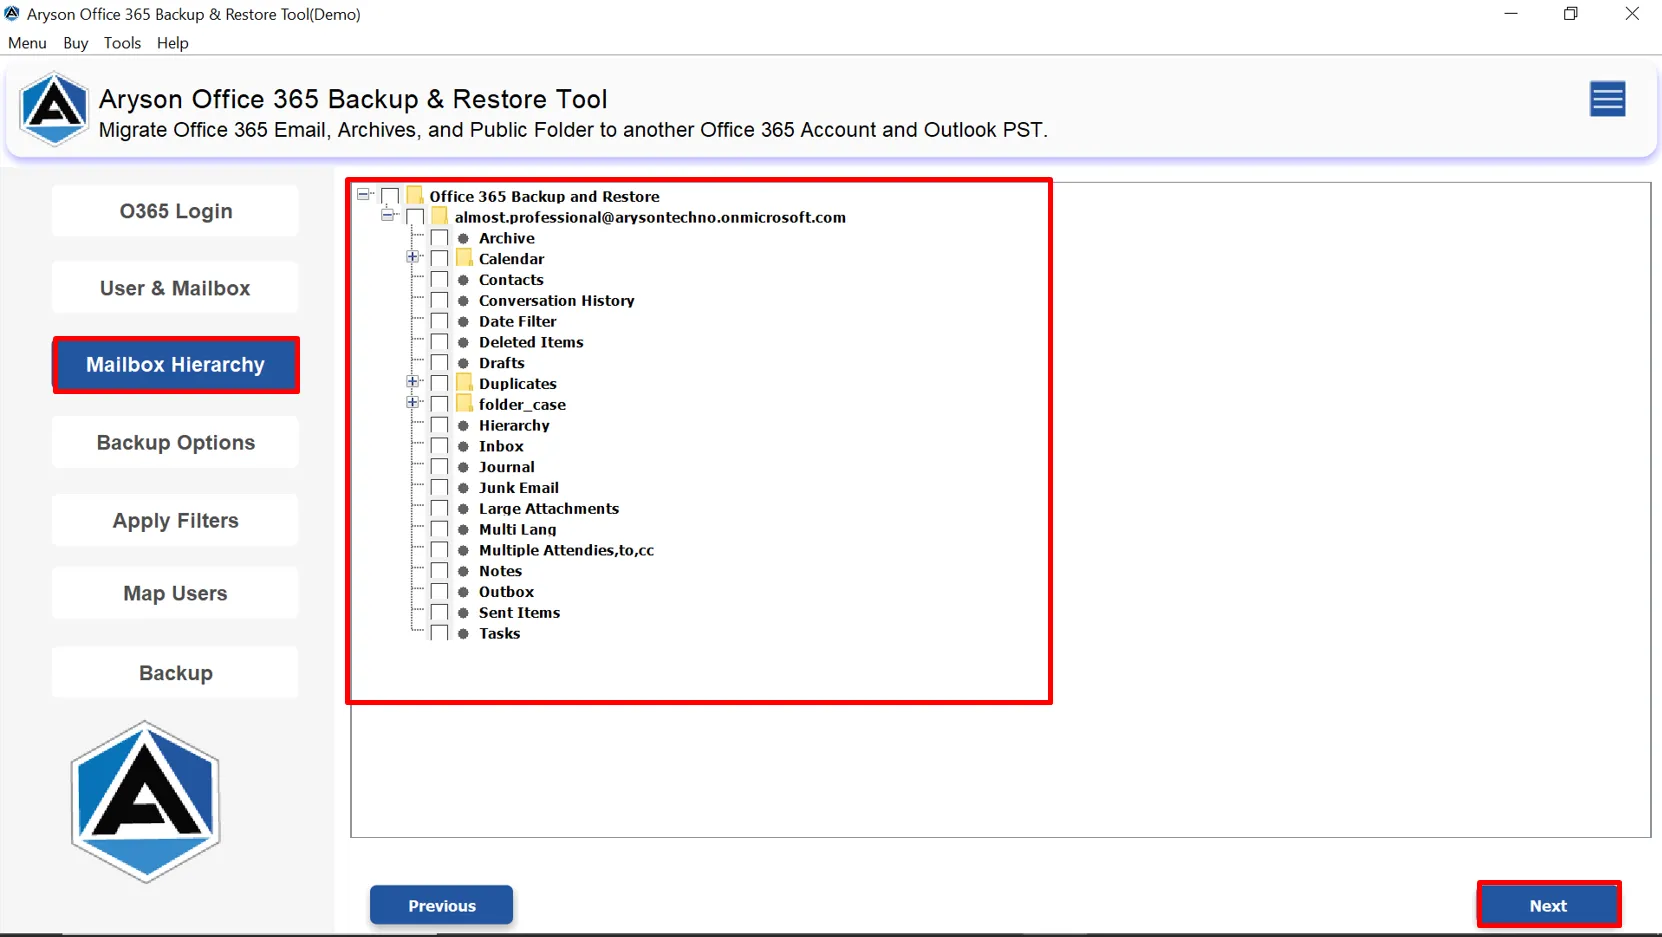
Step 9: Select the required mailbox folders from the tree structure and preview items if needed.
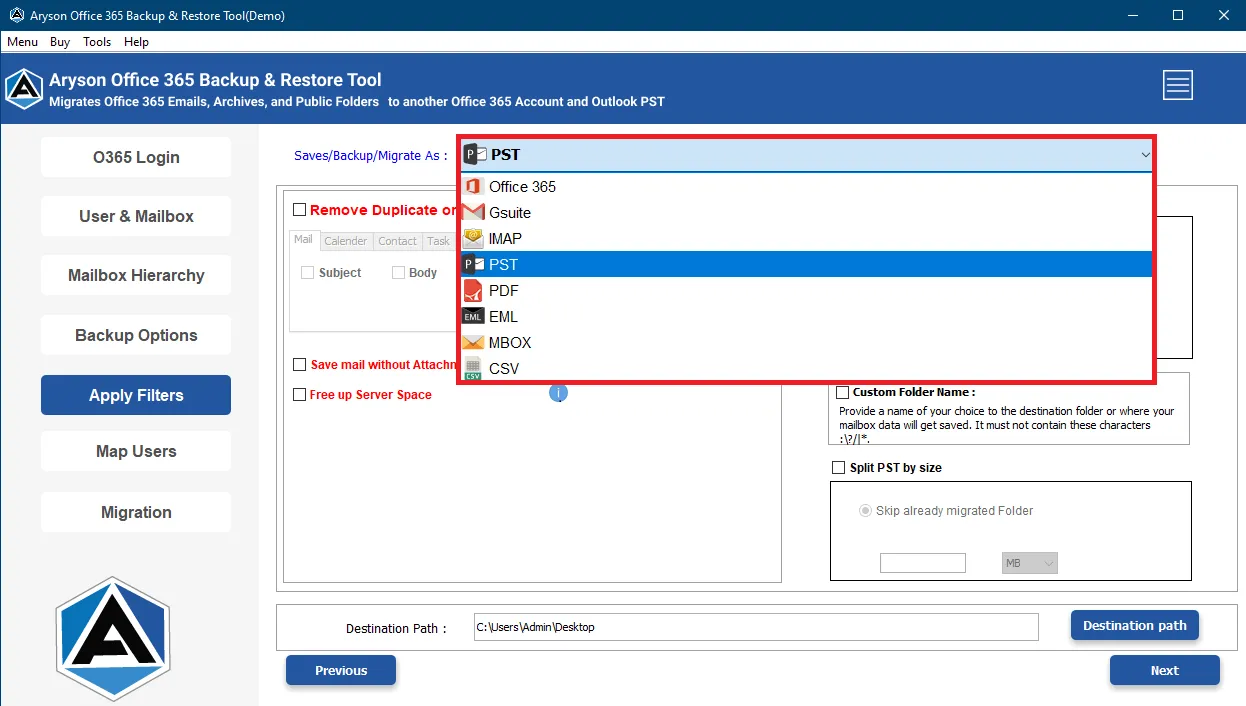
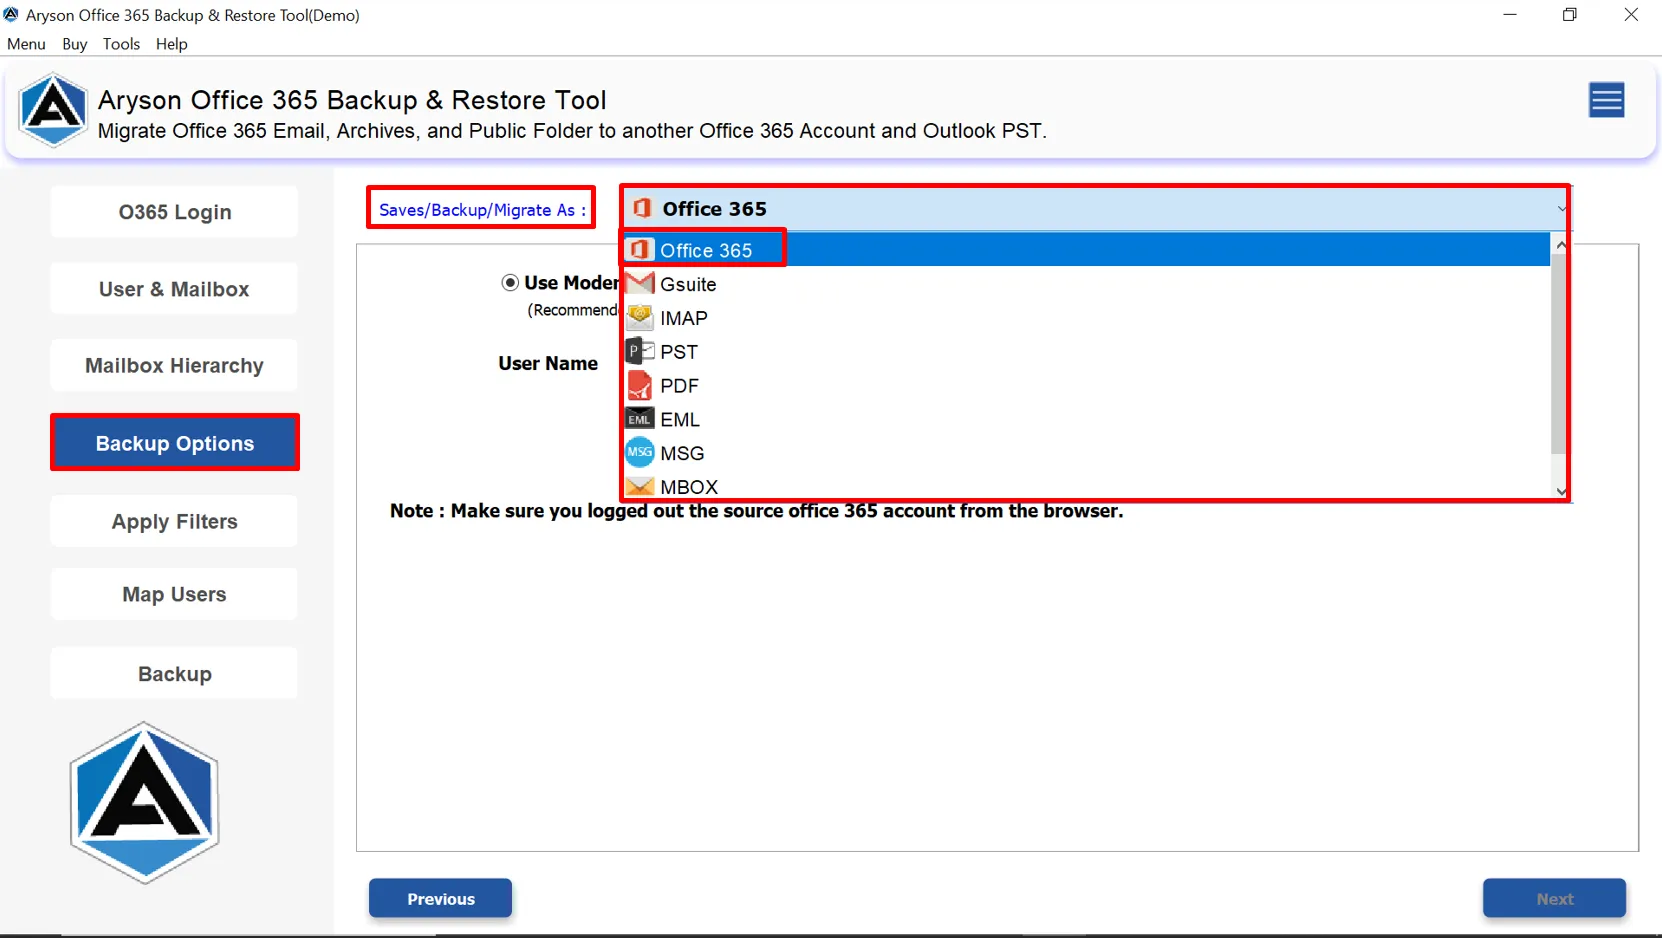
Step 10: From the drop-down list, choose PST as the resultant file format.
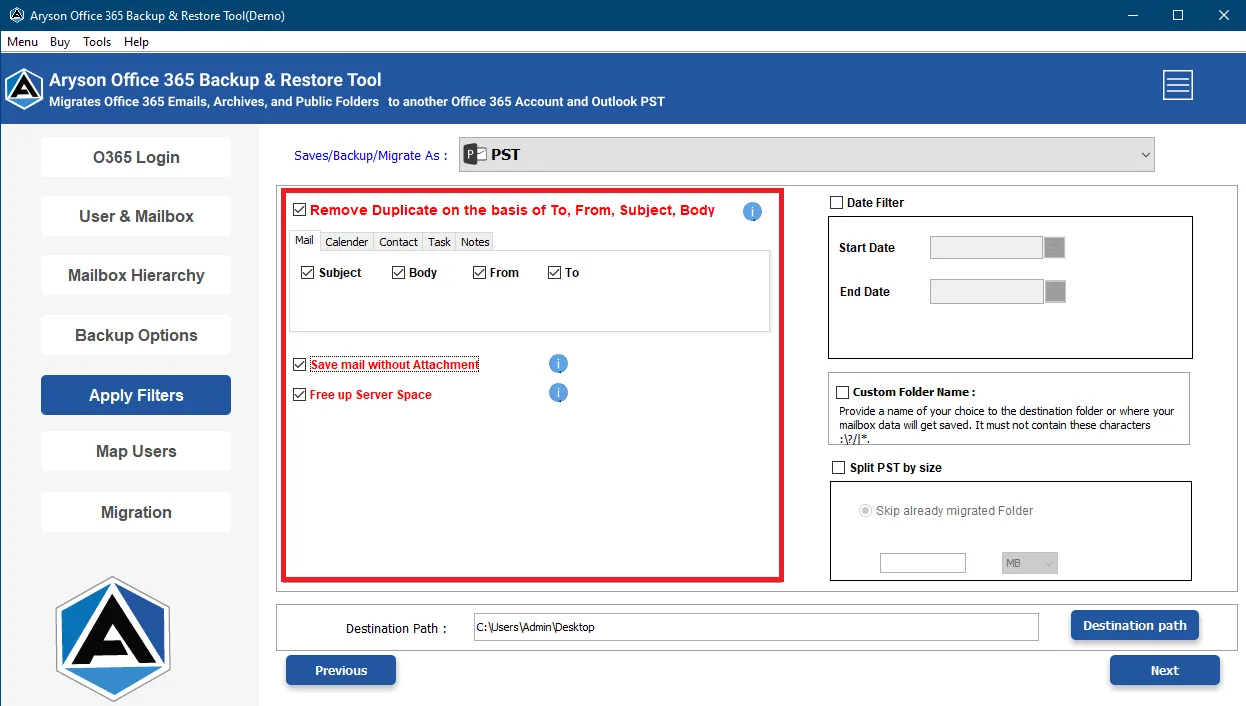
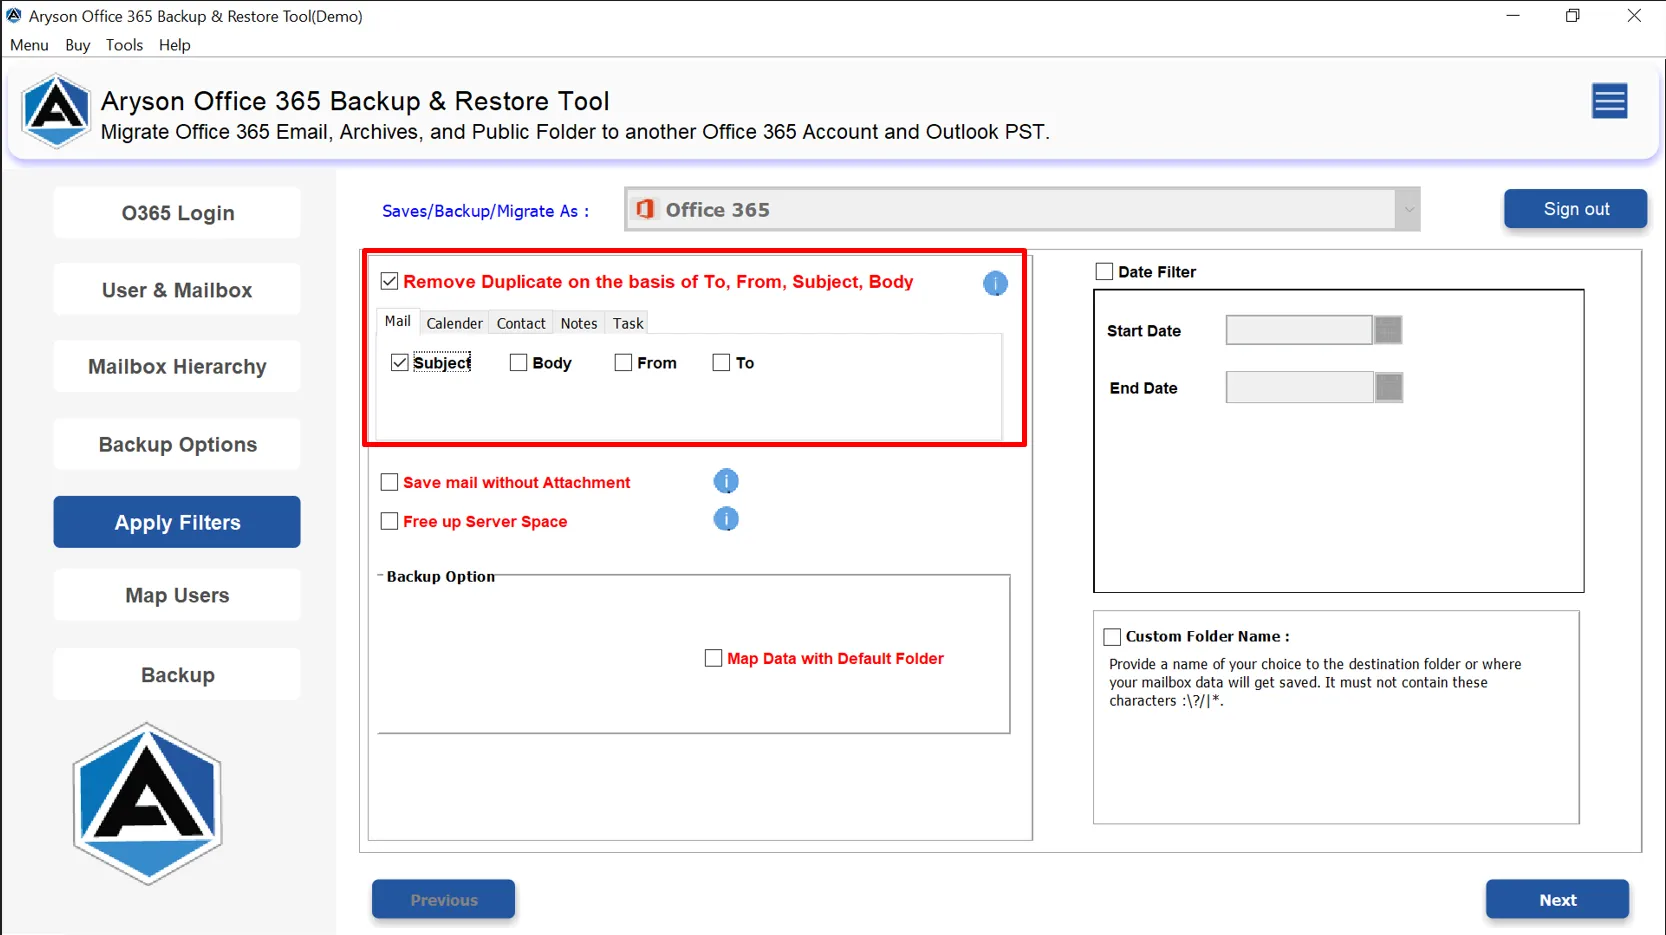
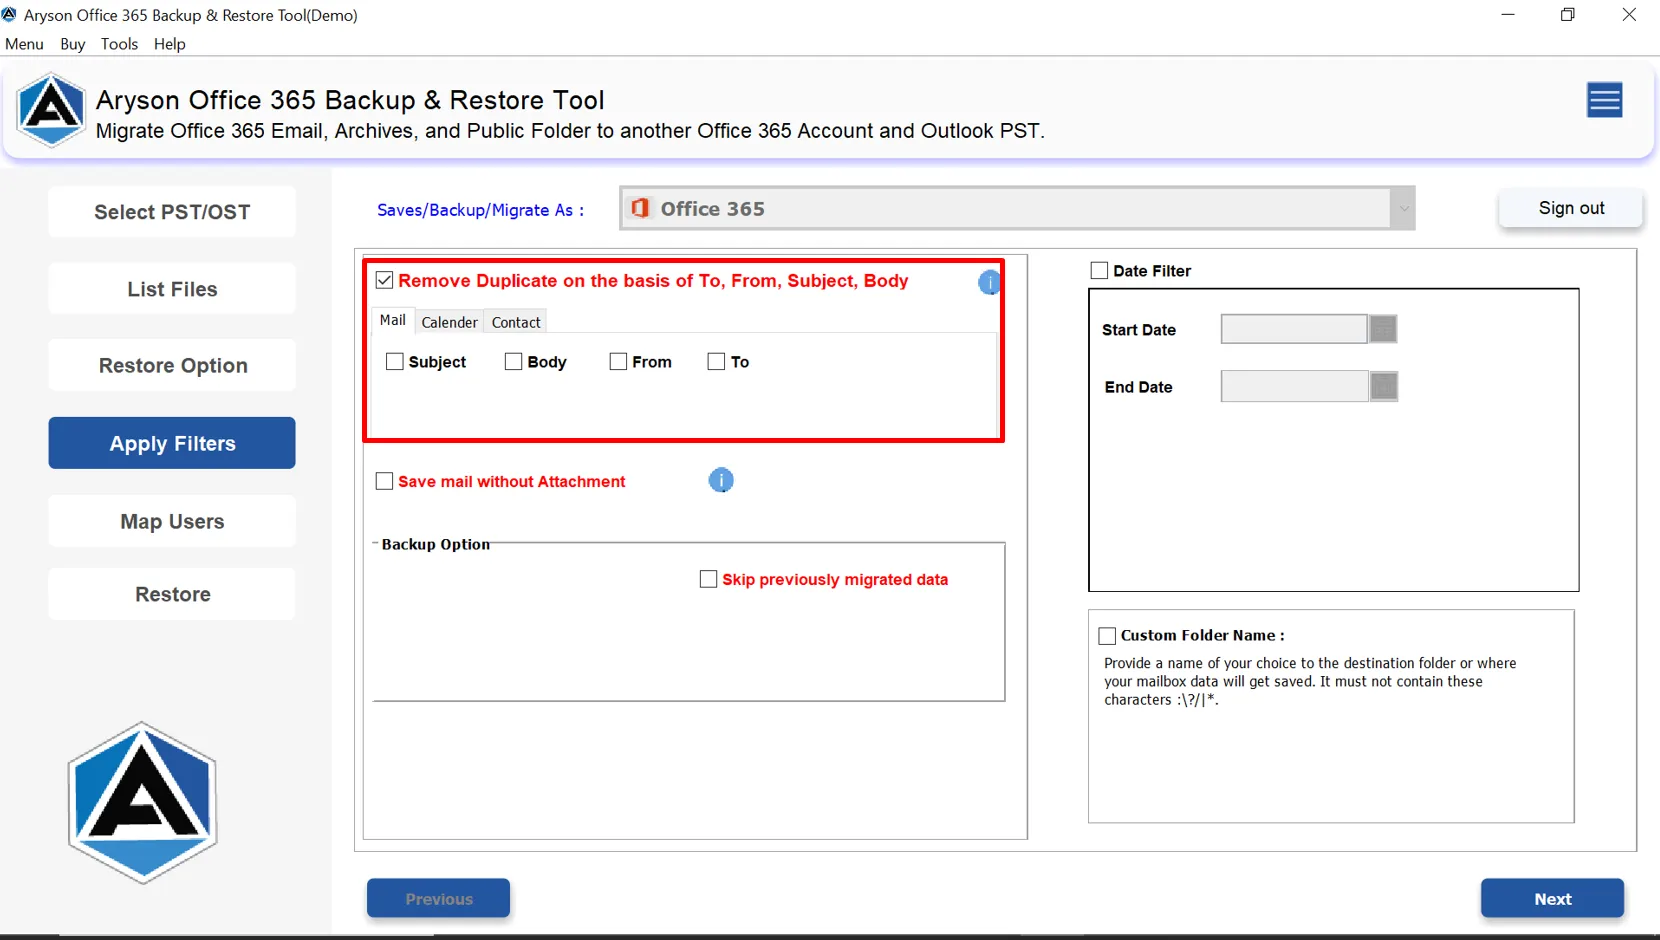
Step 11: Apply the Remove Duplicate Emails feature and eliminate duplicates based on Subject, Body, From, and To.
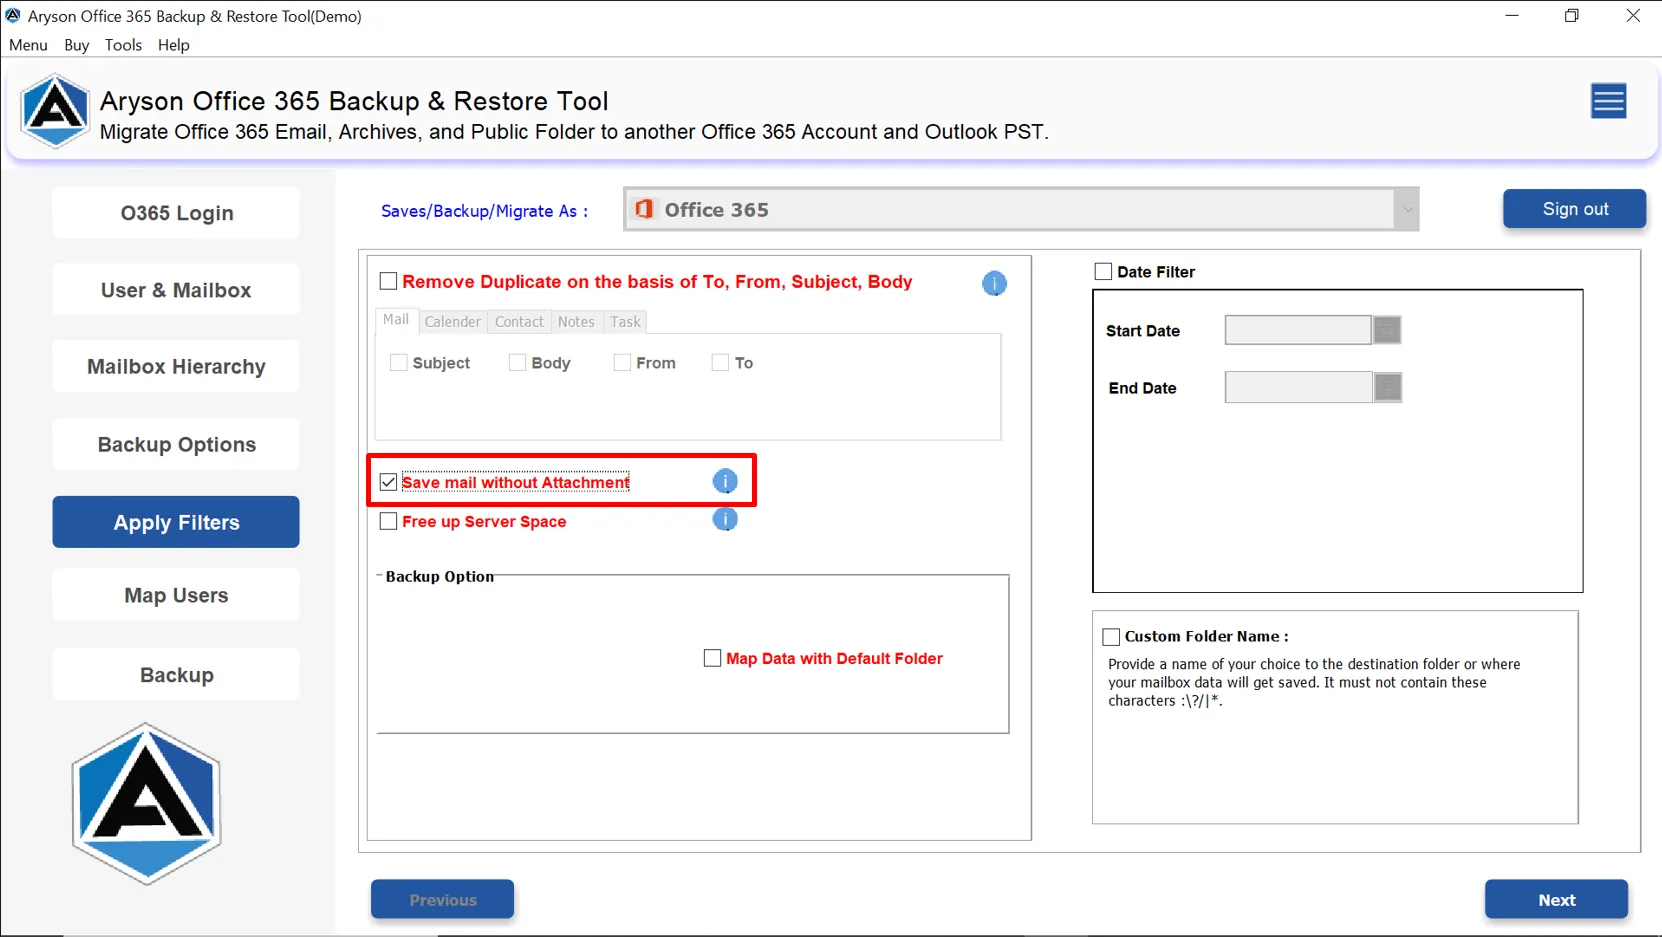
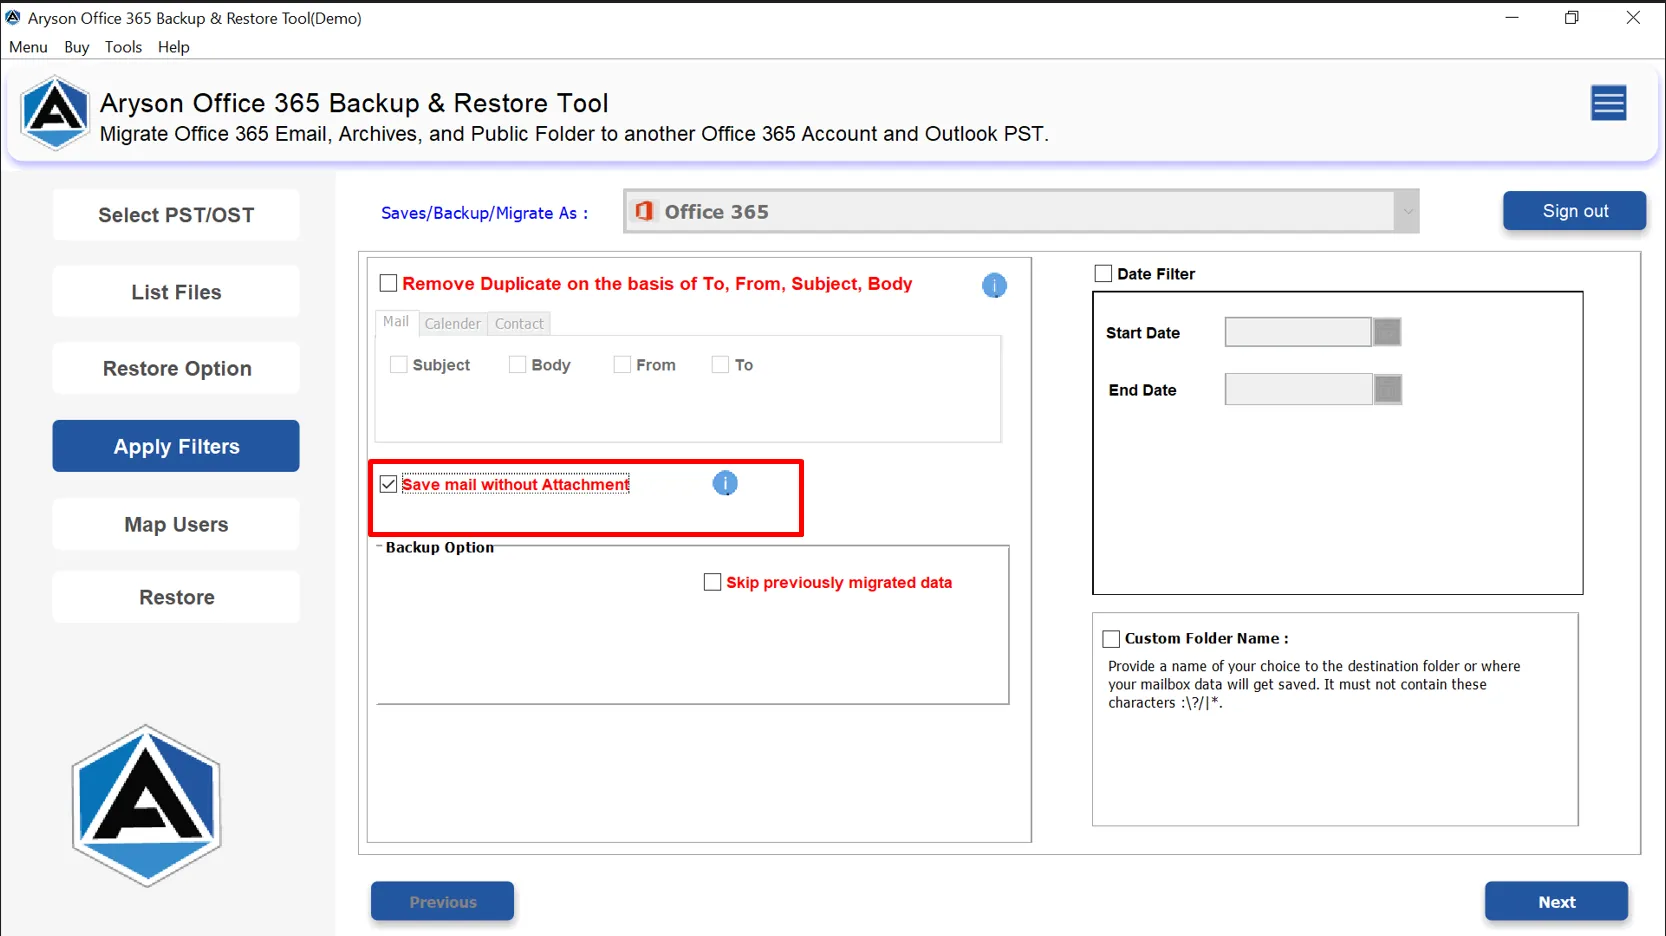
Step 12: Use the “Save Mail without Attachments” option to save emails without their attachments.
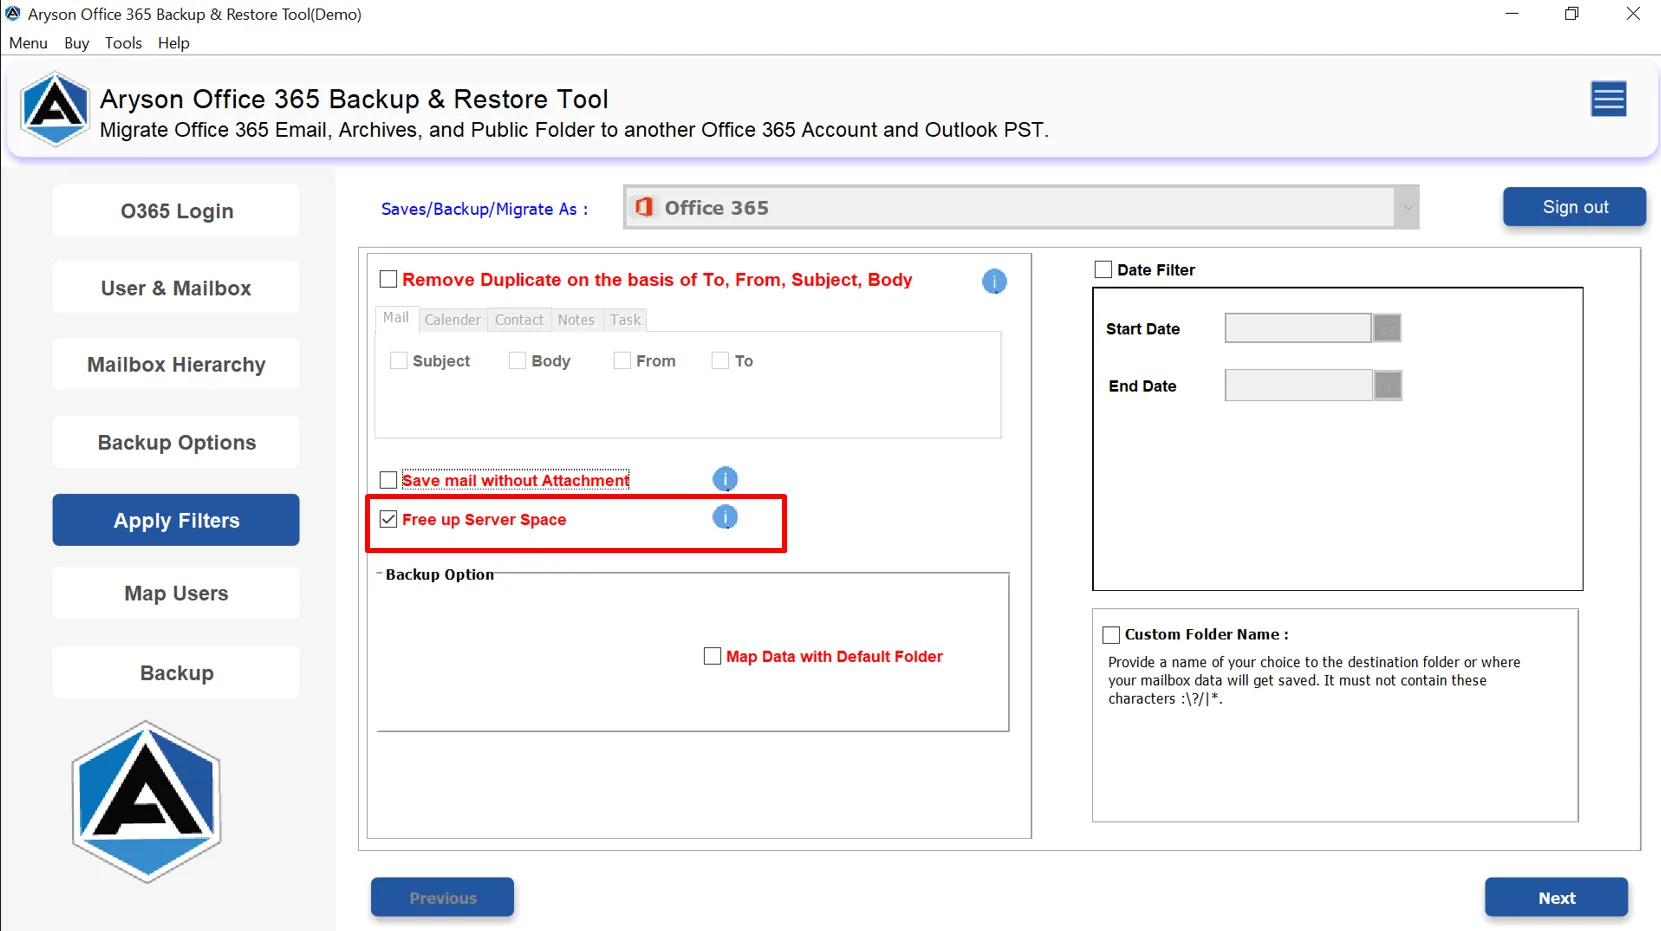
Step 13: Use the Free Up Server Space feature to increase the speed of processing.
Step 14: The Skip Previously Backed-up Data filter will remove the files that are already migrated.
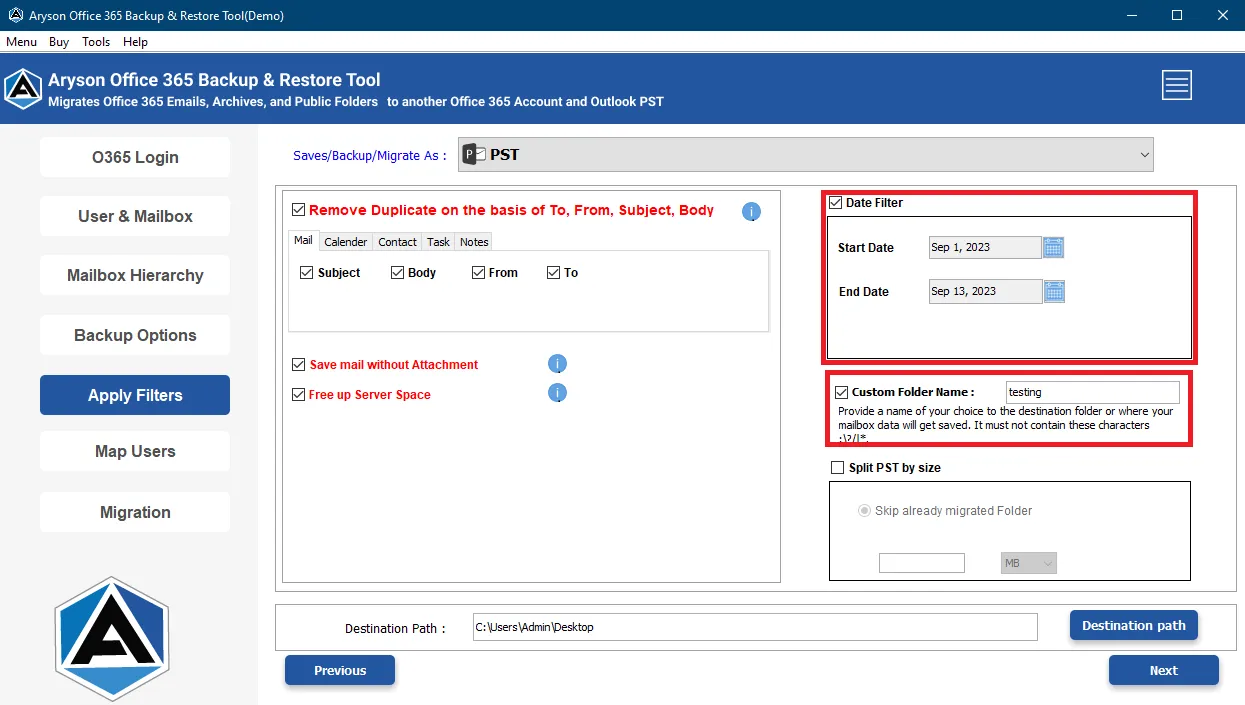
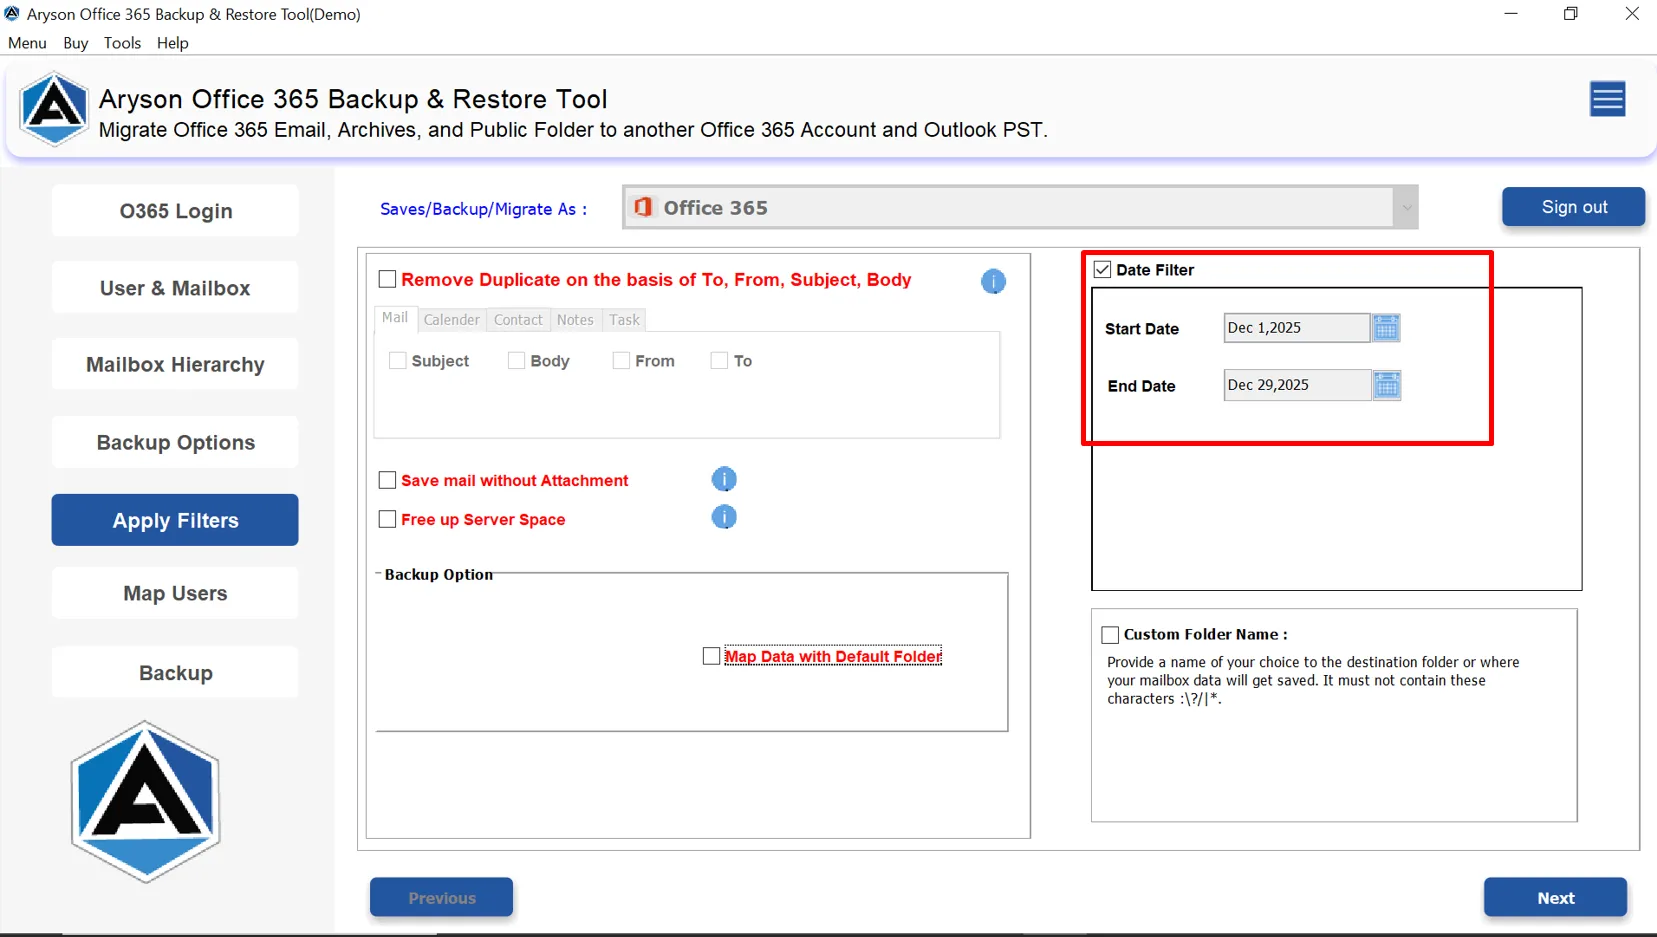
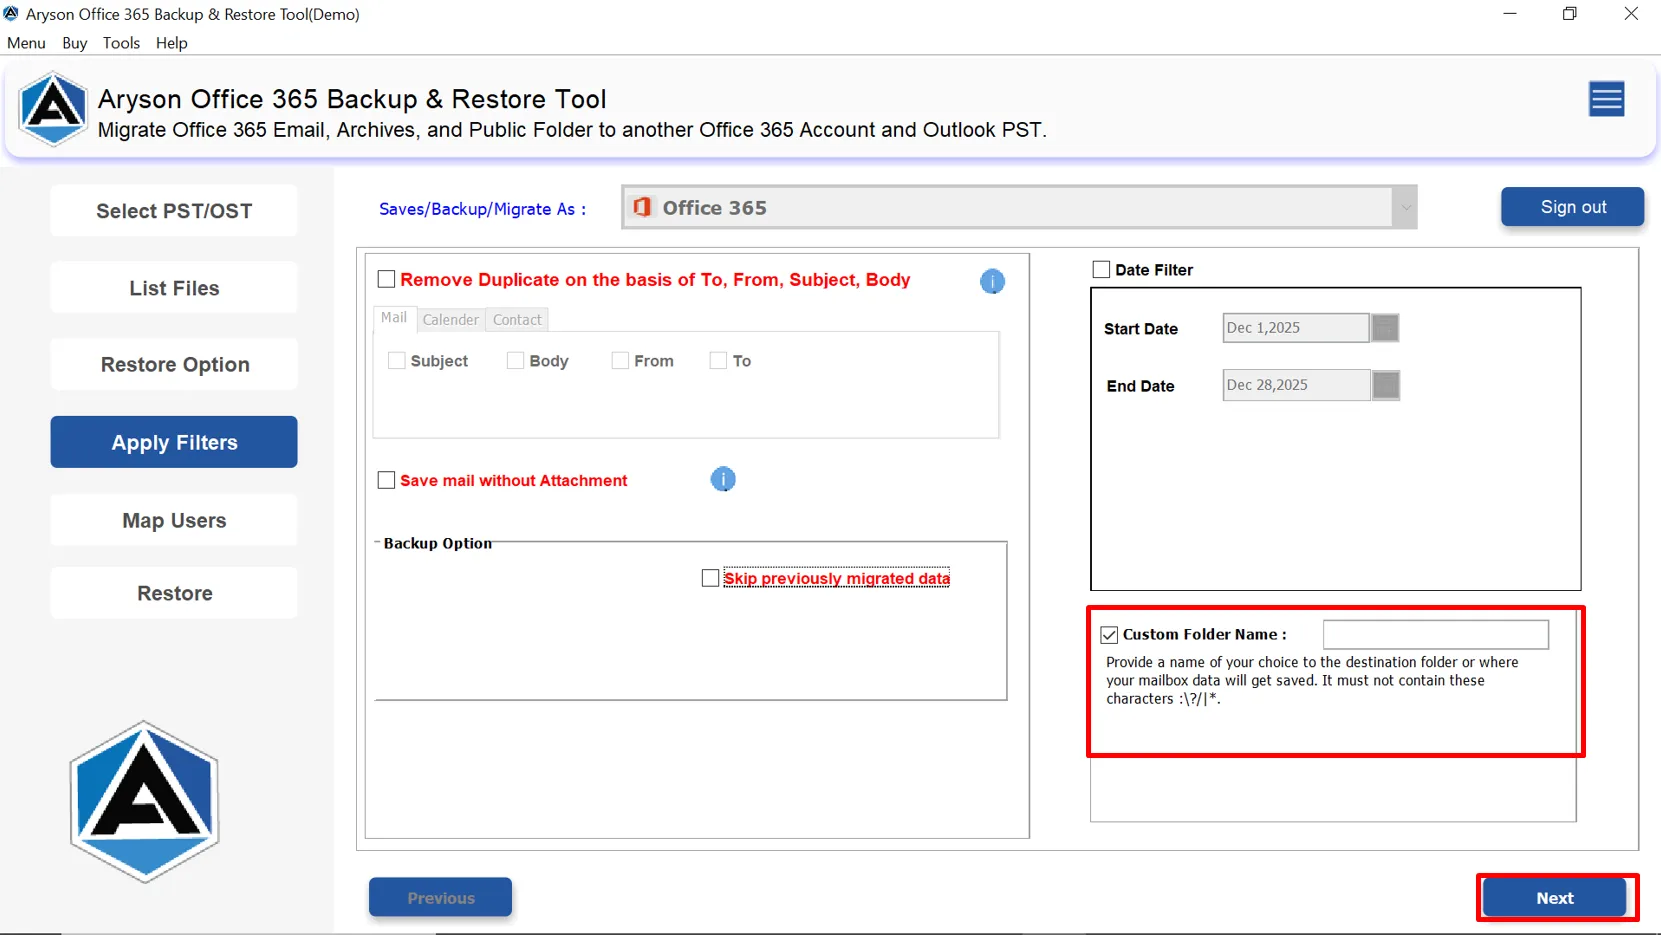
Step 15: Use the Date Filter option and specify the Start Date and End Date of the files to be migrated.
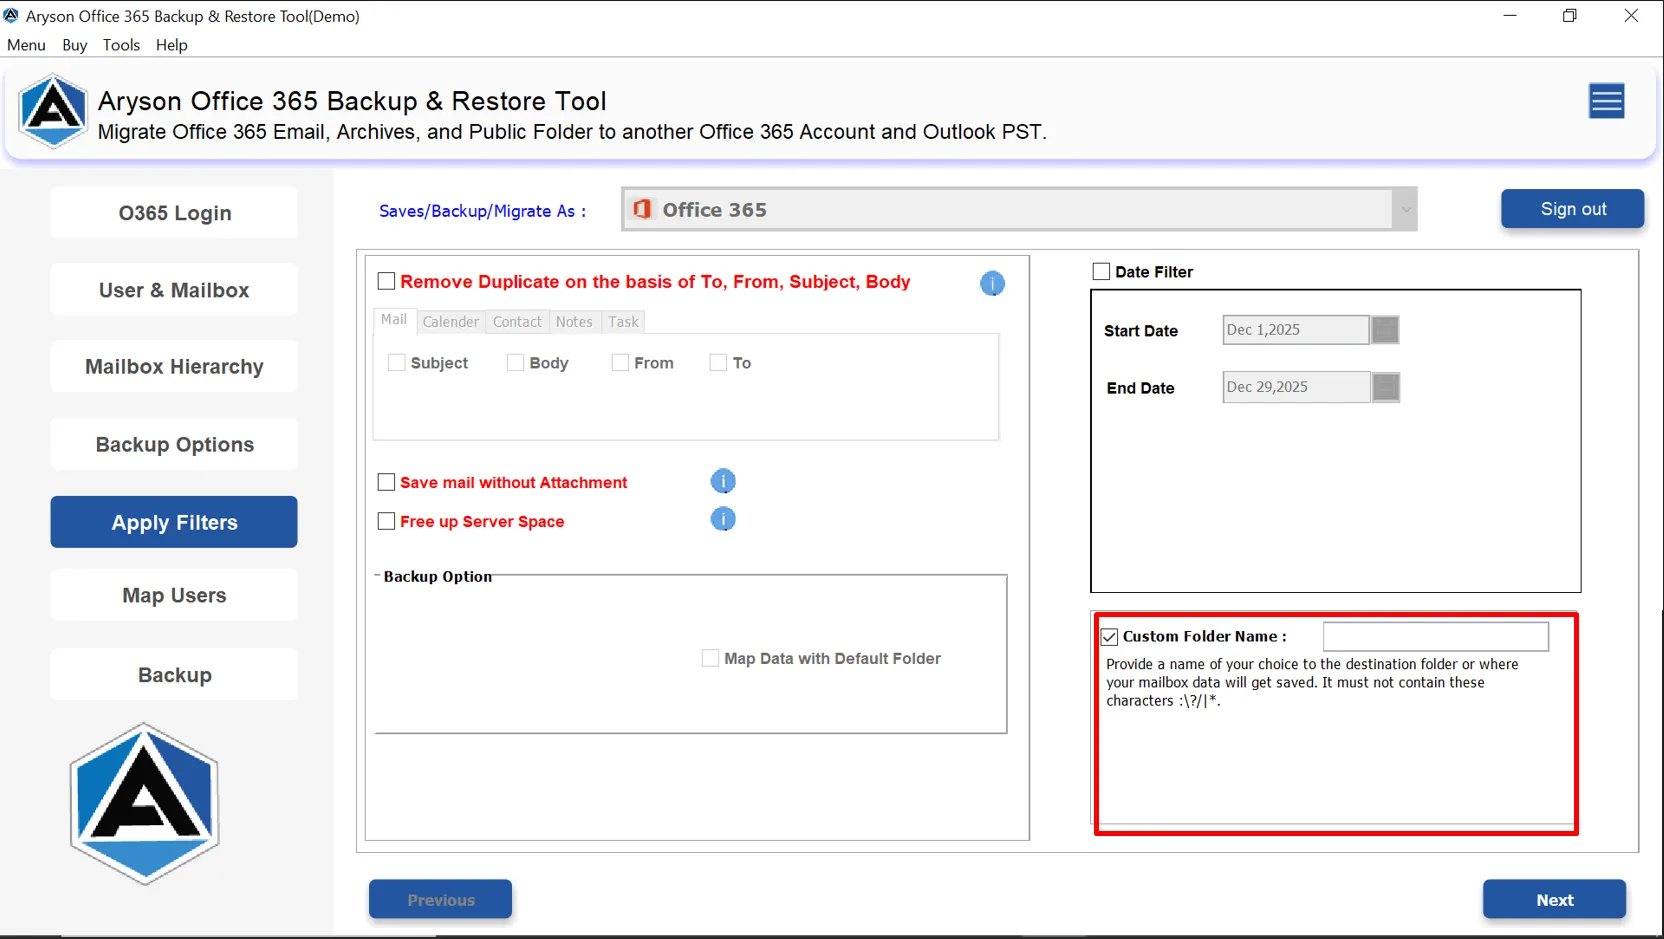
Step 16: Using the Custom Folder Name feature, set a desired name for the resultant folder.

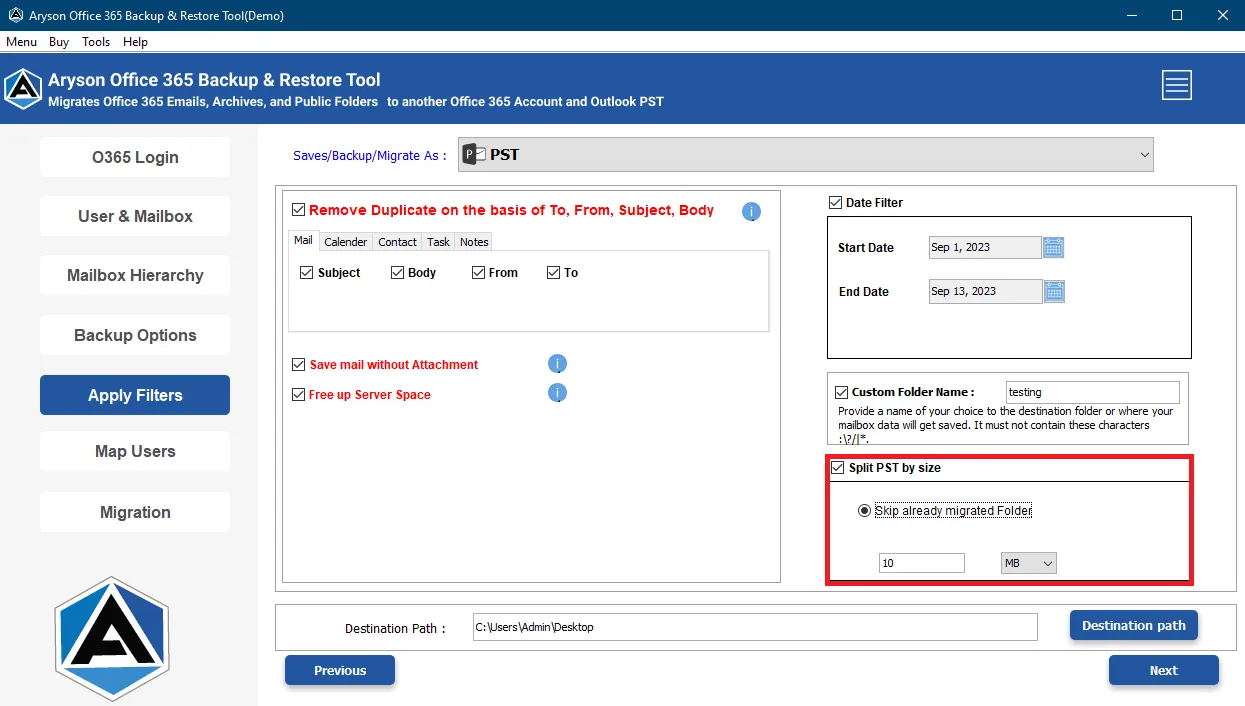
Step 17: The Split PST feature can be used to split the large or bulky PST files, specifying the size of the file.
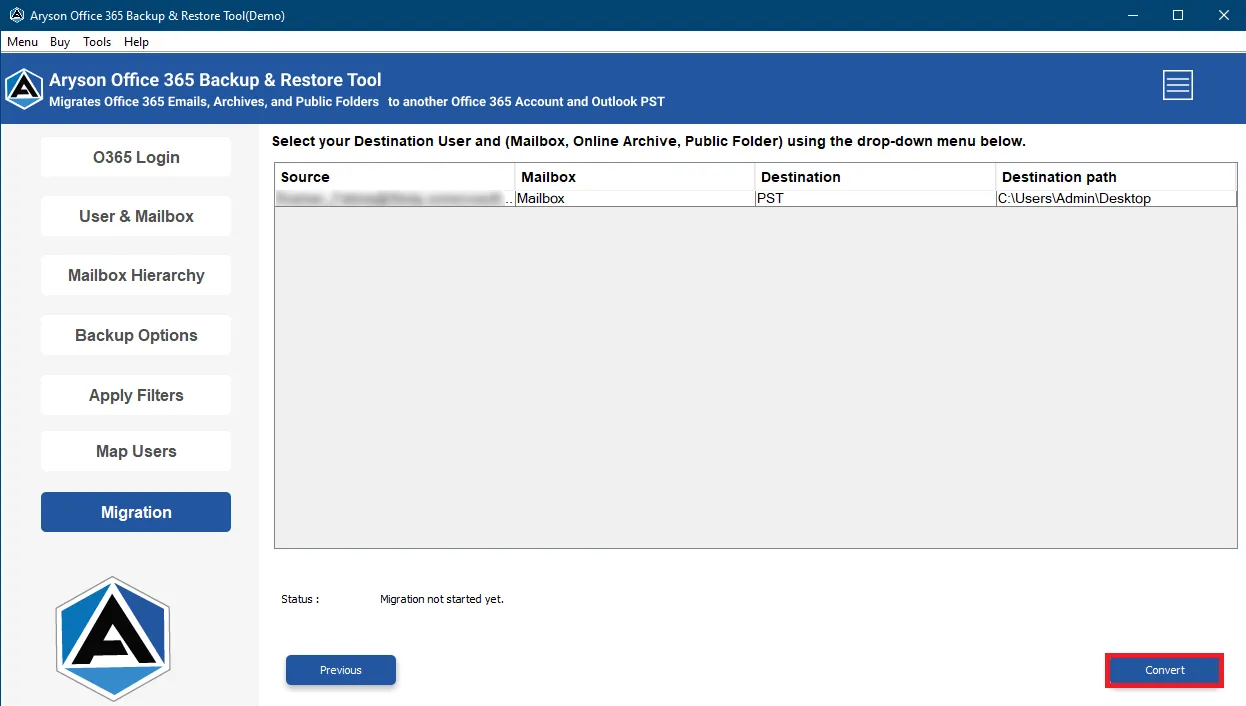
Step 18: Specify the Path to save the resultant PST file on your local system.
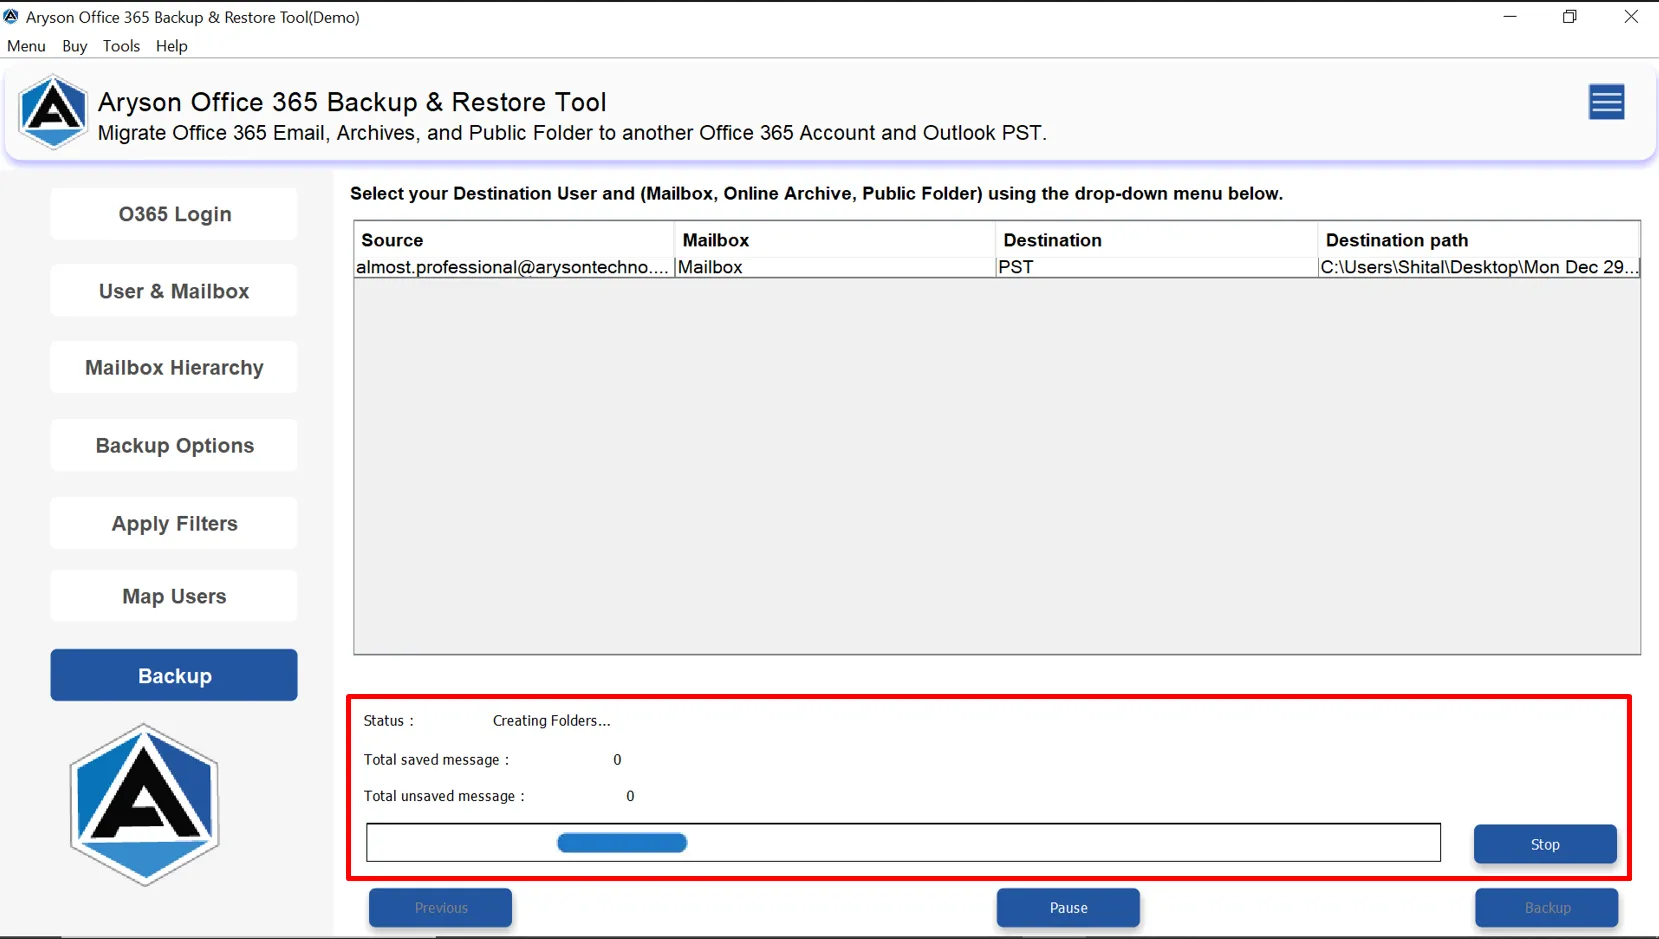
Step 19: Click Backup to begin the process.
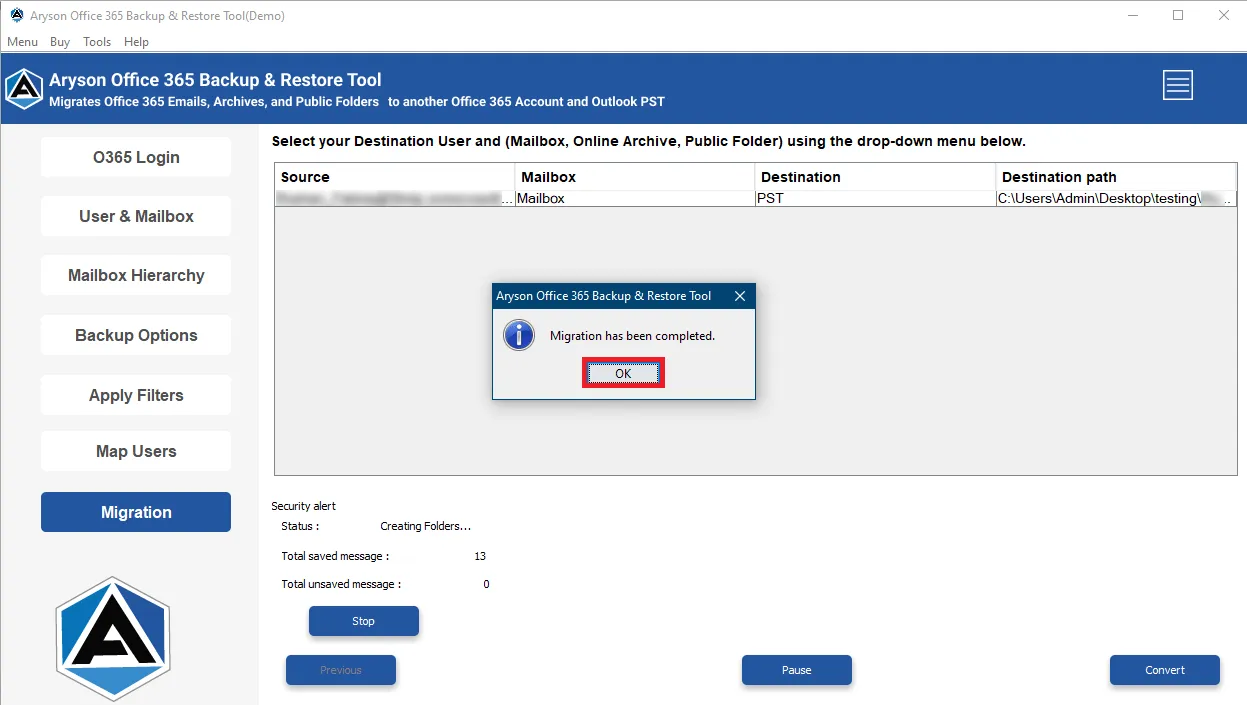
Step 20: The tool displays real-time progress and generates a detailed summary report after completion.
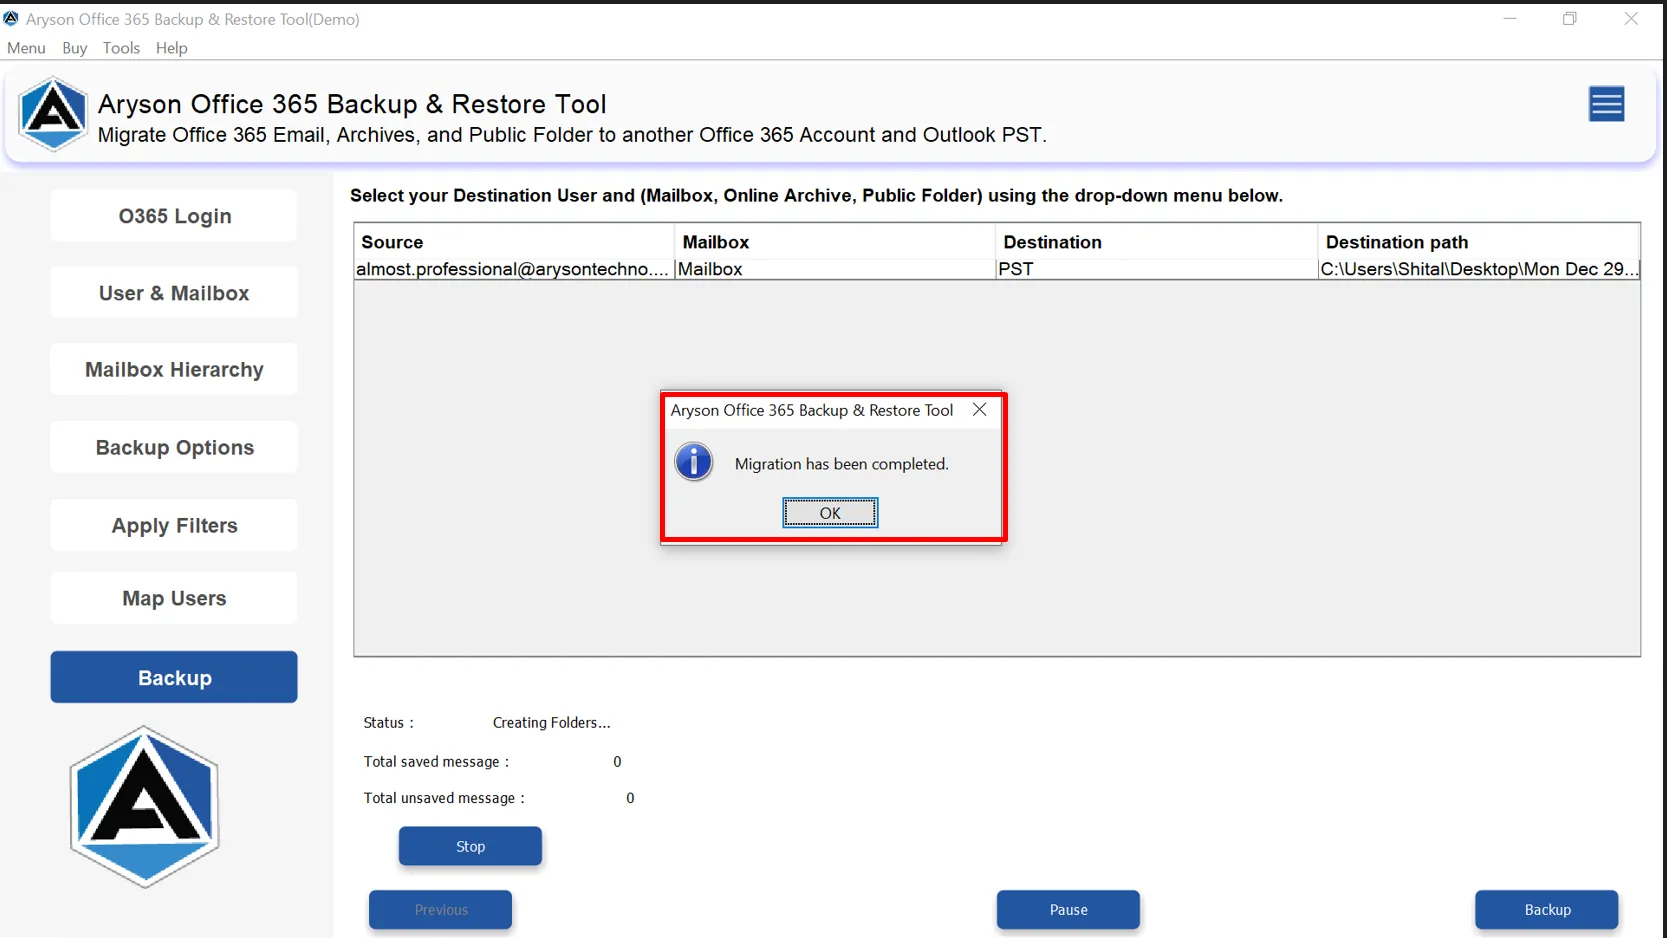
Step 21: A pop-up stating “Migration has been completed” appears on the screen. Click OK to proceed further.
Step 1: Download and install the Aryson Office 365 Backup Tool on your system and click on the Backup Button.
Step 2: Click on the Continue button on the welcome screen.
Step 3: Sign in to your Office 365 account using Modern Authentication (OAuth 2.0) or
Step 4: Tick the Modern Authentication(By using user client id and secret) checkbox.
Step 5: Sign in to your Office 365 account using Client ID & Secret (admin-based login)
Step 6: Enter your required O365 credentials.
Step 7: An authentication completed pop-up will appear in the browser.
Step 8: Choose users and mailbox types such as Primary Mailbox, Online Archive, Public Folder, or Shared Mailbox.

Step 9: Select the required mailbox folders from the tree structure and preview items if needed.
Step 10: From the list of email clients, select Office 365 as the destination platform.
Step 11: Sign in to the destination Office 365 account using Modern Authentication or Client ID & Secret.
- Specify the credentials and Sign In to your Office 365 account.
Step 12: An authentication completed pop-up will appear in the browser.
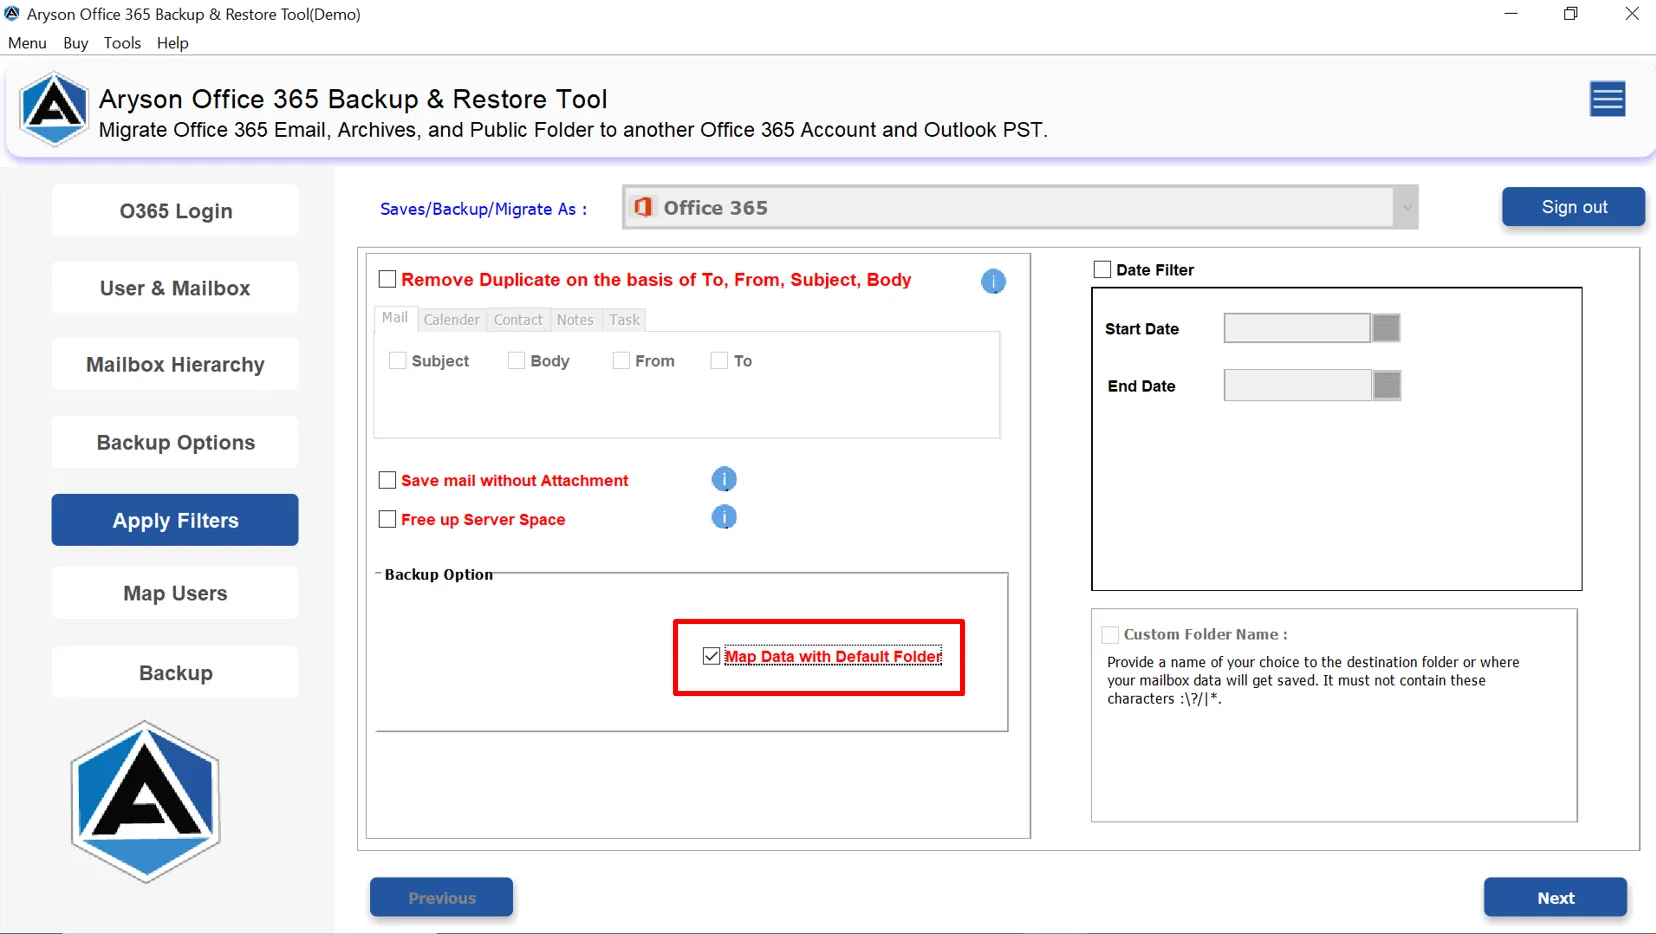
Step 13: Apply the Remove Duplicate Emails feature & eliminate the duplicacy (based on Subject, Body, From, and To).
Step 14: Use the “Migrate without Attachments” to remove the already migrated Office data.
Step 15: The Free-Up server space feature increases processing speed and efficiency of the migration.
Step 16: Use the Date Filter option to define the Start Date and End Date, if required.
Step 17: Use the Custom Folder Name feature to set the destination folder name.
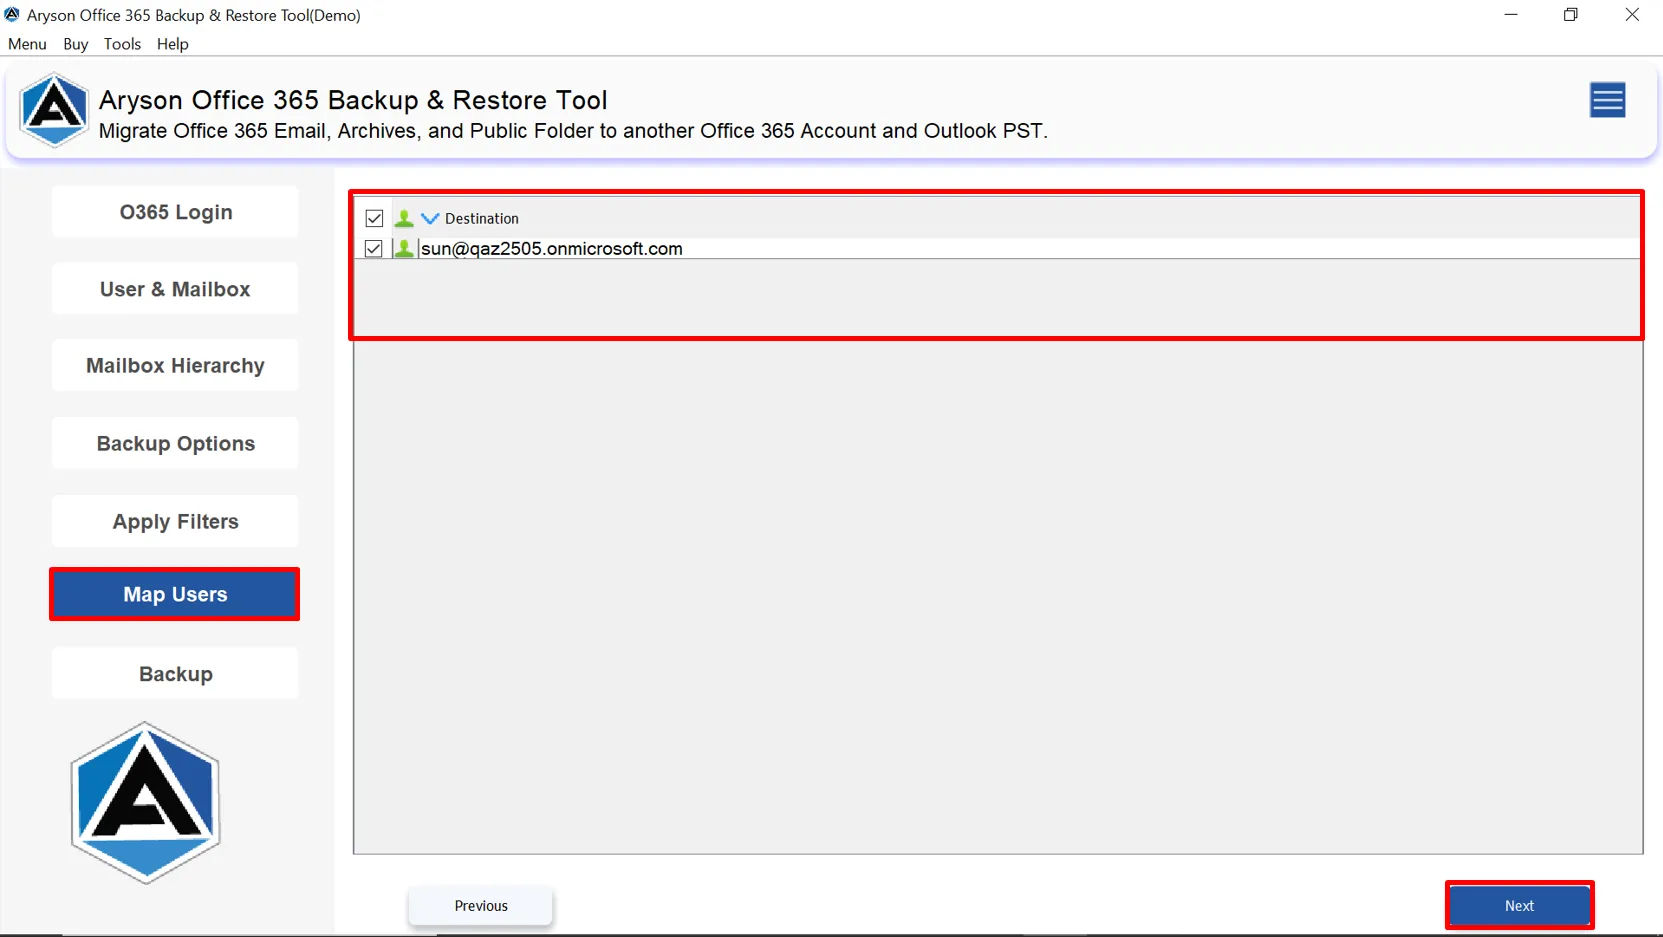
Step 18: Tick the “Map Data with Default Folder” checkbox to map the Office 365 files/folders to the corresponding Office 365 accounts folders.
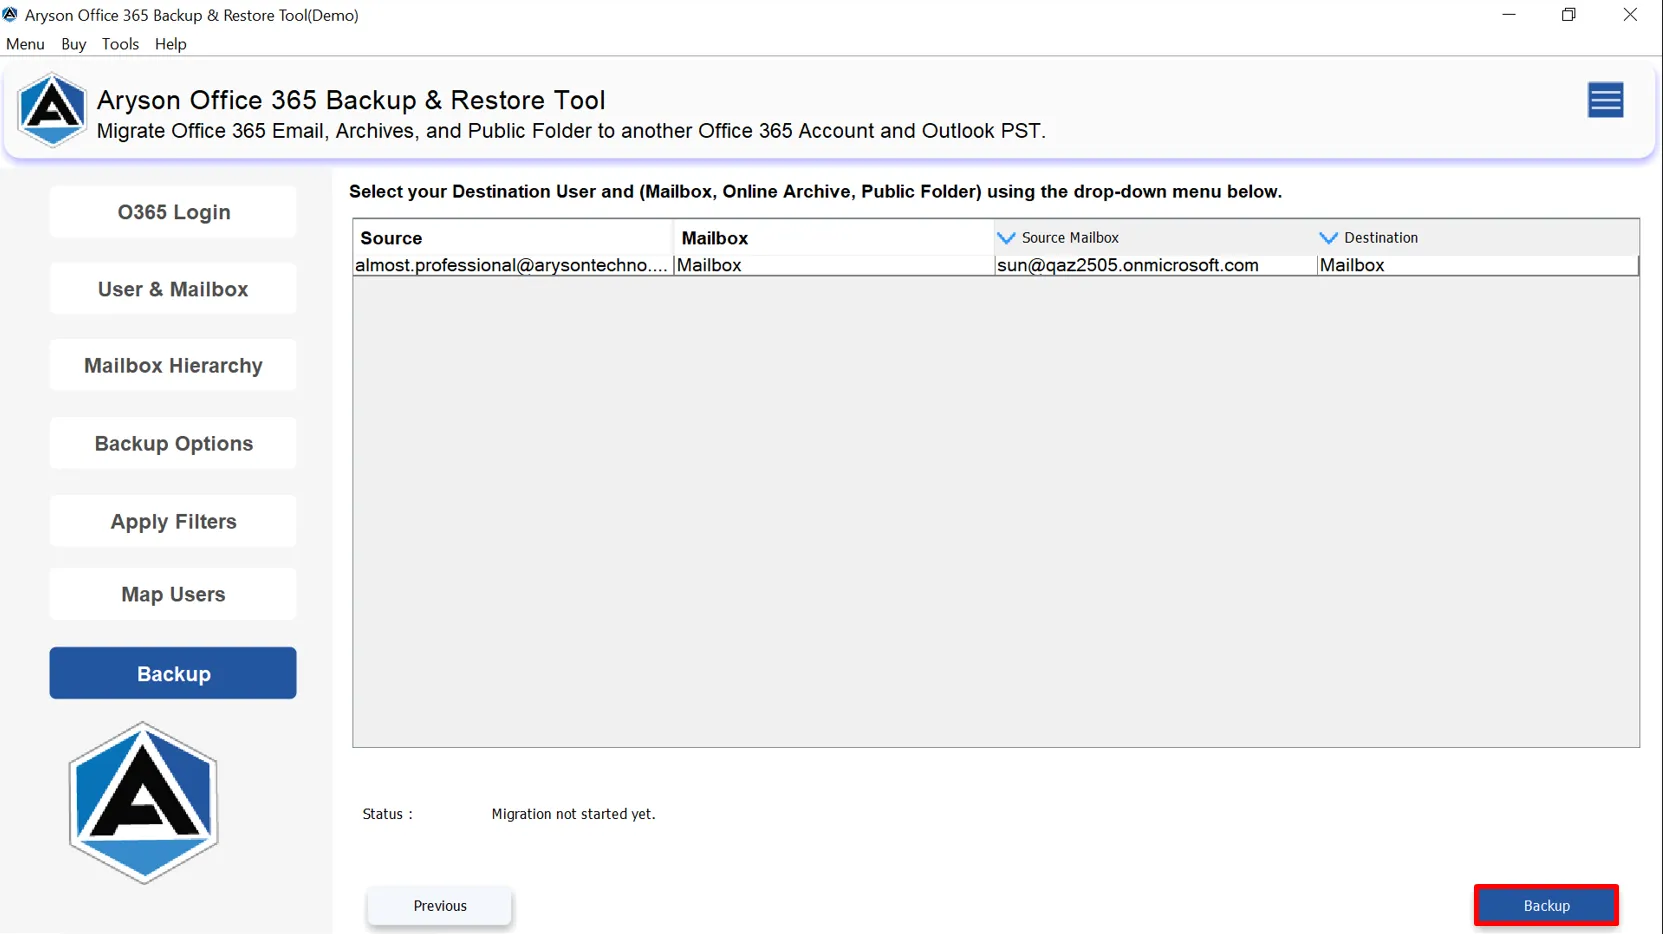
Step 19: Select the desired admin id to start the mapping.
Step 20: Click on the Backup button to begin the Office 365 to Office 365 migration process.
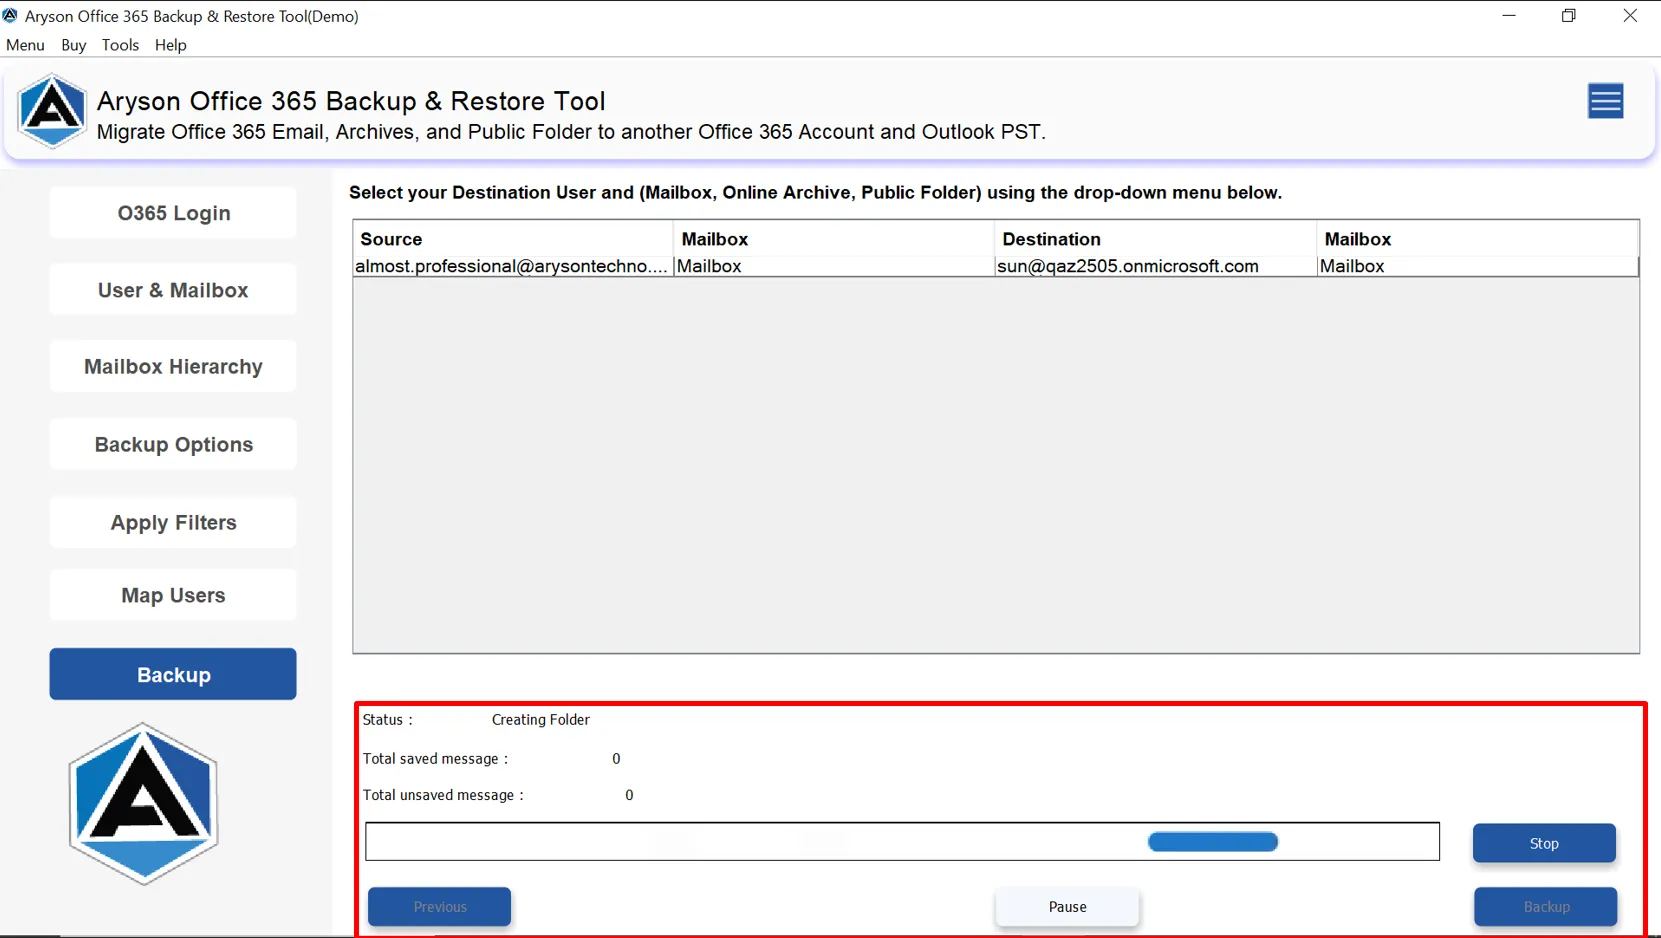
Step 21: The software displays real-time progress and generates a detailed summary report after completion.
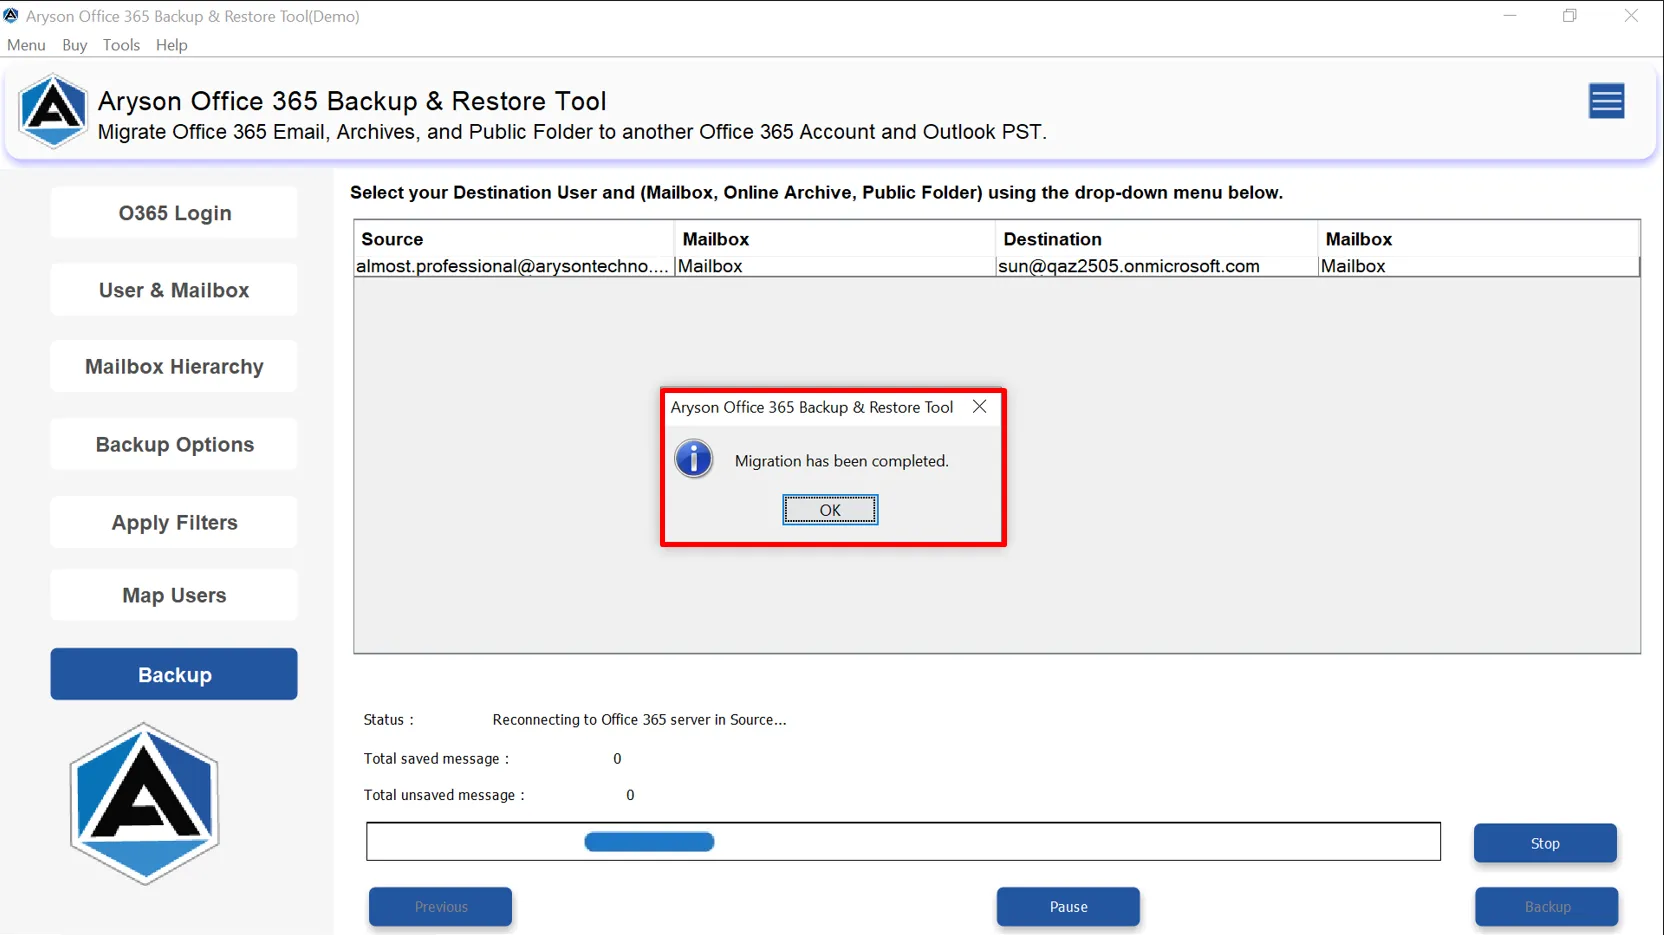
Step 22: A confirmation pop-up stating “Migration has been completed” appears. Click OK to finish.
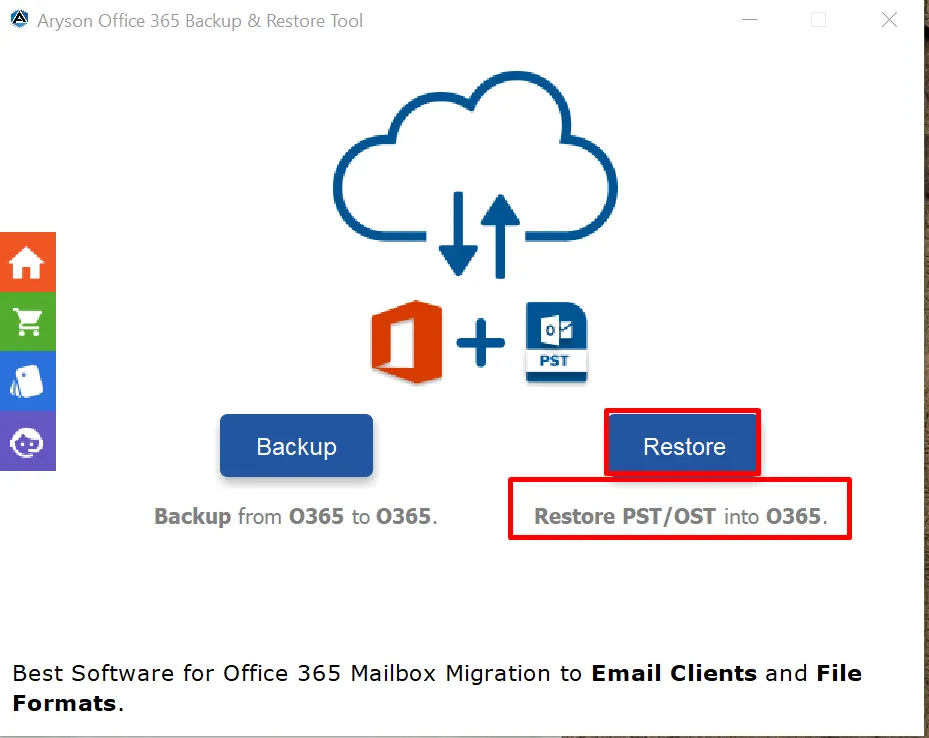
Step 1: Download and install the Aryson Office 365 Backup Tool on your system and click on the Restore option.
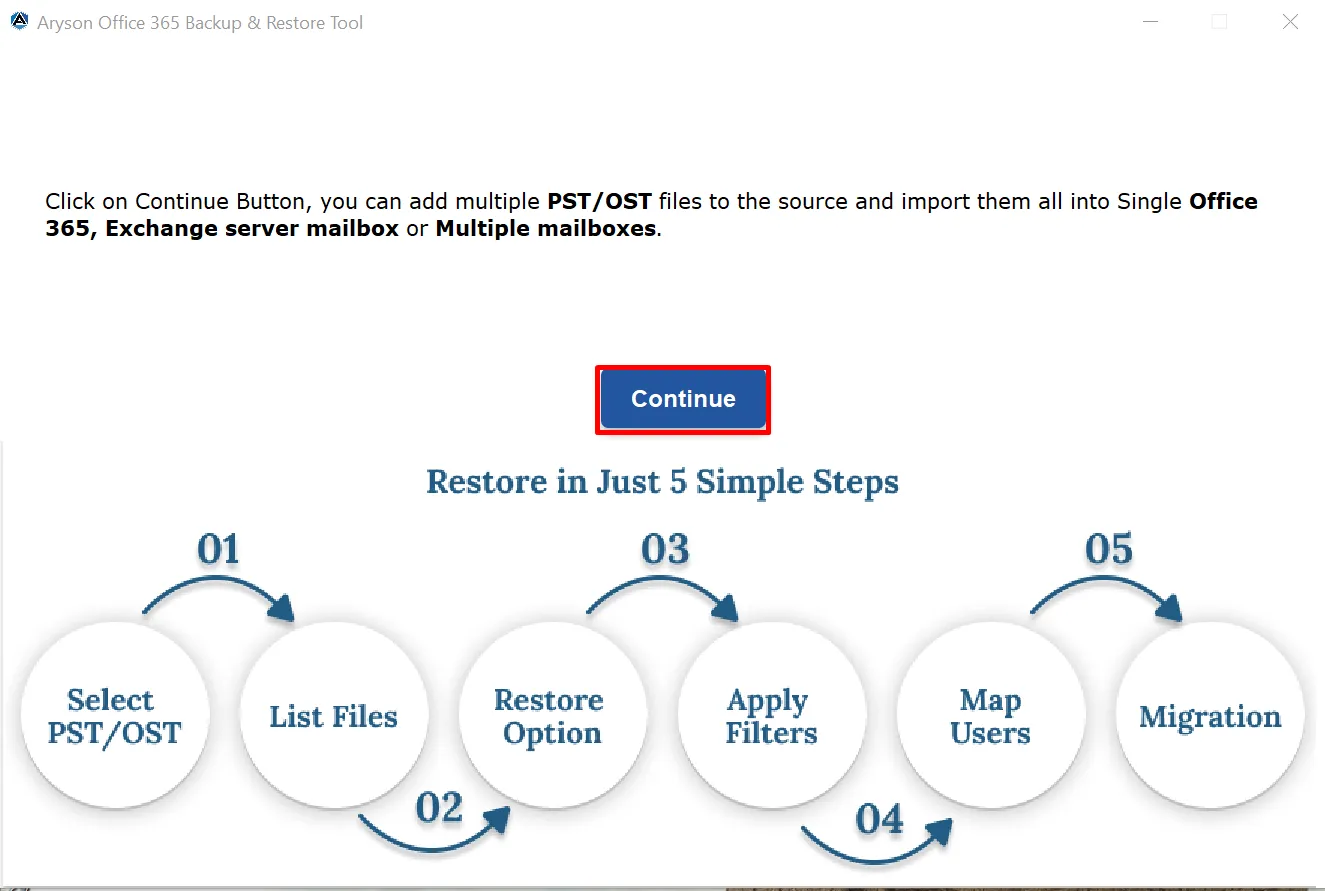
Step 2: Click on the Continue button from the welcome screen to proceed.
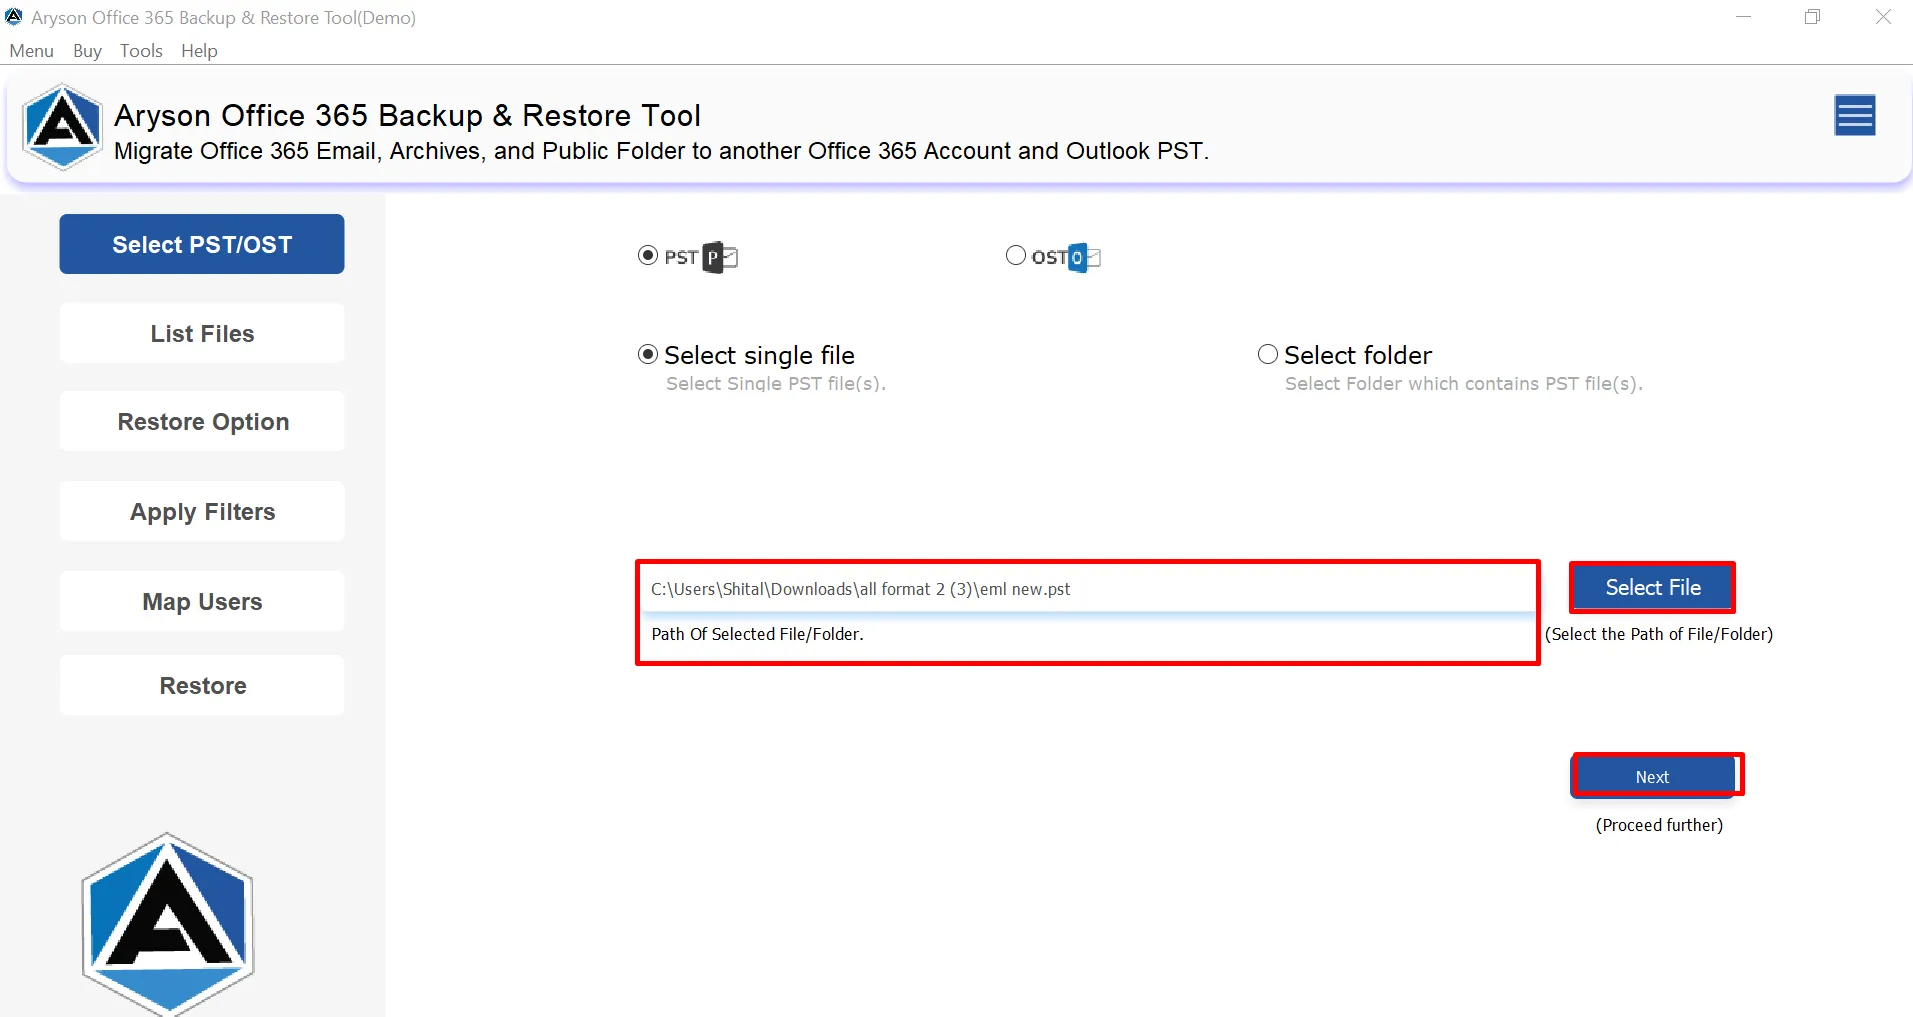
Step 3: Mark the PST or OST radio button based on the file format you want to restore.
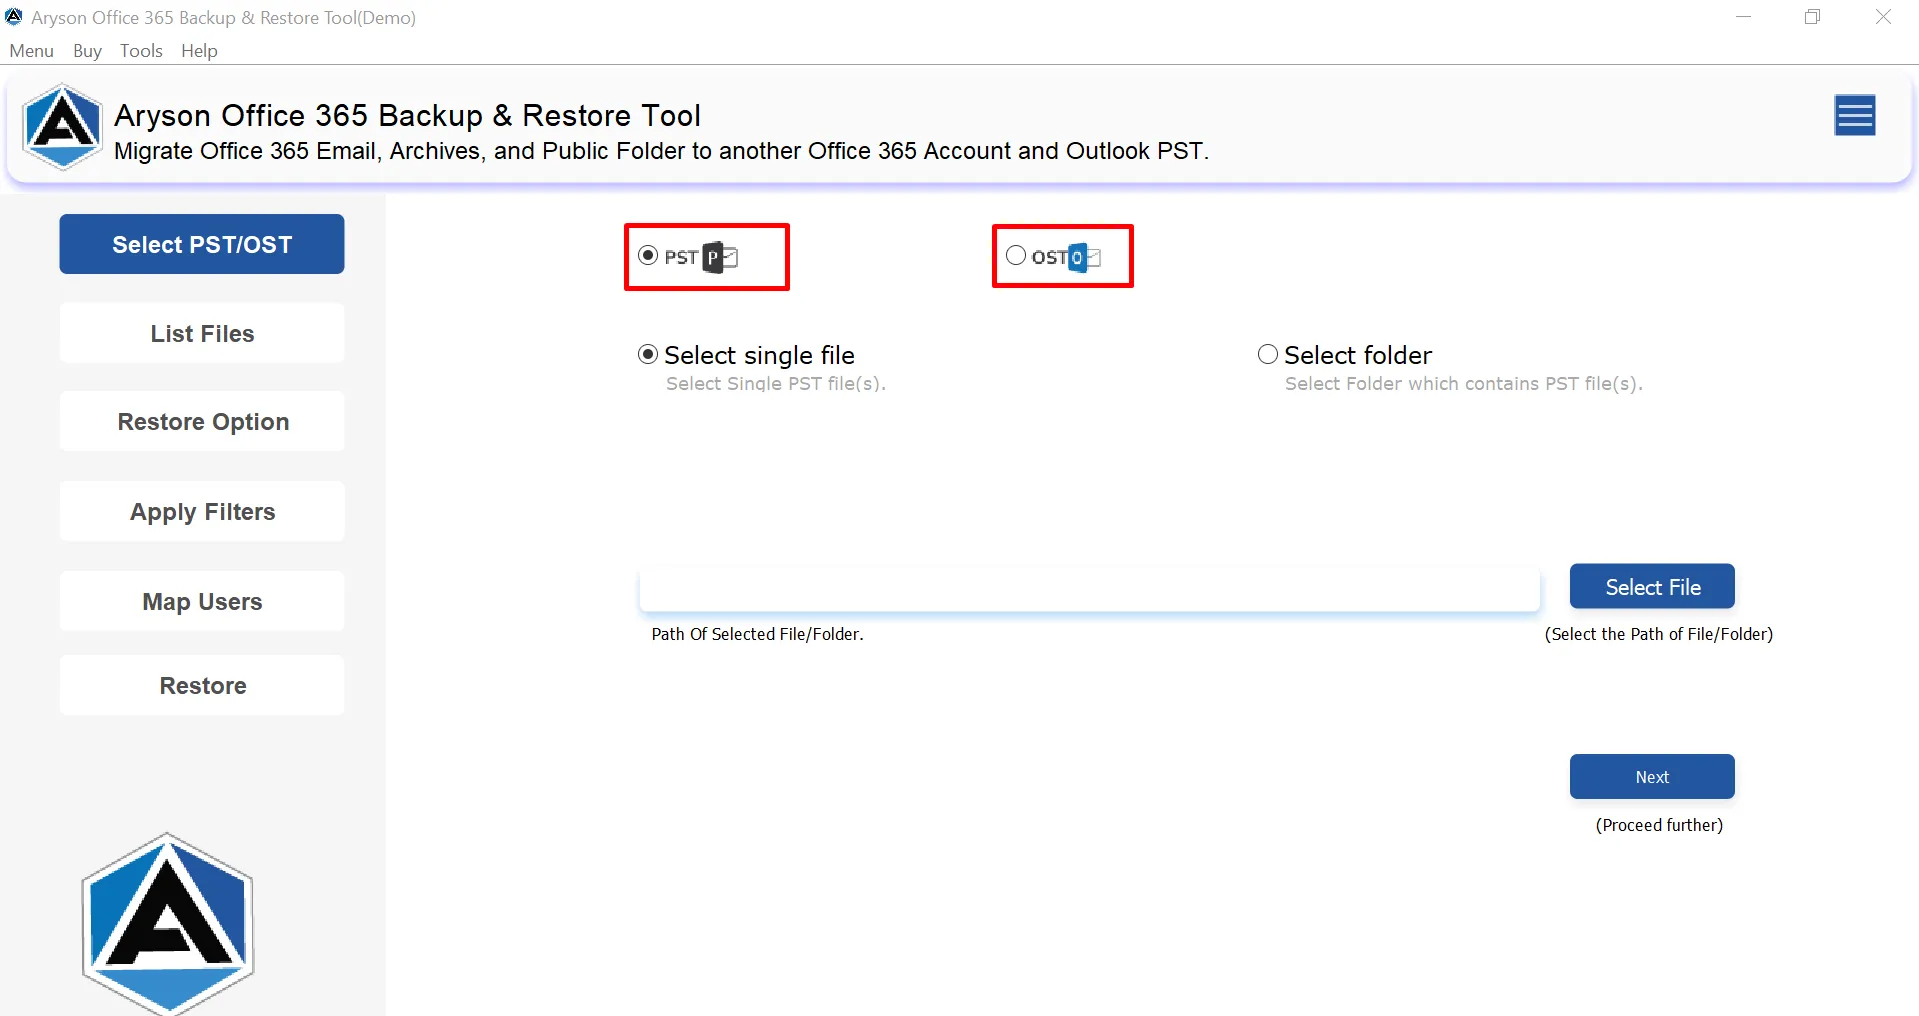
Step 4: Select the Select single File or Select Folder option to load the desired files you want to restore into Office 365.

Step 5: Click on the Select File option & select the files to load into the software.
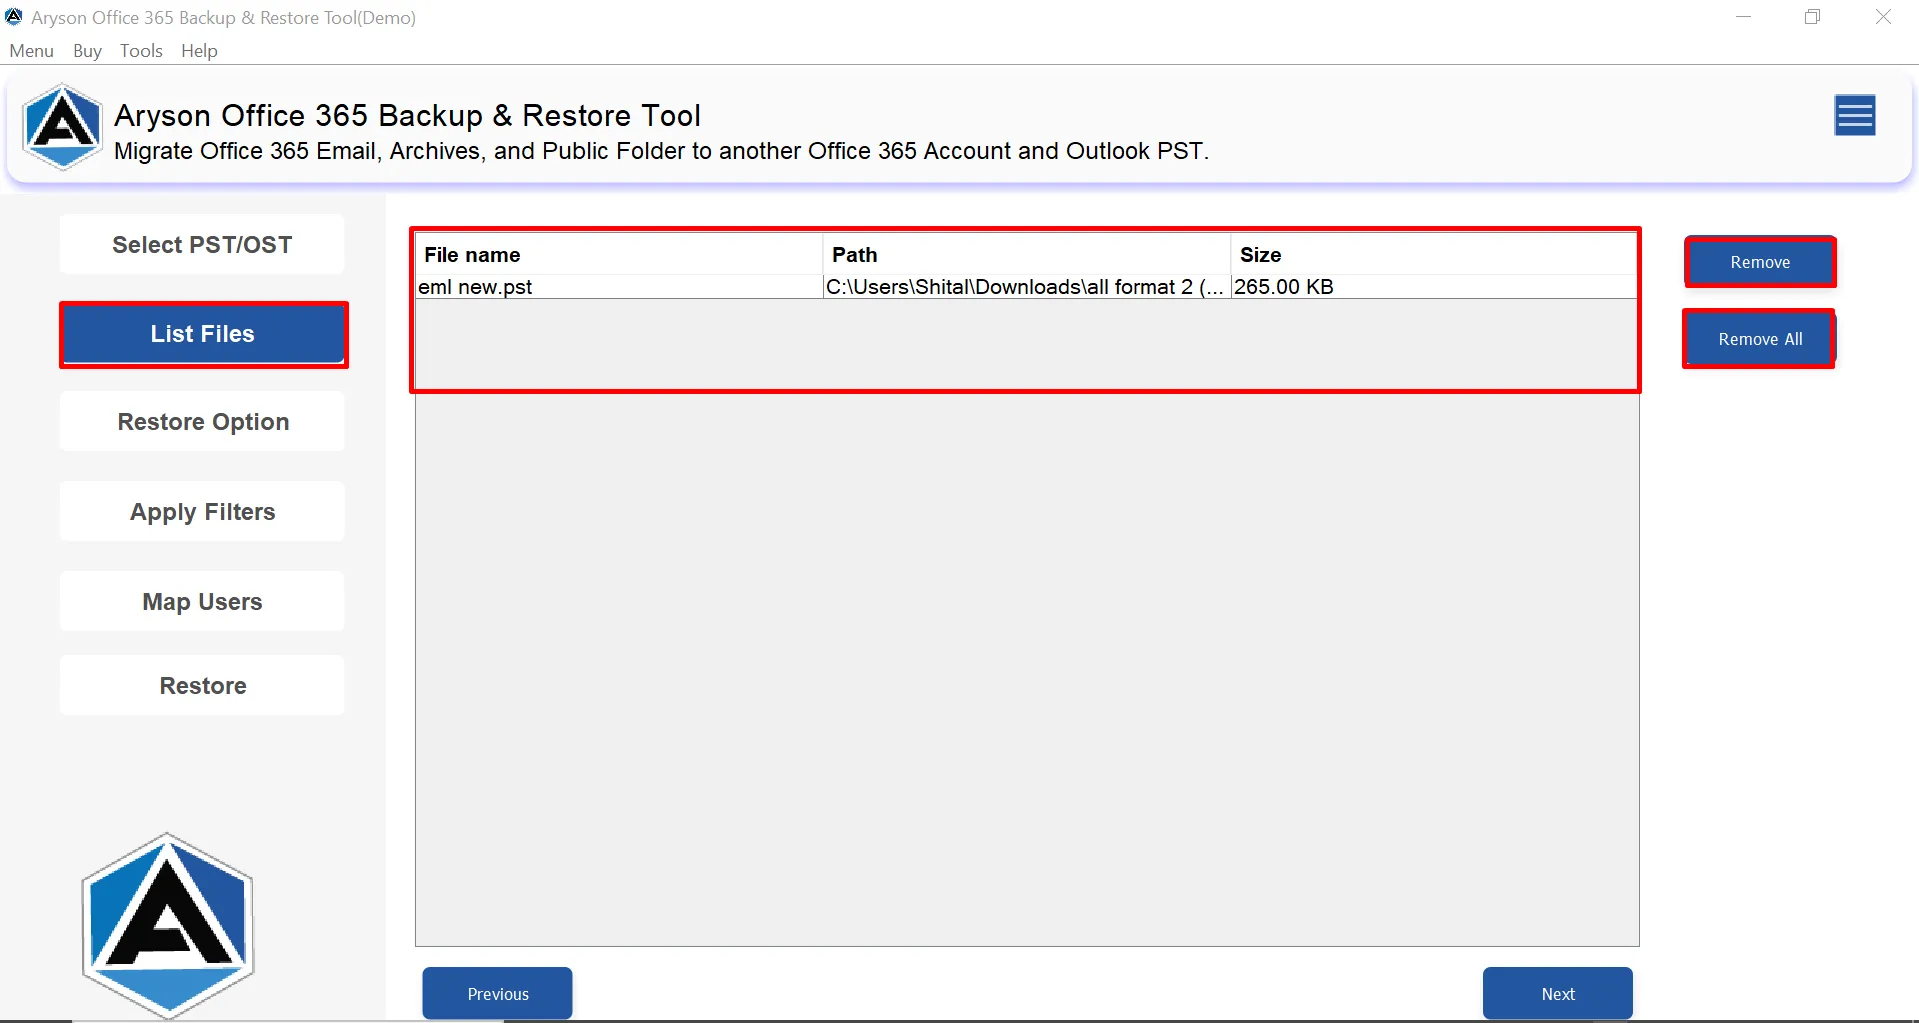
Step 6: The tool lists the selected files and displays them along with the File Name, Path, and size of the files. Use the Remove or Remove All buttons to remove data from the selection..
Step 7: Sign in to your Office 365 account using Modern Authentication (OAuth 2.0).

Step 8: Mark the Modern Authentication(By using user client id and secret) radio button to log in using the client ID and secret ID.
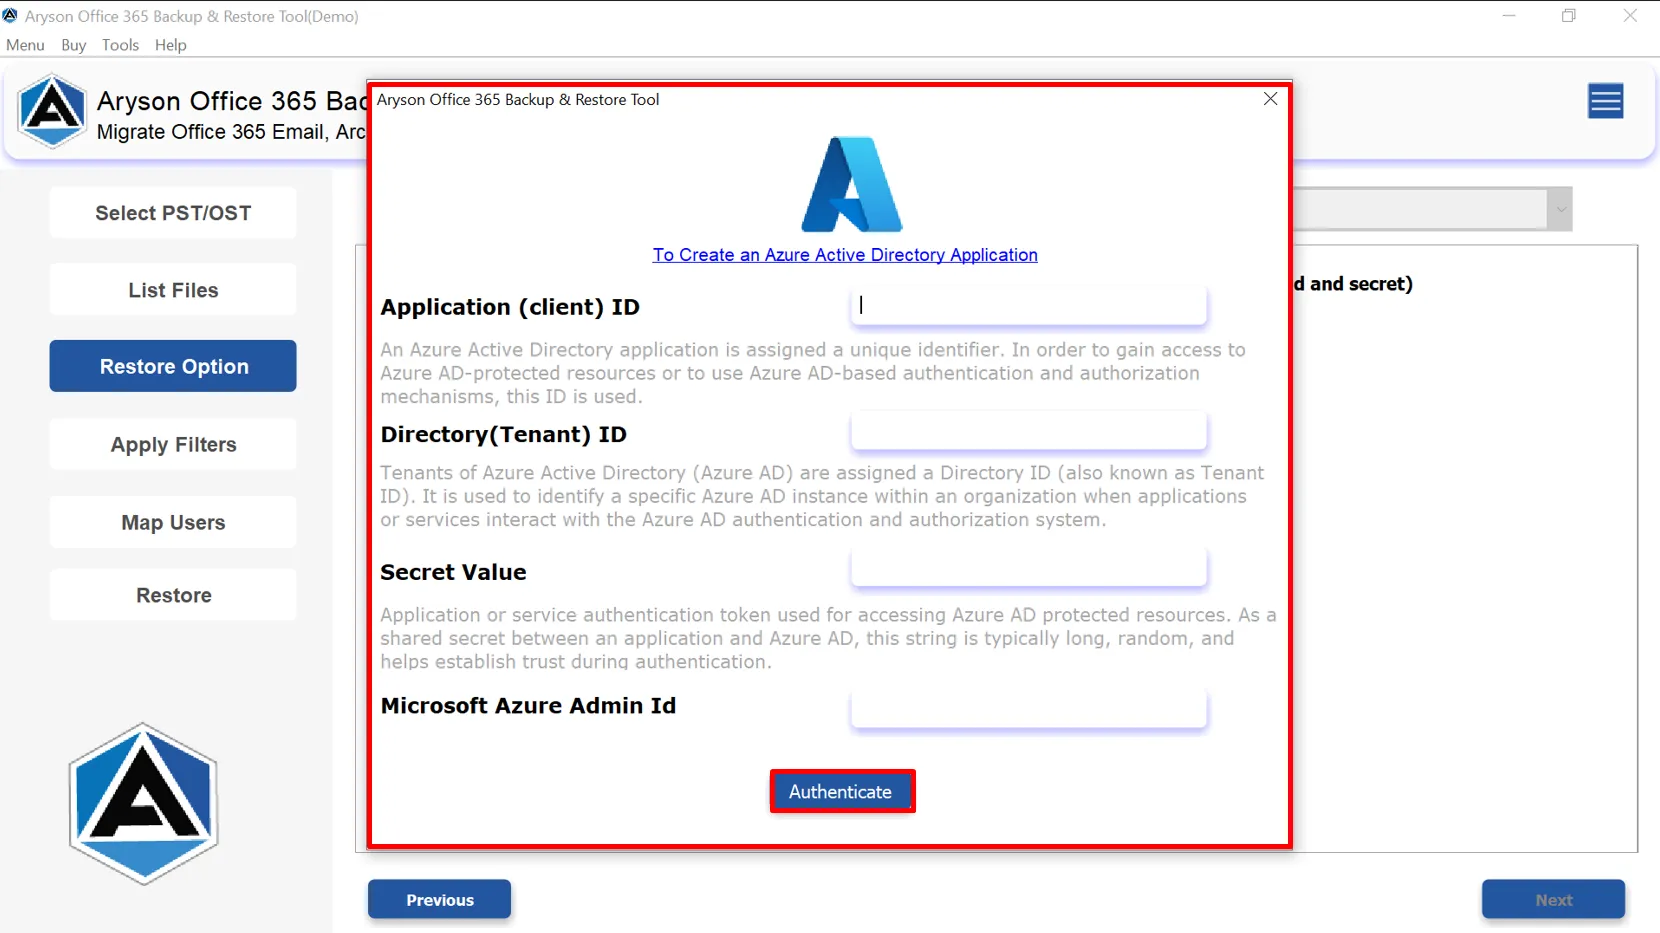
Step 9: Enter your required O365 credentials.
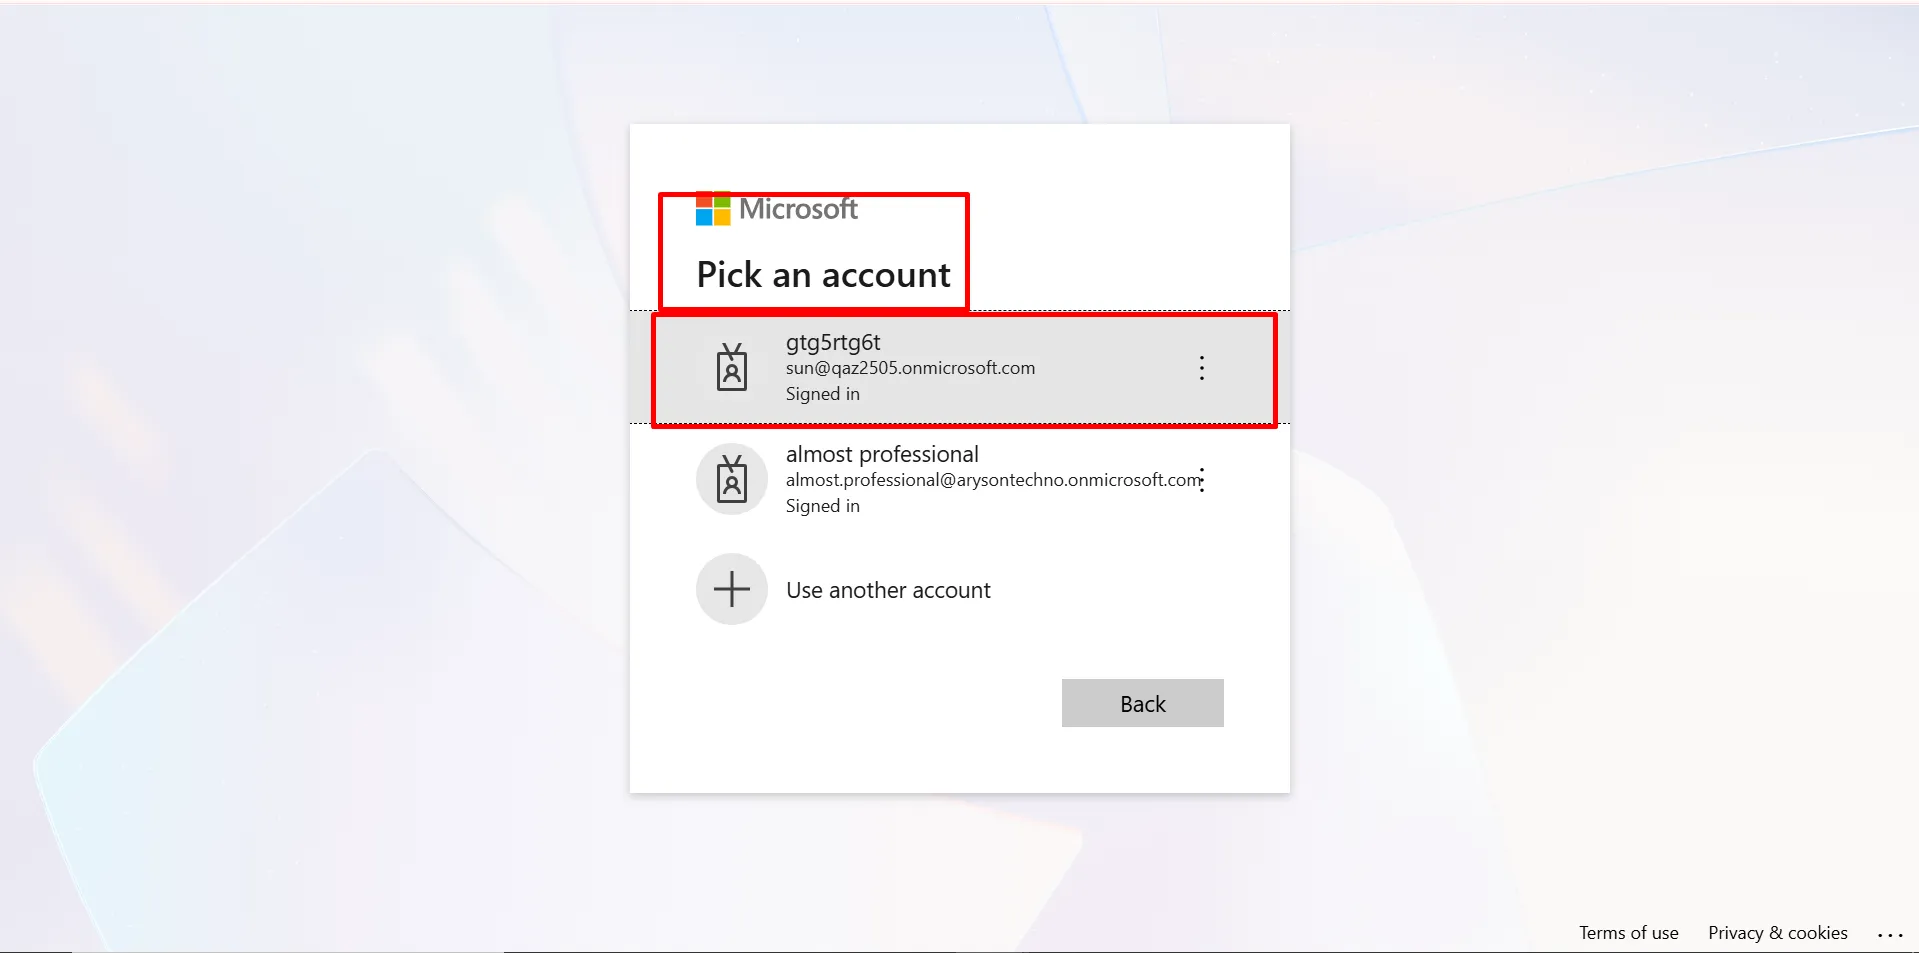
Step 10: After successful authentication, an Authentication Completed pop-up appears in the browser.
Step 11: Apply the Remove Duplicate Emails feature and eliminate duplicates based on Subject, Body, From, and To.
Step 12: Use the “Save Mail without Attachments” option to save emails without their attachments.
Step 13: The Skip Previously Backed-up Data filter will remove the files that are already migrated.

Step 14: Use the Date Filter option and specify the Start Date and End Date of the files to be migrated.

Step 15: Using the Custom Folder Name feature, set a desired name for the resultant folder.
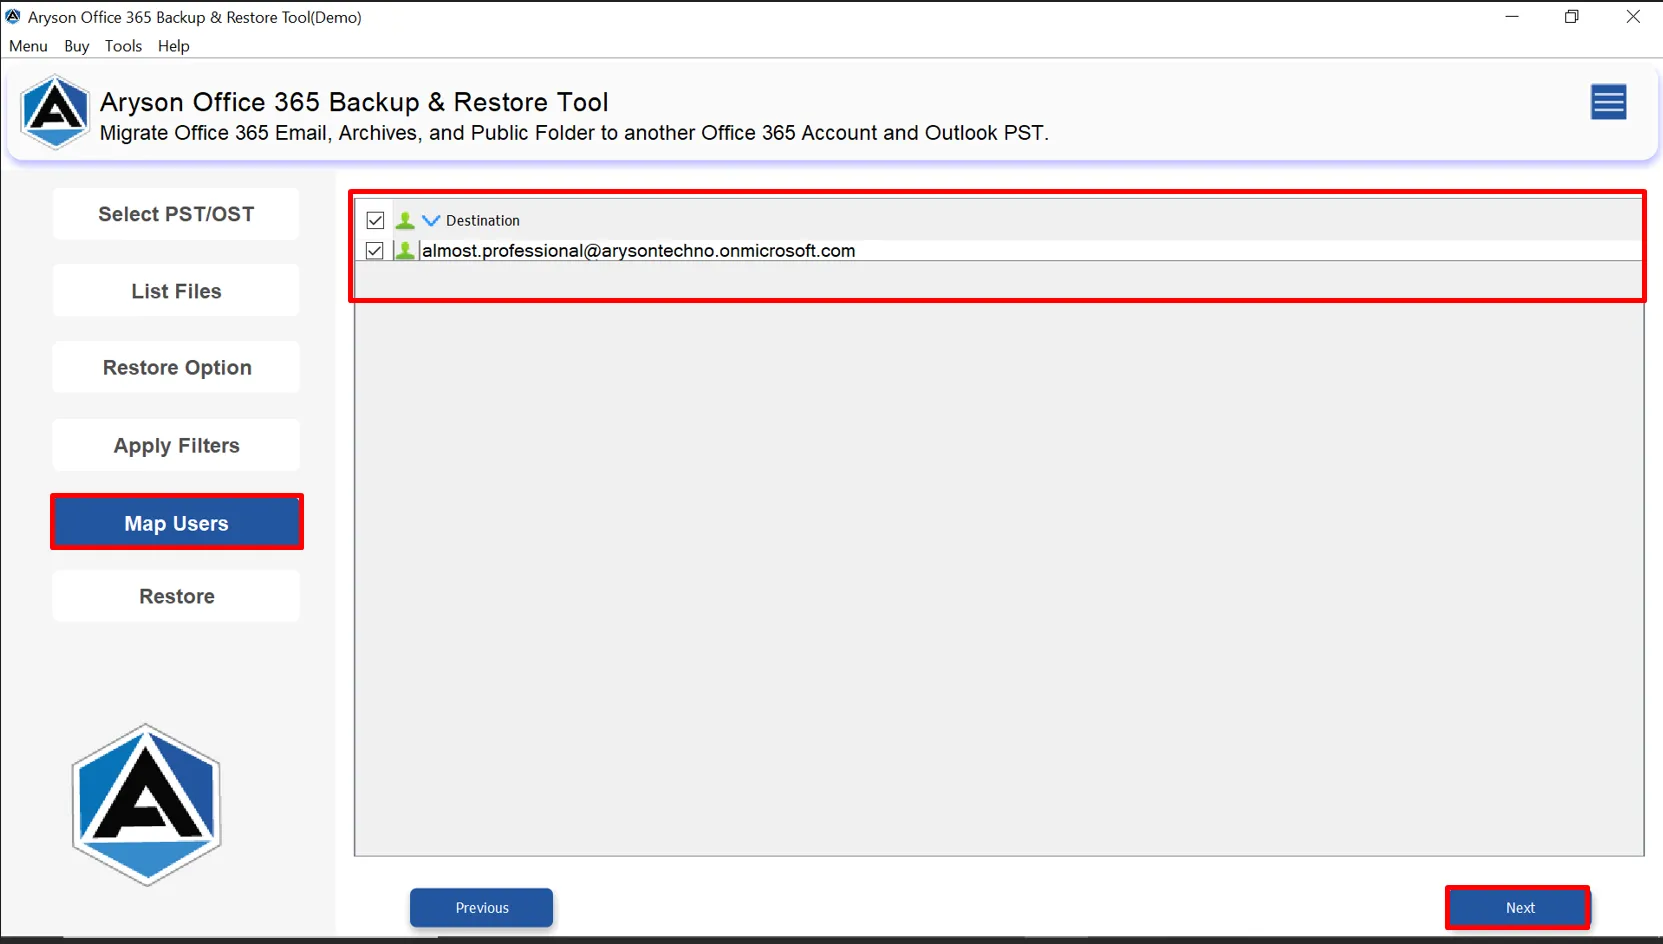
Step 16: Select the admin ID of the destination account to begin the mapping.
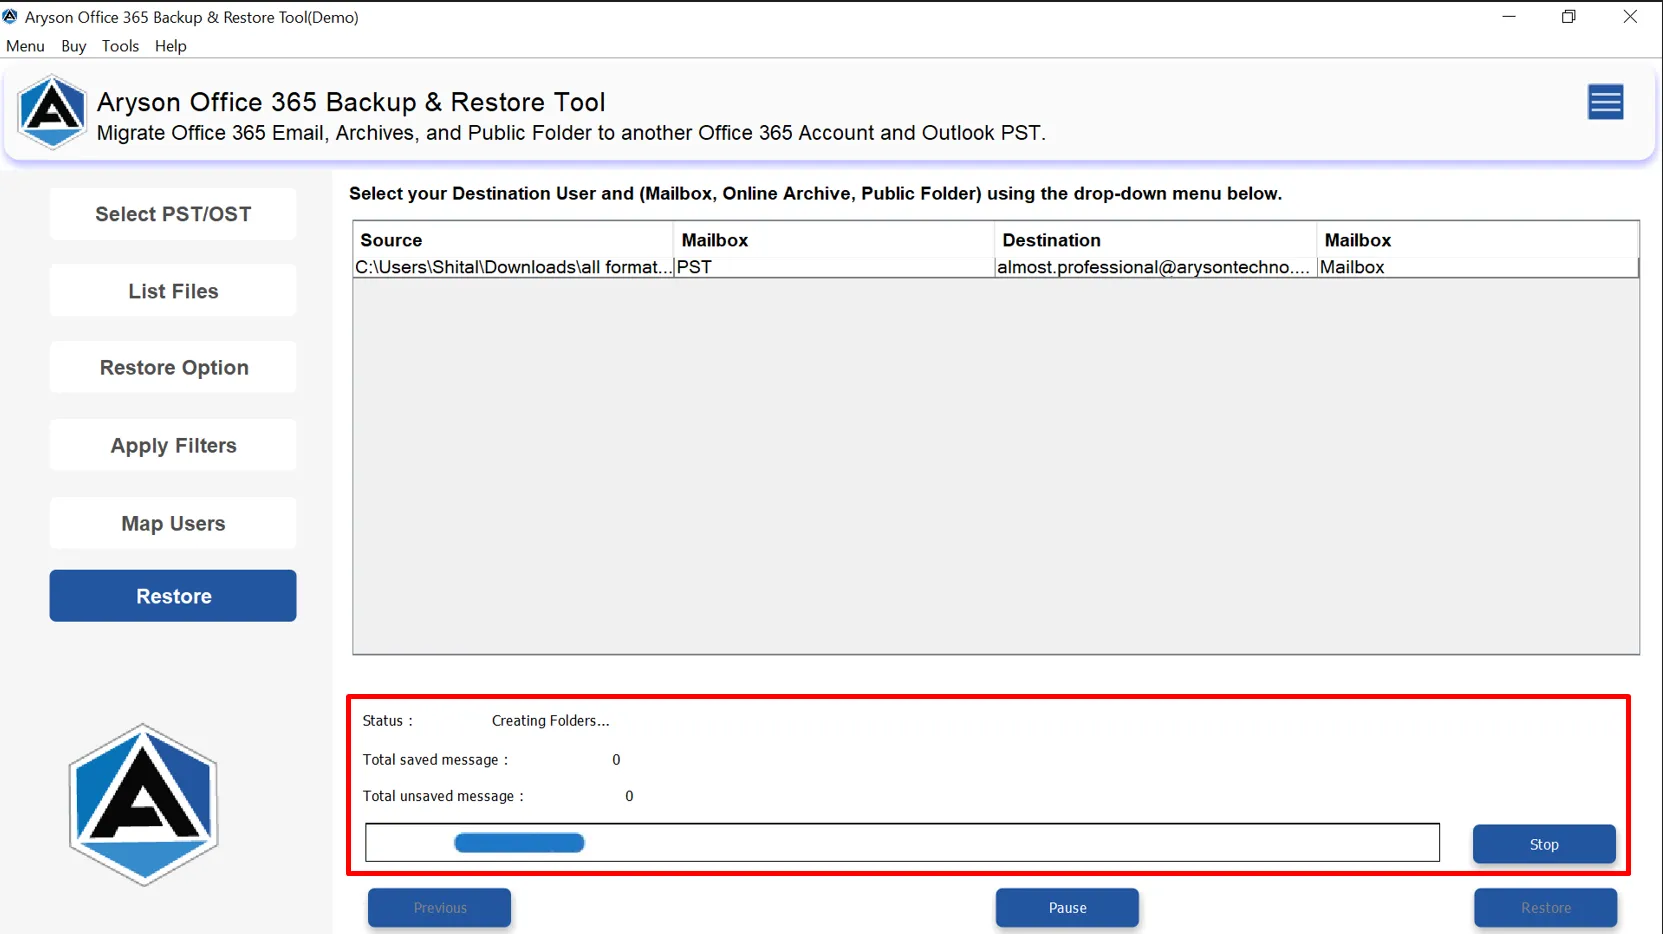
Step 17: Click Backup to begin the process.

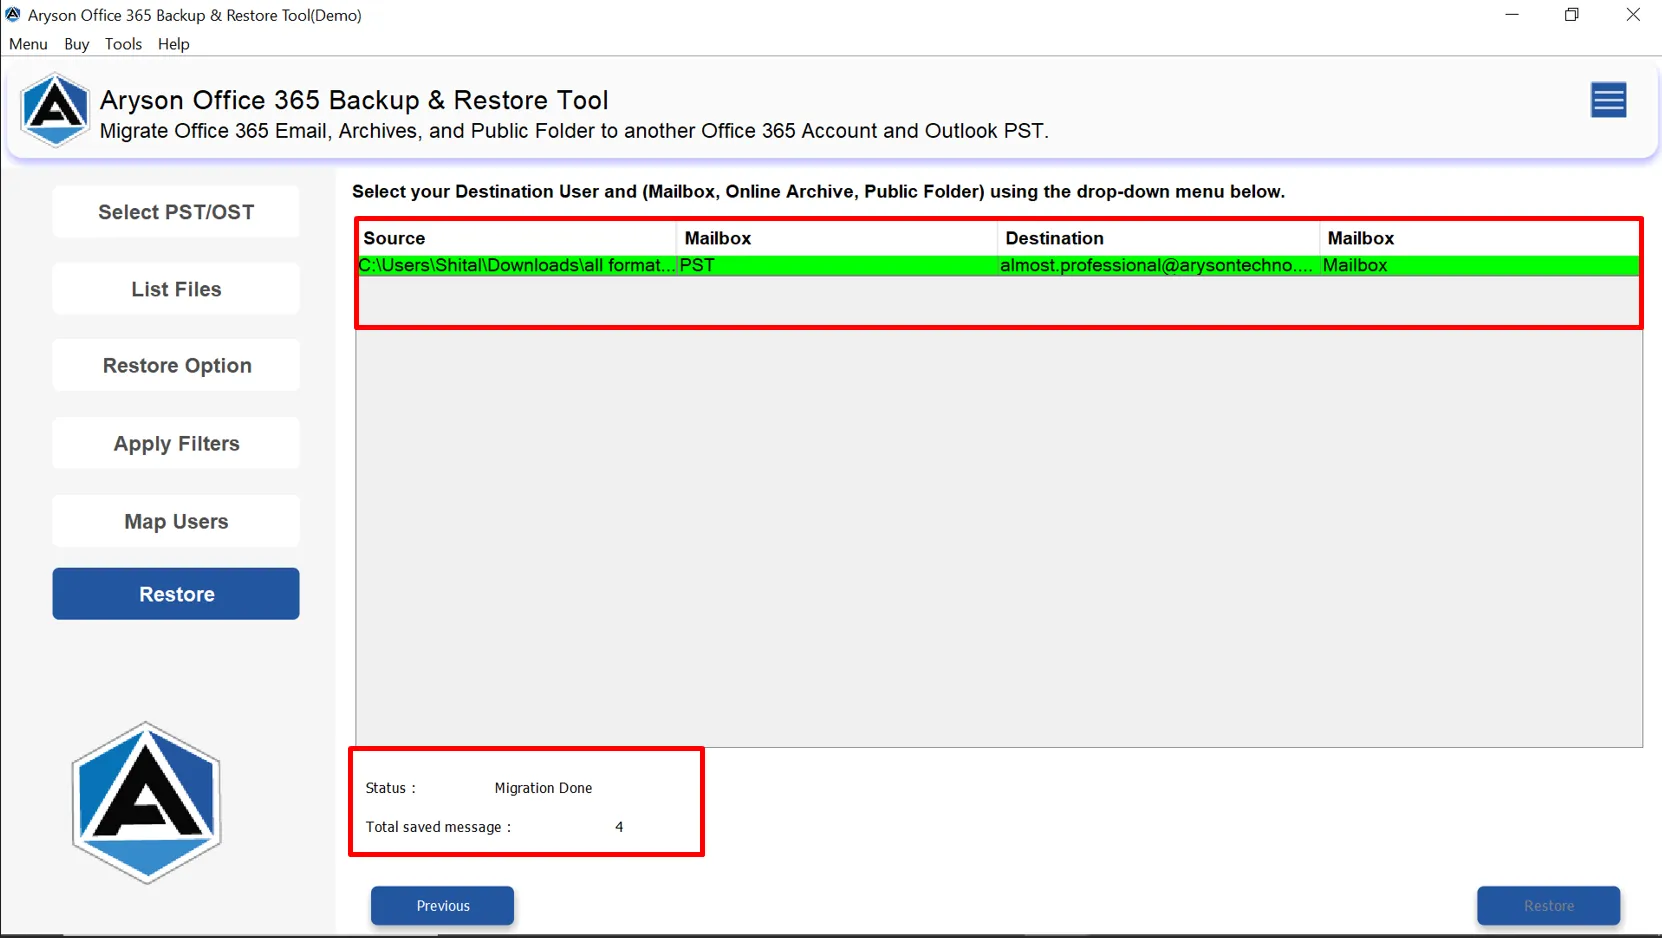
Step 18: The tool displays real-time progress and generates a detailed summary report after completion.
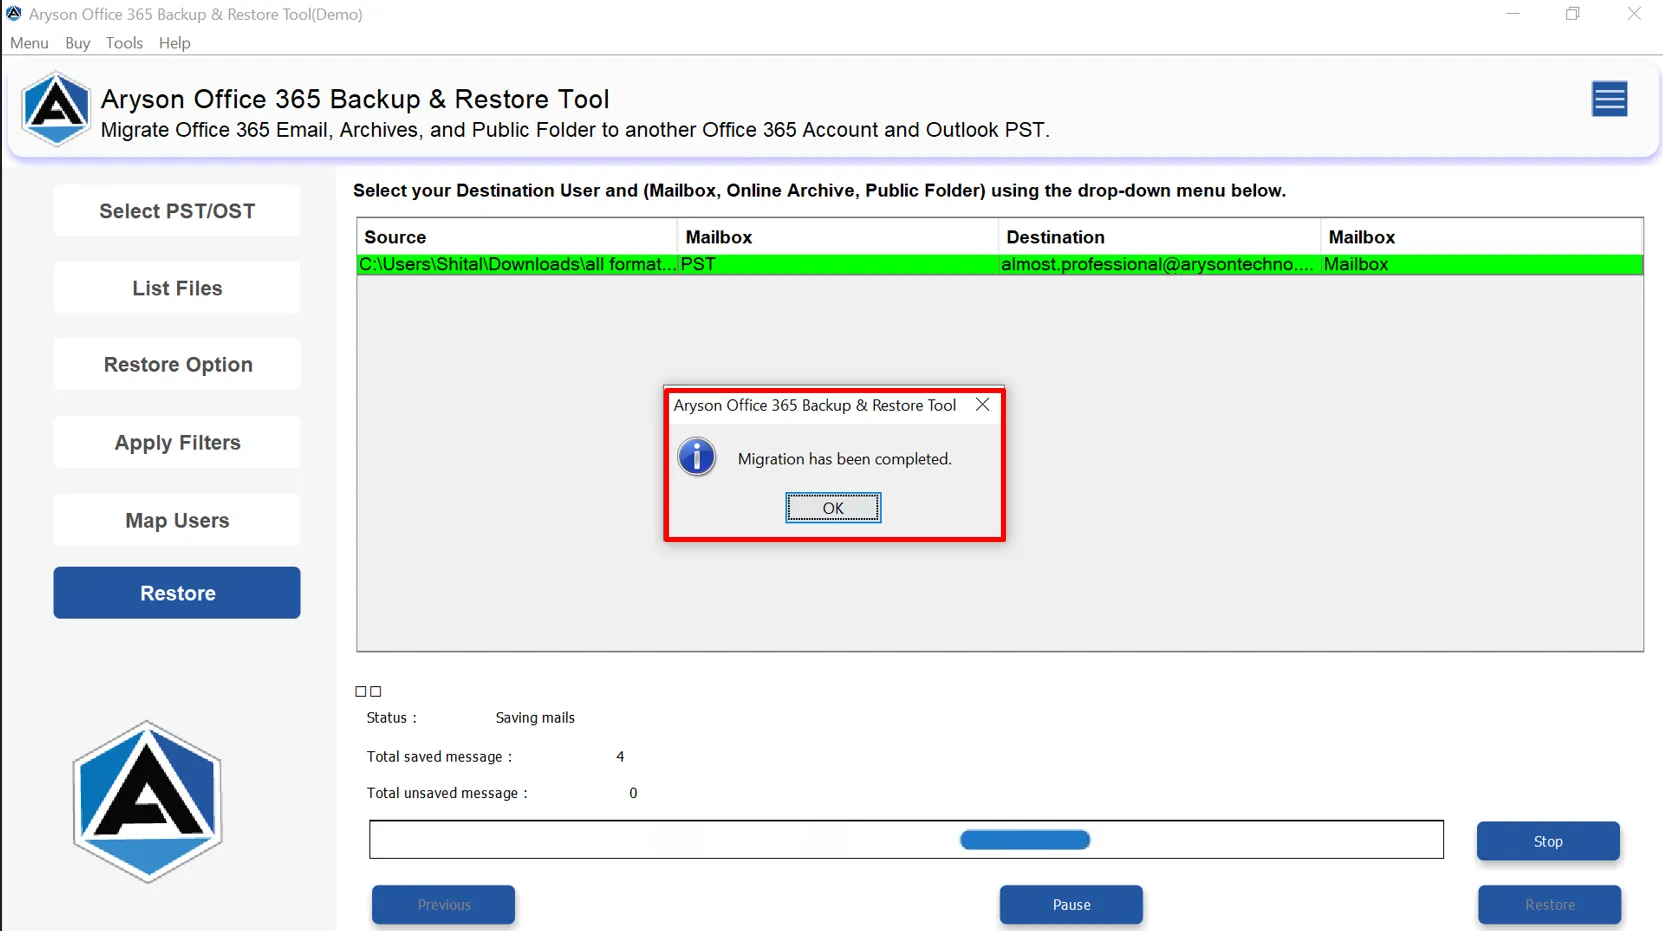
Step 19: A pop-up stating “Migration has been completed” appears on the screen. Click OK to proceed further.
Step 20: Your files have been successfully restored.
Activation Guide
Activate the Software
Installation & Uninstallation
Installation & Uninstallation of Software
User Interface
User Interface
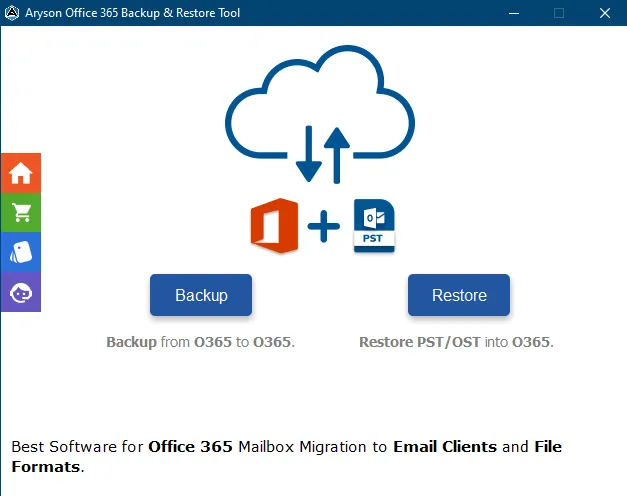
After downloading the Aryson Office 365 Backup & Restore Tool, you will find the welcome screen as played below.
