Complete Step-by-Step Guide for Aryson Maildir Viewer
Open, read, and export Maildir files without the need for any email client installation. Aryson Maildir Viewer enables you to view complete email details, including attachments, and export Maildir data into multiple formats such as PST, HTML, MSG, MBOX, EML, EMLX, PDF, CSV, and MBOX on Windows and Mac systems. For any issues, you can refer to the Functional & Technical Documentation (FTD) Guide for complete assistance.
-
Table of Content
- Software Working Process
- Activation Guide
- Installation & Uninstallation
- User Interface
Software Working Process
Software Working Process
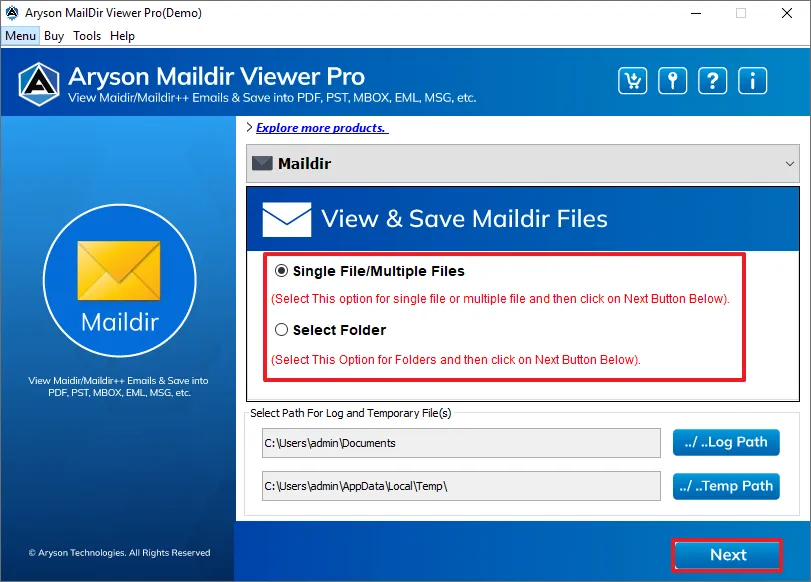
Step 1: Download the Aryson Maildir Viewer Tool and run it as an administrator.
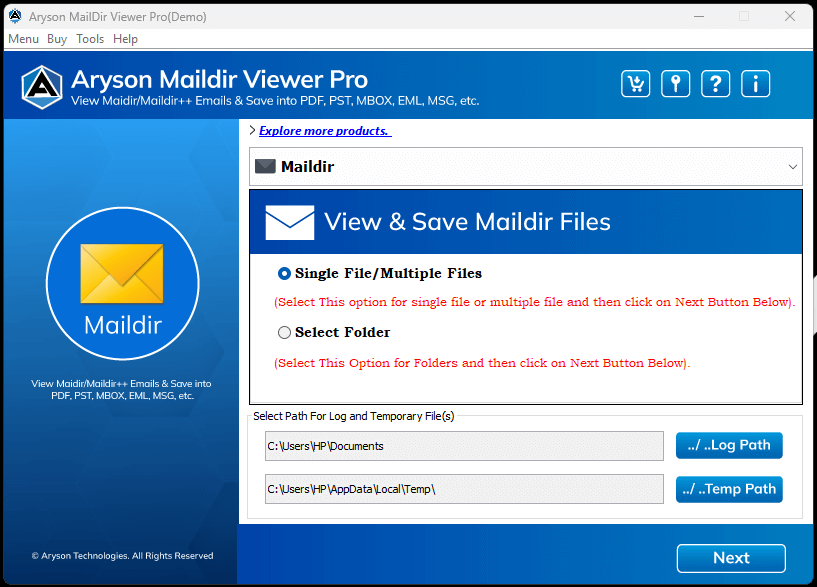
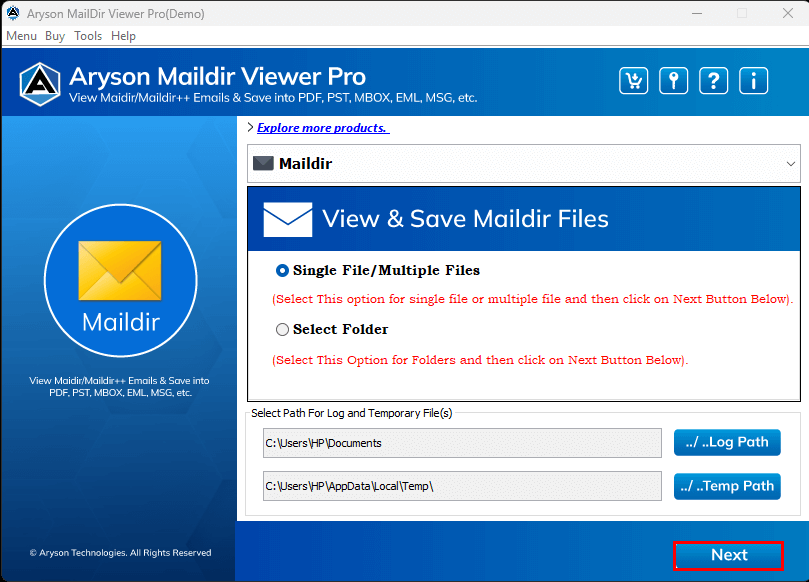
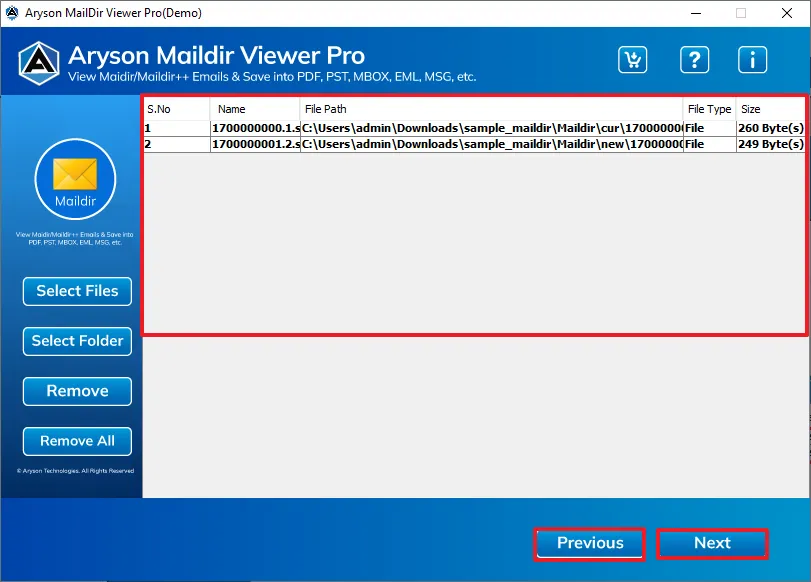
Step 2: Select Single File/Multiple File or Select Folder and click on Next to proceed.
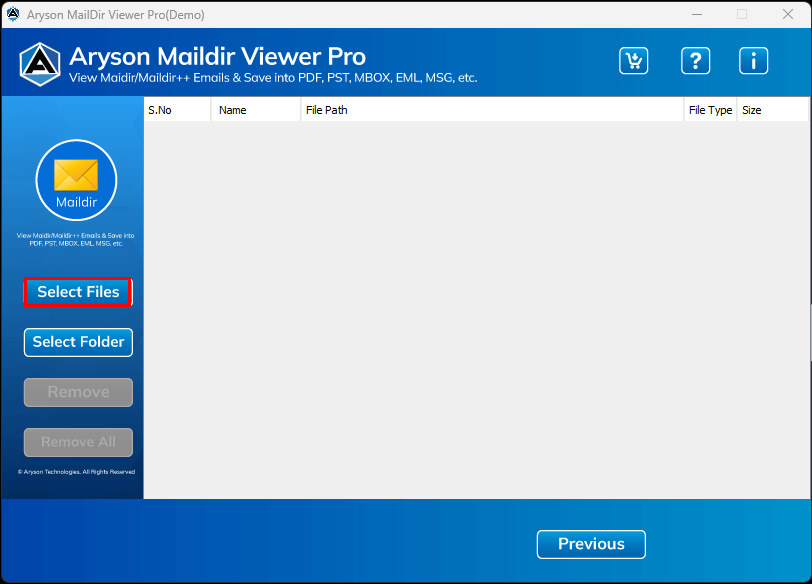
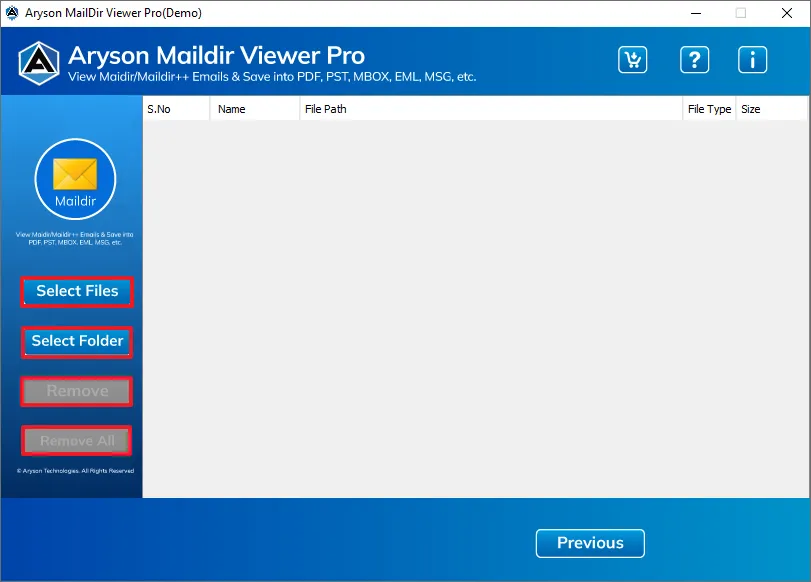
Step 3: Select any of the options for file management
- Select Files: Enables you to browse and add individual Maildir files from your system.
- Select Folder: Allows you to add a complete folder that contains multiple Maildir files at one time.
- Remove: Deletes the selected Maildir file from the added list.
- Remove All: Clears the entire list of selected Maildir files in a single click.
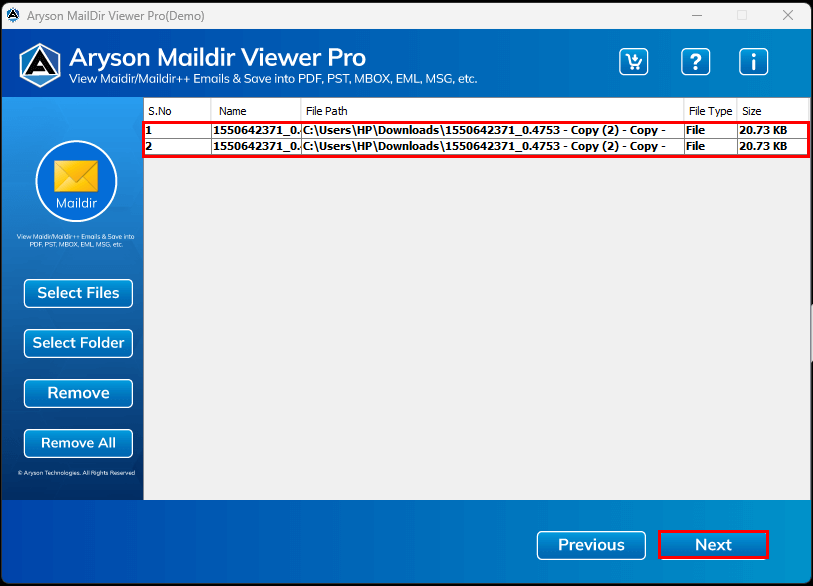
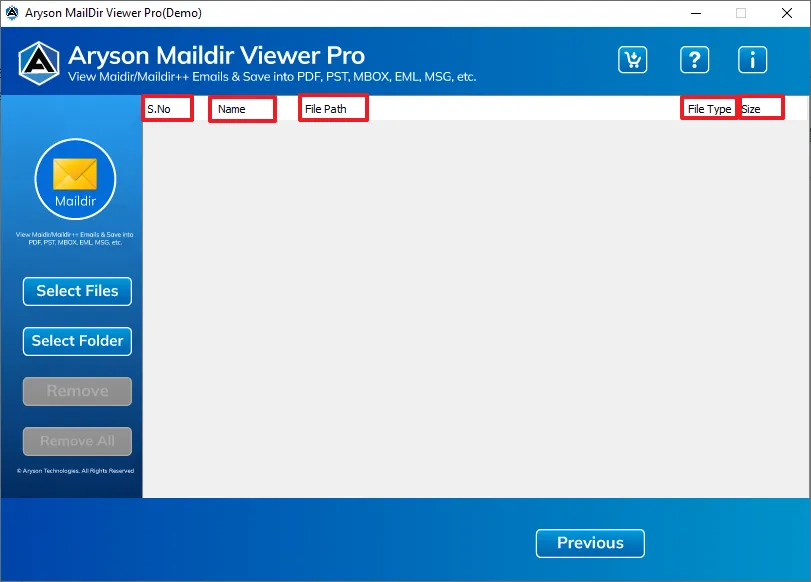
Step 4: The file listing table displays all the selected Maildir files and folders:
- S.No.: Shows the serial number of each added Maildir file or folder.
- Name: Displays the name of the selected Maildir folder.
- File Path: Indicates the full location of the Maildir folder on your system.
- File Type: Shows the file type as Maildir format.
- Size: Displays the total size of the selected Maildir folder.

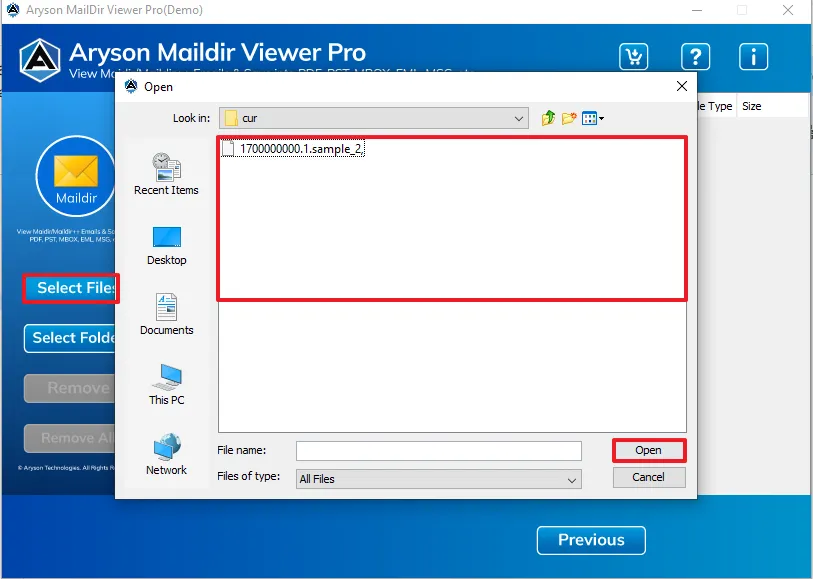
Step 5: Click on Select Files/Select Folder, and browse to the required maildir file, select it, and then click Open.
Step 6: View the selected maildir/maildir++ files and click Next to proceed further.
- Previous: Takes you back to the previous panel or step.
- Next: Moves you forward to the next step in the process.
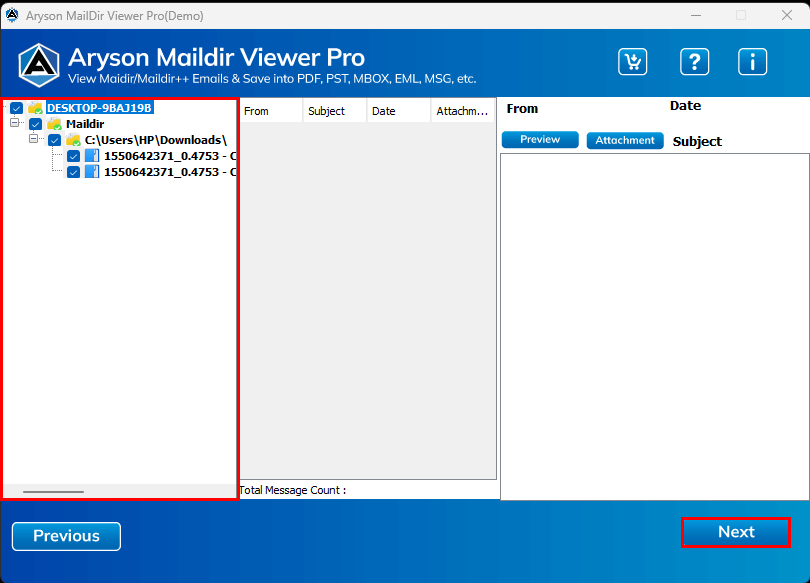
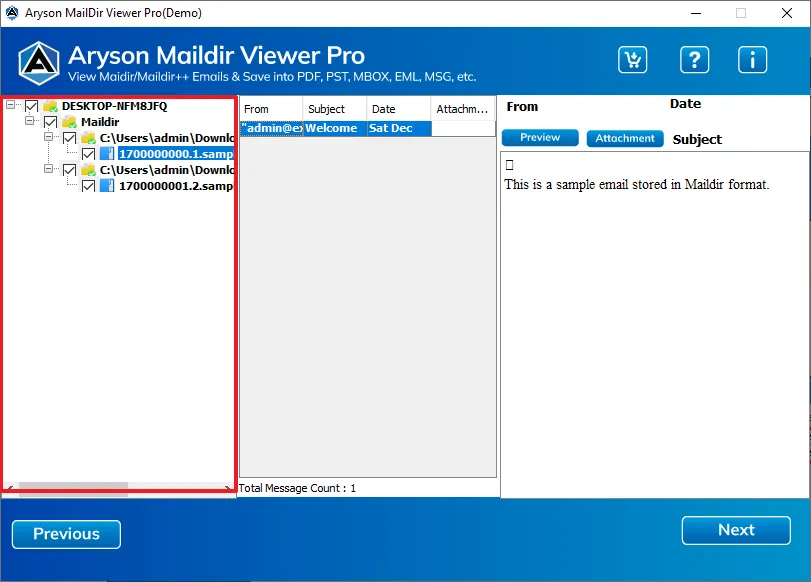
Step 7: Once the loading process completes, this tool displays all maildir files in an organised tree format, making it simple to view and explore the data.
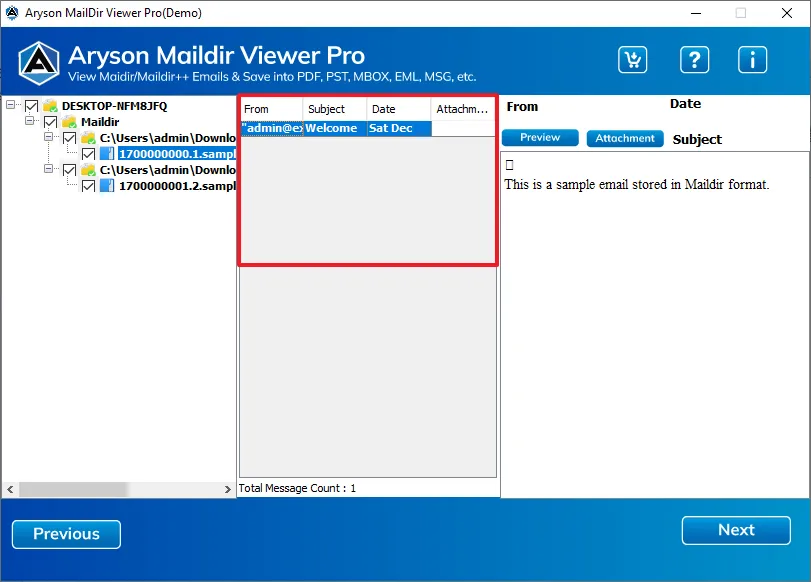
Step 8: Select any folder to preview its emails along with attachments.
- From: Displays the sender of the email or the creator of the event.
- Subject: Shows the title or main topic of the email or calendar item.
- Date: Indicates the date the email was received or the event is scheduled.
- Attachment: Shows whether the email or item includes attached files.
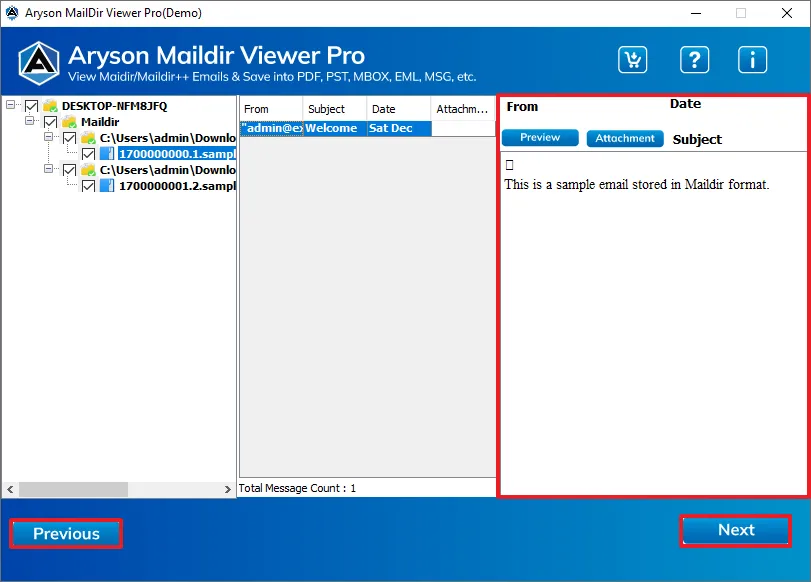
Step 9: View Attachments
- Displays the complete content of the selected Maildir email in the right-side preview pane.
- Shows essential email details such as From, Date, and Subject at the top.
- Provides separate options to preview the email body and attachments.
- Maintains the original email formatting and layout for accurate viewing.
- Allows users to review the full message content before moving ahead.
Previous: Returns to the earlier step or screen.
Next: Proceeds to the next stage of the process.
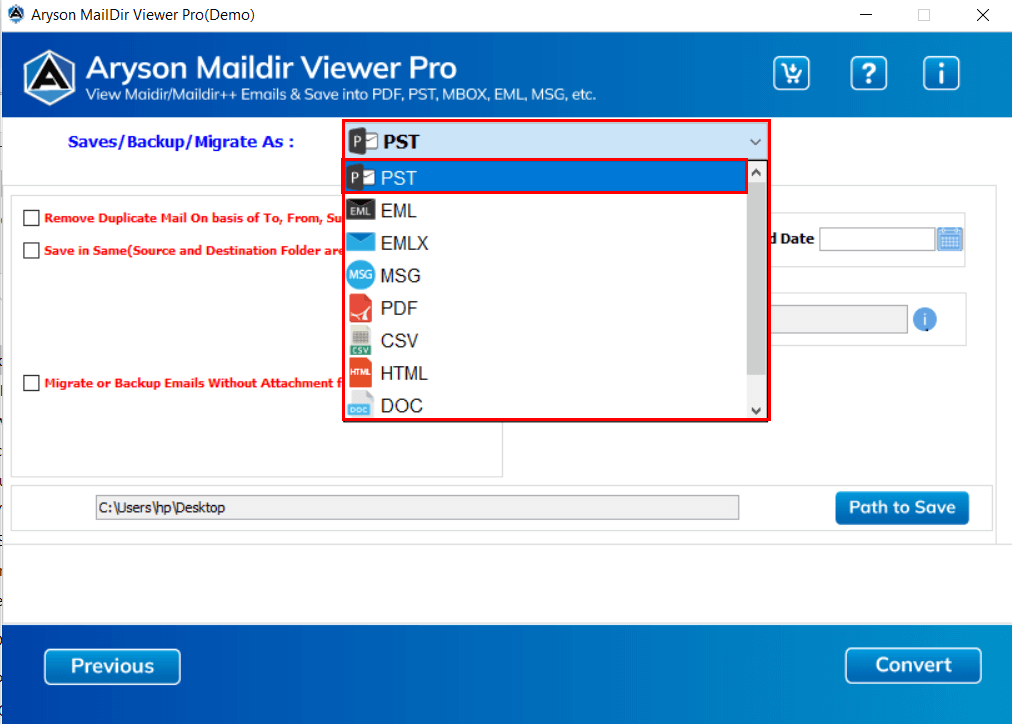
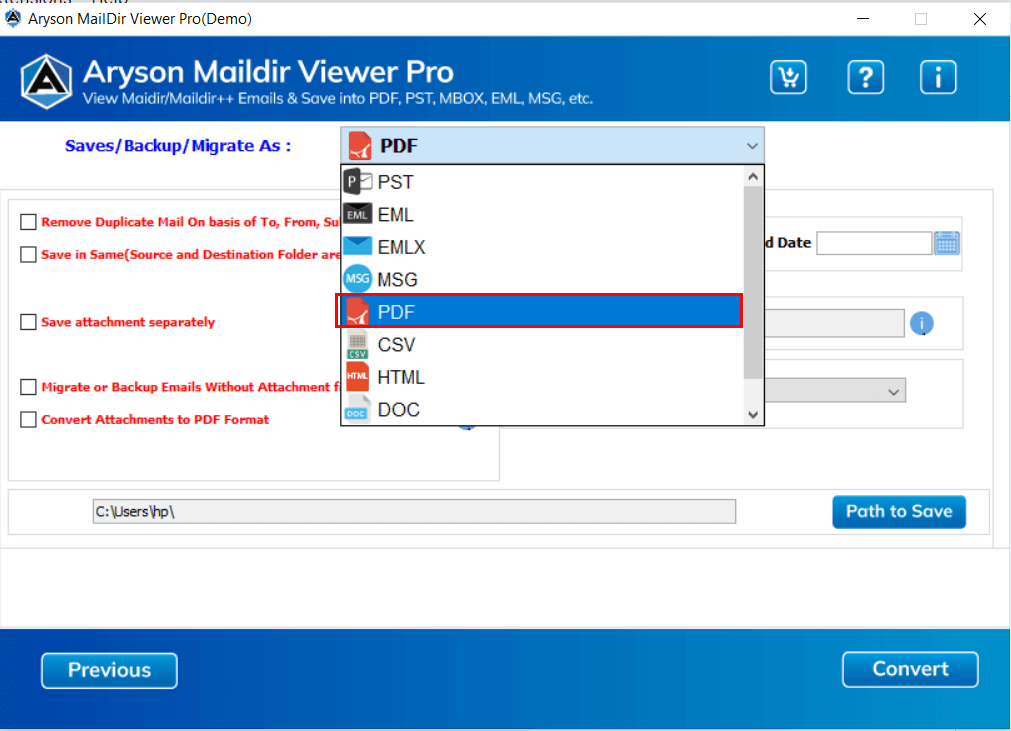
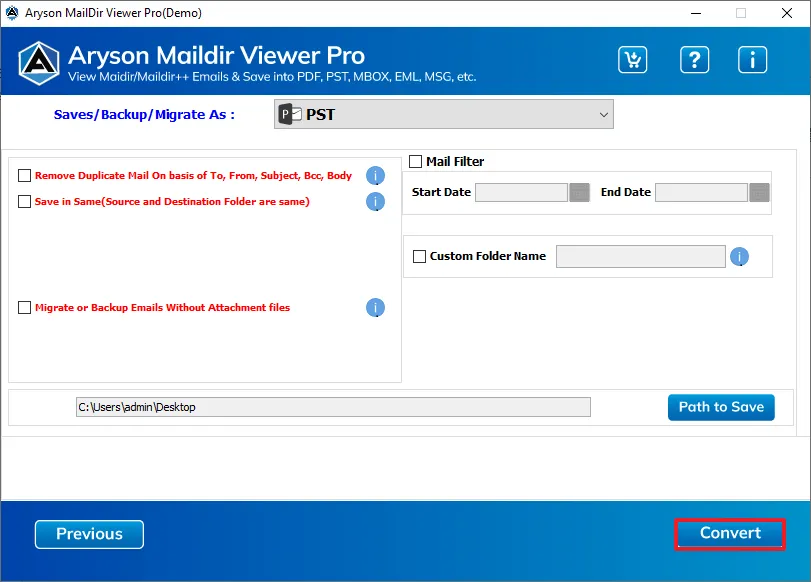
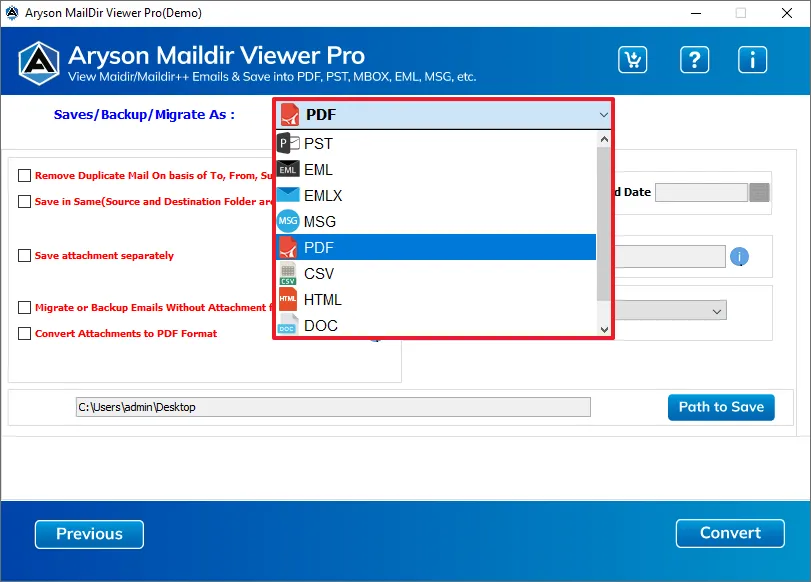
Step 10: Select the file format from the drop-down list (here, we use PST).

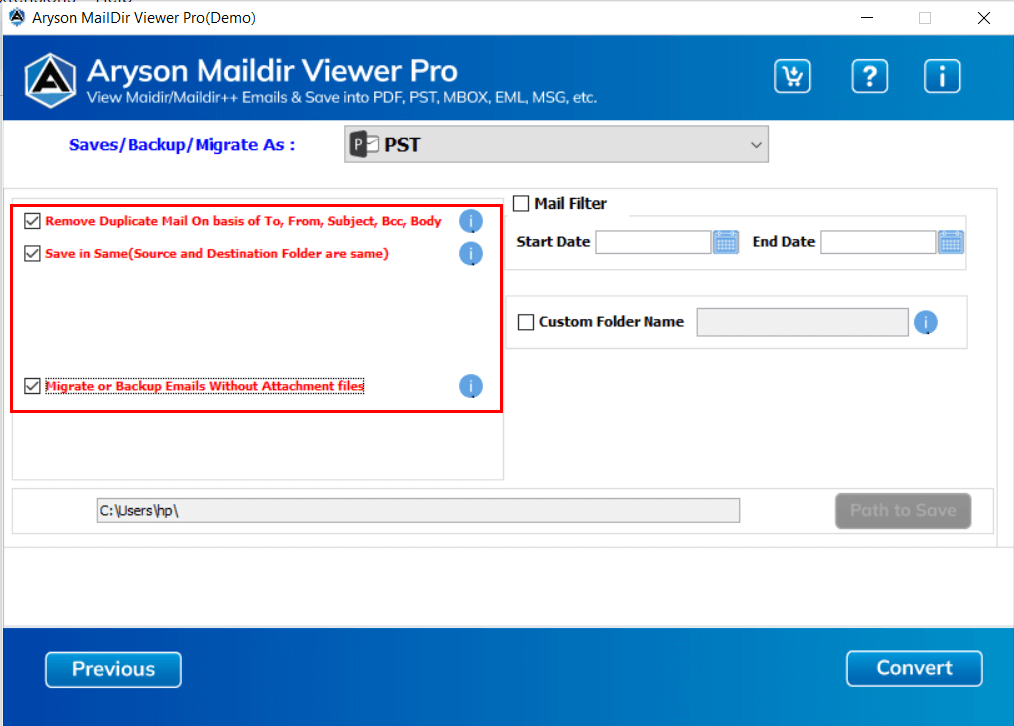
Step 11: Remove Duplicate Mail: Eliminates duplicate emails based on To, From, Subject, Bcc, and Body fields.
Step 12: Save in Same (Source and Destination Folder are the same): Saves the output file in the same location as the source file.
Step 13: Migrate or Backup Emails Without Attachment Files: Exports emails while excluding attachment files to reduce file size.
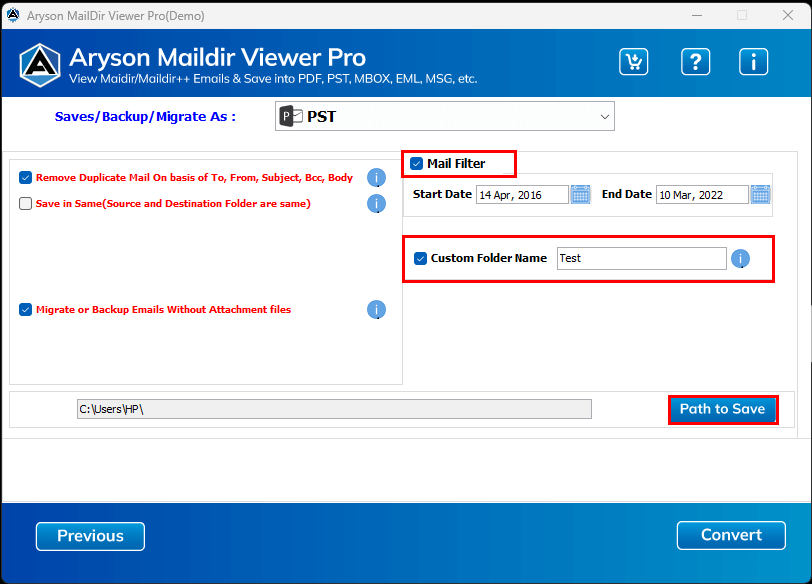
Step 14: Mail Filter: Allows you to filter emails based on a specific date range by selecting the Start Date and End Date. This helps export only the required emails within the chosen time period.
Step 15: Custom Folder Name – Enables you to enter a preferred name for the output folder where the converted or saved file will be stored.
Step 16: Path to Save: Lets you choose the destination location on your system where the final output file will be saved.
Step 17: Convert: Starts the conversion or saving process based on the selected options and filters.
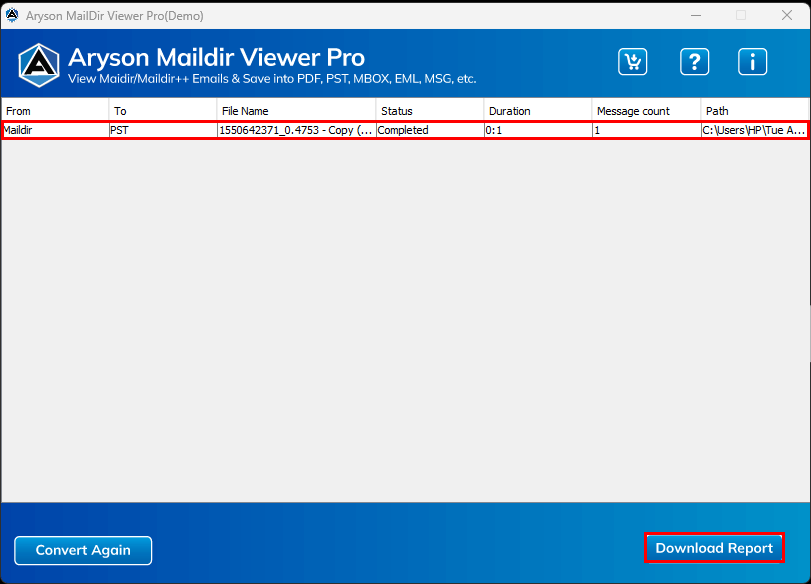
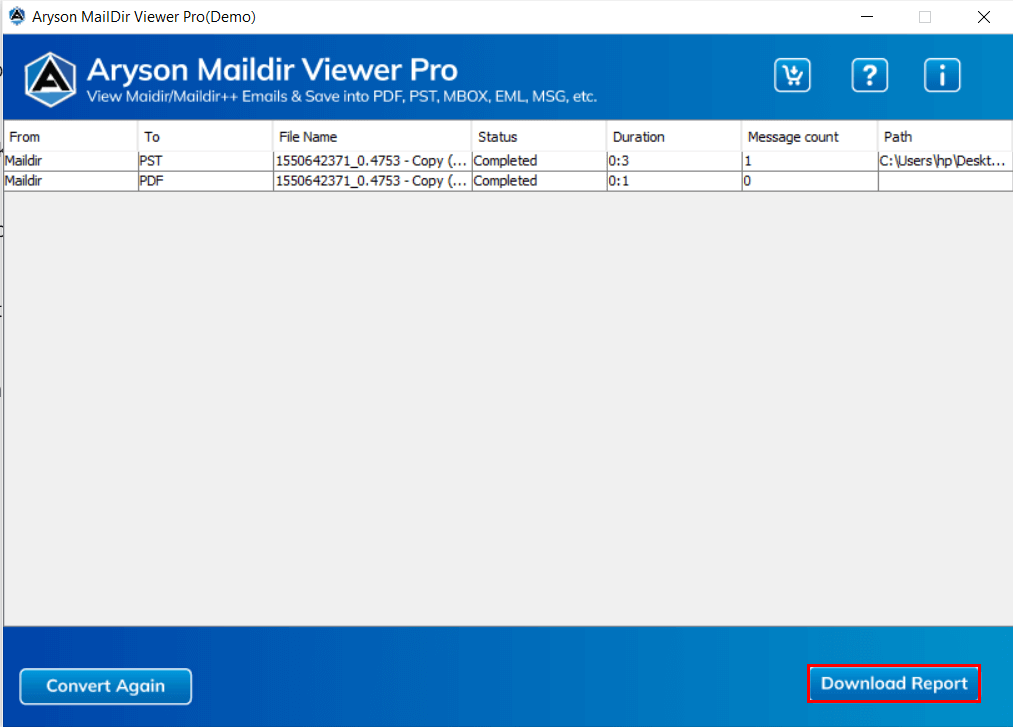
Step 18: After conversion details:
- Provides a “Convert Again” option to start a new process.
- Offers “Download Report” to save the conversion details.

Step 1: Download the Aryson Maildir Viewer Tool and run it as an administrator.
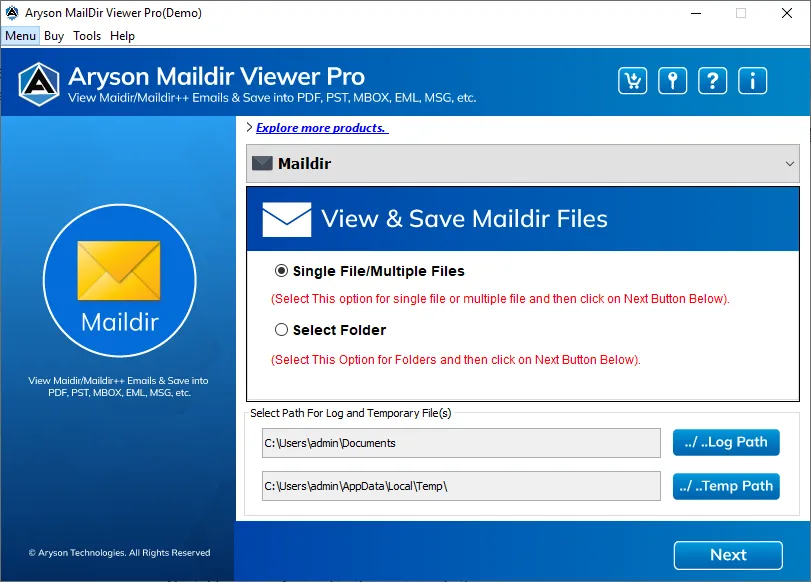
Step 2: Select Single File/Multiple File or Select Folder and click on Next to proceed.
Step 3: Select any of the options for file management
- Select Files: Enables you to browse and add individual Maildir files from your system.
- Select Folder: Allows you to add a complete folder that contains multiple Maildir files at one time.
- Remove: Deletes the selected Maildir file from the added list.
- Remove All: Clears the entire list of selected Maildir files in a single click.
Step 4: The file listing table displays all the selected Maildir files and folders:
- S.No.: Shows the serial number of each added Maildir file or folder.
- Name: Displays the name of the selected Maildir folder.
- File Path: Indicates the full location of the Maildir folder on your system.
- File Type: Shows the file type as Maildir format.
- Size: Displays the total size of the selected Maildir folder.
Step 5: Click on Select Files/Select Folder, and browse to the required maildir file, select it, and then click Open.
Step 6: View the selected maildir/maildir++ files and click Next to proceed further.
- Previous: Takes you back to the previous panel or step.
- Next: Moves you forward to the next step in the process.
Step 7: Once the loading process completes, this tool displays all maildir files in an organised tree format, making it simple to view and explore the data.
Step 8: Select any folder to preview its emails along with attachments.
- From: Displays the sender of the email or the creator of the event.
- Subject: Shows the title or main topic of the email or calendar item.
- Date: Indicates the date the email was received or the event is scheduled.
- Attachment: Shows whether the email or item includes attached files.
Step 9: View Attachments
- Displays the complete content of the selected Maildir email in the right-side preview pane.
- Shows essential email details such as From, Date, and Subject at the top.
- Provides separate options to preview the email body and attachments.
- Maintains the original email formatting and layout for accurate viewing.
- Allows users to review the full message content before moving ahead.
Previous: Returns to the earlier step or screen.
Next: Proceeds to the next stage of the process.
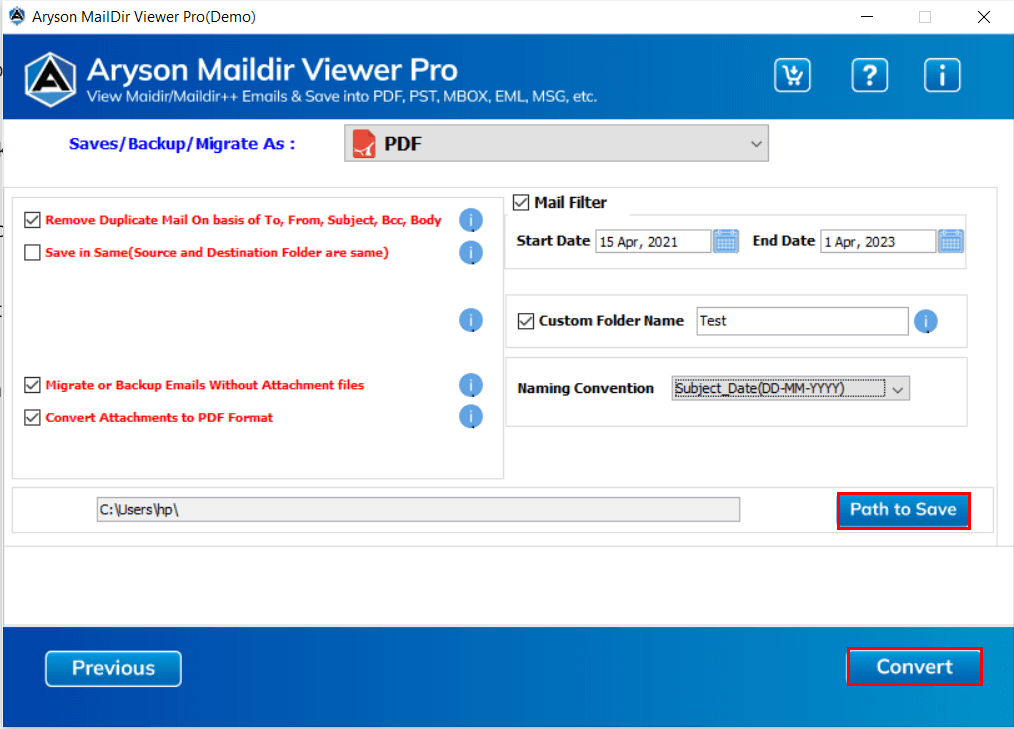
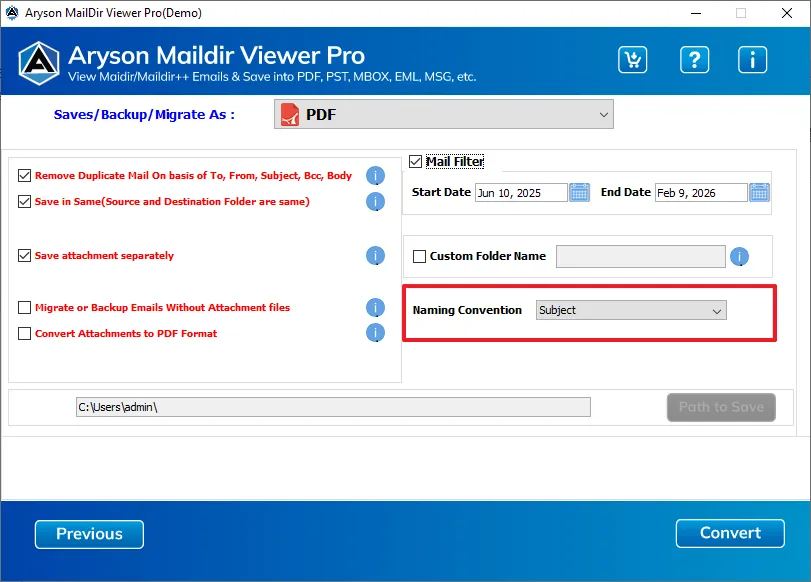
Step 10: Select the file format from the drop-down list (here, we use PDF).
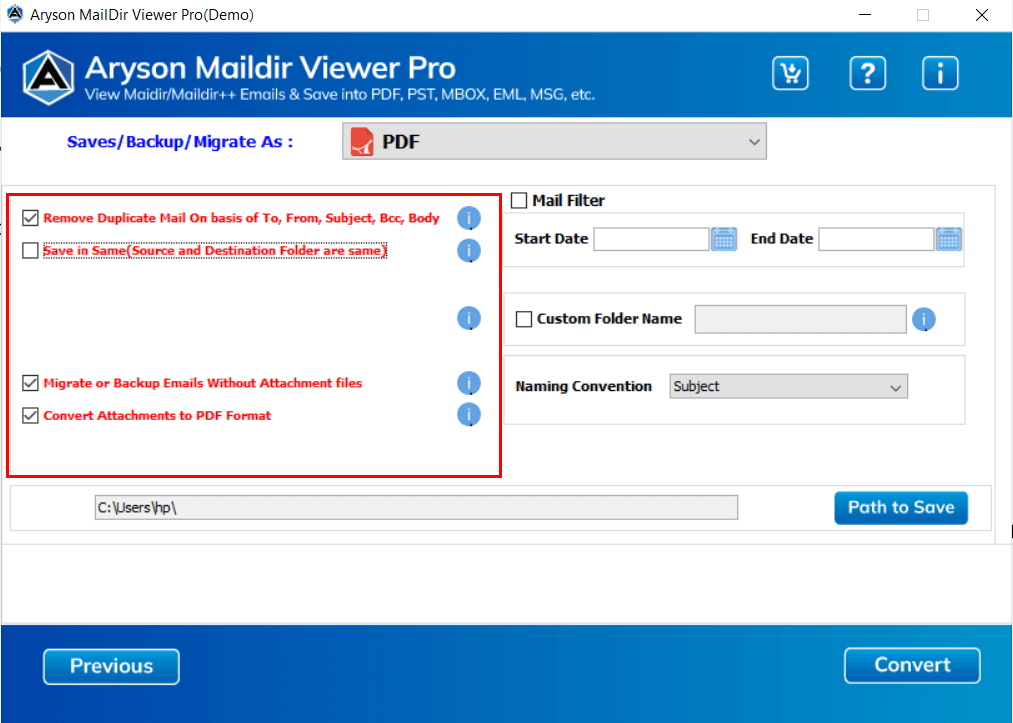
Step 11: Remove Duplicate Mail: Eliminates duplicate emails based on To, From, Subject, Bcc, and Body fields.
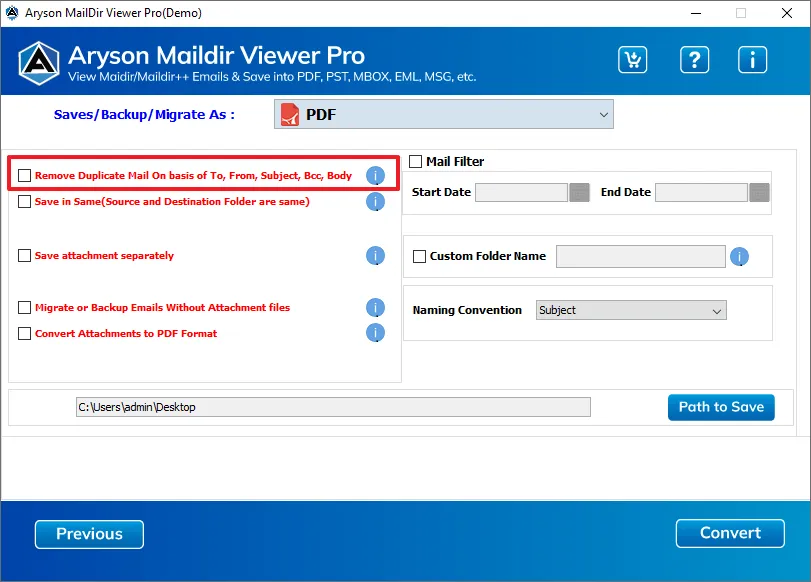
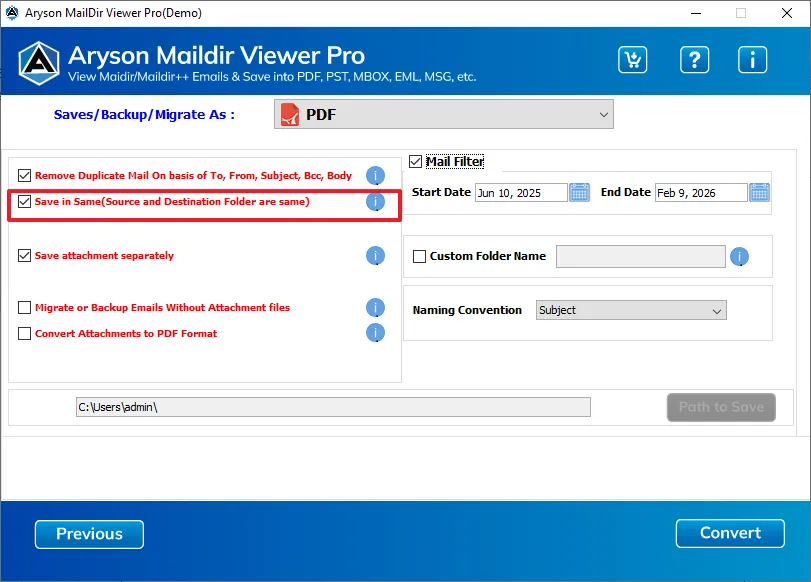
Step 12: Save in Same (Source and Destination Folder are the same): Saves the output file in the same location as the source file.
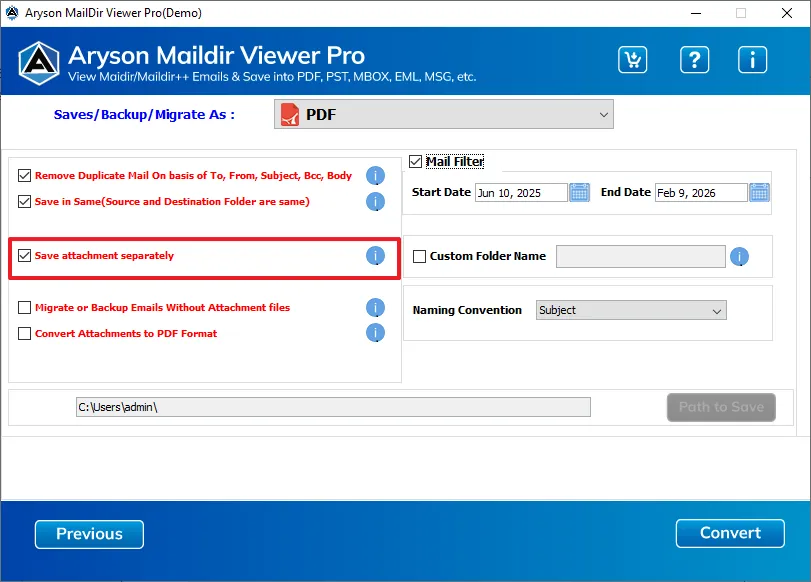
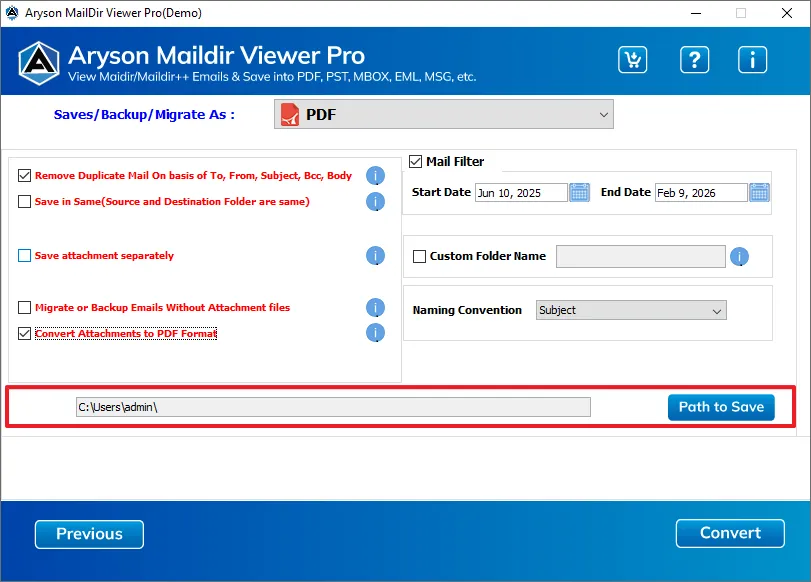
Step 13: Save Attachments Separately: This option extracts and stores all email attachments in a separate folder while keeping the email content saved in the selected format.
Step 14: Migrate or Backup Emails Without Attachment Files: Exports emails while excluding attachment files to reduce file size.
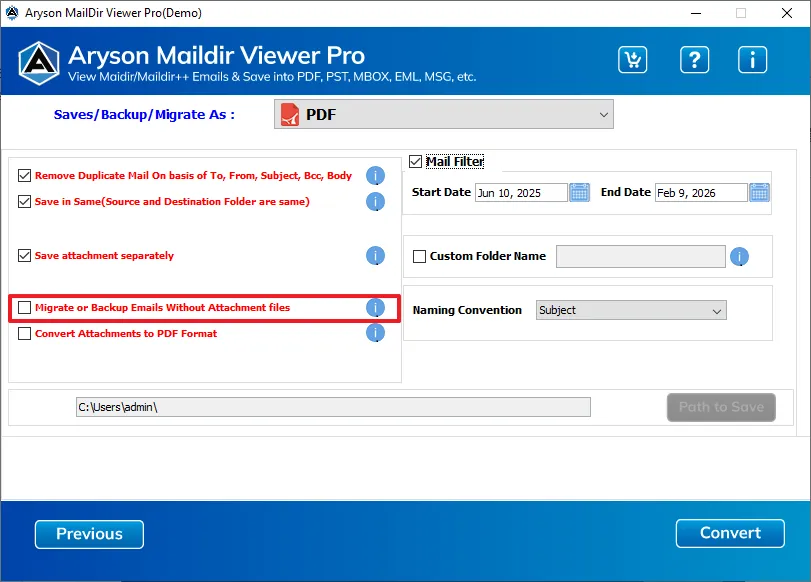
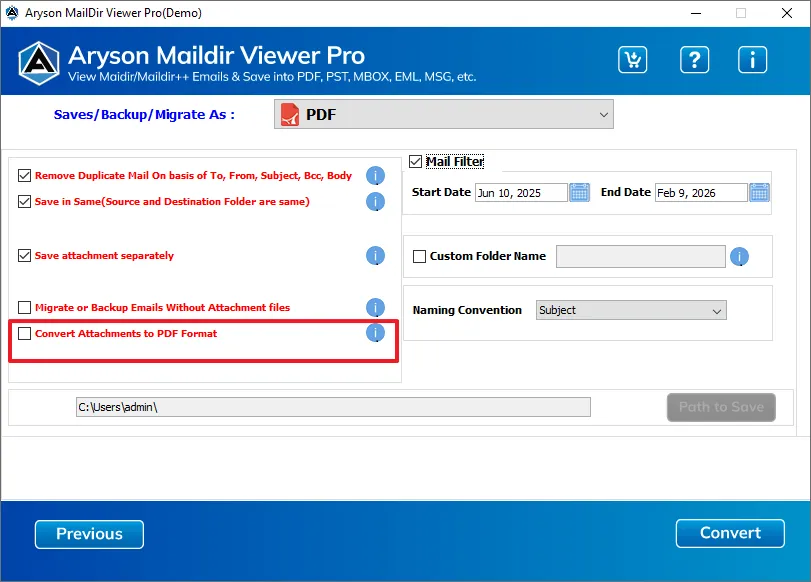
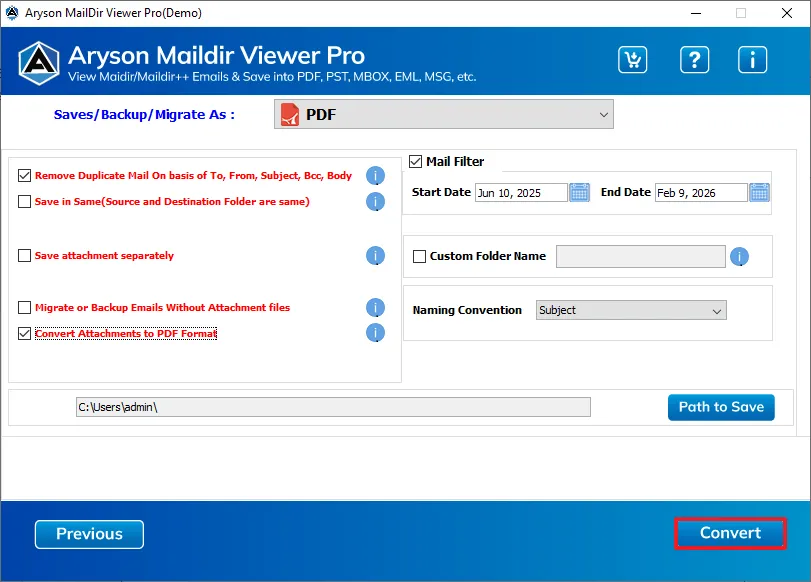
Step 15: Convert Attachments to PDF: This option changes all email attachments into PDF format while saving them during the export process.
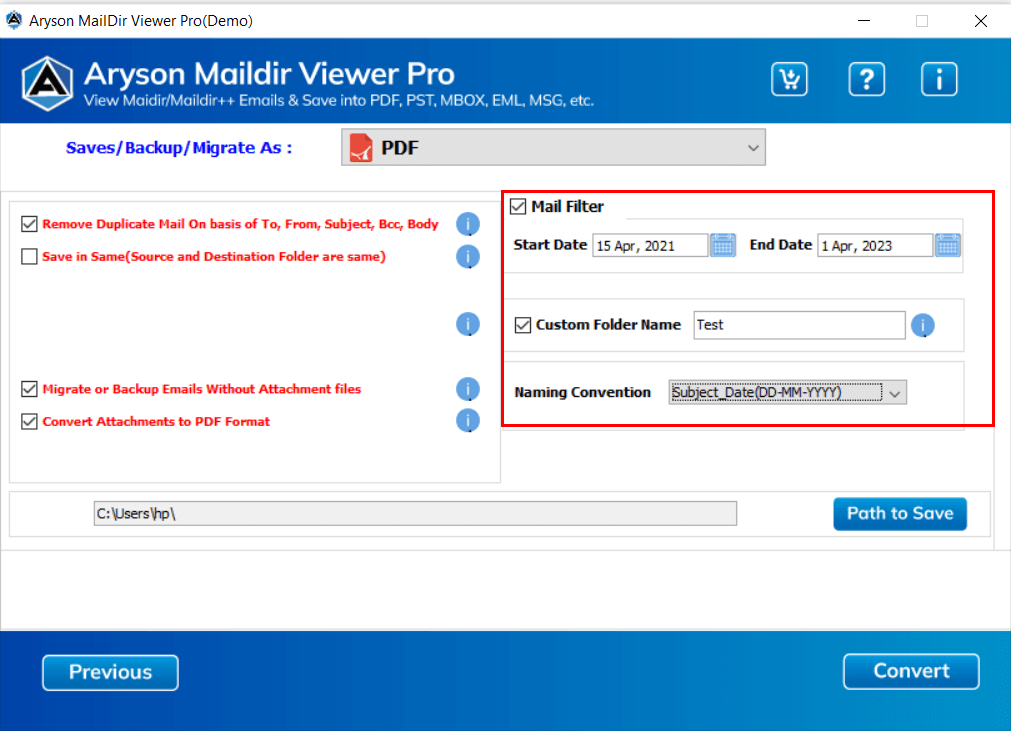
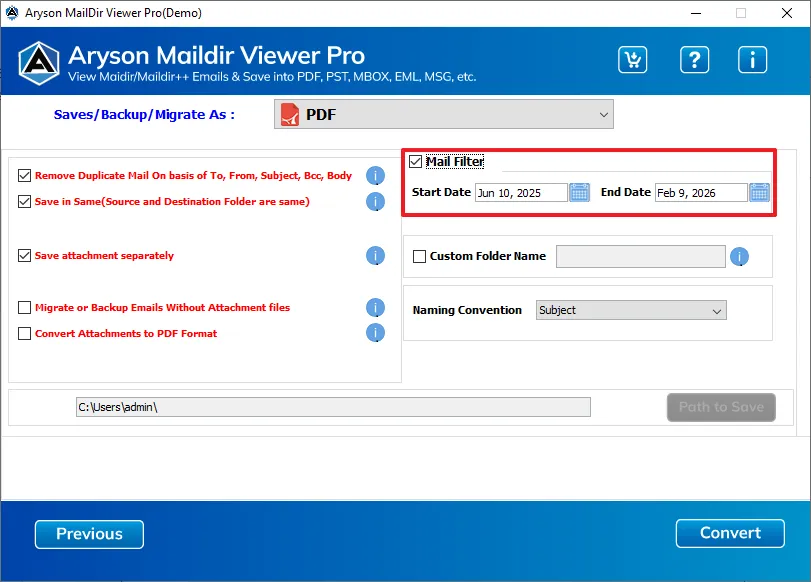
Step 16: Mail Filter: Allows you to filter emails based on a specific date range by selecting the Start Date and End Date. This helps export only the required emails within the chosen time period.
Step 17: Custom Folder Name – Enables you to enter a preferred name for the output folder where the converted or saved file will be stored.
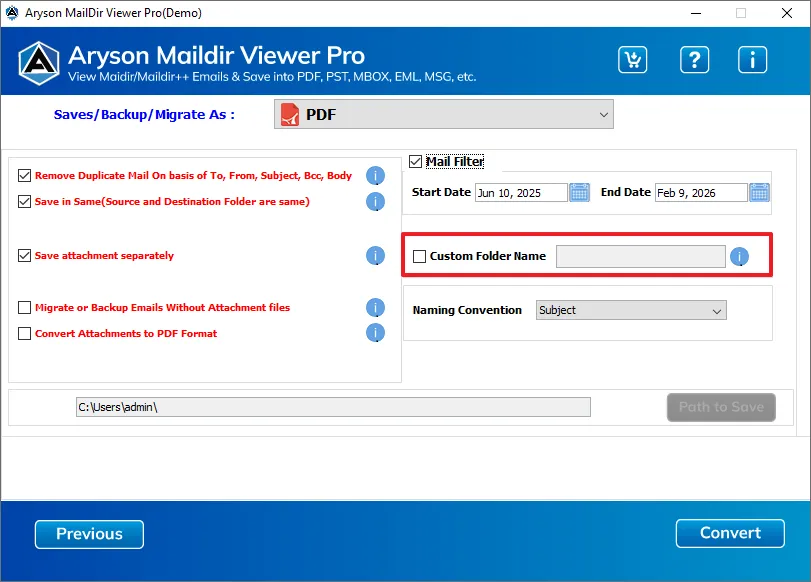
Step 18: Naming Convention: This option lets you choose a preferred file naming format to save exported emails in an organised and systematic manner.
Step 19: Path to Save: Lets you choose the destination location on your system where the final output file will be saved.
Step 20: Convert: Starts the conversion or saving process based on the selected options and filters.
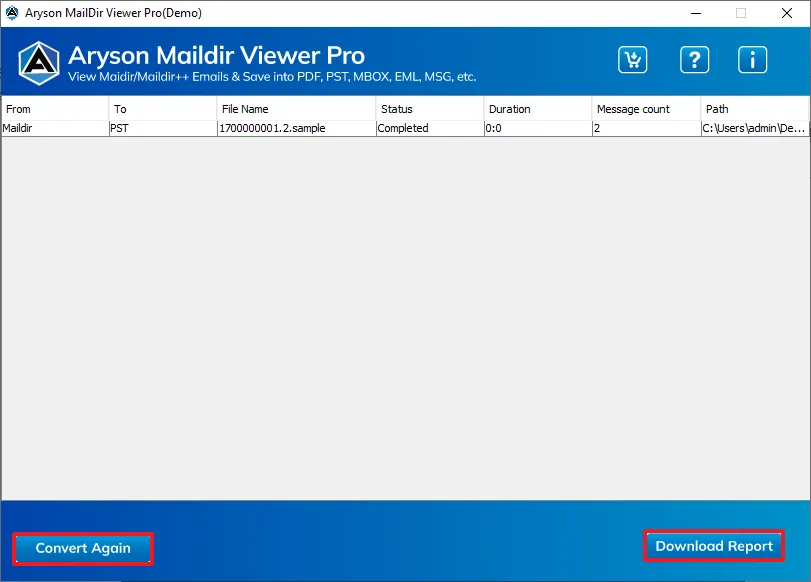
Step 21: After conversion details:
- Provides a “Convert Again” option to start a new process.
- Offers “Download Report” to save the conversion details.
Activation Guide
Activate the Software
Installation & Uninstallation
Installation & Uninstallation of Software
User Interface
User Interface
After downloading the Aryson Maildir Viewer Tool, you will find the welcome screen as played below.