Complete Step-by-Step Guide for Aryson Import PST to Office 365 Tool
Easily migrate Outlook PST file data to Microsoft 365 without complex configuration using the advanced Aryson PST to Office 365 Migration Tool. This tool enables users to transfer complete mailbox data, including emails, contacts, calendars, tasks, and attachments, with high accuracy and security. It also offers advanced features such as Date Filter and Skip Duplicate Emails to prevent redundant transfers and streamline the migration process.
-
Table of Content
- Software Working Process
- Activation Guide
- Installation & Uninstallation
- User Interface
Software Working Process
Steps to Import PST To Office 365
Step 1: Download and install the Aryson PST to Office 365 Migration Tool.
Step 2: Select the Sources Tab from the Left Panel & select the PST Migration card.
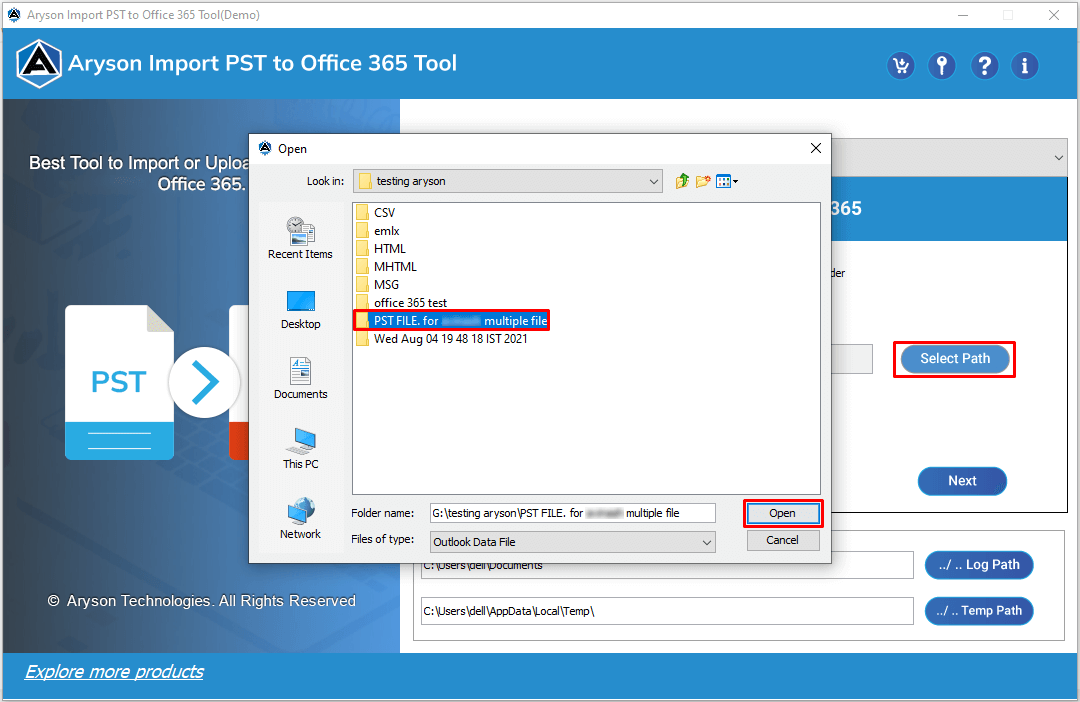
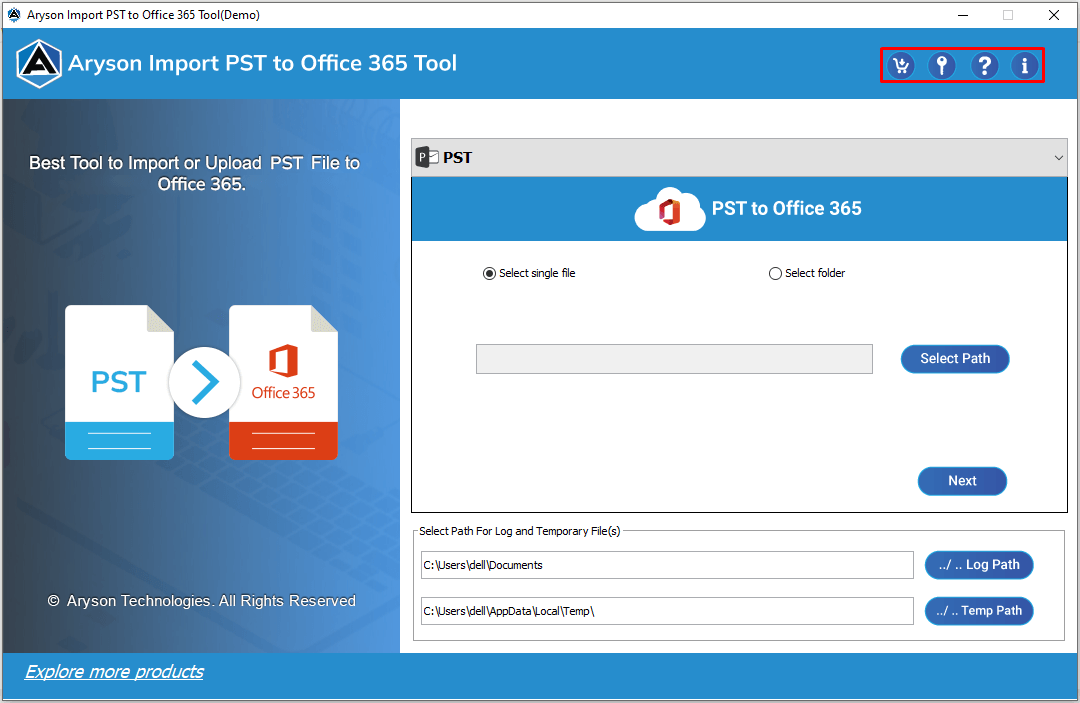
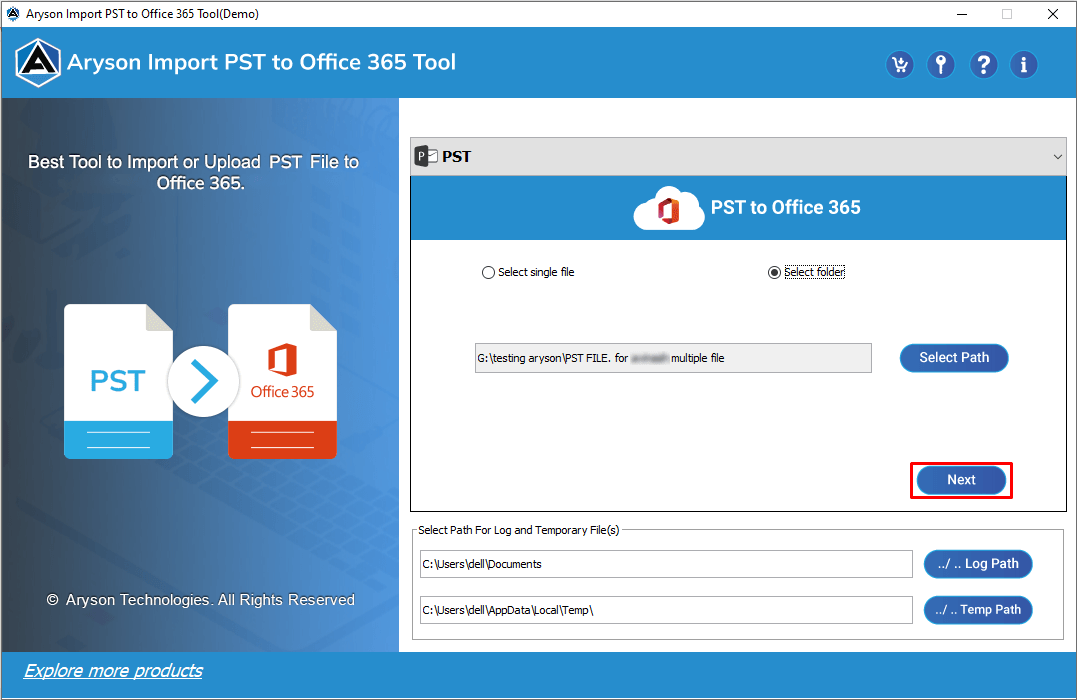
Step 3: Load the required PST files/folders using the buttons appearing.
- Select PST: Click this button to add the required PST files.
- Select Files: Use this option to add an entire folder containing multiple PST files.
- Remove Selected: Remove any selected PST file from the list.
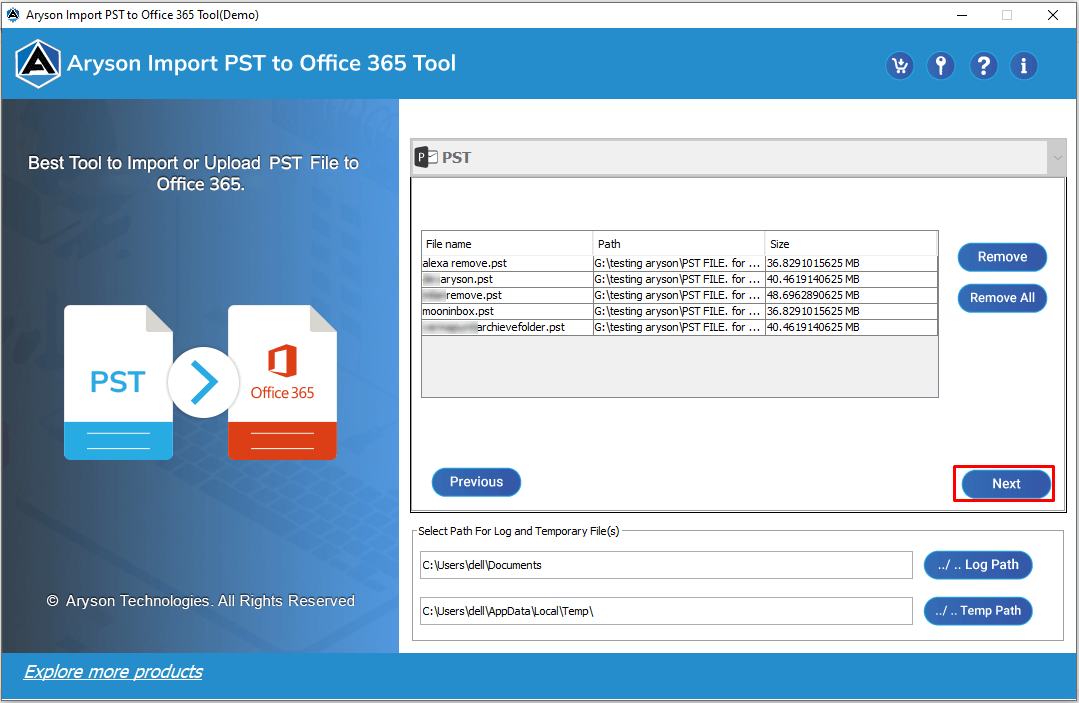
Step 4: Now, the advanced Preview panel will appear and display the following.
- Tree-View: It displays the tree-like folder hierarchy of the selected FilesFolders.
J-Table: Once you select any particular file or folder, it will appear in the central J-Table, which consists of the following fields.
- Subject: Here appears the Subject of the selected PST file.
- From: Displays the sender’s email address and information for the selected email.
- To: Shows the recipient’s email address to whom the message was sent
- Date: Indicates the Date of creation of that selected email.
Enhanced Searching: Users can search on different parameters.
- A specific folder in the tree-like Folder hierarchy.
- Particular files in the J-table are based on fields such as Subject, To, and From.
Note: This panel might not appear if the user selects multiple PSTs at the same time. Whereas, if you select a single PST, this panel appears, and you can select the required folders to migrate.
Step 5: Select the Email Clients option and choose Office 365 under the dropdown list.

Step 6: The software will display different Login Modes and Authentication methods on the screen. Select the login type based on your migration requirements:
- Admin Login: Use this if you are a Global Administrator and need to migrate data into multiple user mailboxes or a specific tenant-wide environment.
- Single Login: Choose this option if you only need to migrate data into an individual user's account using their specific credentials.
Step 7: Choose the Authentication Method for the connection.
- Modern Auth: This uses the standard Microsoft OAuth 2.0 flow, which is the most secure method. It will prompt a browser-based login requiring Global Administrator consent.
Steps to Login via Modern Auth Method:
- Mark the Modern Auth radio button and click on the Add Connection button.
- This will redirect the user to the browser and display the list of already logged-in IDs.
- Provide the credentials for the desired Office 365 ID and login.
- Provide the required permissions to establish a successful connection.
- Client Secret: This method uses Azure Application credentials (Client ID, Tenant ID, and Client Secret). Select this if you have manually registered an app in the Azure Portal for automated or unattended migration.
Steps to Login via Impersonation Method:
- Mark the Client Secret radio button.
- Provide the required Tenant ID, Client ID, and Client Secret in the textboxes.
- Click on the Connect Tenant button to log in.
Step 8: If you chose the Single Login Mode, then,
- Mark the Single Login radio button & click on the Add Connection button to log in.
- Select the desired ID among the listed ones to proceed further.
- Once you log in successfully, the software displays the User ID logged in and provides a log-out button to log out whenever needed.
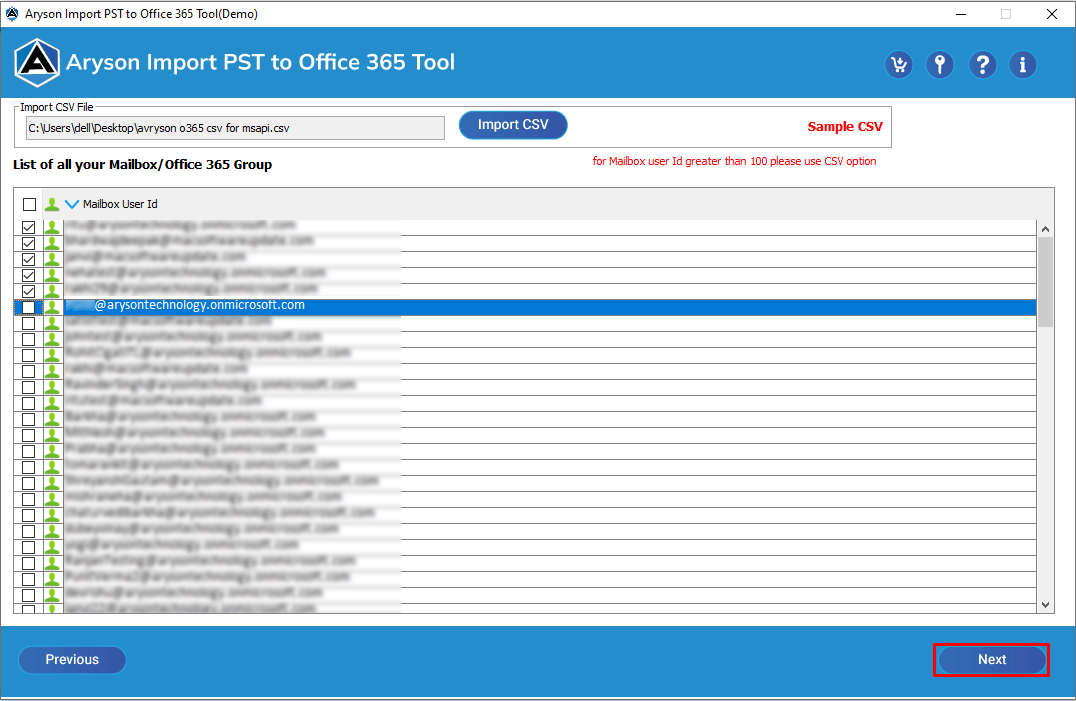
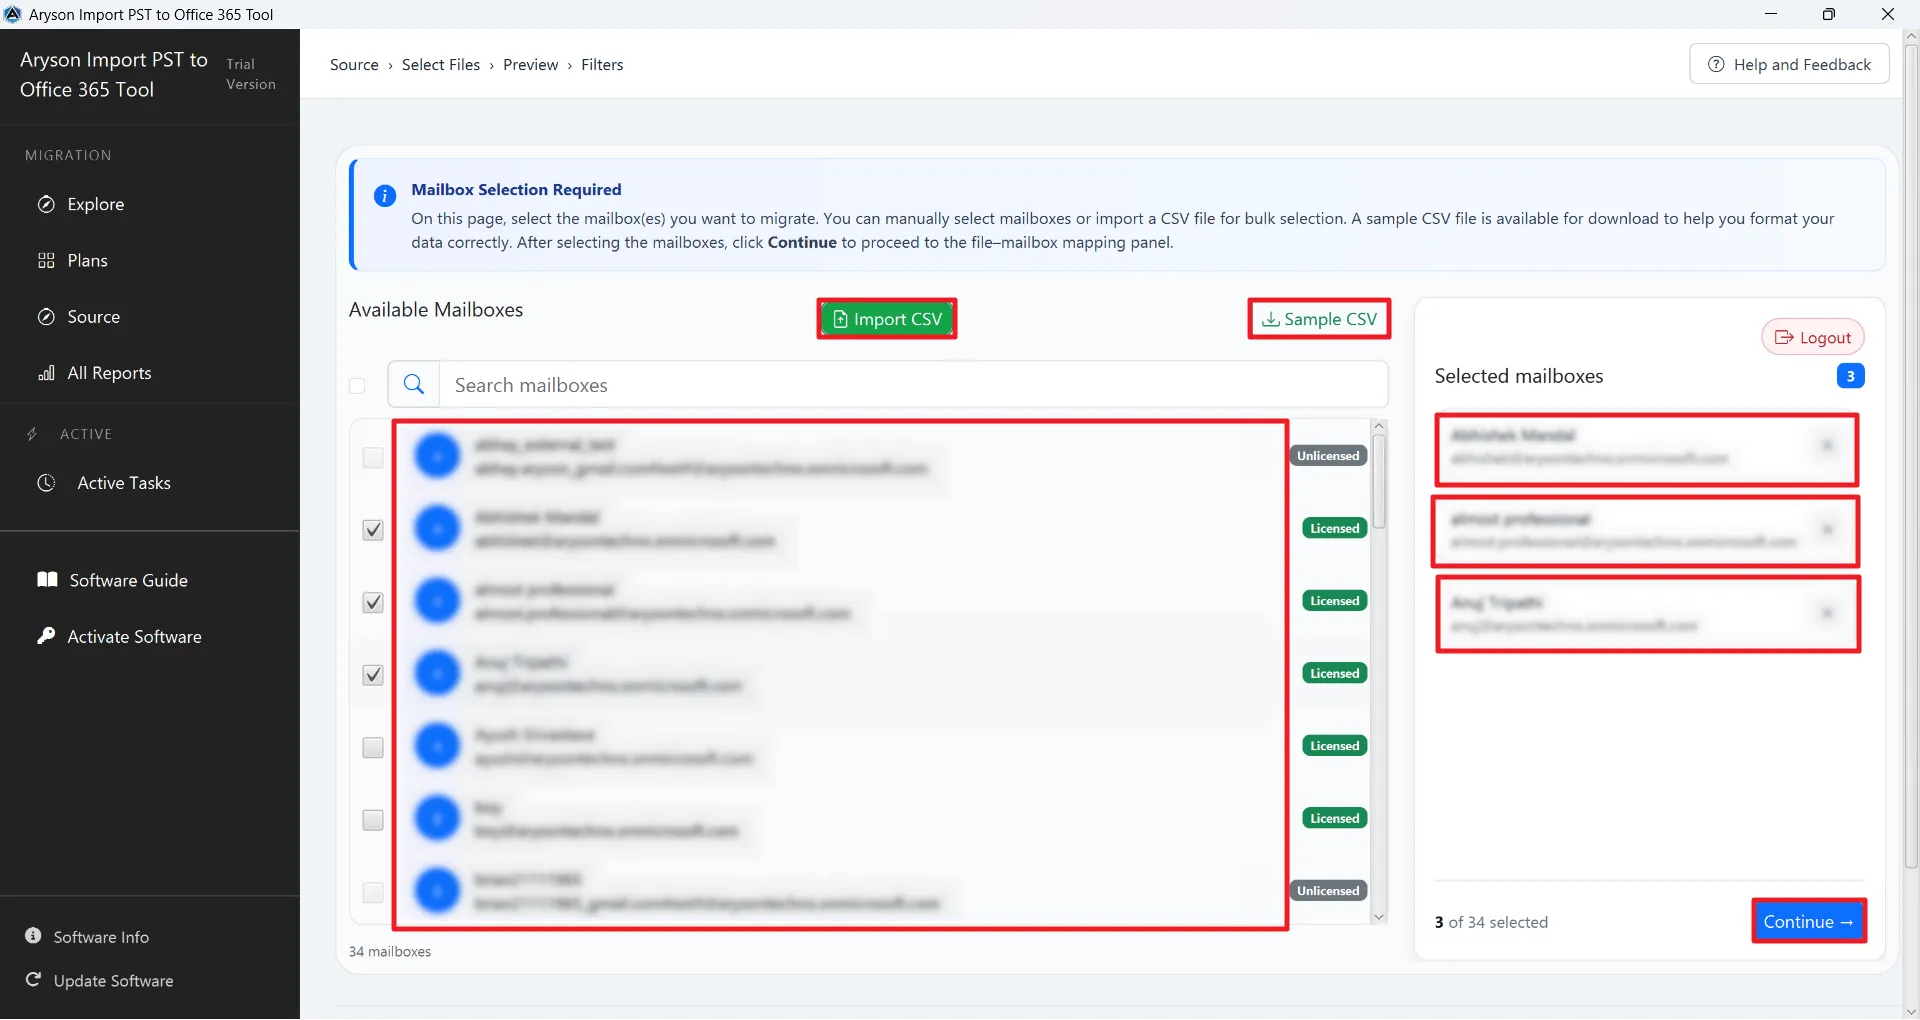
Step 9: After logging in, the software will display a panel with the following options.
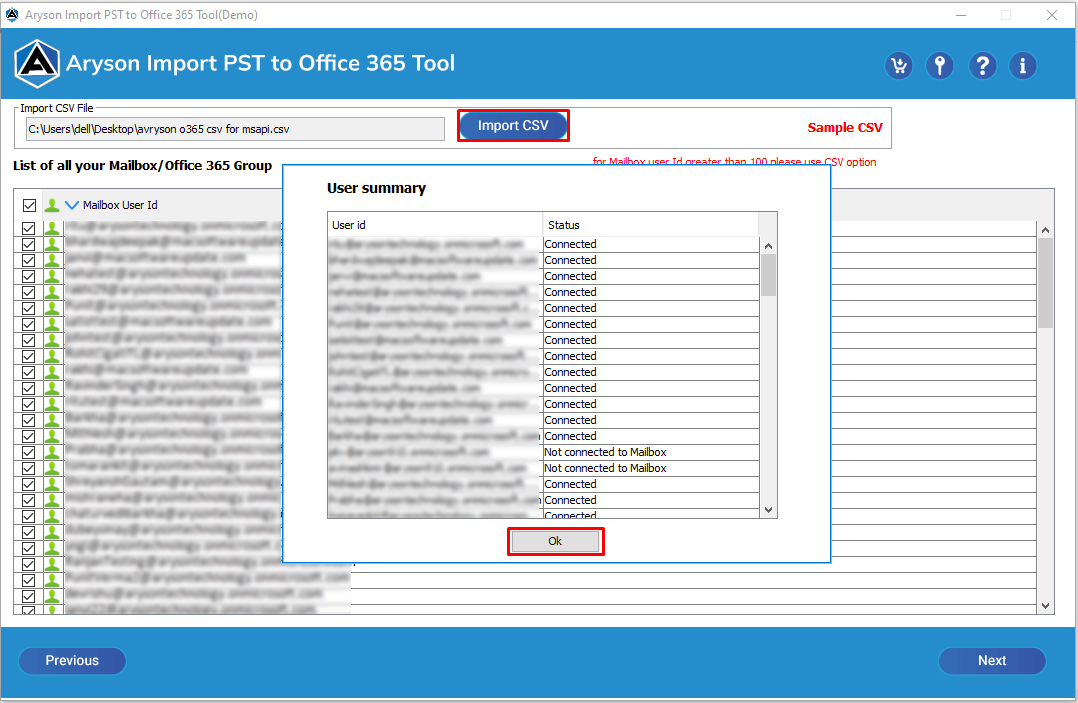
- List of all subusers: displays all mailboxes associated with the connected Office 365 tenant. It shows the user's name, email address, and their current licence status (licensed/unlicensed).
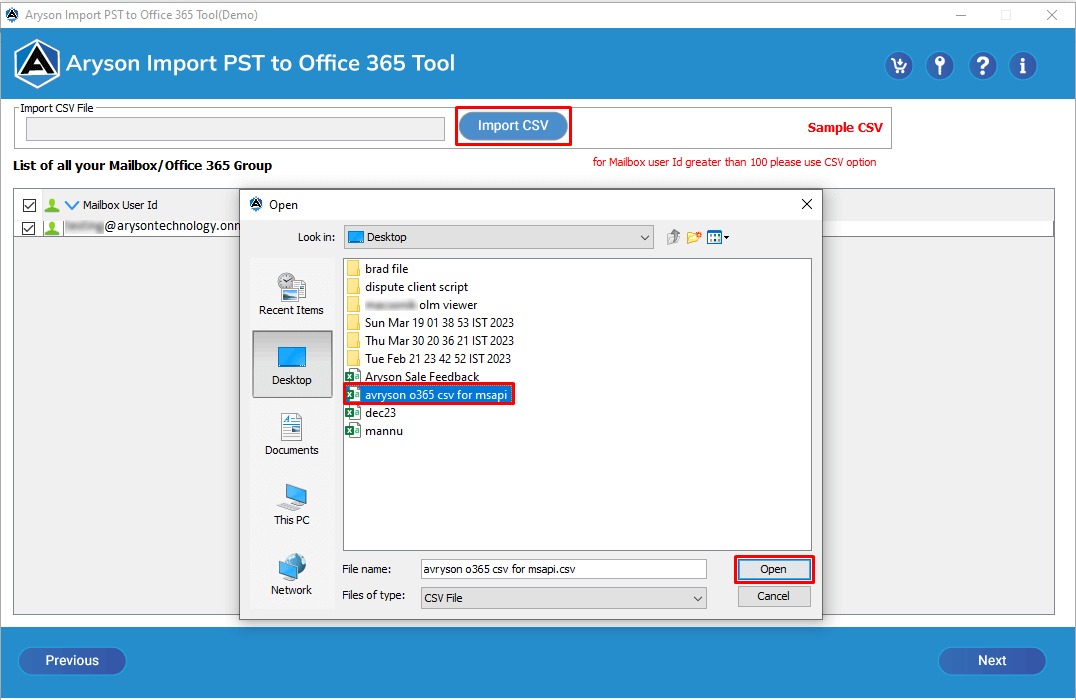
- Import CSV: Use this option to bulk-select mailboxes by uploading a pre-configured CSV file containing the list of target users.
- Sample CSV: Allows you to download a template file to ensure your data is formatted correctly for the bulk import process.
- List of Selected Mailboxes: A preview pane on the right side that shows all the specific accounts you have checked for migration. You can remove individual mailboxes here by clicking the 'X' icon.
- Continue: Click Continue to proceed to the mapping panel.
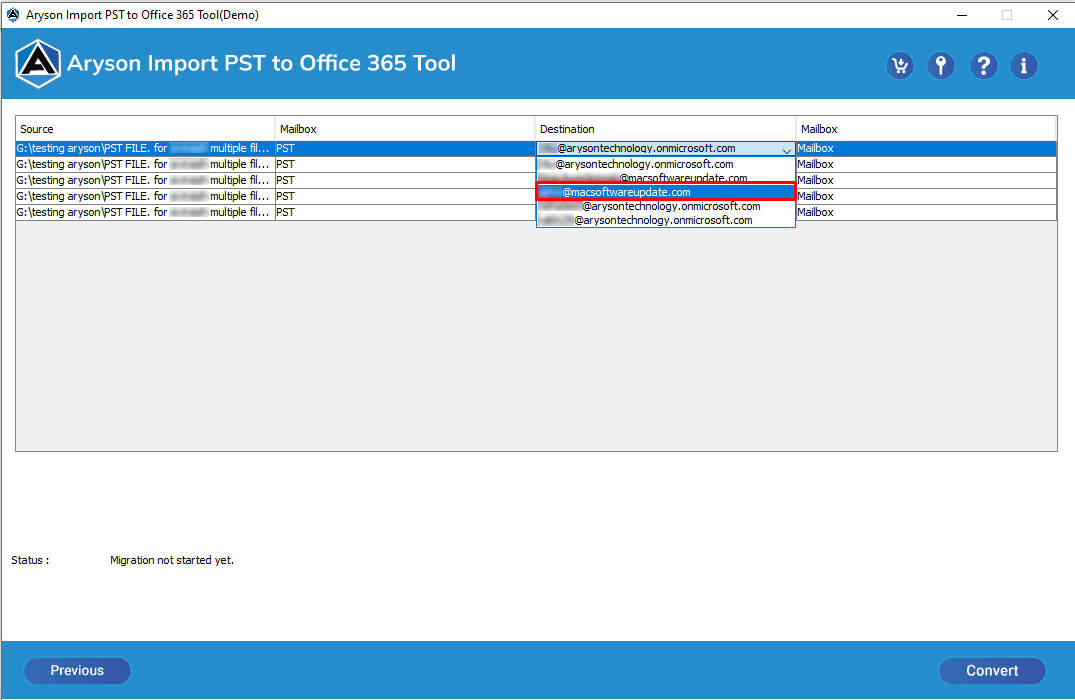
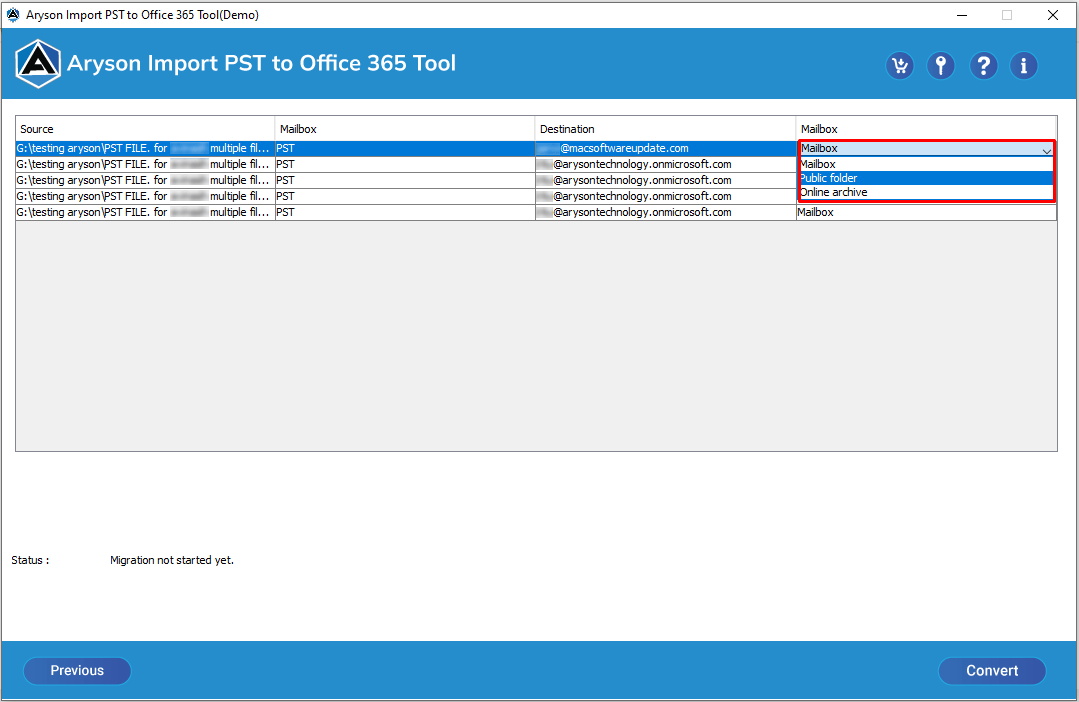
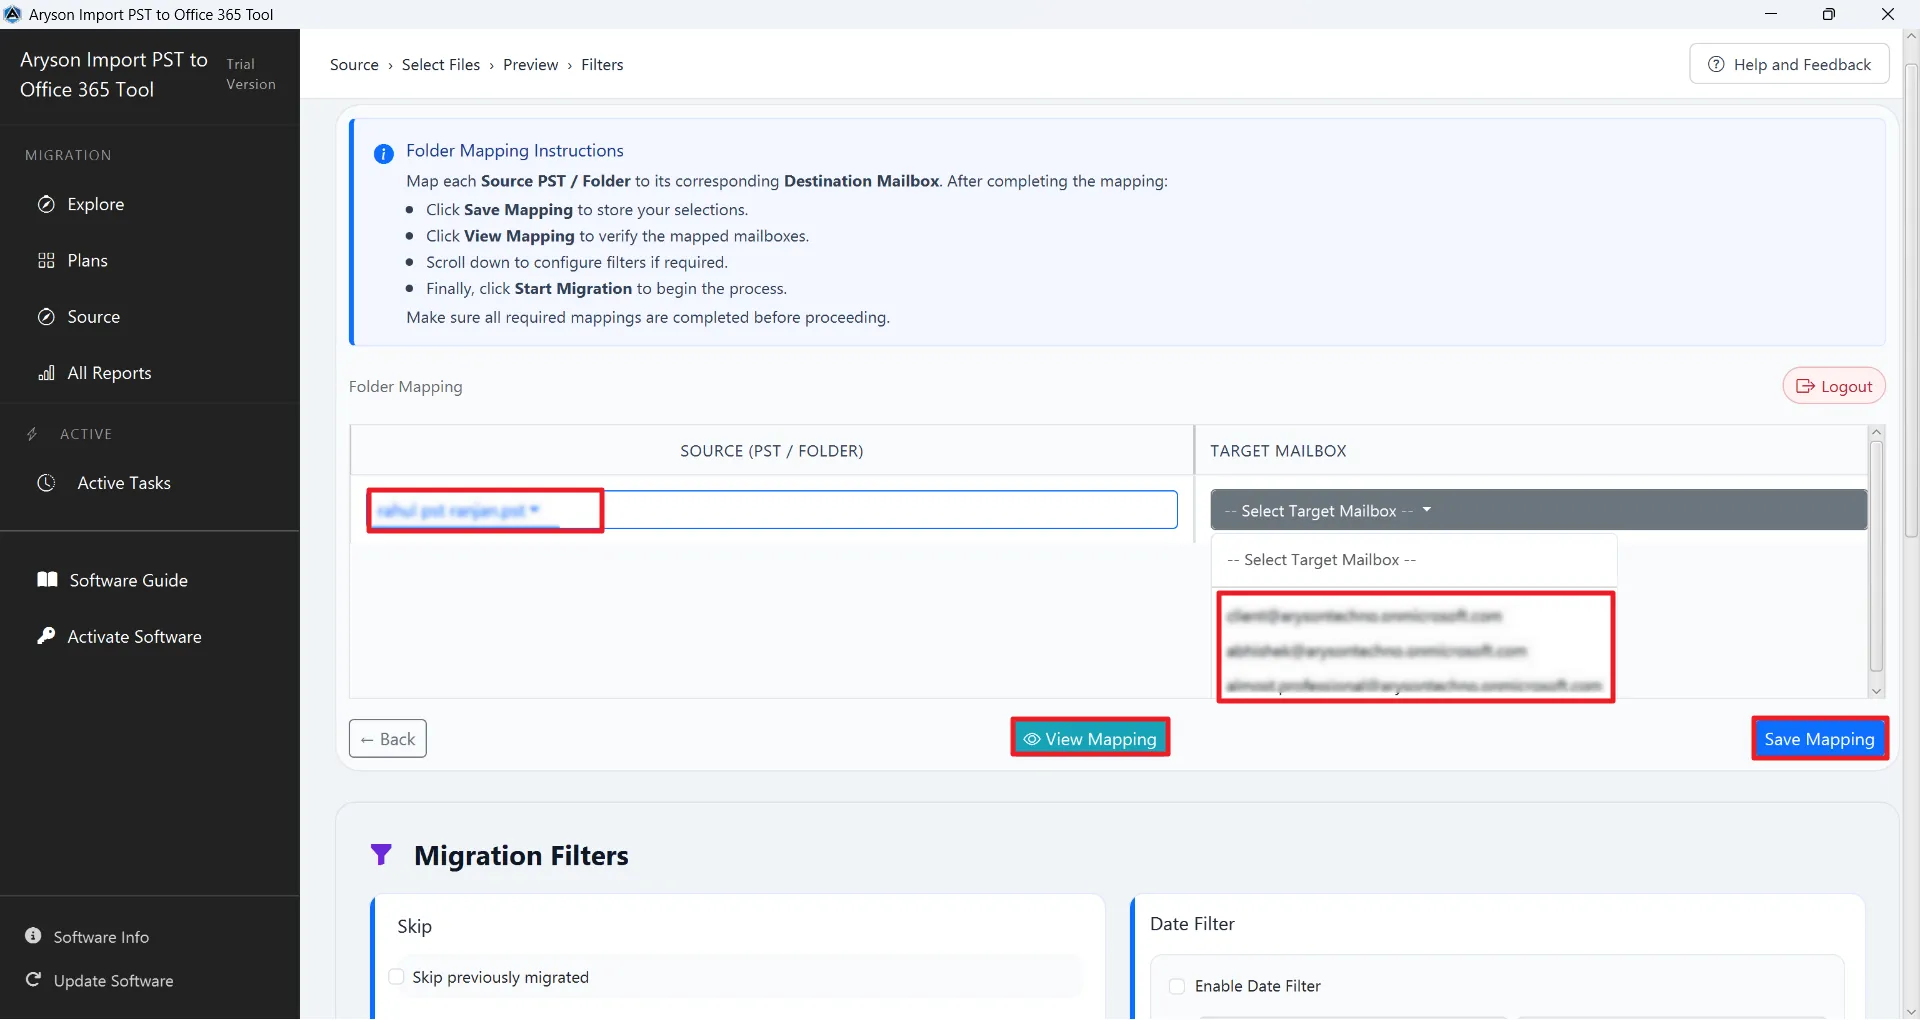
Step 10: Now, the Folder Mapping panel will appear. You must map each source PST file to its corresponding destination mailbox in Office 365.
- Source (PST / Folder): Displays the name of the PST file or specific folder you have loaded for migration.
- Target Mailbox: Allows you to select the destination email address from the dropdown list where the source data will be imported.
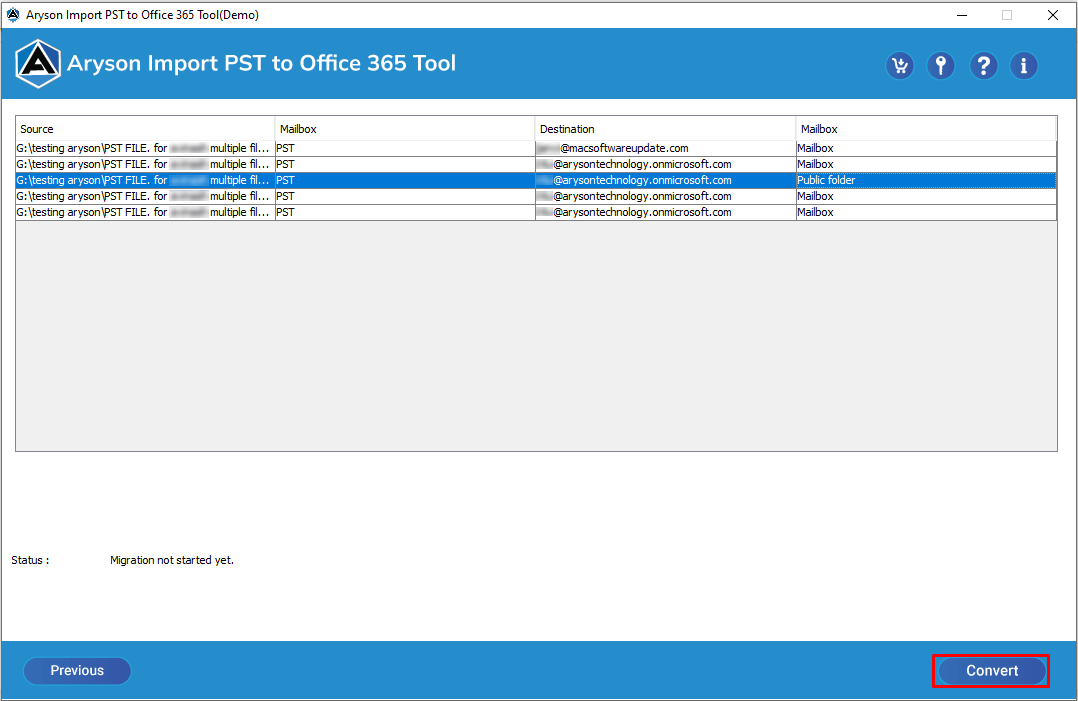
- Save Mapping: Click this button to store and lock your current selection of source-to-destination mappings.
- View Mapping: This button allows you to review a summary of all mapped mailboxes to ensure accuracy before proceeding.
Step 11: Skip Previously Migrated: Enable this checkbox to ensure that the software does not upload the same data twice. It identifies and skips items already migrated in previous sessions to prevent redundancy.
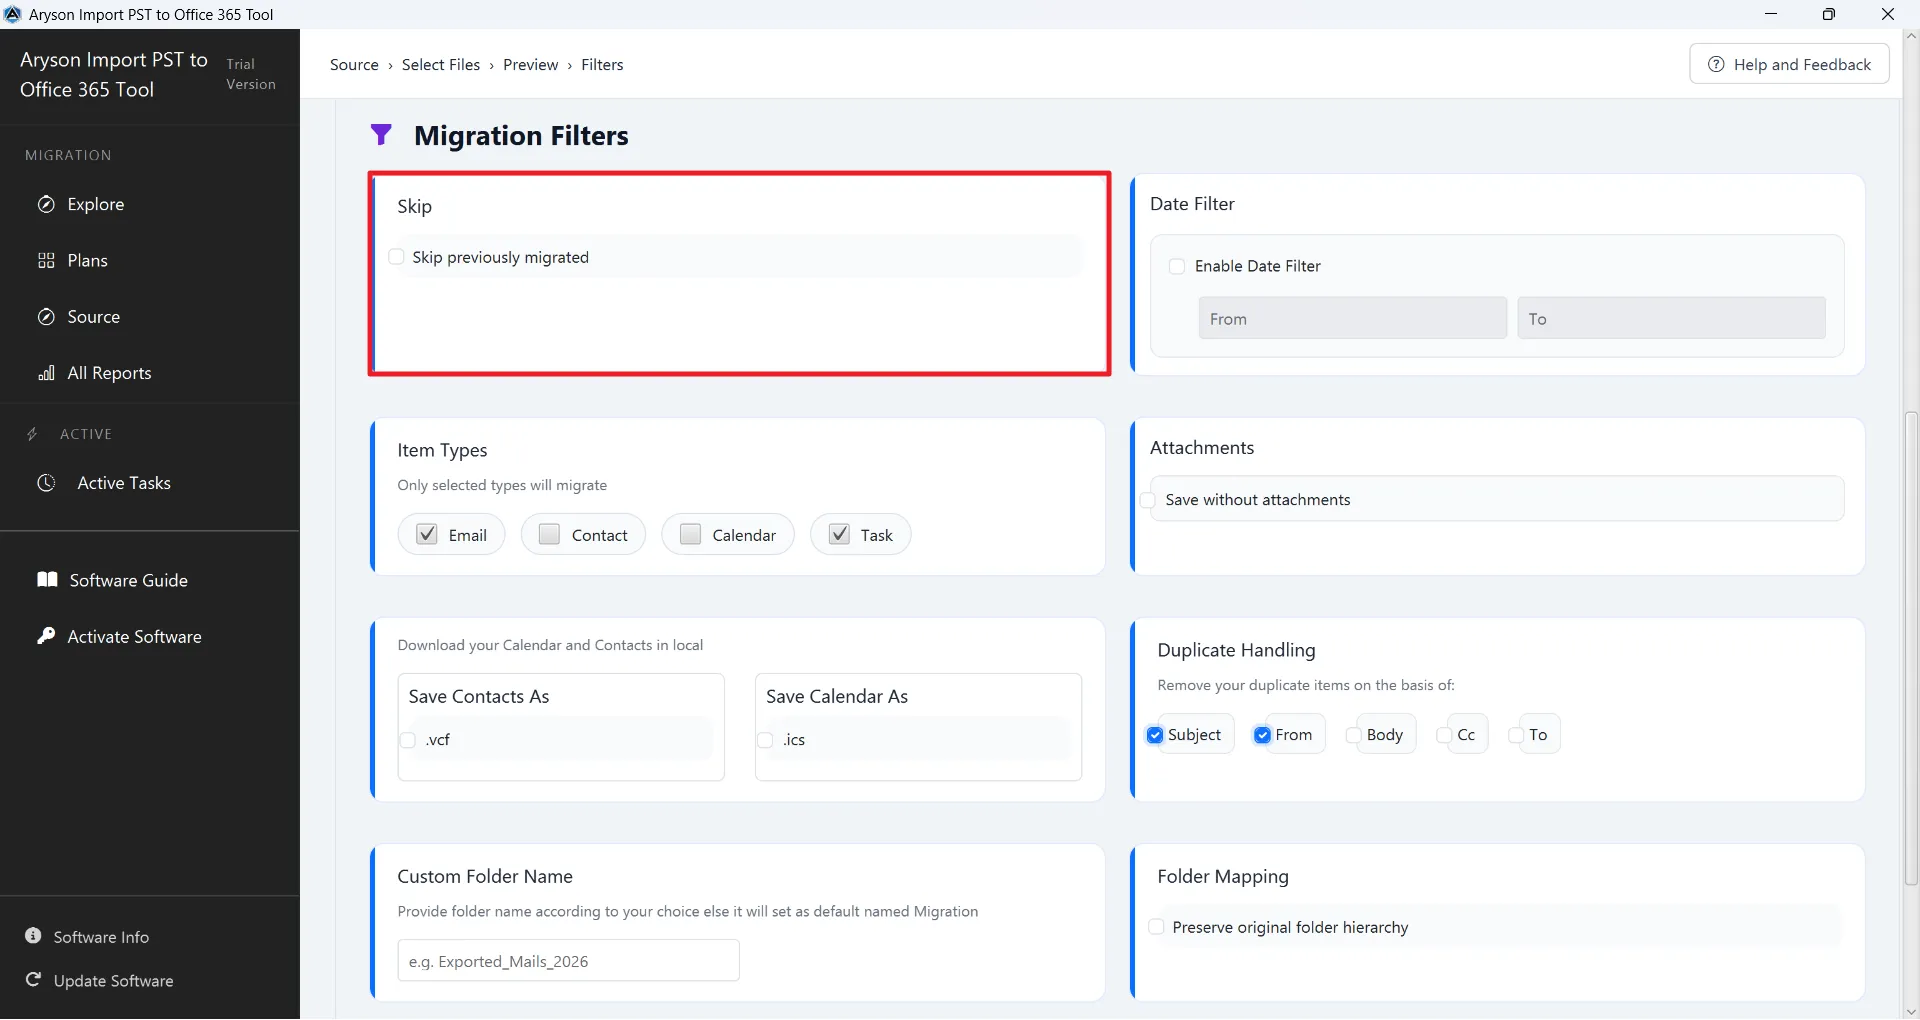
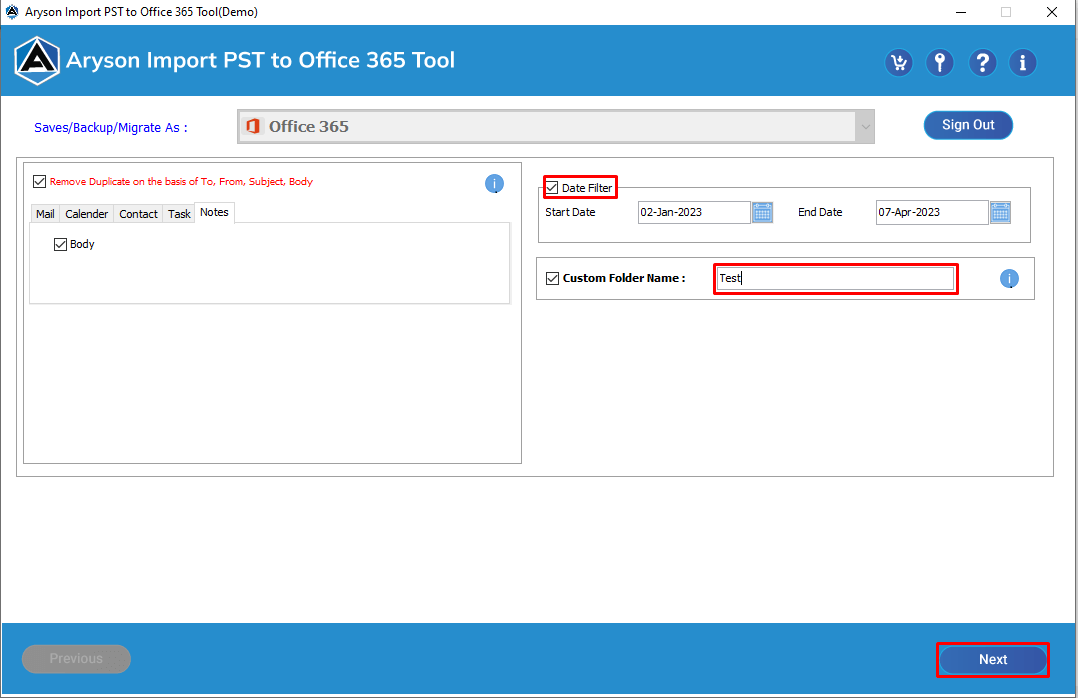
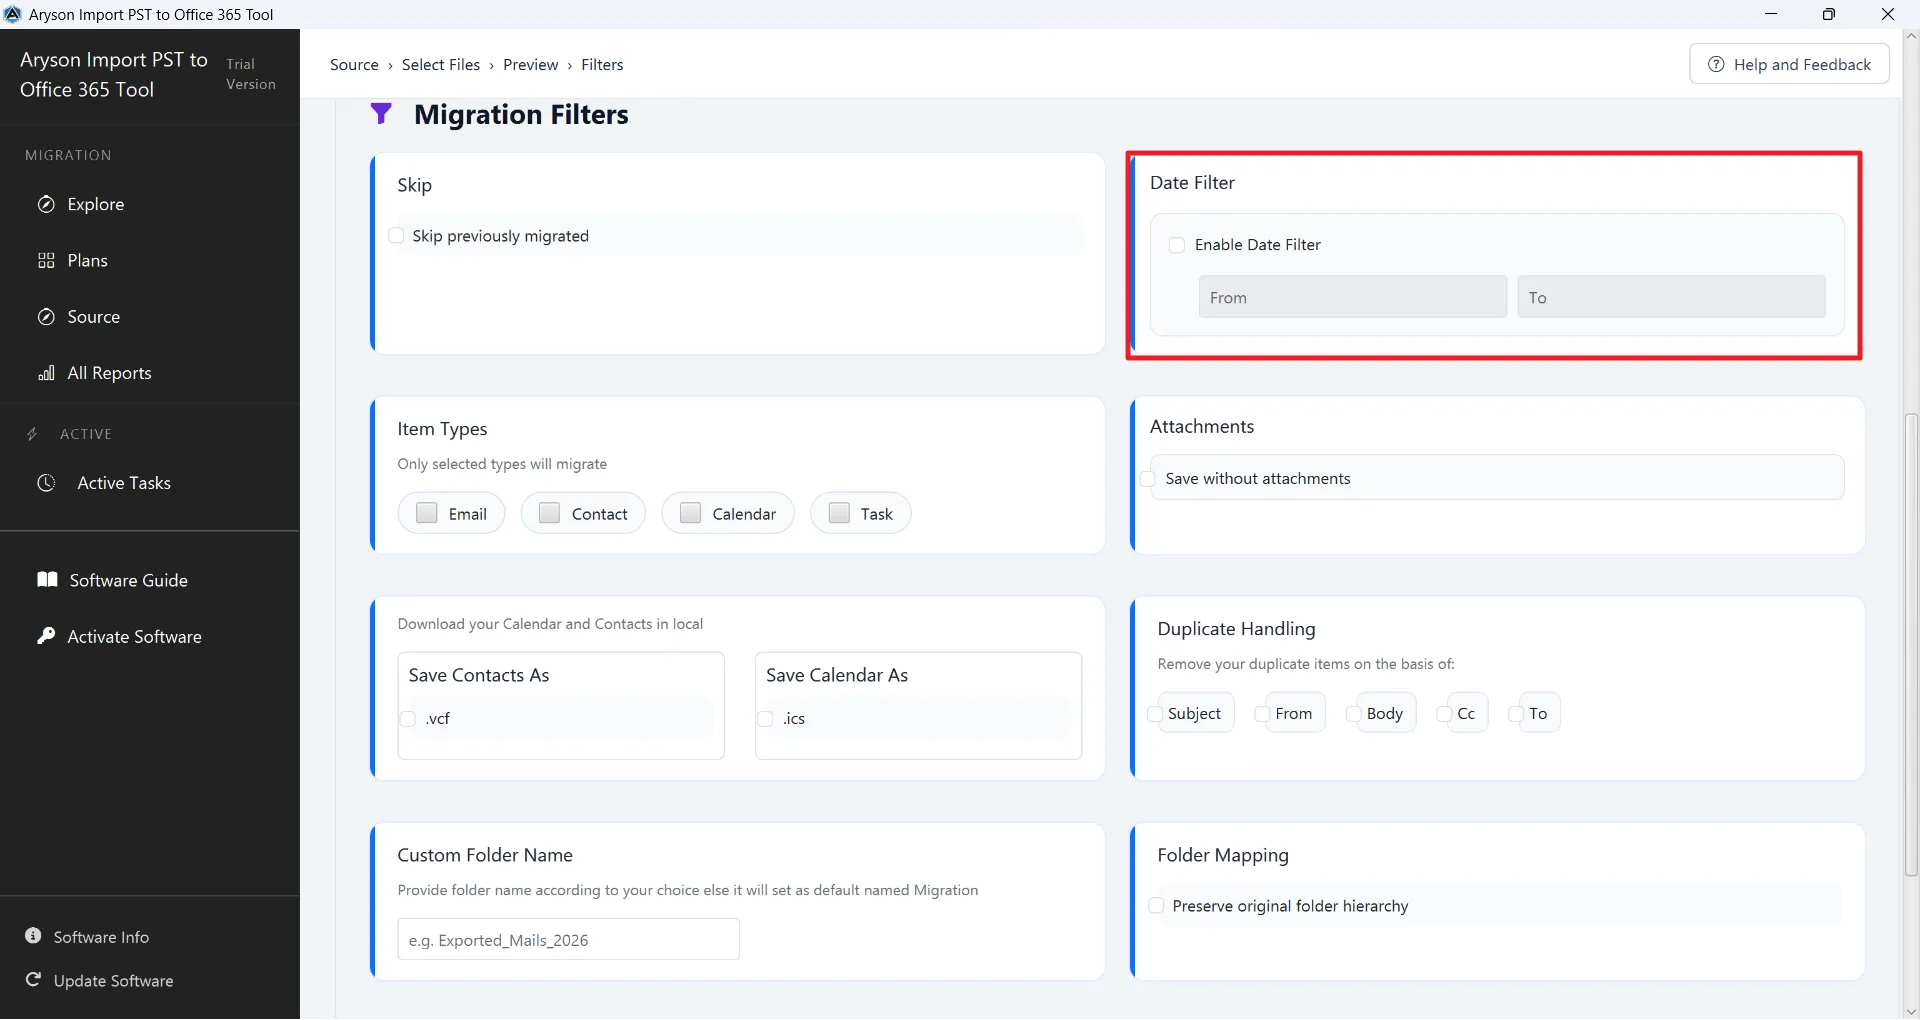
Step 12: Date Filter: Check the Enable Date Filter option to filter data by time. You can select a specific From and To date range to migrate only the emails and items created or received within that period.
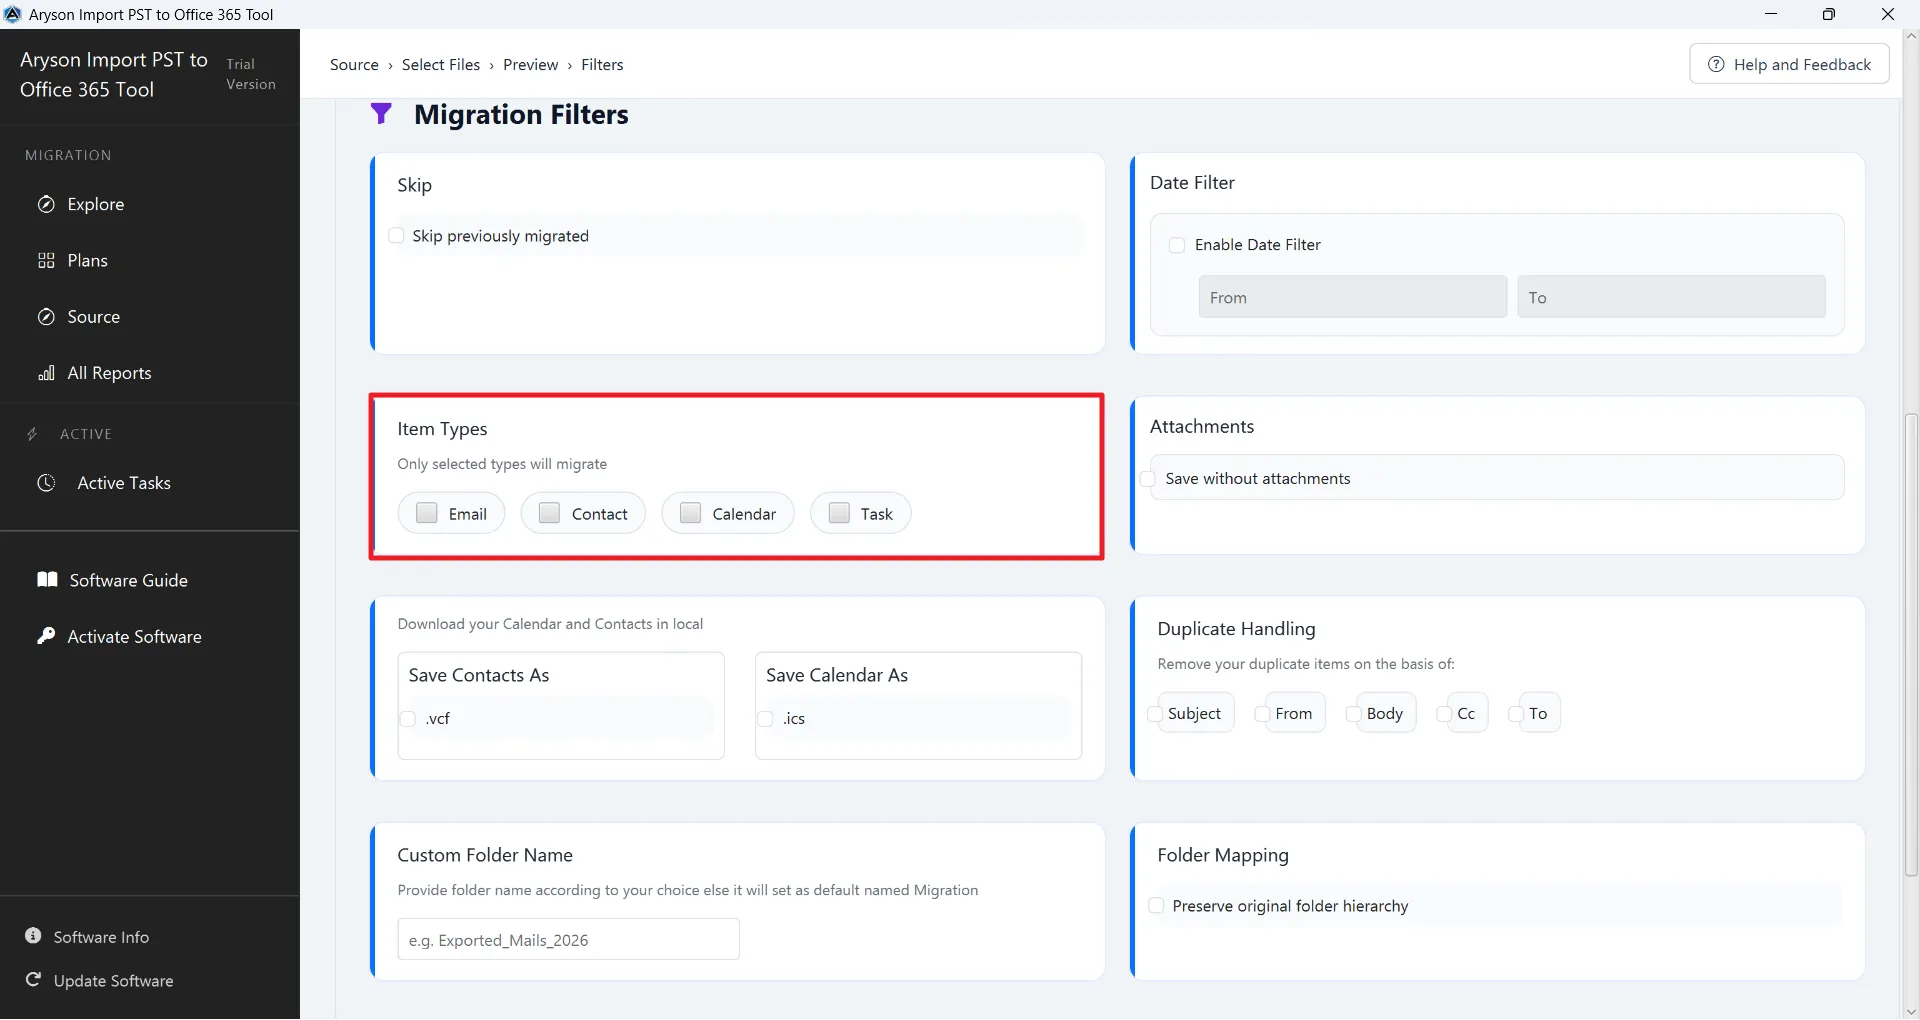
Step 13: Item Types: Customise your migration by selecting only the categories you need. You can choose to migrate emails, contacts, calendars, or tasks individually or all at once.
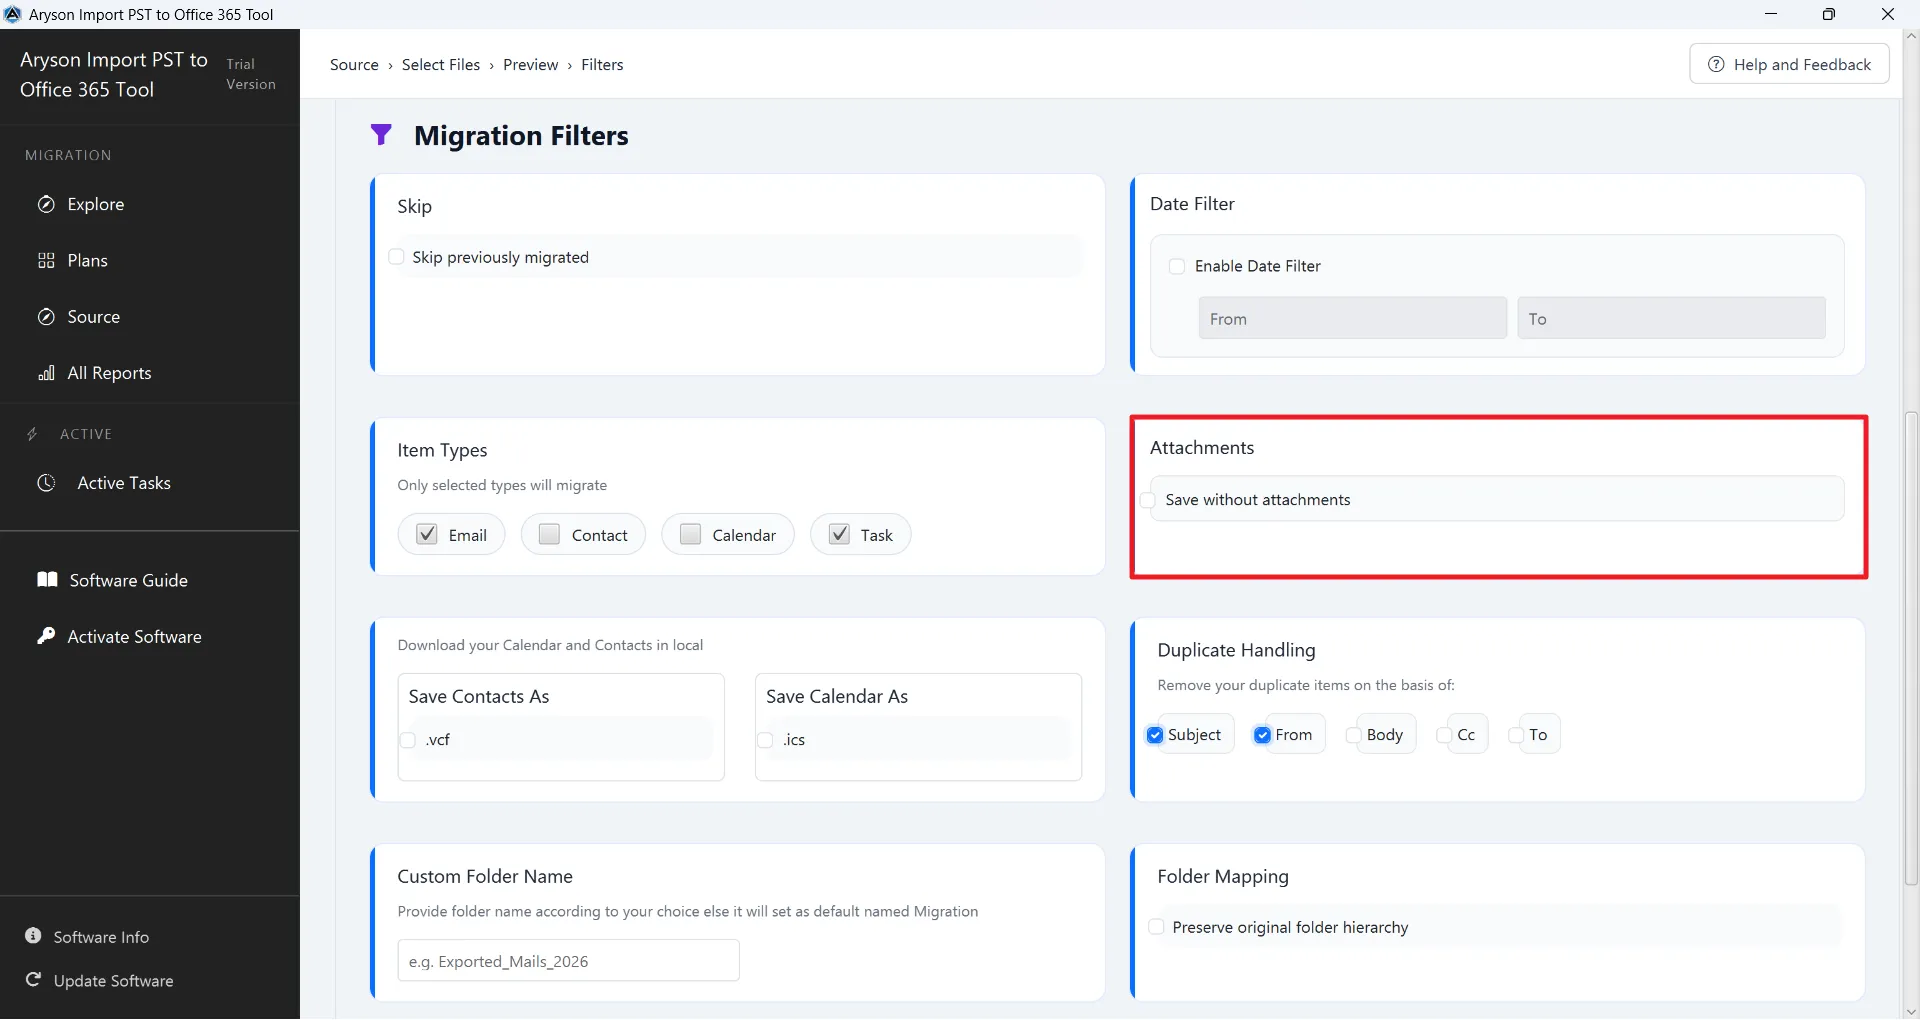
Step 14: Attachments: If you want to reduce the size of the migration or only need the message text, select the Save without attachments option to exclude all files attached to emails.
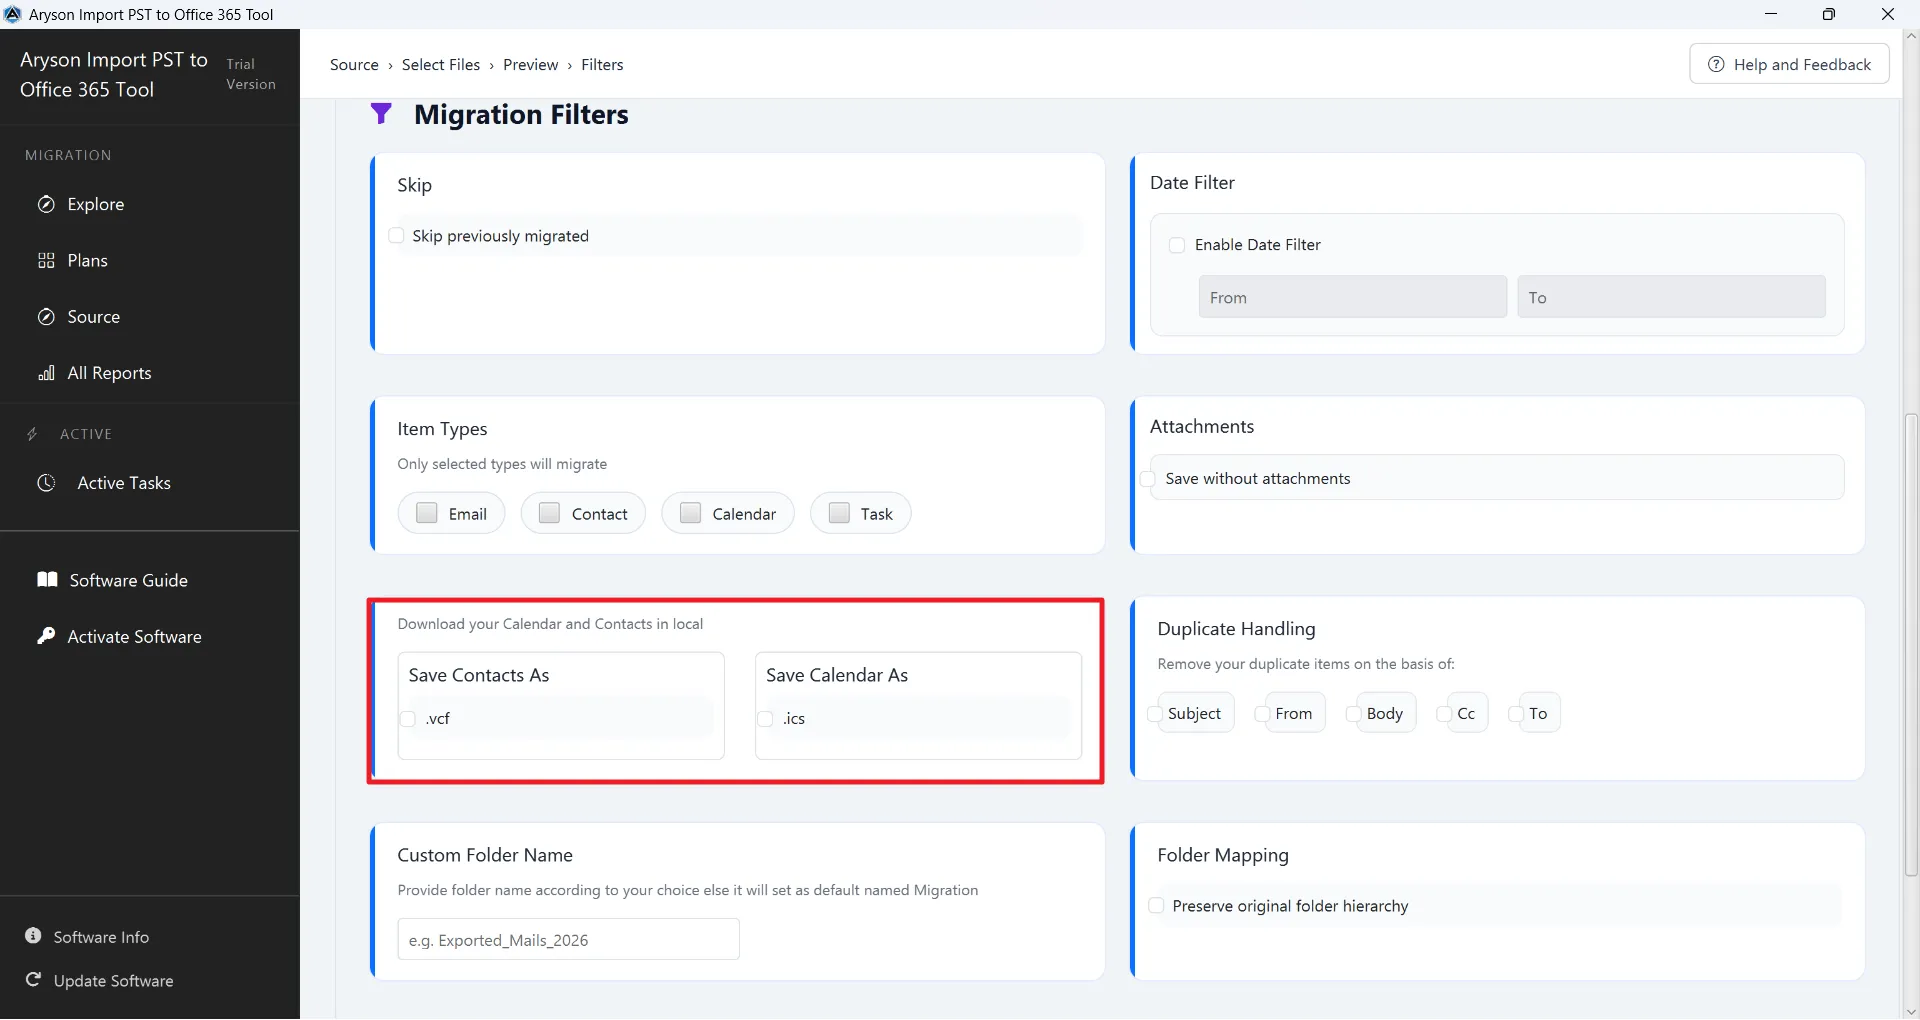
Step 15: Download your calendar and contacts locally: Use this feature to save a local copy of your data. You can export contacts in .vcf format and calendars in .ics format during the migration process.
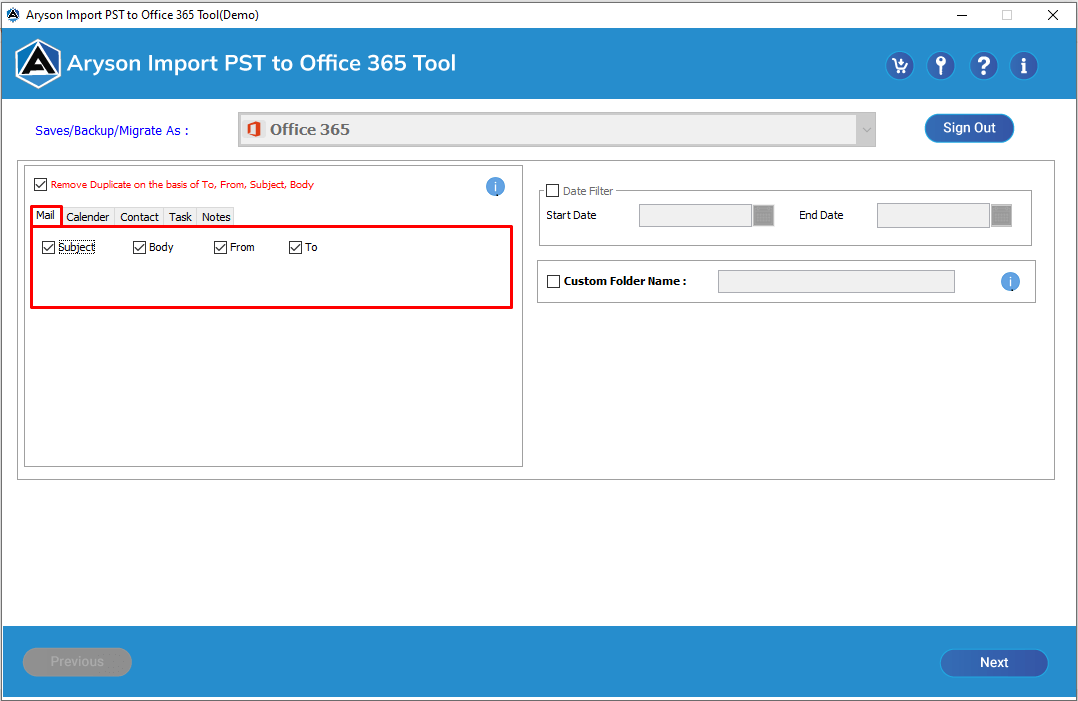
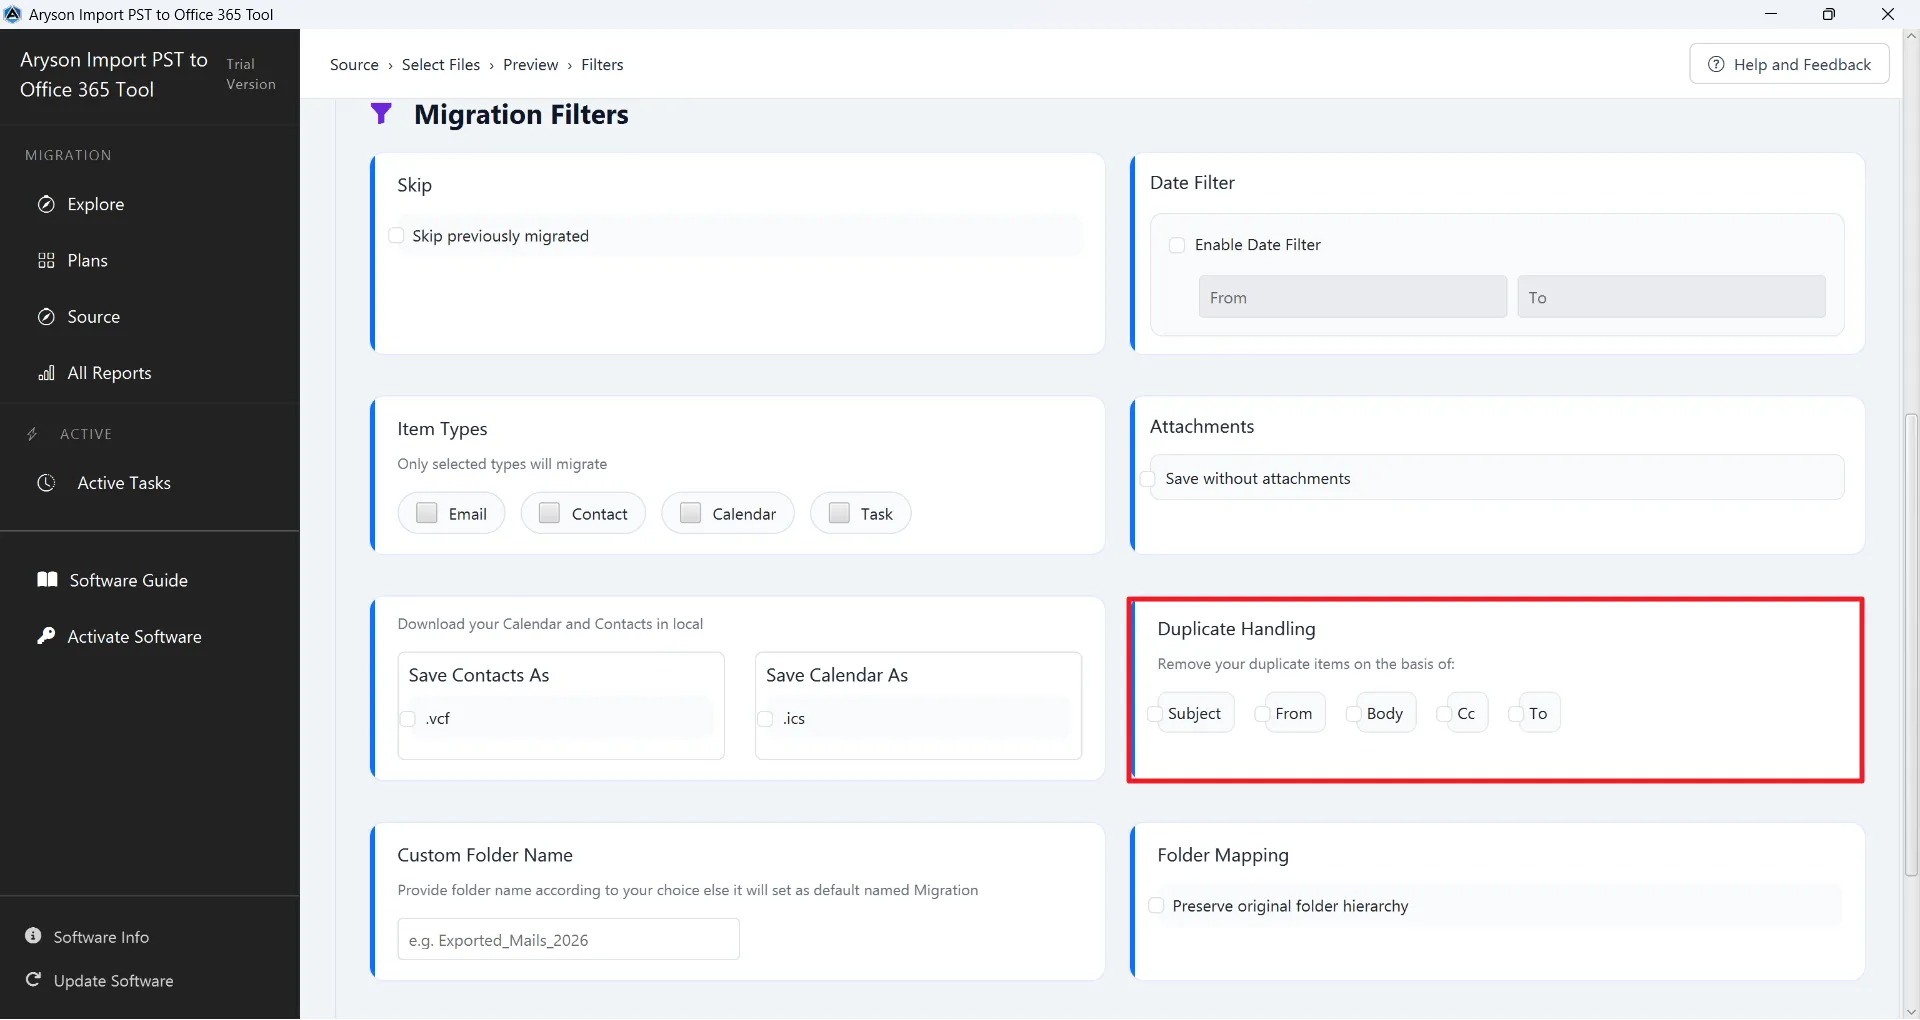
Step 16: Duplicate Handling: To maintain a clean destination mailbox, you can remove duplicate items. The software allows you to identify duplicates based on Subject, From, Body, Cc, or To fields.
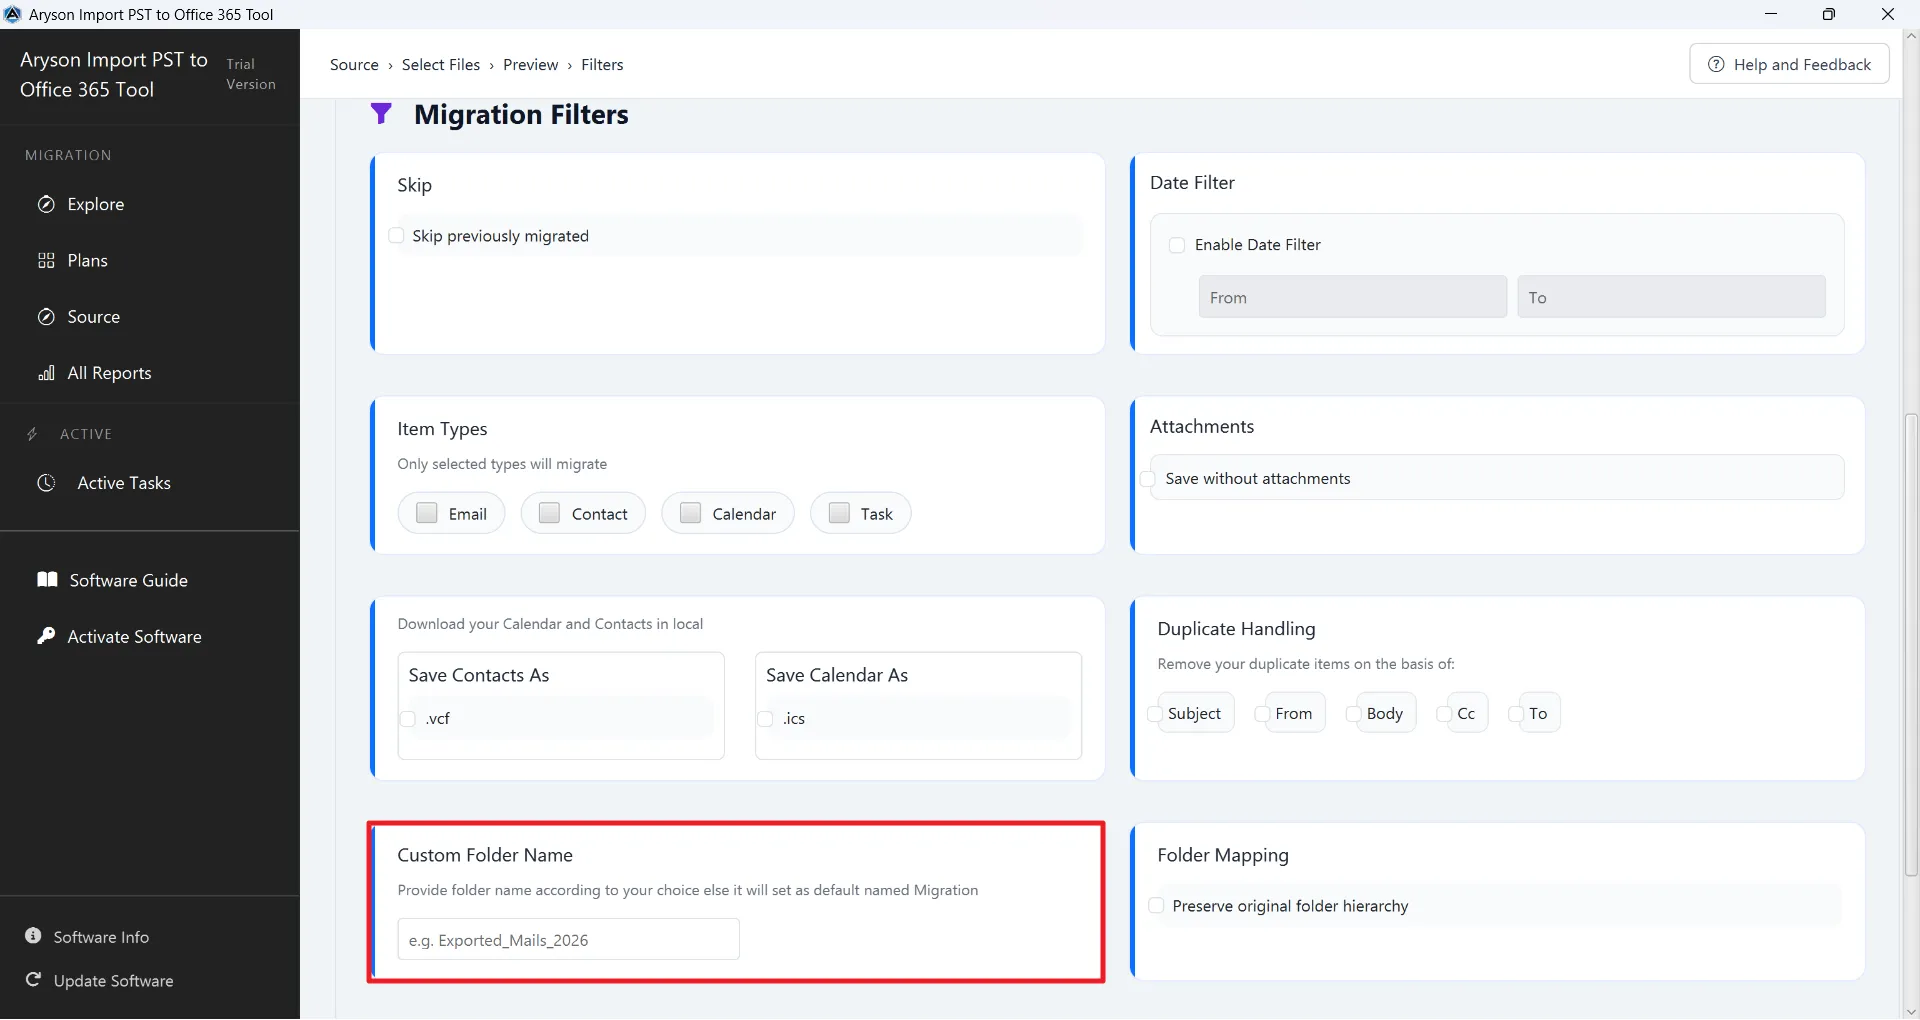
Step 17: Custom Folder Name: You can provide a specific name for the folder where your data will be stored in Office 365 (e.g., Exported_Mails_2026). If left blank, the software uses "Migration_Date_Time" as the default folder name.
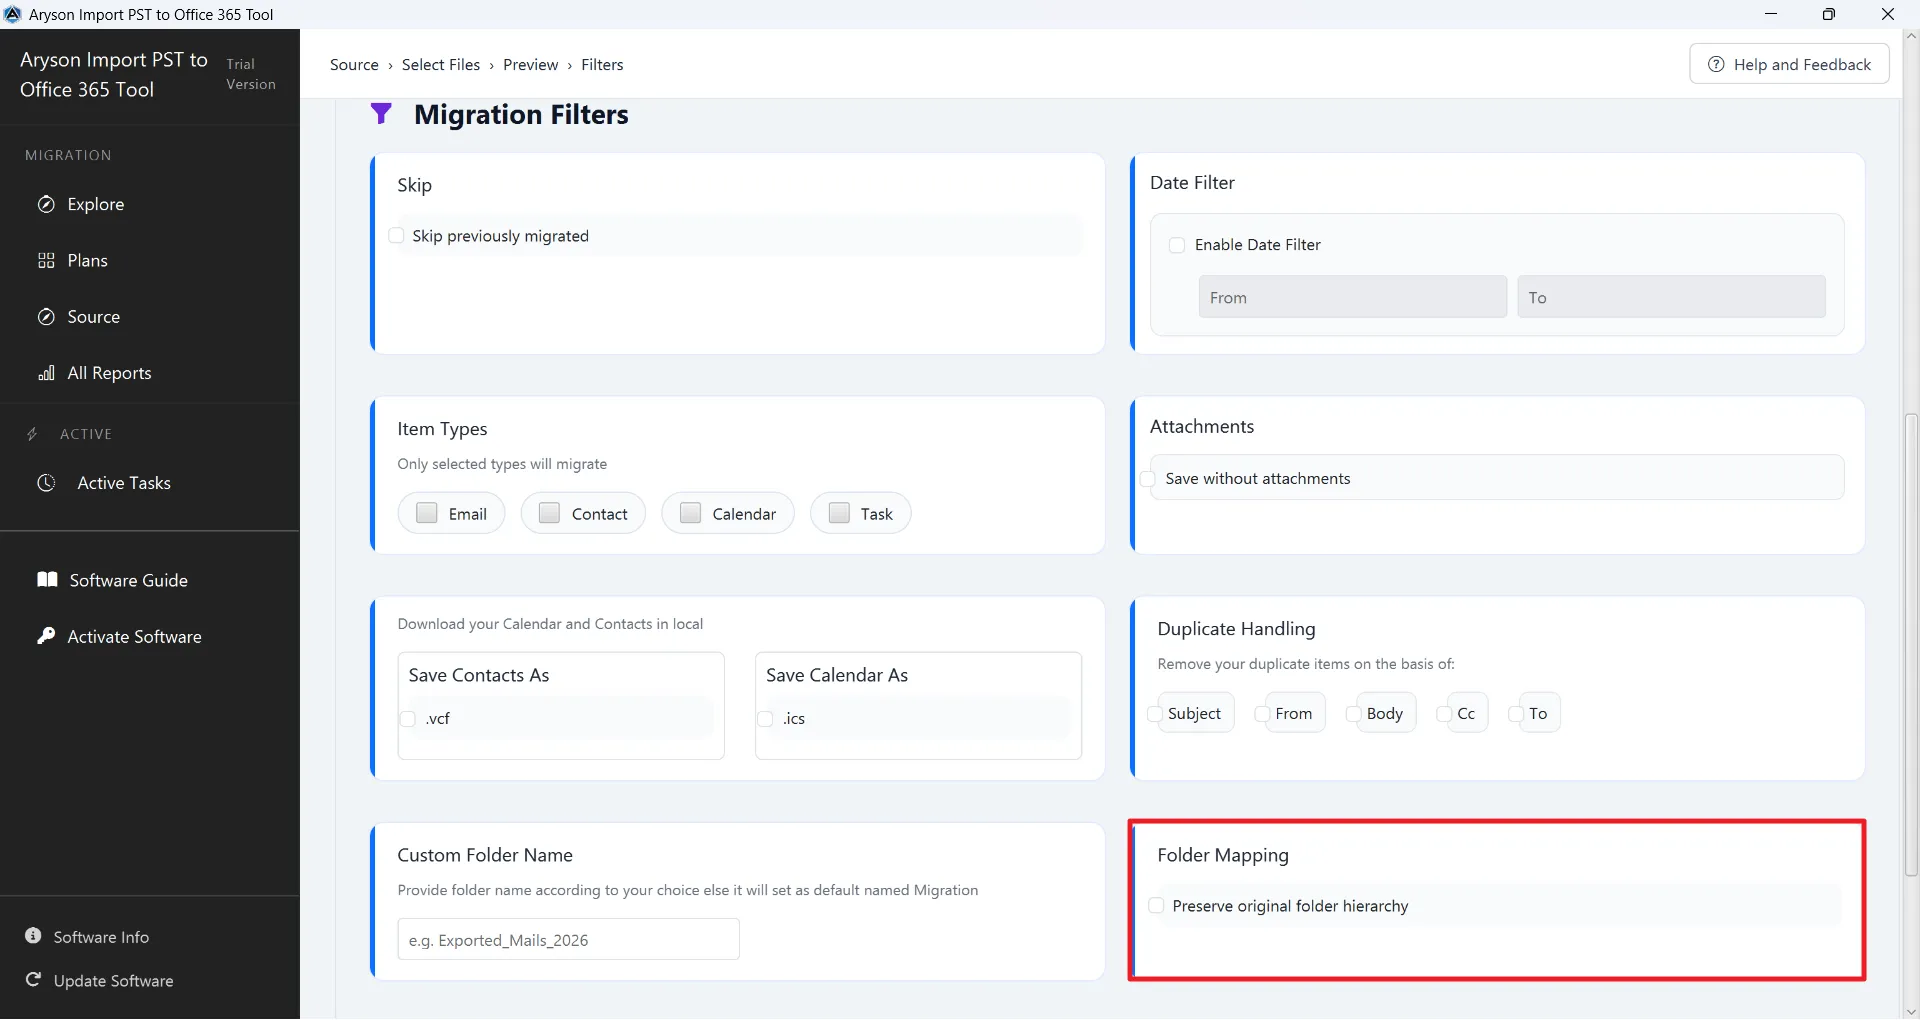
Step 18: Folder Mapping: Check the Preserve original folder hierarchy box if you want the destination mailbox to mirror the exact folder organisation of your source PST file.
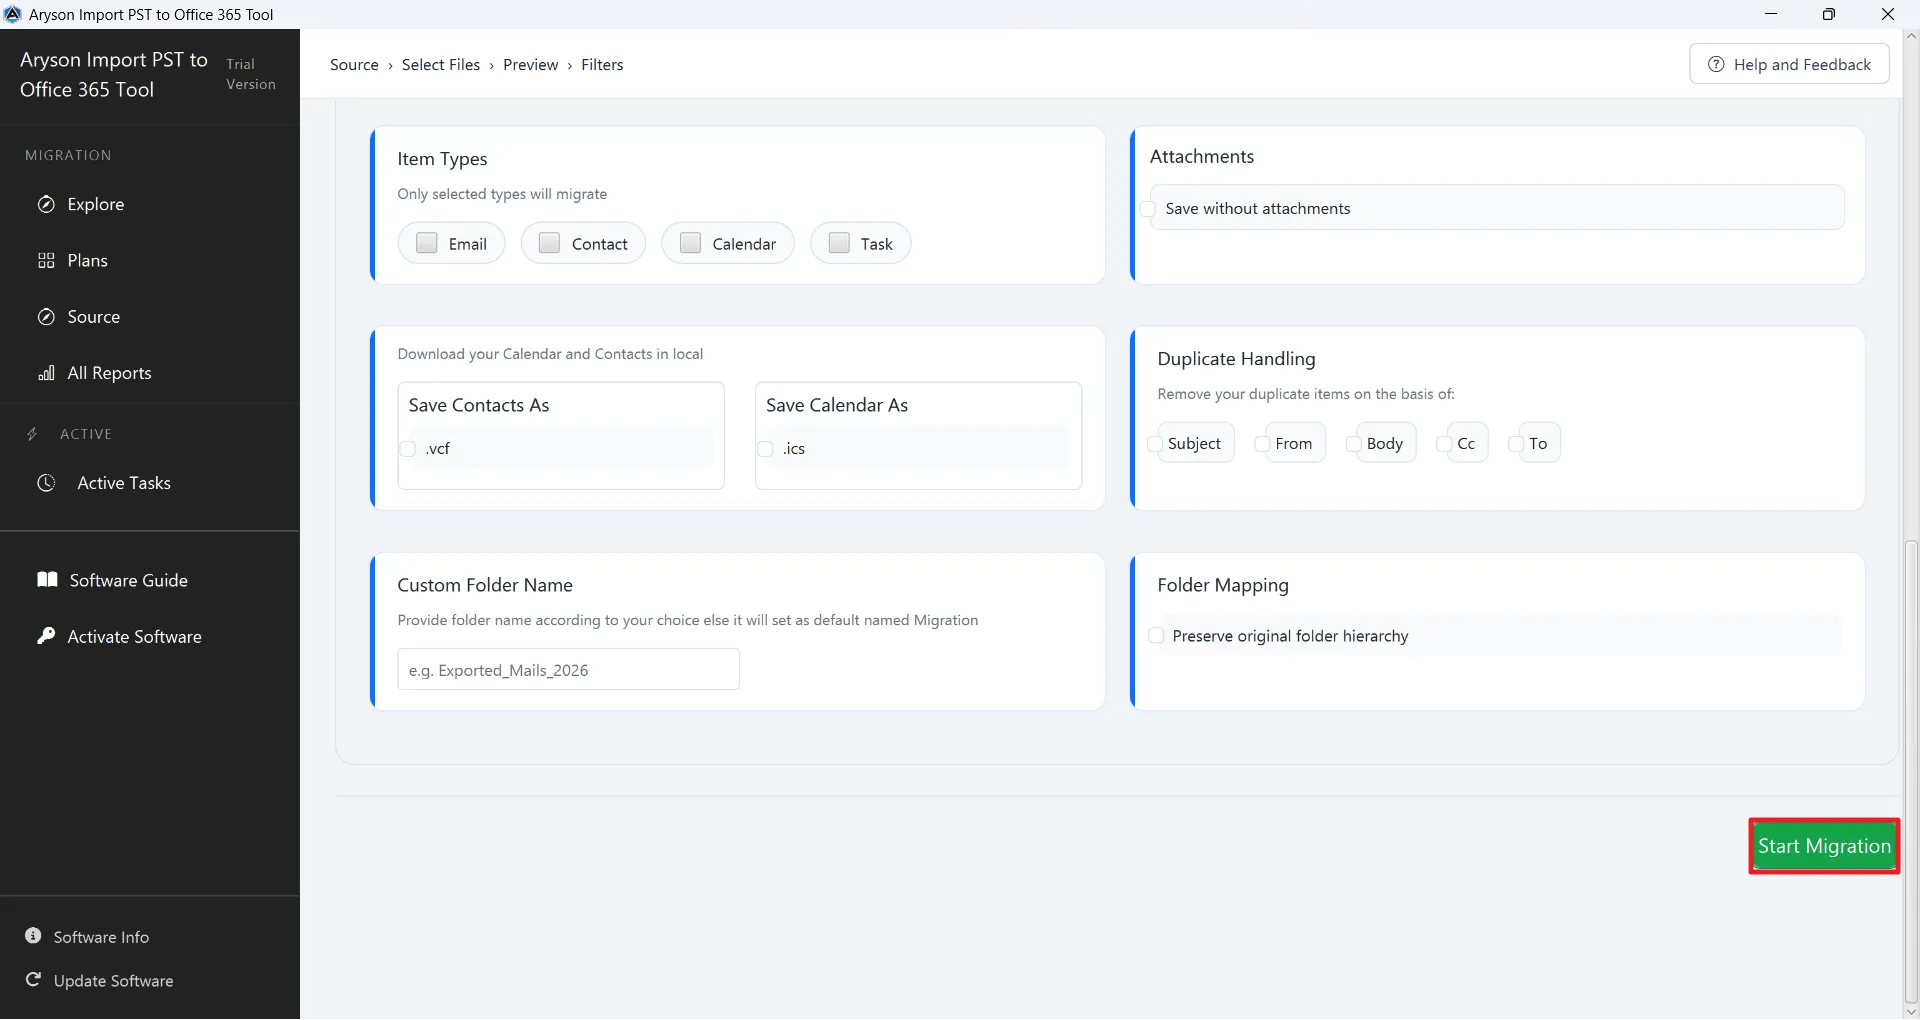
Step 19: After applying all necessary filters & folder settings, click on the Start Migration button to initiate the transfer process.
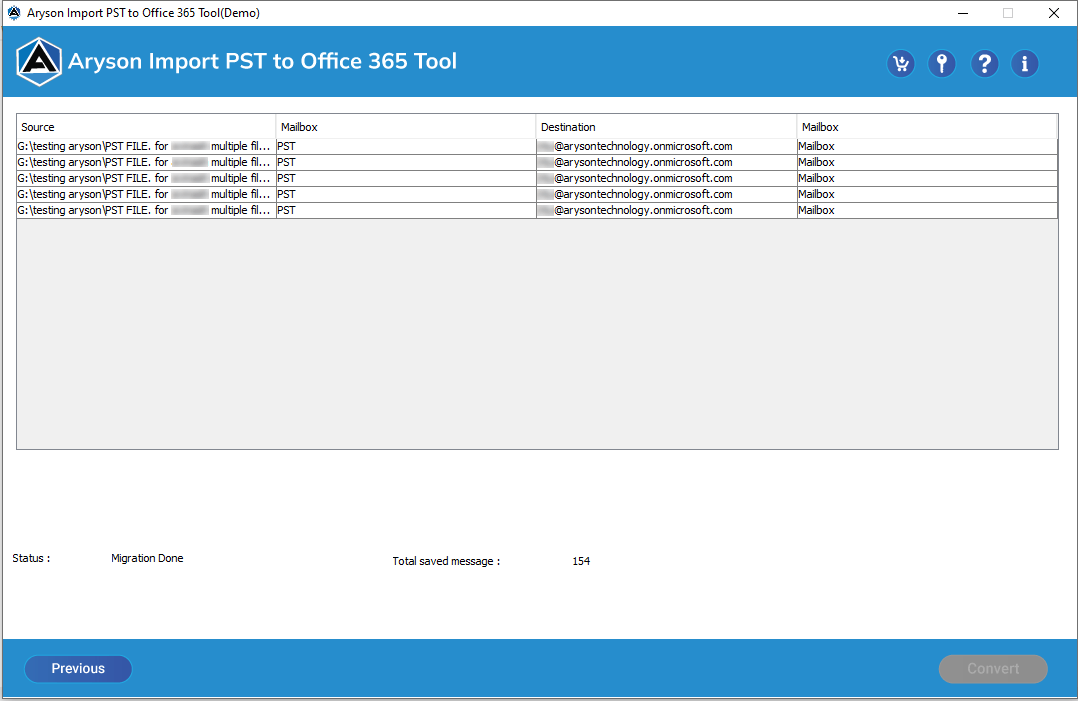
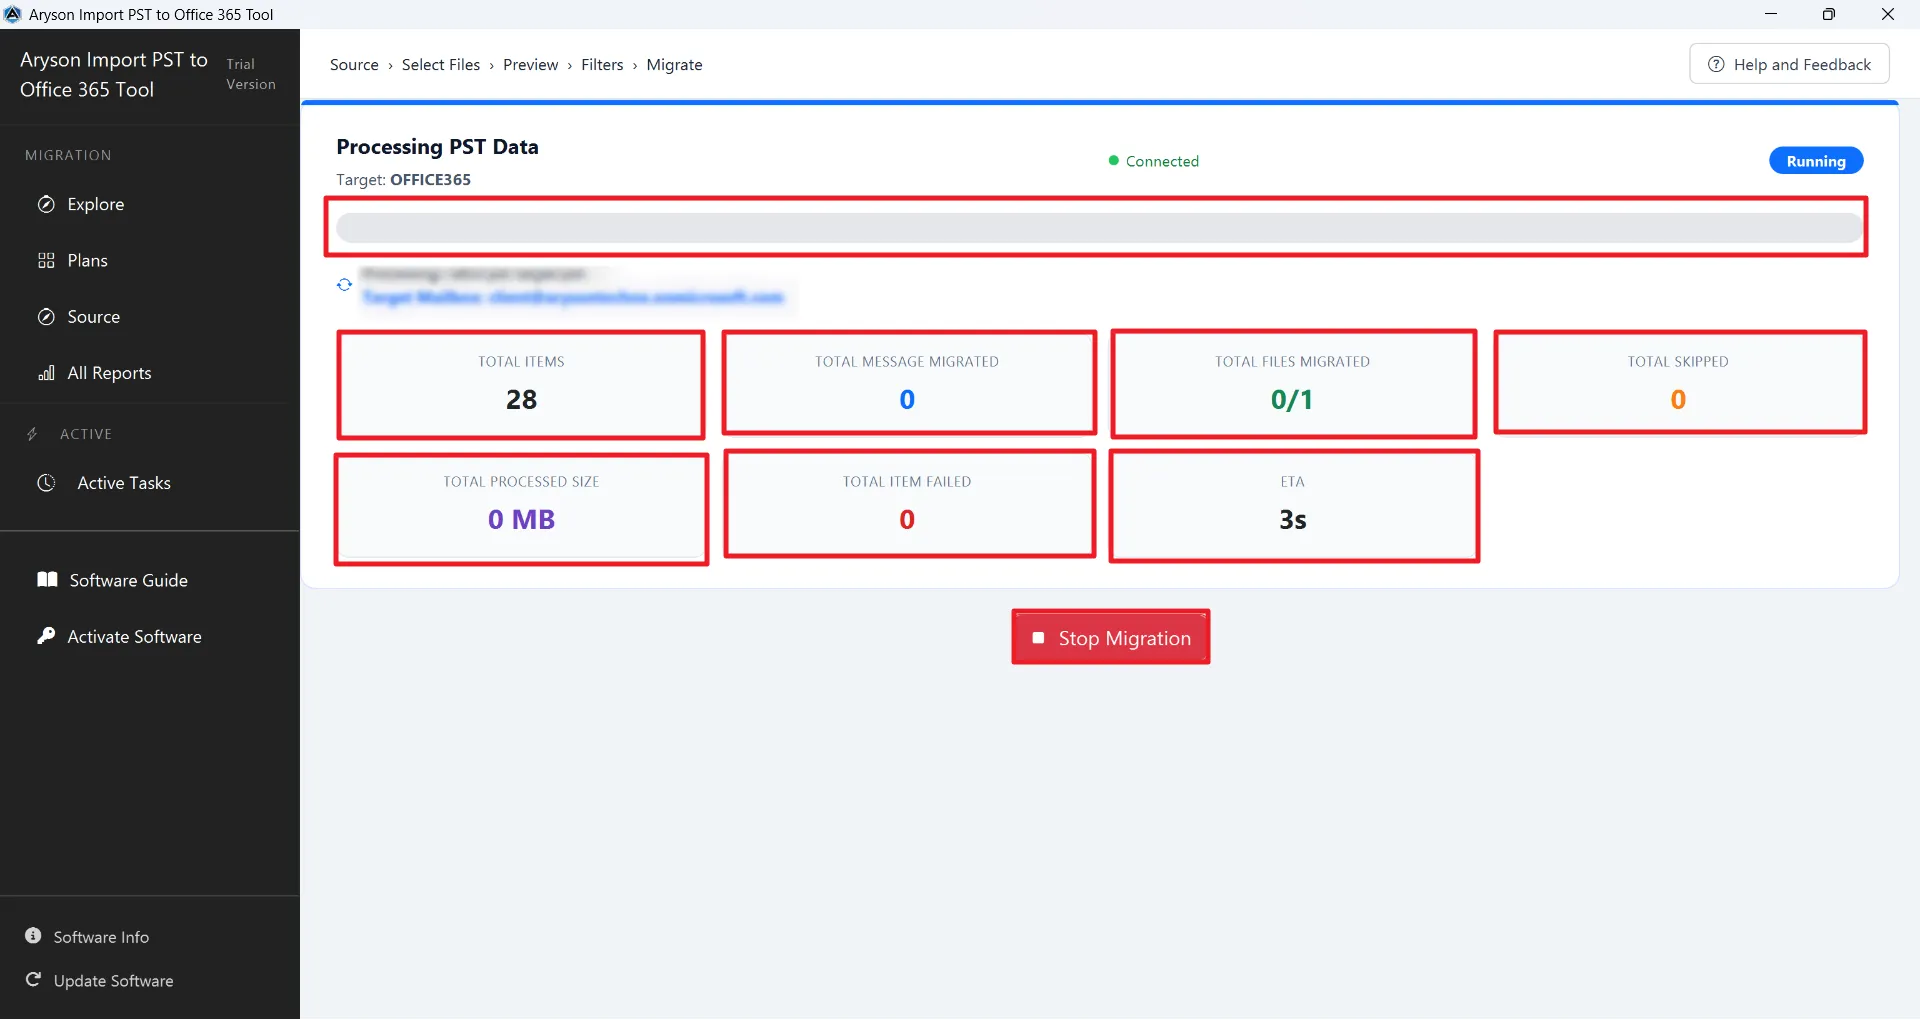
Step 20: Now, the Processing PST Data panel will appear, displaying the live status of the migration process. You can monitor the progress through the following metrics:
- Target: Displays the destination platform (e.g., OFFICE365).
- Processing/Target Mailbox: Shows the specific source file currently being processed and its corresponding destination email address.
- Total Items: Indicates the total number of items identified in the source file for migration.
- Total Message Migrated: Displays the real-time count of emails successfully transferred to the target mailbox.
- Total Files Migrated: Shows the number of source files completed out of the total files added.
- Total Skipped: Indicates the number of items skipped based on your filter settings (e.g., duplicates or previously migrated items).
- Total Processed Size: Shows the total volume of data (in MB/GB) that has been successfully migrated so far.
- Total Item Failed: Displays the count of any items that could not be migrated due to errors.
- ETA: Provides an estimated time remaining for the current migration task to complete.
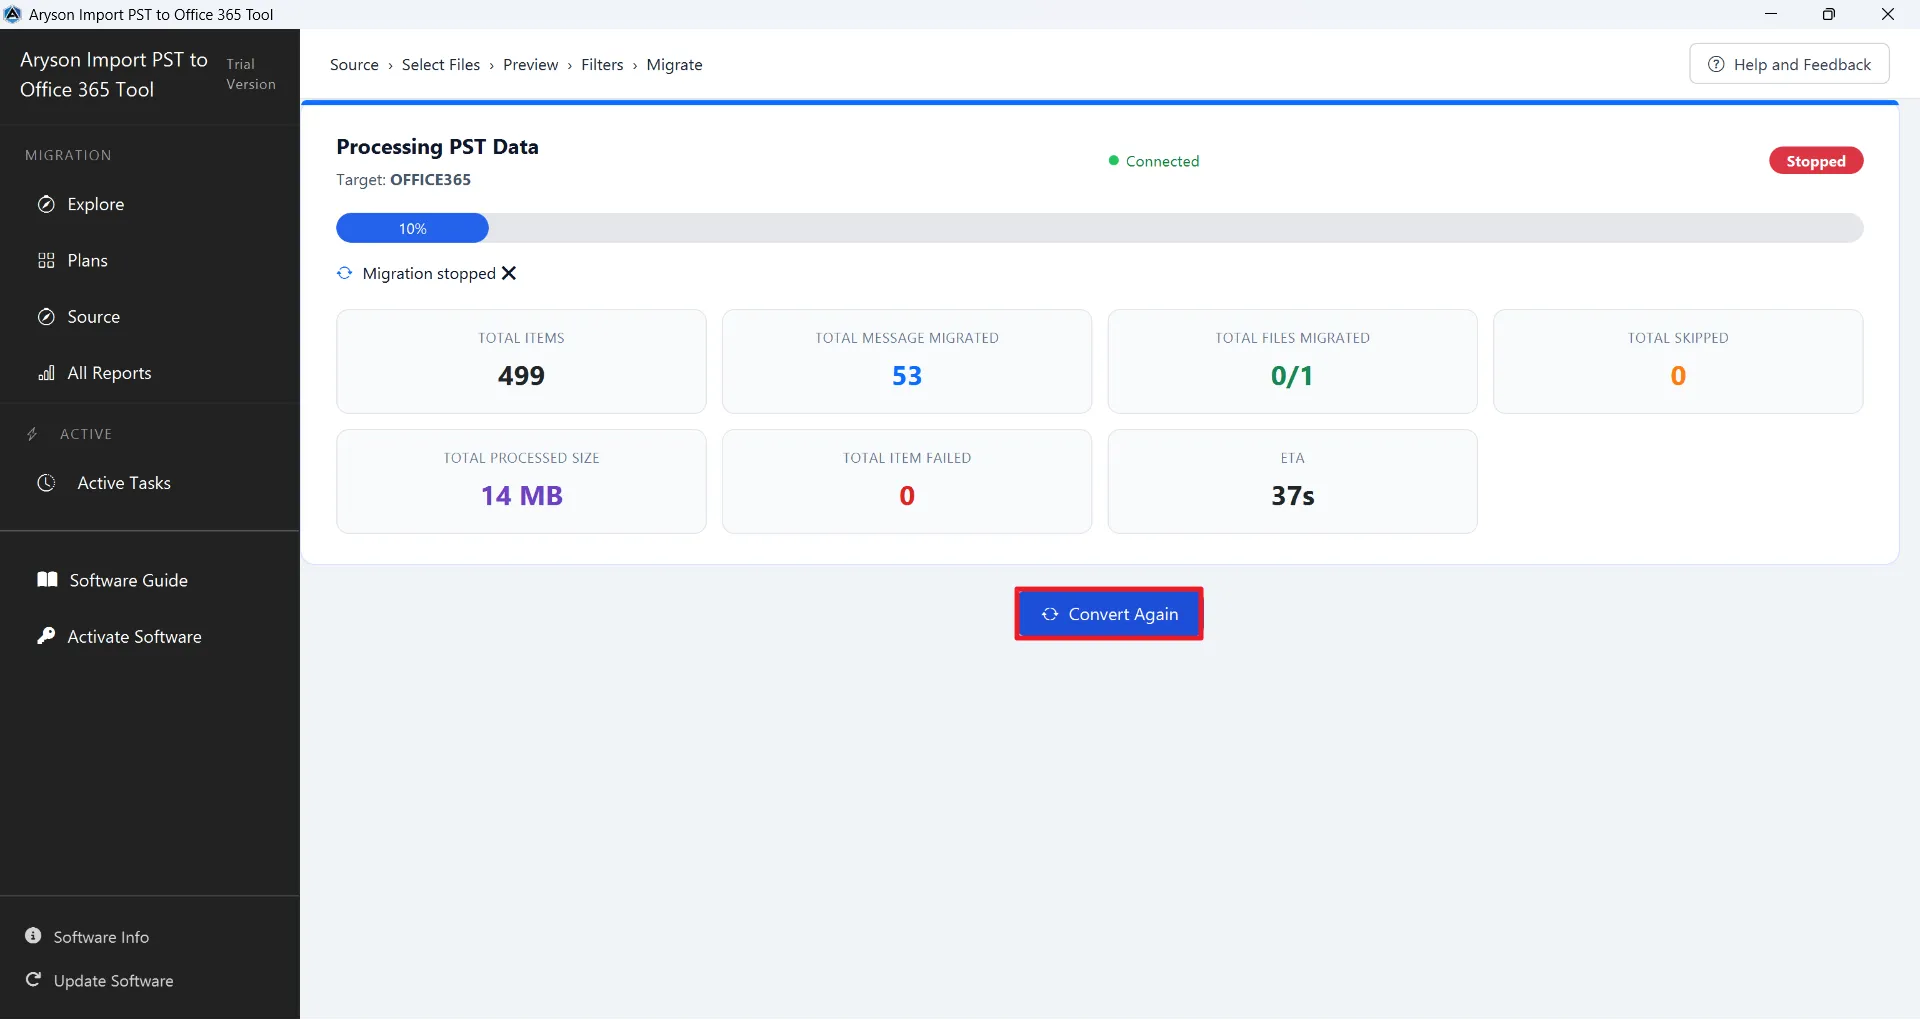
- Stop Migration: Allows you to manually terminate the process at any time if needed.
Step 21: Convert Again: Select this button to return to the initial screen, allowing you to perform another migration without restarting the software.
Activation Guide
Activate the Software
Installation & Uninstallation
Installation & Uninstallation of Software
User Interface
User Interface
After downloading the Aryson Import PST to Office 365 Software, you will find the welcome screen as played below.