Complete Step-by-Step Guide for Aryson ICS Converter
Easily convert ICS files to PST, ICS, EML, MSG, PDF, CSV, EXCEL, JPG, HTML, MHTML, DOCX, DOCM & TXT formats on Windows, Mac, and Linux. This software also migrates ICS files to Gmail, G Suite, and Microsoft 365. For any issues, you can refer to the Functional & Technical Documentation (FTD) Guide for complete assistance.
-
Table of Content
- Software Working Process
- Activation Guide
- Installation & Uninstallation
- User Interface
Software Working Process
Software Working Process
Step 1: Download and install the Aryson ICS Converter on your existing system.

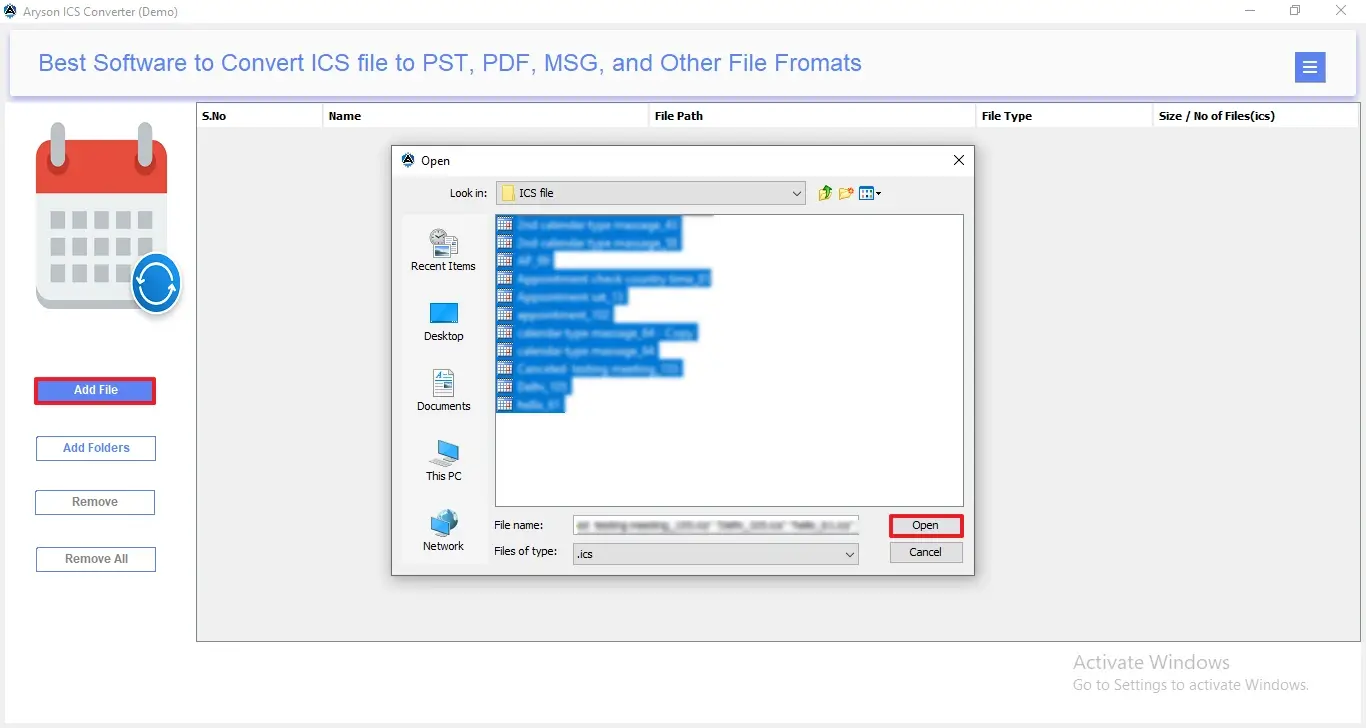
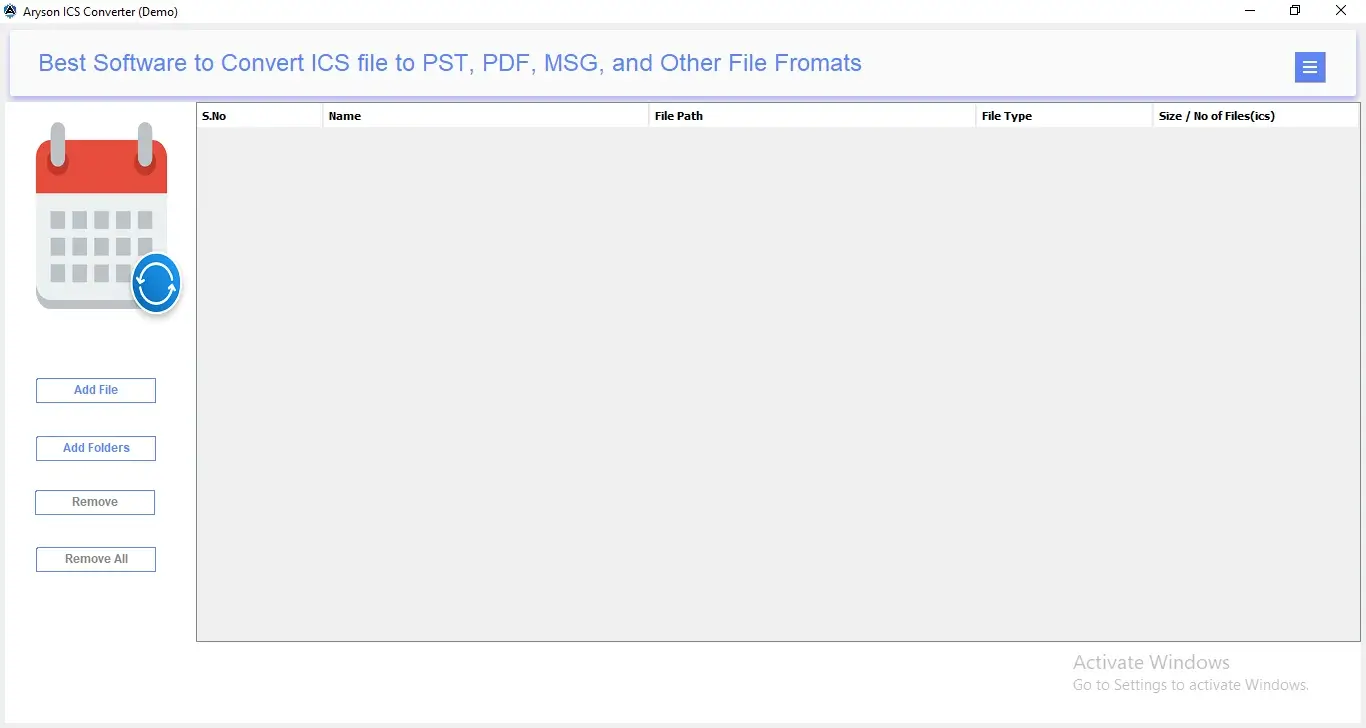
Step 2: Click on Add File or Add Folder to import single or multiple ICS files>>Open.
Step 3: To begin the conversion process, these simple buttons help you manage ICS files easily:
- Add File – Lets you add a single ICS file from your system for quick conversion.
- Add Folders – Allows you to load a complete folder containing multiple ICS files.
- Remove – Deletes the selected ICS file from the list if added by mistake.
- Remove All – Clears all added ICS files at once, so you can start fresh.
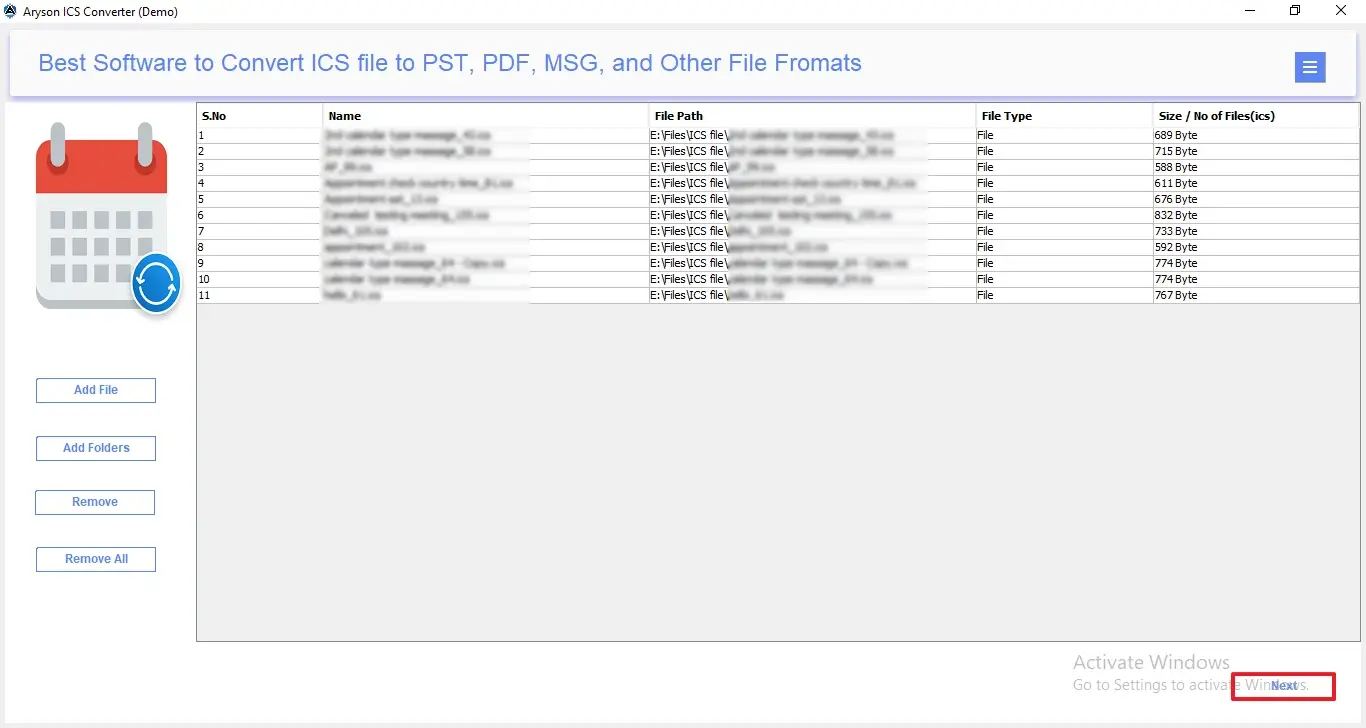
Step 4: The File List Panel will display all the loaded ICS files with the following details:
- S.No – Shows the serial number of each added ICS file.
- Name – Displays the name of the ICS file.
- File Path – Indicates the exact location of the ICS file on the system.
- File Type – Confirms whether the added item is a file or folder.
- Size / No of Files (ICS) – Shows the file size or total number of ICS files added.

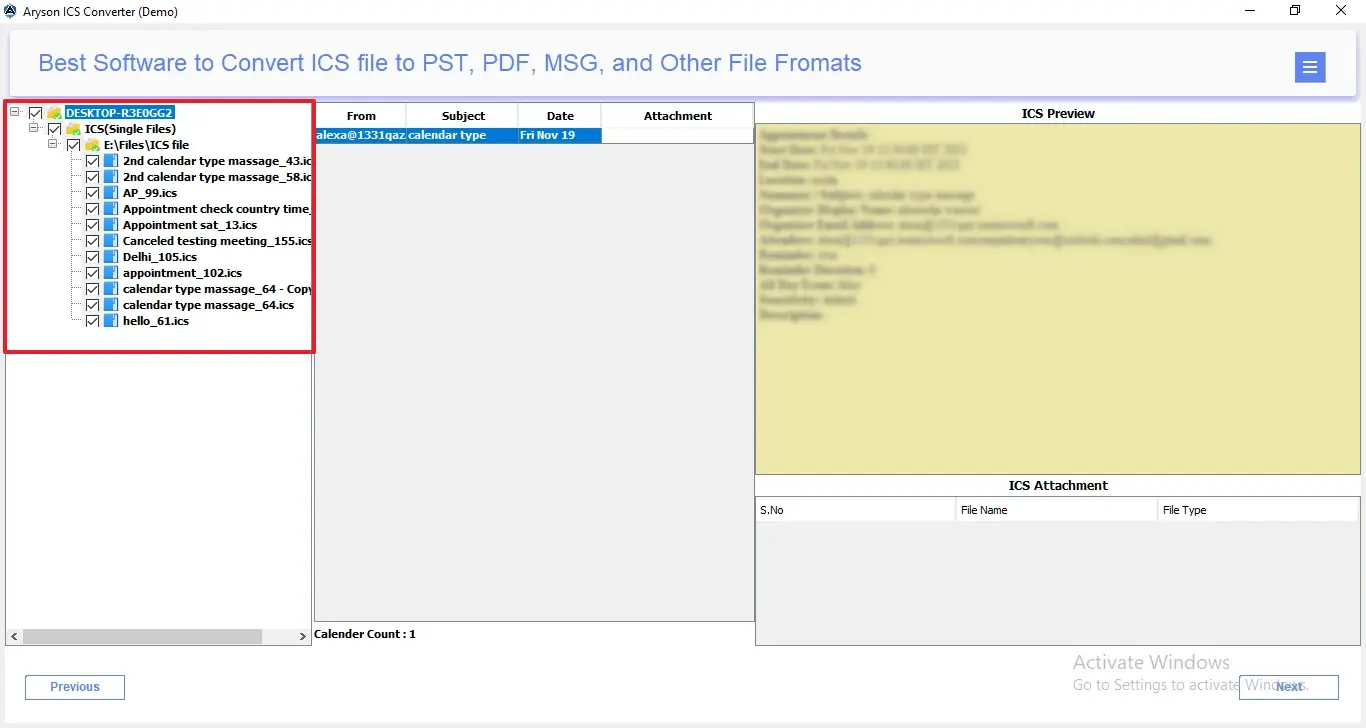
Step 5: After that, preview the loaded calendar items to verify the data before conversion. In the middle panel, you get the detailed info based on:
- From – Displays the sender or creator of the email or event.
- Subject – Shows the title or topic of the calendar entry/email.
- Date – Indicates the date of the event or email.
- Attachment – Highlights if there are any files attached to the entry.

Step 6: Users can preview attachments directly from this panel without opening separate applications.
- S.No – Displays the attachment’s serial number for easy tracking.
- File Name – Shows the exact name of each attached file.
- File Type – Indicates the attachment format, such as PDF, DOCX, XLSX, or images.
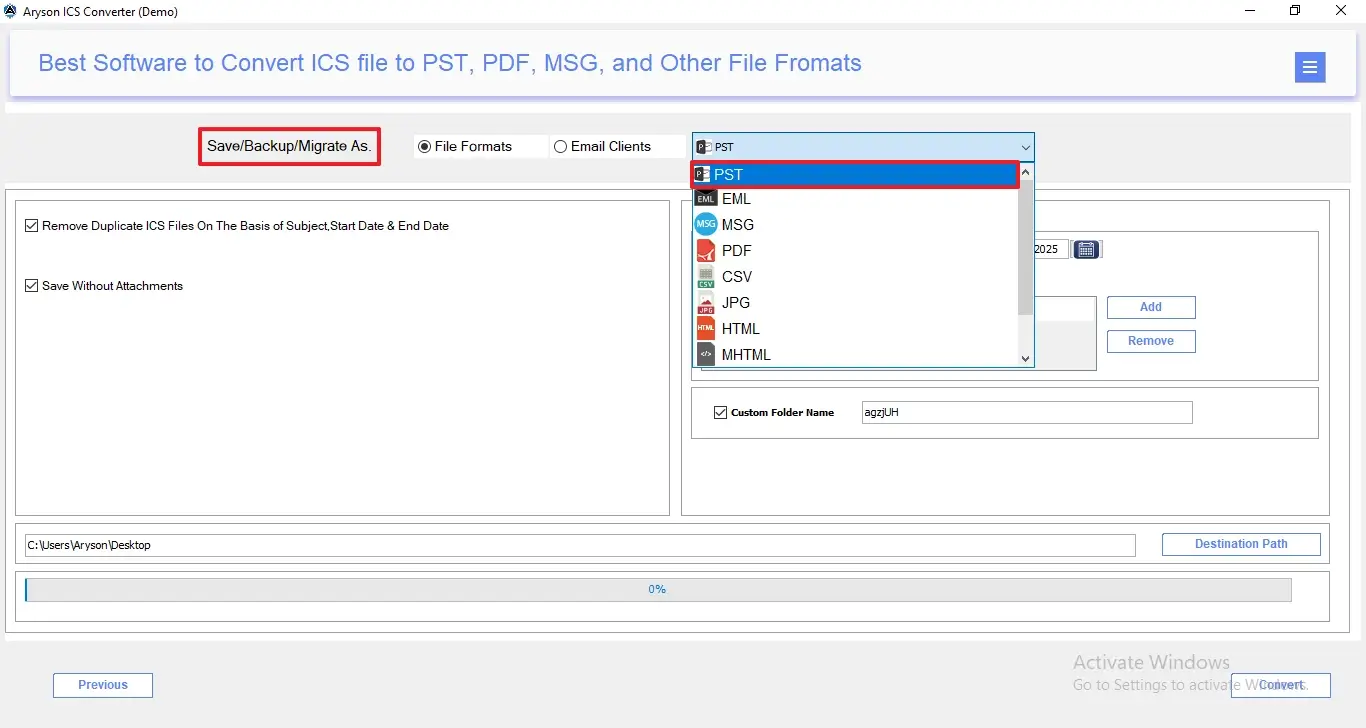
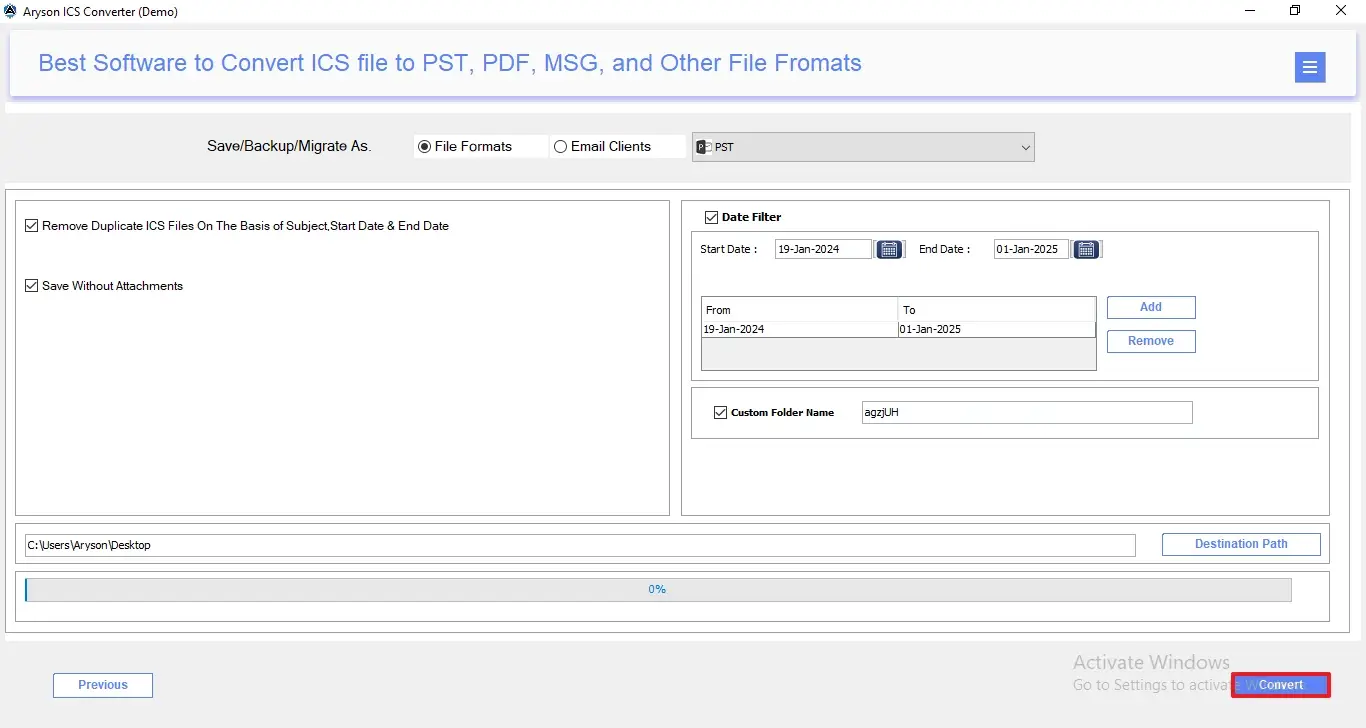
Step 7: From Save/Backup/Migrate As apnel, mark the File format radio button and pick PST as the resultant output.
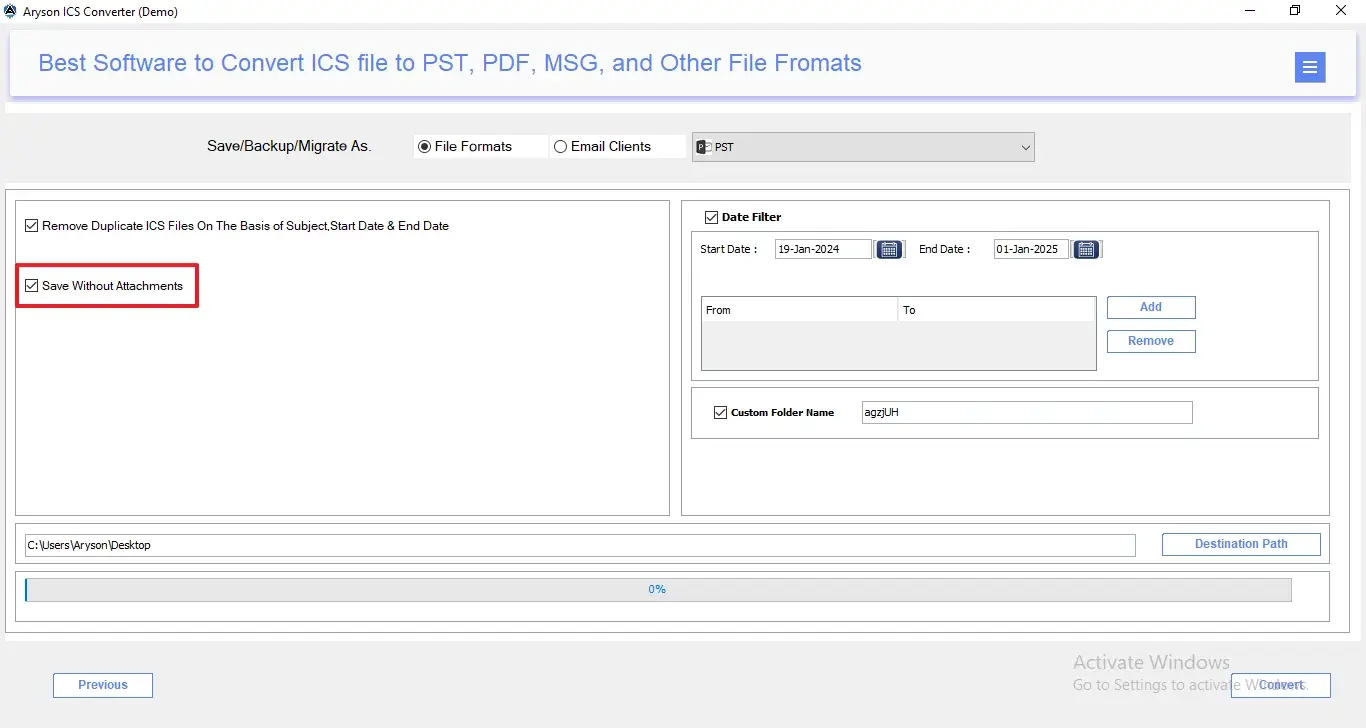
Step 8: Now, you can proceed with the additional options of the software:
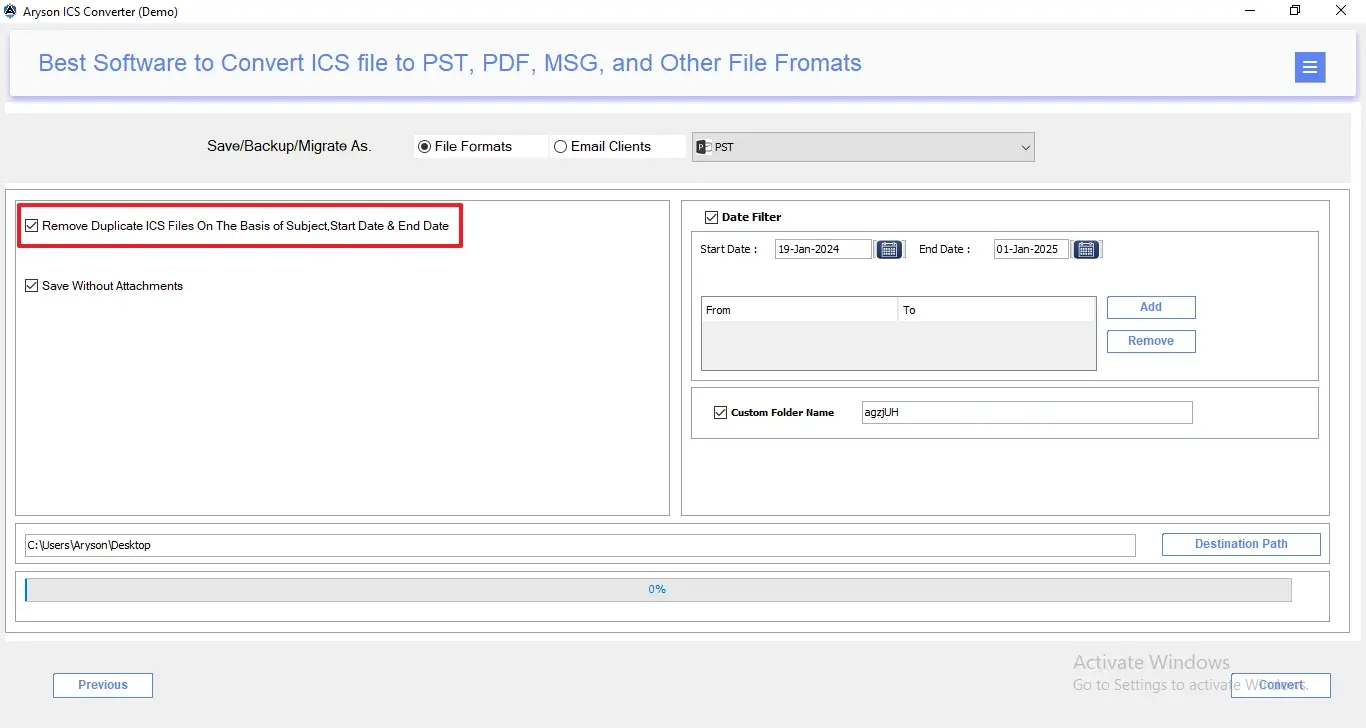
- Remove Duplicate ICS Files – Automatically removes duplicate calendar entries based on Subject, Start Date, and End Date.
- Save Without Attachments – Option to exclude attachments during the conversion process.
- Skip Previously Migrated Items – Prevents re-conversion of already migrated ICS entries.
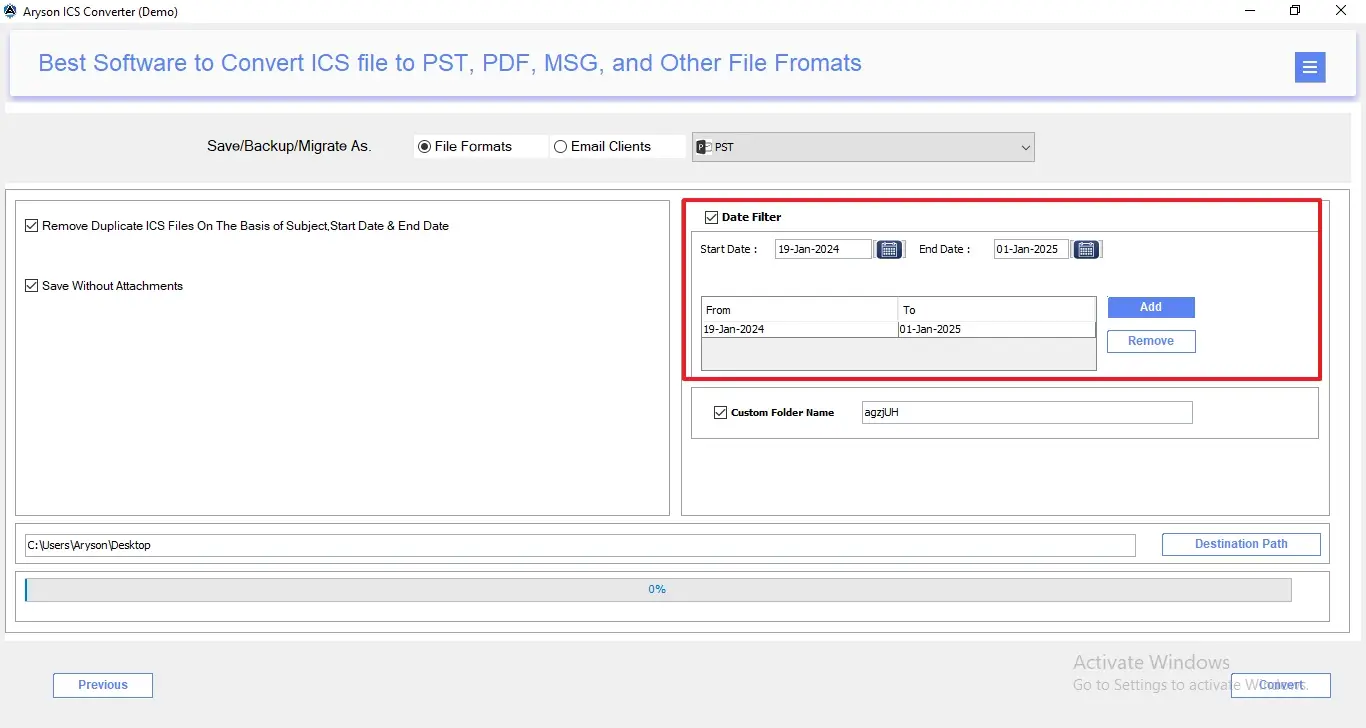
Step 9: According to the requitement you can enable any of the given options:
- Date Filter Option – To convert ICS files within a specific start and end date range.
- Multiple Date Range Selection – Add or remove multiple date filters as needed.
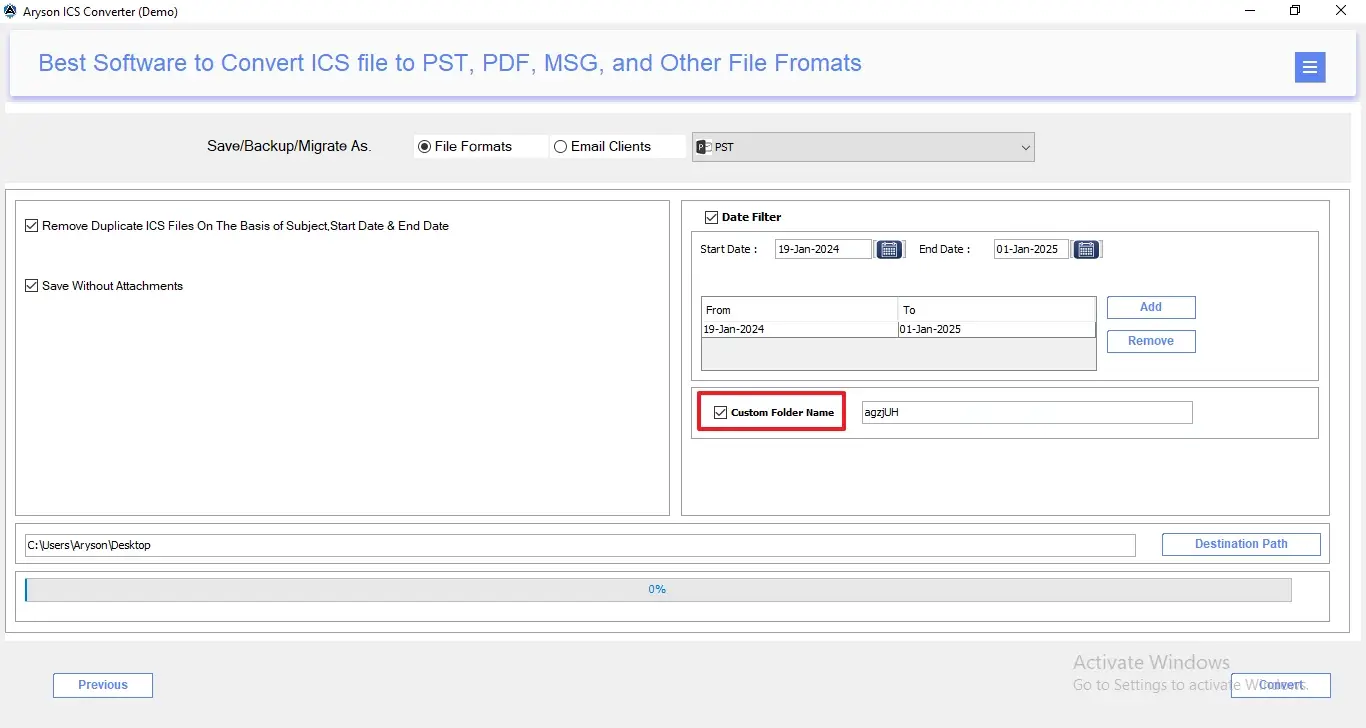
- Custom Folder Name Option – Define a custom folder name for the output data.
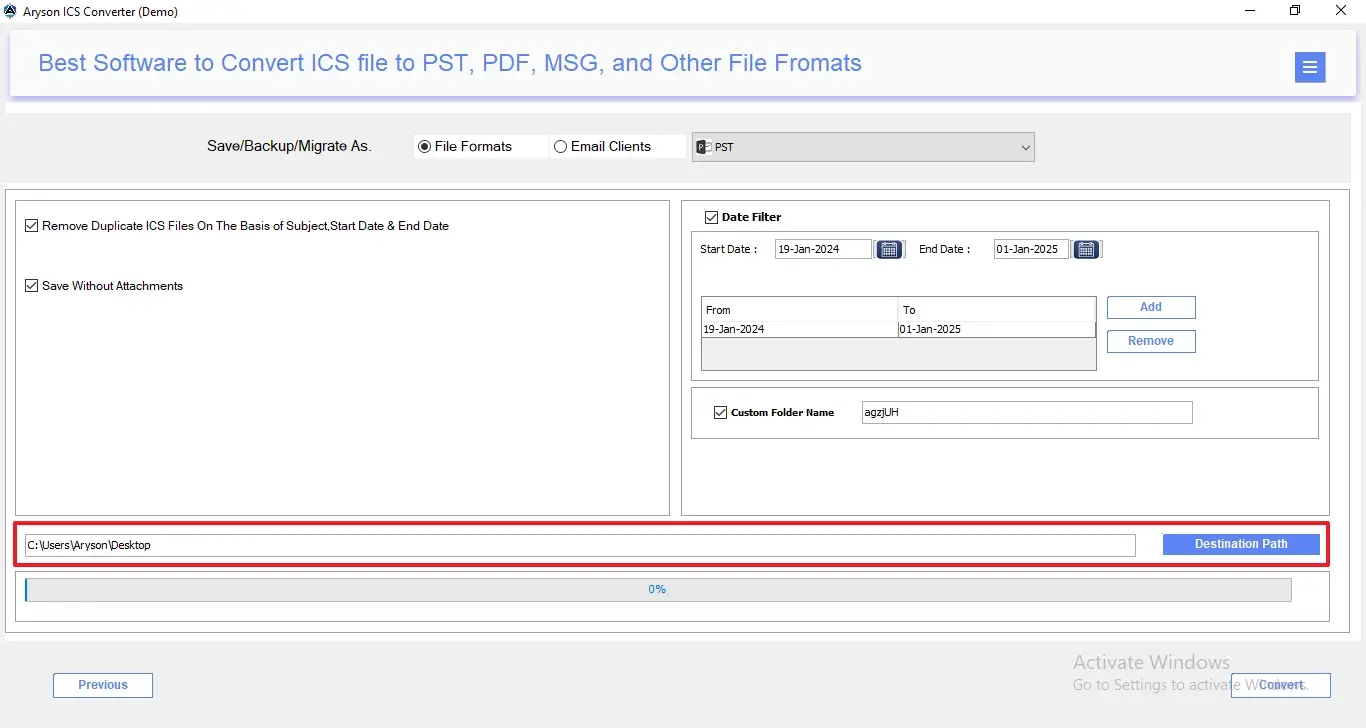
Step 10: Assign Destination Path to choose the desired location to save the converted file.
Step 11: At last, click on the Convert button to start the ICS to PST conversion process.
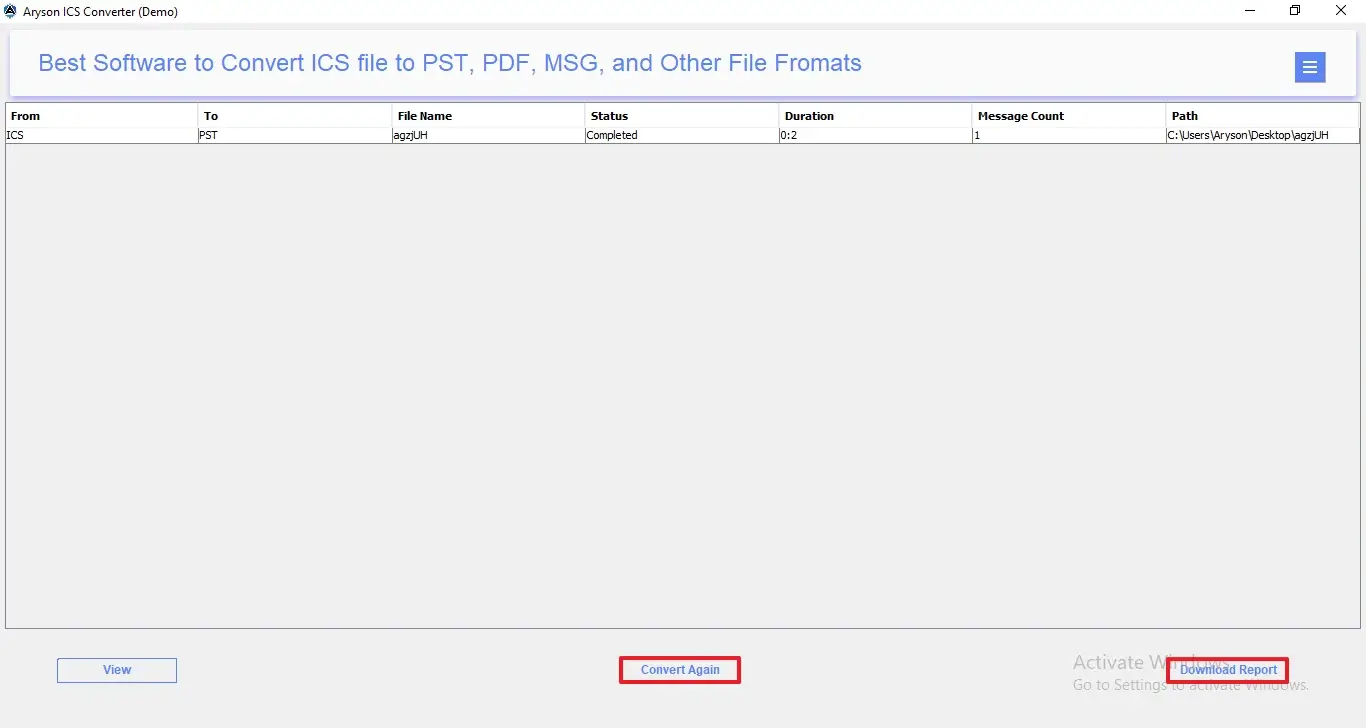
Step 12: After conversion, the summary panel shows the source and target format, file name, status, duration, message count, and destination path. Click View to open and verify the converted file.
- Convert Again – Enable this to start a new conversion without closing the tool.
- Download Report – Enable this to save a detailed conversion report for records and documentation.
Step 1: Download and install the Aryson ICS Converter on your existing system.
Step 2: Click on Add File or Add Folder to import single or multiple ICS files>>Open.
Step 3: To begin the conversion process, these simple buttons help you manage ICS files easily:
- Add File – Lets you add a single ICS file from your system for quick conversion.
- Add Folders – Allows you to load a complete folder containing multiple ICS files.
- Remove – Deletes the selected ICS file from the list if added by mistake.
- Remove All – Clears all added ICS files at once, so you can start fresh.

Step 4: The File List Panel will display all the loaded ICS files with the following details:
- S.No – Shows the serial number of each added ICS file.
- Name – Displays the name of the ICS file.
- File Path – Indicates the exact location of the ICS file on the system.
- File Type – Confirms whether the added item is a file or folder.
- Size / No of Files (ICS) – Shows the file size or total number of ICS files added.

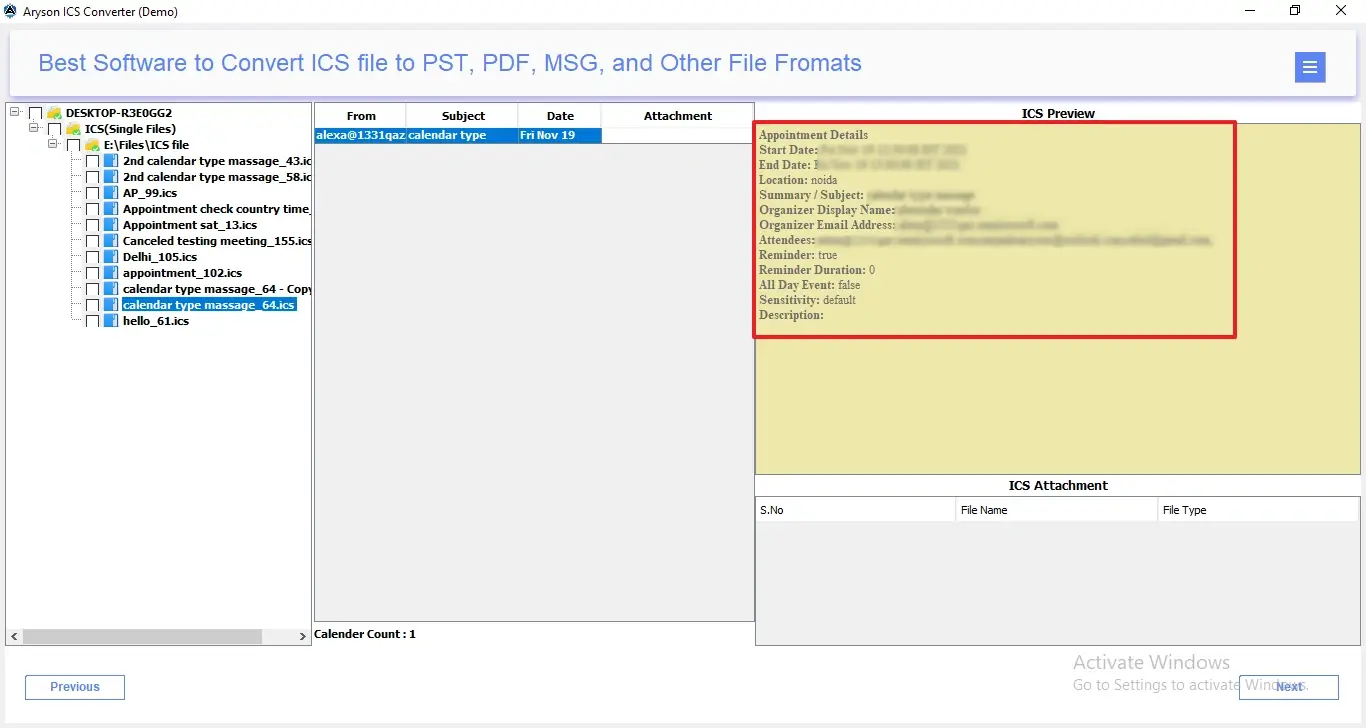
Step 5: After that, preview the loaded calendar items to verify the data before conversion. In the middle panel, you get the detailed info based on:
- From – Displays the sender or creator of the email or event.
- Subject – Shows the title or topic of the calendar entry/email.
- Date – Indicates the date of the event or email.
- Attachment – Highlights if there are any files attached to the entry.

Step 6: Users can preview attachments directly from this panel without opening separate applications.
- S.No – Displays the attachment’s serial number for easy tracking.
- File Name – Shows the exact name of each attached file.
- File Type – Indicates the attachment format, such as PDF, DOCX, XLSX, or images.
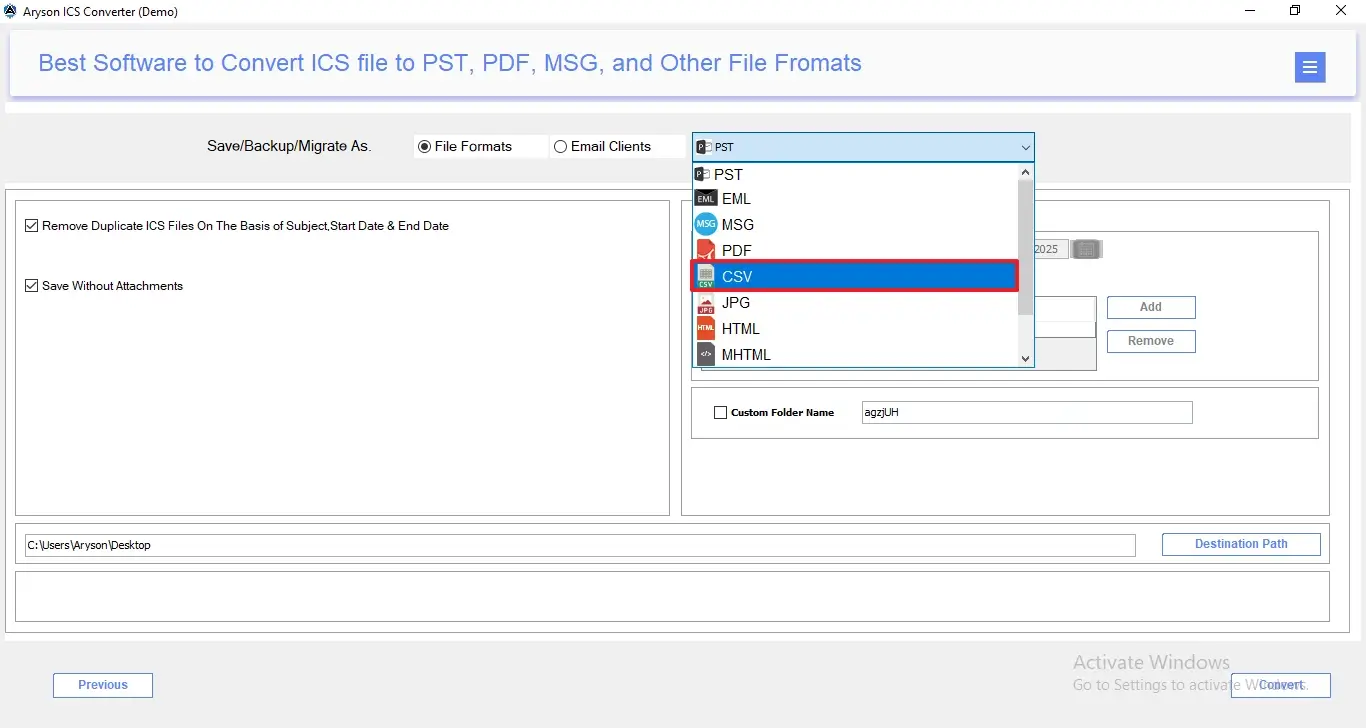
Step 7: From Save/Backup/Migrate As apnel, mark the File format radio button and pick CSV as the resultant output.
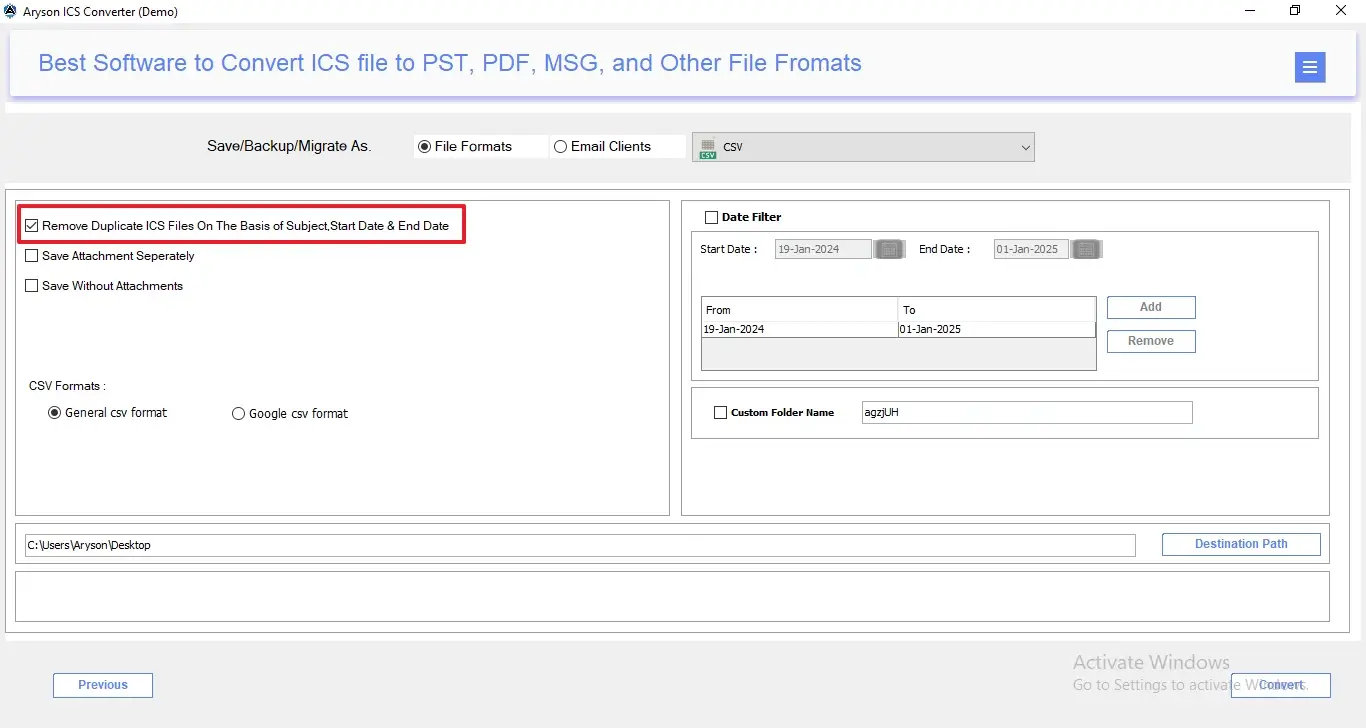
Step 8: If you want to avoid duplicate calendar entries, enable Remove Duplicate ICS Files. It removes repeated ICS items based on Subject, Start Date, and End Date.
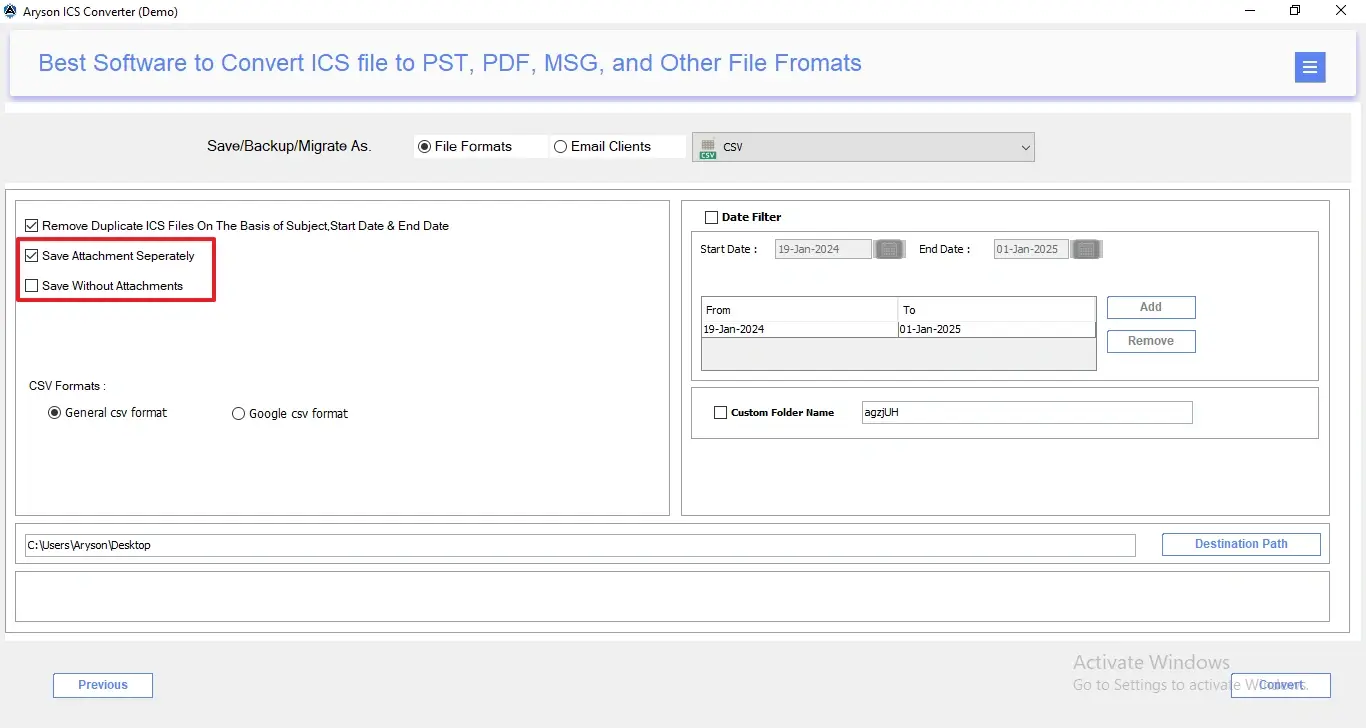
Step 9: To manage your attachment file, there are two options: Either you can Save Attachment Separately or you can Save without Attachments.
Step 10: If you want to prevent re-conversion of already migrated events, enable the Skip Previously Migrated Items panel. It ensures only new ICS items are processed.
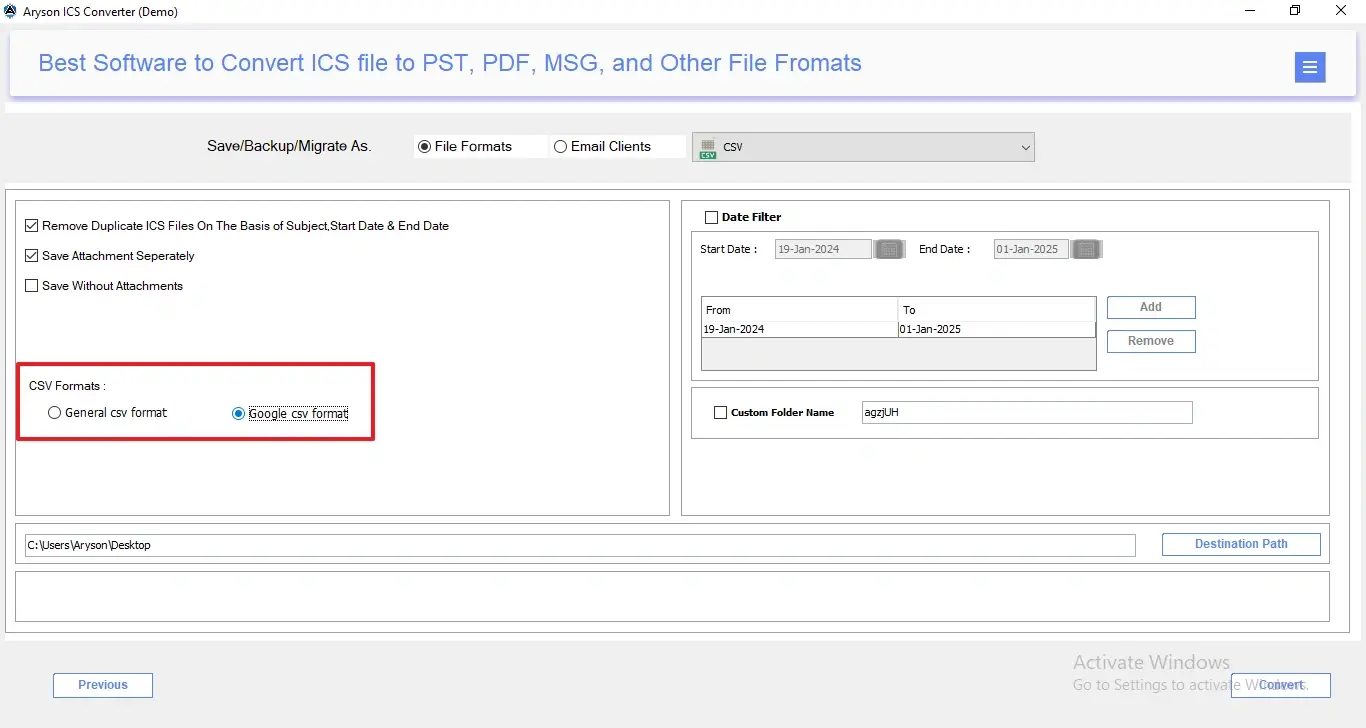
Step 11: Mark the " Merge All Data in a Single CSV File option if you want to combine all ICS data into one single CSV file instead of creating multiple CSV files.
- General CSV Format – Select this if you want a standard CSV file compatible with most applications.
- Google CSV Format – Select this if you plan to import the CSV file directly into Google Calendar
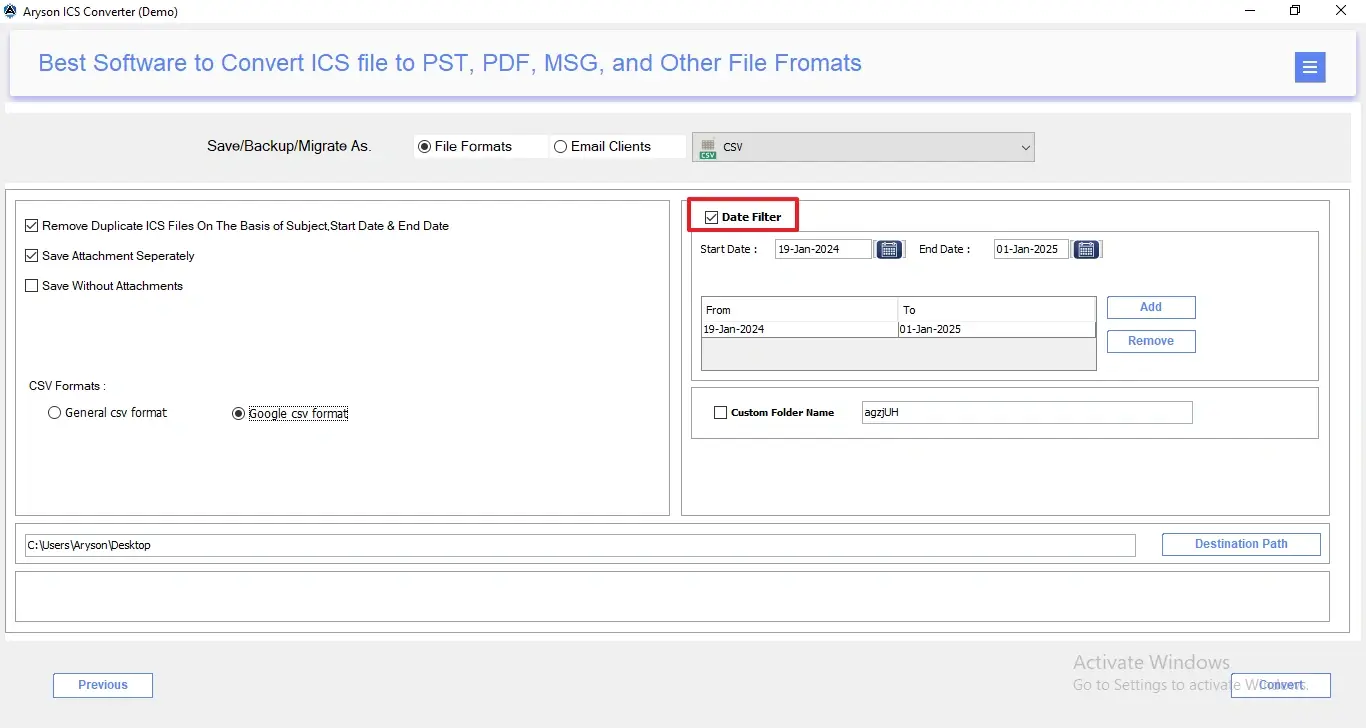
Step 12: According to the requitement you can enable any of the given options:
- Date Filter Option – To convert ICS files within a specific start and end date range.
- Multiple Date Range Selection – Add or remove multiple date filters as needed.
Step 13: Proceed with the Custom Folder Name Option to define a custom folder name for the output data.
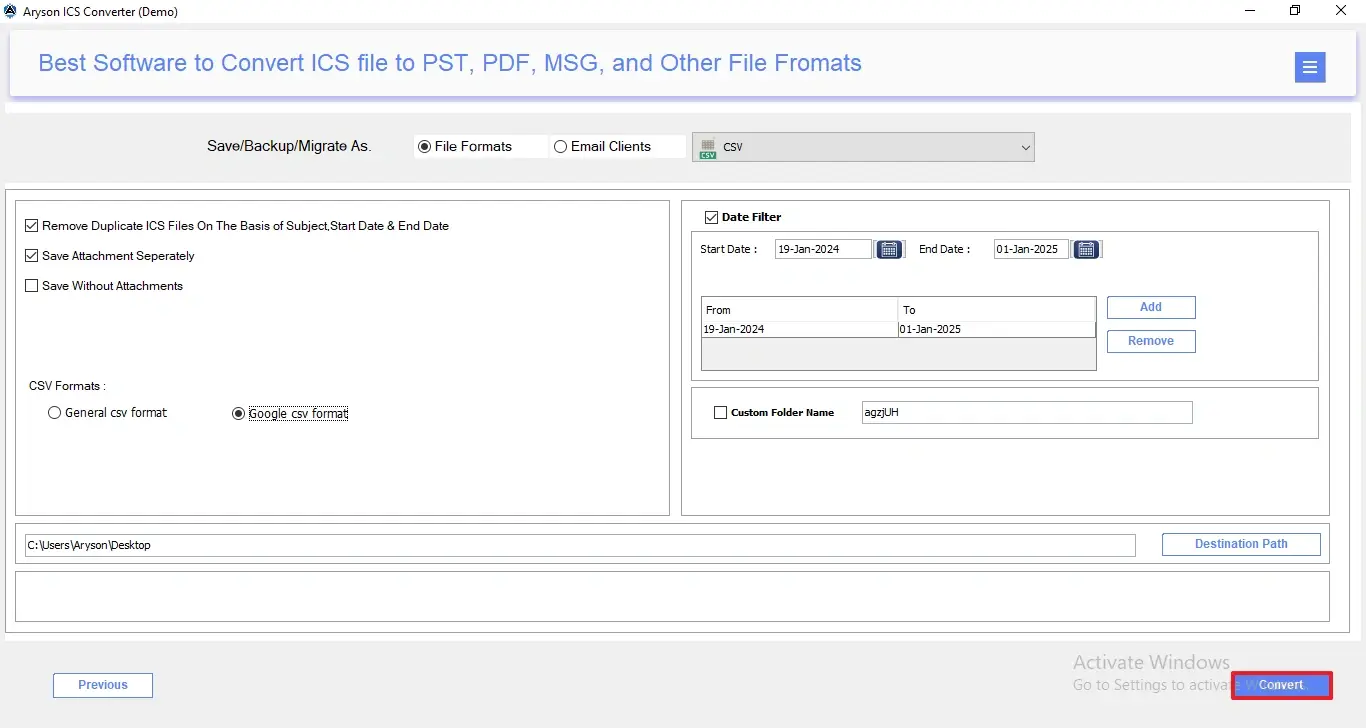
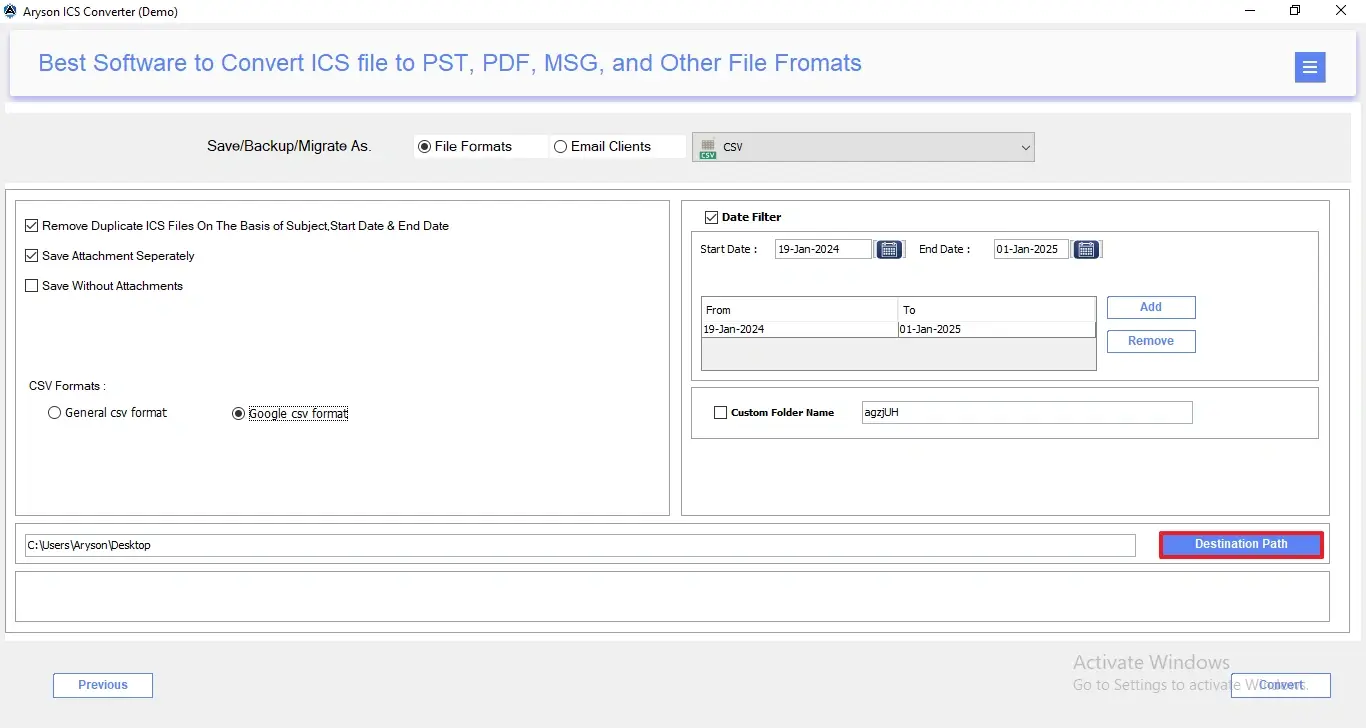
Step 14: Assign Destination Path to choose the desired location to save the converted file. Click the Convert button to begin the ICS to CSV Conversion process.

Step 15: After conversion, the software displays a summary panel showing the source and target format, file name, status, duration, message count, and destination path. You can click View to open and verify the converted file.
- Convert Again – Enable this to start a new conversion without closing the tool.
- Download Report – Enable this to save a detailed conversion report for records and documentation.

Step 1: Download and install the Aryson ICS Converter on your existing system.

Step 2: Click on Add File or Add Folder to import single or multiple ICS files>>Open.
Step 3: To begin the conversion process, these simple buttons help you manage ICS files easily:
- Add File – Lets you add a single ICS file from your system for quick conversion.
- Add Folders – Allows you to load a complete folder containing multiple ICS files.
- Remove – Deletes the selected ICS file from the list if added by mistake.
- Remove All – Clears all added ICS files at once, so you can start fresh.

Step 4: The File List Panel will display all the loaded ICS files with the following details:
- S.No – Shows the serial number of each added ICS file.
- Name – Displays the name of the ICS file.
- File Path – Indicates the exact location of the ICS file on the system.
- File Type – Confirms whether the added item is a file or folder.
- Size / No of Files (ICS) – Shows the file size or total number of ICS files added.
Step 5: After that, preview the loaded calendar items to verify the data before conversion. In the middle panel, you get the detailed info based on:
- From – Displays the sender or creator of the email or event.
- Subject – Shows the title or topic of the calendar entry/email.
- Date – Indicates the date of the event or email.
- Attachment – Highlights if there are any files attached to the entry.
Step 6: Users can preview attachments directly from this panel without opening separate applications.
- S.No – Displays the attachment’s serial number for easy tracking.
- File Name – Shows the exact name of each attached file.
- File Type – Indicates the attachment format, such as PDF, DOCX, XLSX, or images.
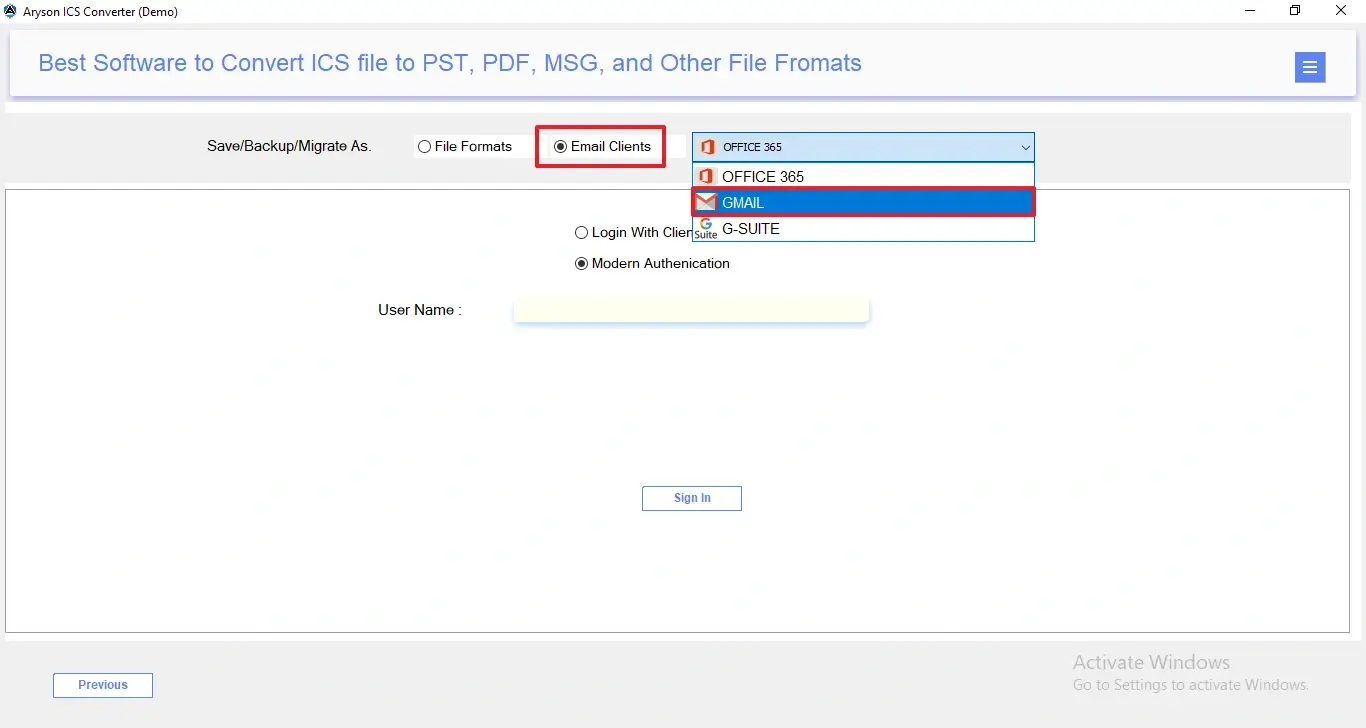
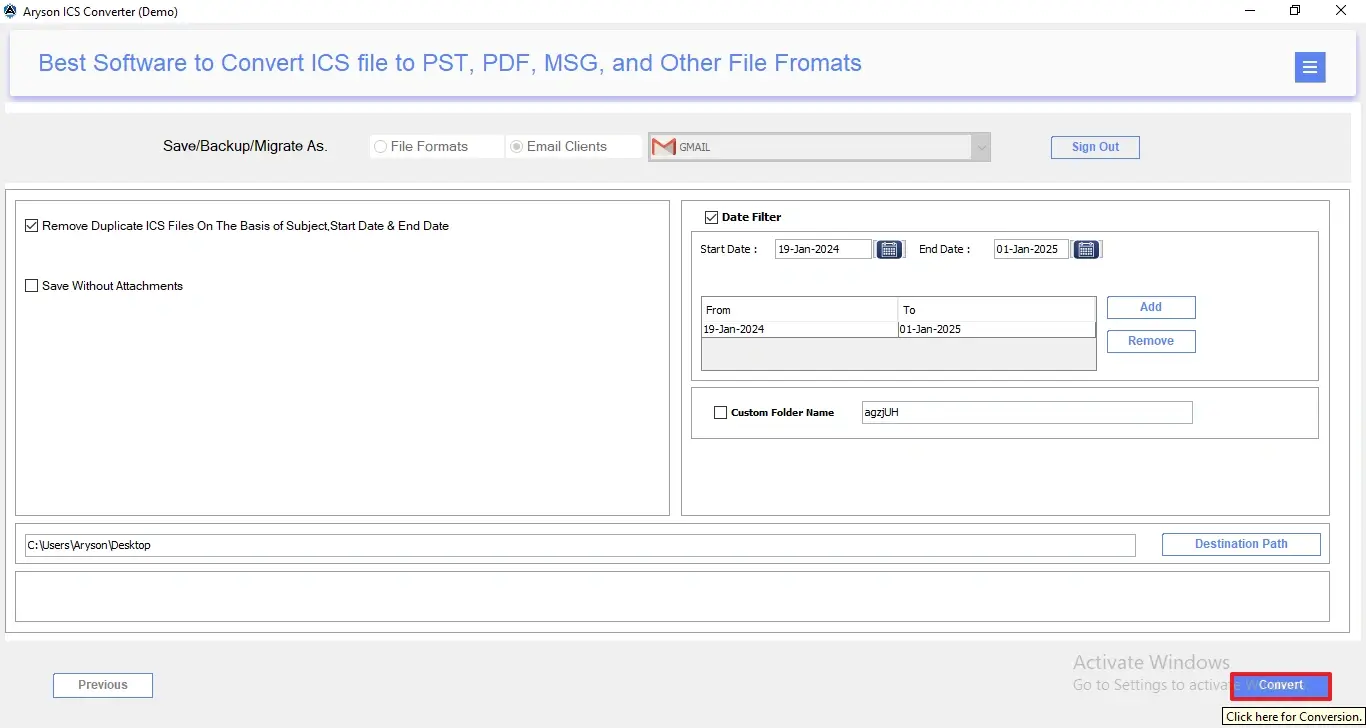
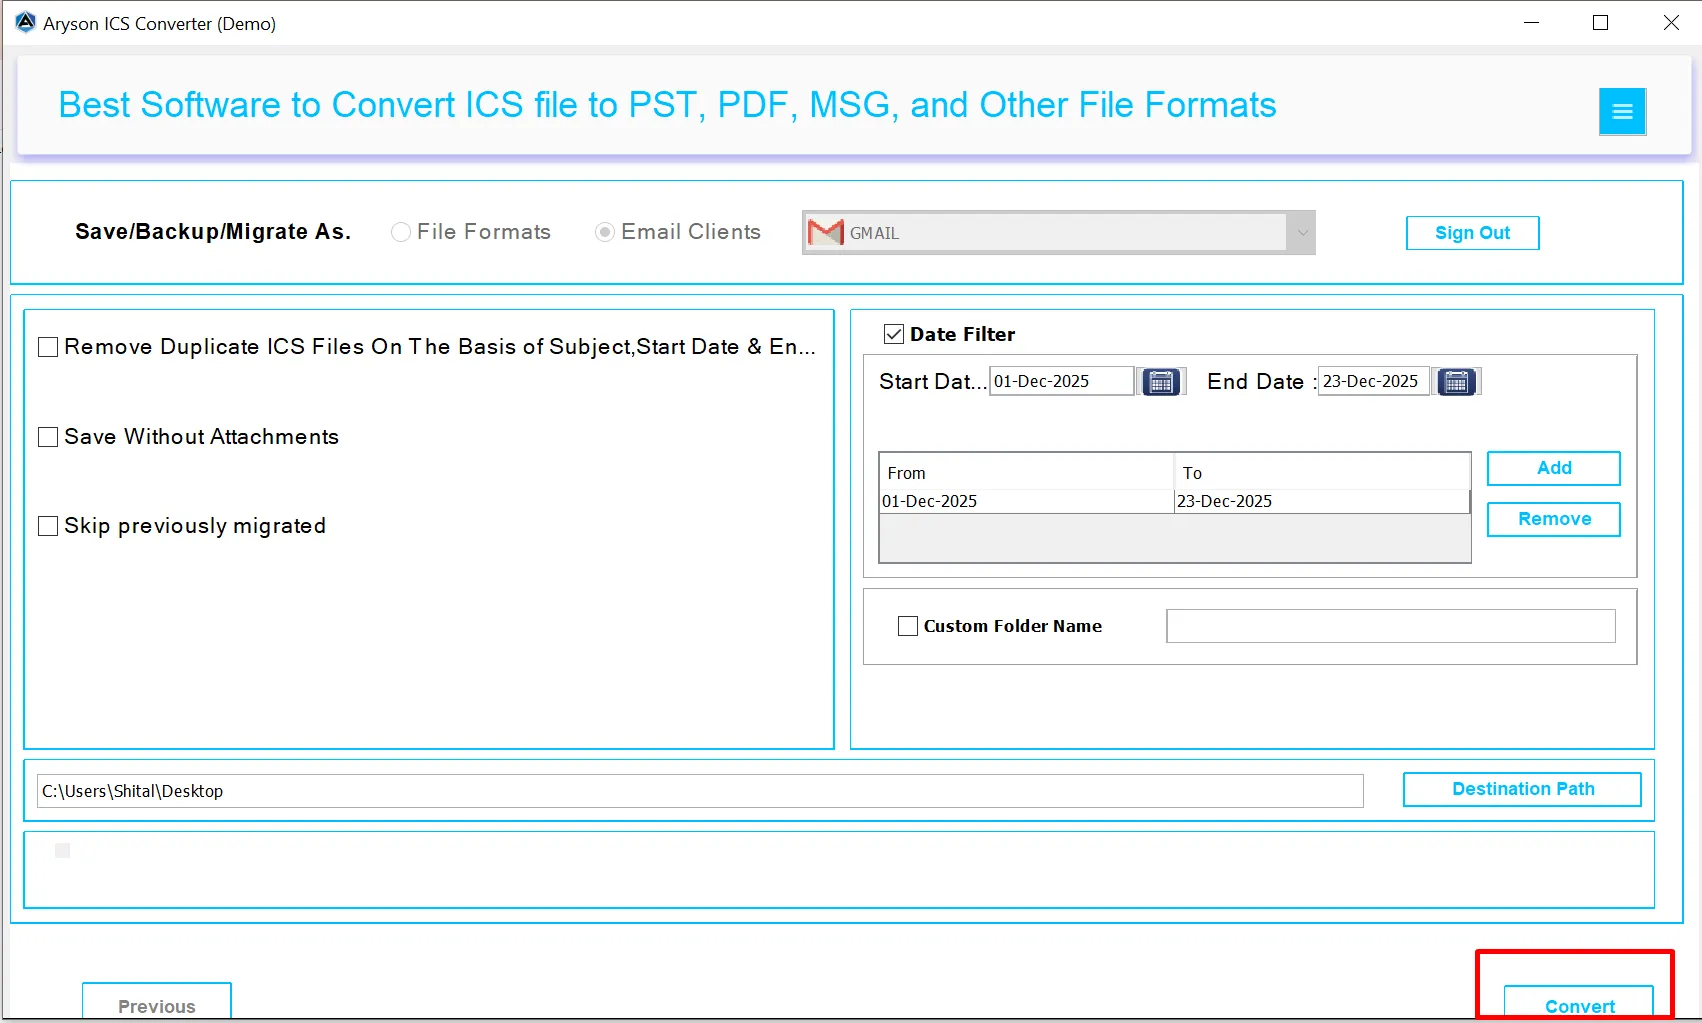
Step 7: From Save/Backup/Migrate As>>Email Clients. Select Gmail from the list of available email clients.
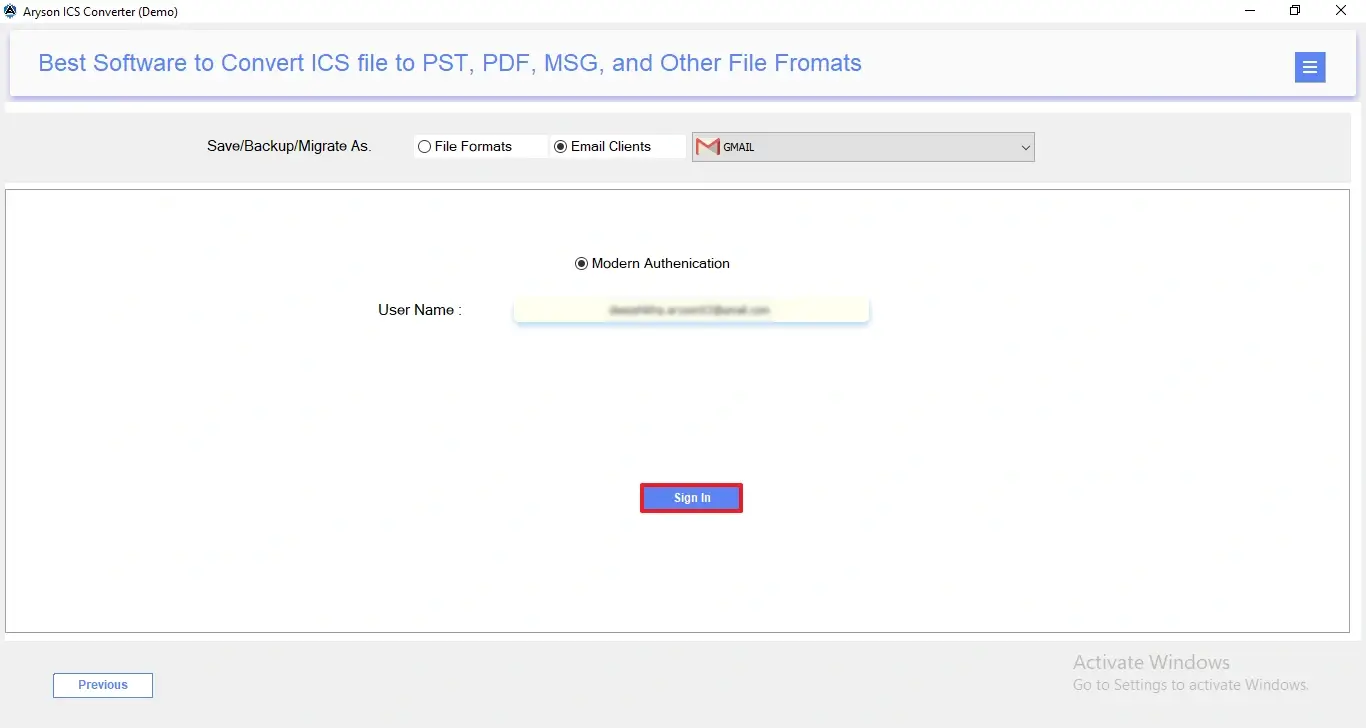
Step 8: Afterward, enter your Gmail email address and click Sign In to authenticate the account securely.
Step 9: It will navigate to the browser and you will get the option to choose an account accordingly.
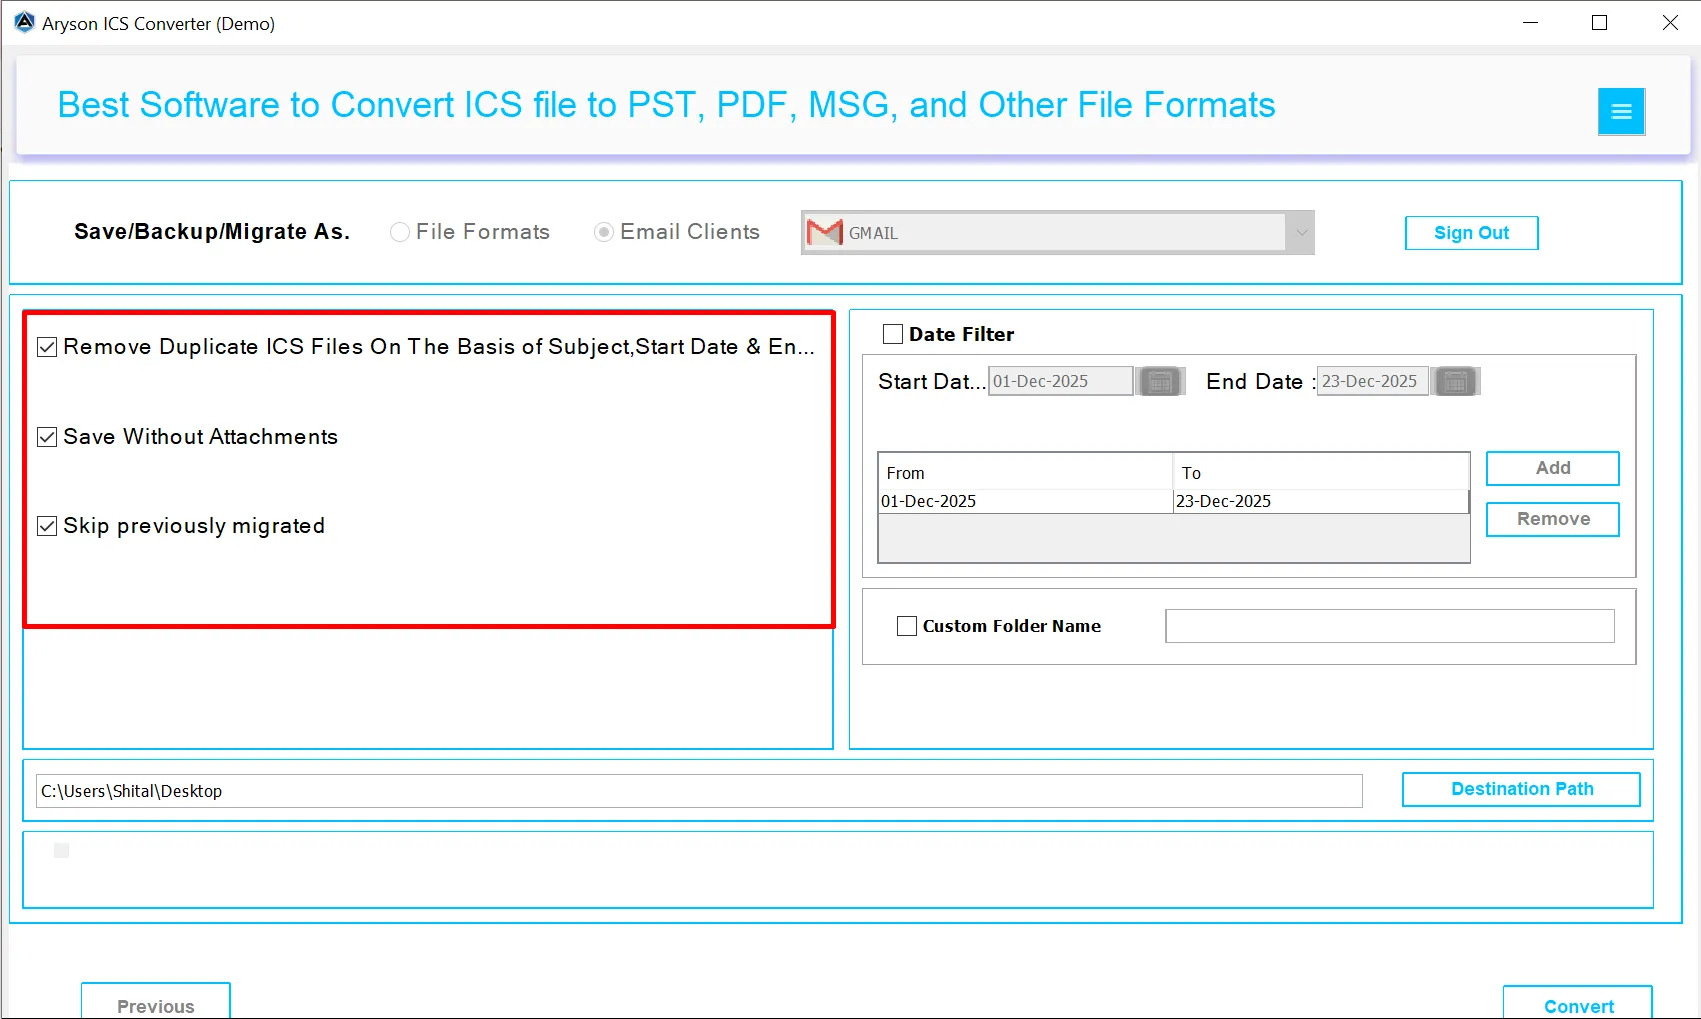
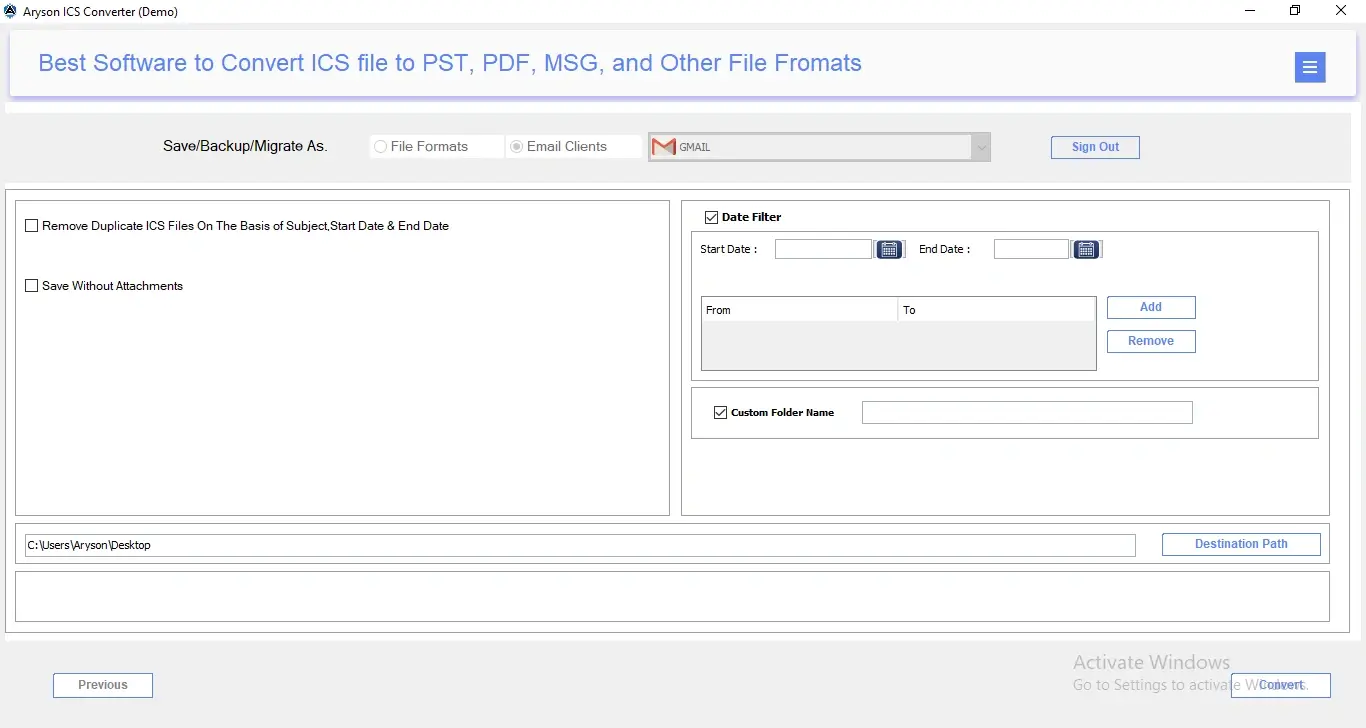
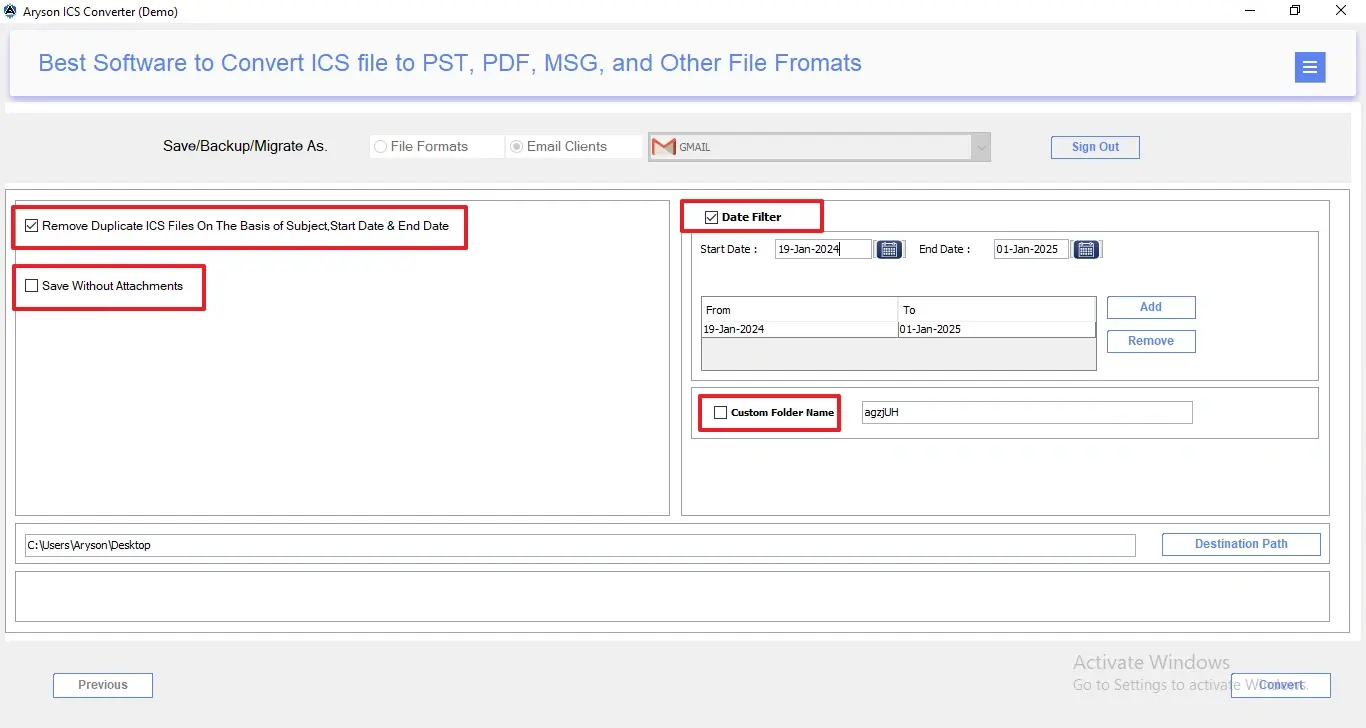
Step 10: If needed, users can enable the given filters, such as:
- Remove Duplicate ICS Files: Removes repeated events based on subject, start date, and end date.
- Save Without Attachments: To convert only calendar details. It excludes all attachments from the output.
- Skip Previously Migrated Items: Enable this filter if you do not want to re-migrate events that were already converted earlier.
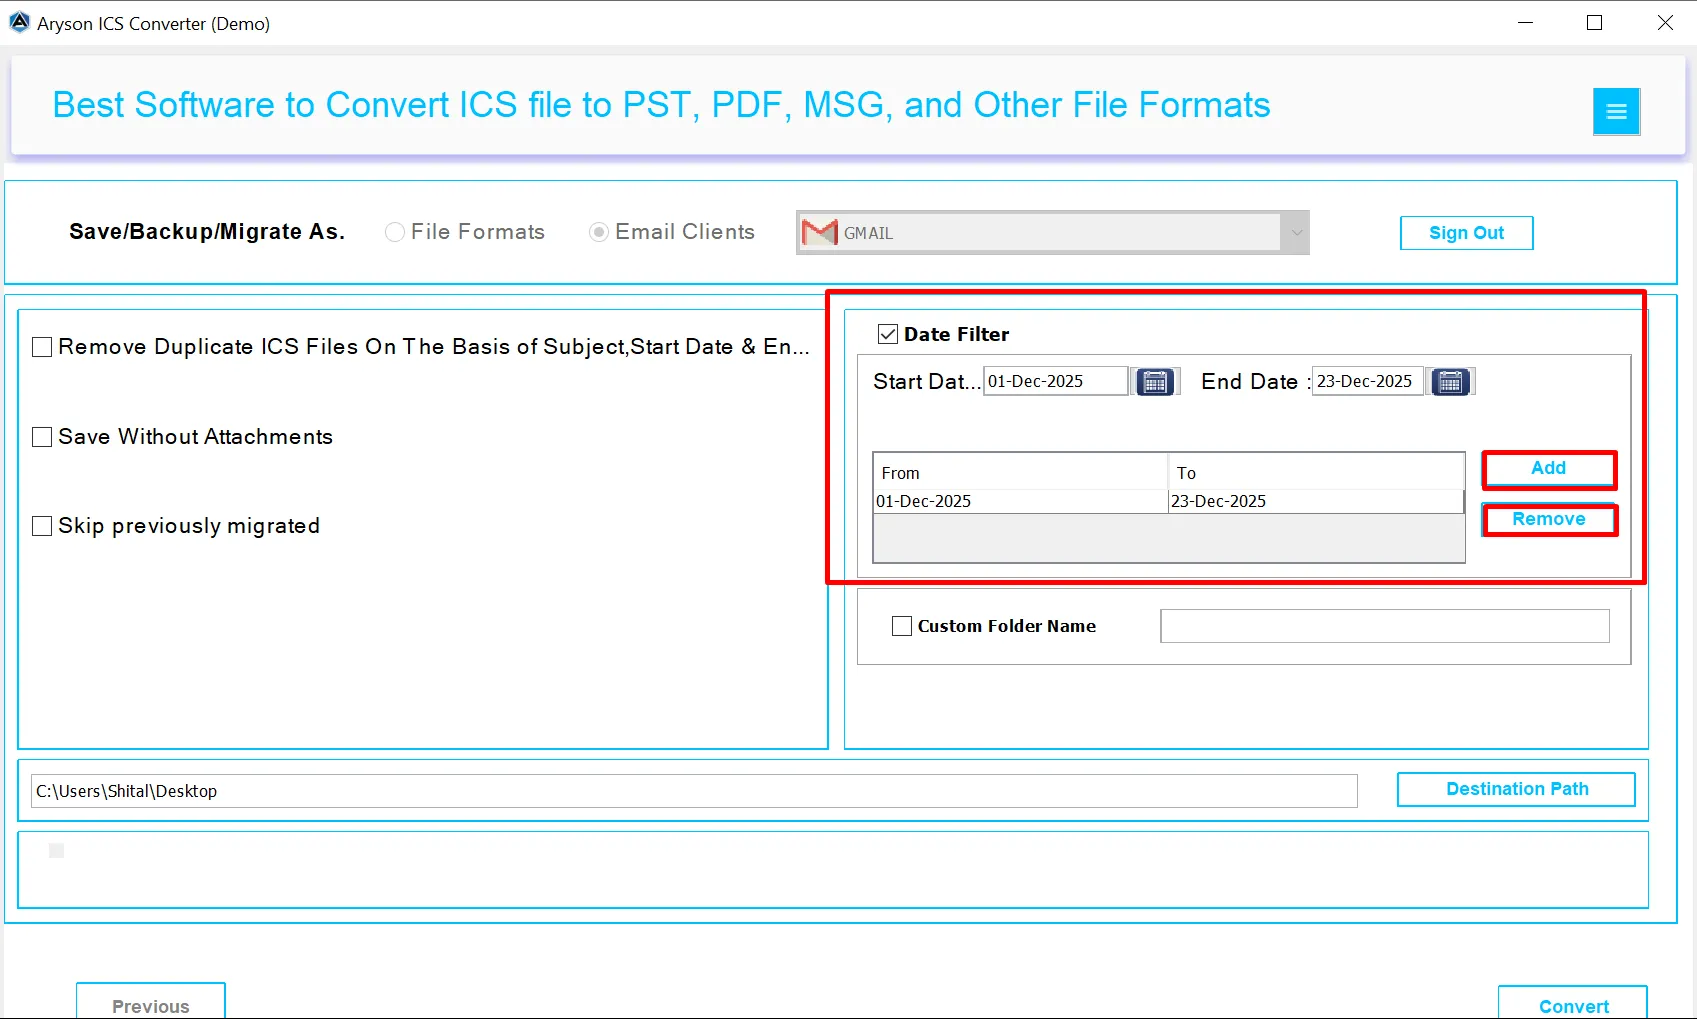
Step 11: According to the requitement you can enable any of the given options:
- Date Filter Option – To convert ICS files within a specific start and end date range.
- Multiple Date Range Selection – Add or remove multiple date filters as needed.
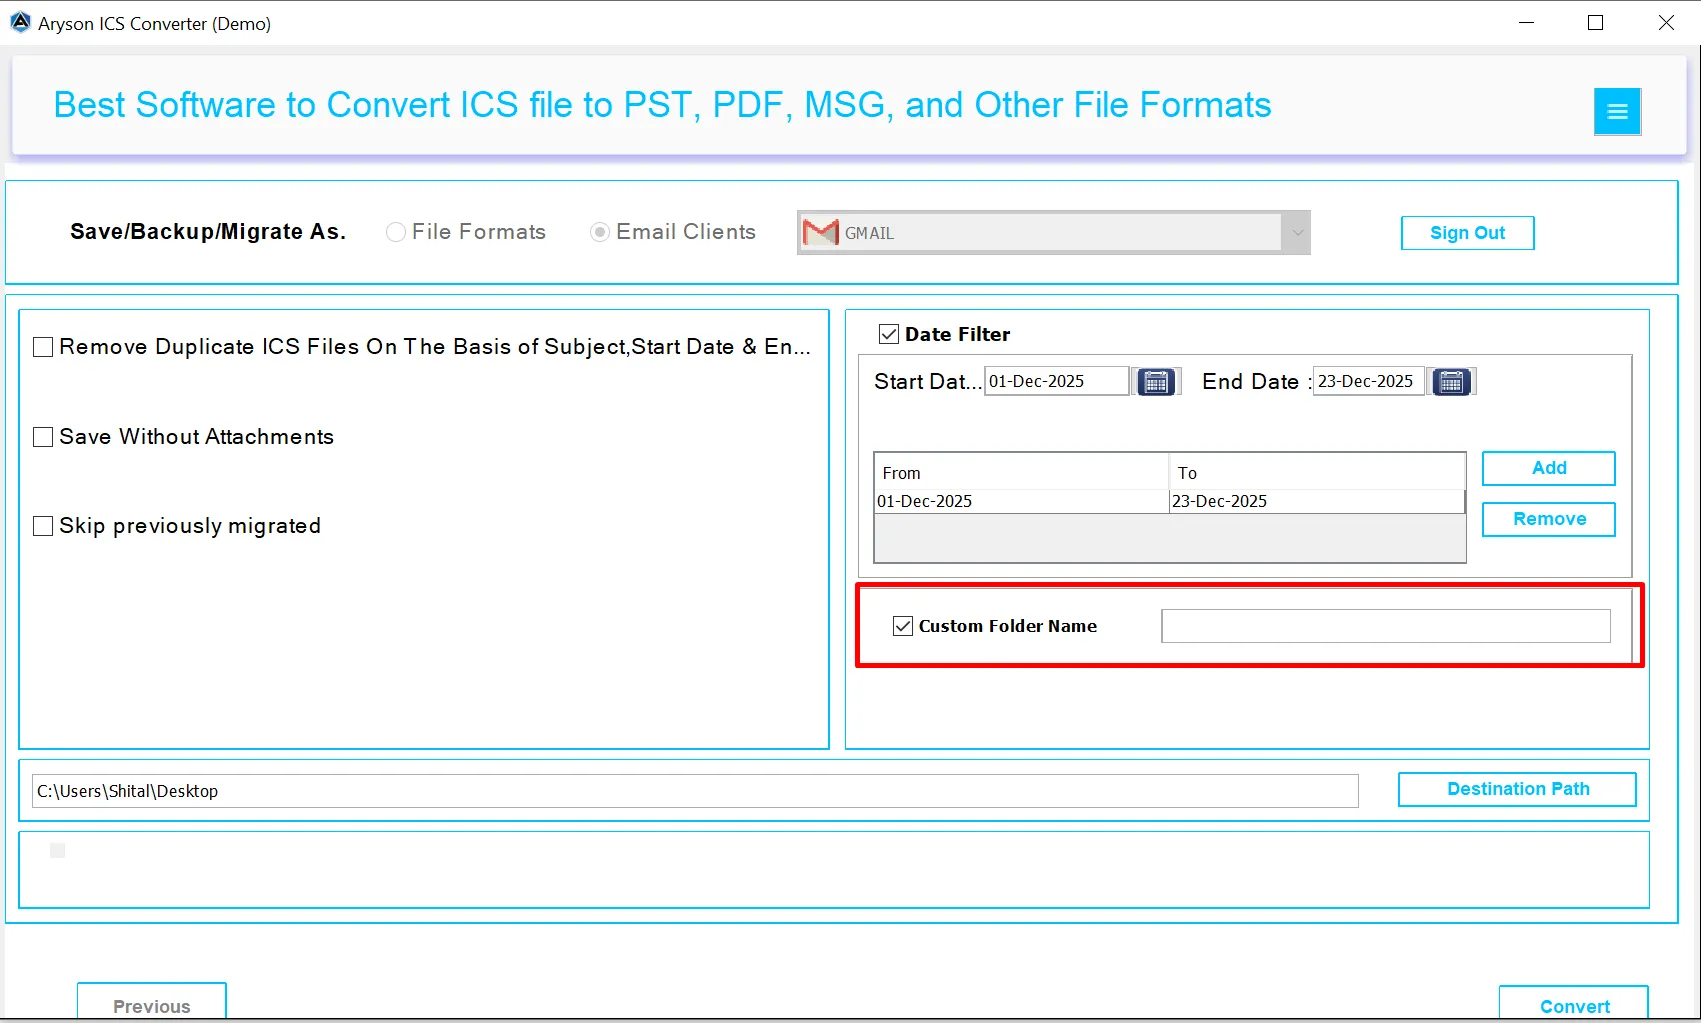
Step 12: Proceed with the Custom Folder Name Option to define a custom folder name for the output data.
Step 13: Finally, click the Convert button to start importing ICS calendar events into Gmail.
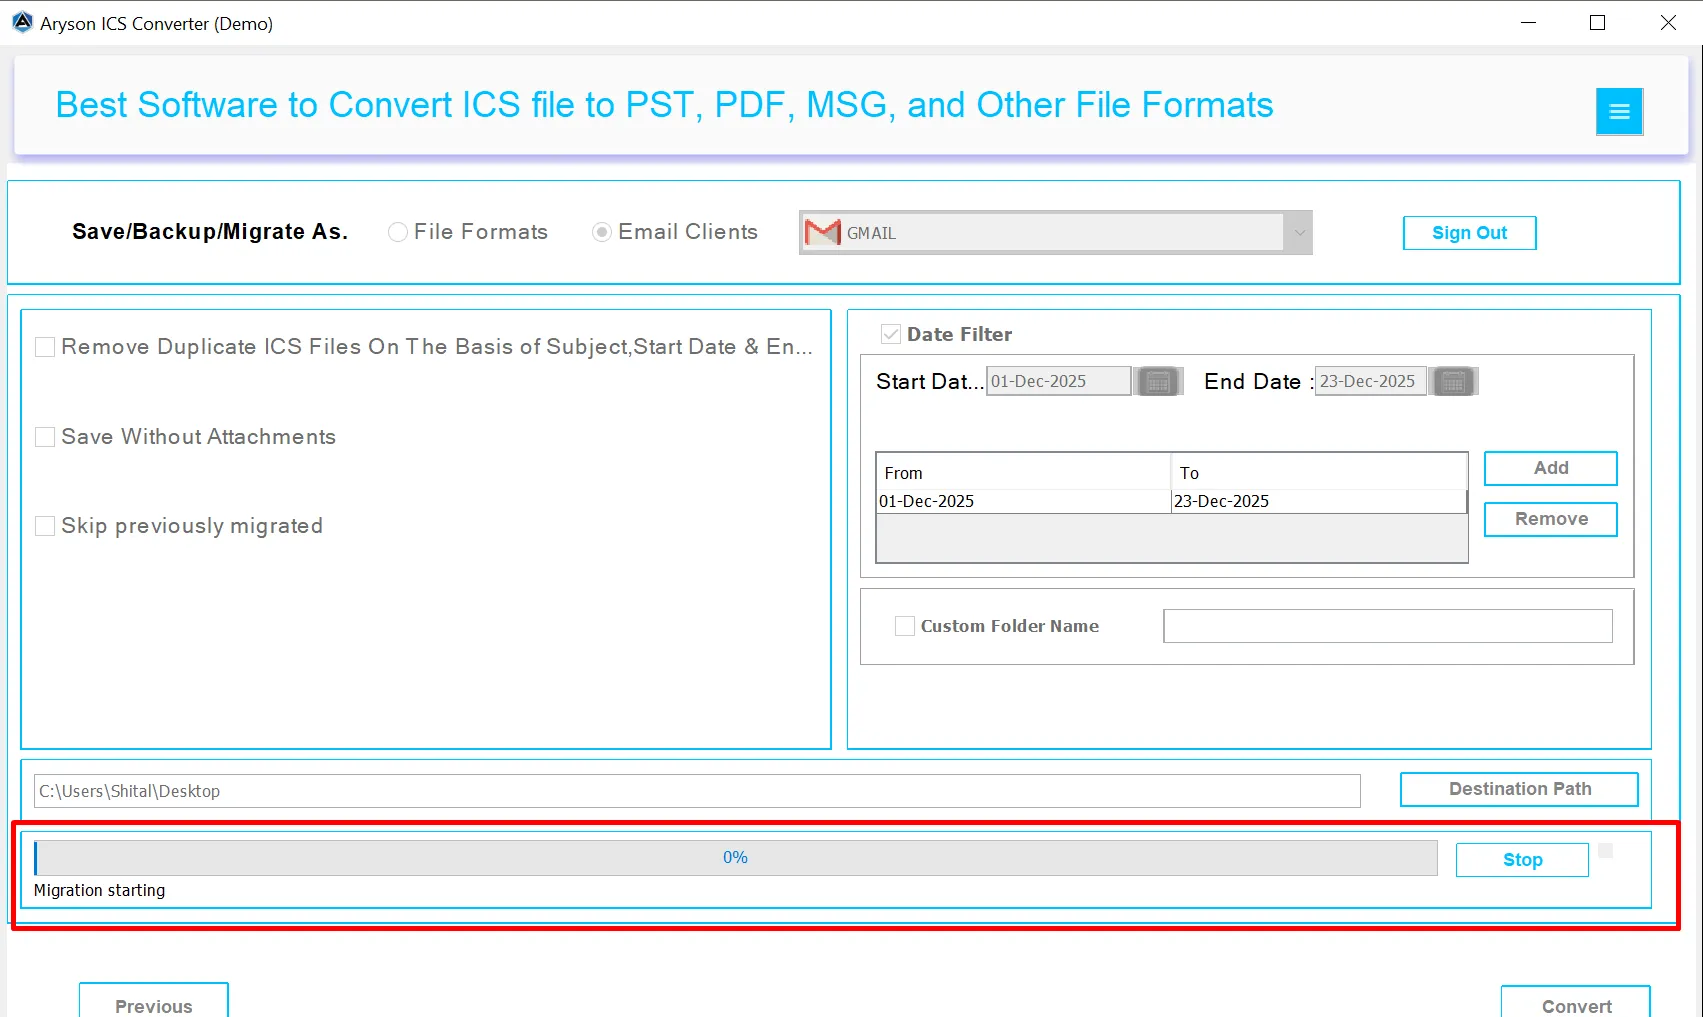
Step 14: The Real-Time Process Panel shows live conversion progress to track the current status, processed items, and overall completion in real time.
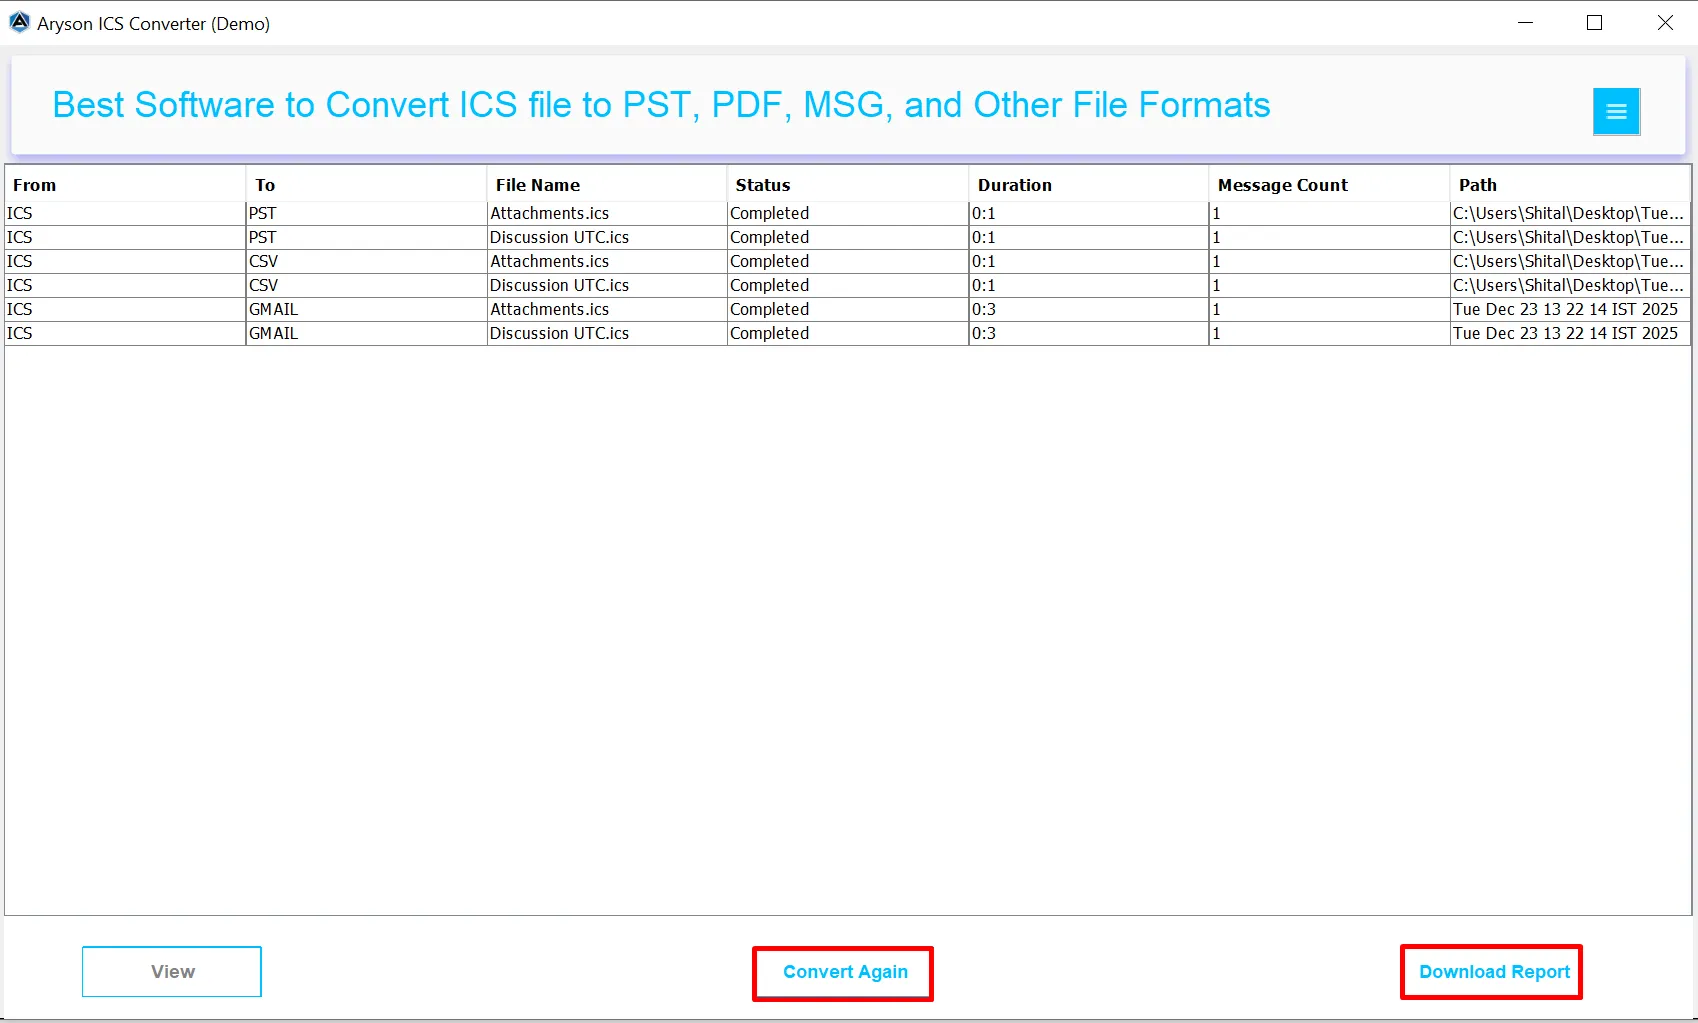
Step 15: After the conversion finishes, the software shows a summary panel with details like source and target format, file name, status, duration, message count, and destination path. You can click View to open and verify the converted file
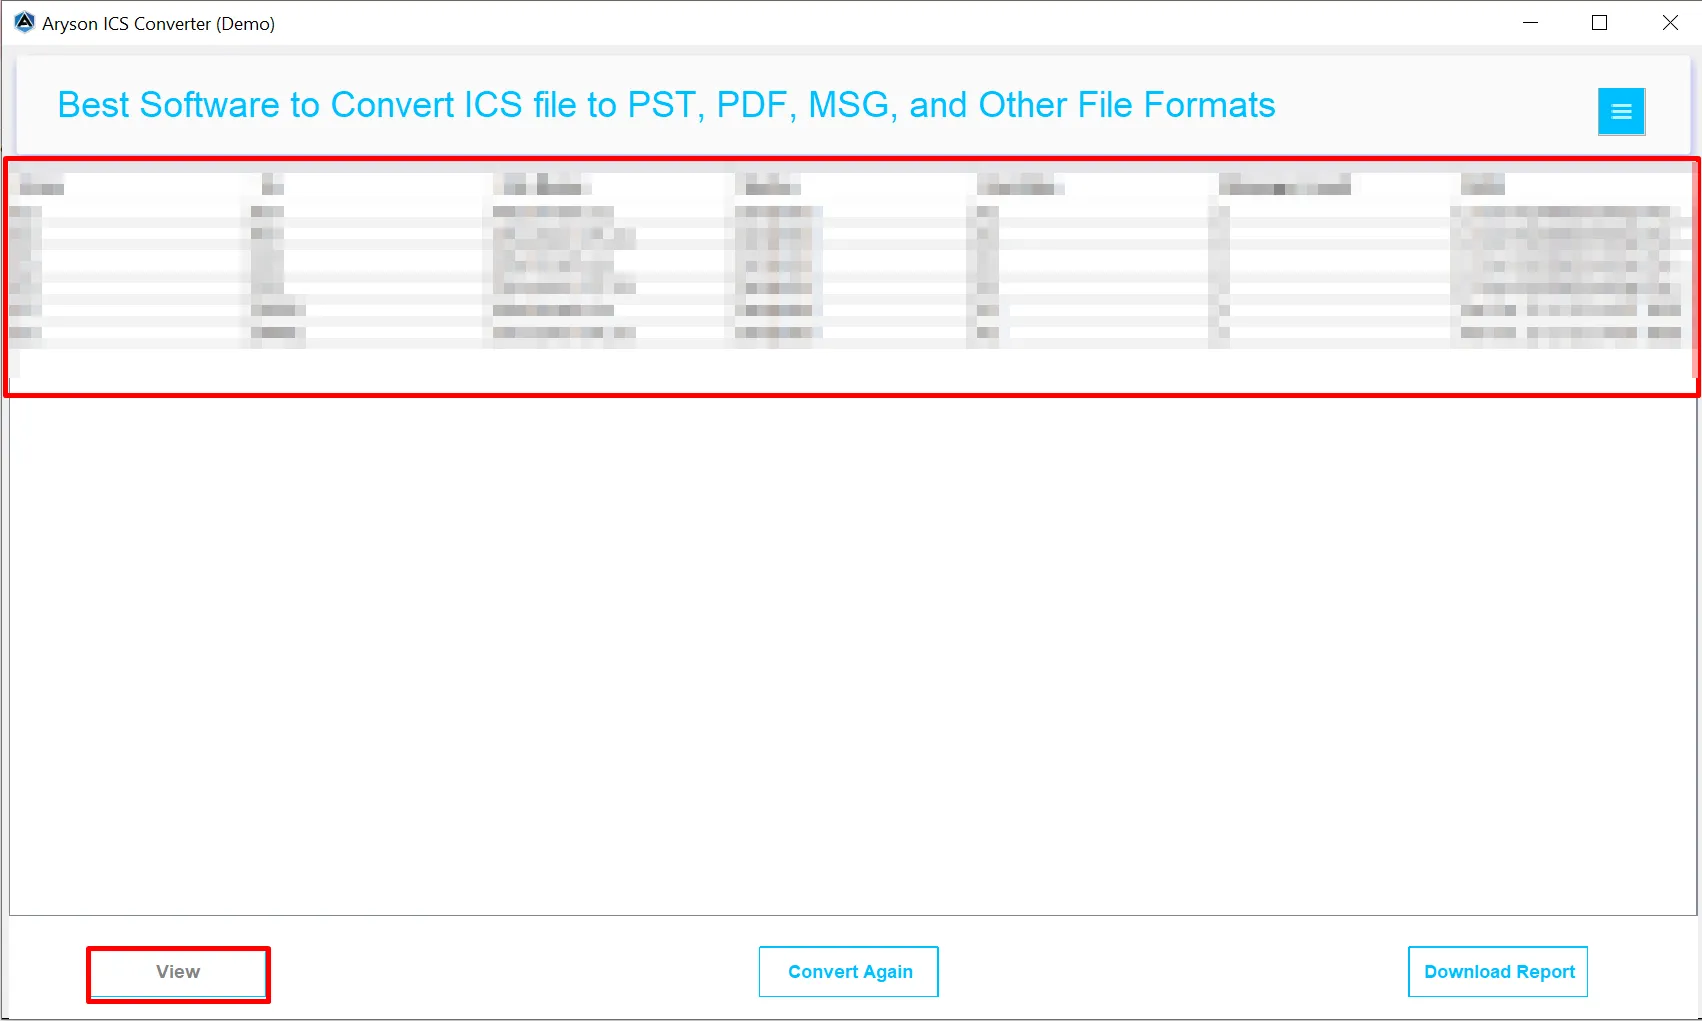
Step 16: Also, you can utilize the Post-Conversion Options:
- Convert Again – Enable this to start a new conversion without closing the software.
- Download Report – Enable this to save a detailed conversion report for records and documentation.
Activation Guide
Activate the Software
Installation & Uninstallation
Installation & Uninstallation of Software
User Interface
User Interface
After downloading the Aryson OST to PST Converter Tool, you will find the welcome screen as played below.