Software Guide - Aryson GoDaddy Email Backup Tool
-
Table of Content
- Software Working Process
- Activation Guide
- Installation & Uninstallation
- User Interface
Software Working Process
Software Working Process
Step 1: Download and Run the GoDaddy Mail Backup Tool as Administrator.
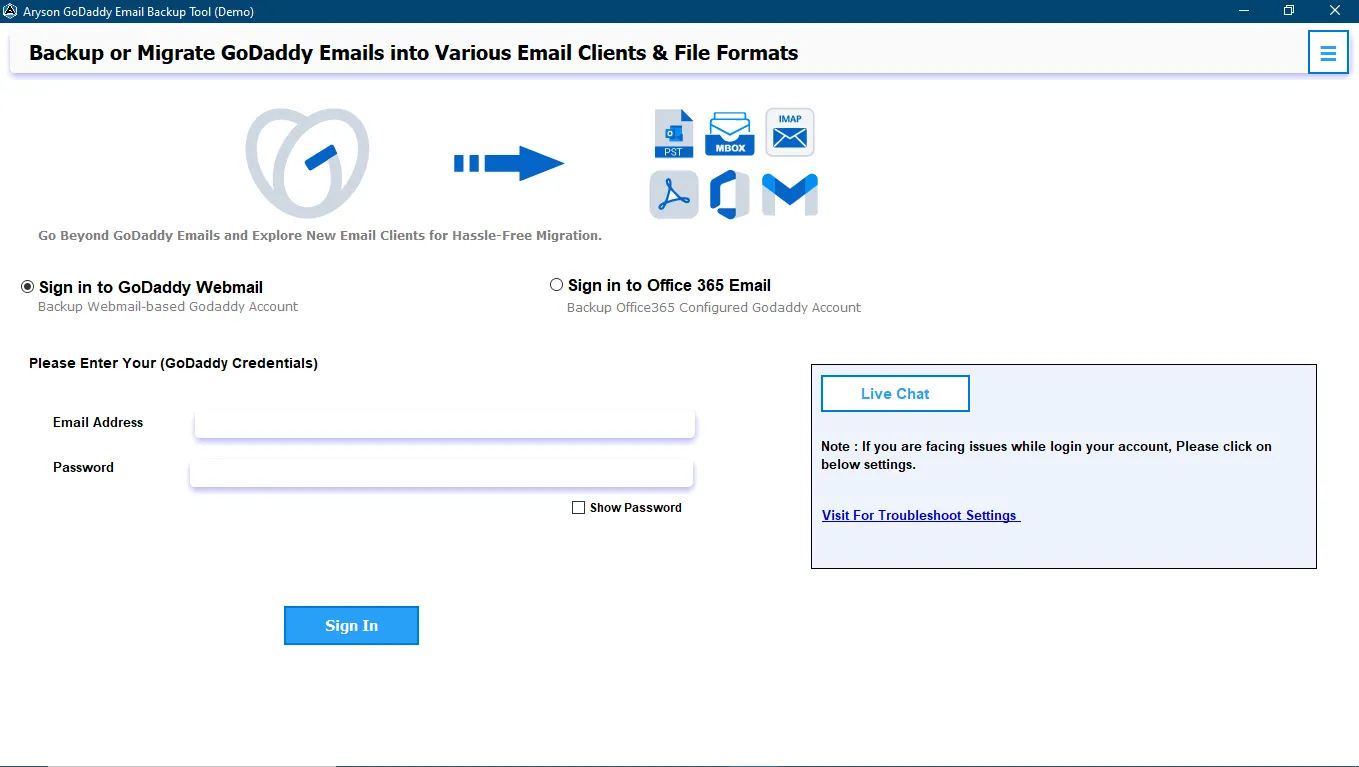
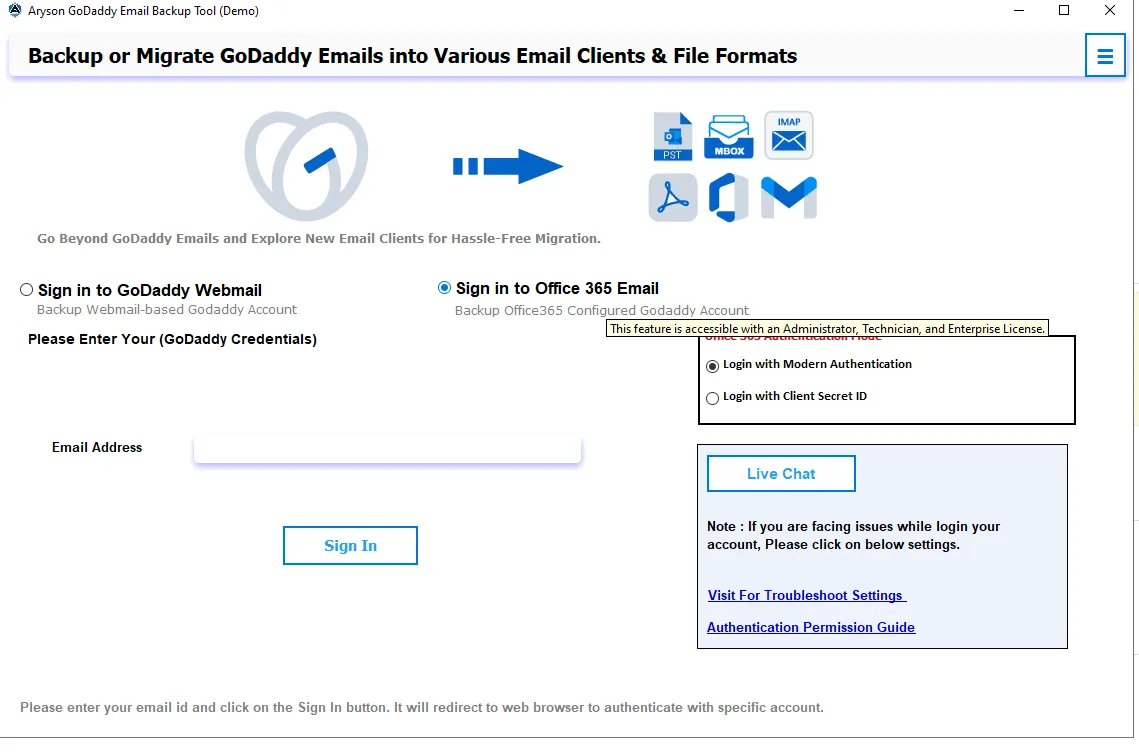
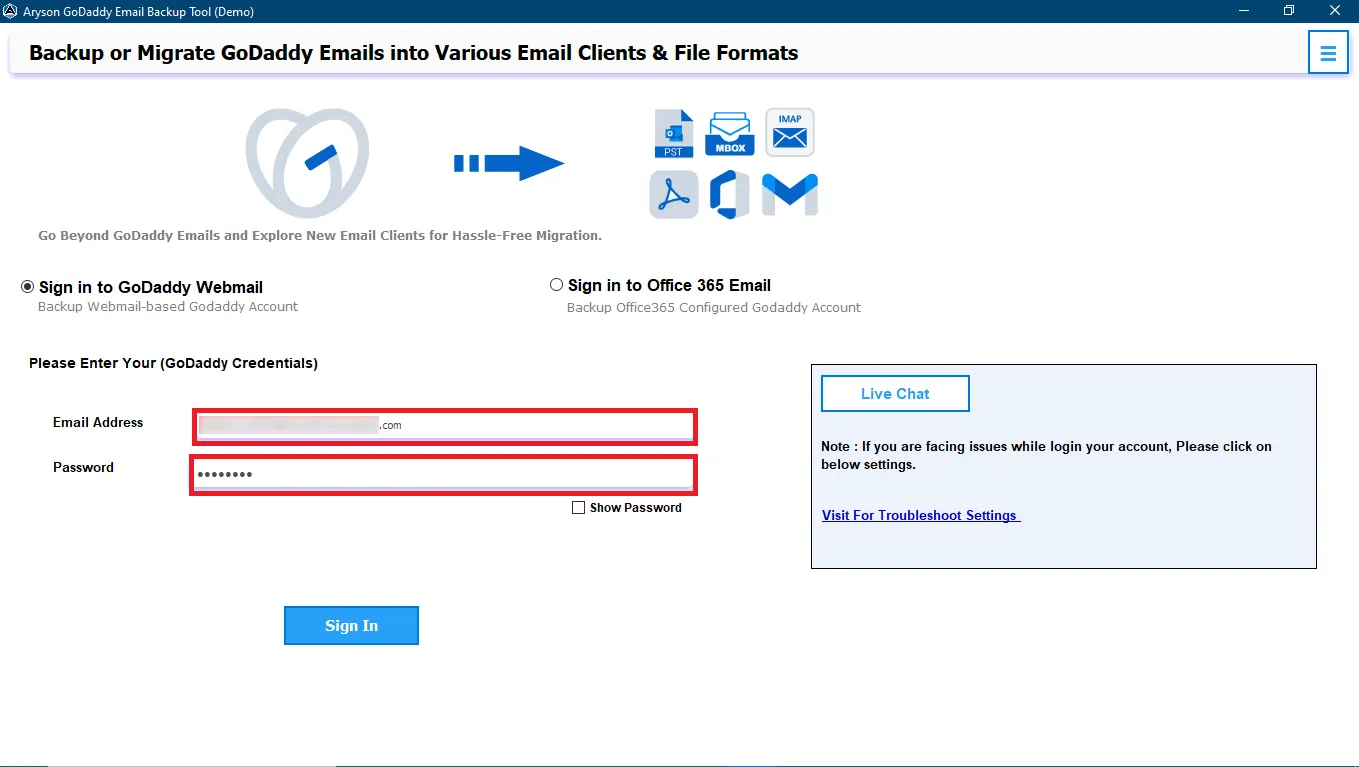
Step 2:Choose Sign In With GoDaddy Webmail or Sign In With Office 365 Email.
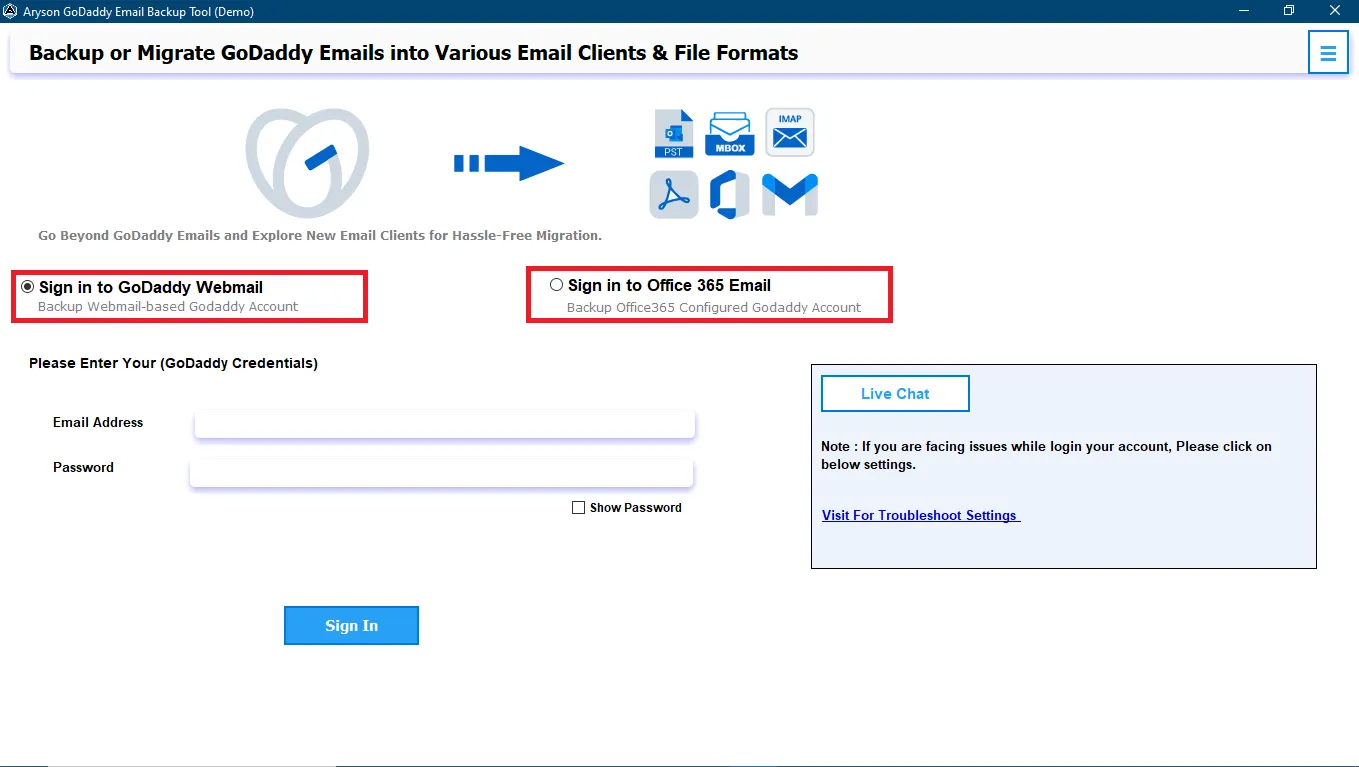
Step 3:Enter your GoDaddy username and password and click on the Sign In button.
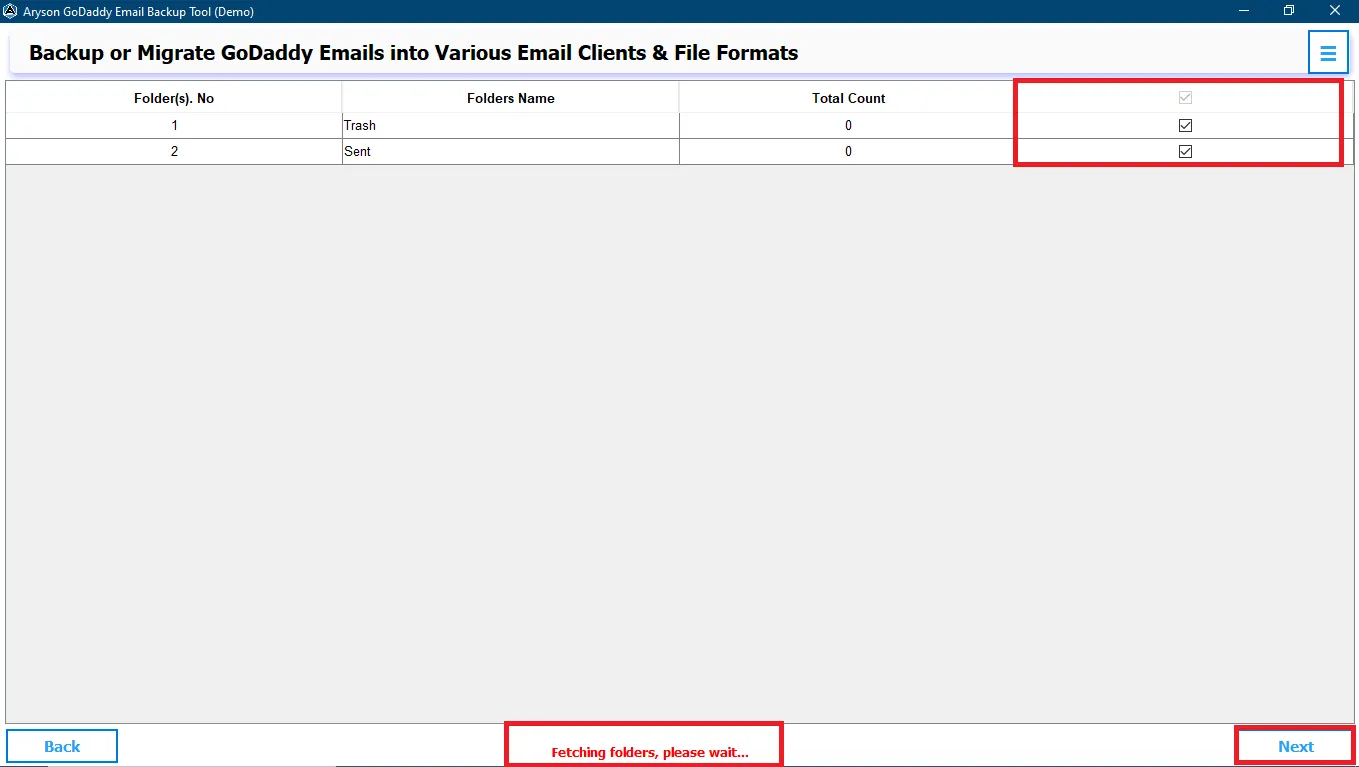
Step 4:Here the software will load all your GoDaddy data. After loading, check the folders you require and click Next.
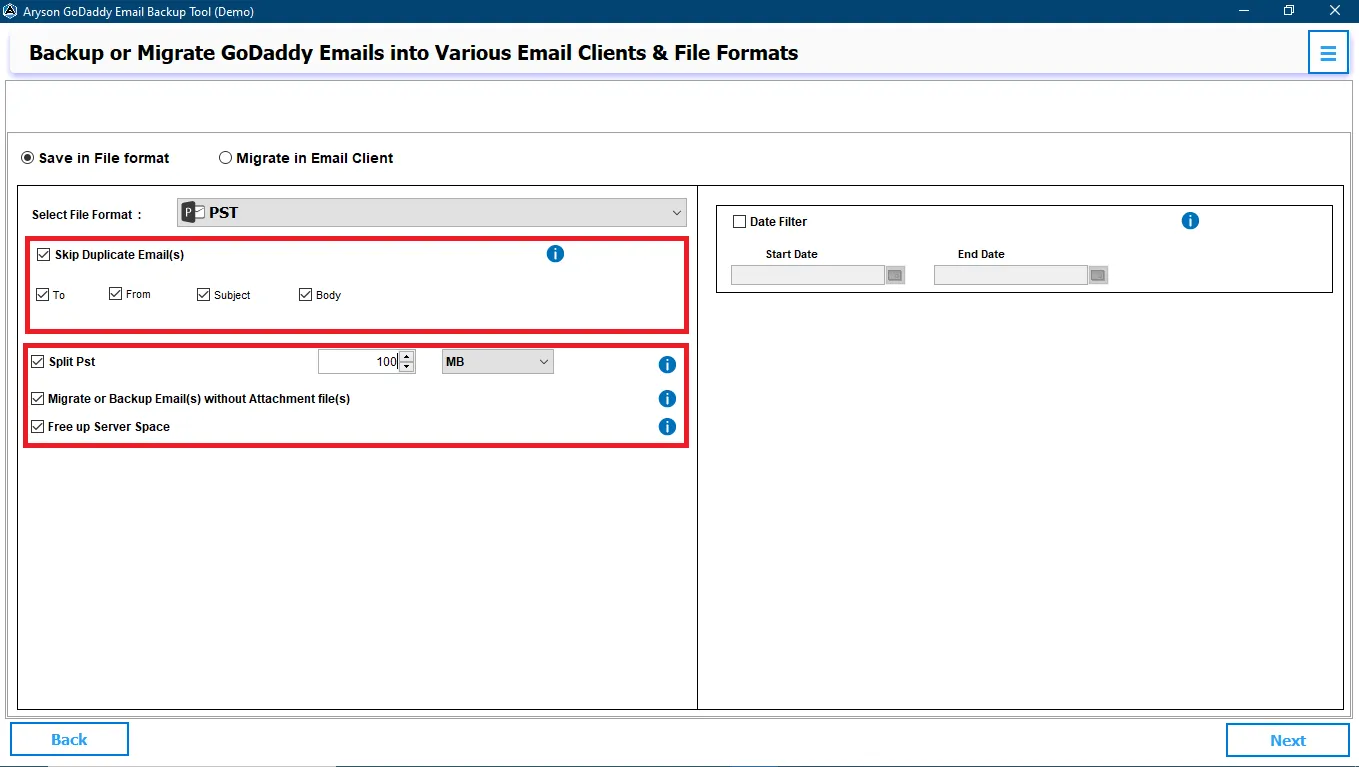
Step 5:Select the PST as your saving format from the drop-down menu.

Step 6:Choose the features you require:
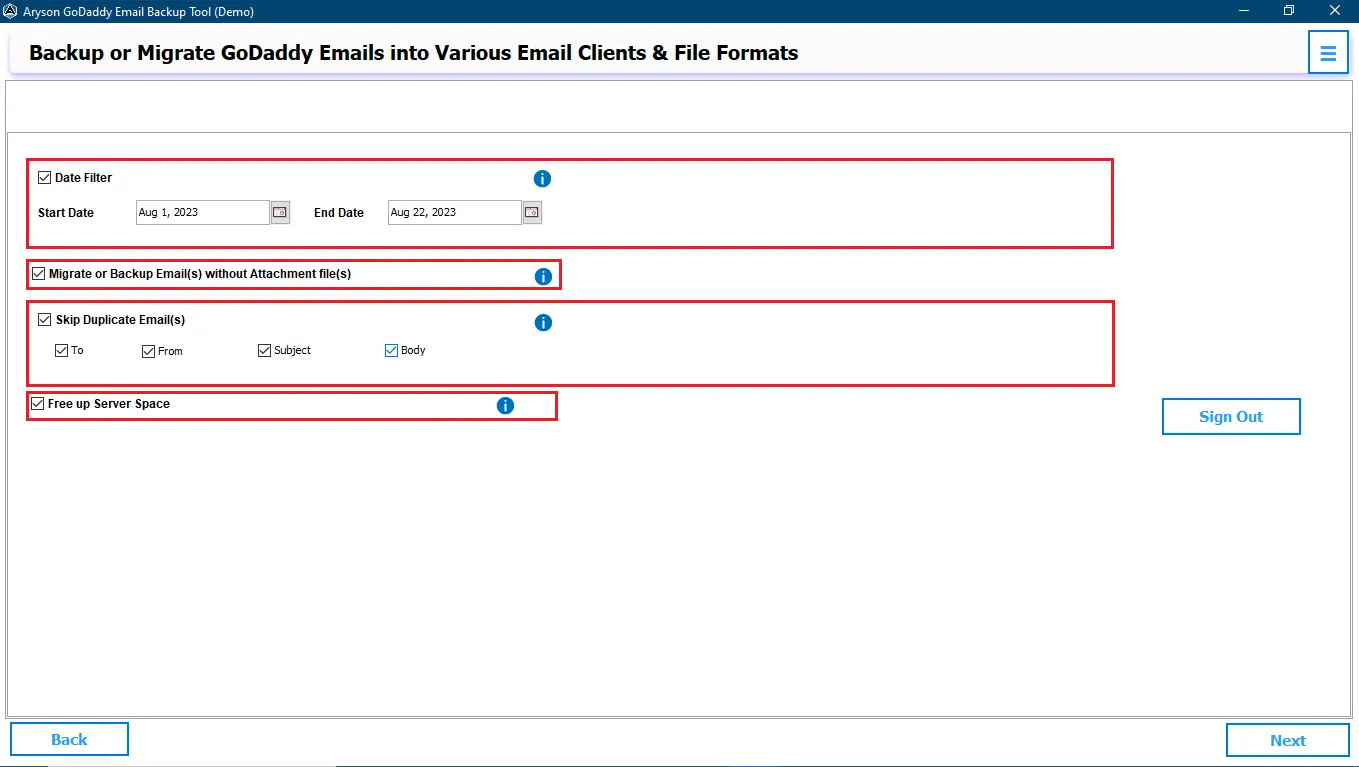
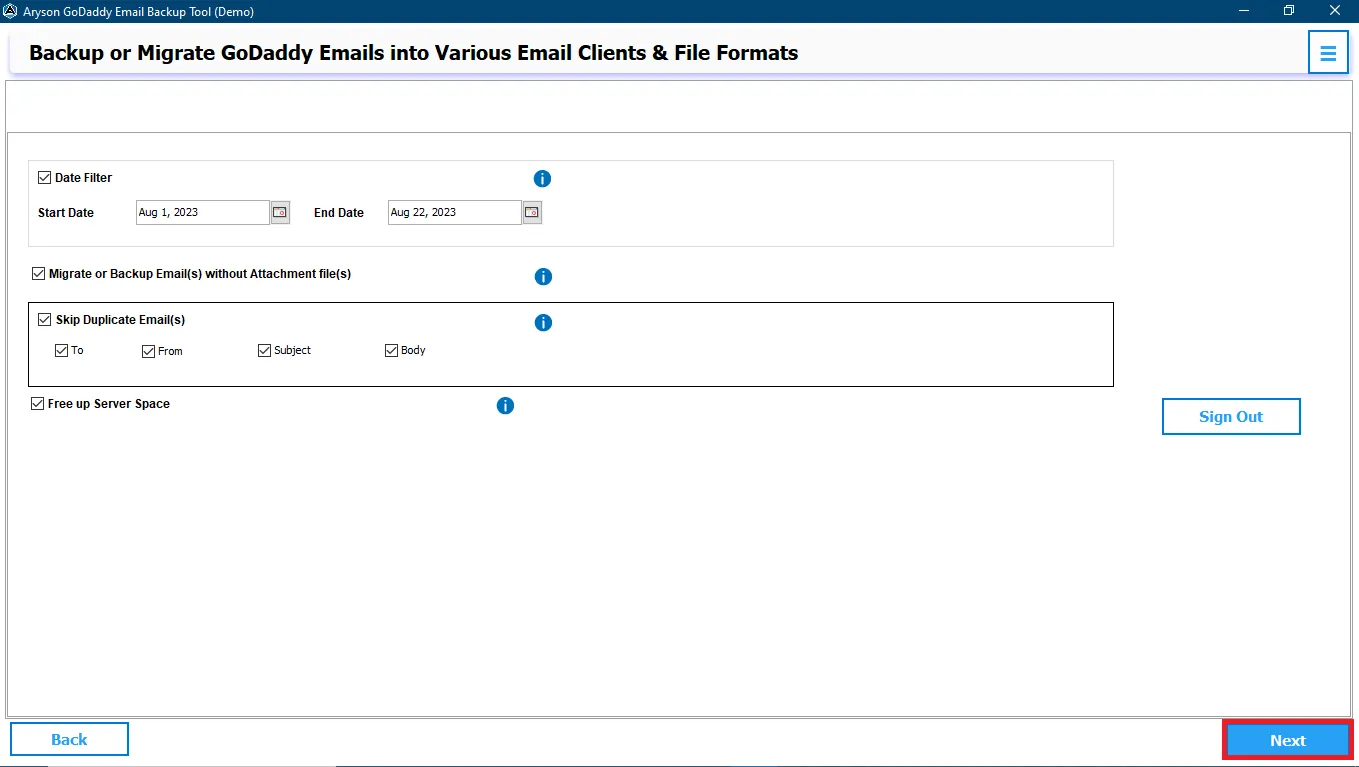
- Skip Duplicate Emails: To remove the duplicate GoDaddy emails from the backup process.
- Split PST: If your PST file is very large then choose this option to split them into smaller PST files.
- Migrate or Backup Without Attachments Files: To back up the emails only.
- Free Up Server Space: Delete the emails from the server after backup.
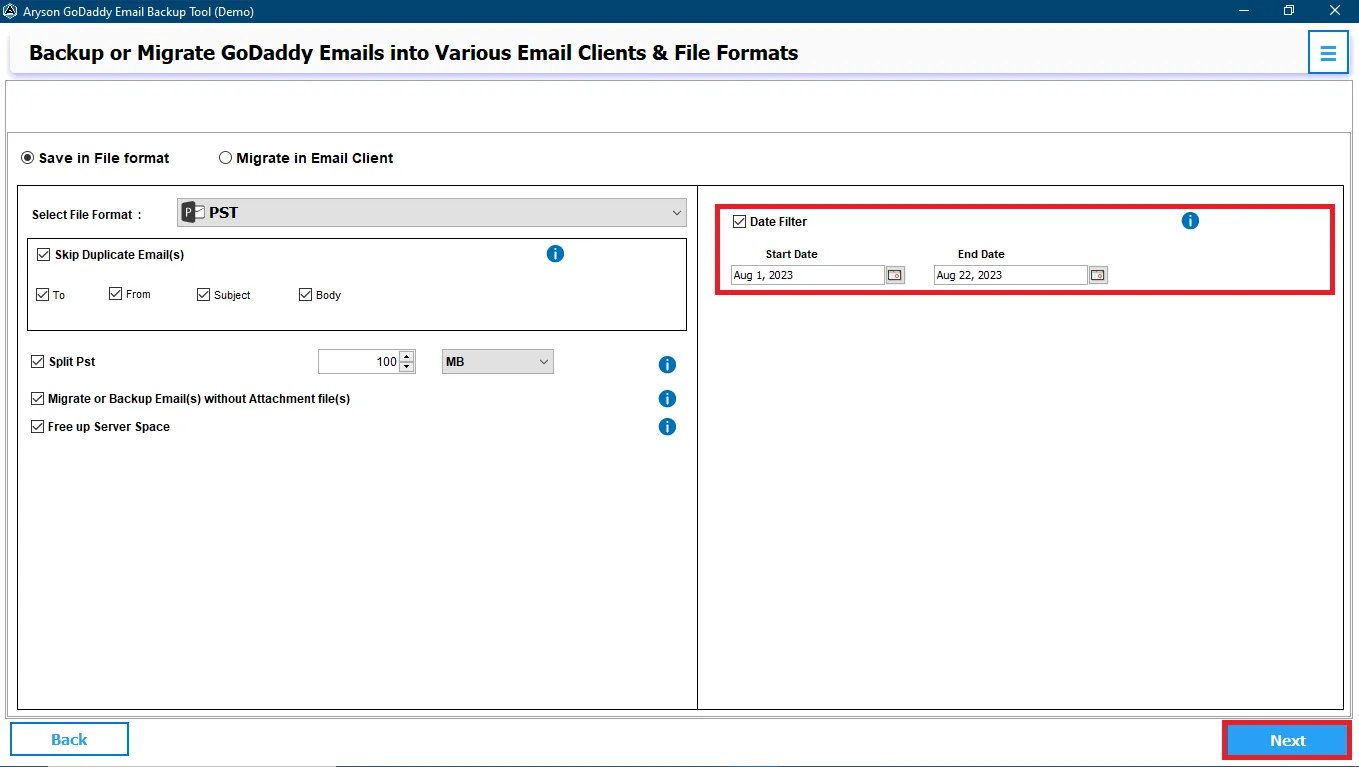
Step 7:Select the Date Filter option to back up only specific emails by date range and click the Next button.
Step 8:Go to the Save Path button to define the saving location for the resultant file.
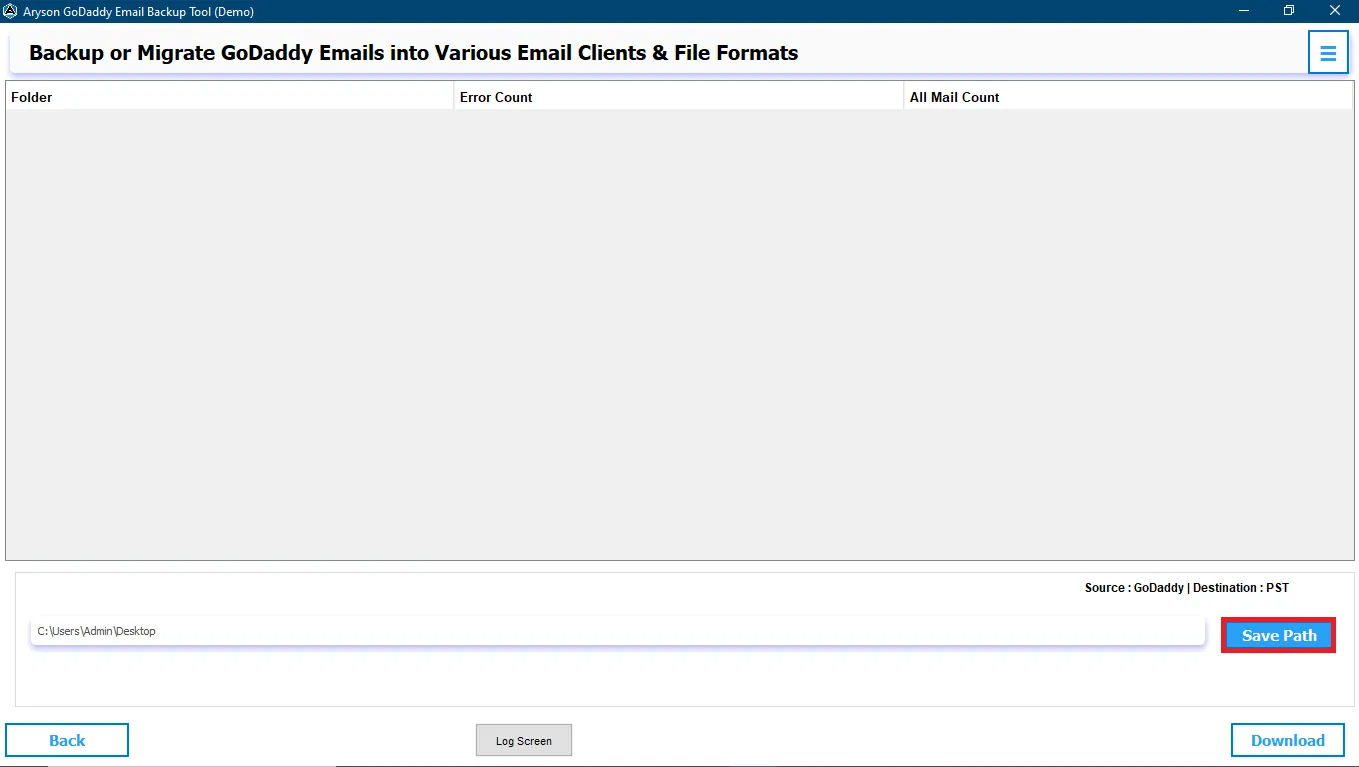
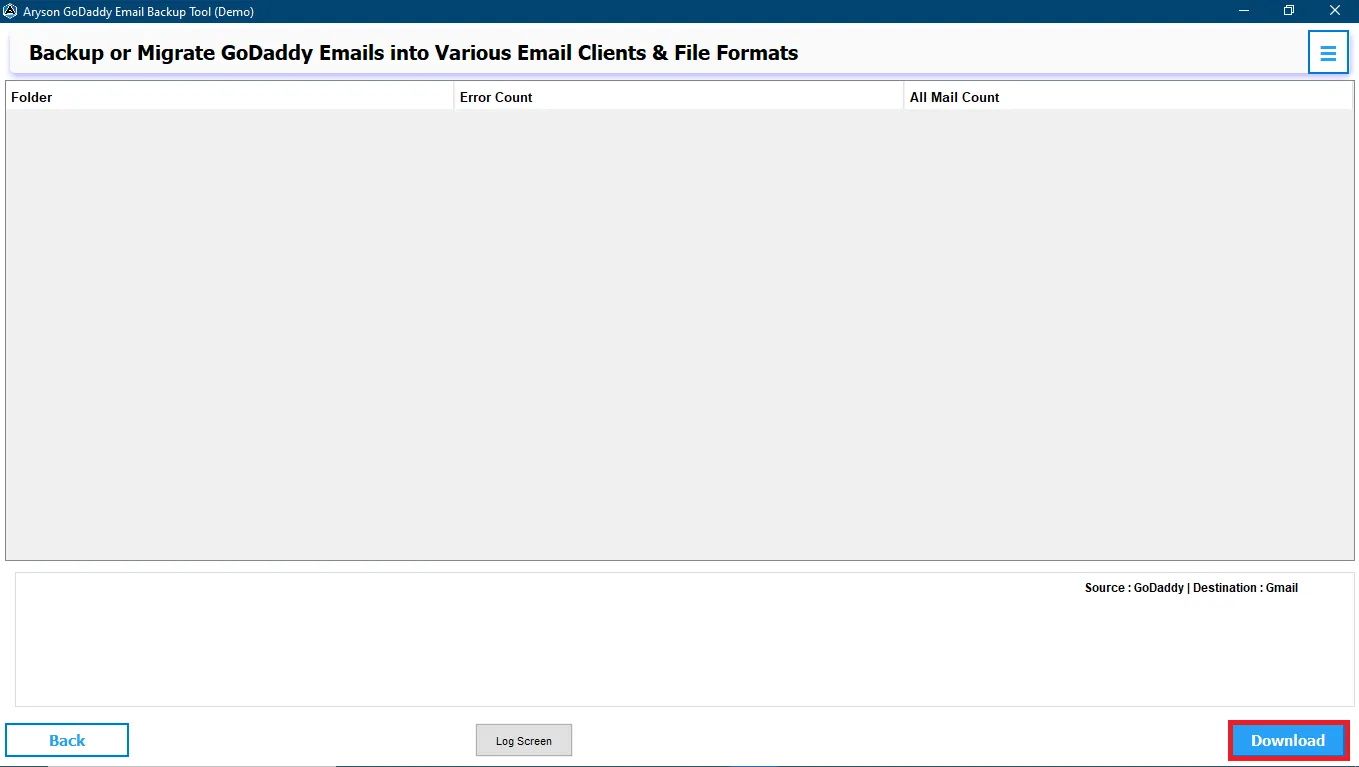
Step 9:Click on the Download button to initiate the Backup process of GoDaddy emails into PST.

Step 10:Wait for the process to be completed and then click the OK button to end the process.

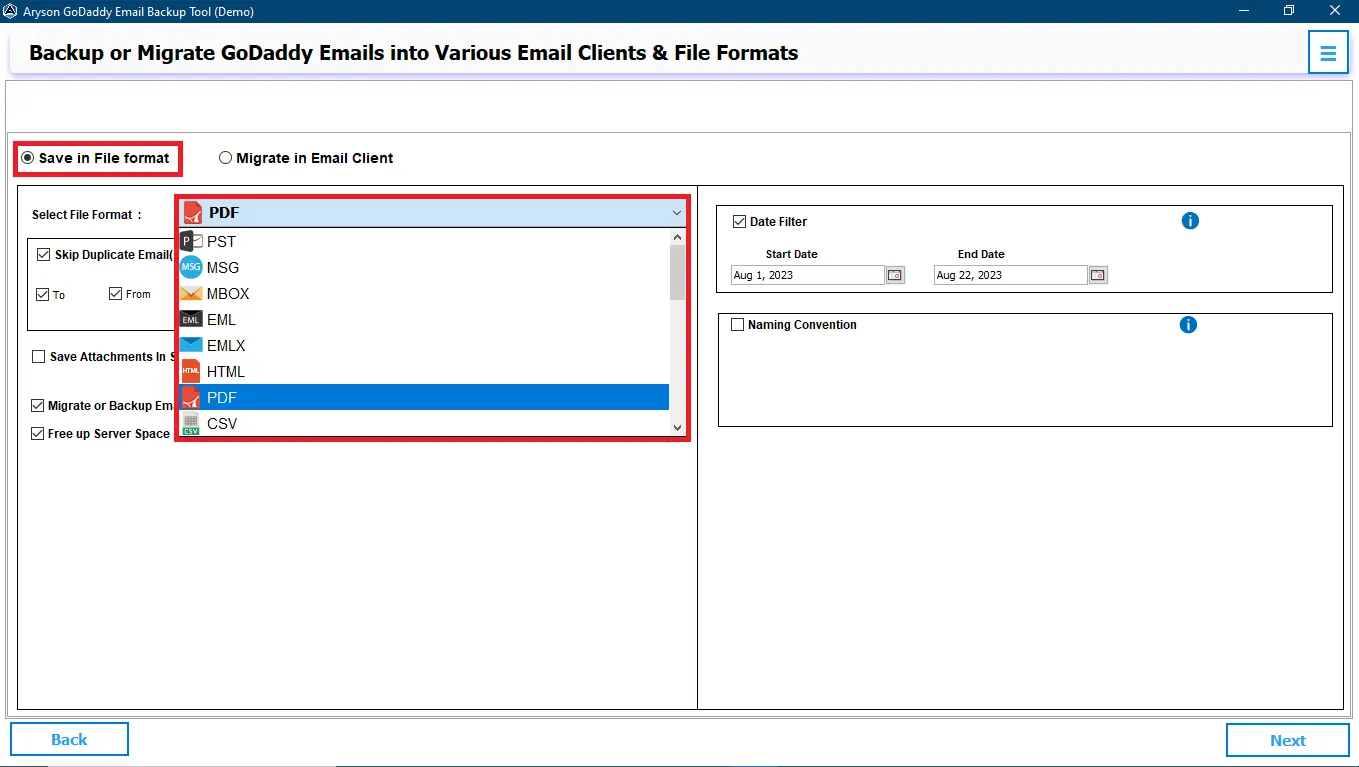
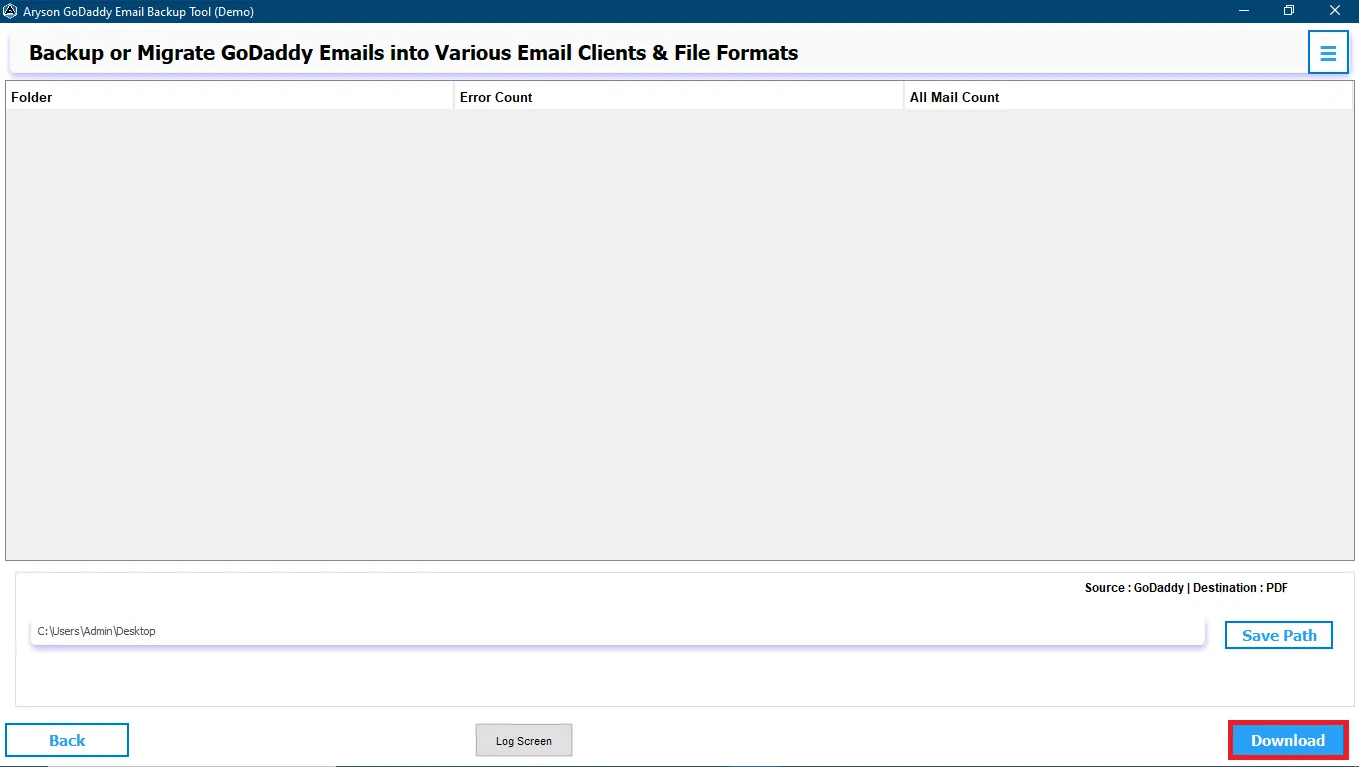
Step 5:Select PDF as your saving format from the drop-down menu.
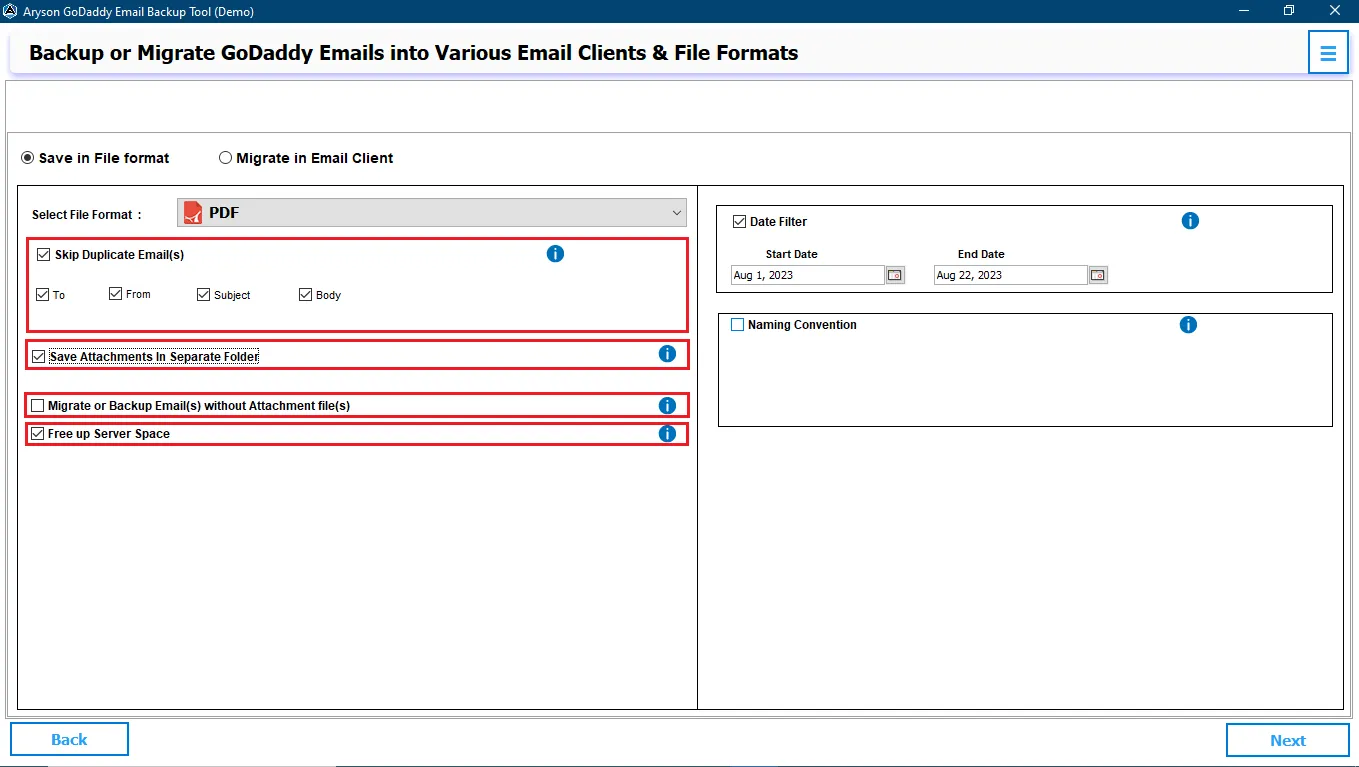
Step 6: Choose the additional feature you require:
- Remove Duplicate Emails: To remove the duplicate GoDaddy emails from the backup process.
- Maintain Folder Hierarchy: To maintain the folder structure as the original.
- Save PDF attachments separately: It allows you to save the PDF file attachments separately.
- Free Up Server Space: Delete the emails from the server after backup.
Step 7:If you want to backup emails between a particular period, then check the option Date Filter and choose the dates. To save the backup files in a specific format, Opt for Naming Convention and select the formats after that click Next.
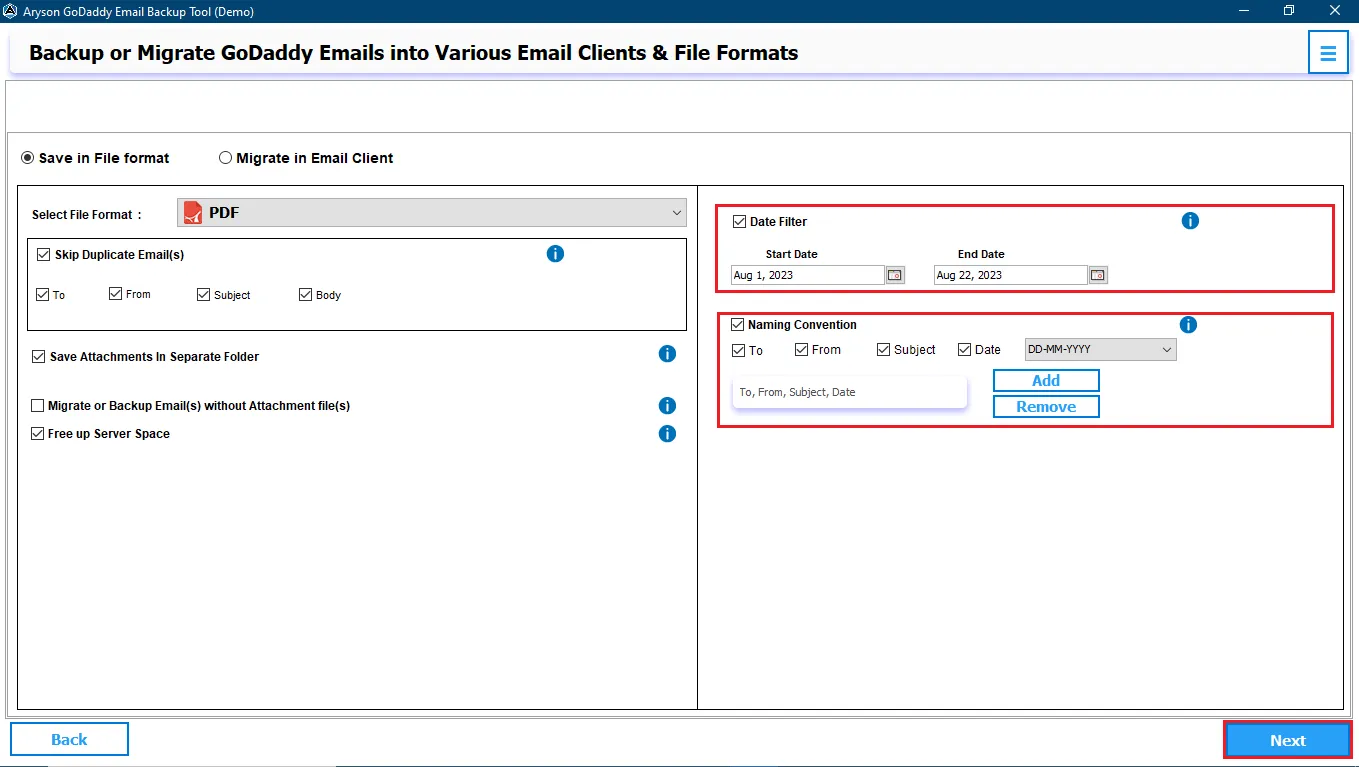
Step 8:Go to the Save Path button to define the saving location for the resultant file.
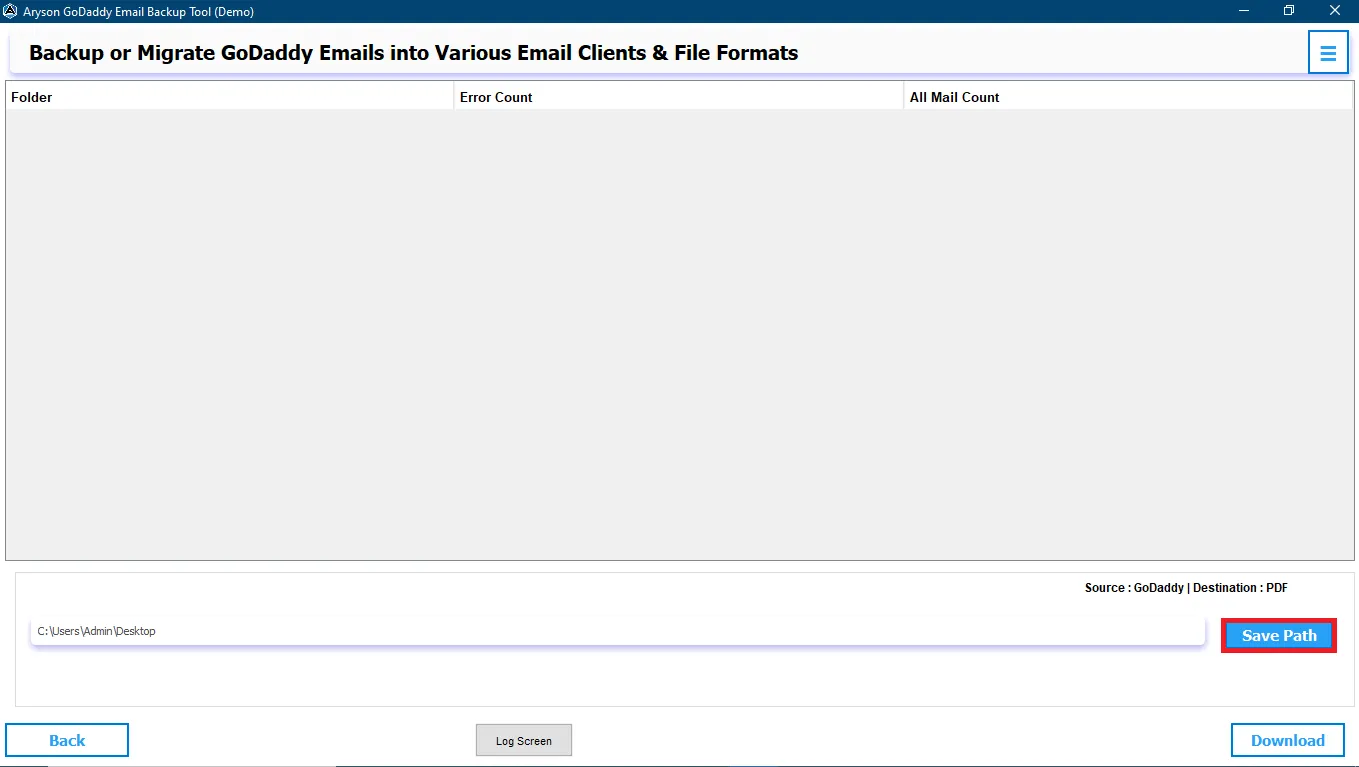
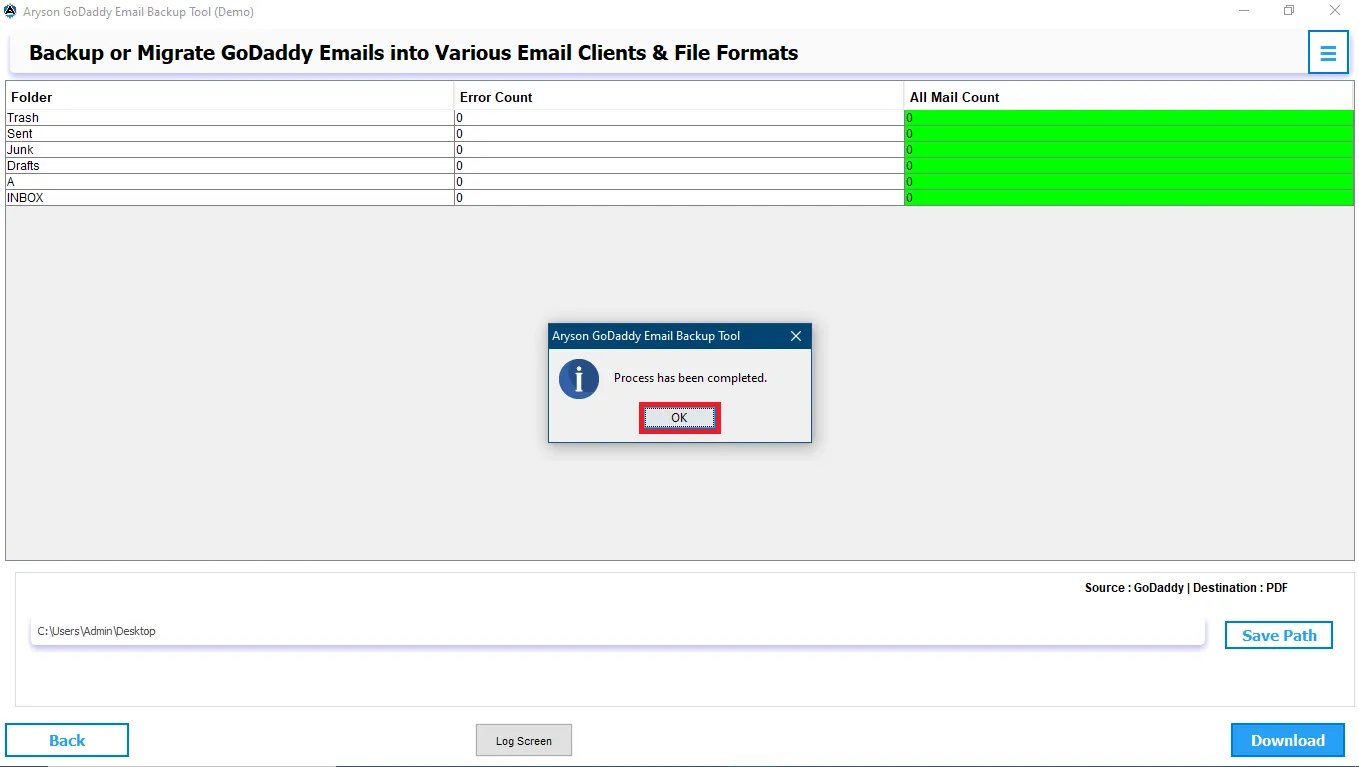
Step 9:Click on the Download button to initiate the Backup process of GoDaddy emails into PDF.
Step 10:Click OK, now you have successfully backed up the GoDaddy emails in PDF format.
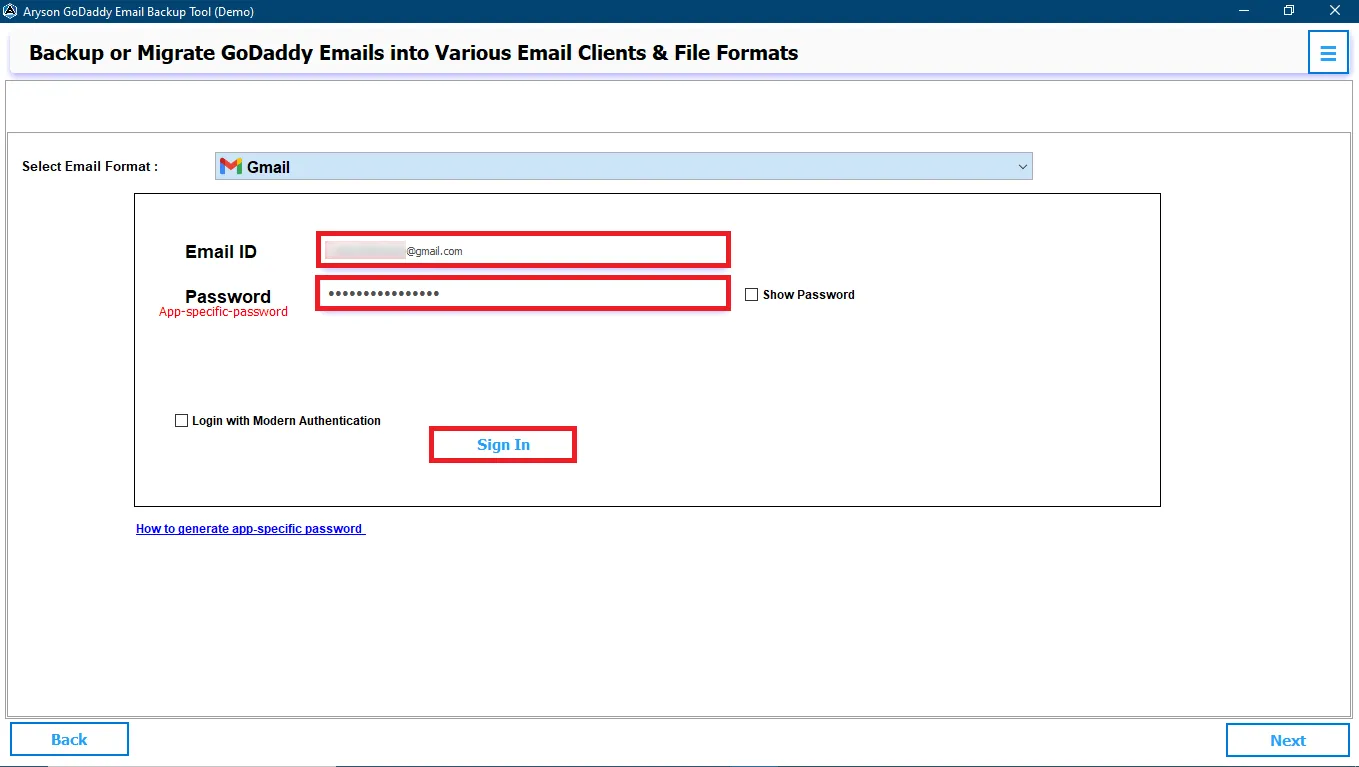
Step 5:Pick the Gmail from the drop-down list.
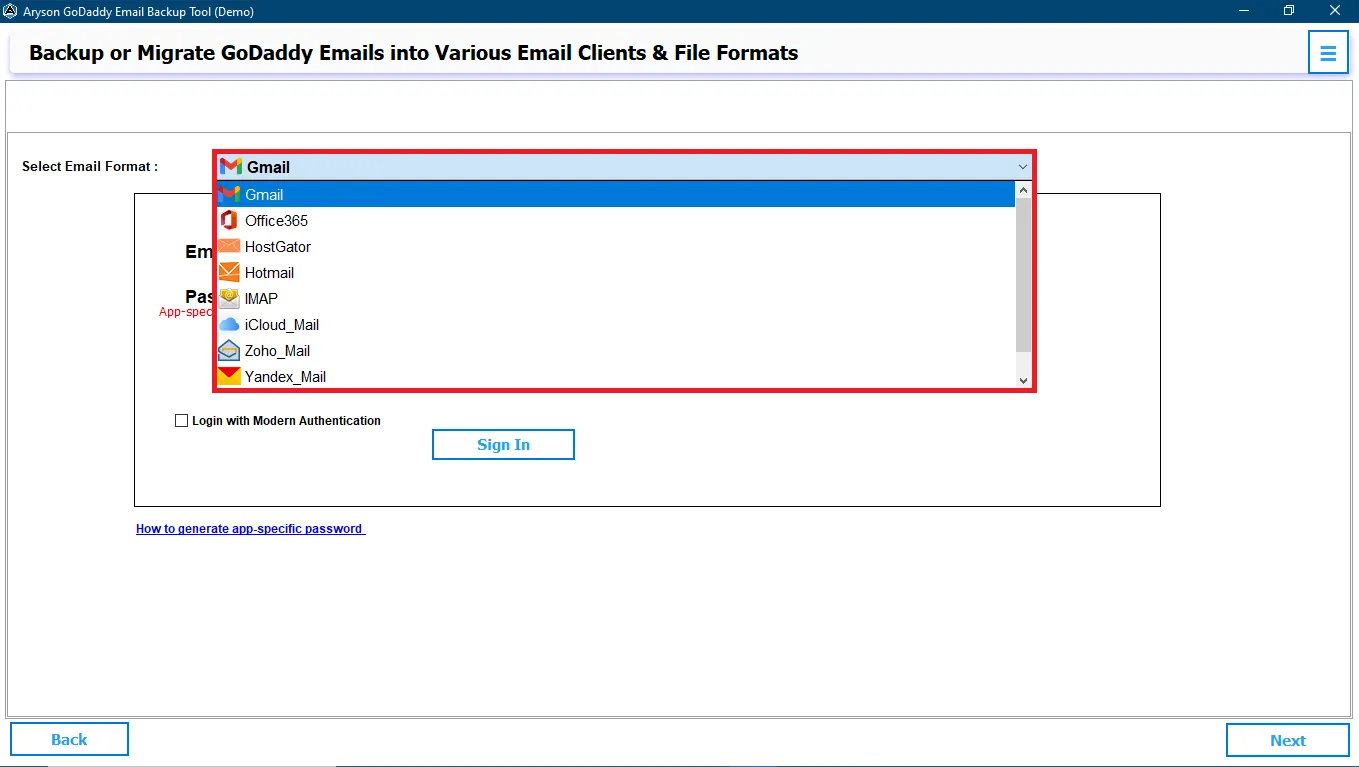
Step 6:Sign In using Gmail ID and third-party app password in the Aryson GoDaddy Email Backup Tool.
Step 7:Check the following:
- Check the checkbox Skip Duplicate Emails to remove the duplicate emails from the selected folder.
- Maintain the folder structure: By default, check to keep the original structure of folders.
- Free Up Server Space to delete the server emails after the backup.
Step 8:After selecting the features you require, click Next.
Step 9:Click on the Download button to transfer your GoDaddy emails into Gmail.
Step 10:Click OK, now you have successfully migrated the GoDaddy emails in Gmail.

Step 5:Choose the Office 365 email client from the drop-down.
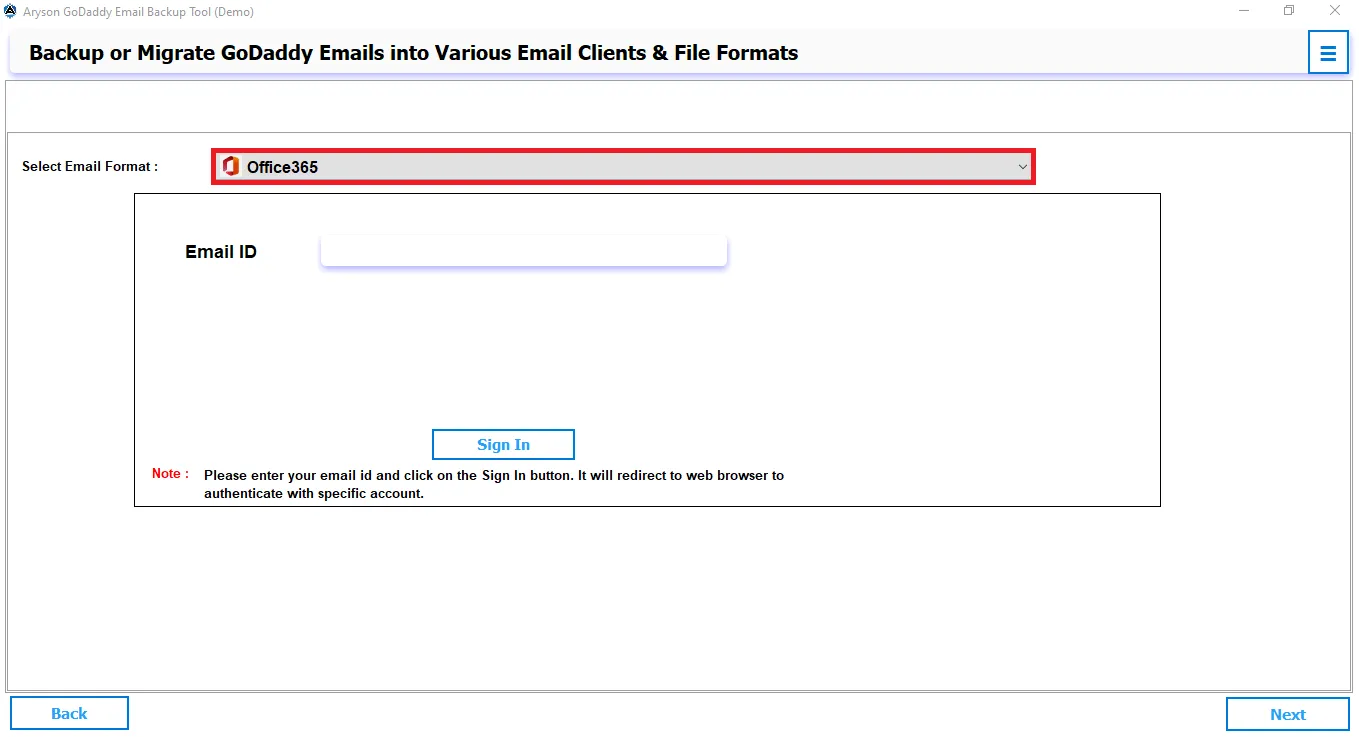
Step 6:Enter your Office 365 ID in GoDaddy Email Backup Software.
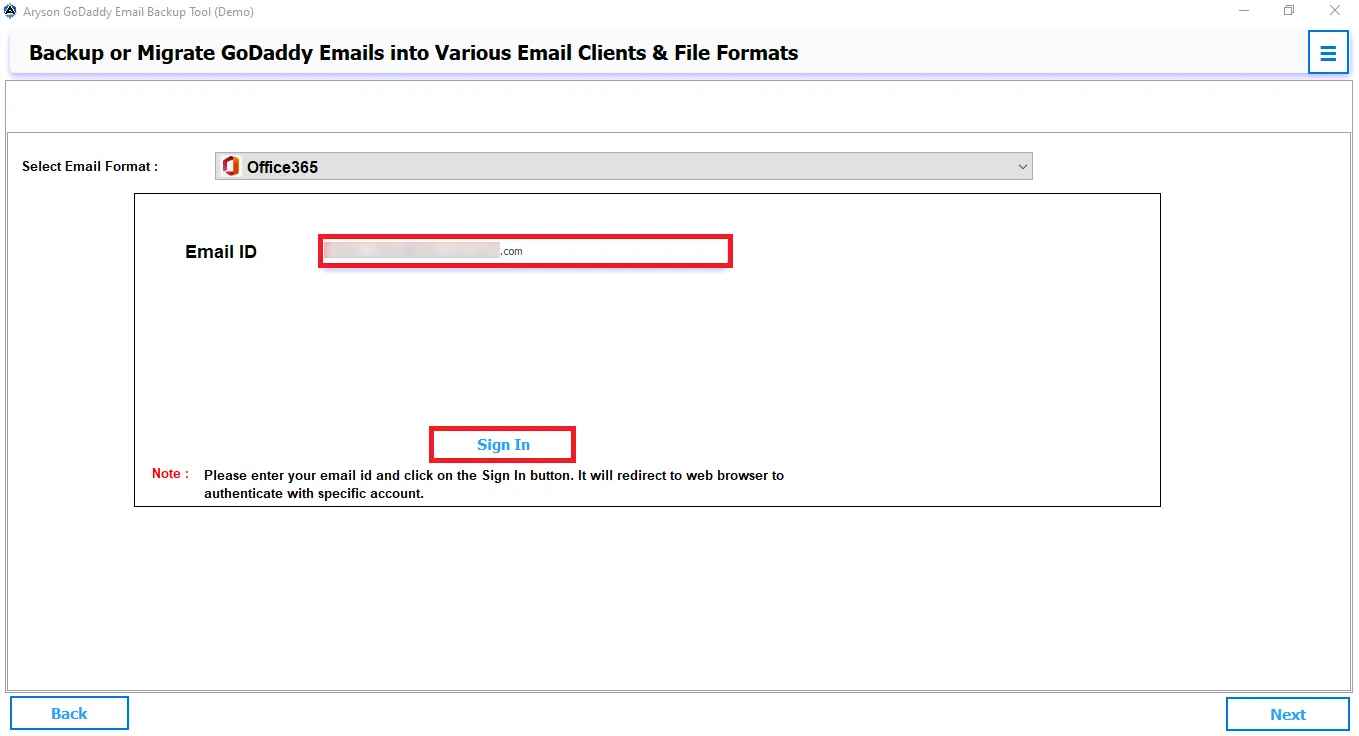
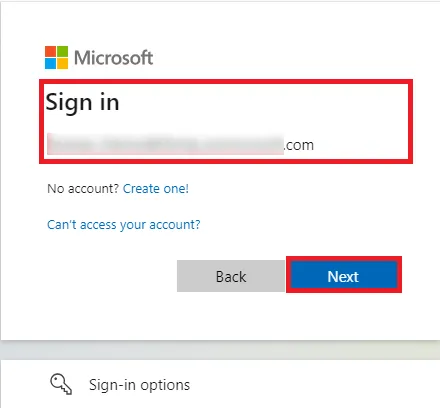
Step 7: Provide your Office 365 ID again and click Next.
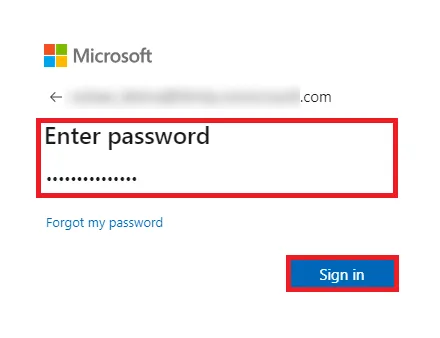
Step 8:Enter your Password and then click on the Next button. After that Accept all the permissions.
Step 9: Choose the feature you require:
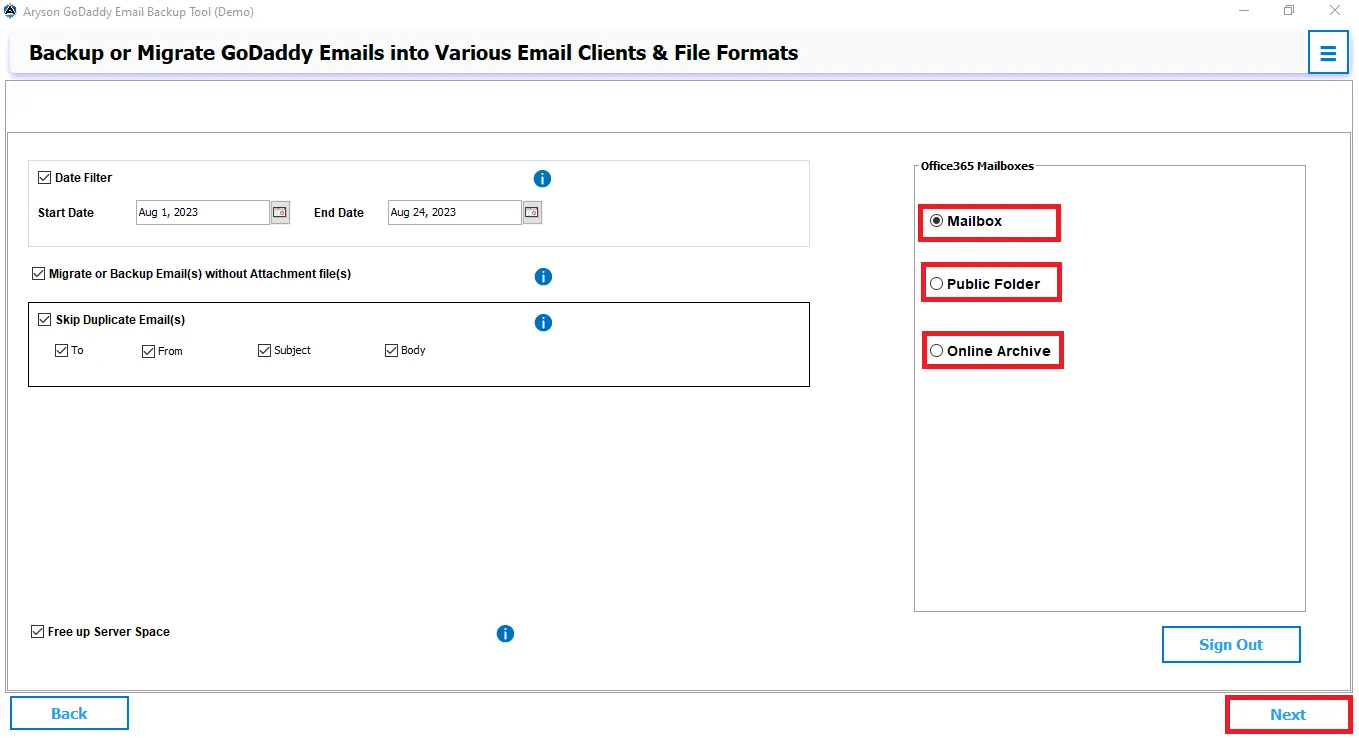
- Check the option Date Filter and choose the dates.
- Check the checkbox Skip Duplicate Emails to remove the duplicate emails from the selected folder.
- Maintain the folder structure: By default, check to keep the original structure of folders.
- Free Up Server Space to delete the server emails after the backup.
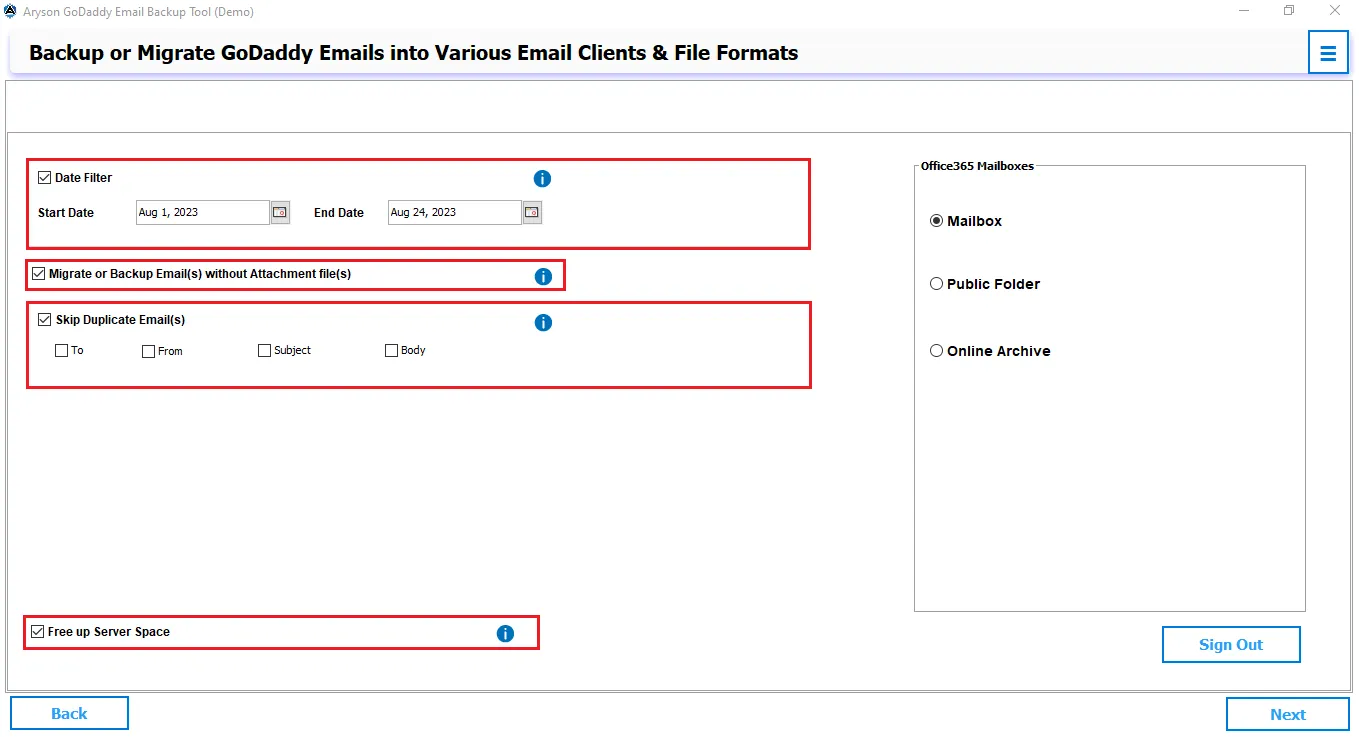
Step 10:Select Mailbox, Public Folder, or Online Archive to save your Office 365 data and click Next.
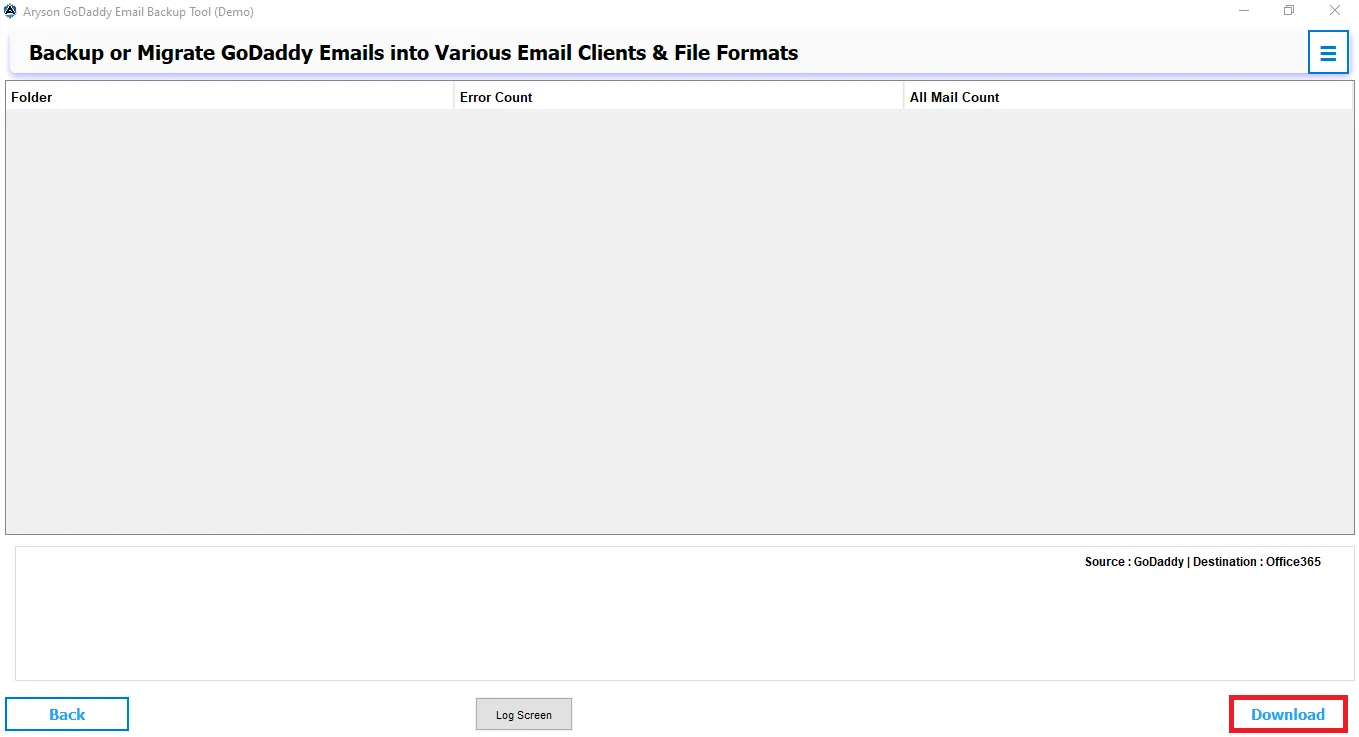
Step 11:Click on the Download button to transfer your GoDaddy emails into O365.
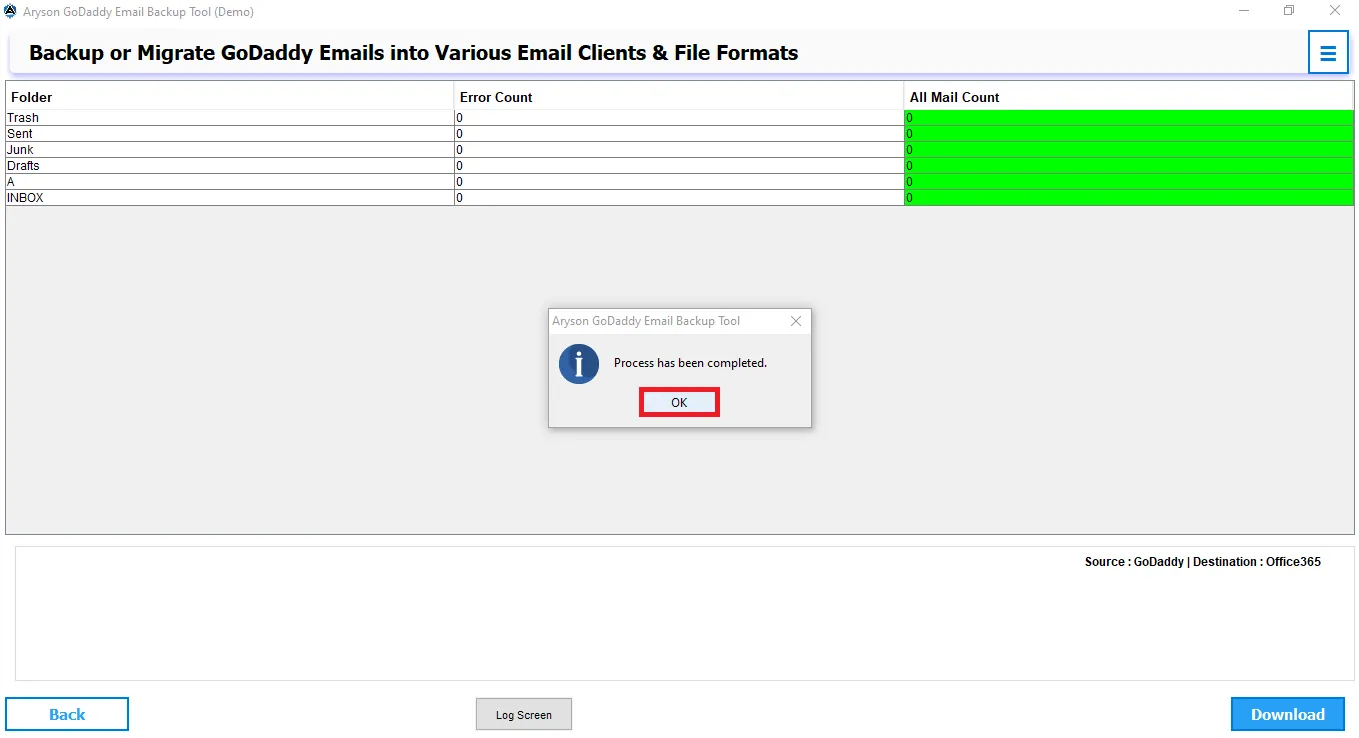
Step 12:Click OK, now you have successfully migrated the GoDaddy emails to Office 365.
Activation Guide
Activate the Software
Installation & Uninstallation
Installation & Uninstallation of Software
User Interface
User Interface
Download and Run the GoDaddy Mail Backup Tool as Administrator.