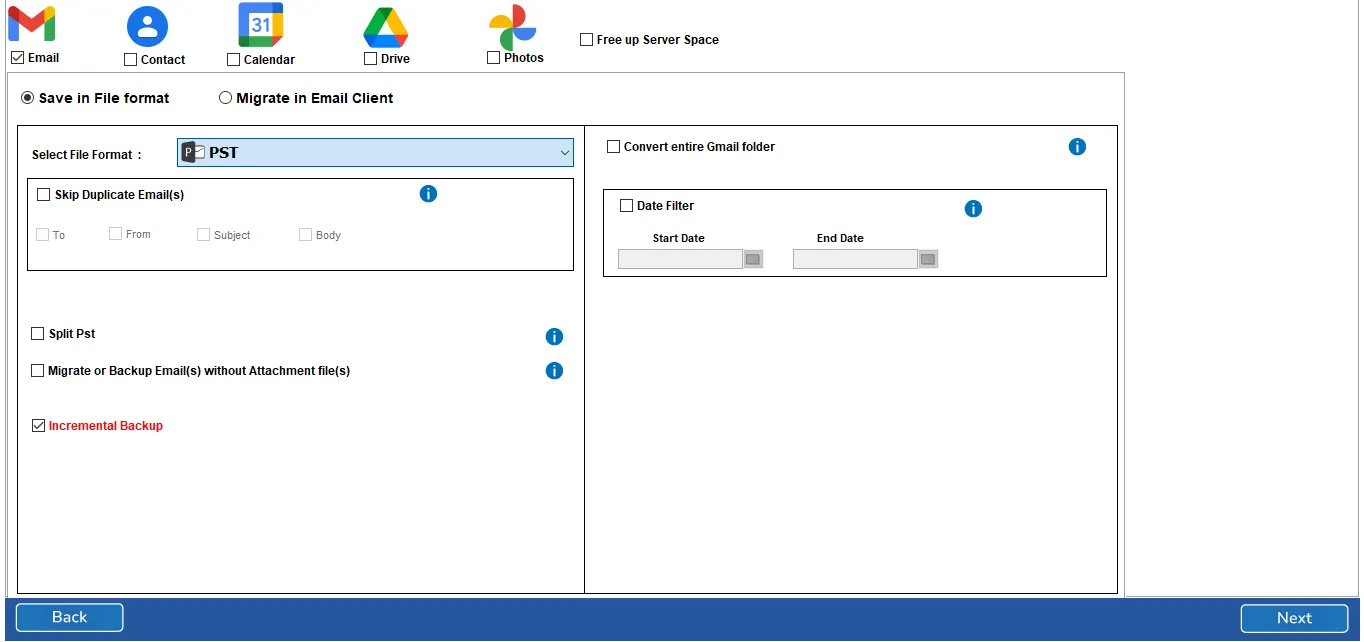
Step 1: Open your browser, search for GCP, or click this link: https://cloud.google.com/
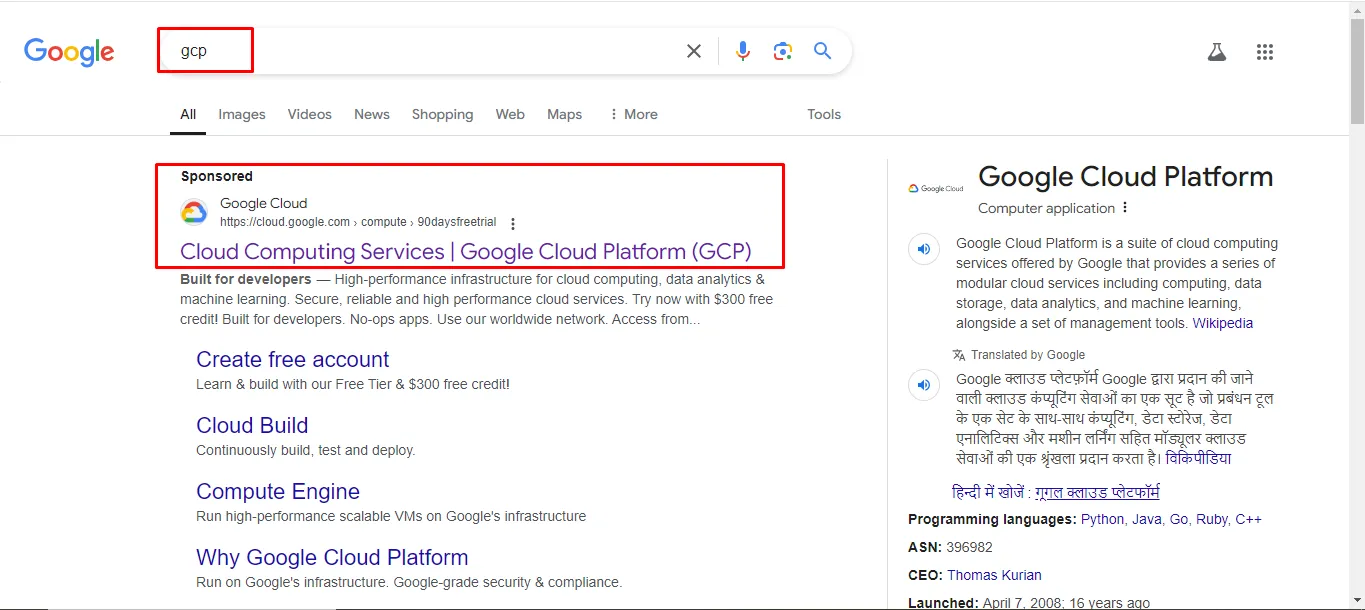
Step 2: Log in using your Gmail ID and click on the Console button in the top-right corner.
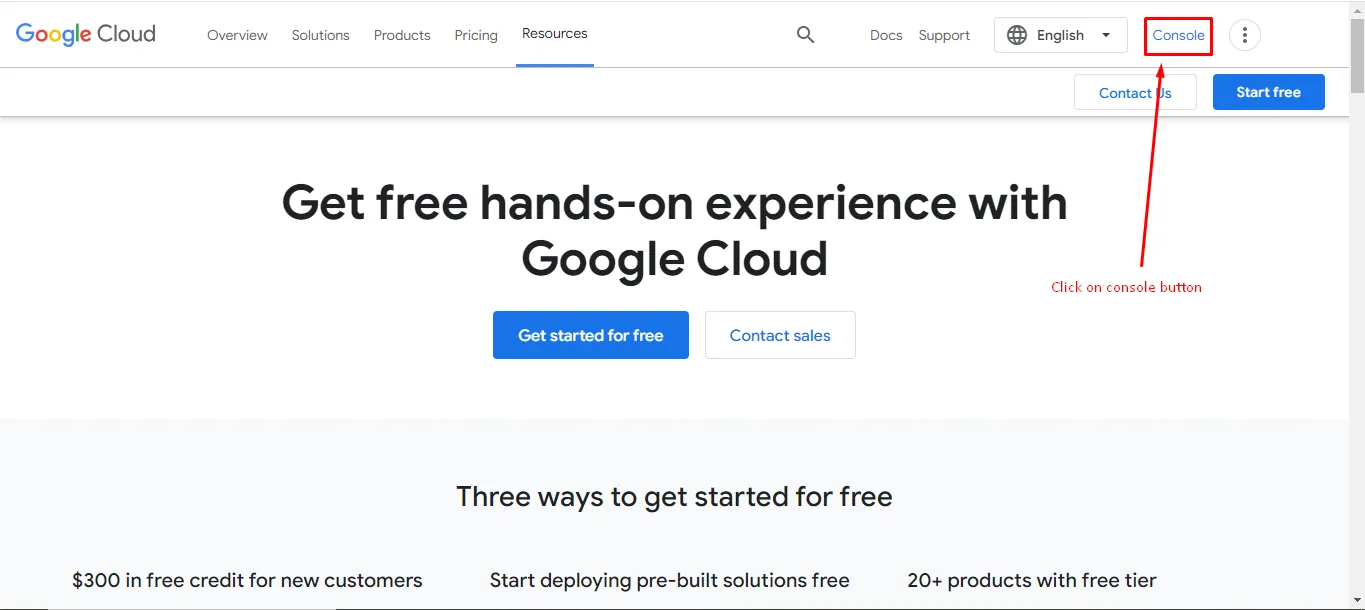
Step 3: Click the drop-down menu and select Create a new project.
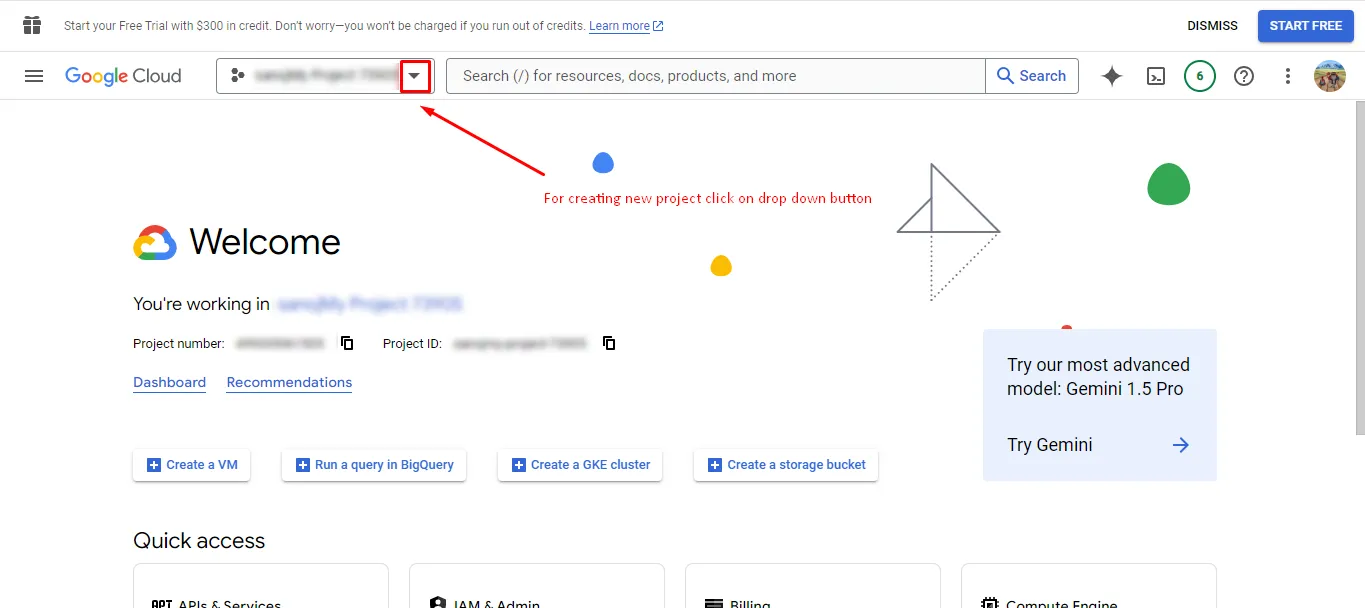
Step 4: Choose your project or create a new one by clicking on New Project in the top-right corner.
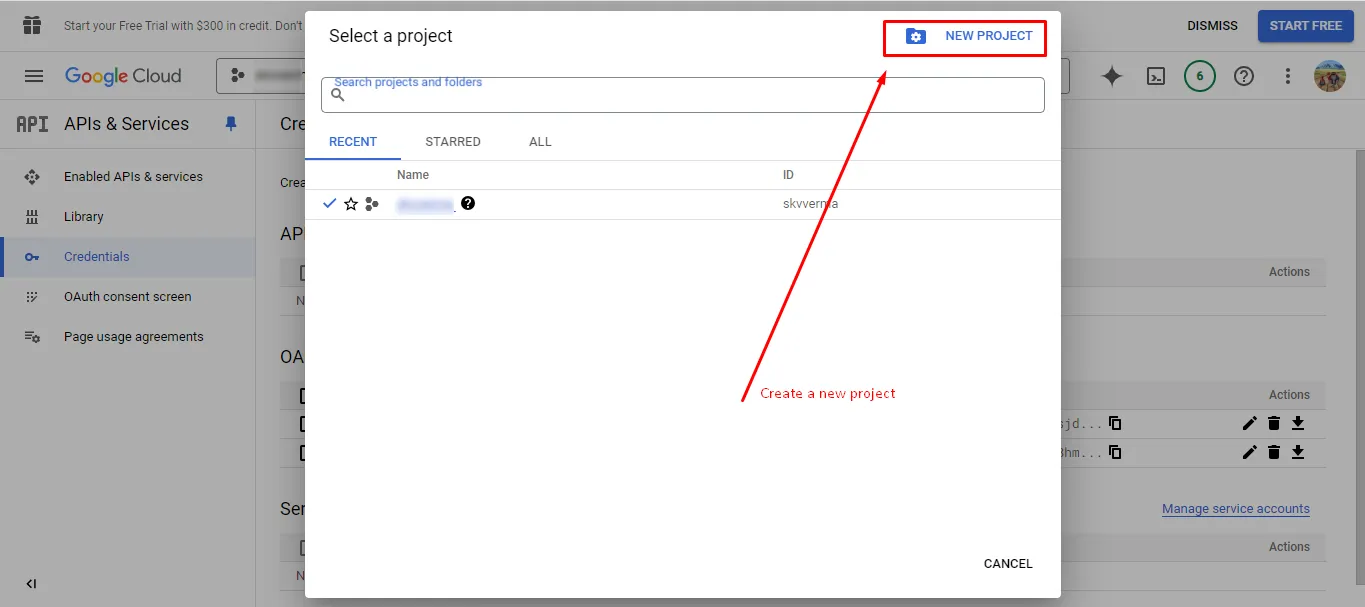
Step 5: Enter the project name in the Project Name field.
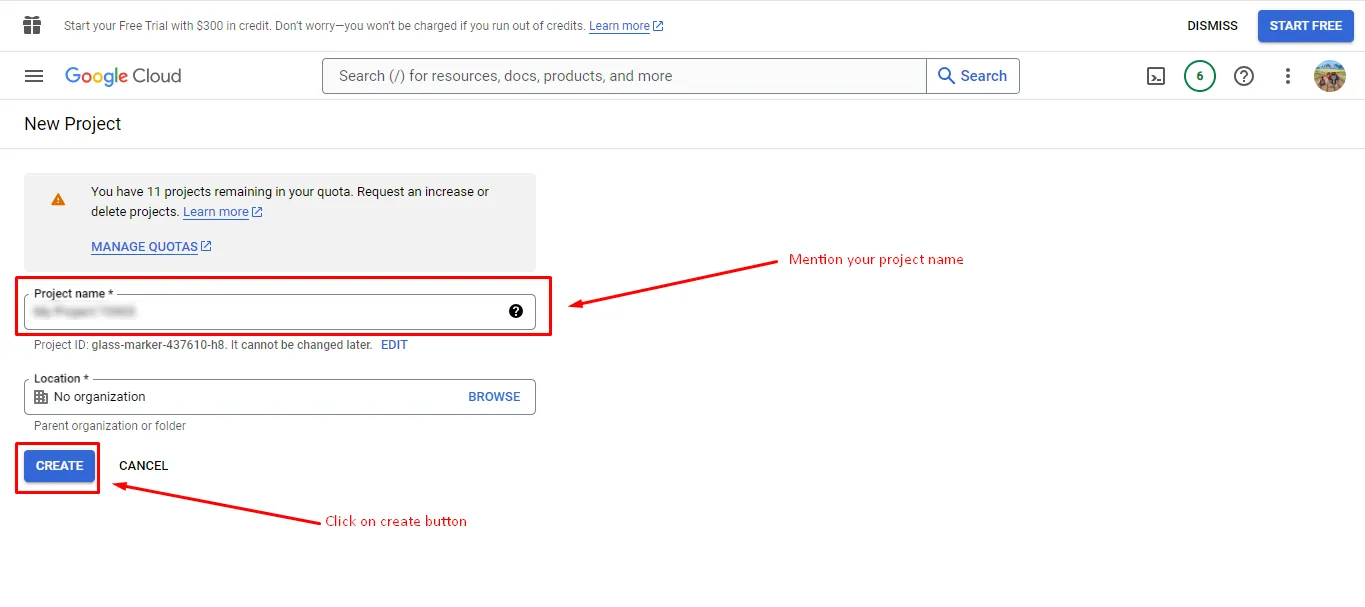
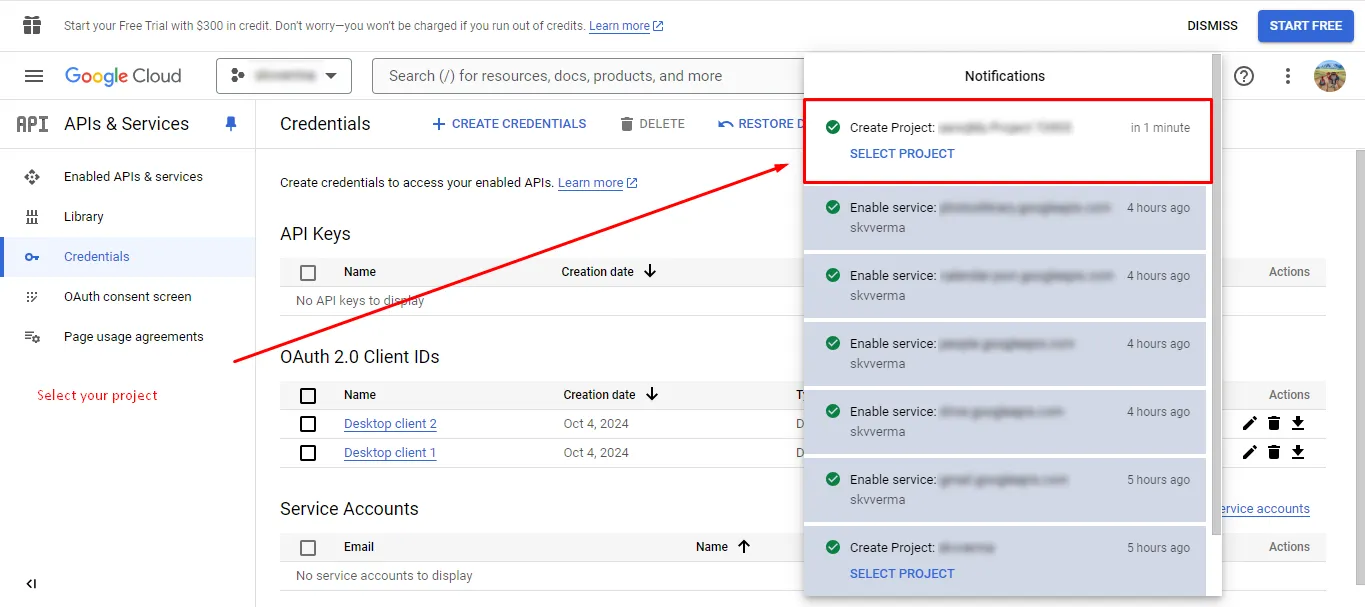
Step 6: Select the newly created project in the Notifications panel
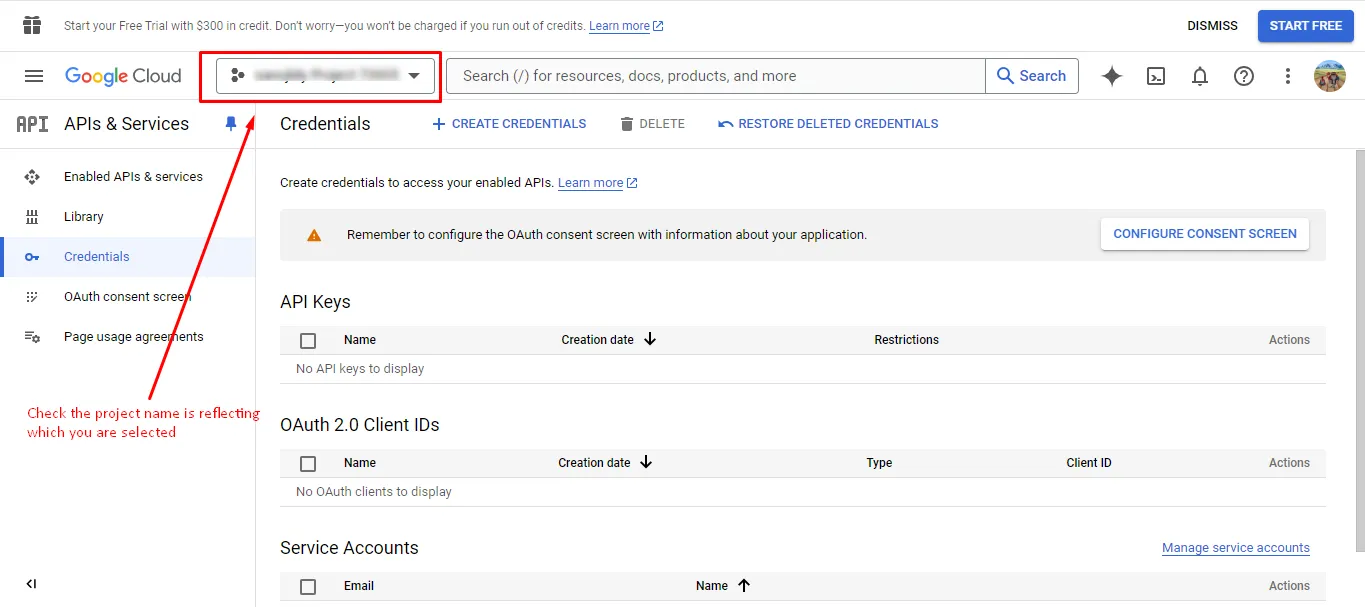
Step 7: Make sure your ID is selected in the drop-down for the project.
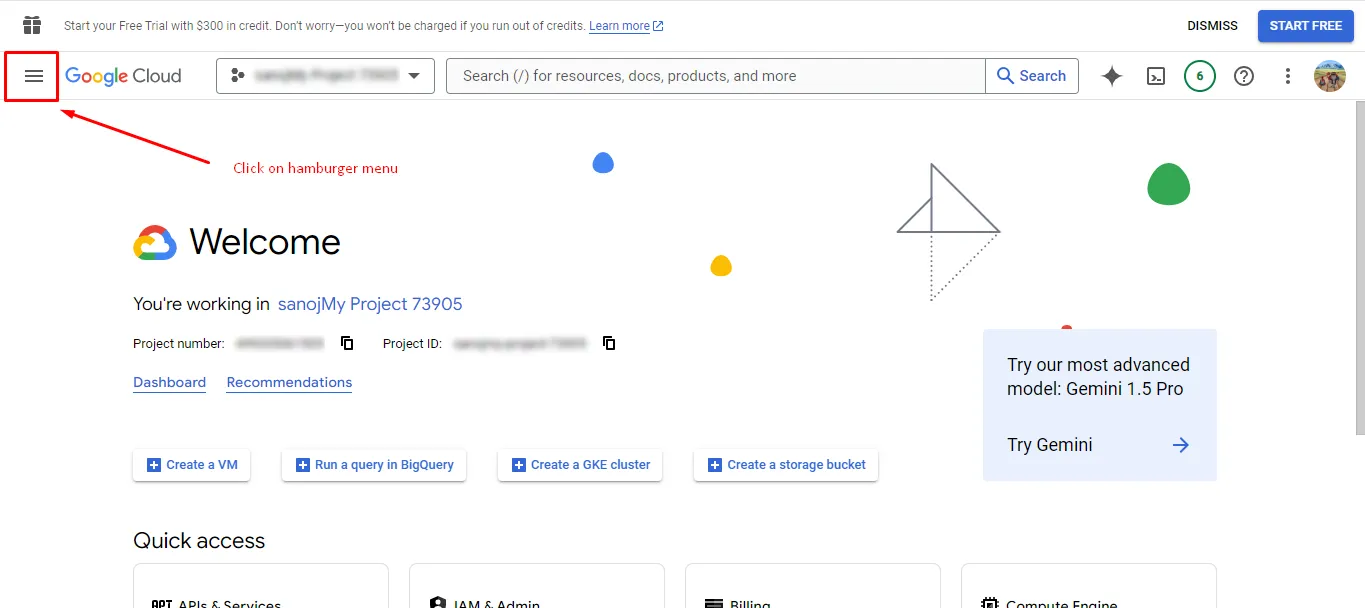
Step 8: Click the Three-Lines menu in the top-left corner.
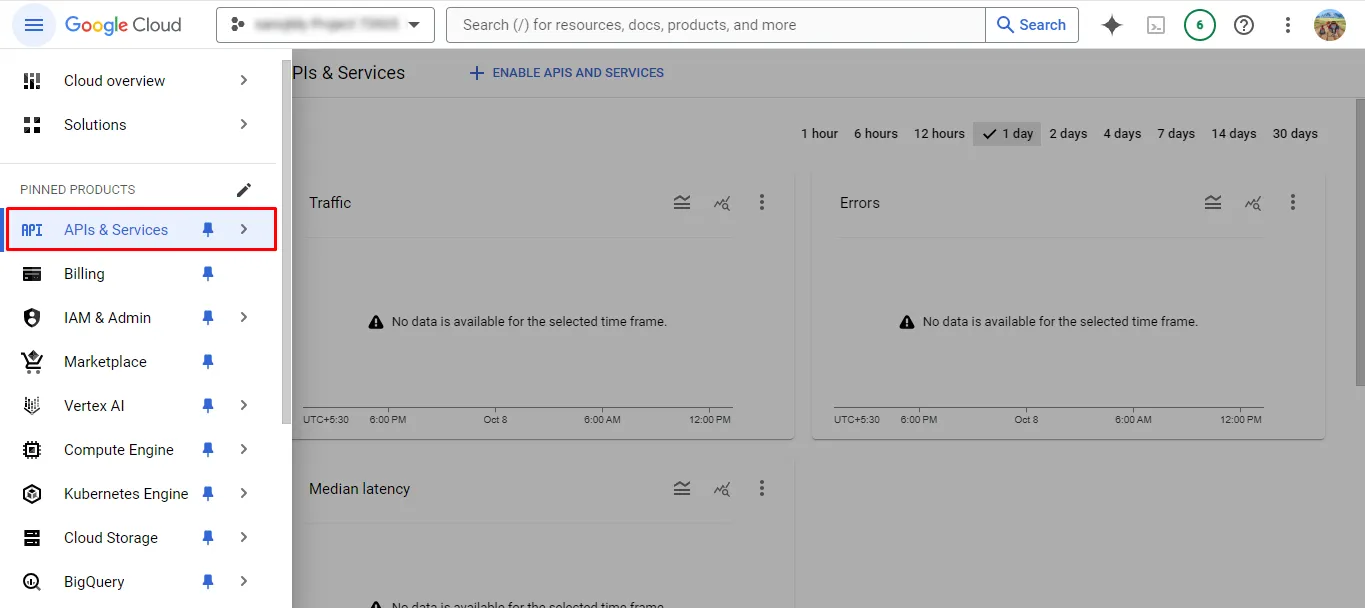
Step 9: Go to APIs & Services from the pinned product list.
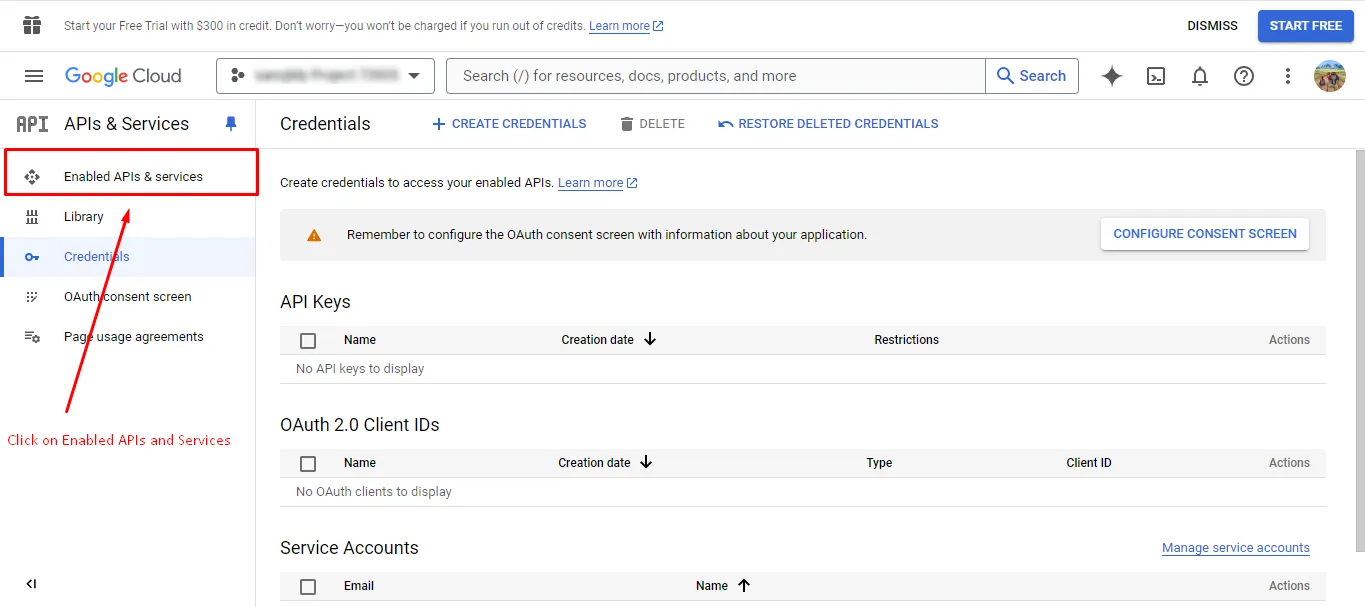
Step 10: Click the Enable APIs & Services tab.
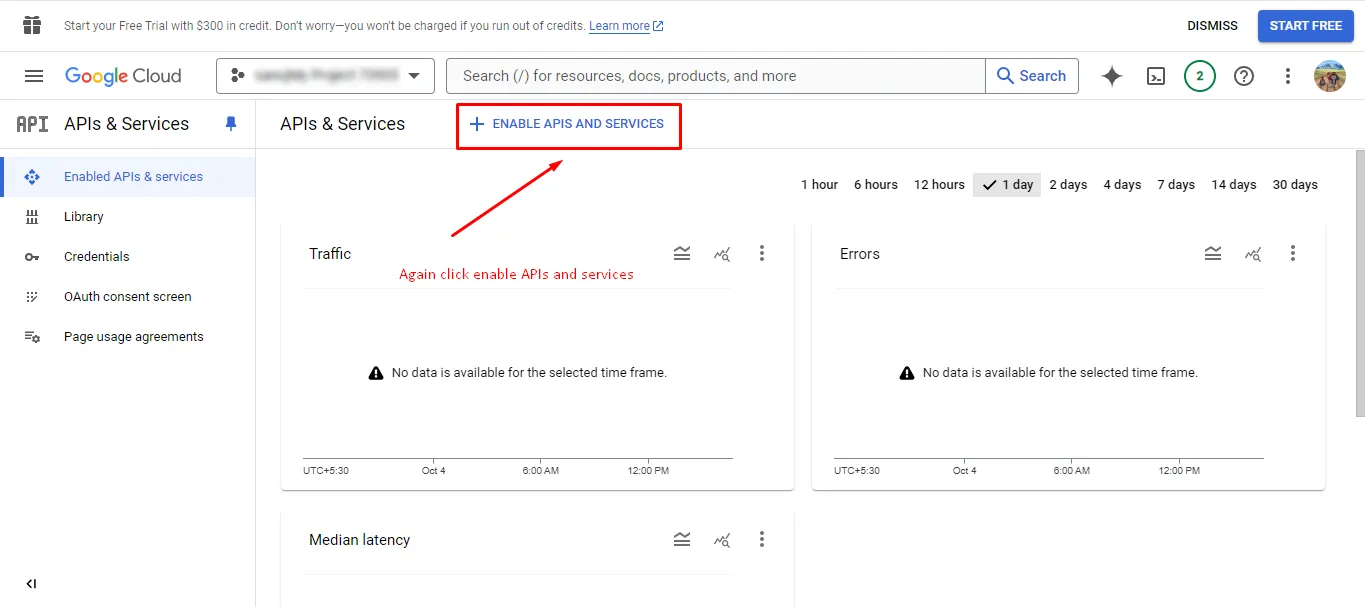
Step 11: Click the + Enable APIs & Services button again.
Step 12: In the API Library, search for Gmail API.
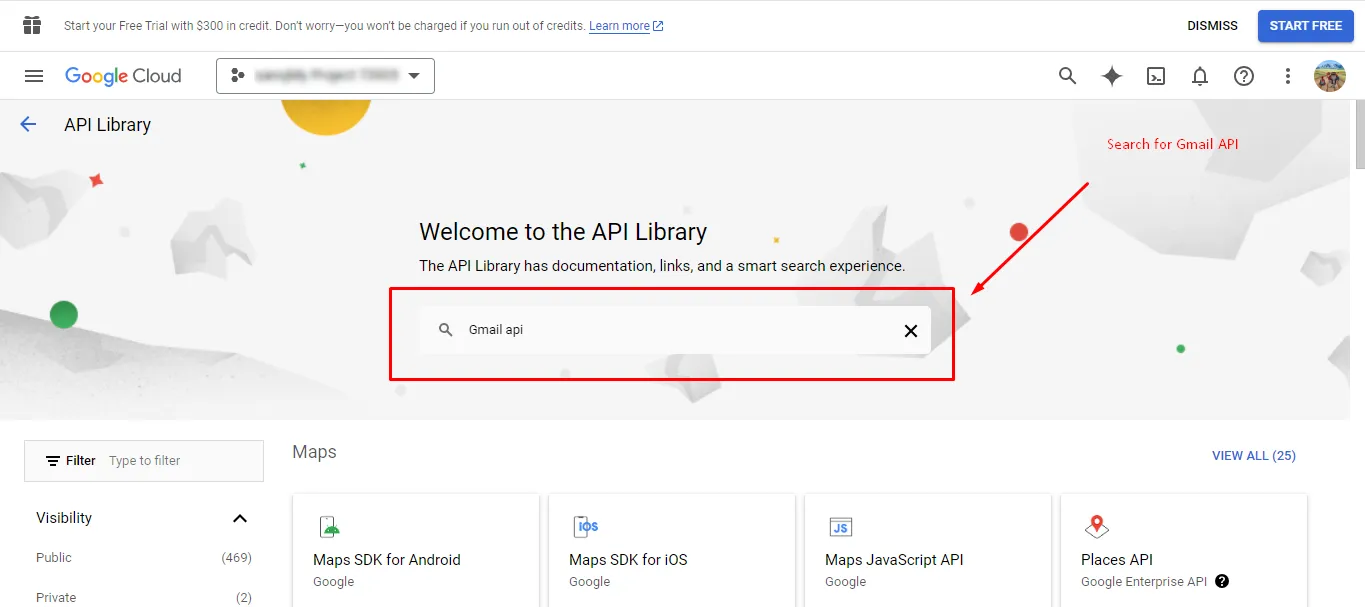
Step 13: Select the Gmail API from the results.
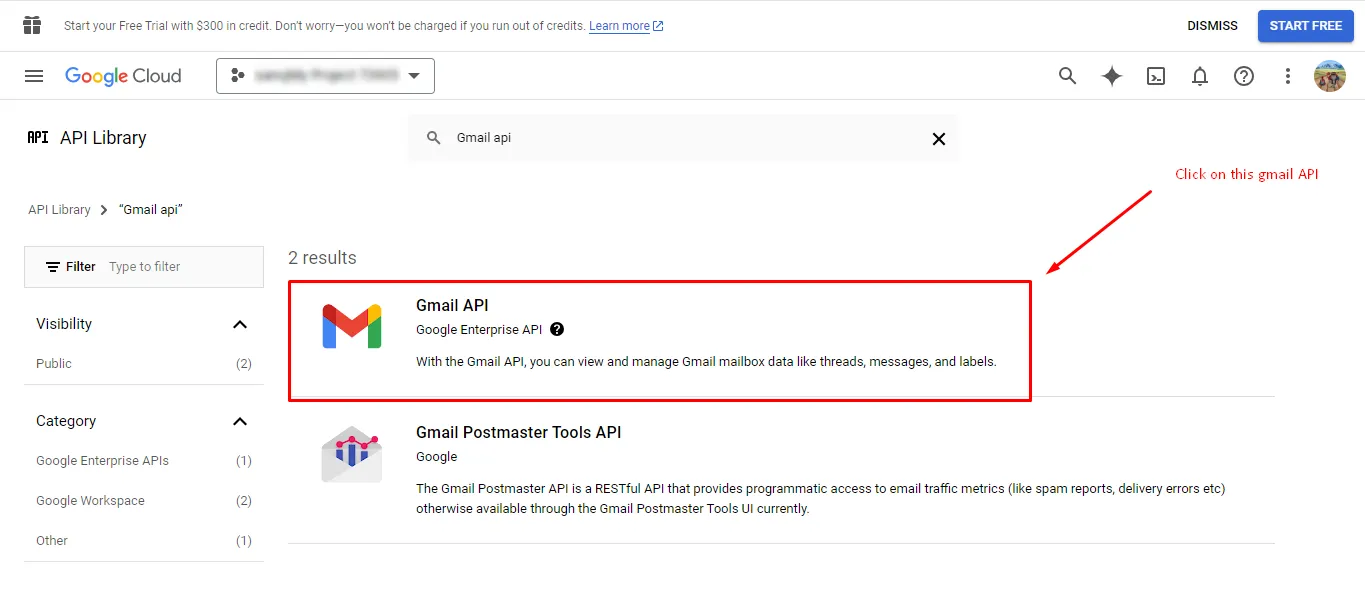
Step 14: Click the Enable button in the Gmail API section.
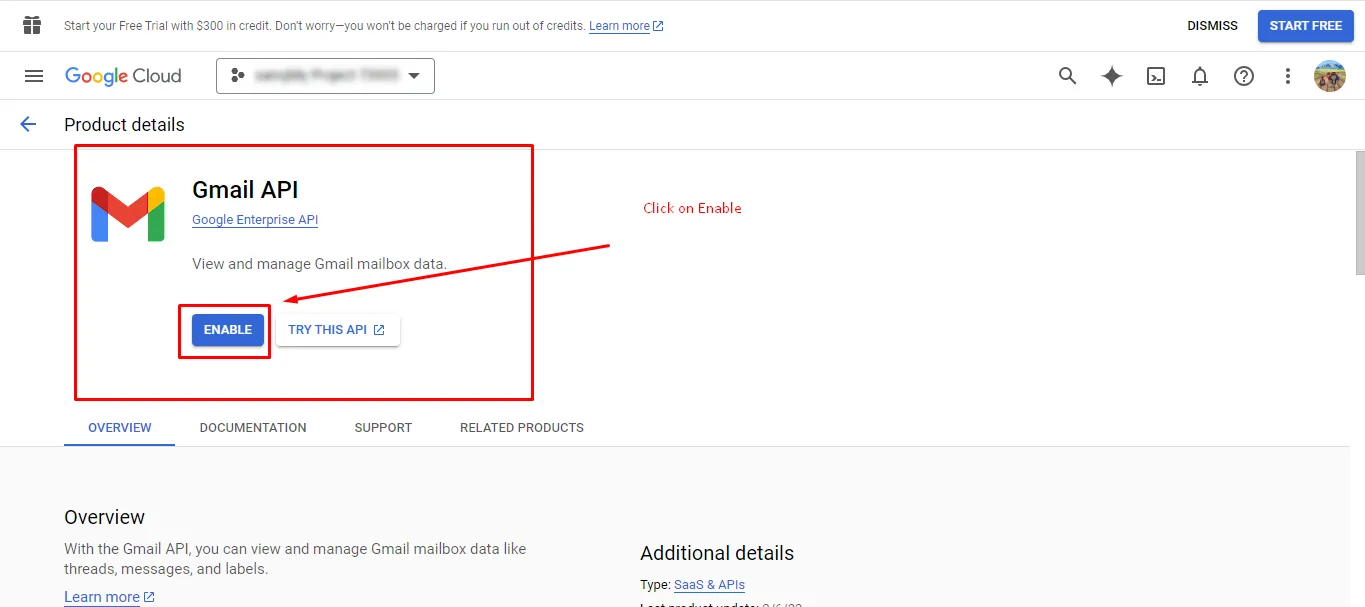
Step 15: Repeat the steps to enable other APIs like:
- Google Calendar API
- Google Photos API
- Google Drive API
- Google People API
Step 16: Click on the Three-Lines menu again in the top-left corner.
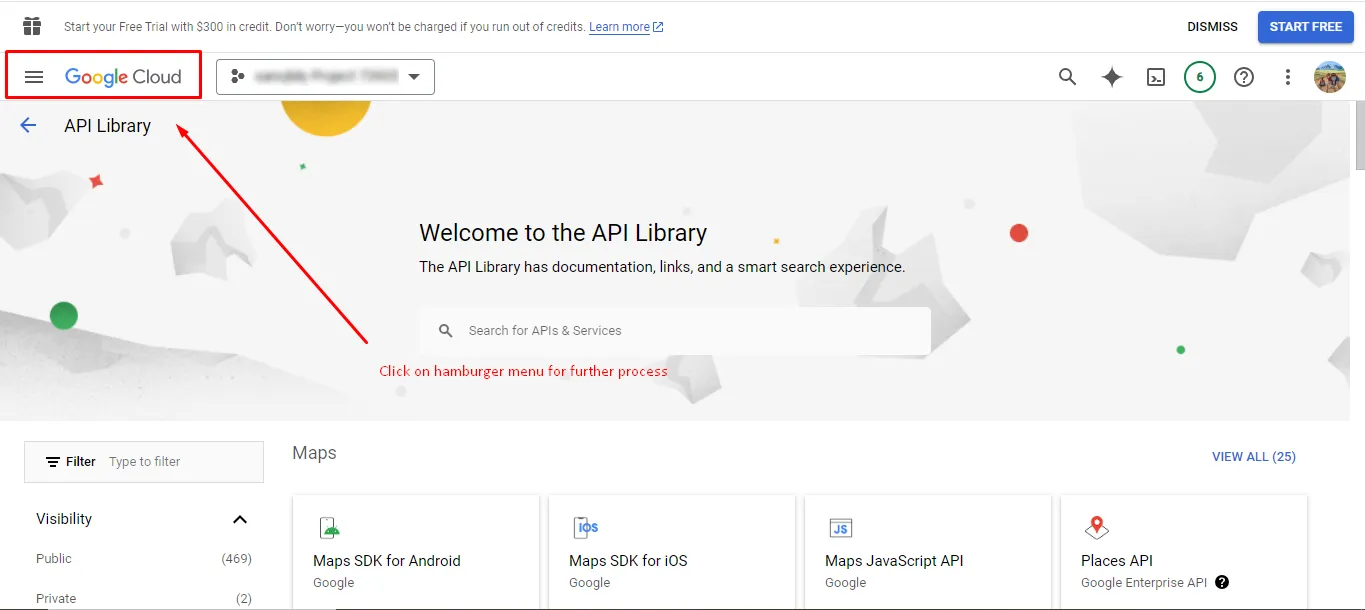
Step 17: Go to APIs & Services and select Credentials.
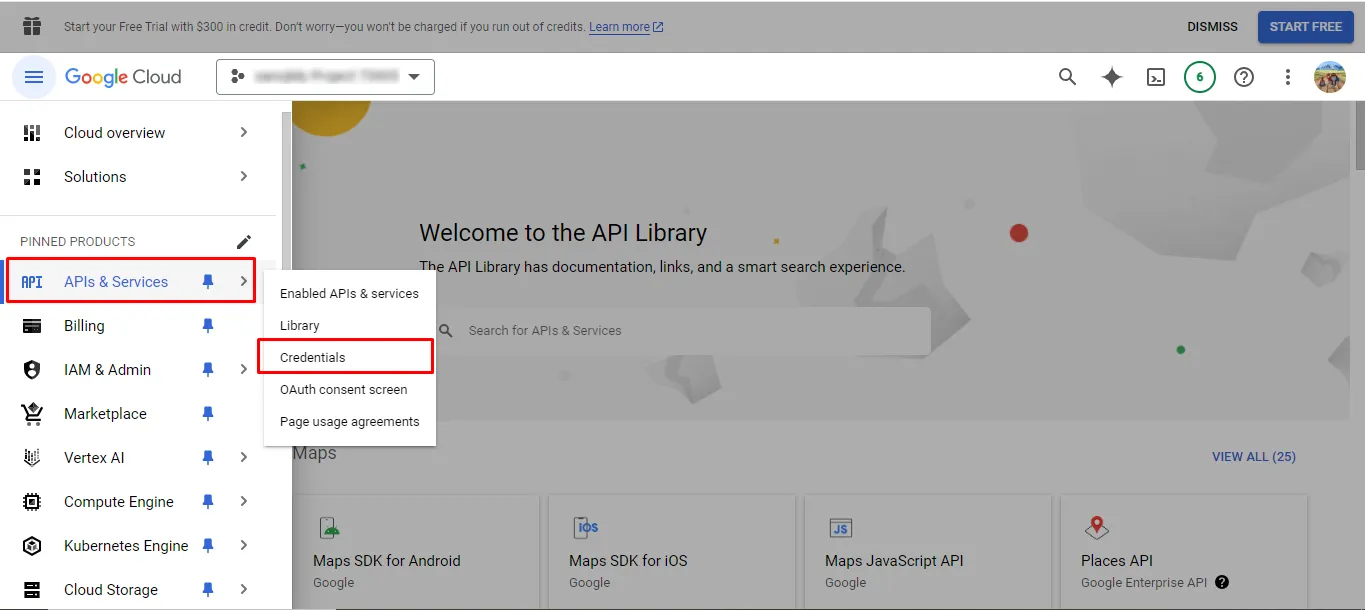
Step 18: Click the + Create Credentials button.
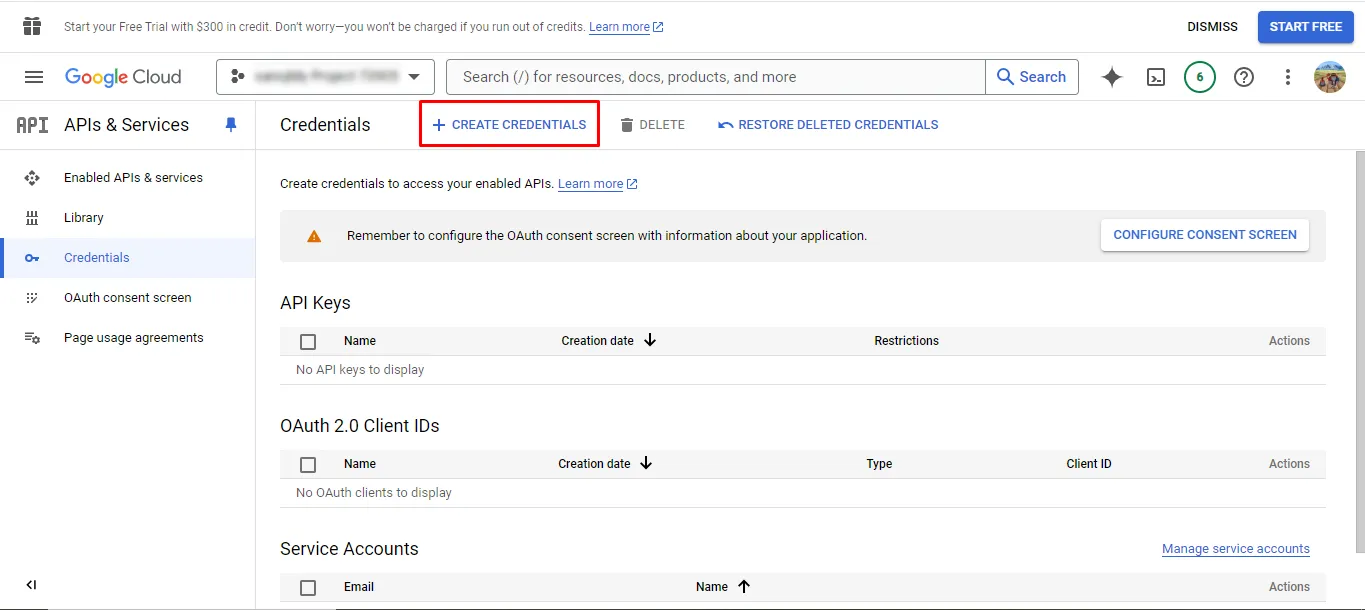
Step 19: Select OAuth Client ID from the list.
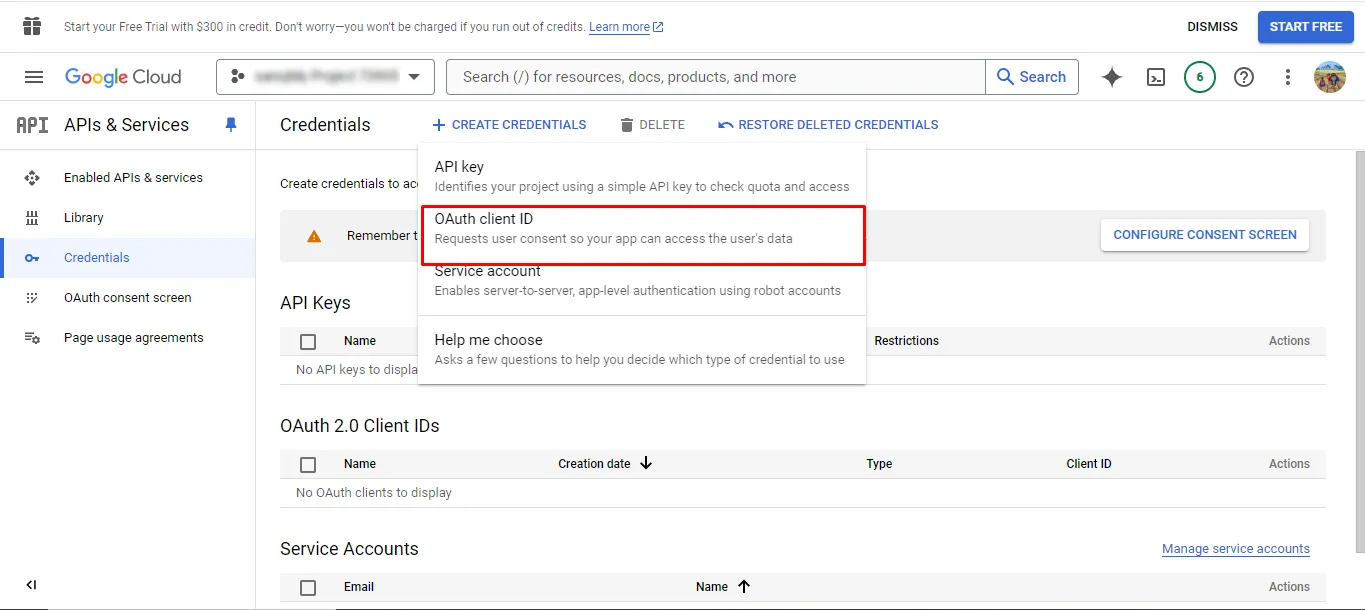
Step 20: To create an OAuth Client ID, click CONFIGURE CONSENT SCREEN.
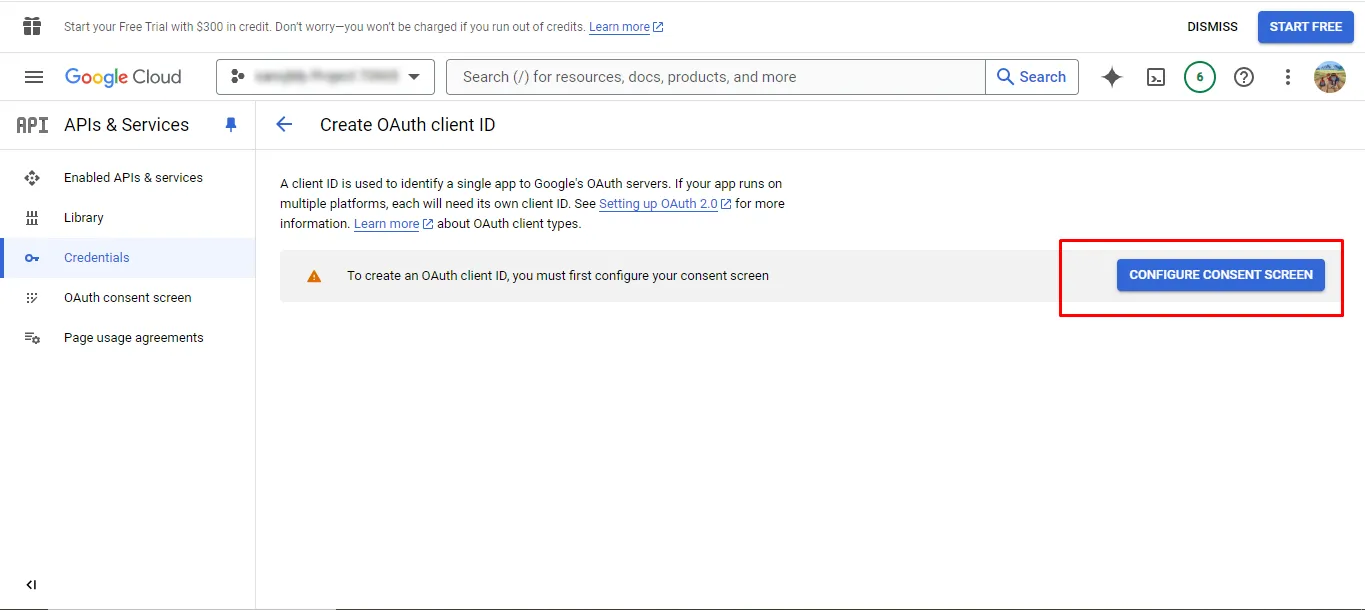
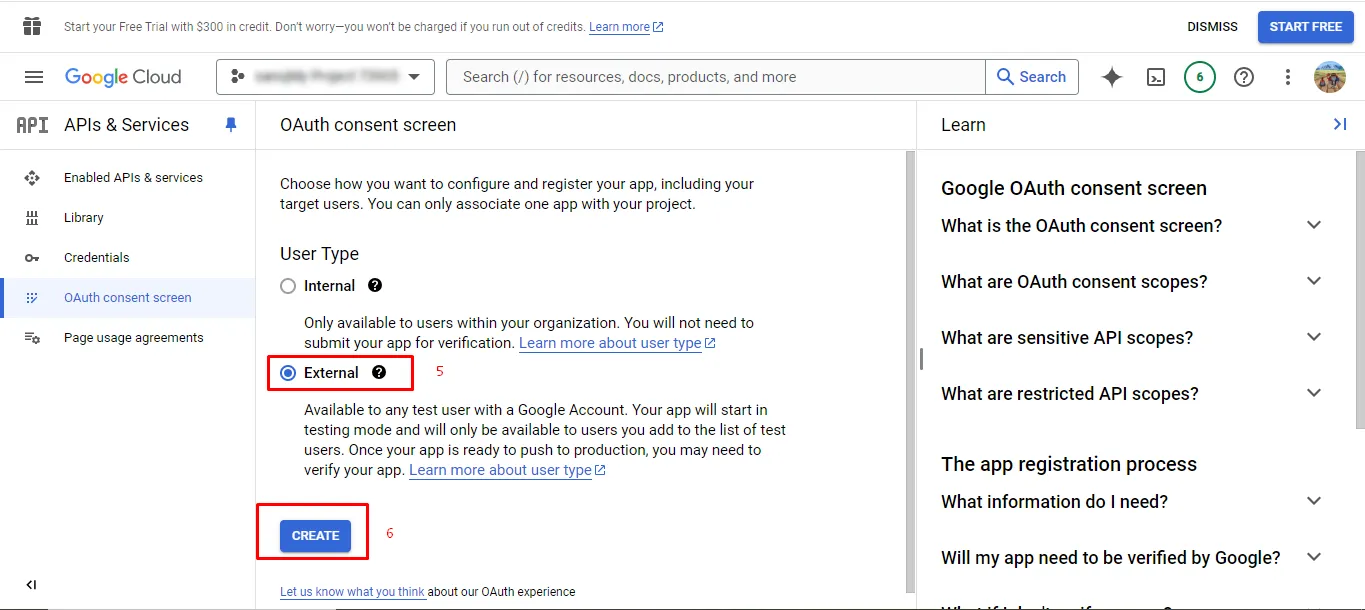
Step 21: On the OAuth consent screen, choose External and click Create.
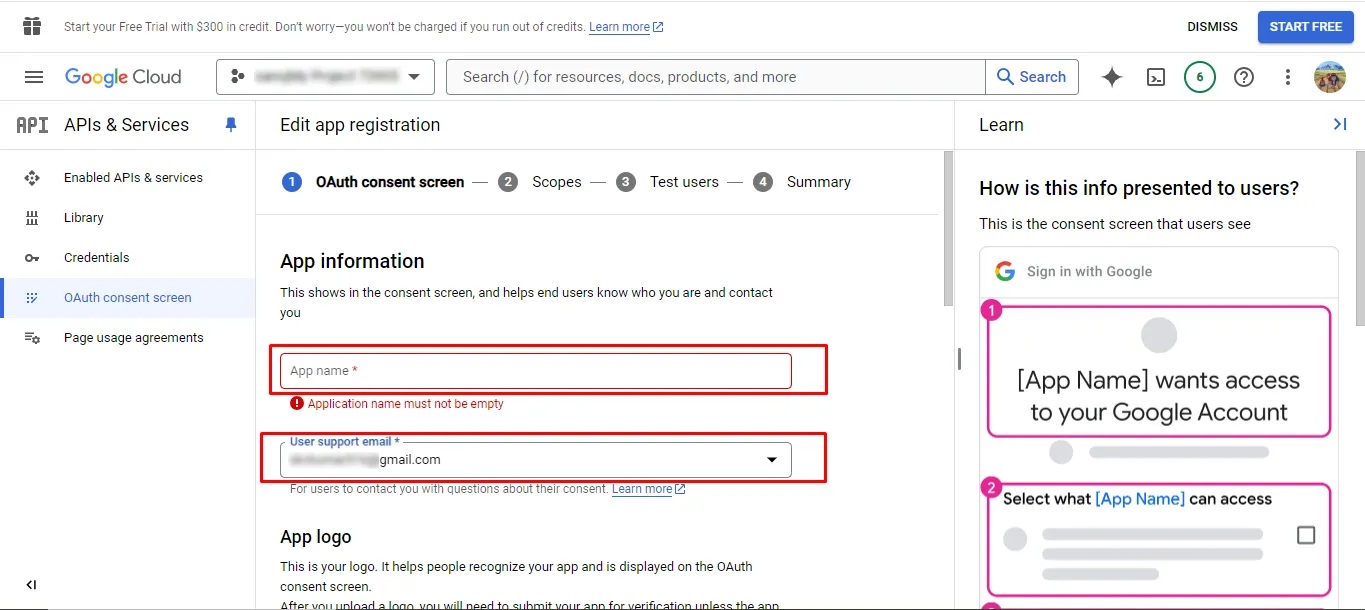
Step 22: Fill in-app information such as App Name and User Support Email.
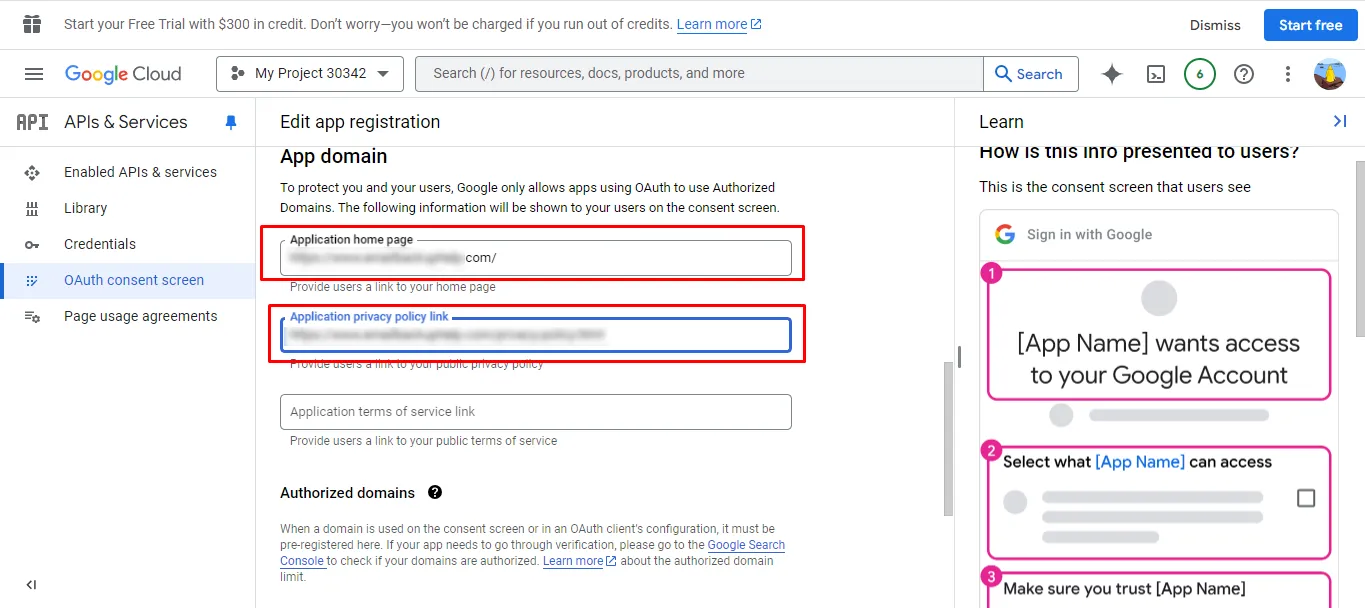
Step 23: Enter your Application Home Page Link (e.g., https://www.arysontechnologies.com/ ) and the Application Privacy Policy Link (e.g., https://www.arysontechnologies.com/privacy-policy.html ).
Step 24: Click the + Add Domain button.
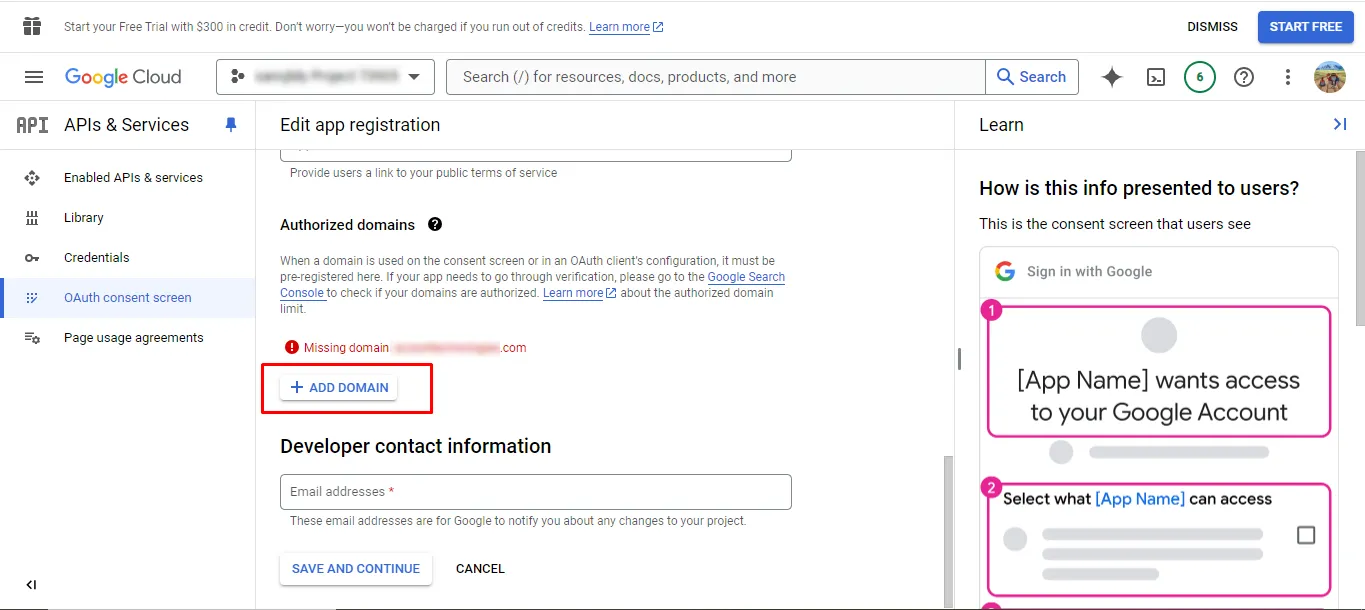
Step 25: If you get a Missing Domain error, copy the provided link.
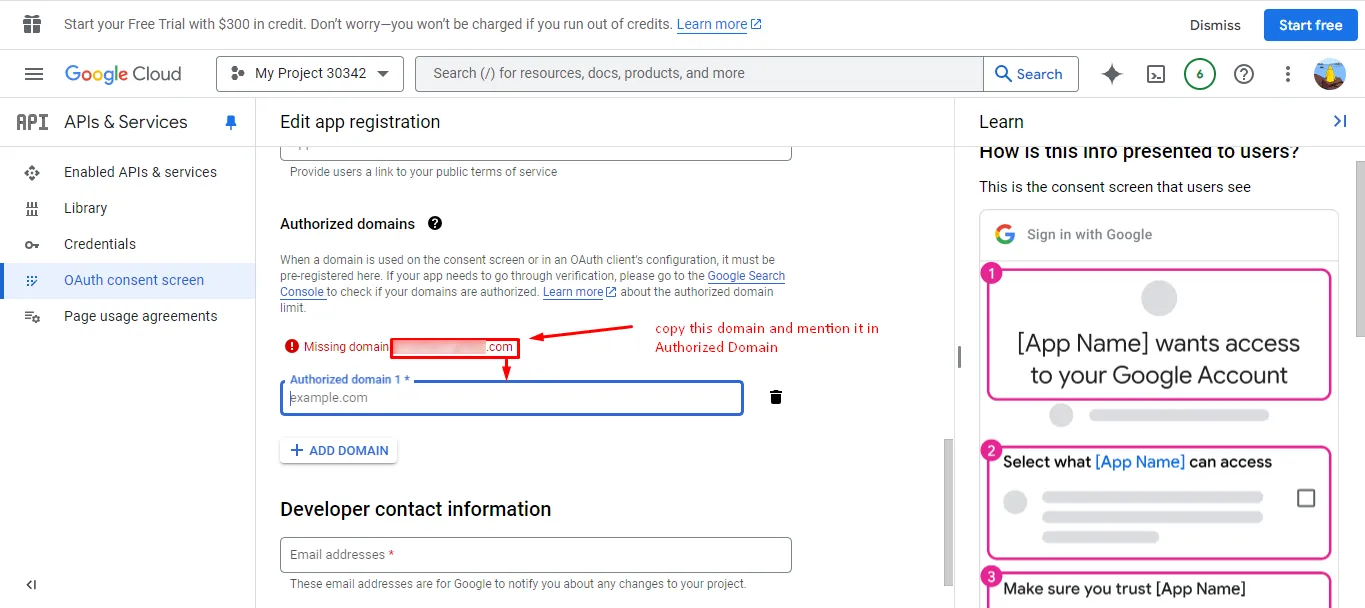
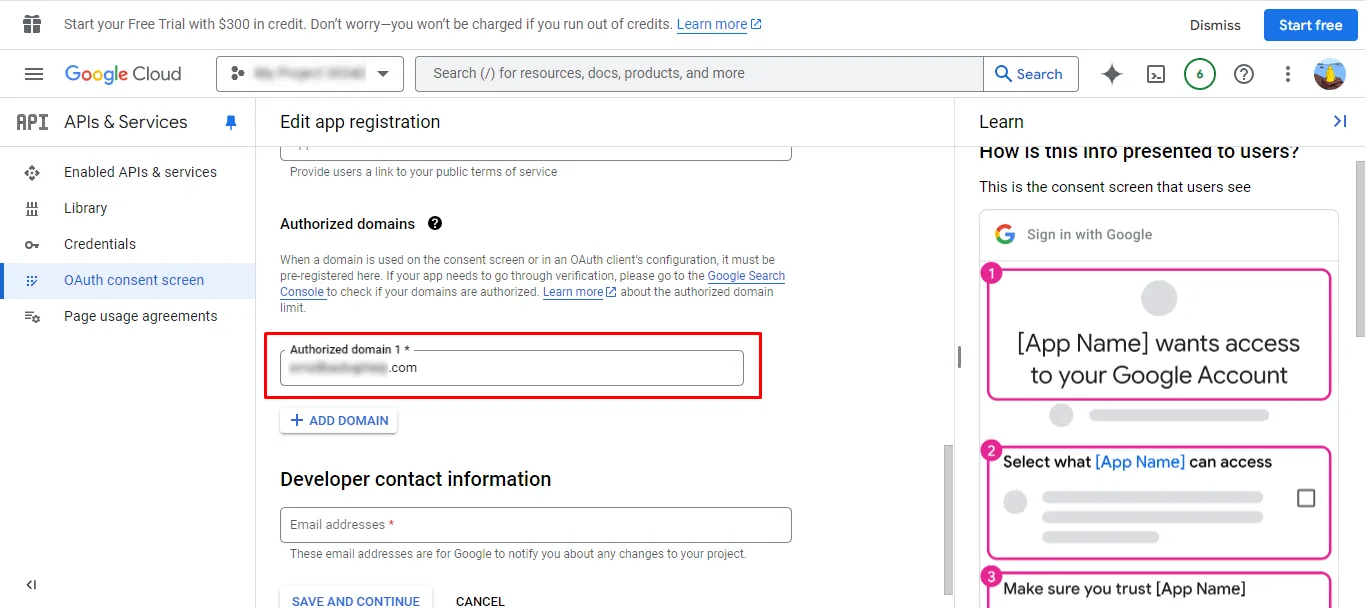
Step 26: Paste this link into the Authorized Domain 1 field.
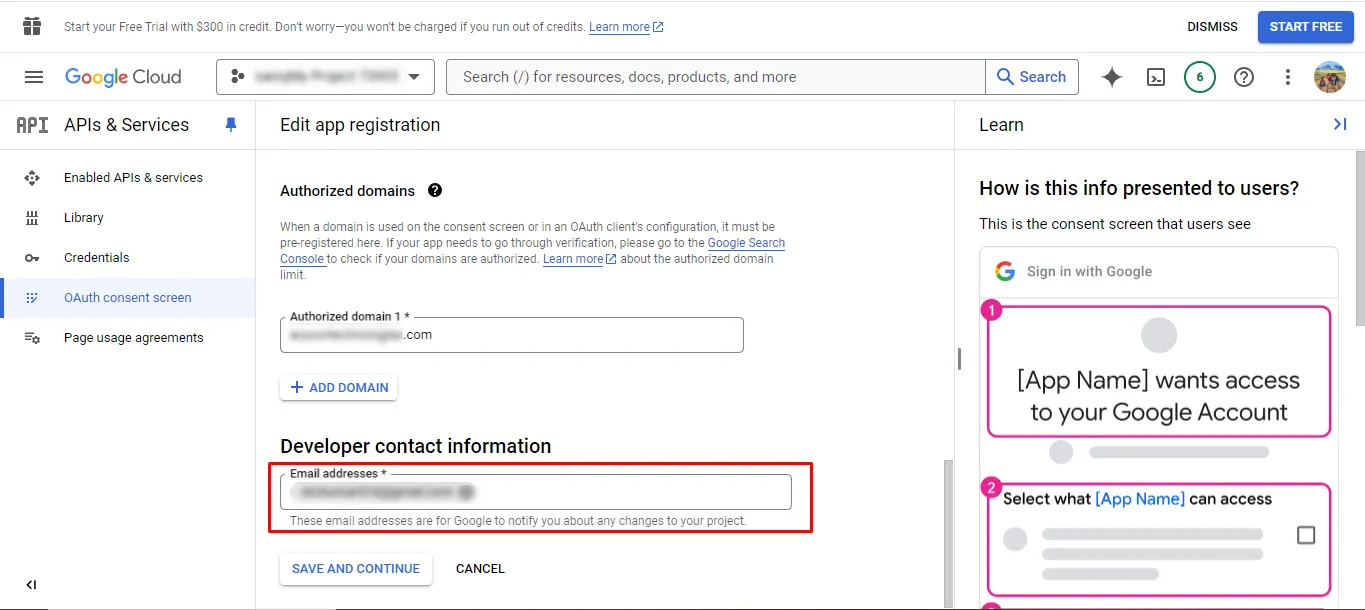
Step 27: Enter your email in the Developer Contact Information section.
Step 28: Once all information is complete, click Save and Continue.
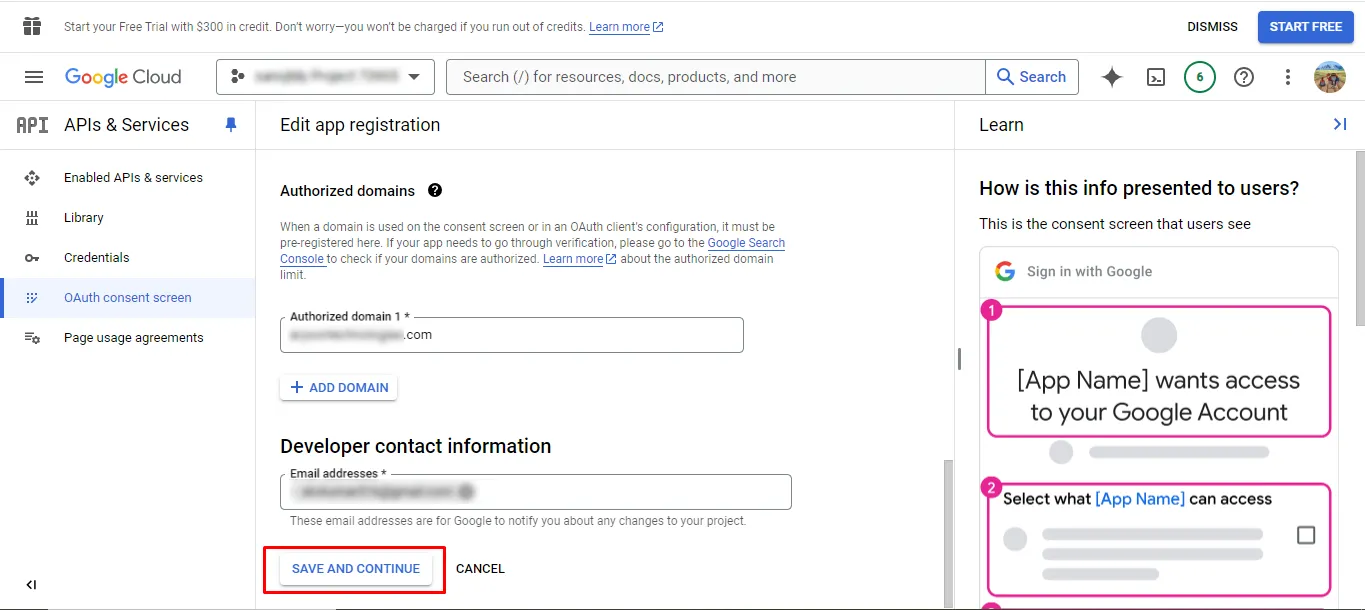
Step 29: Click Save and Continue again on the next screen.
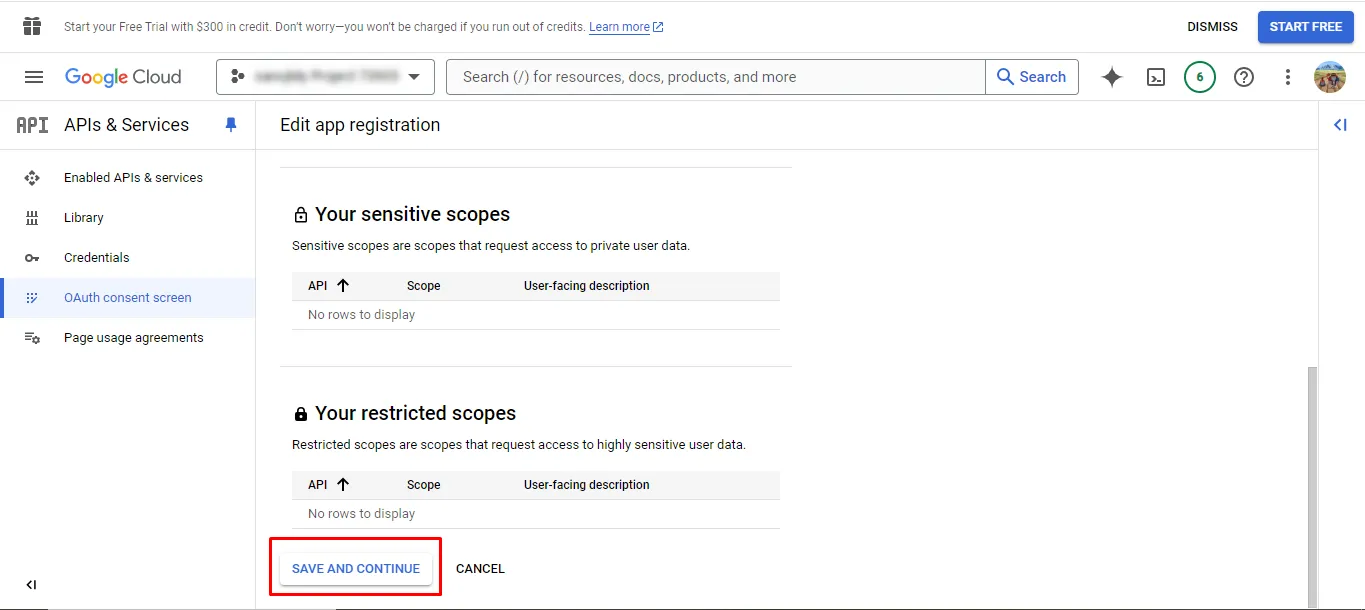
Step 30: In the Test Users section, click Save and Continue.
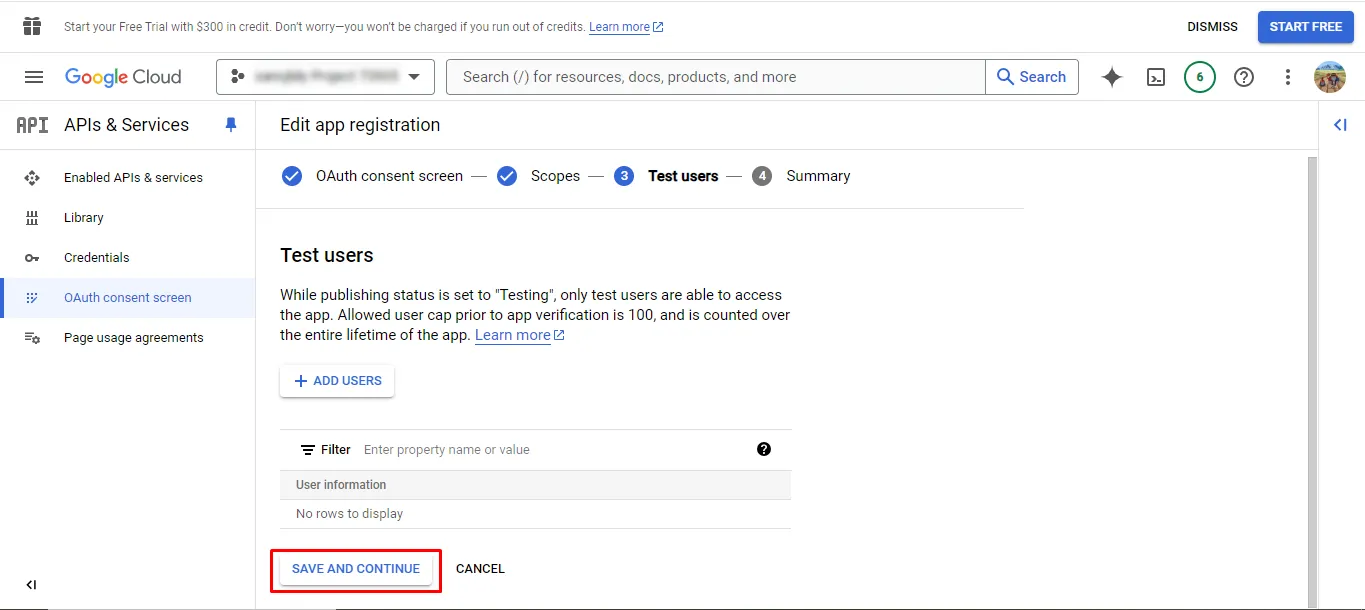
Step 31: Return to the Dashboard by clicking Back to Dashboard.
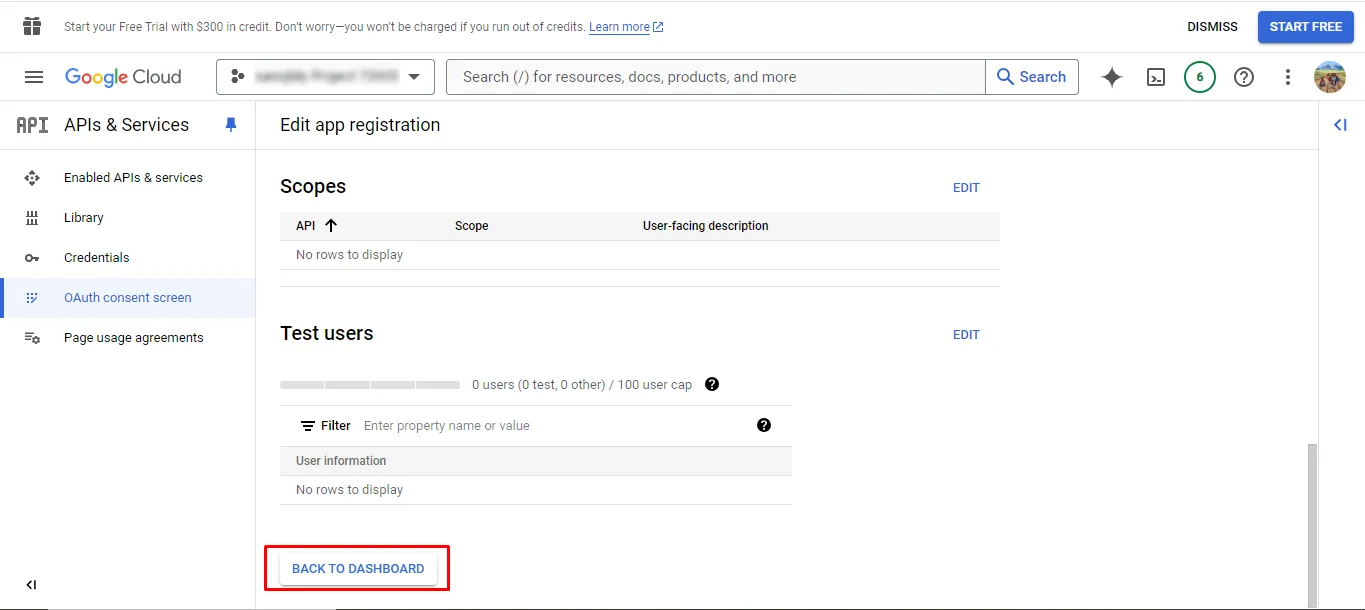
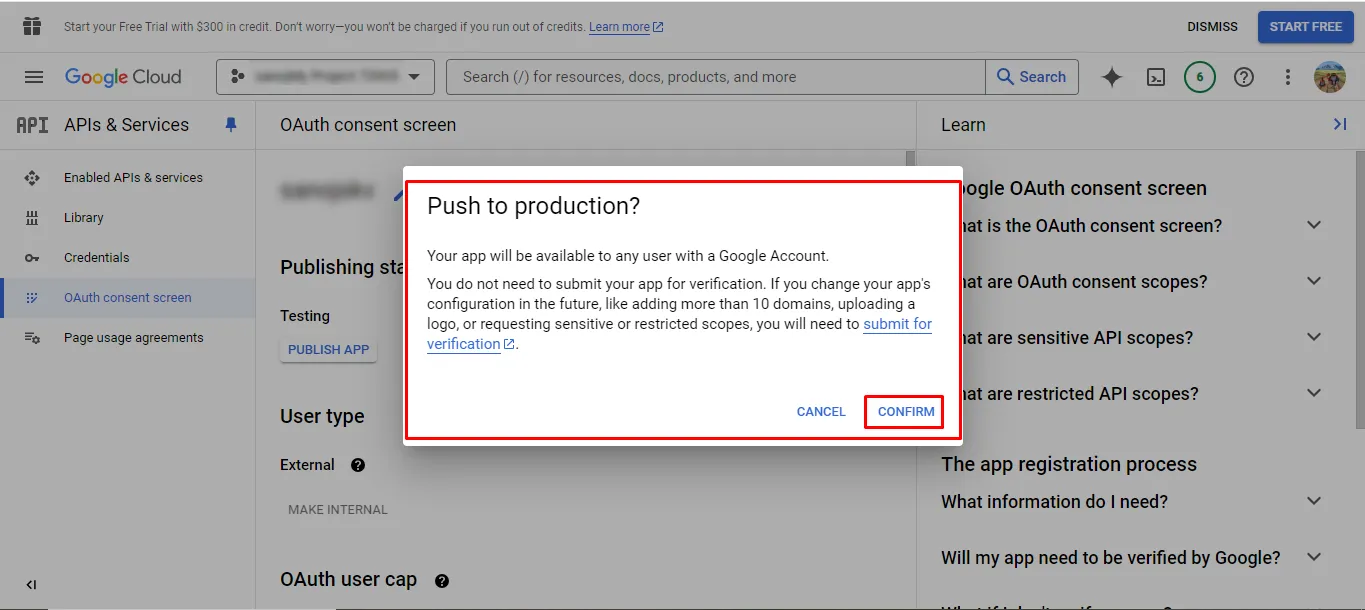
Step 32: Click the Publish App button.
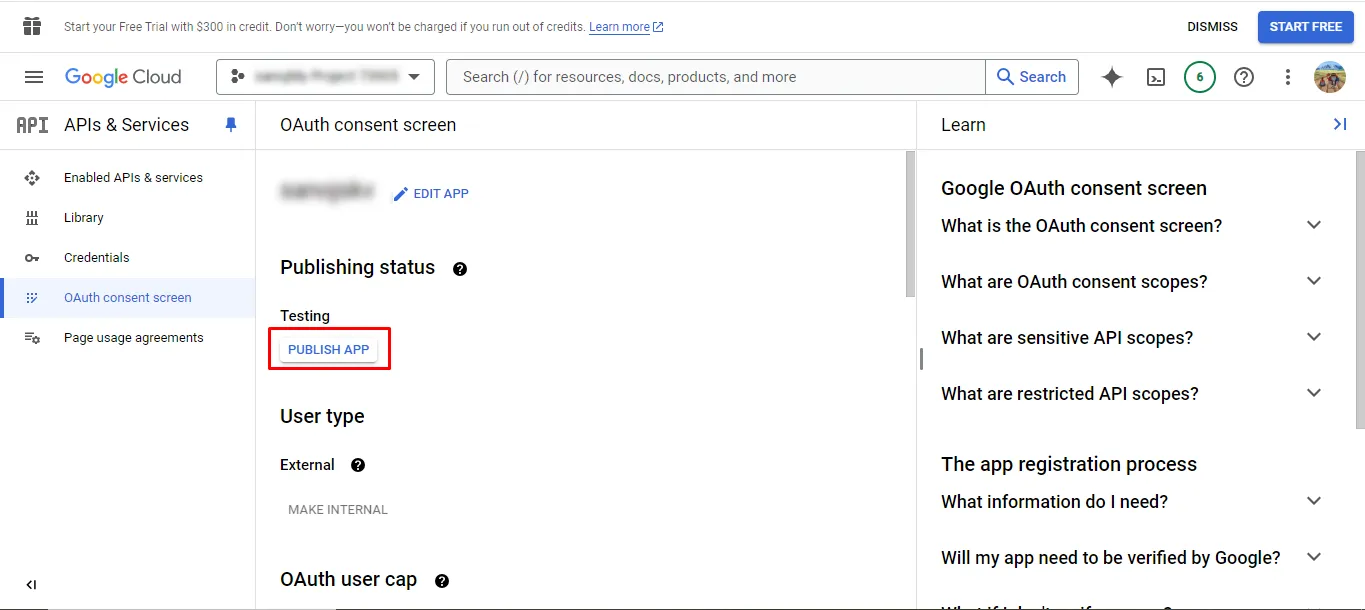
Step 33: A dialog box will appear. Click Confirm.
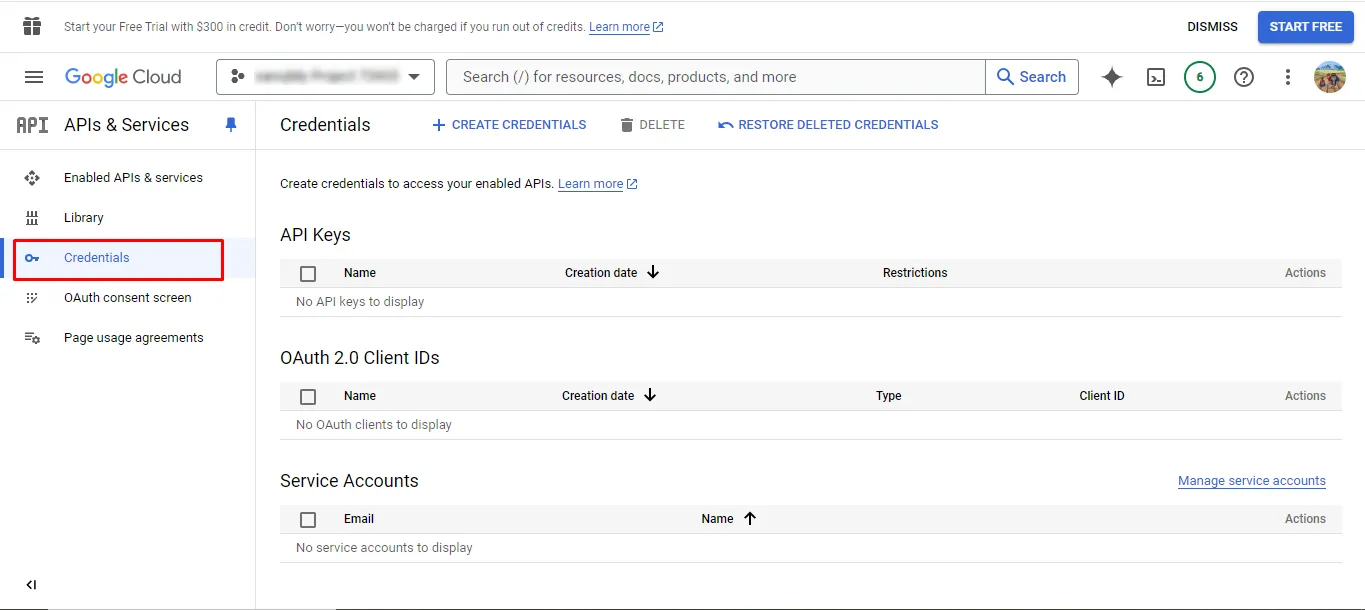
Step 34: Go back to the Credentials section.
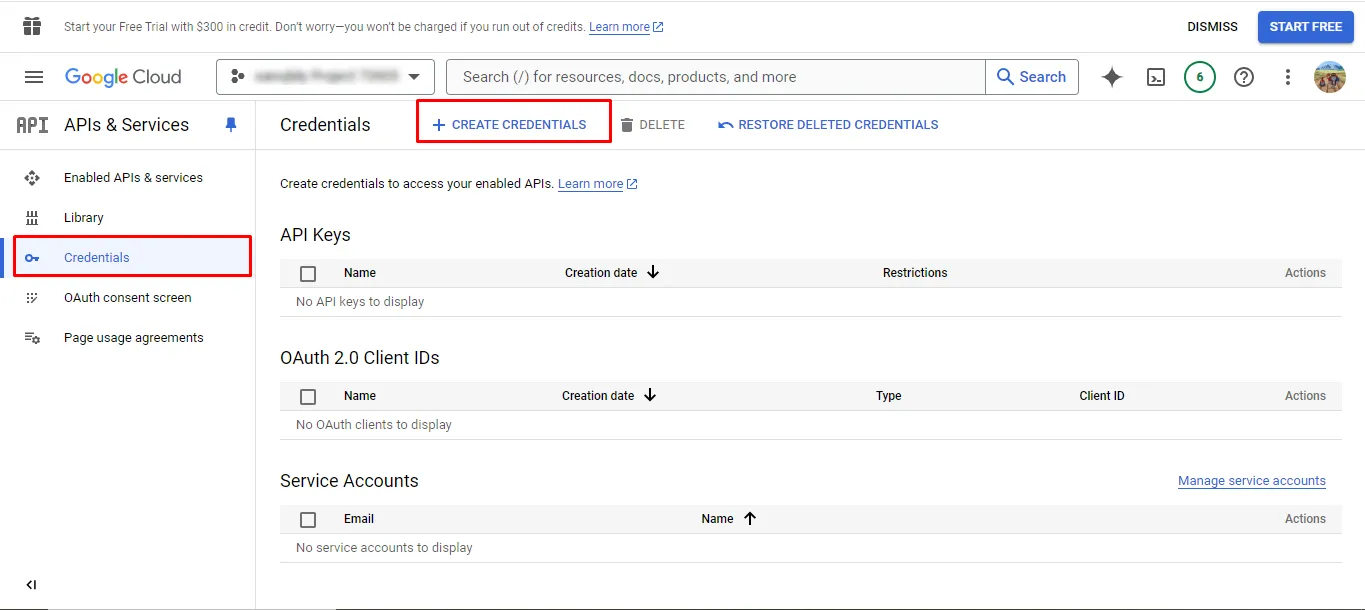
Step 35: Click + Create Credentials again.
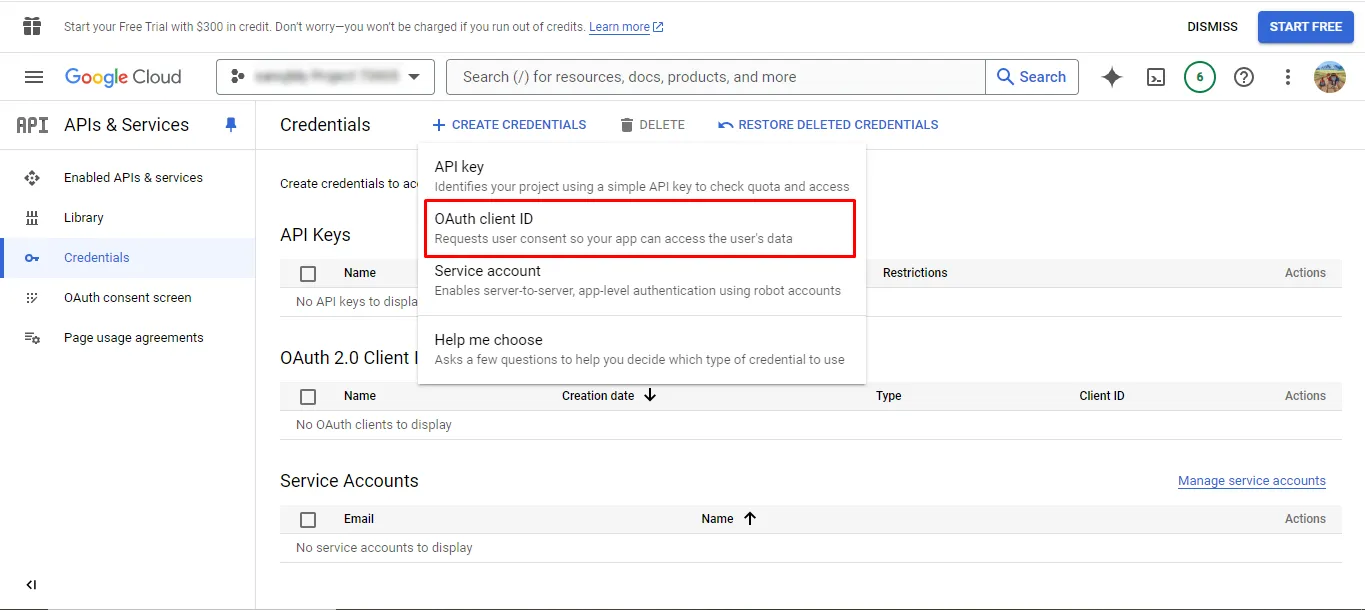
Step 36: Select OAuth Client ID once more.
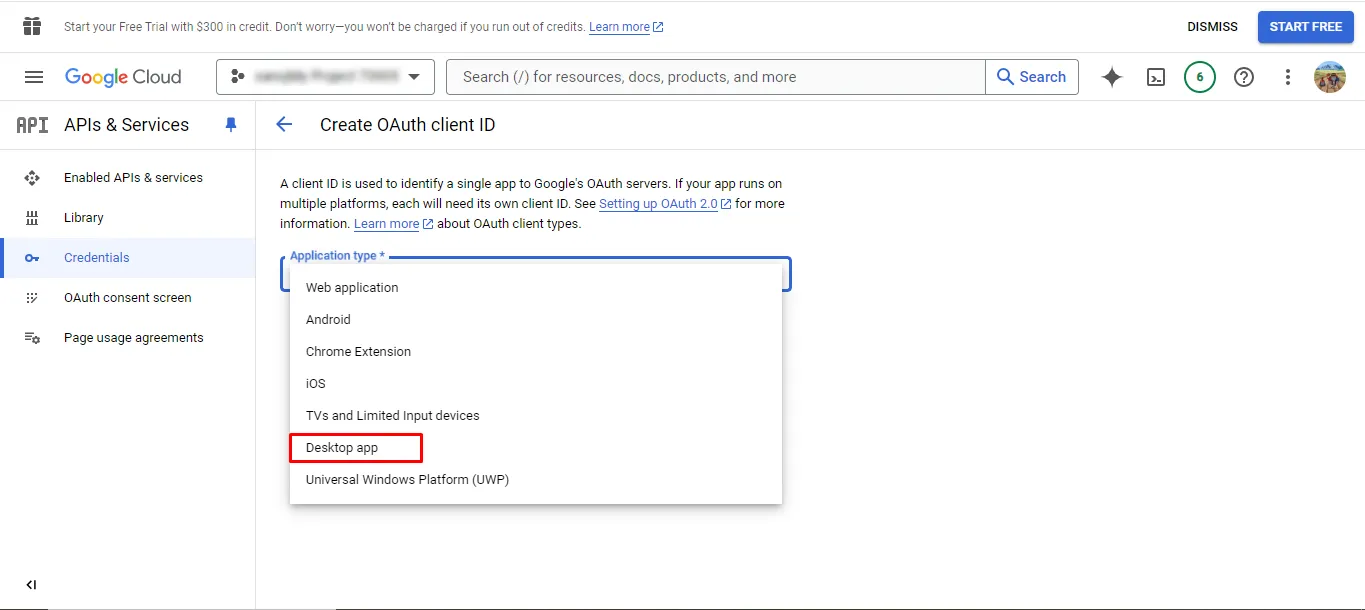
Step 37: Choose Desktop App from the Application type drop-down menu.
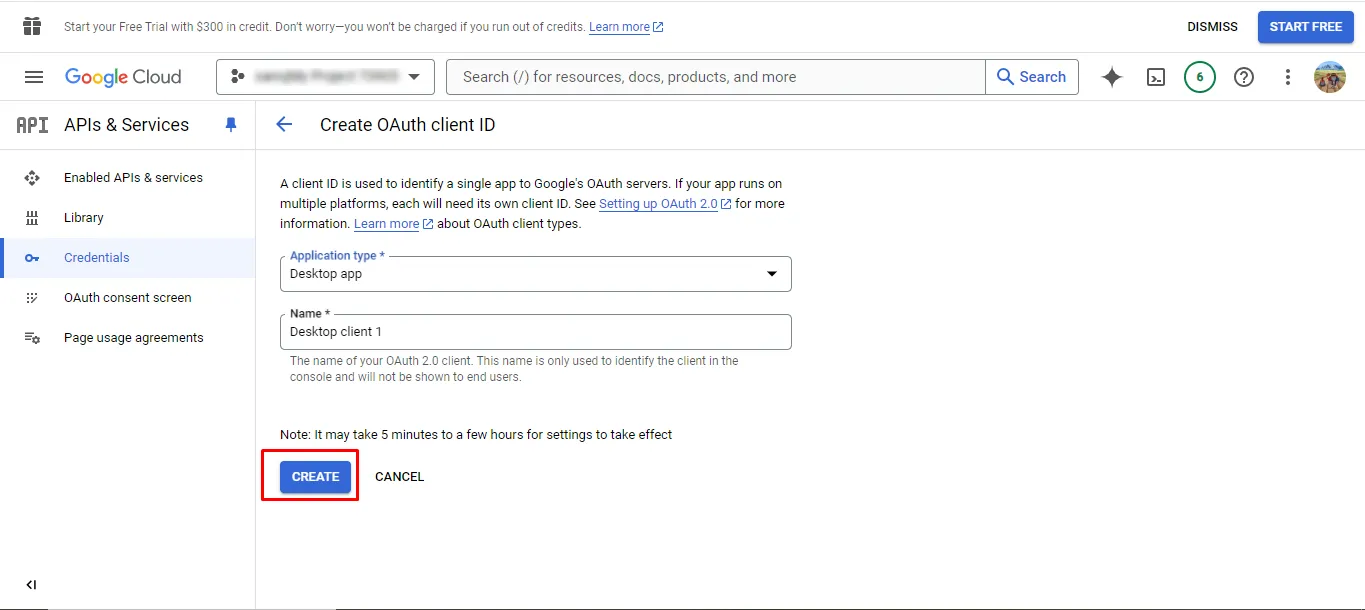
Step 38: Enter the Desktop Client Name and click Create.
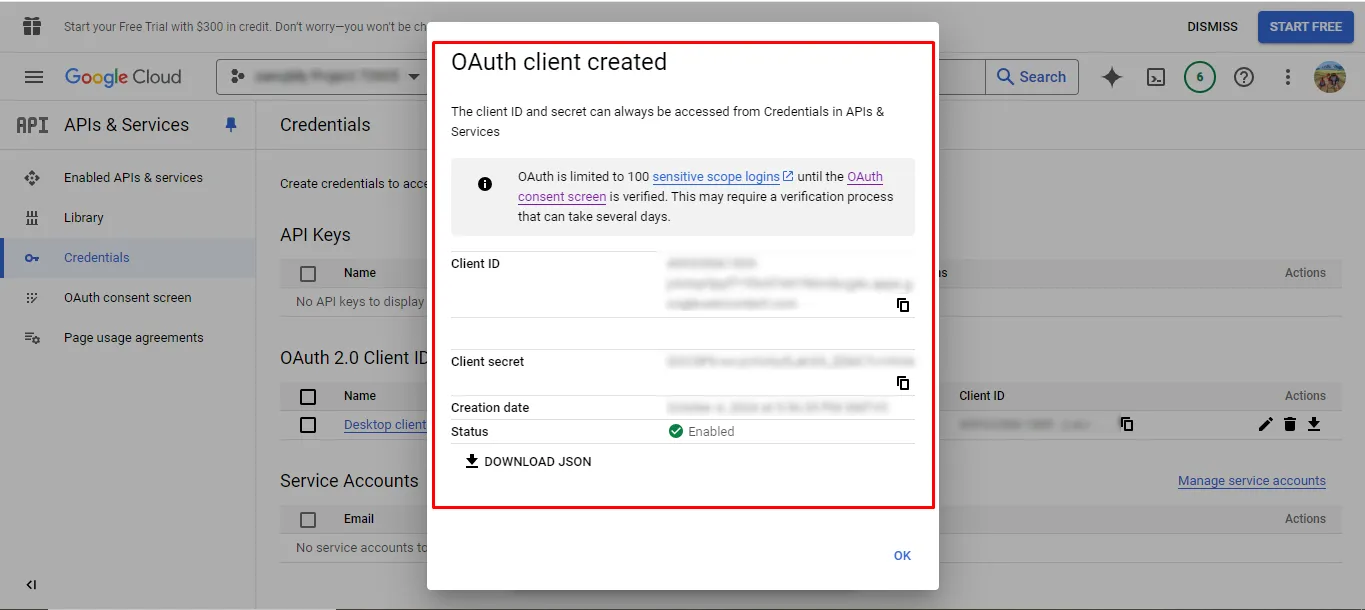
Step 39: The OAuth Client is now created. Copy the Client ID and Client Secret and keep them safe, then click OK.
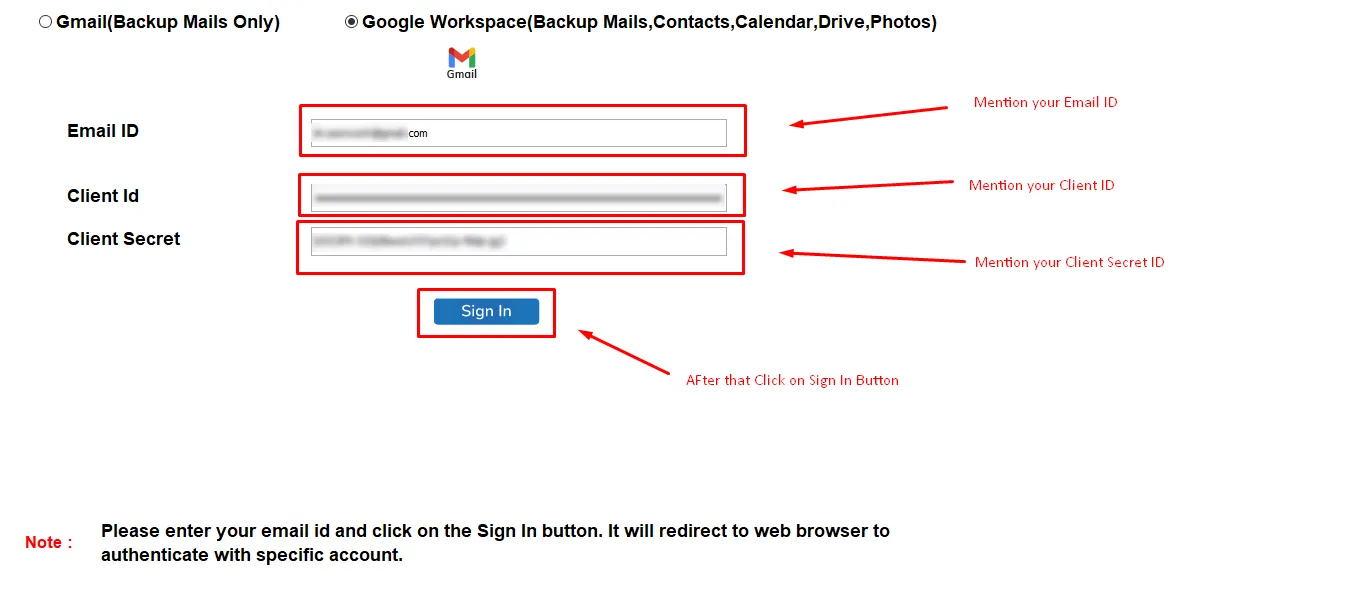
Step 40: Return to your software and enter your Email ID, Client ID, and Client Secret. Then, click Sign In.
Step 41: A pop-up will appear. Click OK.
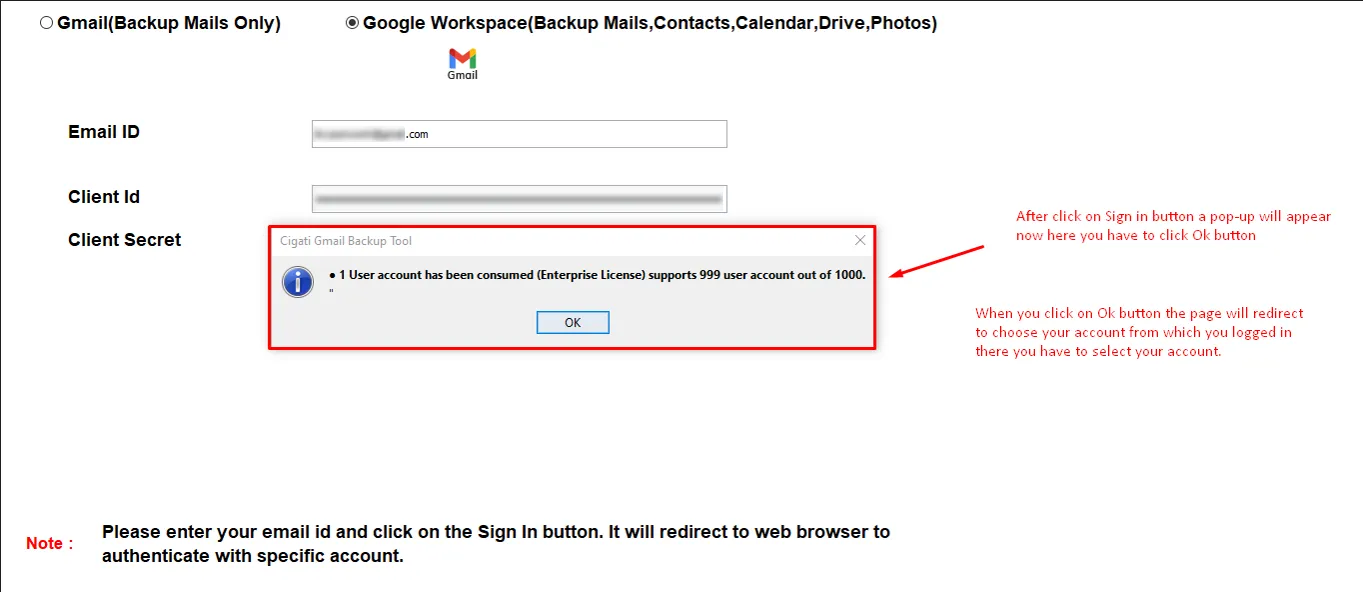
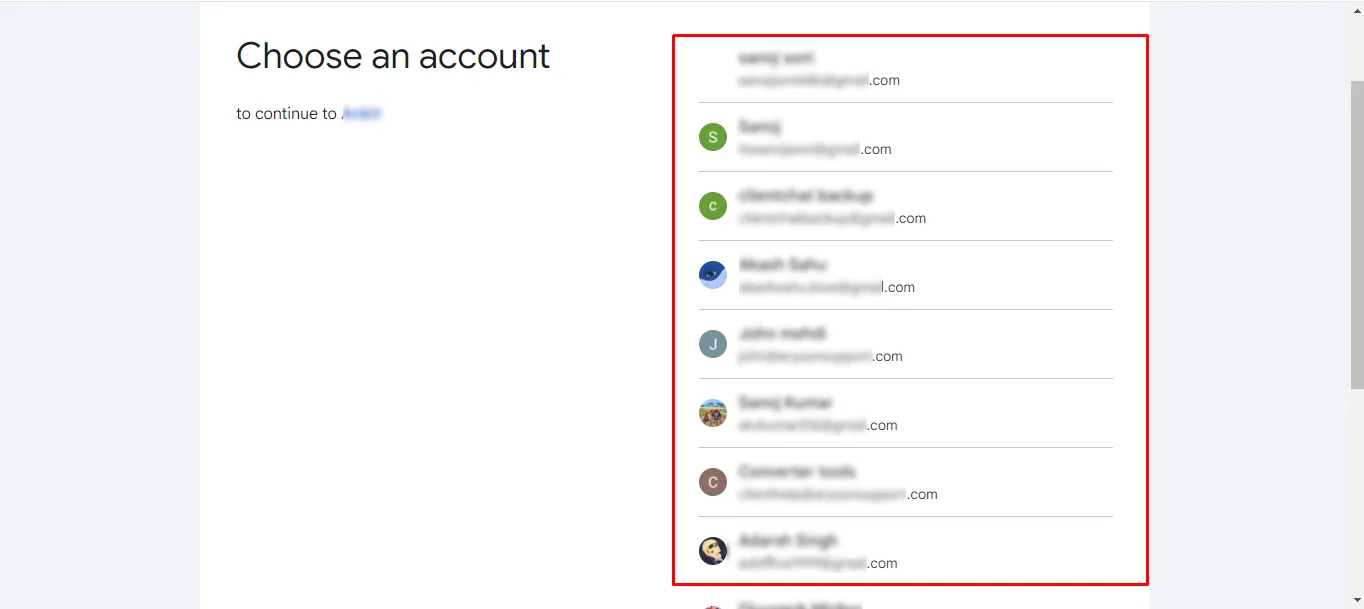
Step 42: Select the Gmail account you logged in with from the list.
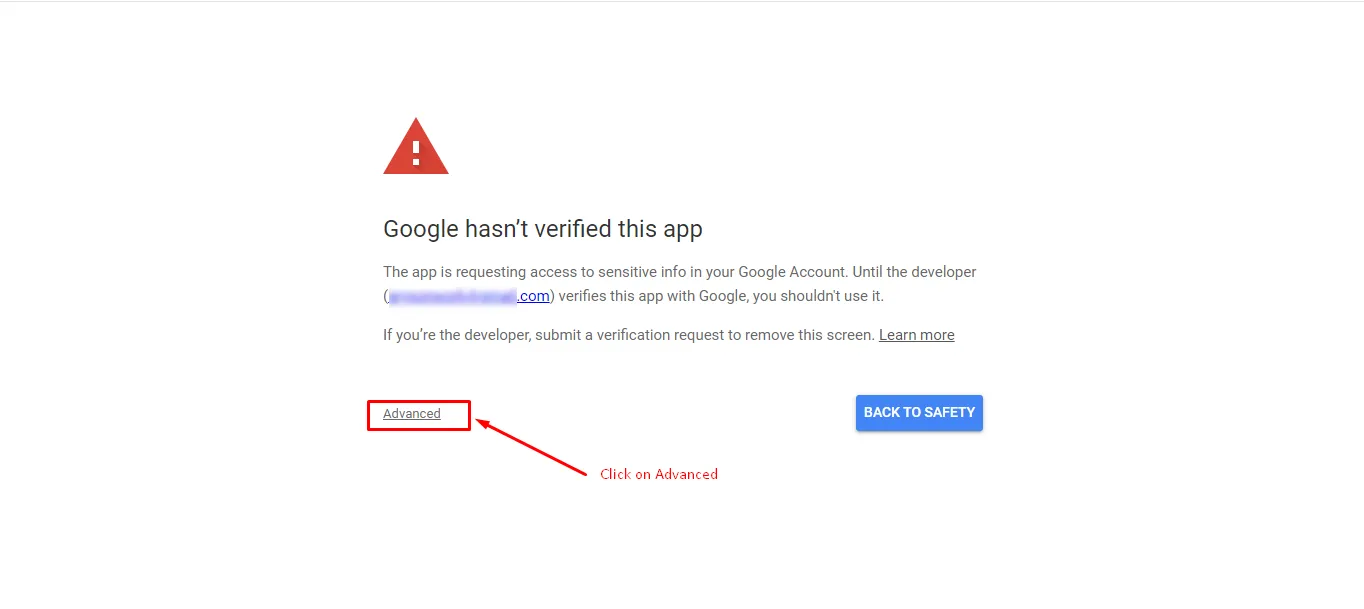
Step 43: A pop-up will appear. Click Advanced at the bottom-left corner.
Note: Our software adheres to strict security standards to ensure the safety and privacy of your data.
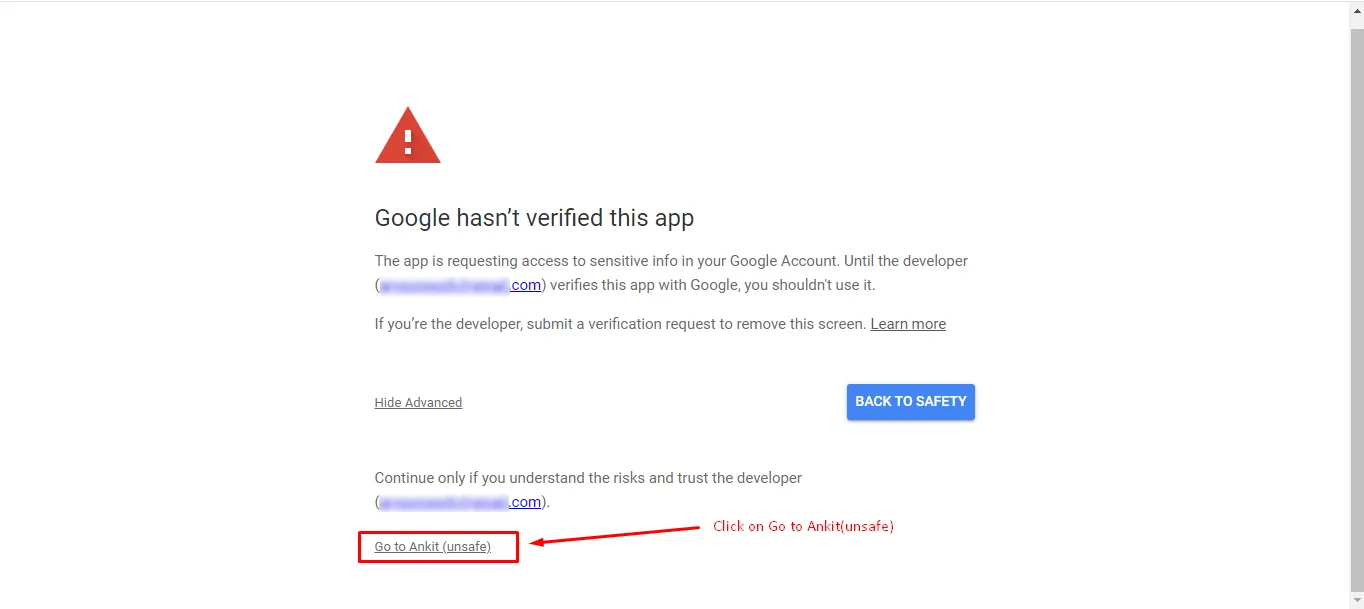
Step 44: Click the Go to... (unsafe) option.
Step 45: Check the box to select all permissions.
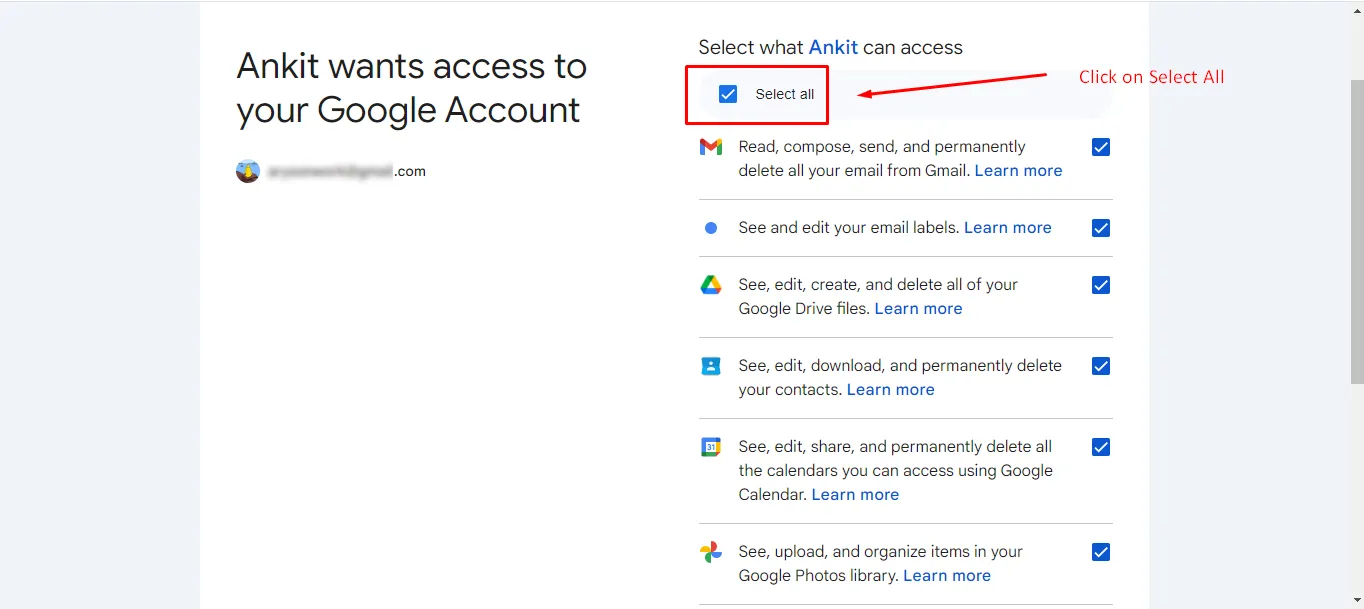
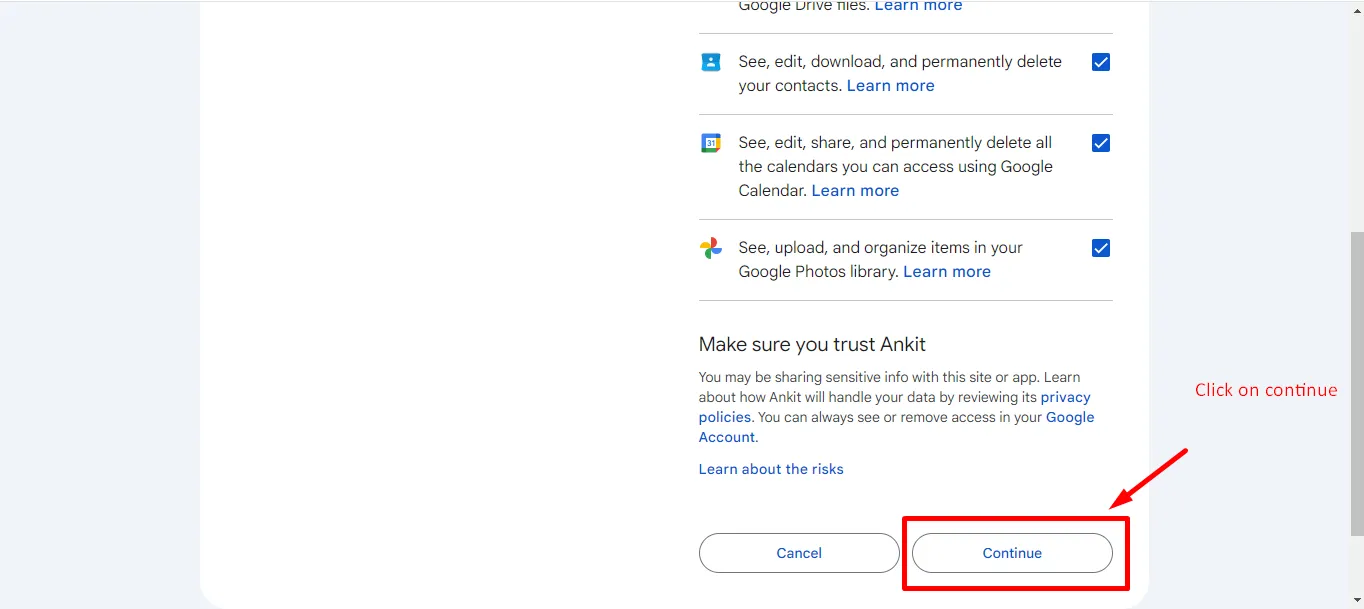
Step 46: Click Continue to proceed.
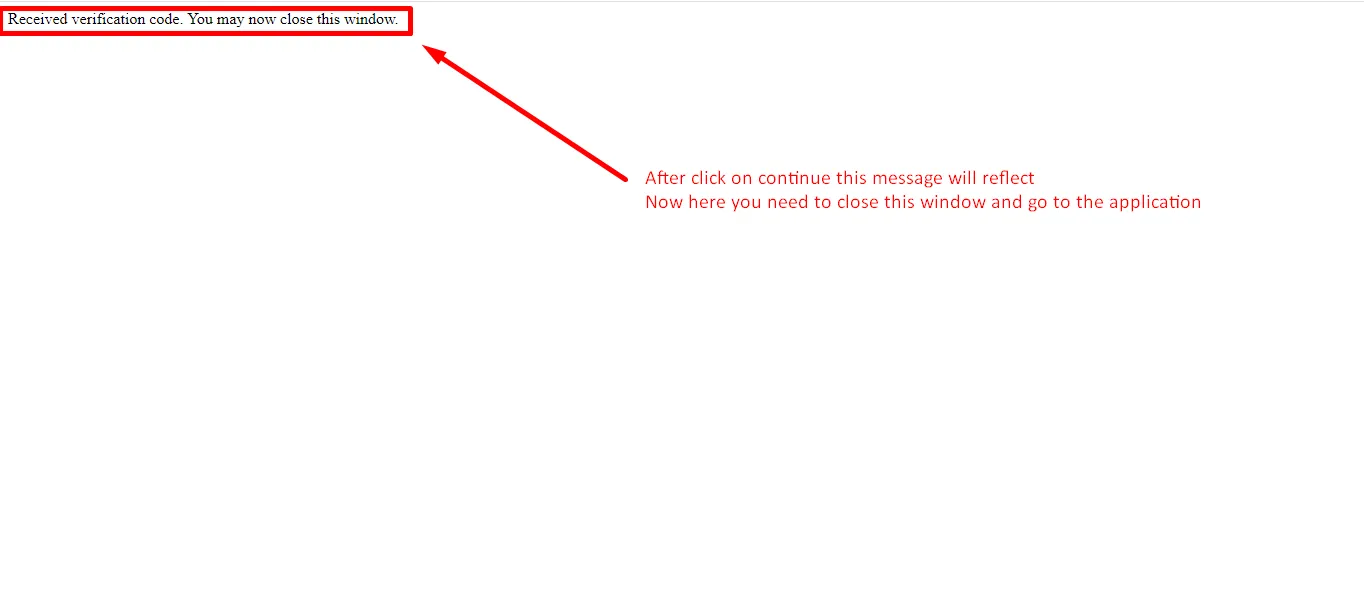
Step 47: A message indicating you've received a verification code will appear. You may now close the window.
Step 48: Congratulations! Your account login process is complete, and you can proceed with your migration smoothly.