Software Guide for Aryson VCF to CSV Converter
Quick Stepwise Guide For Converting VCF Files to CSV
This user manual helps users to convert their VCF files to CSV and other file formats like PDF, PST, Outlook CSV, VCF, DOCX, etc. IT professionals and experts can convert their vCard/VCF files to CSV format without any data loss on both Windows and Mac OS.
-
Table of Content
- Software Working Process
- Activation Guide
- Installation & Uninstallation
Software Working Process
Software Working Process
Step 1: Download and install the Aryson VCF to CSV Converter on your system.
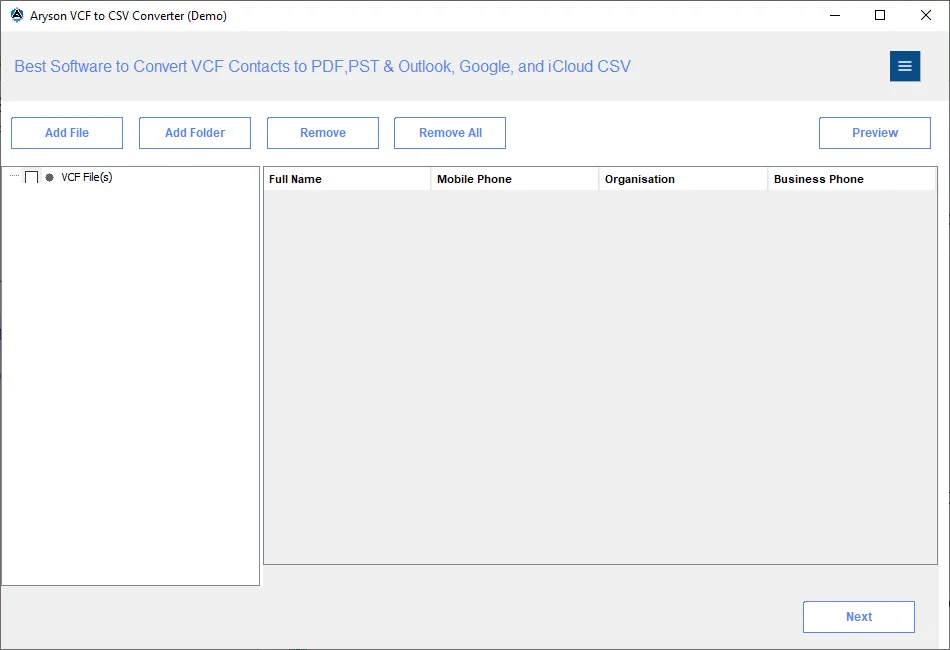
Step 2: Activate the software by using the Order No. and Activation Key (or continue with the Demo version ).
Step 3: Select the Language in which you are comfortable. You can choose the preferred language from the drop-down list:
English, Français, Netherlands, Português, Español, Deutsch, Italiano, Indonesia, Dansk, Magyar, Norsk, Polski, Svenska, Turkce, Cestina.
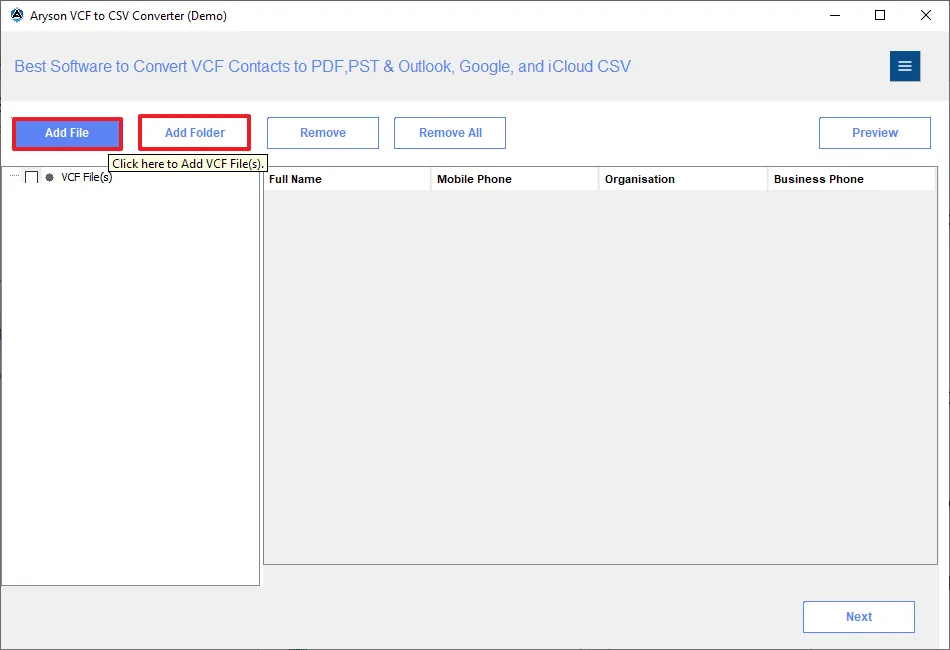
Step 4: Choose how you want to add the required VCF data into the software:
- Add Files: Hit this button to add single or multiple VCF files.
- Add Folders: Use this to add a whole folder, which contains VCF files.
- Remove Selected: Click it to delete the selected files.
- Remove All: Delete all added VCF files.
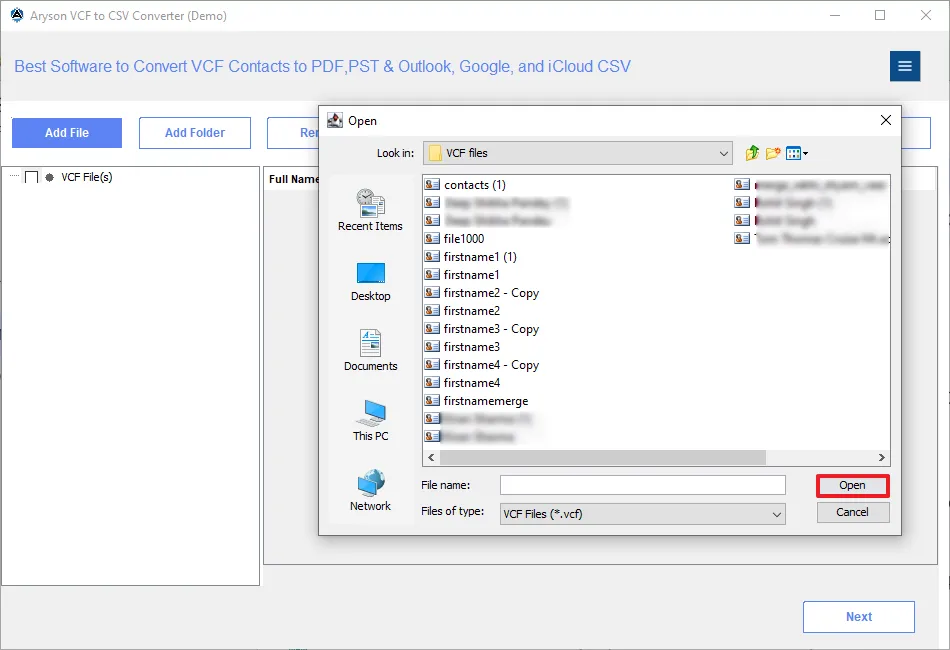
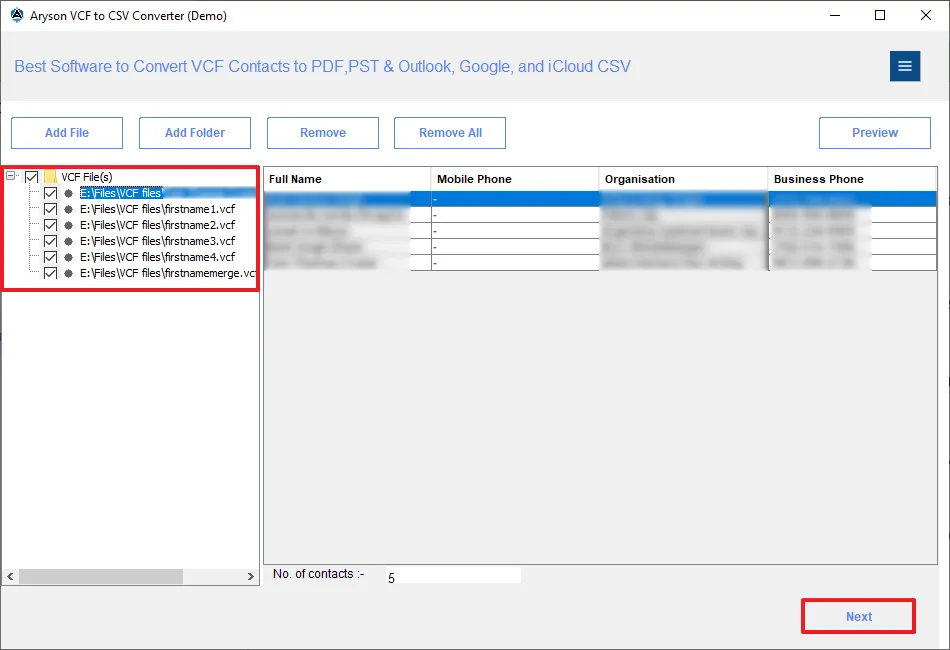
Step 5: Select the necessary VCF file/folder and click Open to import it into the software.
Step 6: The software includes a Merge & Split feature that allows files to be merged or split based on specified conditions.
To split the files, the conditions are:
- Split by each contact: Creates a separate file for each contact.
- Split by number of contacts: Splits the file based on the number of contacts per file given by the user.
Once you click the Merge button, select Remove Duplicate Contacts, and apply the conditions given below:
- First Name: Deletes contacts with the same first name.
- Last Name: Removes contacts based on a similar last name.
- Contact No: Discard contacts with the same contact number.
- Mail-ID: Deletes contacts based on similar email addresses.
Once done, click Destination Path to select where you want to save the split or merged VCF file, and click Export.
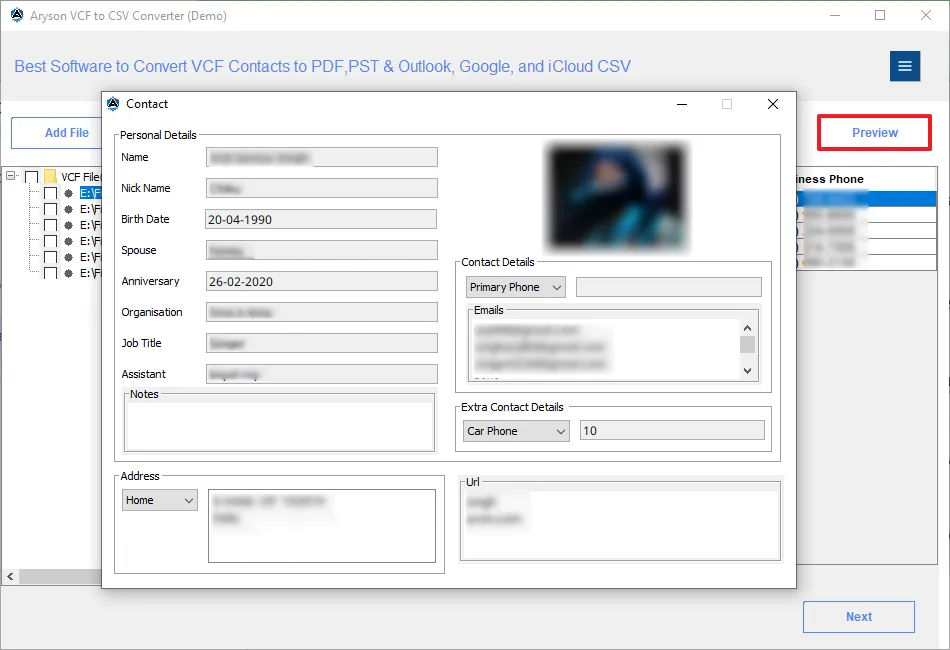
Step 7: In the Preview section, you can view the Personal Details of the contact owner. Once verified and files selected from the tree structure, click Next.
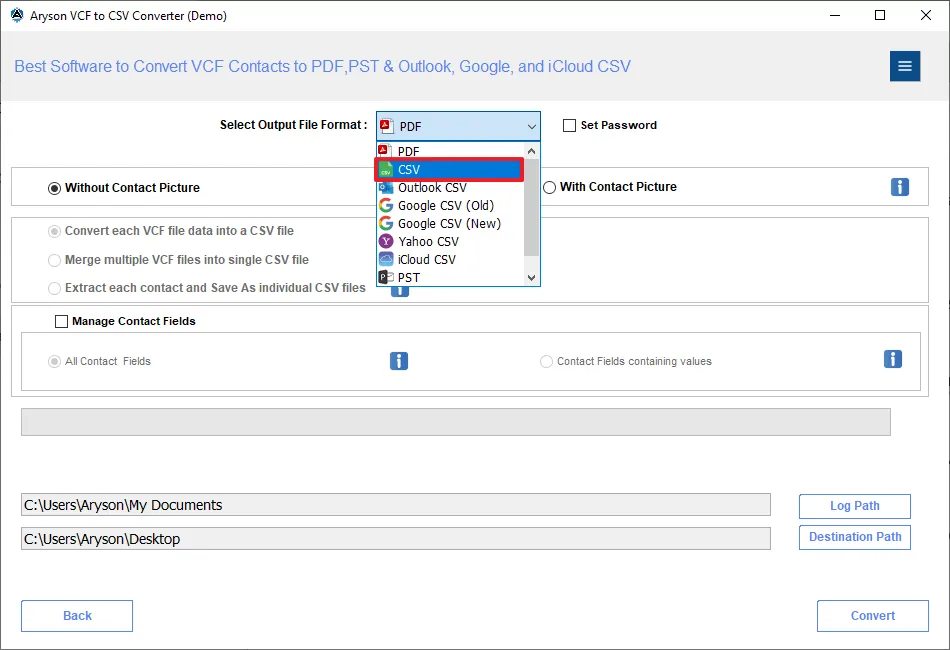
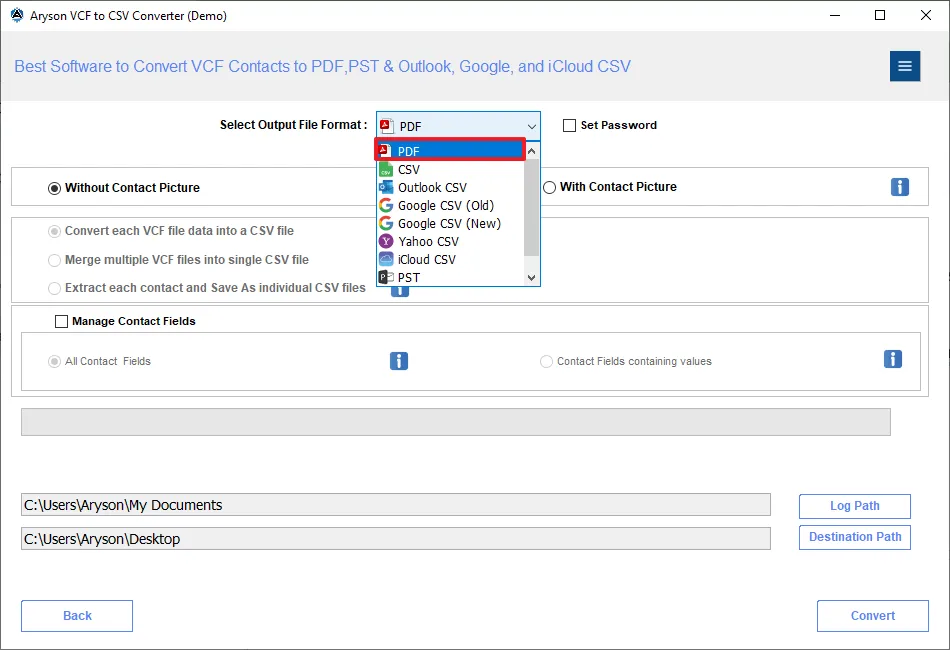
Step 8: Select CSV under the Select Output File Format drop-down list to convert the Virtual Contact File (VCF/vCard).
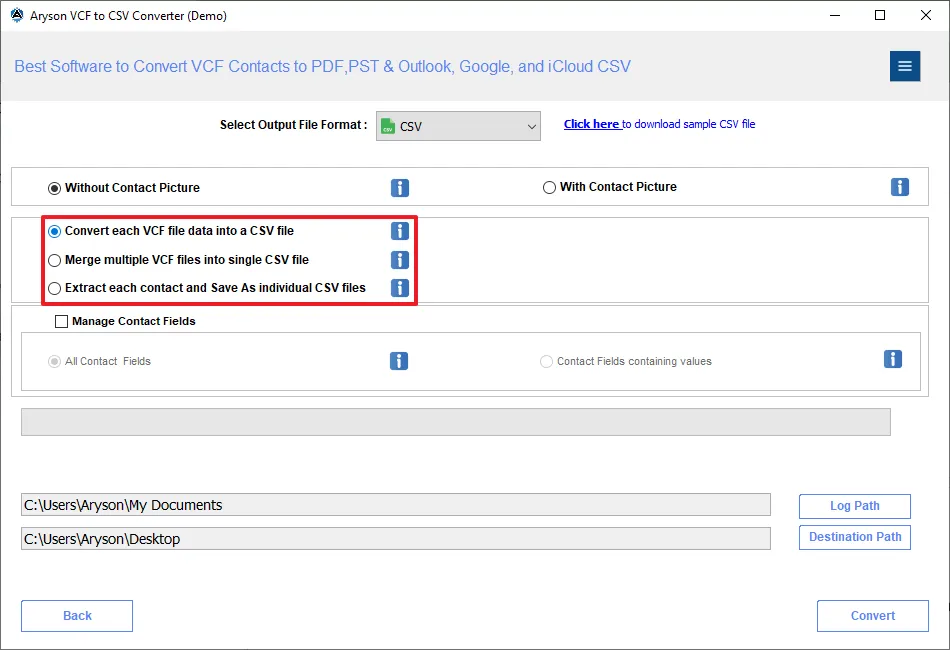
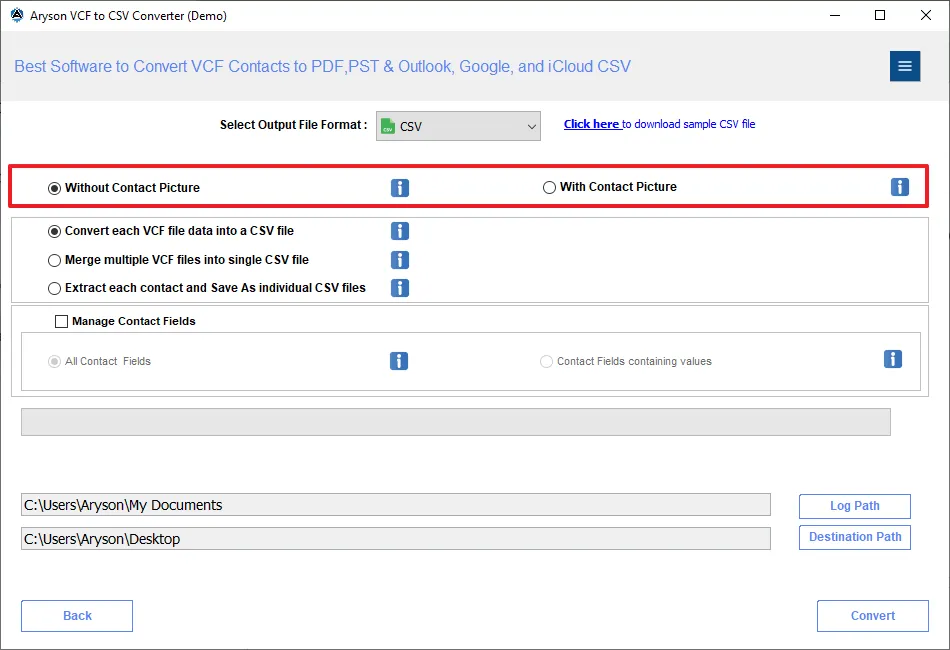
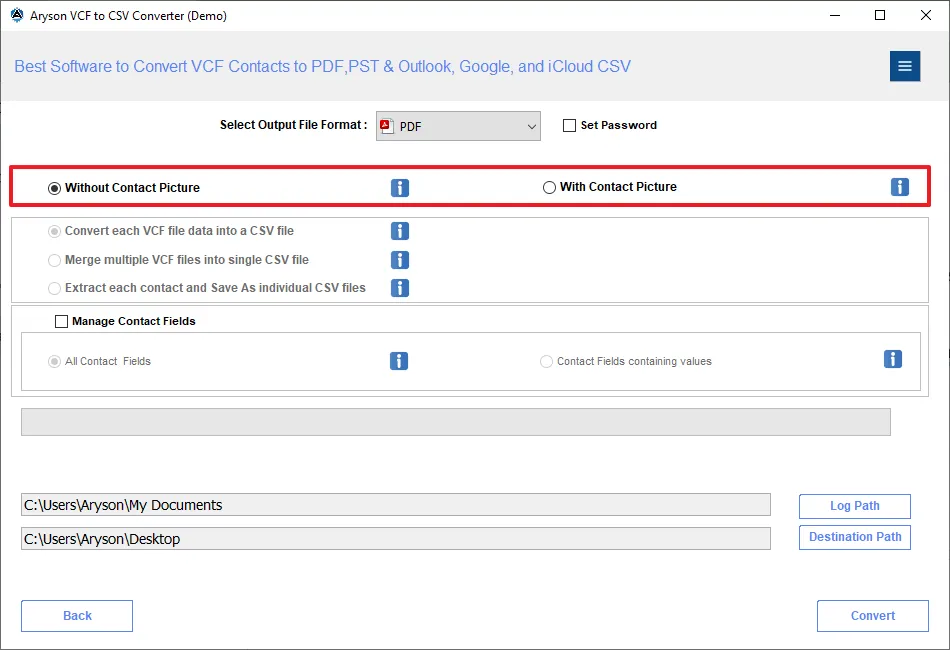
Step 9: Apply the filter of how you want the contact pictures to be accessed:
- Without Contact Picture: Saves the CSV files without a contact picture.
- With Contact Picture: Export the CSV files with a contact picture.
Step 10: Convert each VCF file to a CSV file: Use this filter to convert each VCF file to a separate CSV file.
Step 11: Merge multiple VCF files into a single CSV file: This allows you to convert multiple VCF files into a single CSV file for ease of access.
Step 12: Extract each contact and Save As individual CSV files: Enables you to save each individual VCF contact as a separate CSV file.
Step 13: Skip Previously Migrated Data: Avoid contacts that have already been migrated due to any technical error or halt.
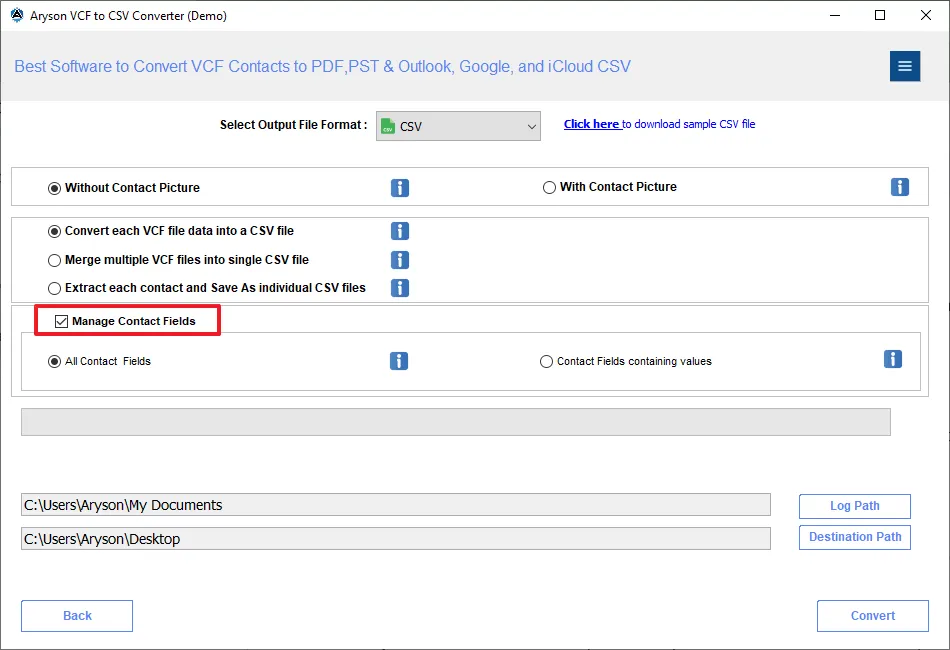
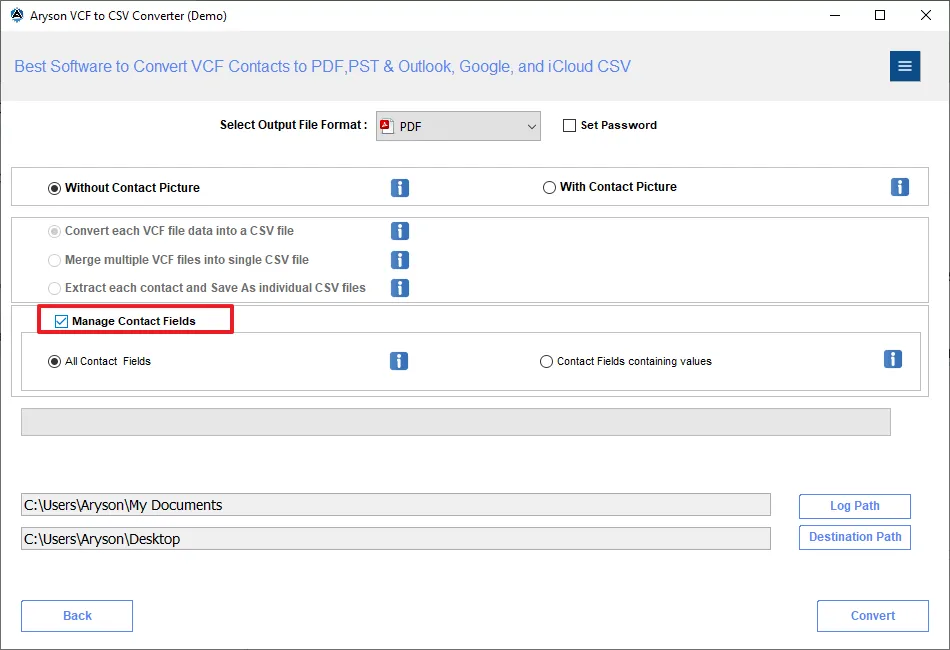
Step 14: Manage Contact Fields: After enabling the feature, there are two options:
- All Contact Fields: Allows you to save the CSV file even with empty fields.
- Contact Fields containing values: Saves the CSV file only with the fields that contain values.
Step 15: Extract Name, email & phone from contacts: Lets you extract only name, email, and phone from contacts and save it to a CSV or Excel file.
Step 16: Remove Duplicate Contacts on the basis of:
- First Name: Delete the contacts with the same first name.
- Last Name: Remove the contacts with a similar last name.
- Phone Number: Delete the contacts with the same phone number.
- Mail ID: Remove the contacts with the same email address.
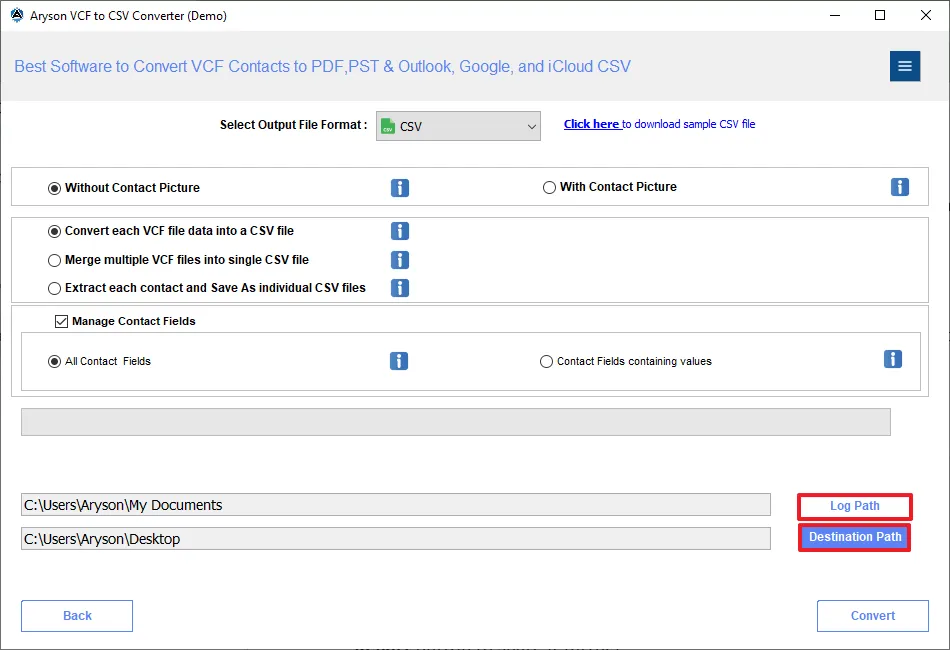
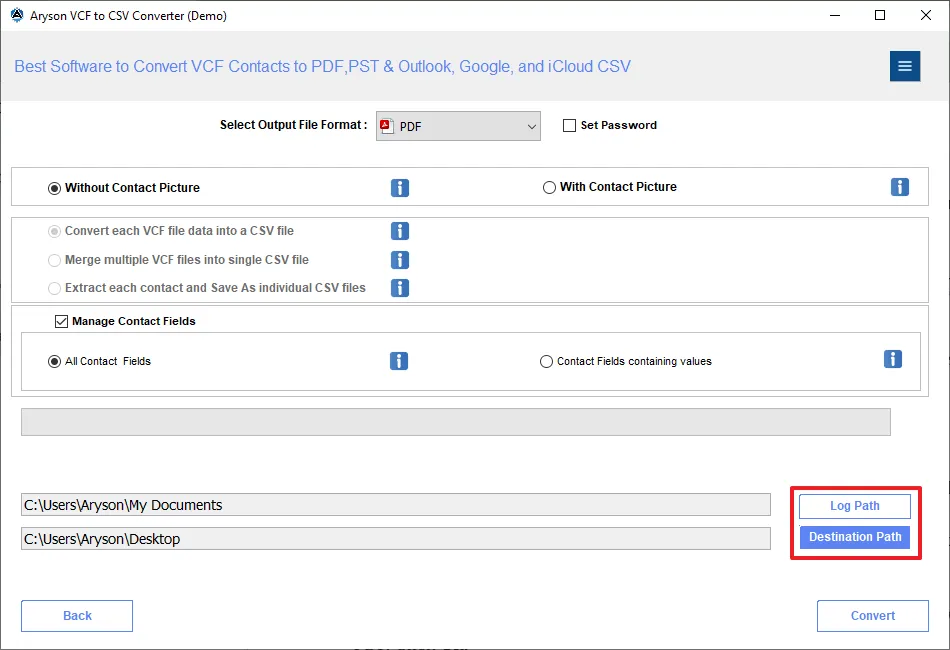
Step 17: Click on the Destination Path button to provide a destination for the converted CSV file. Select the path and click Select.
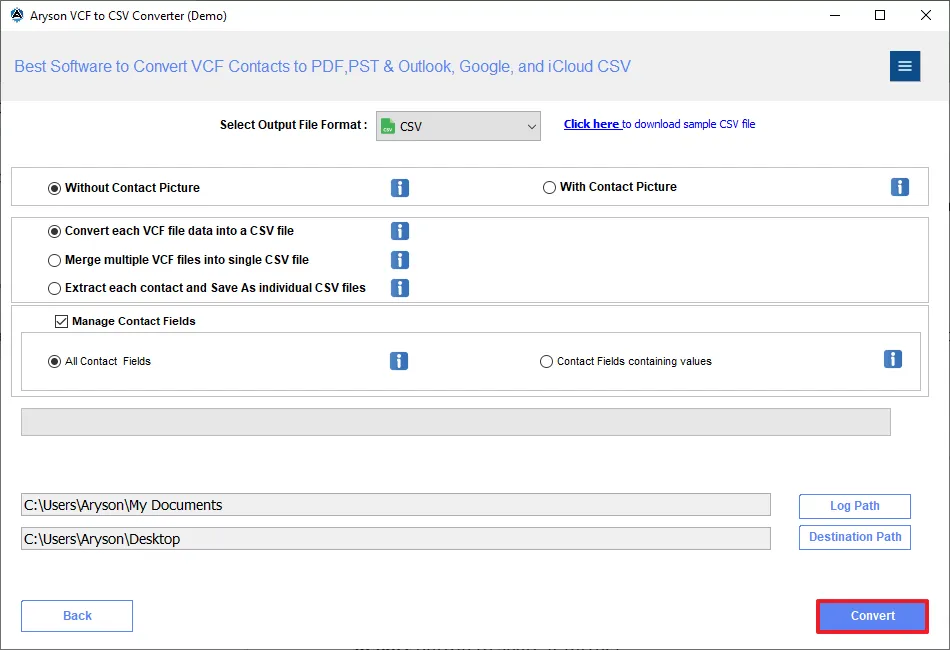
Step 18: Click on the Convert button to start the conversion process.
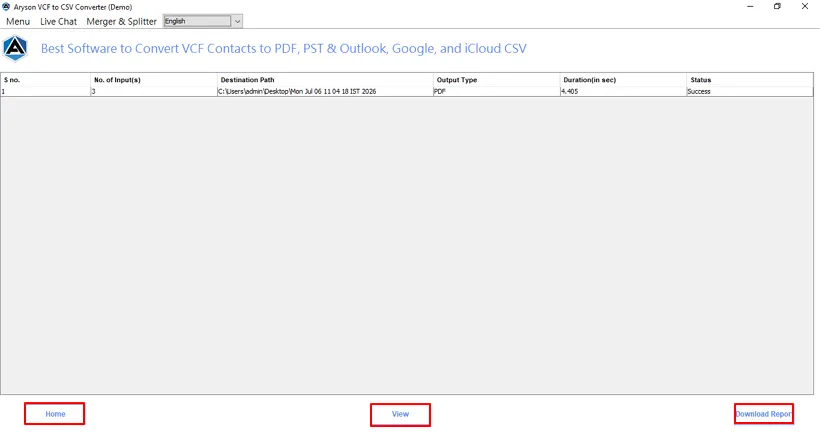
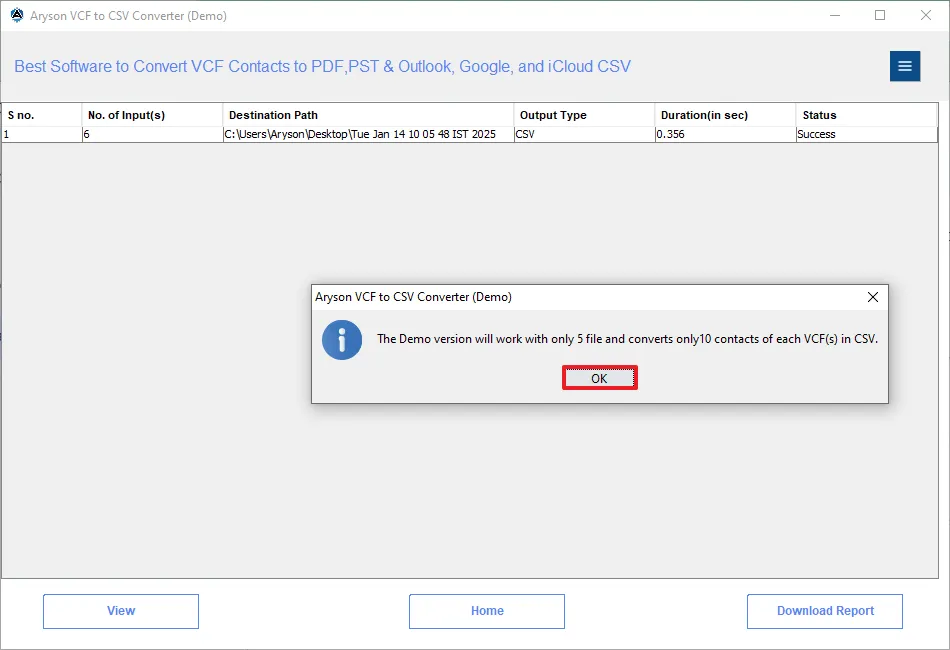
Step 19: After successful completion, the software displays S No., No. of inputs, Destination Path, Output Type, Duration(in sec), and Status.
Step 20: After conversion, details
- Home: Takes you to the home page of the software.
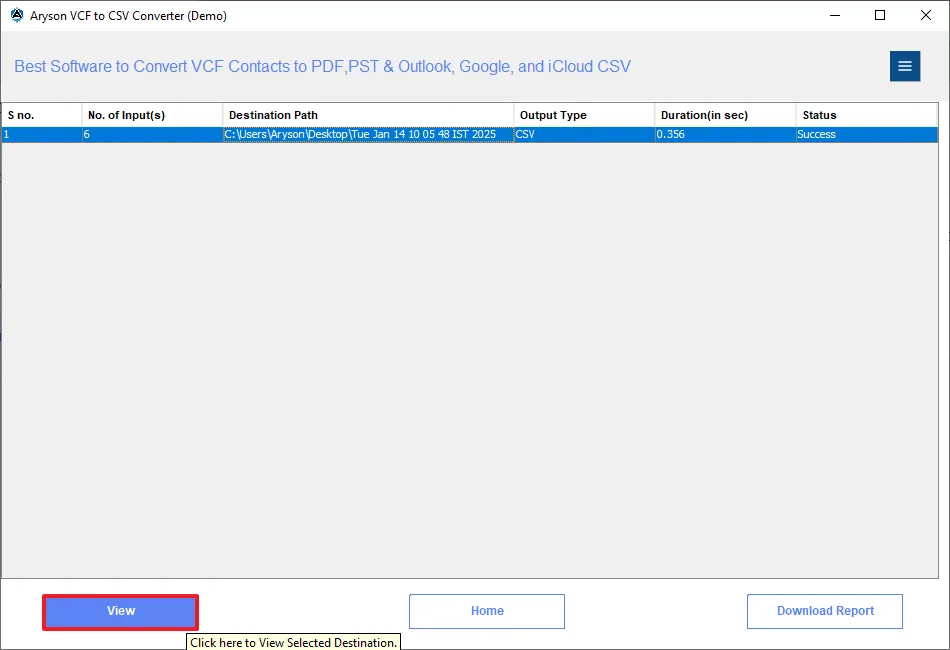
- View: First, select a converted row, and then view the converted CSV files.
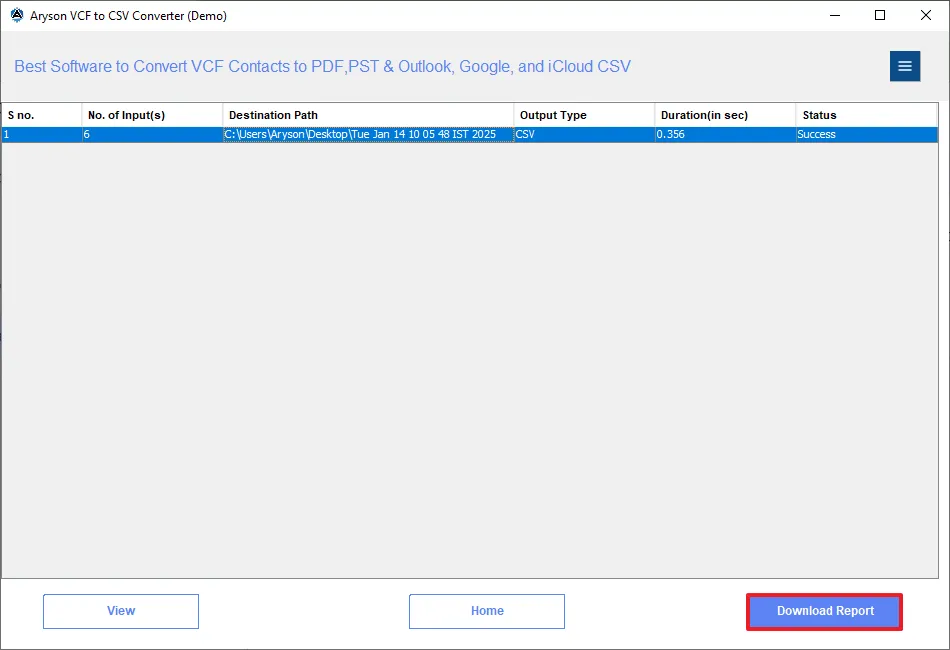
- Download Report: Generates a report of the converted files.
Software Working Process
Step 1: Download and install the Aryson VCF Converter on your system.
Step 2: Activate the software by using the Order No. and Activation Key (or continue with the Demo version).
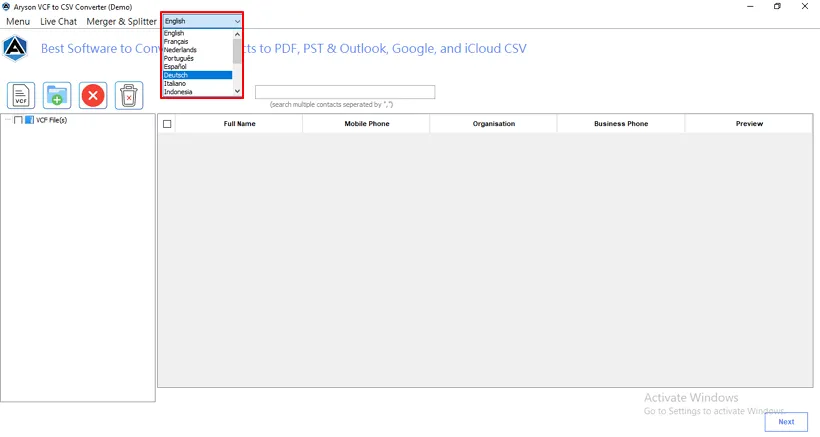
Step 3: Select the Language in which you are comfortable. You can choose the preferred language from the drop-down list:
English, Français, Netherlands, Português, Español, Deutsch, Italiano, Indonesia, Dansk, Magyar, Norsk, Polski, Svenska, Turkce, Cestina.
Step 4: Choose how you want to add the required VCF data into the software:
- Add Files: Hit this button to add single or multiple VCF files.
- Add Folders: Use this to add a whole folder, which contains VCF files.
- Remove Selected: Click it to delete the selected files.
- Remove All: Delete all added VCF files.
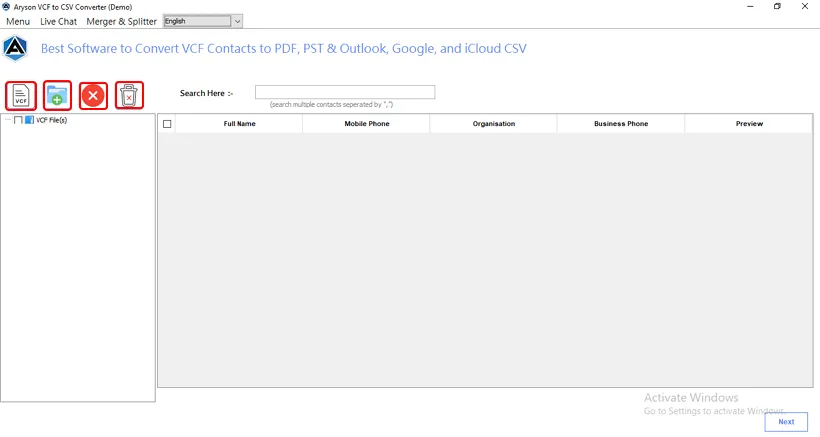
Step 5: Select the necessary VCF file/folder and click Open to import it into the software.
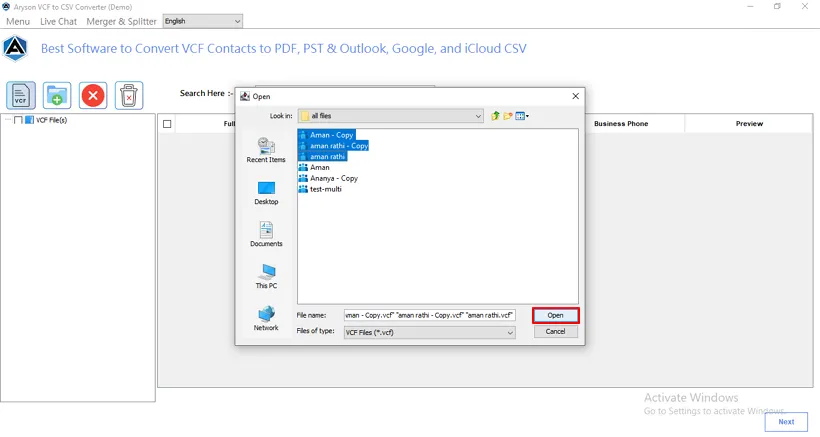
Step 6: The software includes a Merge & Split feature that allows files to be merged or split based on specified conditions.
To Split the files, the conditions are:
- Split by each contact: Creates a separate file for each contact
- Split by number of contacts: Splits the file based on the number of contacts per file given by the user.
Once you click the Merge button, select Remove Duplicate Contacts, and apply the conditions given below:
- First Name: Deletes contacts with the same first name.
- Last Name: Removes contacts based on a similar last name.
- Contact No: Discard contacts with the same contact number.
- Mail-ID: Deletes contacts based on similar email addresses.
Once done, click Destination Path to select where you want to save the split or merged VCF file, and click Export.
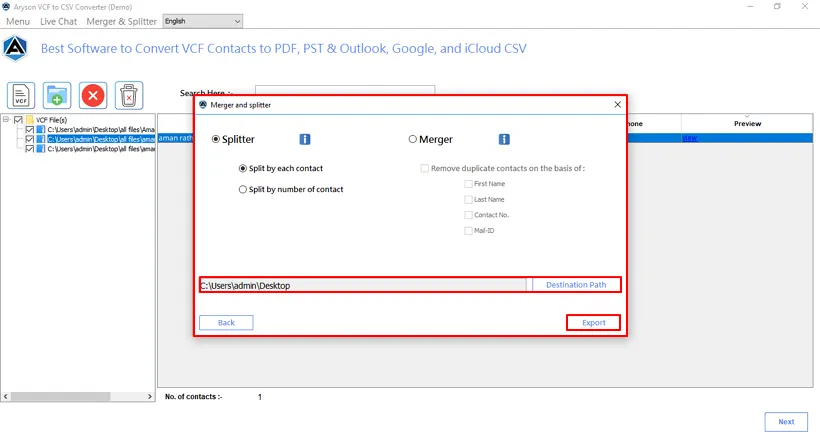
Step 7: In the Preview section, you can view the Personal Details of the contact owner. Once verified and files selected from the tree structure, click Next.
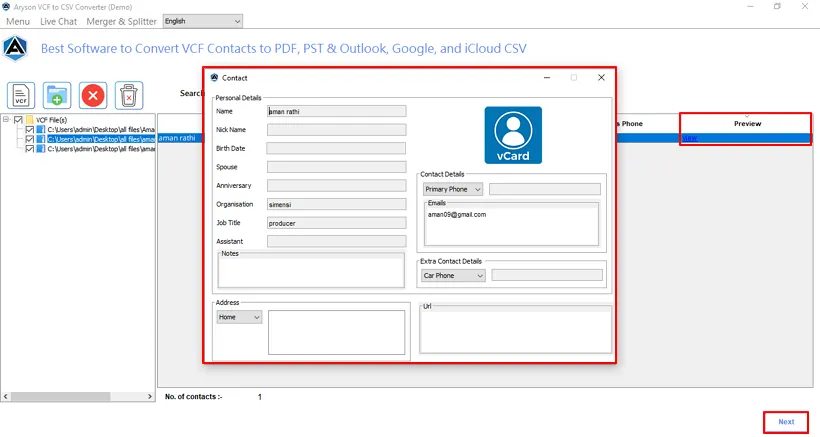
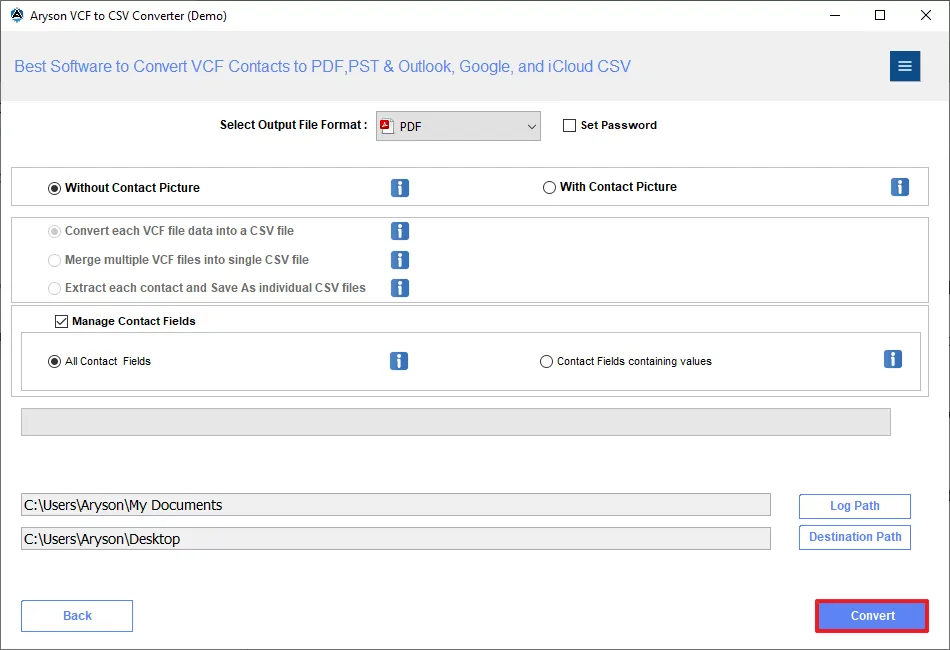
Step 8: Select PDF under the Select Output File Format drop-down list to convert the Virtual Contact File (VCF/vCard).
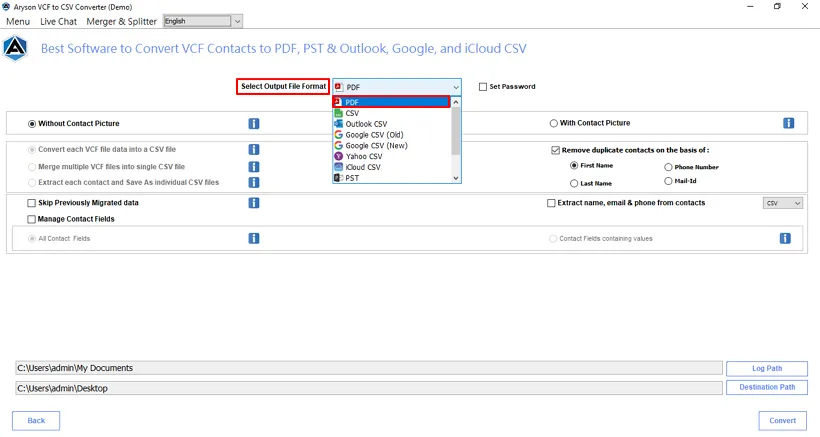
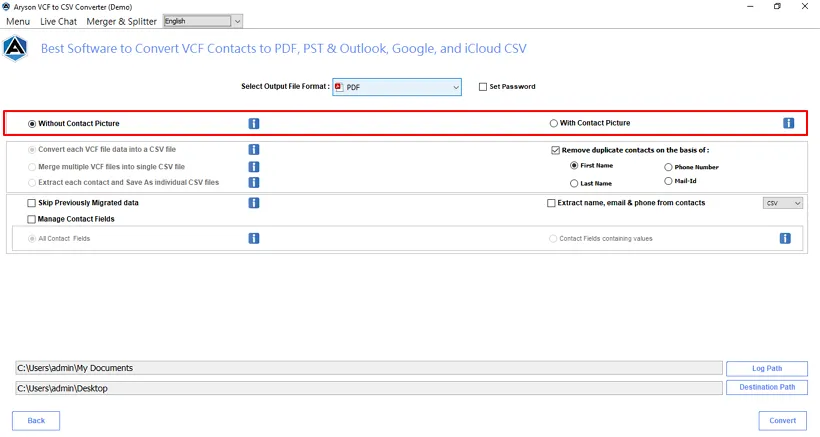
Step 9: Apply the filter of how you want the contact pictures to be accessed:
- Without Contact Picture: Saves the PDF files without a contact picture.
- With Contact Picture: Export the PDF files with a contact picture.
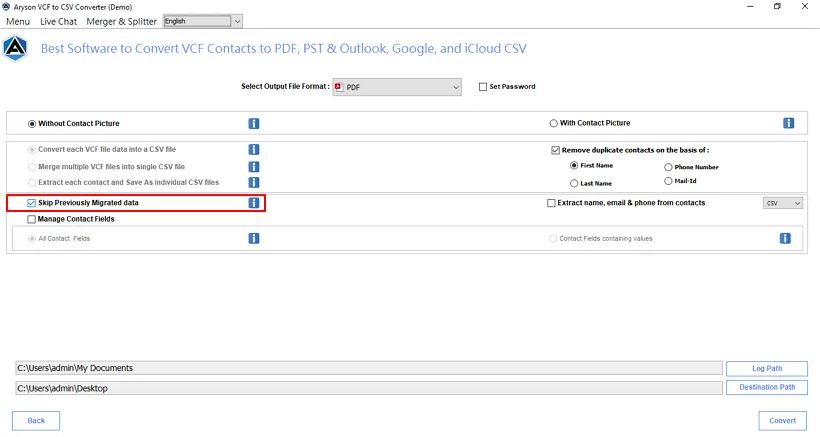
Step 10: Skip Previously Migrated Data: Avoid contacts that have already been migrated due to any technical error or halt.
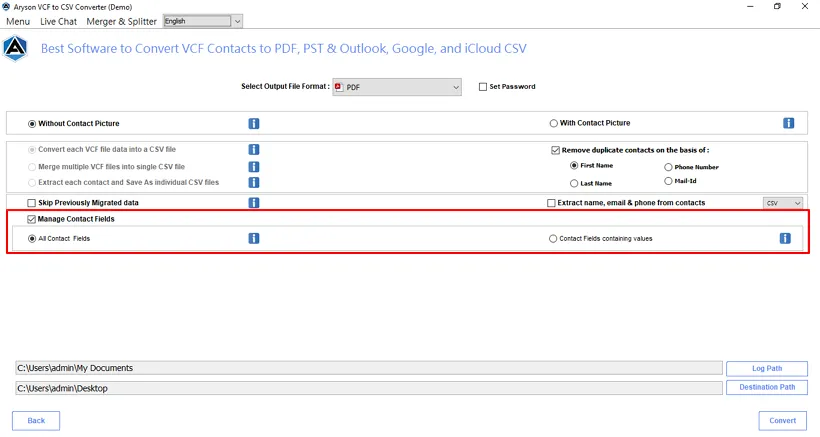
Step 11: Manage Contact Fields: After enabling the feature, there are two options:
- All Contact Fields: Allows you to save the PDF file even with empty fields.
- Contact Fields containing values: Saves the PDF file only with the fields that contain values.
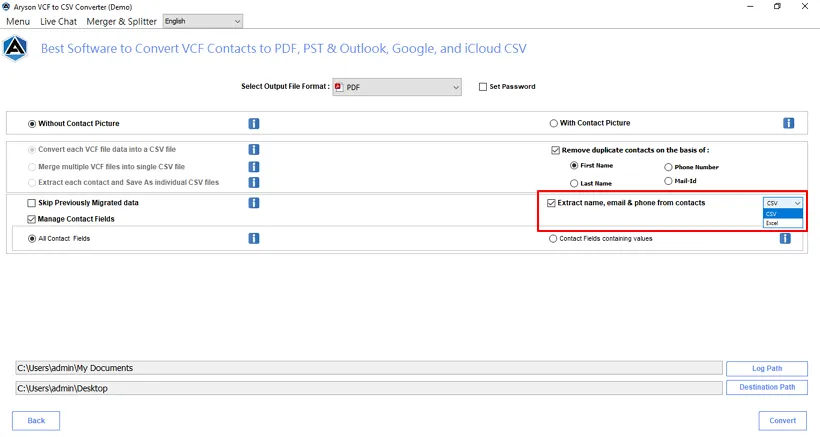
Step 12: Extract Name, email & phone from contacts: Lets you extract only name, email, and phone from contacts and save it to a CSV or Excel file.
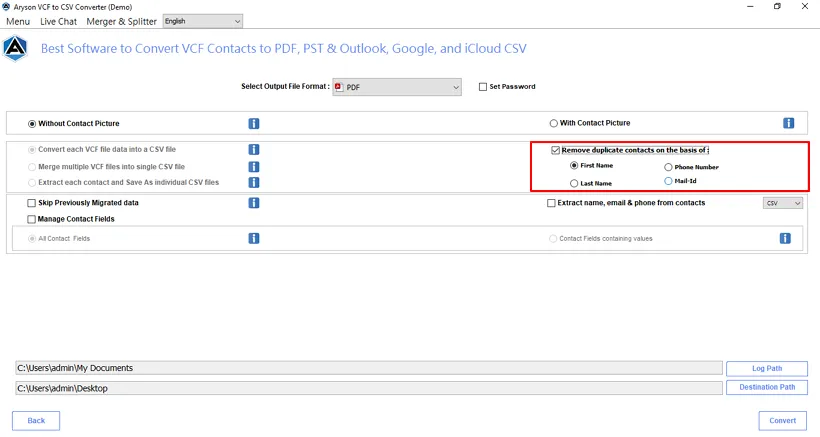
Step 13: Remove Duplicate Contacts on the basis of:
- First Name: Delete the contacts with the same first name.
- Last Name: Remove the contacts with a similar last name.
- Phone Number: Delete the contacts with the same phone number.
- Mail ID: Remove the contacts with the same email address.
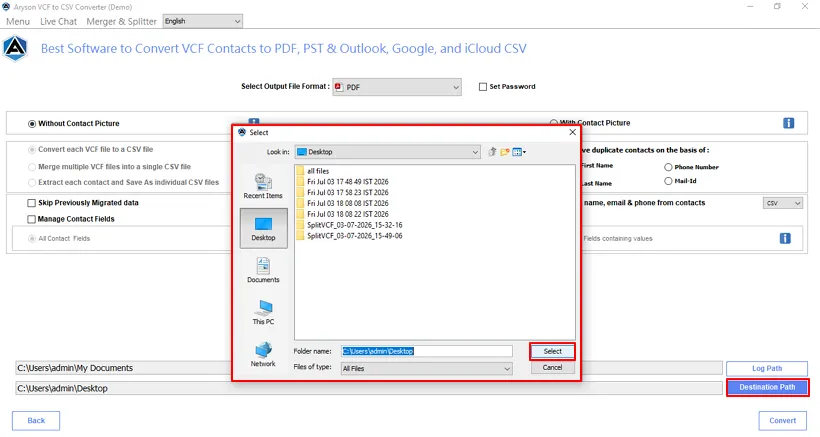
Step 14: Click on the Destination Path button to provide a destination for the converted PDF file. Select the path and click Select.
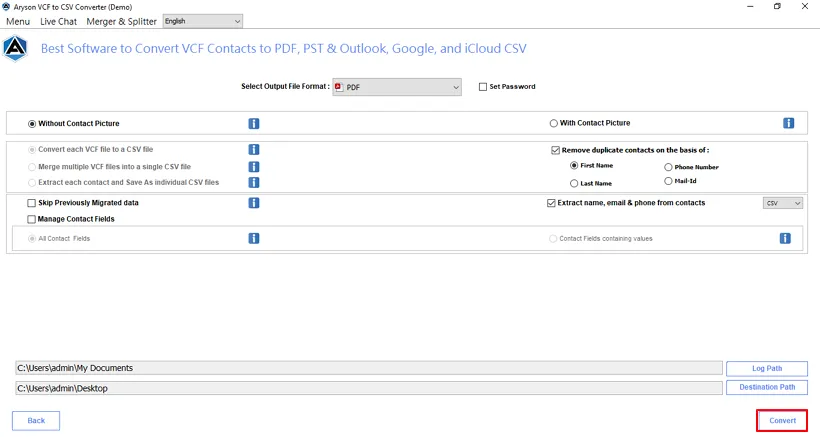
Step 15: Click on the Convert button to start the conversion process.
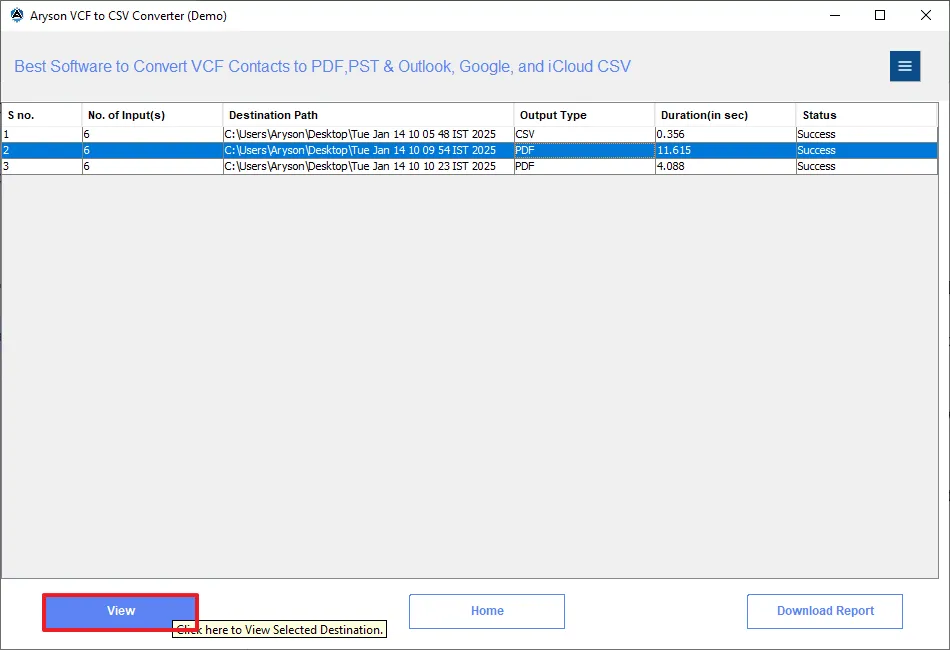
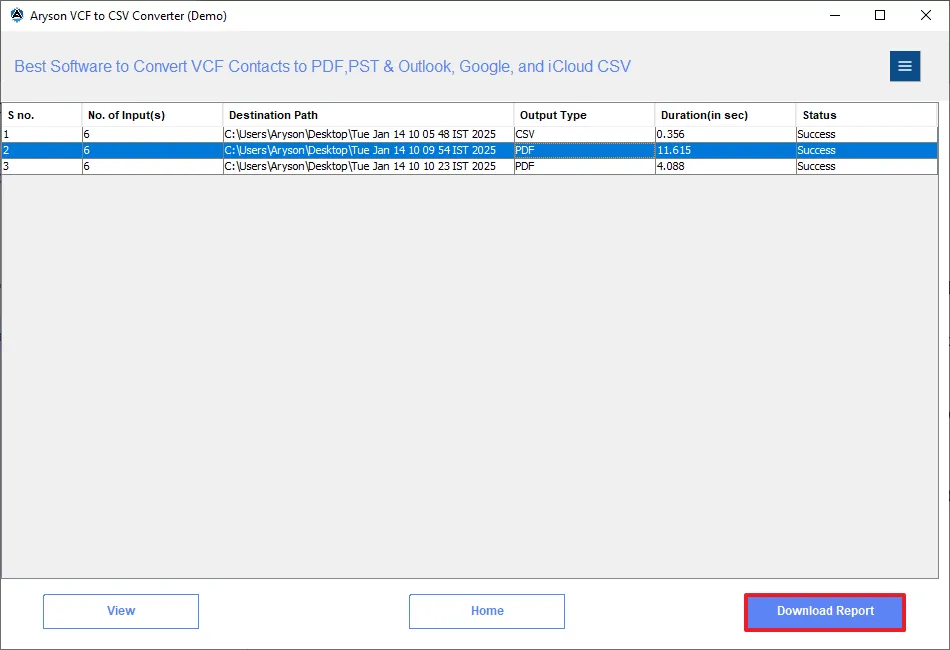
Step 16: After successful completion, the software displays S No., No. of inputs, Destination Path, Output Type, Duration(in sec), and Status.
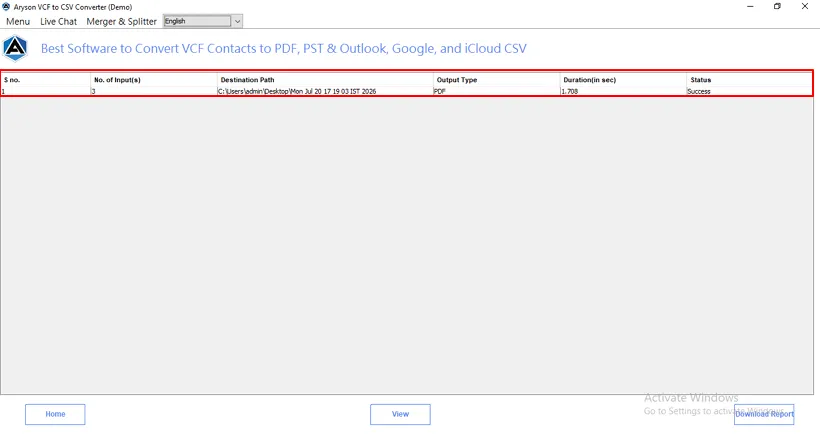
Step 17: After conversion, details
- Home: Takes you to the home page of the software.
- View: First, select a converted row, and then view the converted PDF files.
- Download Report: Generates a report of the converted files.