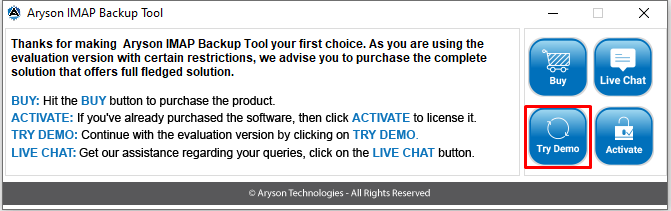
- Run the software and click on the Try Demo button.
- Now, a pop-up will show, displaying a limitation of the demo version that it can only backup/migrate 50 items per folder. Click on the OK button and move ahead.

- After clicking ok, you can see the software interface.
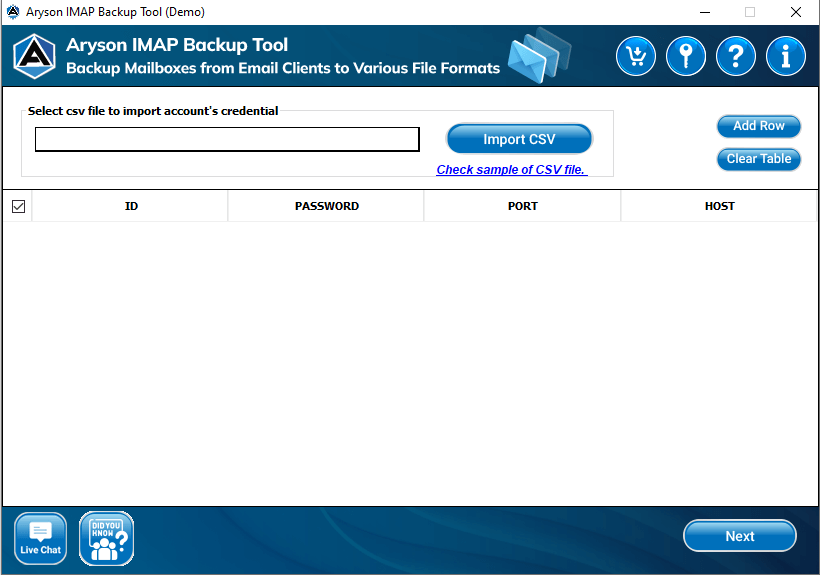
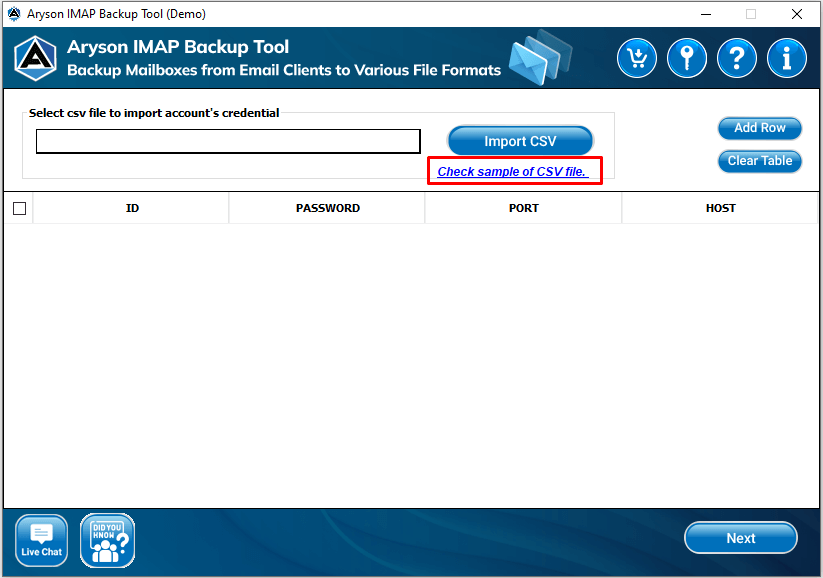
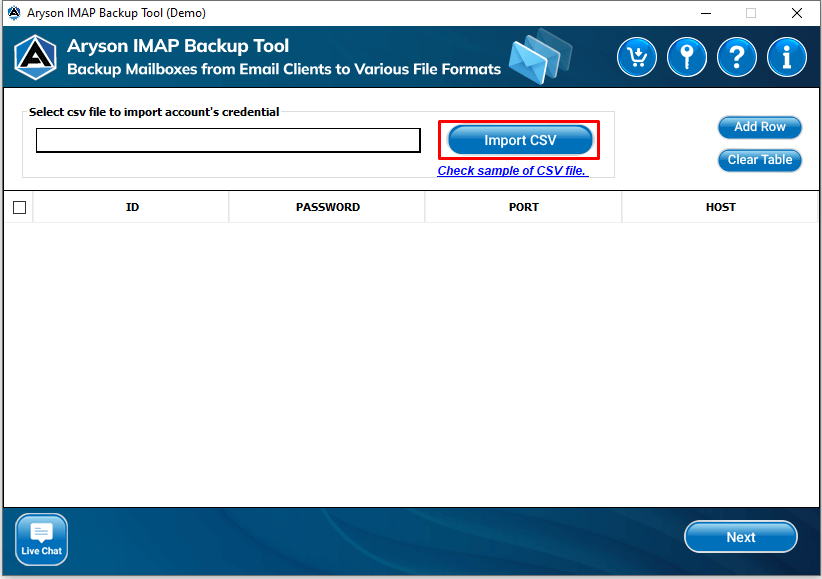
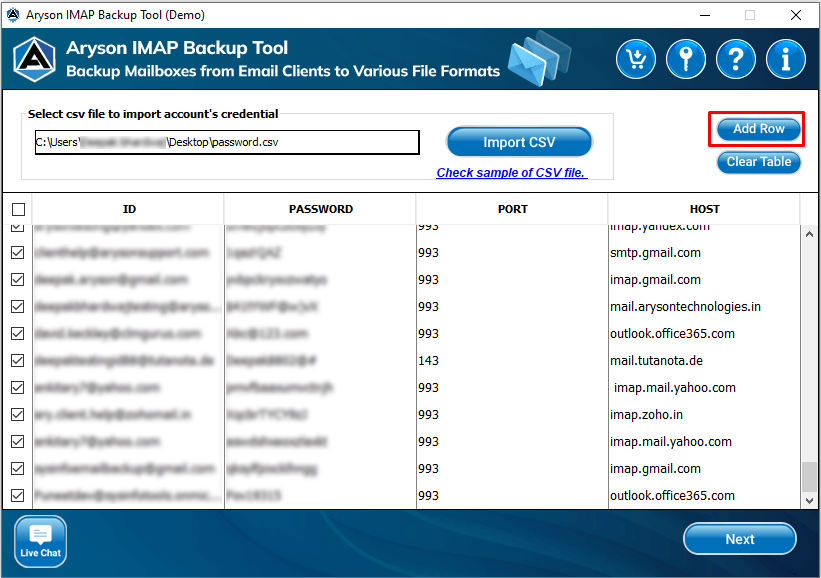
- Click on the Check sample of CSV file option to clarify the format that you need to follow to add the IMAP-enabled accounts to take backup.
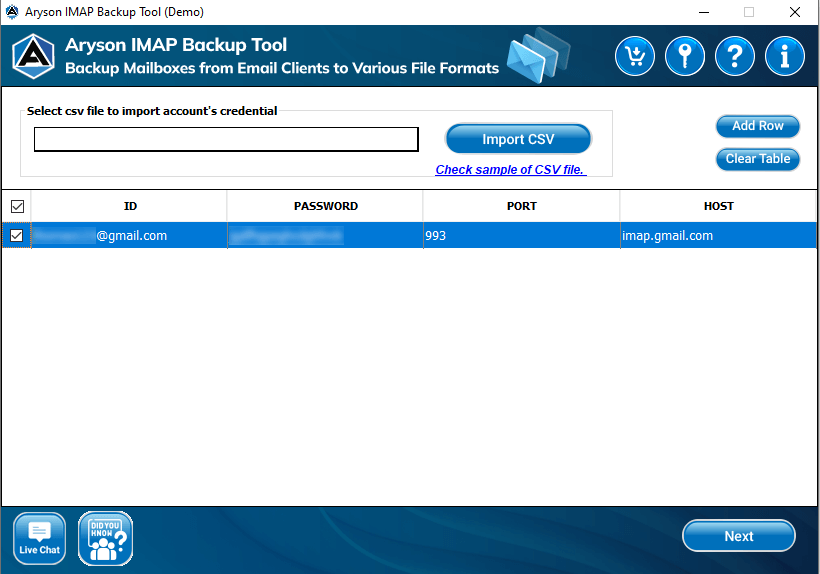
- Go to the Import CSV option to add the IMAP-enabled accounts from where you want to import the data. (Make sure the data of your IDs is in order of ID, Password, Port, and Host as shown in the interface of the software.)
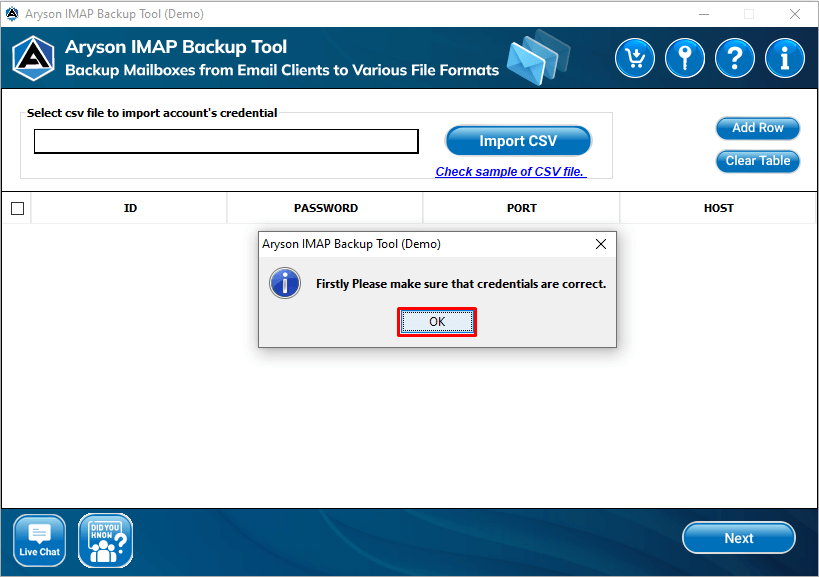
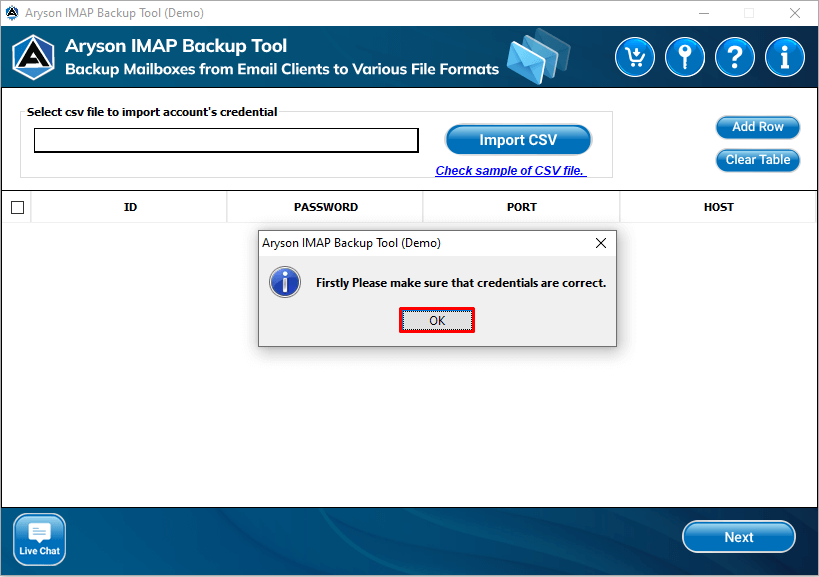
- The credentials of your provided accounts should be 100% correct otherwise, the software will not process it. After that, click the OK button to move forward.
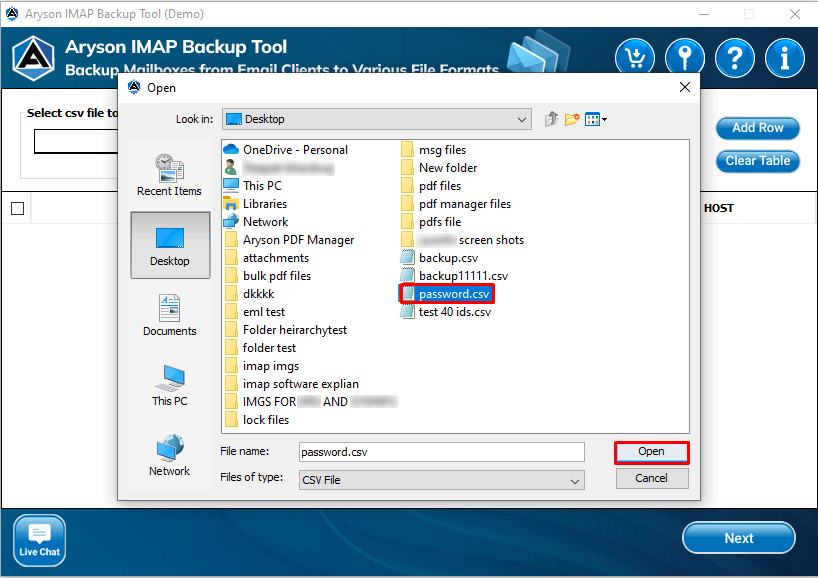
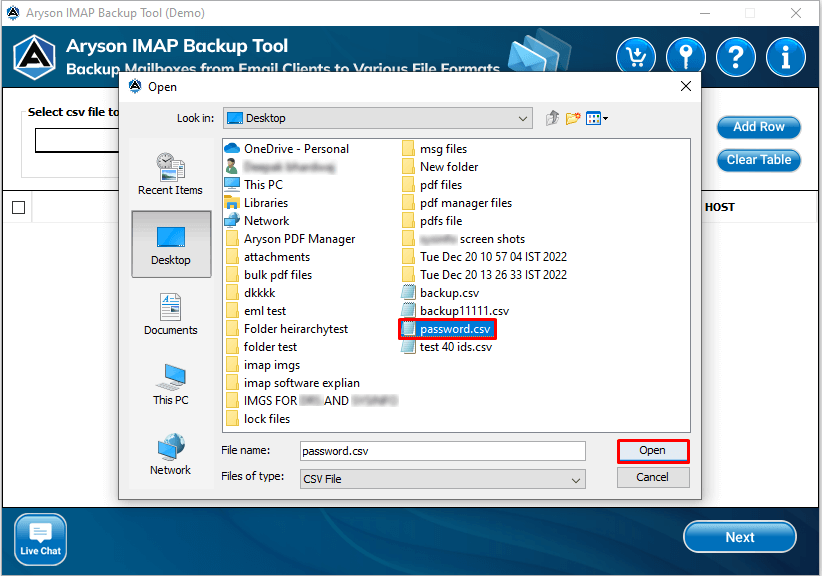
- Choose the CSV file and press the Open button to add the file to the tool’s interface.
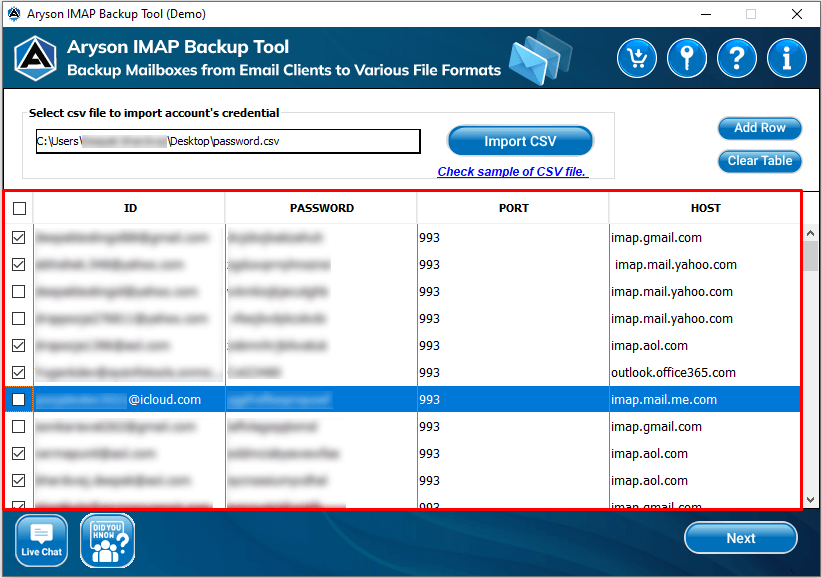
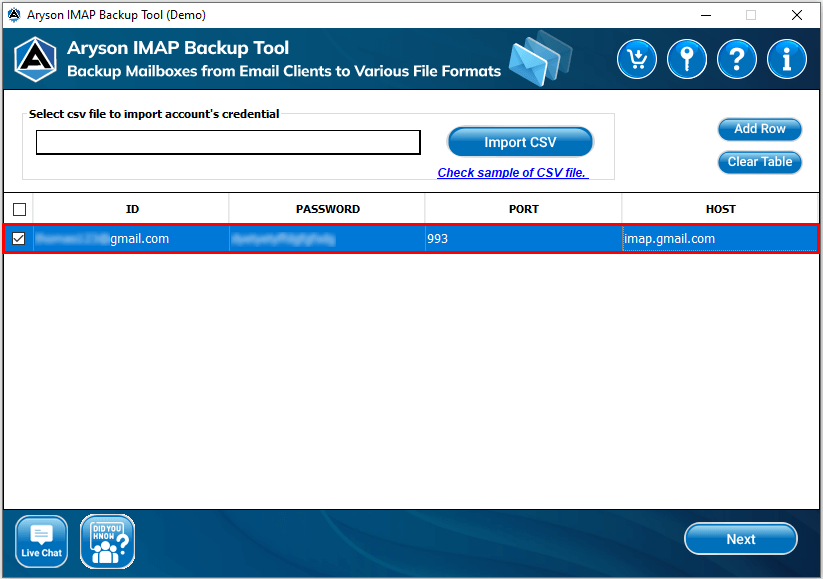
- Now the software is showing all the accounts that the selected CSV file has. Here if you want to choose some specific accounts then tick or untick the checkbox to include or exclude the preferred accounts respectively.
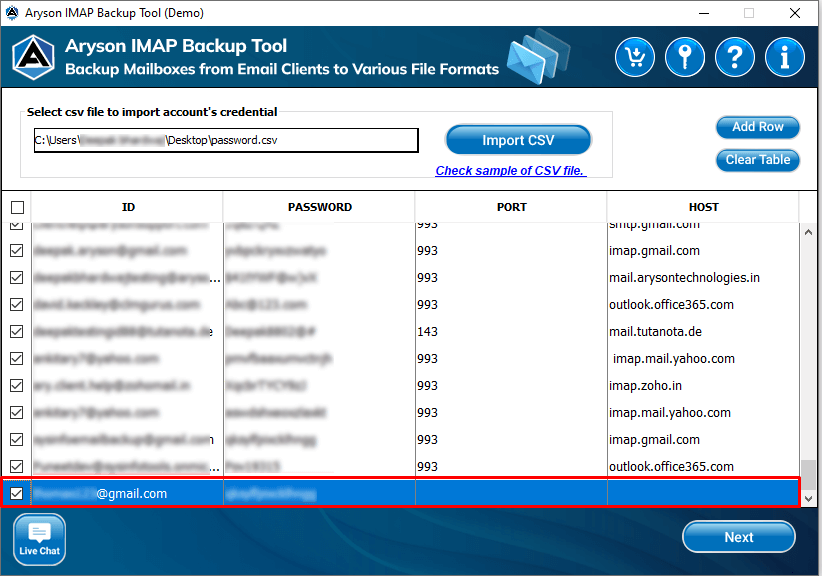
- If you want to add the accounts manually, click the Add Row option.
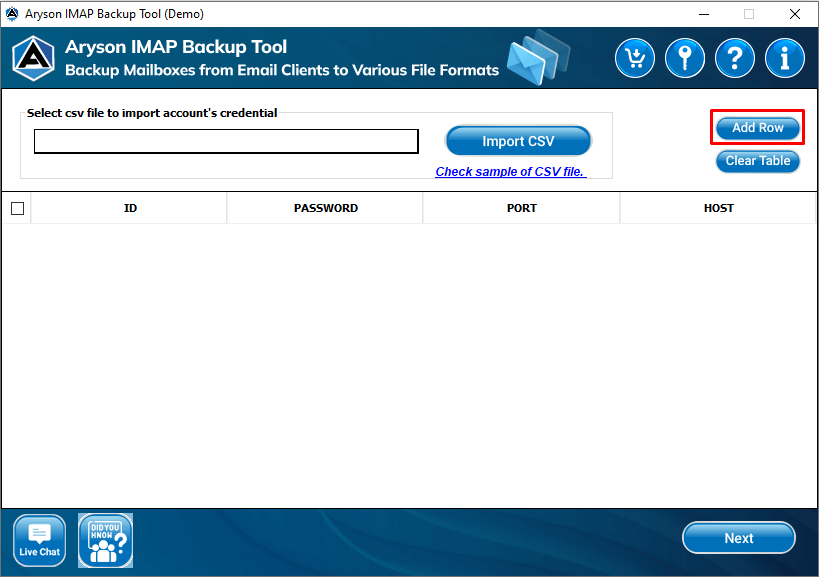
- Add the row as shown in the figure below in the order of ID, Password, Port, and Host.
- Click on the Import CSV option to add the IMAP-enabled accounts.

- Make sure your credentials are correct otherwise the software will not accept it.
- Choose the CSV file that you require to add and then click Open.
- Now, all your account data of the selected CSV file is displayed on the tool’s wizard.
- Here, let’s suppose that the CSV file that you added doesn't have a few accounts which you need to migrate. In this case, you can add those accounts manually by adding one or two additional rows as per your requirement by clicking on the Add Row button.
- To remove all the accounts that you have added, press the Clear Table button.
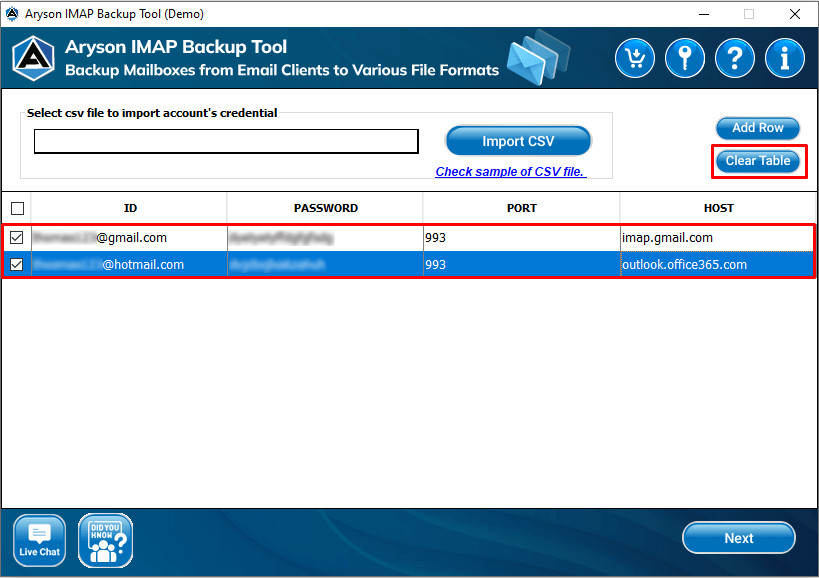
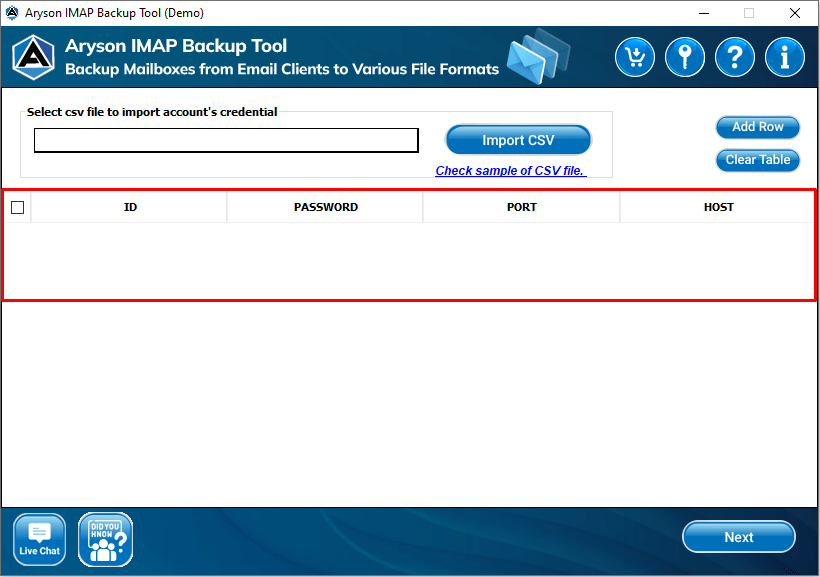
- You have a clear table now you can add a CSV file again at your requirement and then click Next.
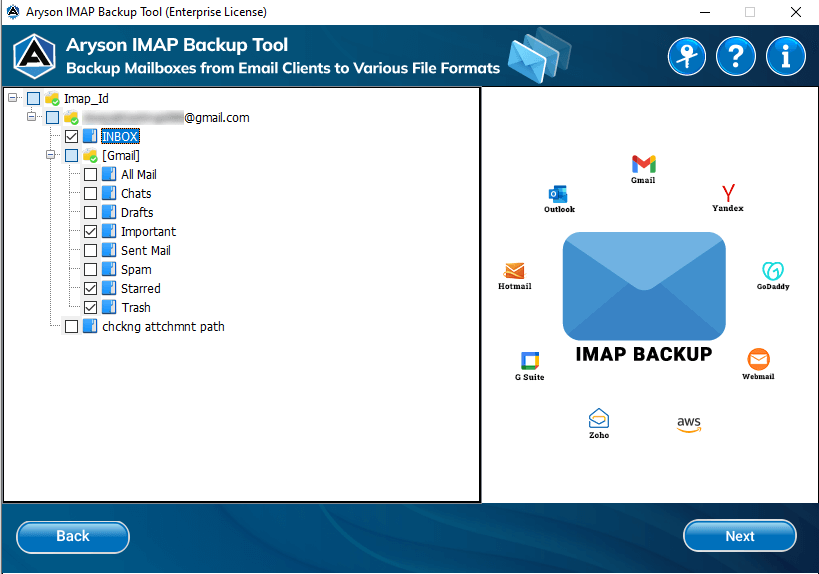
- After clicking next, you can see all the folders in a tree structure of your selected account. Check the required folders and then click the Next button to proceed further.
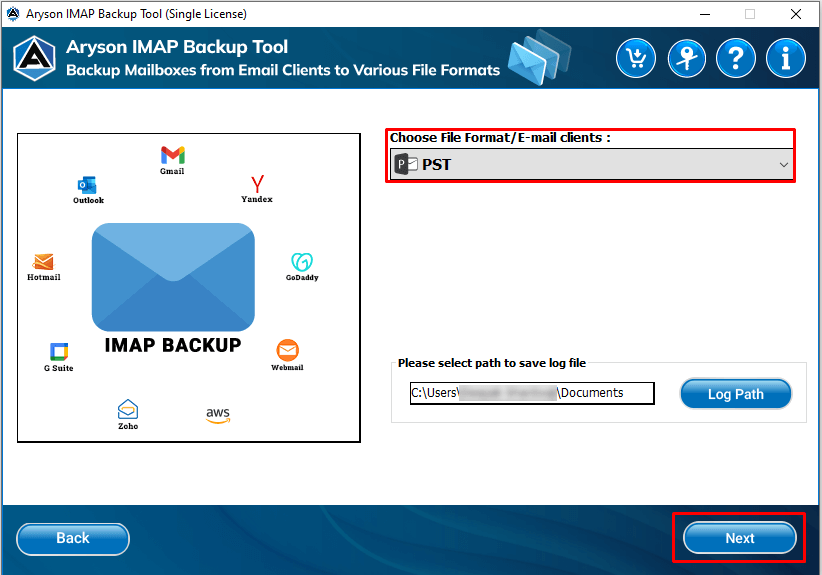
- Choose the PST file format from the drop-down menu and click on the Next button.
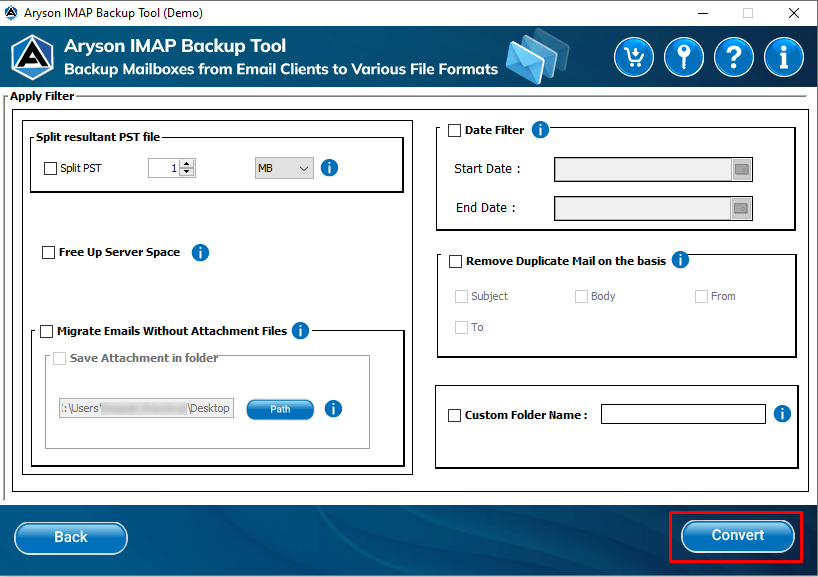
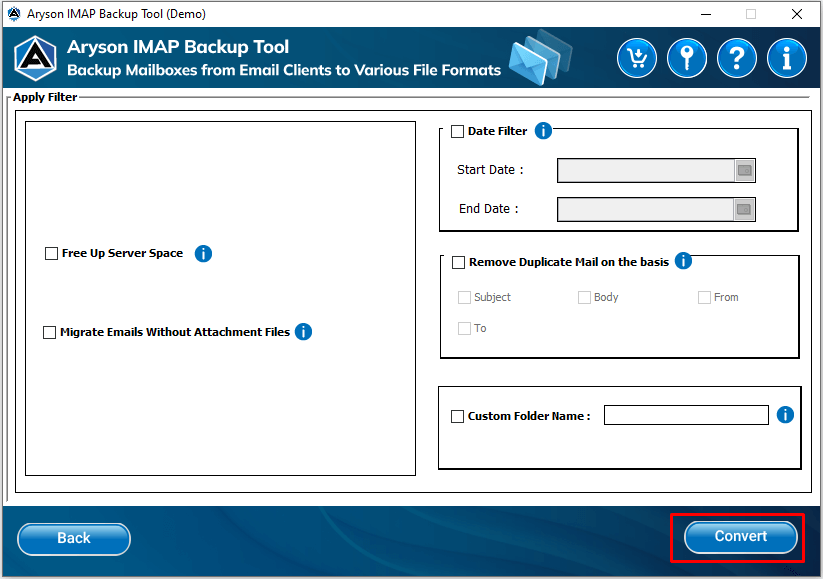
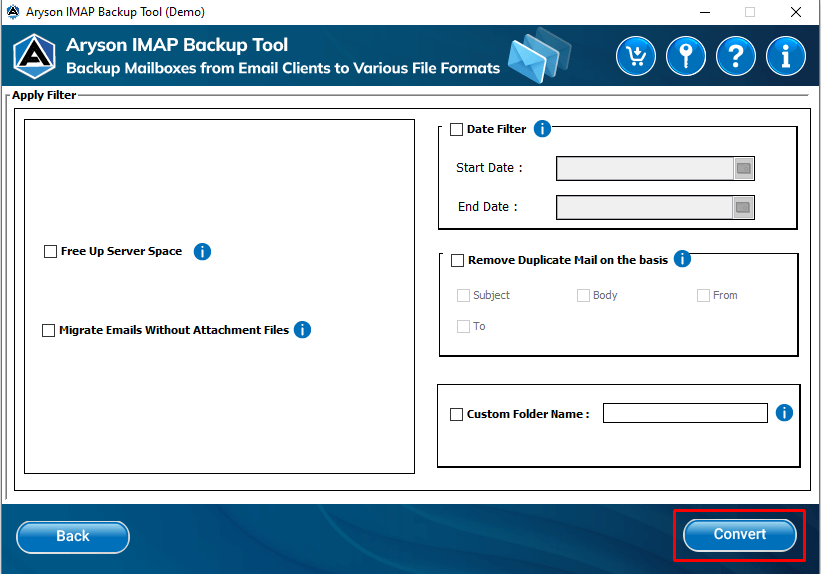
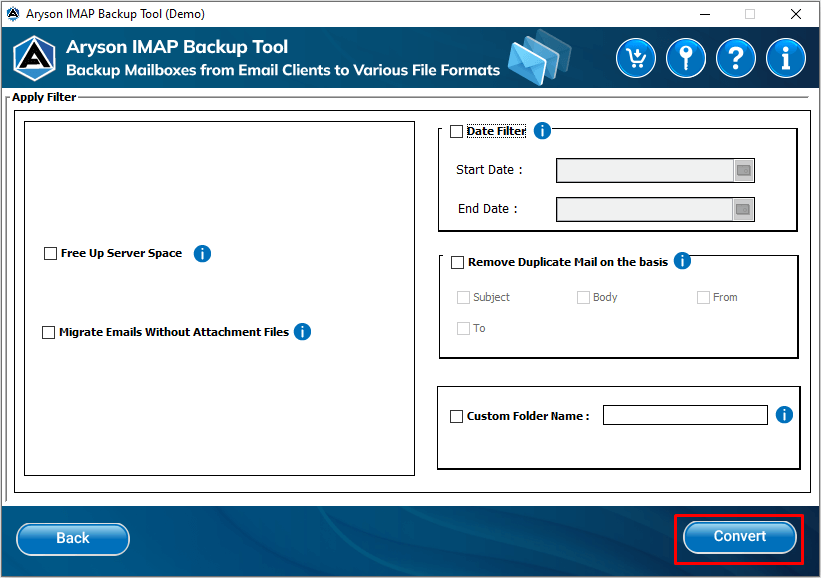
- Choose the filters that you require per your need in the Apply Filter wizard as all of them are described below.
- Split resultant PST file: Split large PST files into smaller ones.
- Free up Server Space: Using this option you can free up th+e space of your account after backing up the IMAP emails by deleting them.
- Migrate Emails Without Attachment Files: You can migrate IMAP emails without their attachment files with the help of this option.
- Date Filter: Backup IMAP emails of a specific date range.
- Remove Duplicate Mails on the basis: You can delete duplicate items using this filter based on subject, body, from, and to.
- Custom Folder Name: This filter can assist in giving the desired name to your resultant folder.
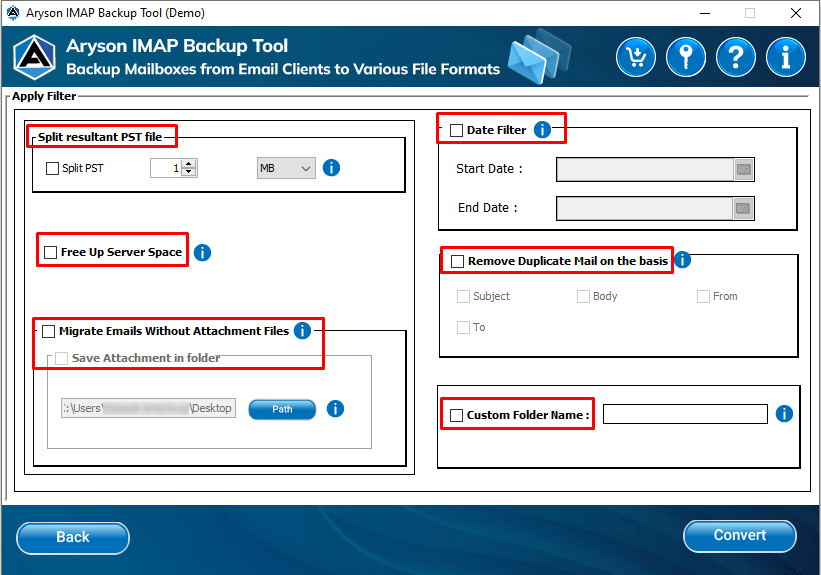
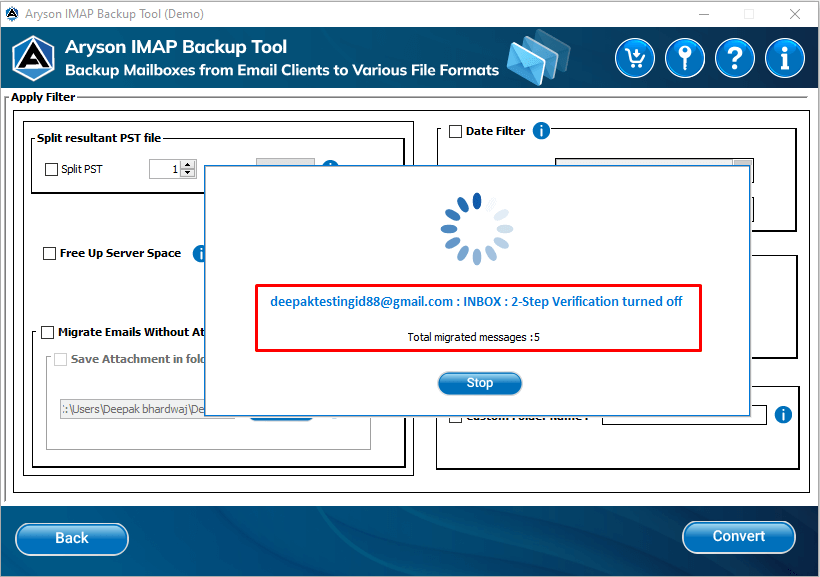
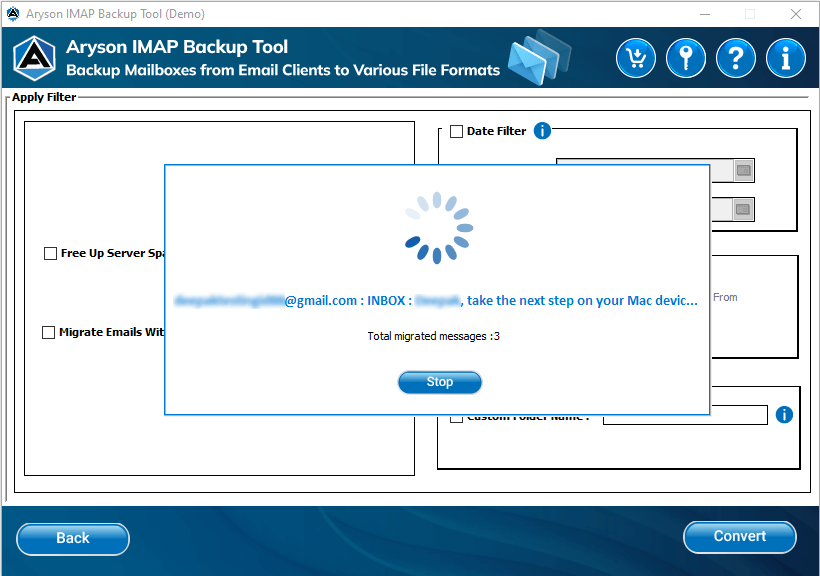
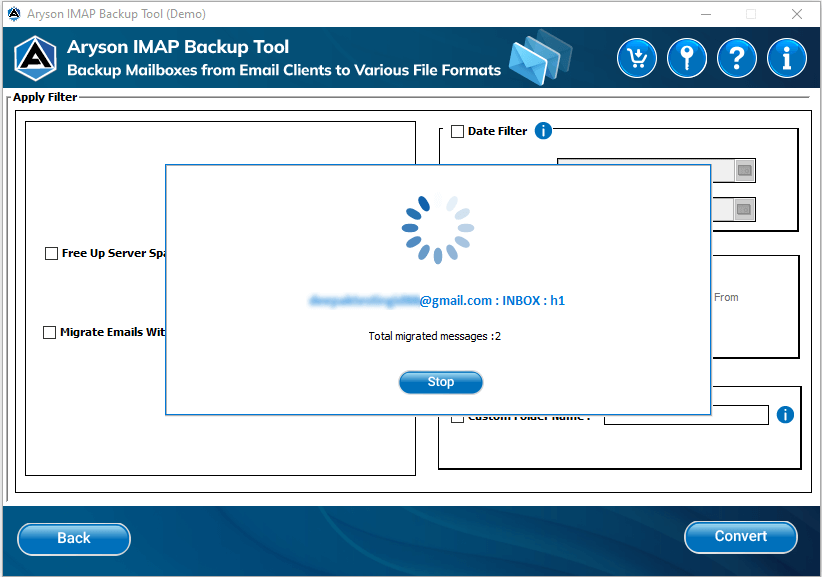
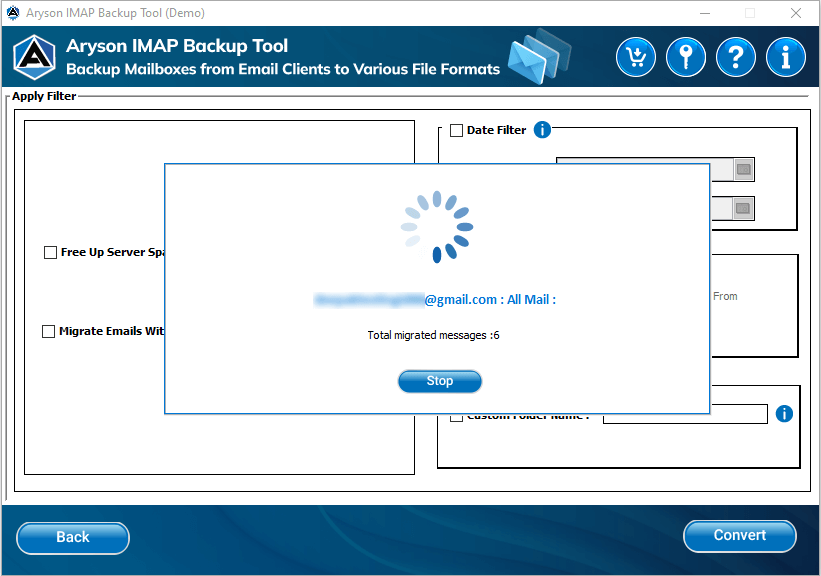
- Click on the Convert button to initiate the conversion process.
- Here, the software provides you with an option to Stop the conversion process.
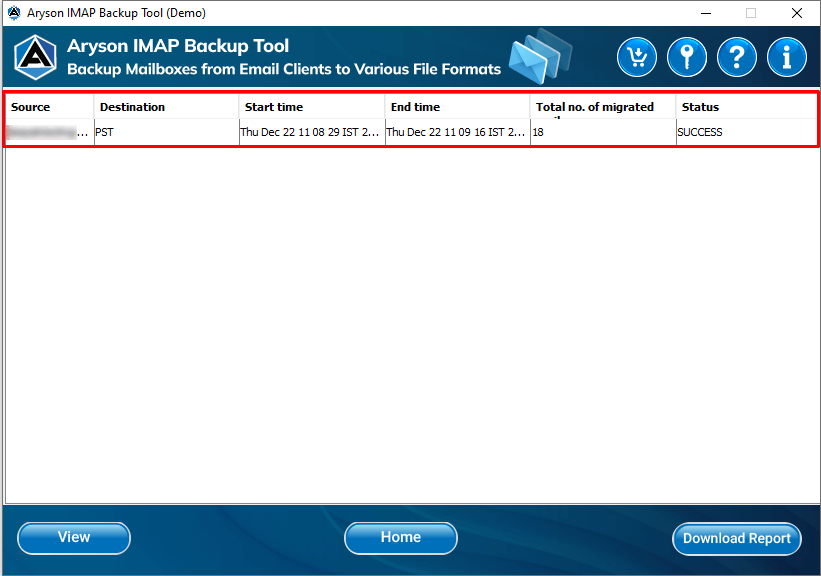
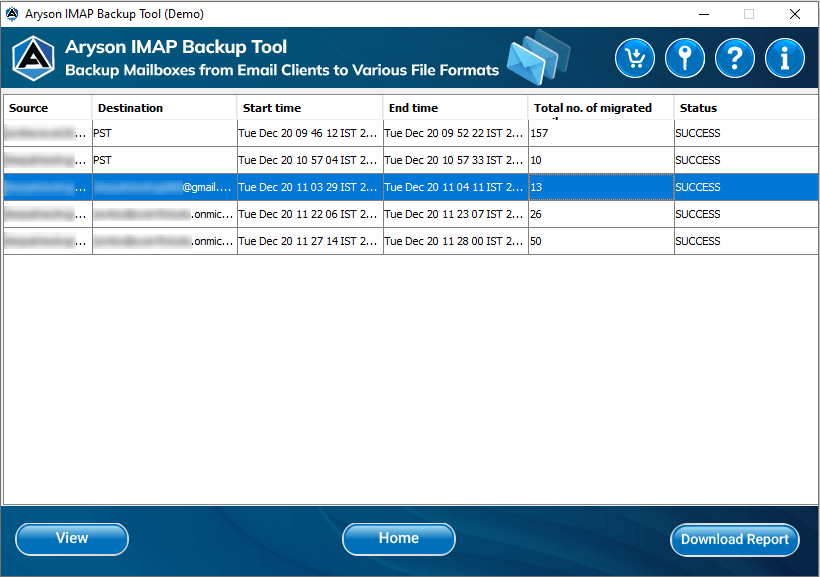
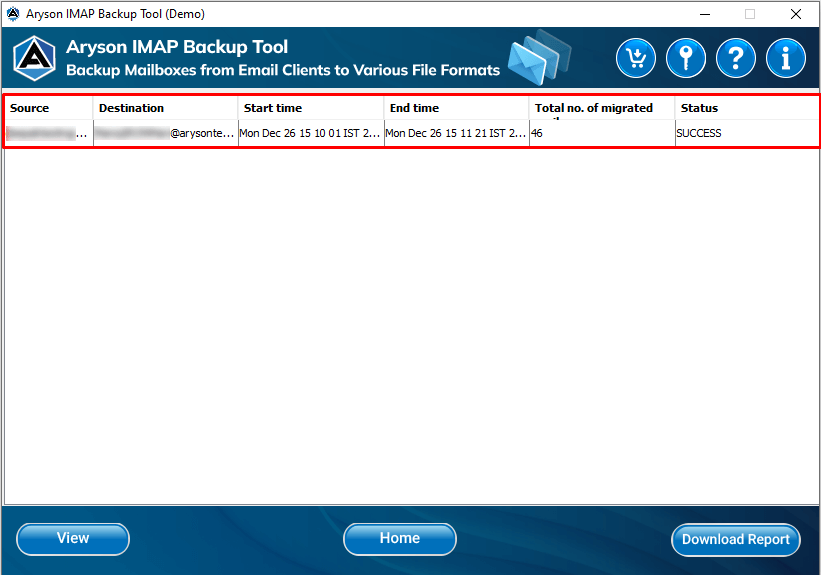
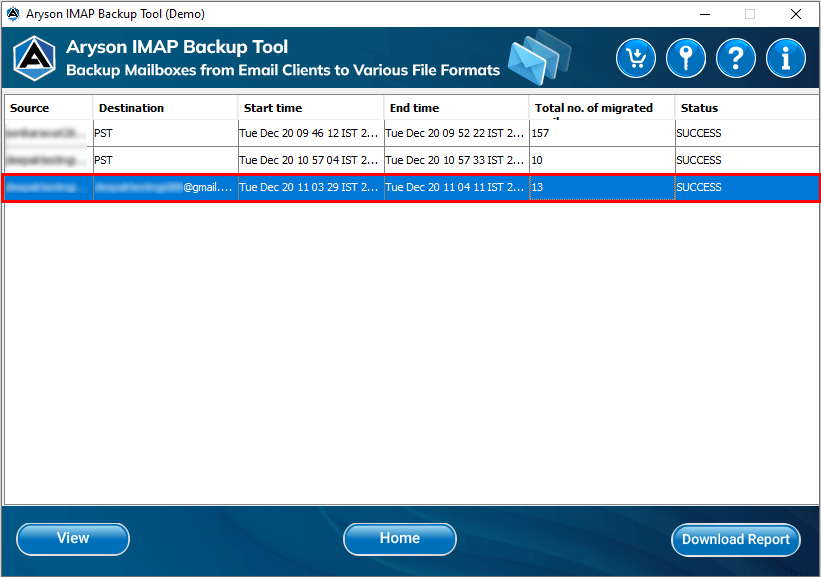
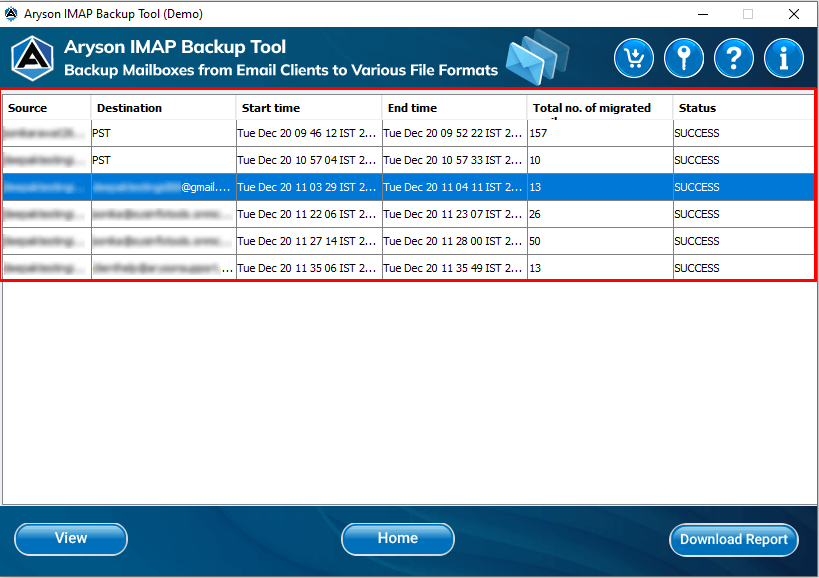
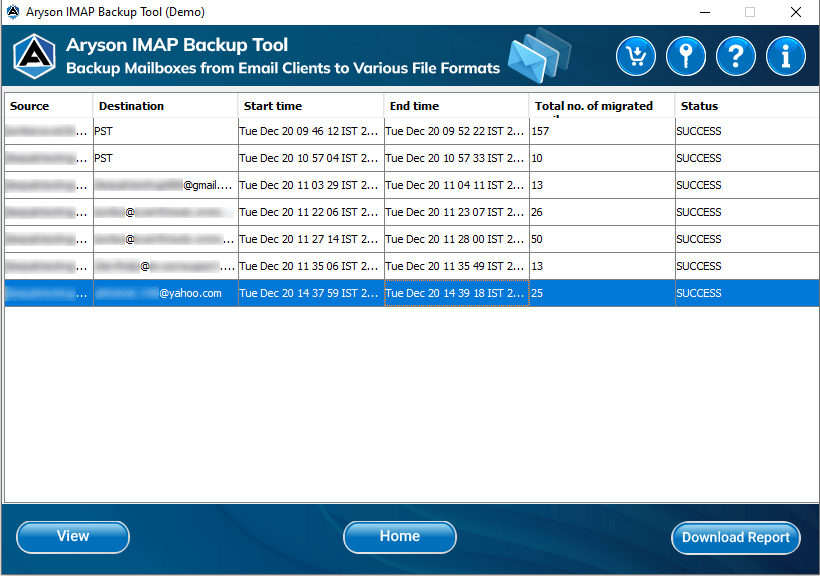
- After the successful completion of the process, click on the Download Report button to analyse the procedure.
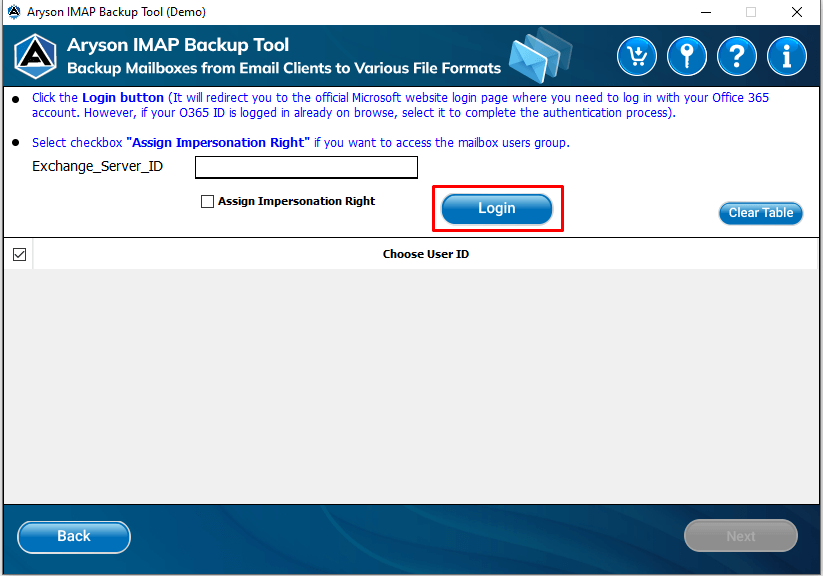
Steps to Assign Impersonation:
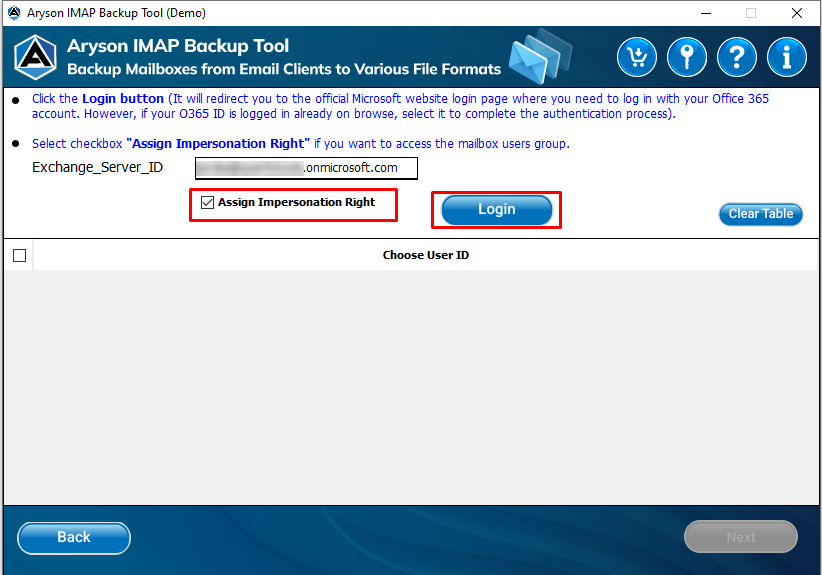
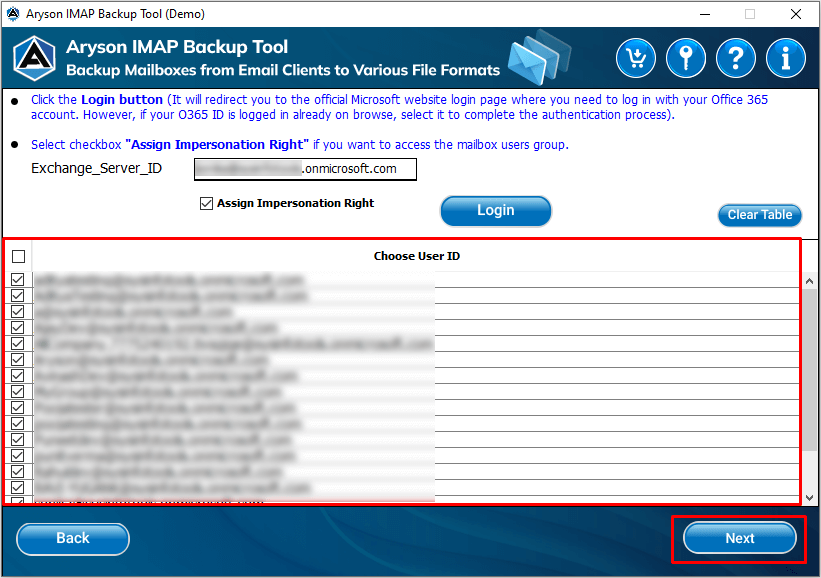
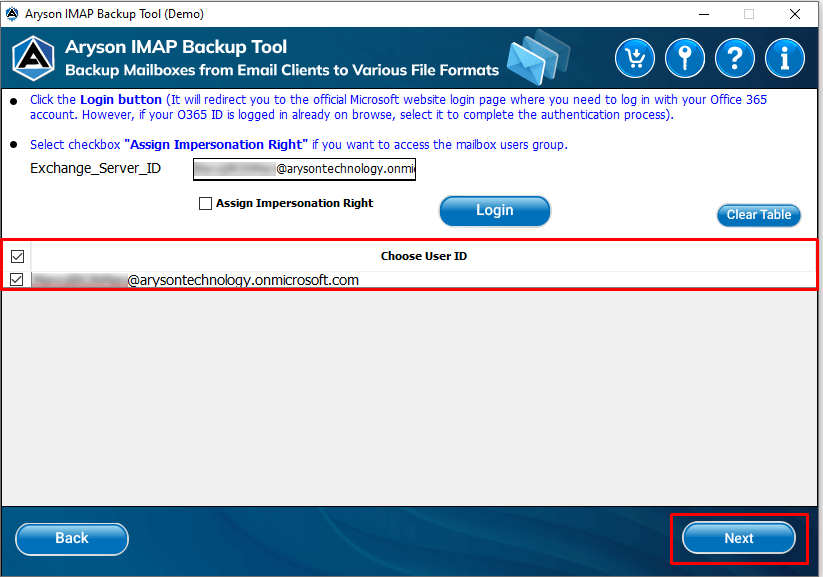
- Enter your Exchange Server ID and check the Assign Impersonation Right box then click on the Login button.
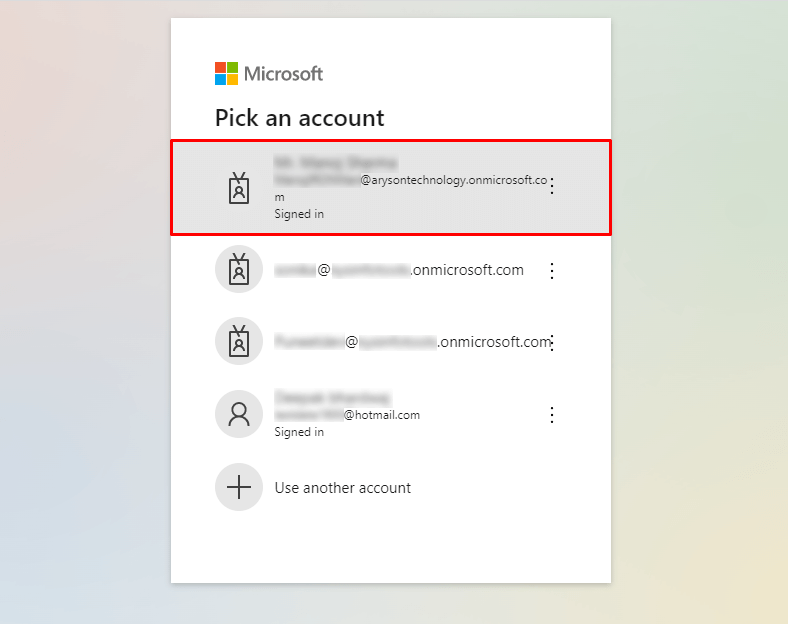
- Provide the account from which you need to back up your IMAP emails.
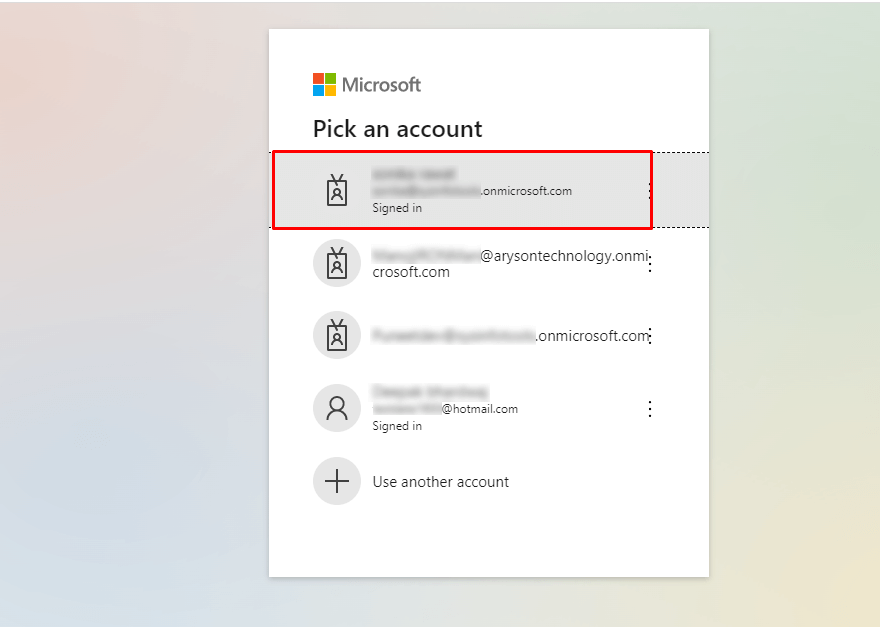
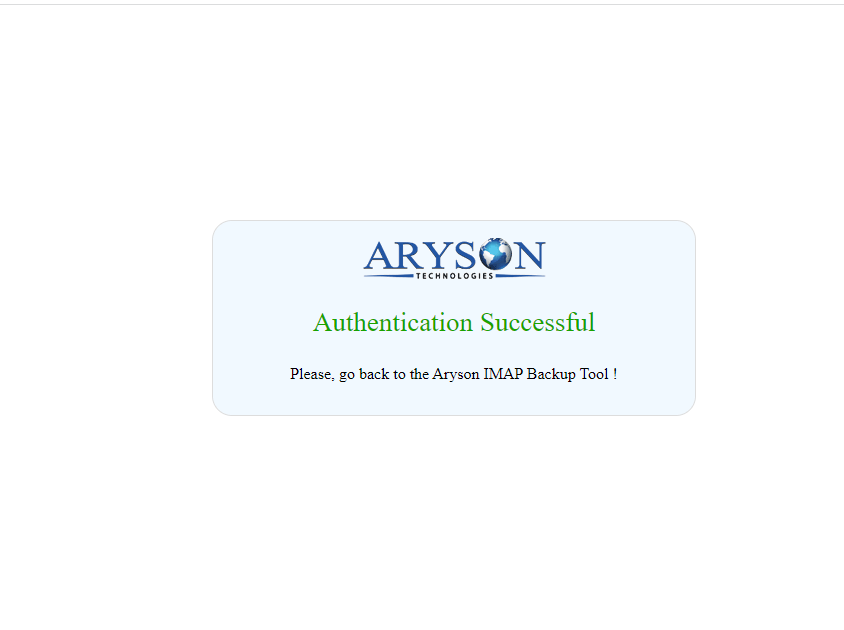
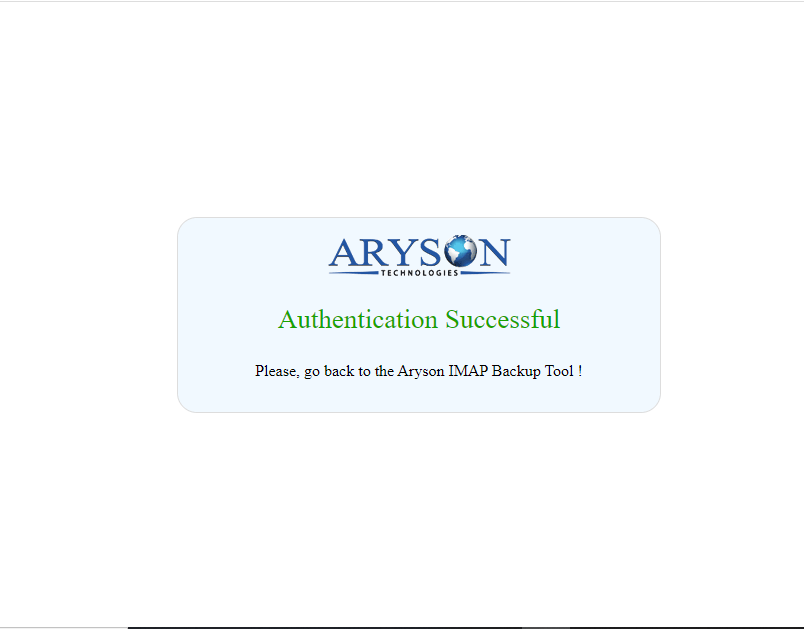
- Wait for the Authentication to be successful.
- Here, you can see all the accounts associated with the exchange server ID, pick the account(s) that you are required and click on the Next button.
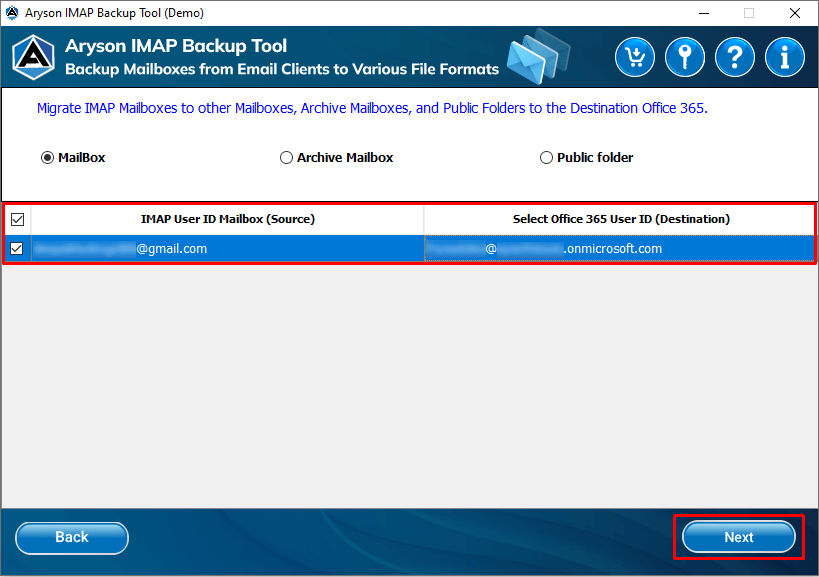
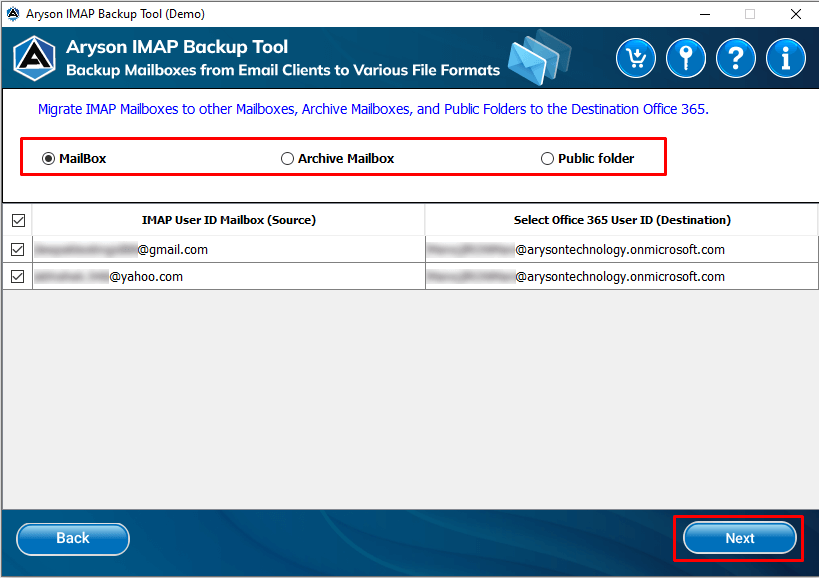
- Select the Mailbox/Archive Mailbox/Public folder as per your requirement then from the drop-down menu choose the destination account(s) to where you want to migrate your IMAP data.

- After selecting the IDs press the Next button.
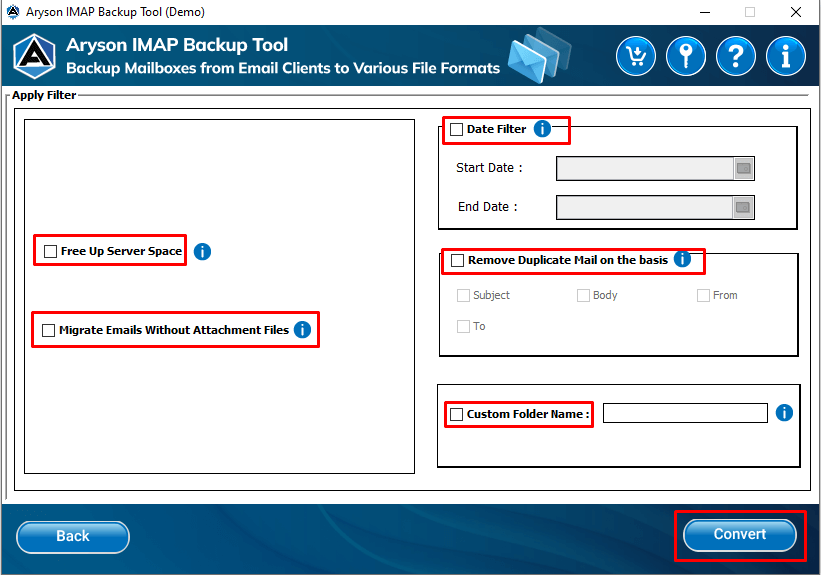
- Select the filters that you need and hit the Convert button.
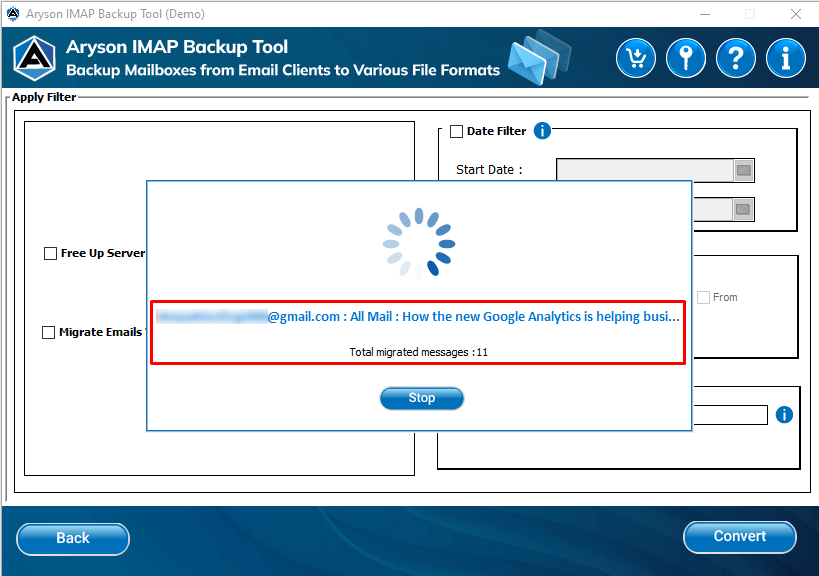
- Now, the conversion process is started, to end the procedure in the middle click Stop.

- Finally, the conversion process is completed, hit the Download Report button to check the procedure.
Steps to Migrate IMAP Emails to Office 365:
- Choose Office 365 from the drop-down menu and then hit the Next button.

- Provide your account details and press Login.
- Select the ID that you require.
- After scanning your details will be Authenticated Successfully.
- Choose the account and click the Next button.
- Here, pick from the options to migrate the IMAP data in folders such as Mailbox, Archive Mailbox, and Public Folder, and hit the Next button.
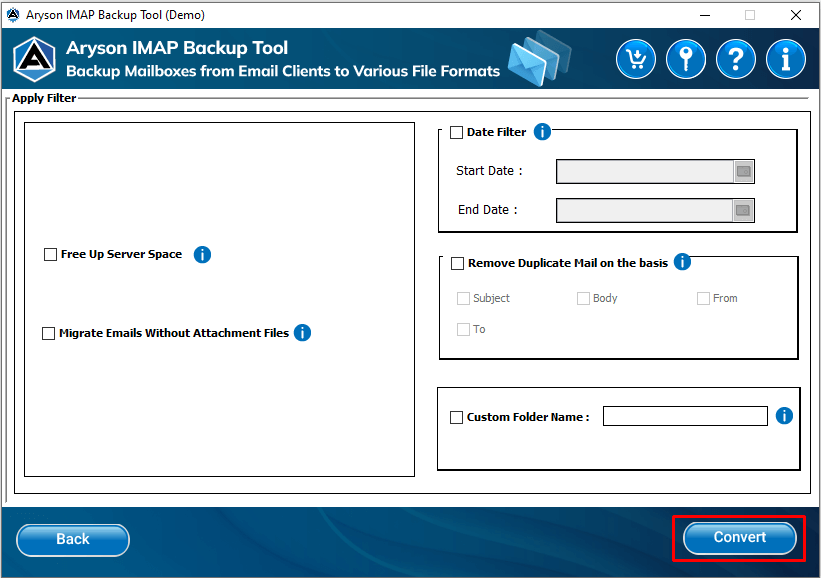
- In the Apply Filter wizard choose the options provided by the software.
- Free up Server Space: After Backing up the data you can delete it from the server to free up the space using this option.
- Migrate Emails Without Attachment Files: If you want to migrate emails without their attachment then use this feature.
- Date Filter: To migrate specific emails according to the data range utilise this option.
- Remove Duplicate Mails on the basis: Using this feature you can remove identical emails based on subject, body, from, and to.
- Custom Folder Name: Using this feature you can provide the desired name for your resultant folder.
- After selecting the options click the Convert button.
- Now, the process of conversion is started, click on the stop button to end it.
- Press the Download Report button to analyse the procedure.
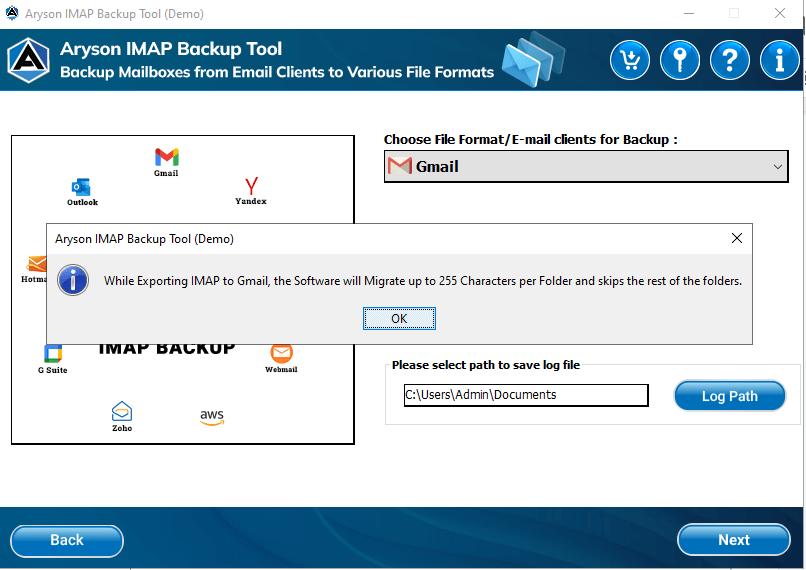
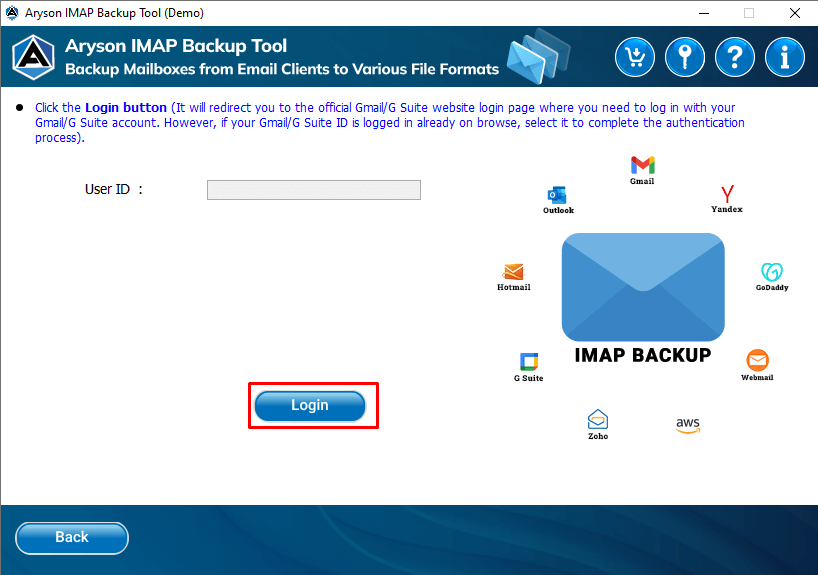
- Select Gmail from the drop-down list.
- Now a pop up will show informing you that the software will only migrate 255 characters according to the folder names and leave the rest of the folders.

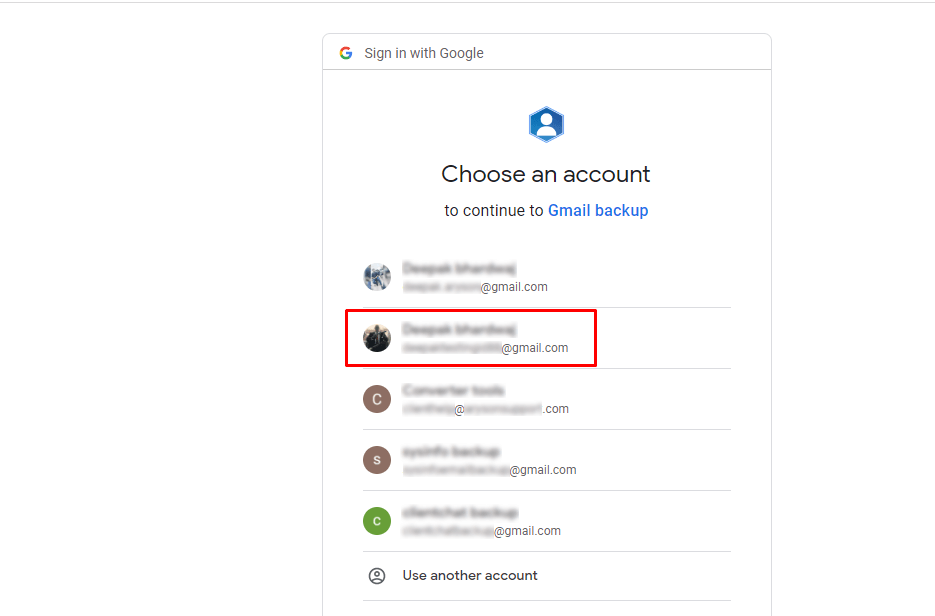
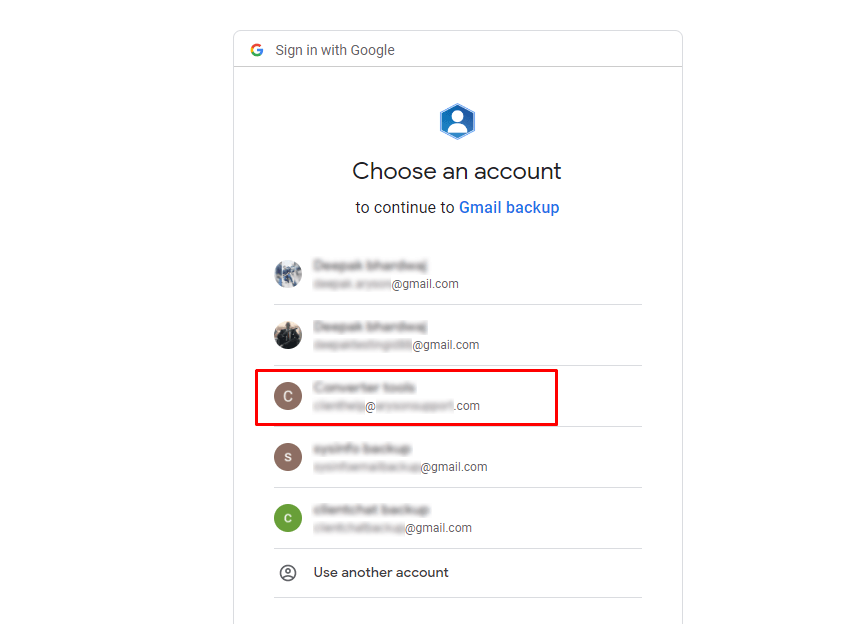
- Click on the Login button to select the Gmail Account that you need.

- Here, you can see all your previously saved Gmail accounts and also Use another account option to choose a different account that is not showing on the list.
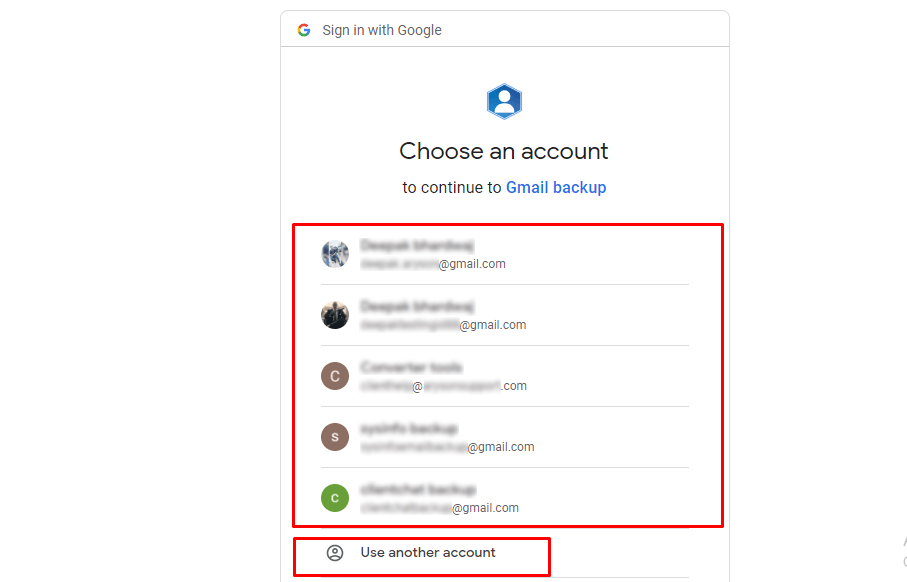
- Here, we are continuing with the already saved account.
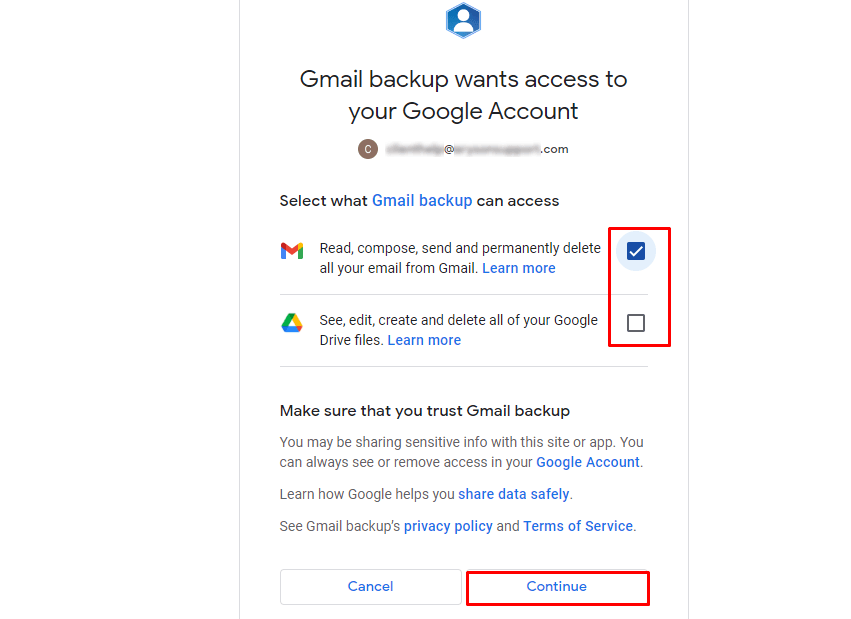
- In the wizard, Gmail Backup will ask for access to proceed ahead.
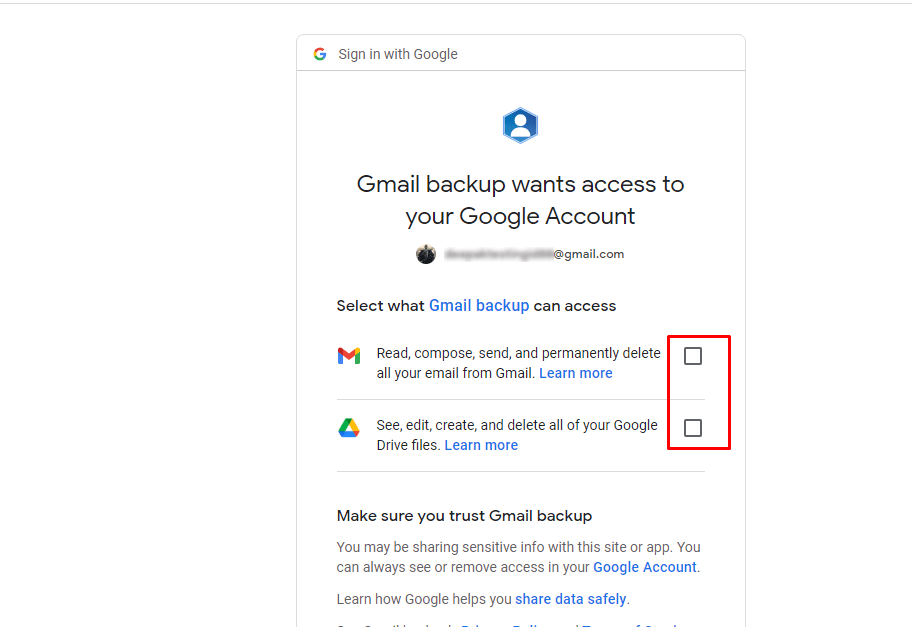
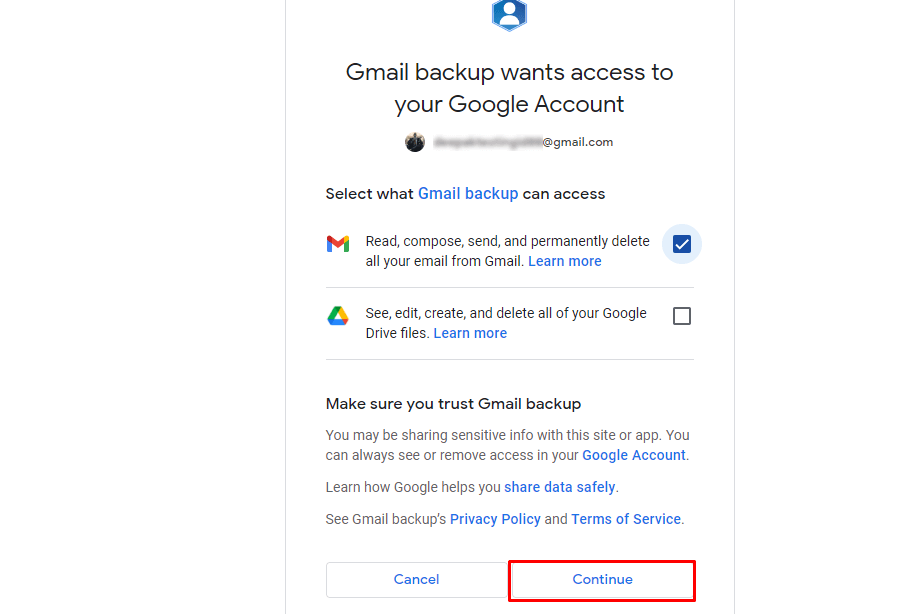
- Provide access by checking the box as shown in the image below and clicking Continue to move forward.
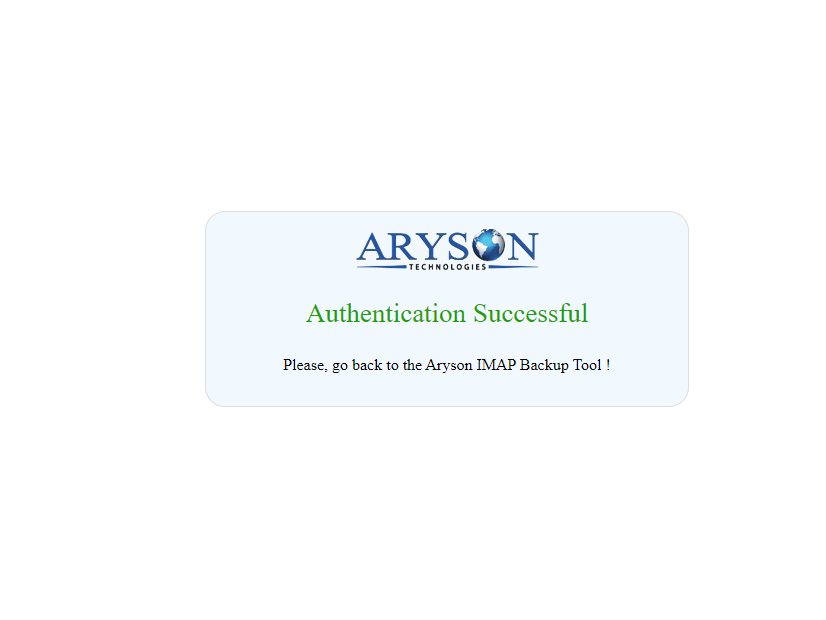
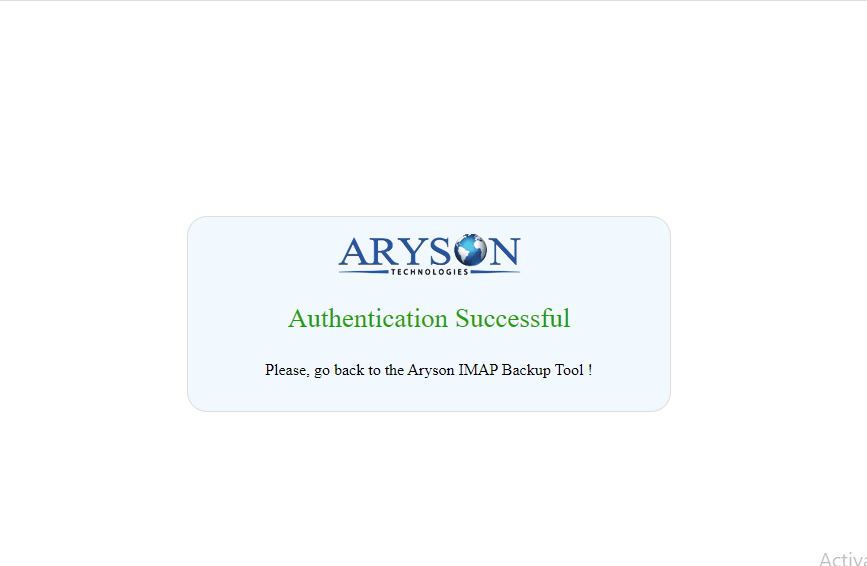
- Wait till the Authentication is successful.
- In the interface of the tool, choose and utilise the features provided by the software and then click the Convert button.
- Now the conversion process is started to cancel the process, hit the Stop button.
- After completion of the migration of IMAP emails to GMAIL, click on the Download Report option to view the conversion procedure.
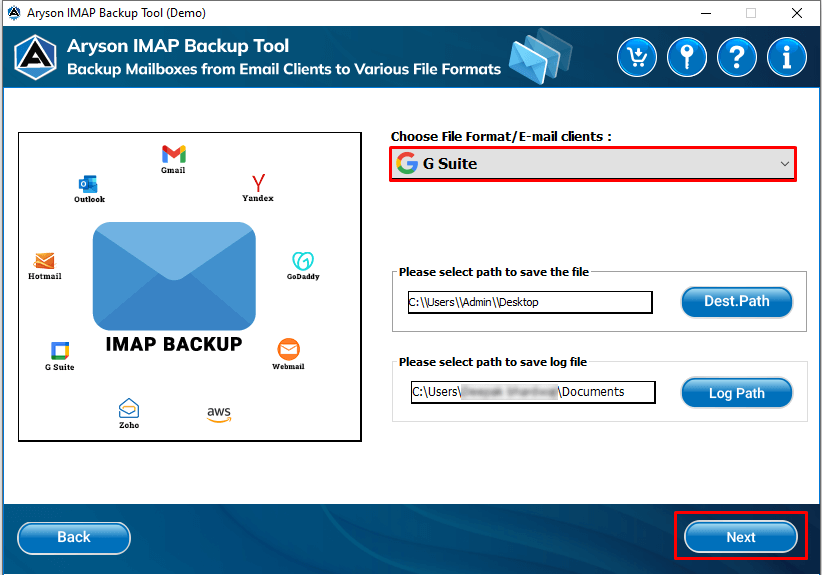
- Click on the drop-down menu and select G Suite to migrate your IMAP emails then press Next.
- Here, a pop up will show that the software will only migrate 255 characters according to the folder names and leave the rest of the folders.
- Press the Login option to choose the G Suite account.
- Here, we are choosing the already saved account.
- Tick the checkbox to provide access to the Gmail Backup then click on the Continue option to move forward.
- Now a notification will show information about the Authentication Successful.
- Utilise the features facilitated by the software and then click on the Convert option.
- As you can see the conversion process is started, to end the procedure hit the Stop button.
- Finally, once the process is completed, press the Download Report option to analyse the procedure.
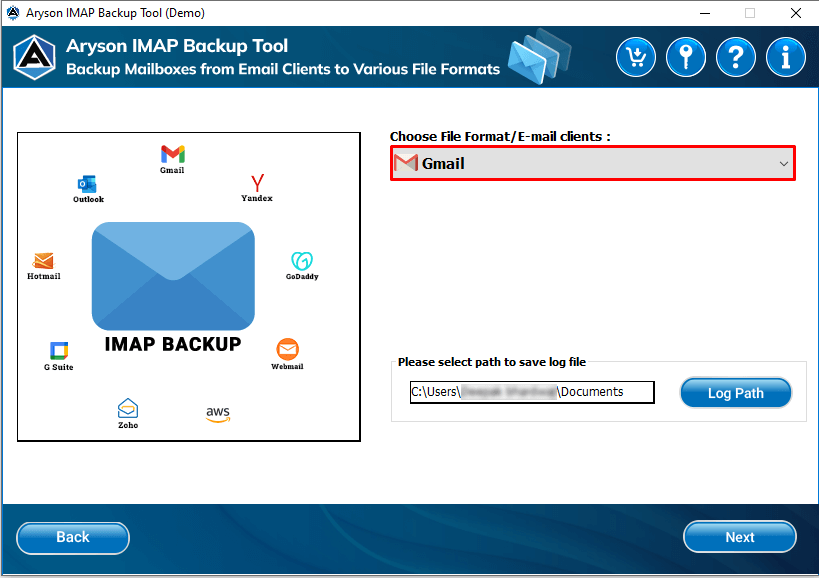
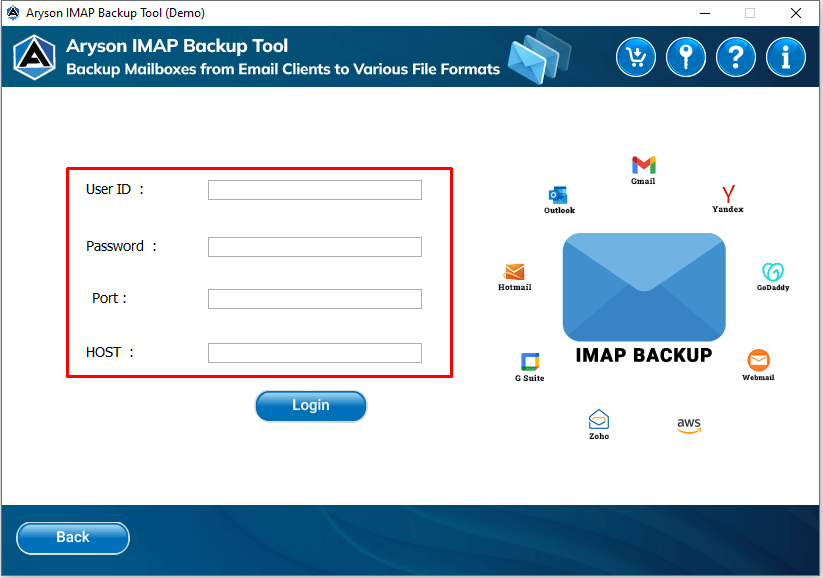
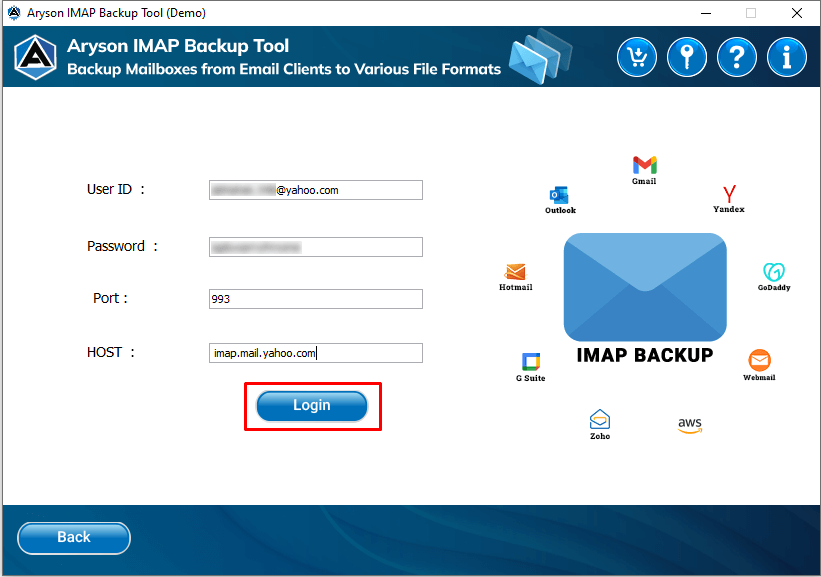
- Choose the IMAP option as your saving email client from the drop-down list and then hit the Next button.
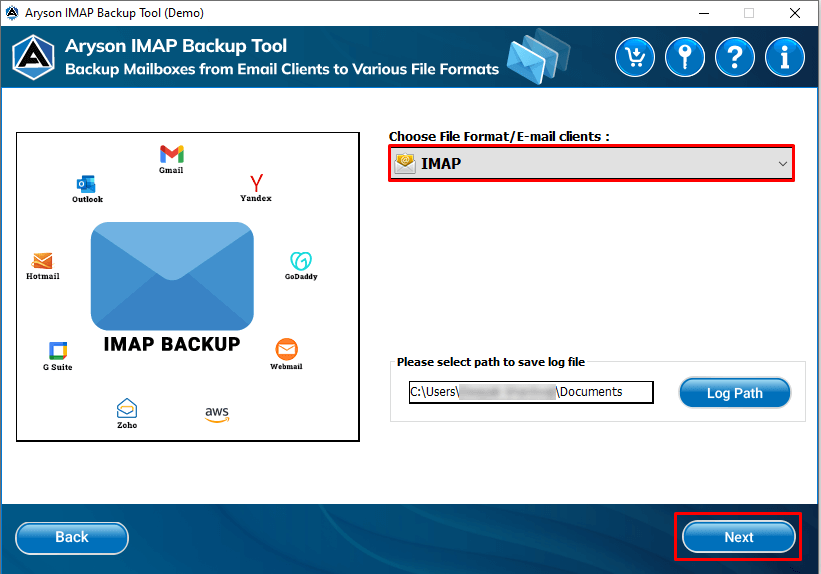
- To login into an IMAP account, you need to know the User ID, Password, Port, and Host number.
- Click on the Let You Know icon.
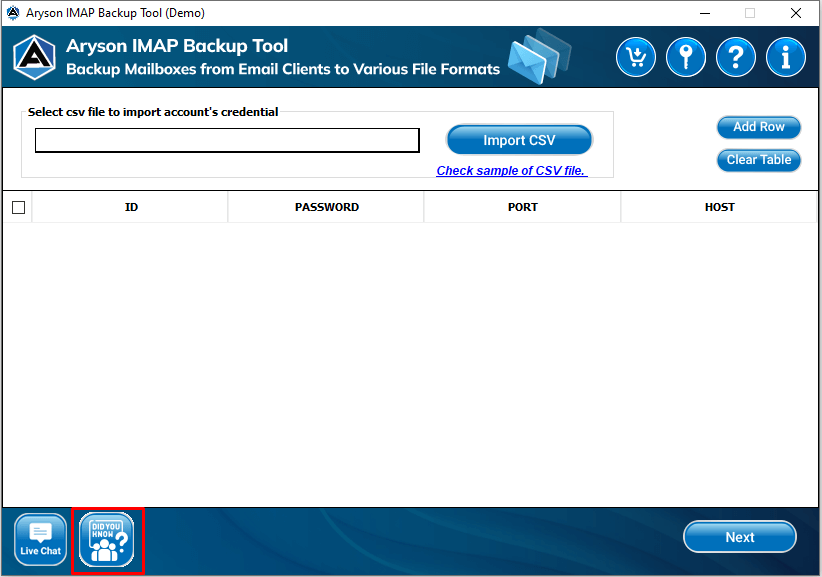
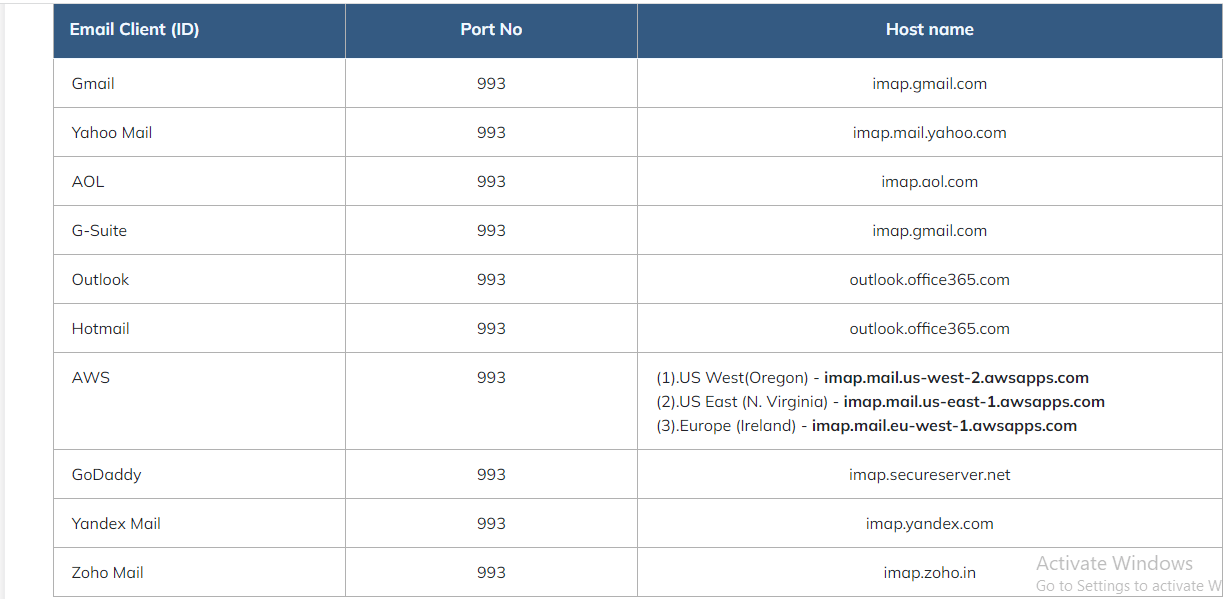
- Here, you can see the information regarding the Port and Host number according to the email client.
- Now, provide the details to login into your IMAP account.
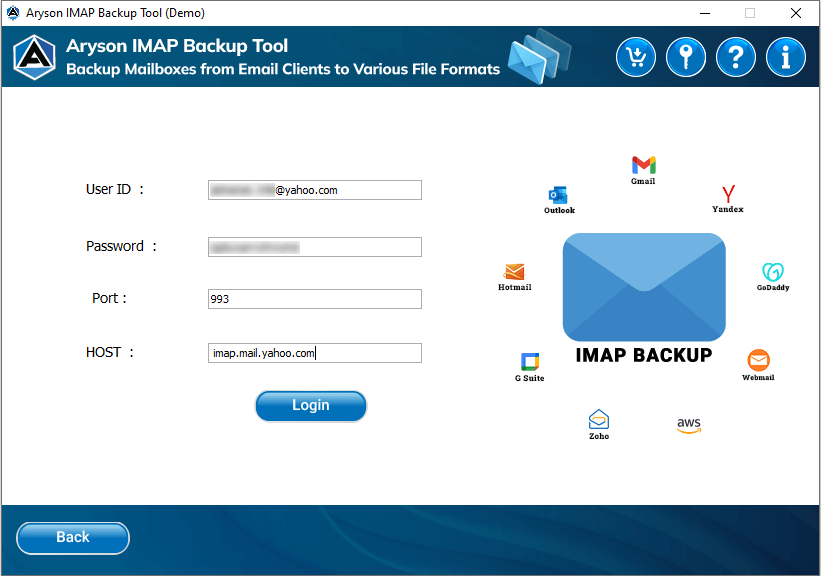
- Press the Login button to proceed ahead.
- Use the provided features of the software and then click on the Convert button.
- Now the process of conversion is started and to put an end to it, press the Stop option.
- Download the report to analyse the procedure.
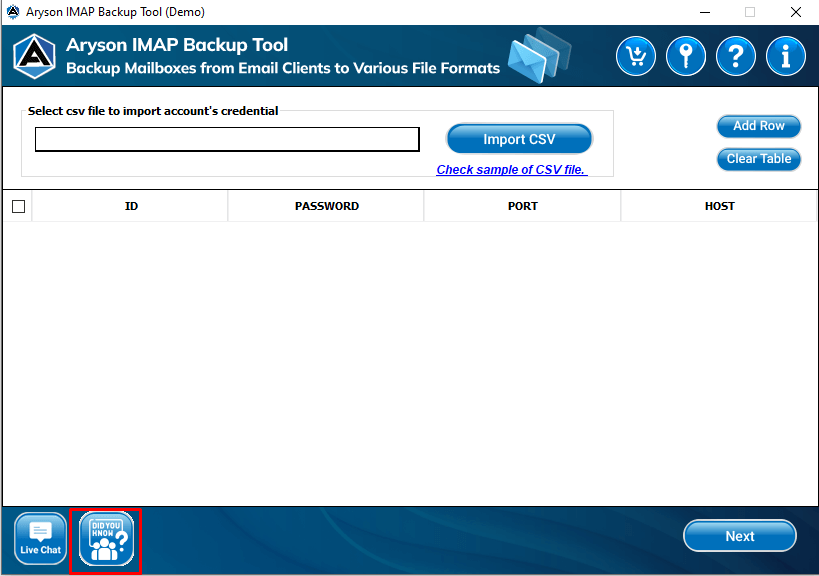
- Click on the Did You Know button, then the software will redirect you to an informative page where you can find the details that you need to know to run the software.
- If you need support regarding sales and technical support then click on the Live Chat button.
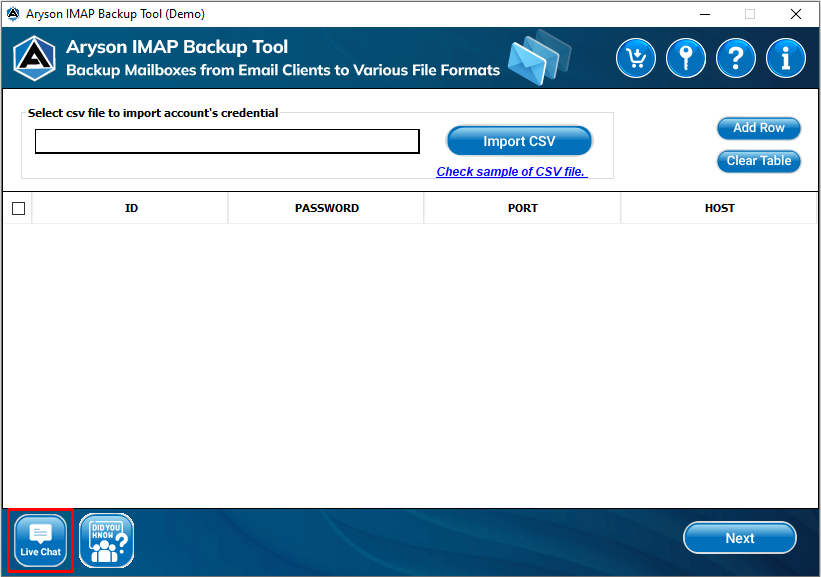
- Here, select the type of support you need so we can contact the right department to solve your problems. After that provide your Name, Email Address, and Your question. Then we will connect with you and solve all your queries.

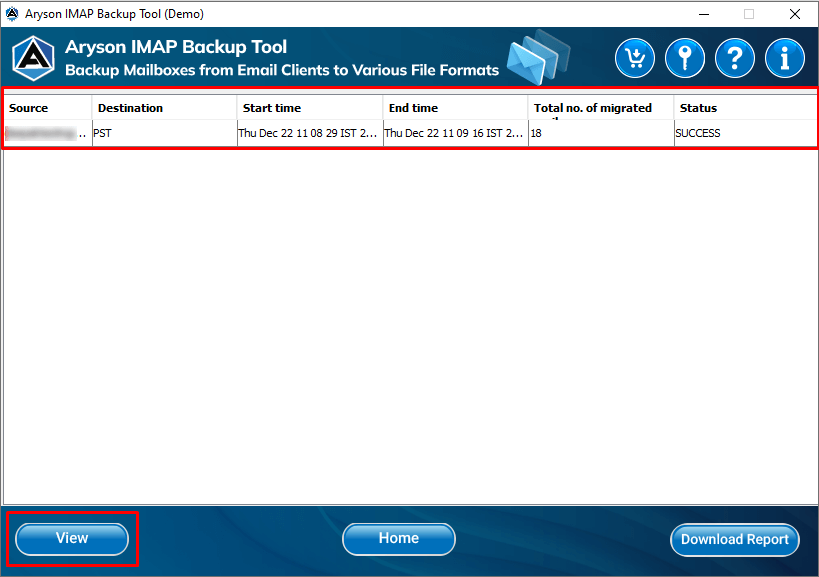
- After completion of the conversion process, select the file and click on the view button to analyse the data.
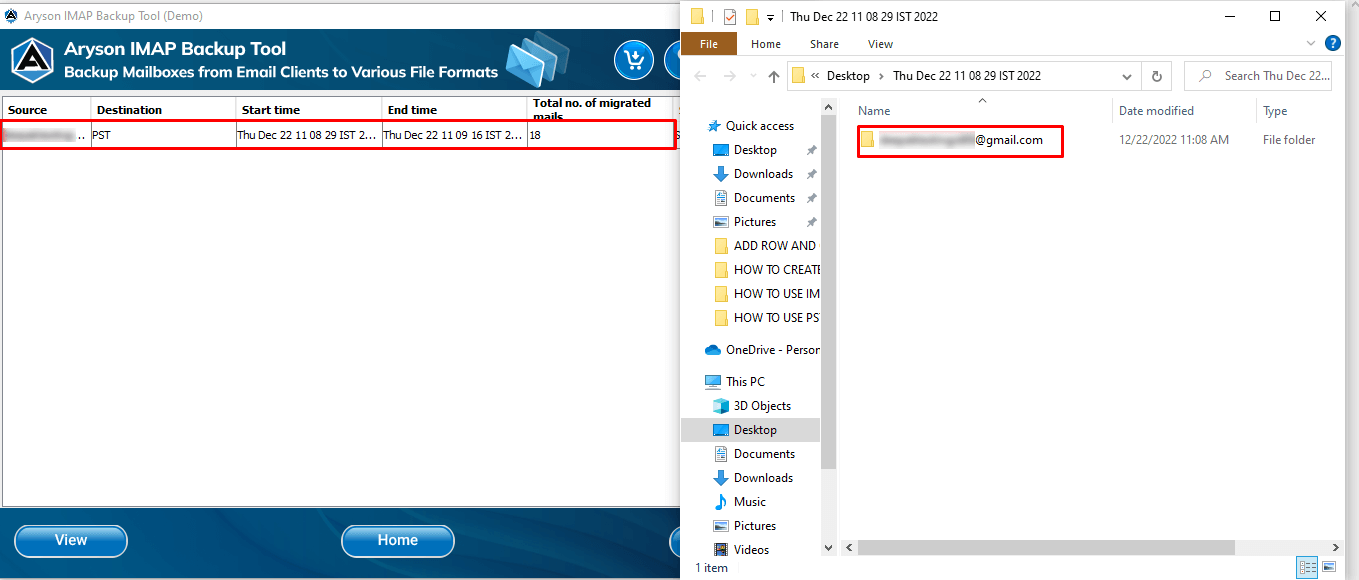
- A pop-up will show where your resultant file is saved. Click on that file to view the content of the file.
- Select the output file and then hit the download report button to analyse the procedure.
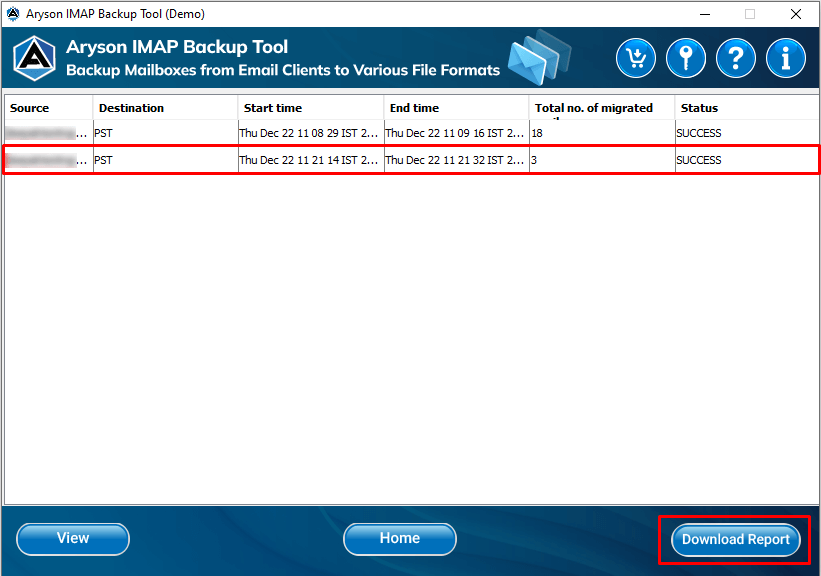
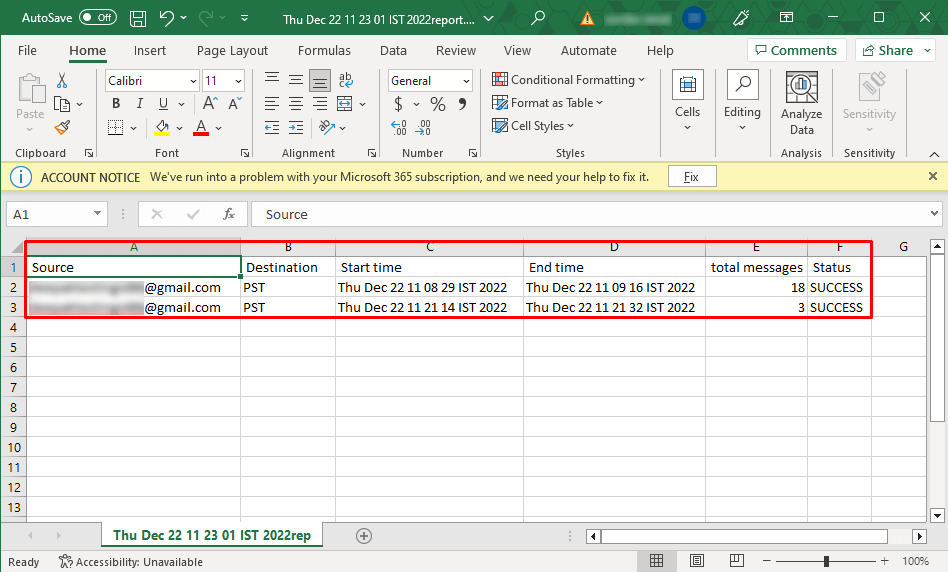
- When you click the download report button it will show the details in a CSV file, where you can check the resultant file.
- Here, if you want to convert again then click on the Home button.
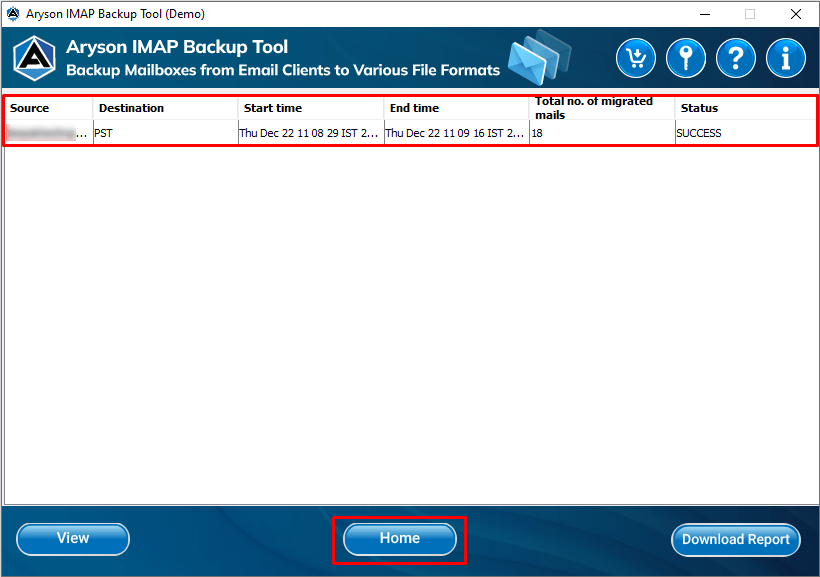
- It will redirect you to the homepage of the software and from here you can start again to back up IMAP emails into different file formats and email clients.
Steps to Enable IMAP Setting in Gmail
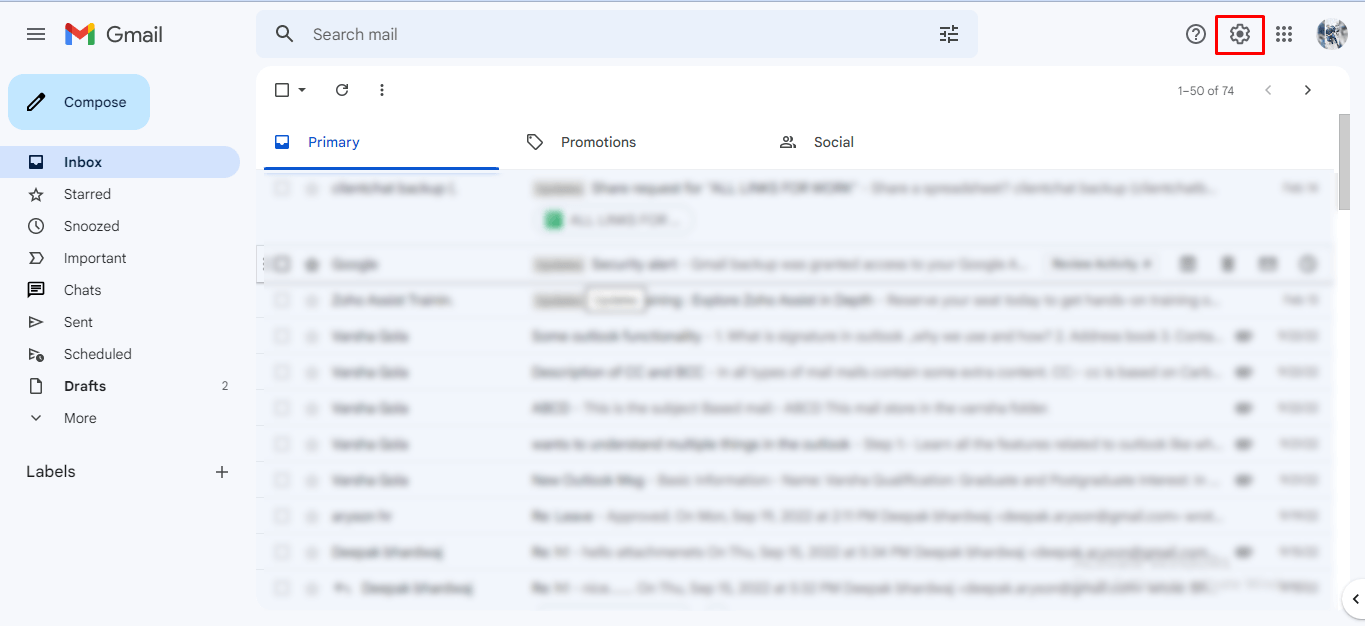
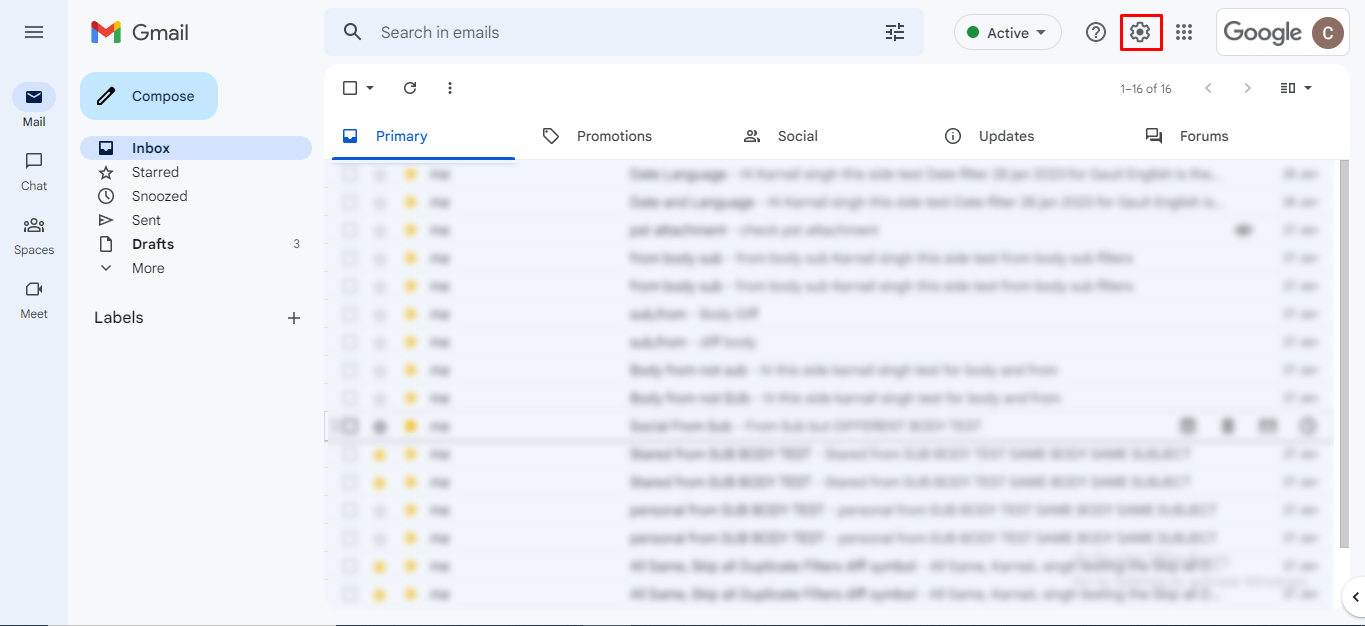
- Open your Gmail Mailbox and click on the Setting icon.
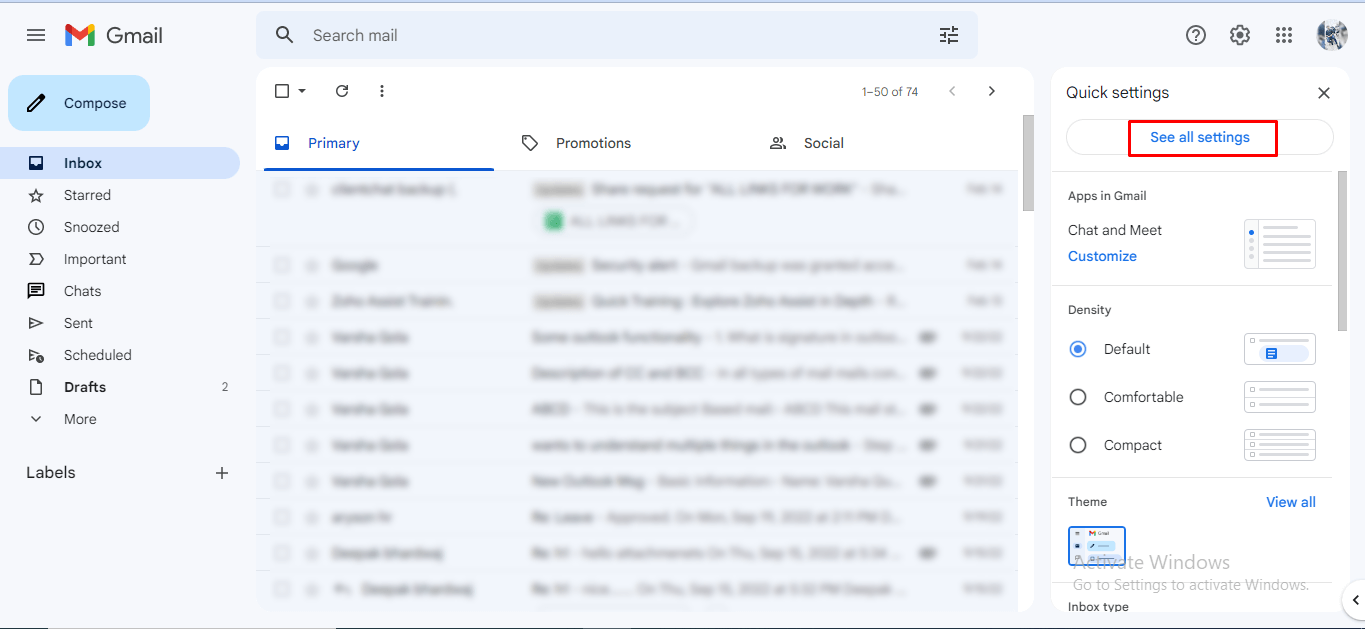
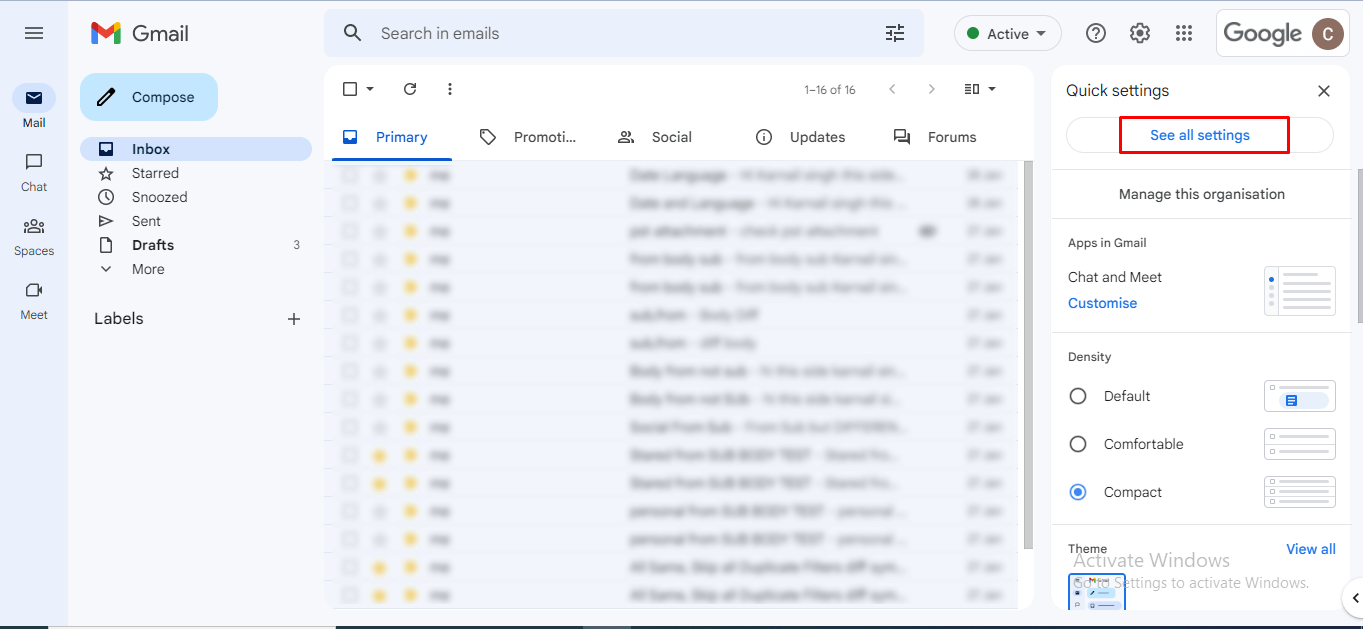
- Select the See all settings button.
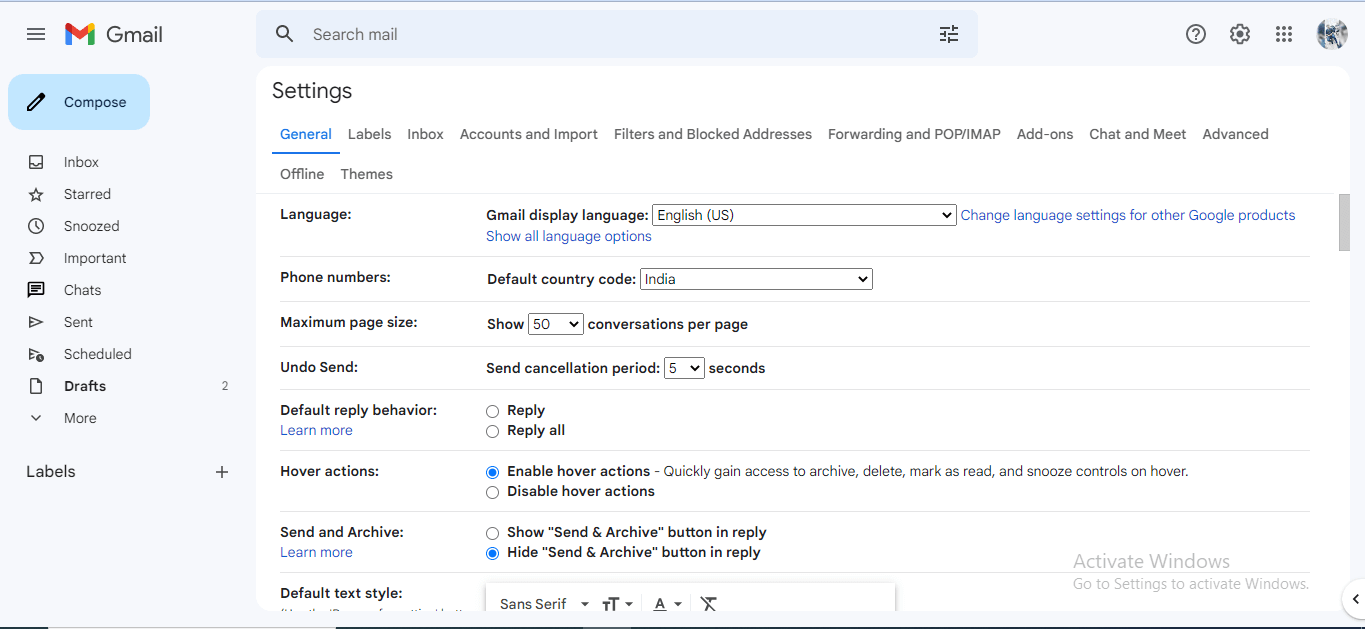
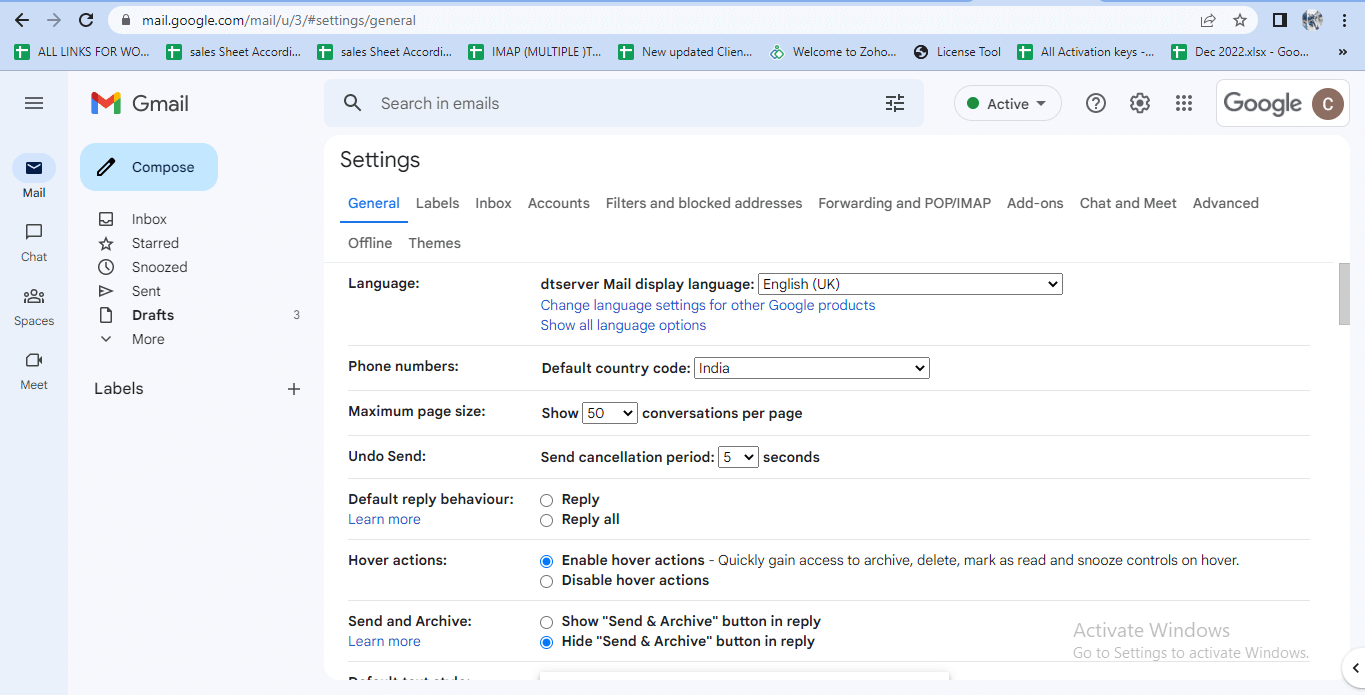
- Now you can see the settings panel of your Gmail account on the screen.
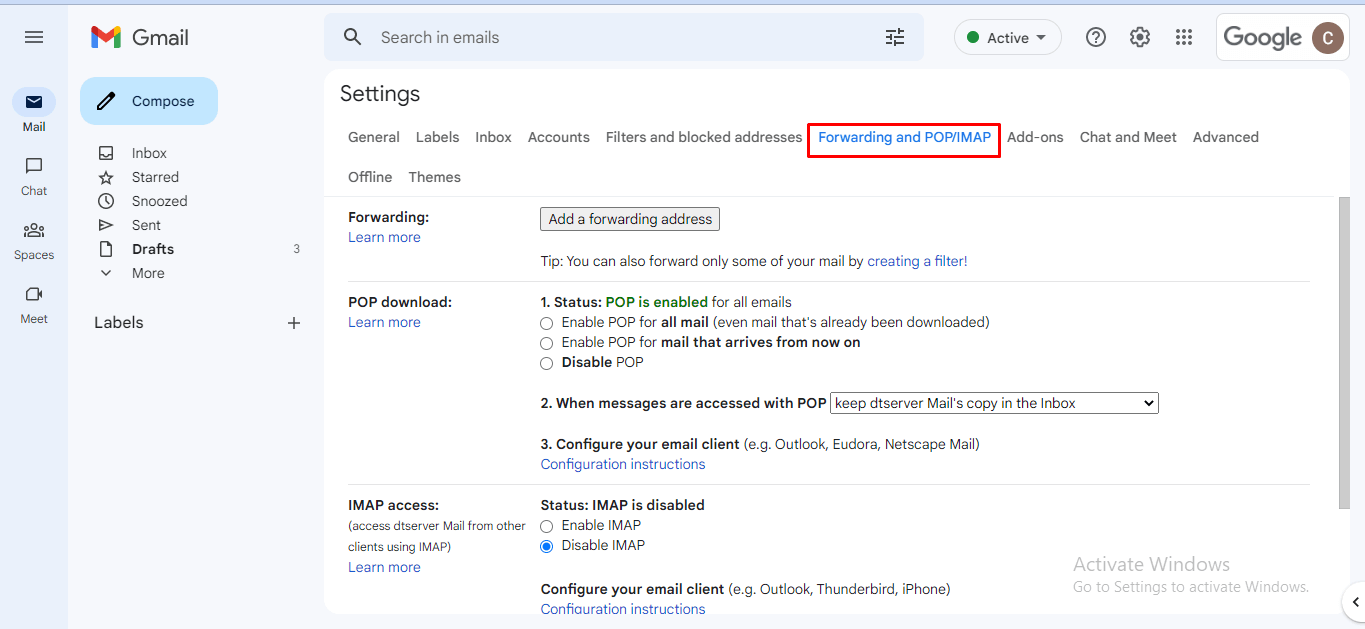
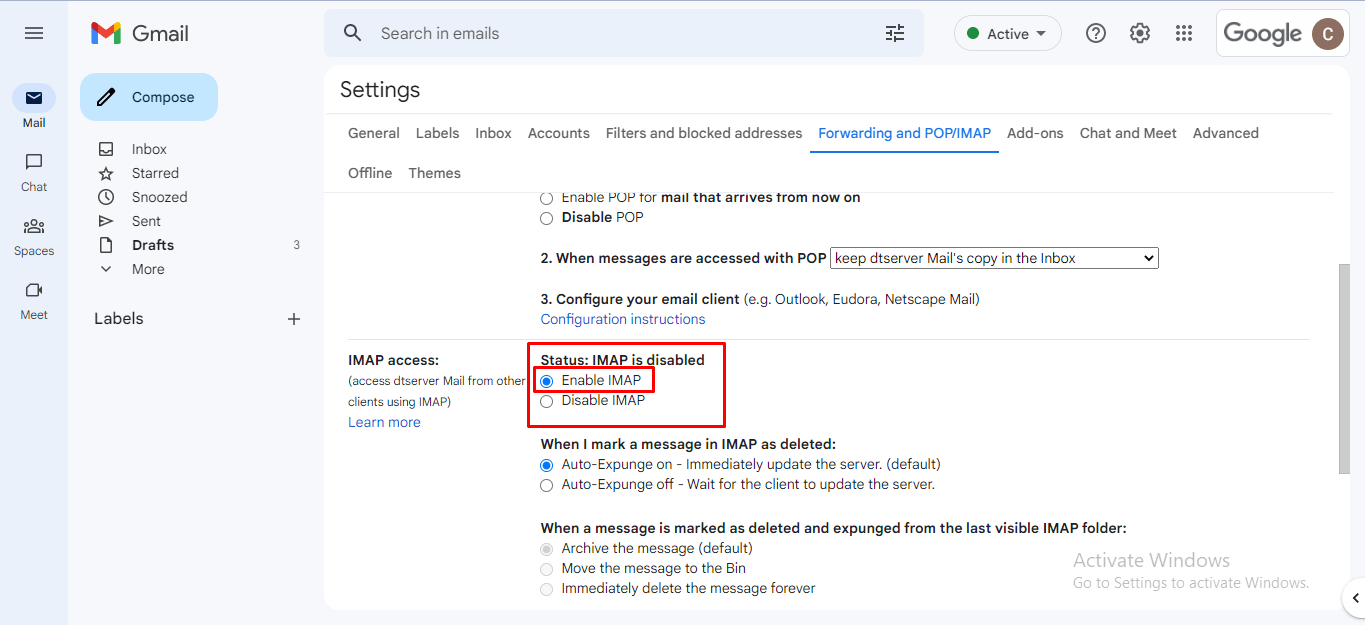
- Go to the Forwarding and POP/IMAP tab.
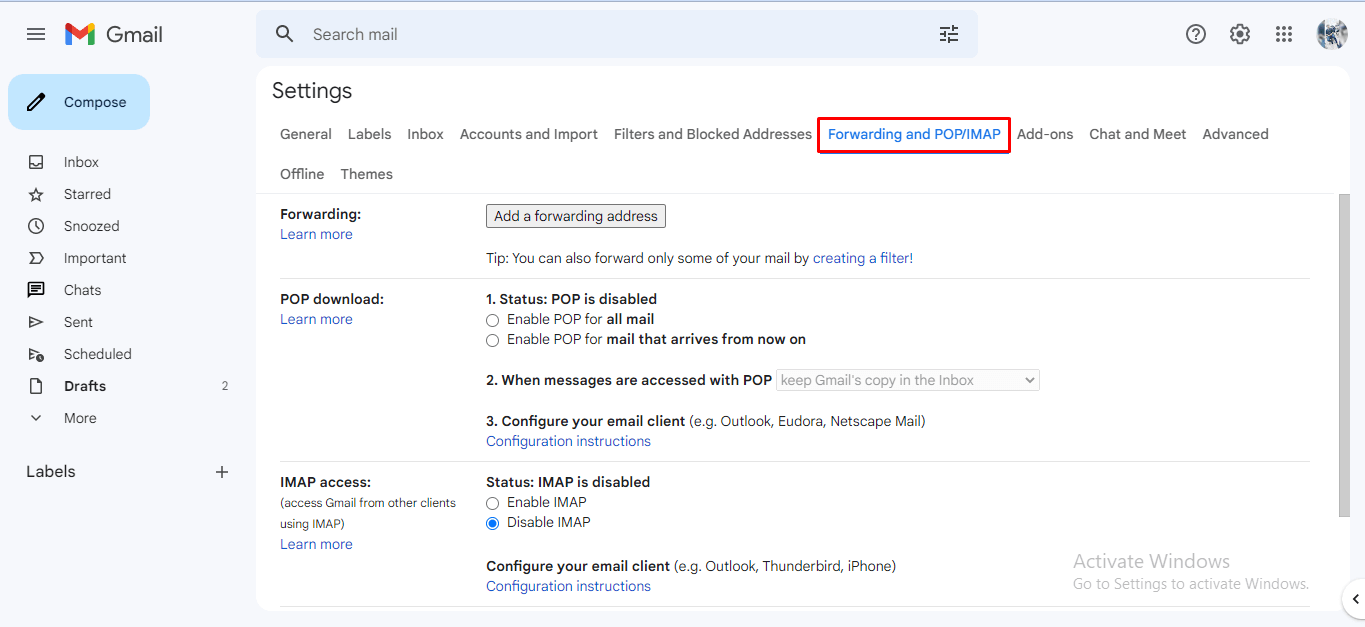
- Here, you will find a feature of IMAP access.
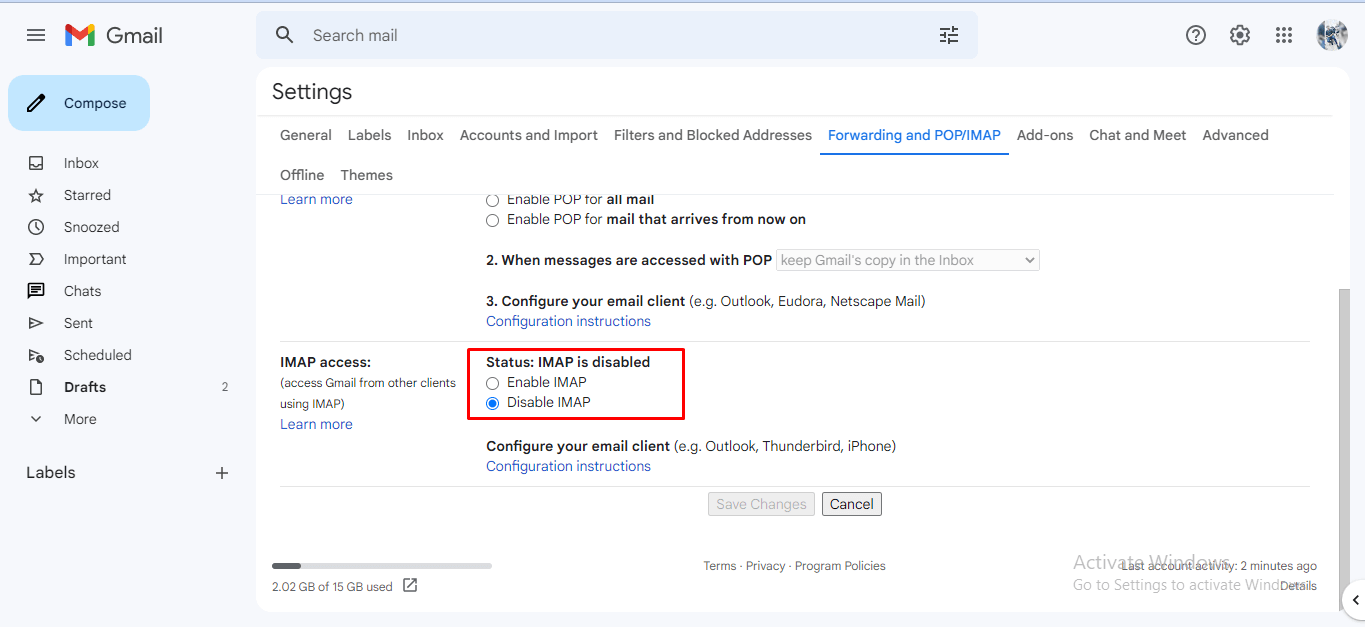
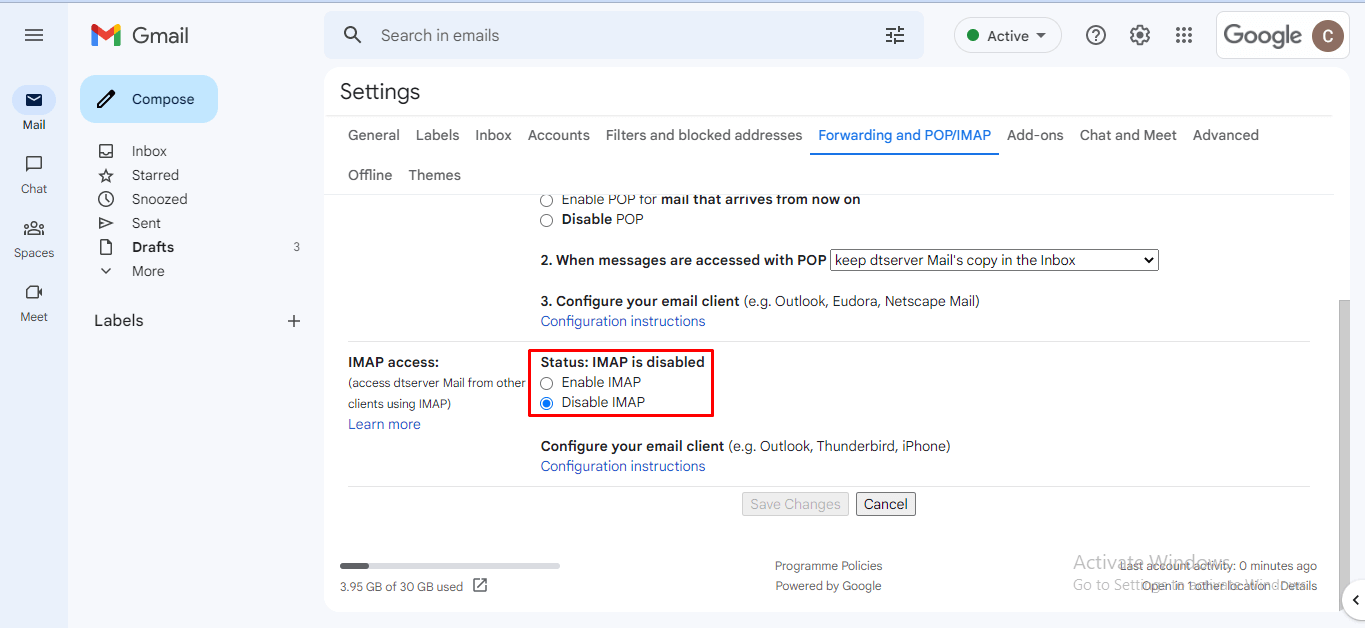
- Click on the Enable IMAP button to authorise the IMAP access.
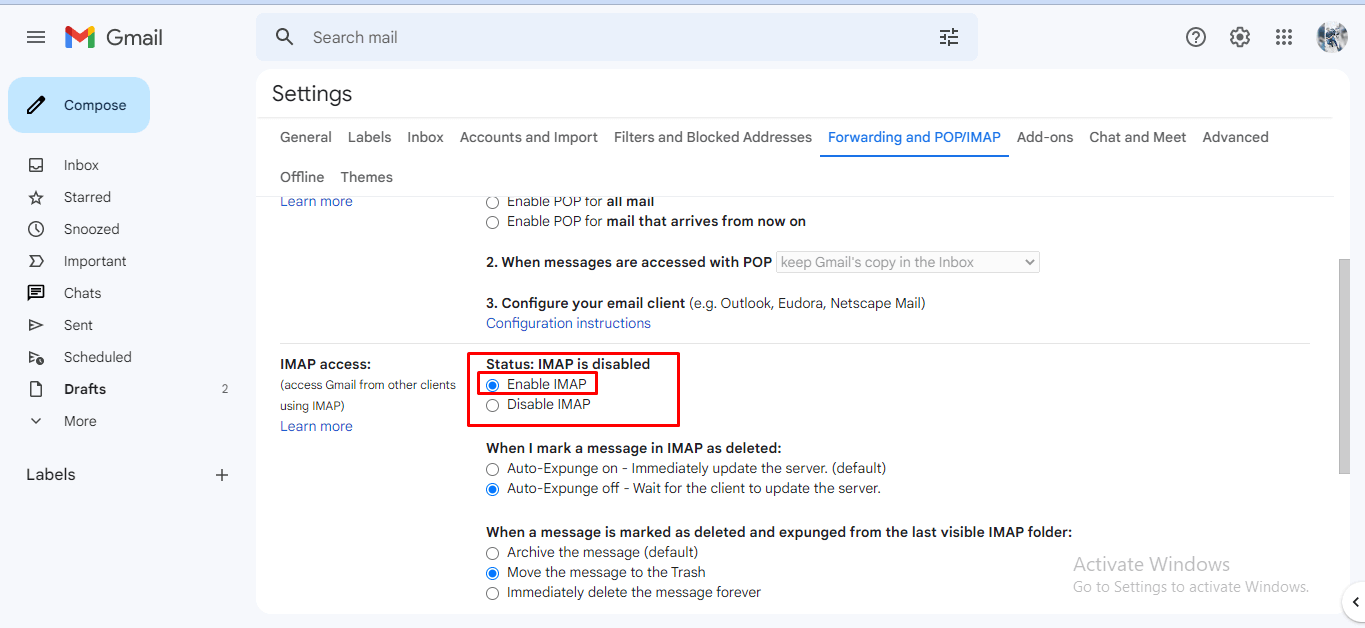
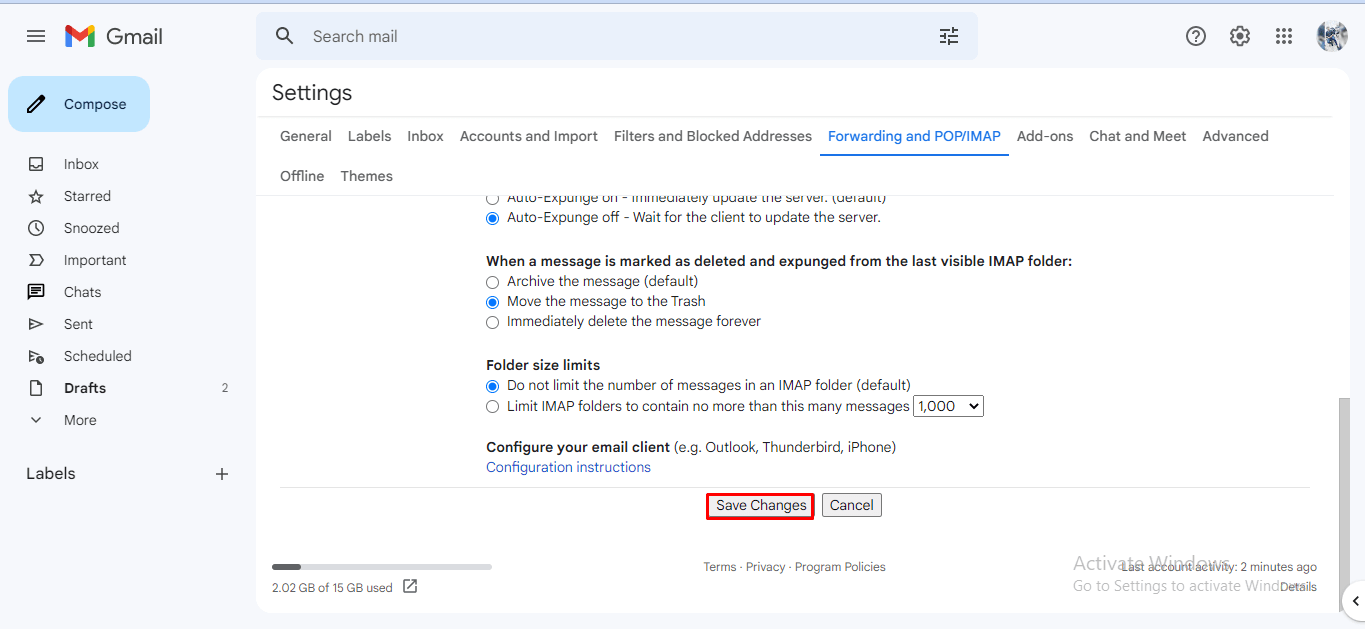
- Lastly, click on the Save Changes button to finish the process.
Steps to Enable IMAP Setting in G Suite
- Open your Gmail Mailbox and click on the Setting icon.
- Select the See all settings button.
- Now you can see the settings panel of your Gmail account on the screen.
- Go to the Forwarding and POP/IMAP tab.
- Here, you will find a feature of IMAP access.
- Click on the Enable IMAP button to authorise the IMAP access.
- Lastly, click on the Save Changes button to finish the process.

Steps to Enable IMAP Setting in Outlook
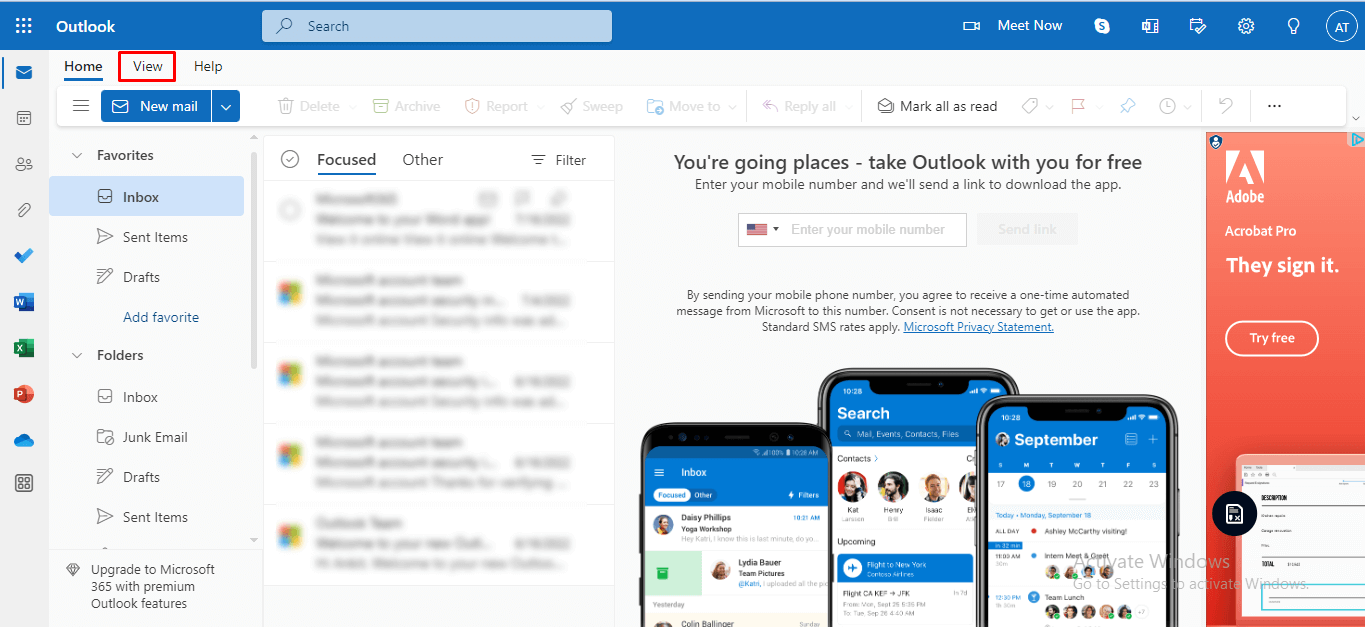
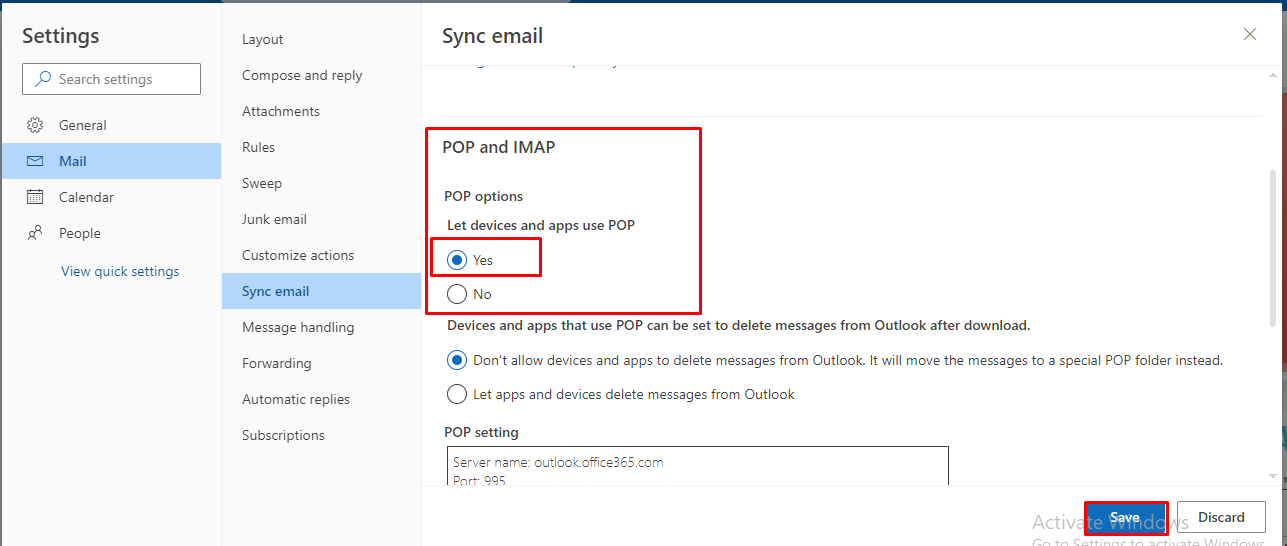
- Open MS Outlook on your system and click on the View tab.
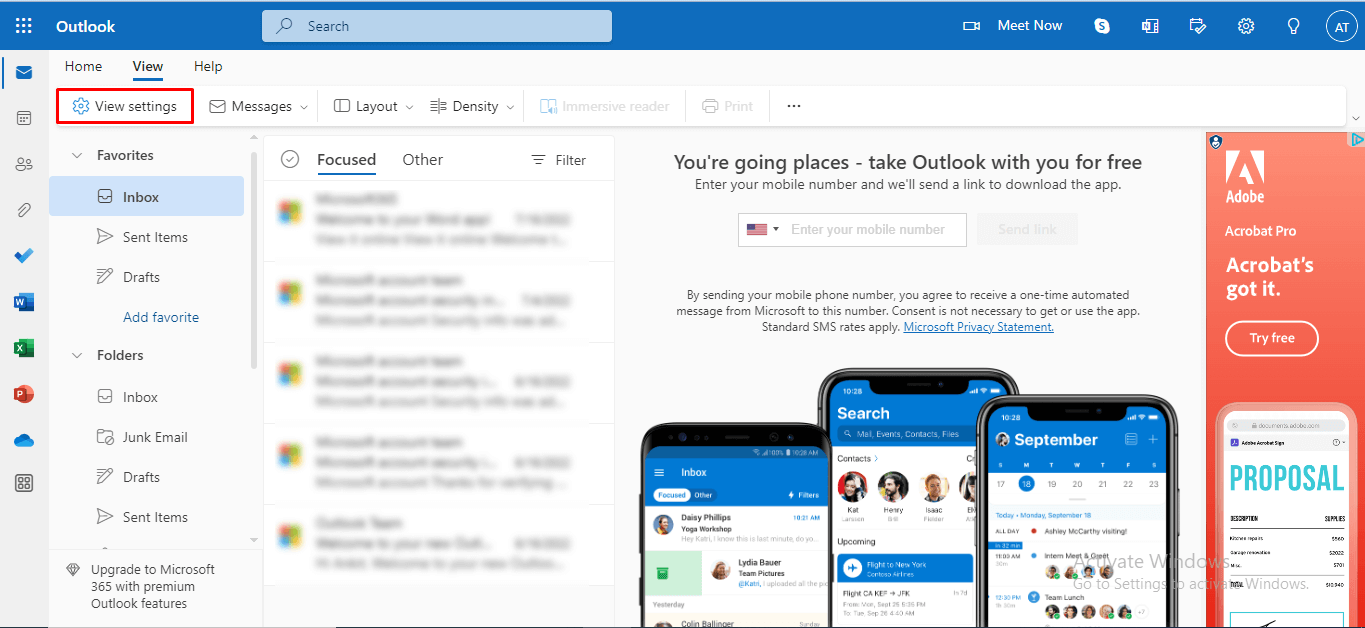
- Select the View Setting option.
- Click the Mail >> Sync email.
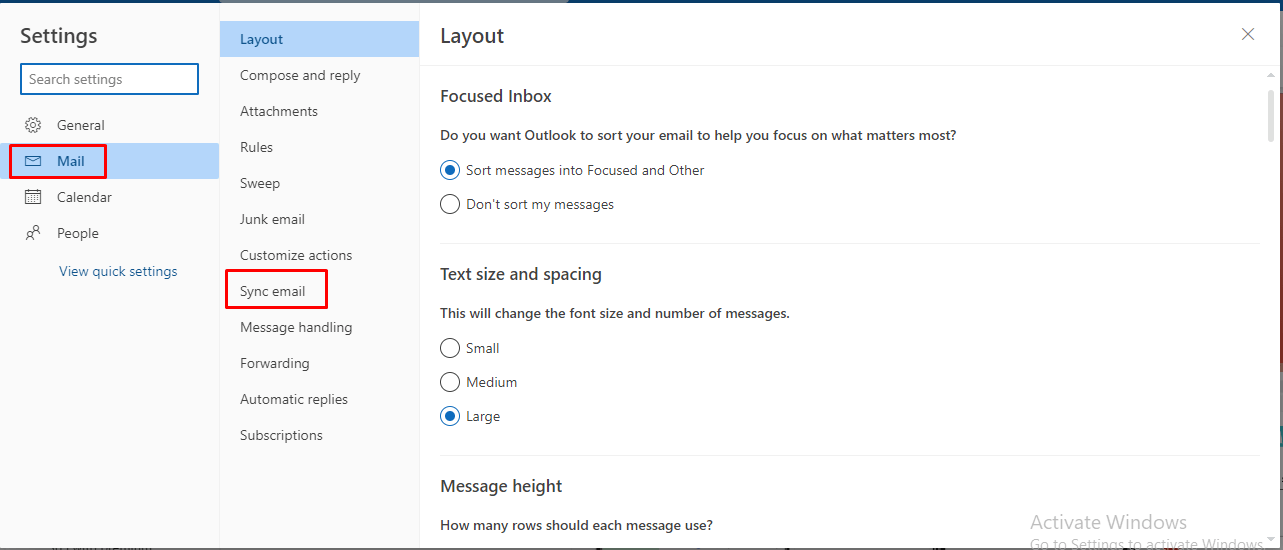
- Here, you can see the POP and IMAP settings.

- Click on the Yes button and then select the Save option to enable the IMAP access.
Steps to Enable IMAP Setting in Zoho Mail
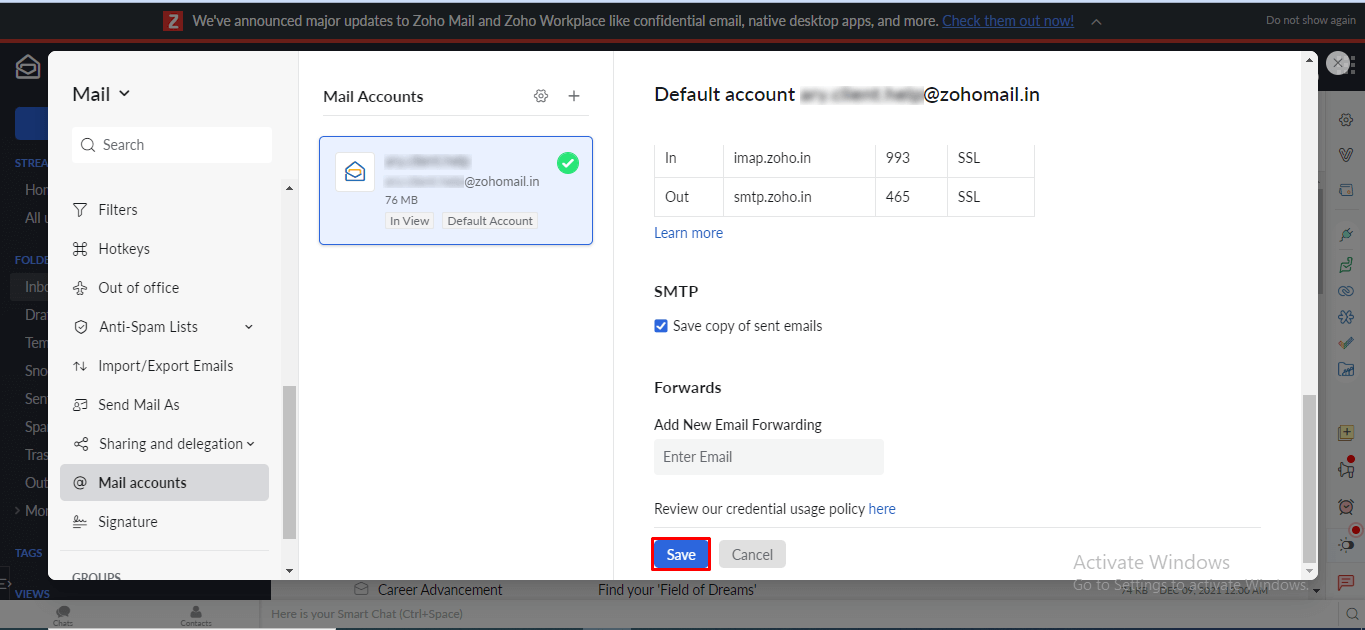
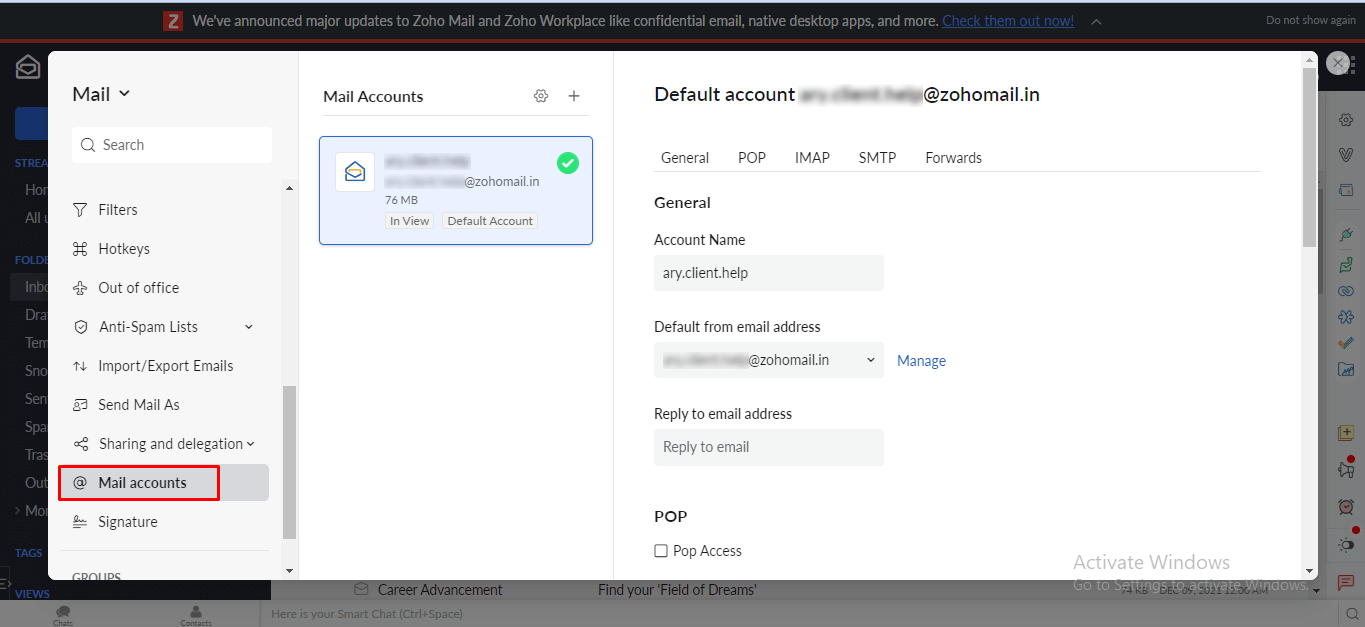
- Launch Zoho Mail on your browser and select the Setting icon.
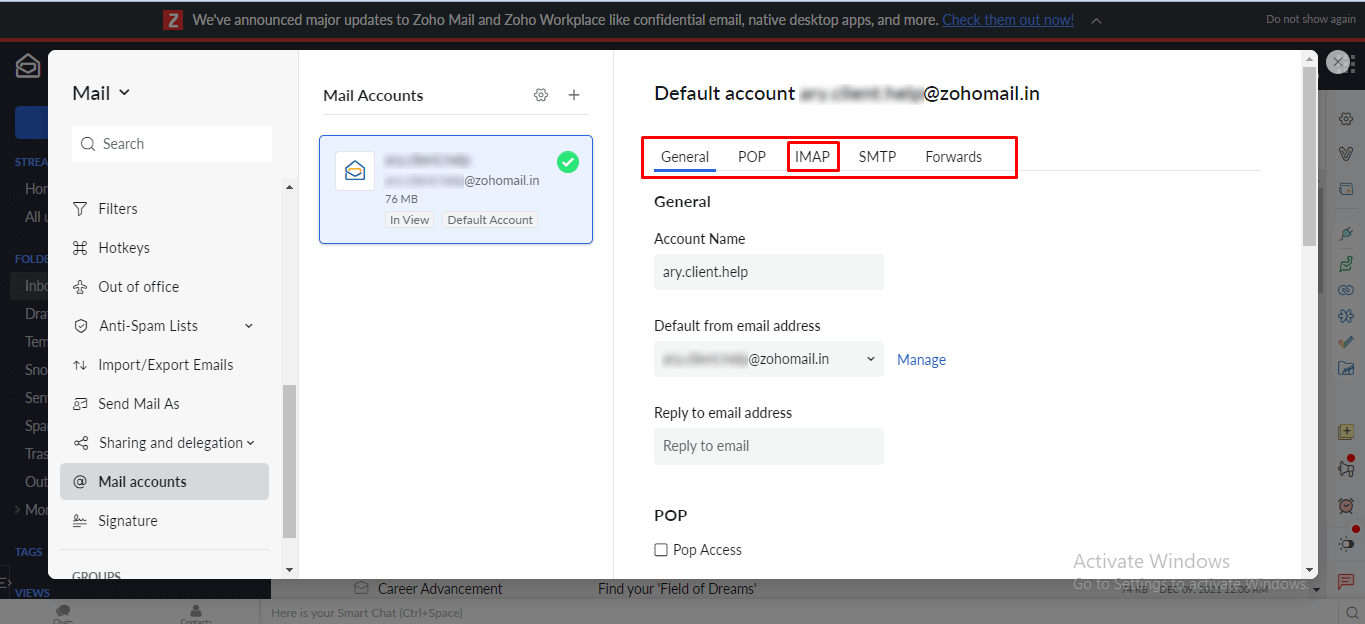
- Click on the Mail accounts.
- Now, select the IMAP option from the top right section.
- Here, you will find the option to enable the IMAP service.
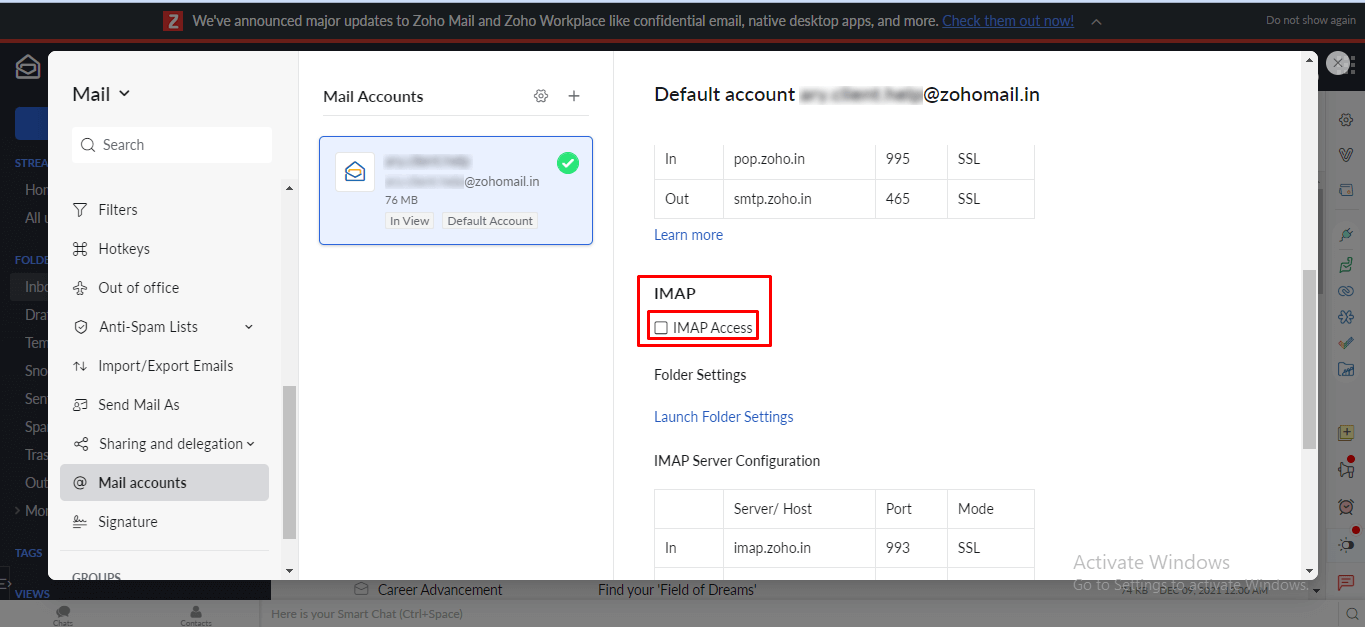
- ChecK the IMAP access box and move forward.
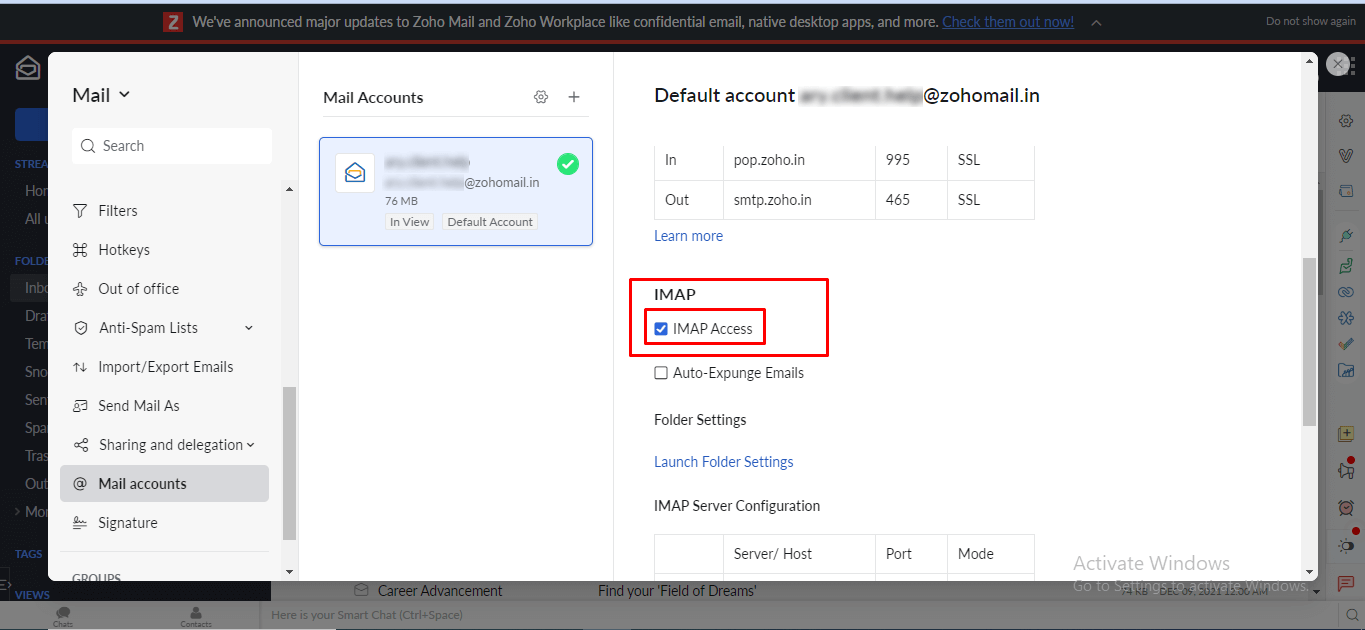
- Click the Save button to save the changes.